
You also want an ePaper? Increase the reach of your titles
YUMPU automatically turns print PDFs into web optimized ePapers that Google loves.
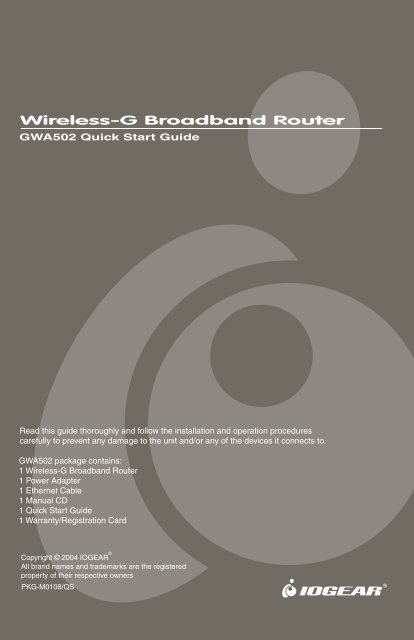
<strong>Wireless</strong>-G <strong>Broadband</strong> <strong>Router</strong><br />
GWA502 Quick Start Guide<br />
Read this guide thoroughly and follow the installation and operation procedures<br />
carefully to prevent any damage to the unit and/or any of the devices it connects to.<br />
GWA502 package contains:<br />
1 <strong>Wireless</strong>-G <strong>Broadband</strong> <strong>Router</strong><br />
1 Power Adapter<br />
1 Ethernet Cable<br />
1 Manual CD<br />
1 Quick Start Guide<br />
1 Warranty/Registration Card<br />
Copyright © 2004 IOGEAR ®<br />
All brand names and trademarks are the registered<br />
property of their respective owners<br />
PKG-M0108/QS<br />
®
1. Welcome<br />
Thank you for choosing IOGEAR ®<br />
to serve your wireless needs. In no time you will be sharing files<br />
or surfing the Internet wirelessly. We hope you will have as much fun using your IOGEAR ®<br />
<strong>Wireless</strong>-G <strong>Broadband</strong> <strong>Router</strong>, as we had designing it.<br />
Rest assured, your IOGEAR ®<br />
<strong>Wireless</strong>-G <strong>Broadband</strong> <strong>Router</strong> is built rock-solid to ensure maximum<br />
up-time for you to stay up-and-running. If for any reason you have a problem, we stand behind our<br />
products with an industry-leading 3 year factory warranty, so you can have peace-of-mind with your<br />
current and future IOGEAR ®<br />
purchases.<br />
We want you to be happy with your purchase, so we have made every effort to ensure product<br />
quality, reliability, and ease-of-use.<br />
Note:<br />
Your order has been carefully packaged and inspected, and we hope you are pleased with the<br />
IOGEAR ®<br />
product you purchased. Please inspect the contents of the package to ensure that you<br />
have received all items and that nothing has been damaged. If you discover a problem, please<br />
contact your dealer immediately for assistance.<br />
Contact Information:<br />
949-453-8782<br />
23 Hubble<br />
Irvine, CA 92618<br />
USA<br />
www.iogear.com<br />
support@iogear.com<br />
2. Hardware Requirements & Features<br />
Applications<br />
• Small Office/Home Office (SOHO) computer networking<br />
• Using multiple computers on a single Internet Connection (xDSL/Cable/ISDN)<br />
Features<br />
• Turn-key Installation - Up and running in minutes!<br />
• Built-in Patch Antanna - Focus your wireless transmission to achieve higher data rate and longer range.<br />
• Built-in <strong>Router</strong> - Hook-up multiple Macs/PCs to a single Internet connection!<br />
• 802.11b (11Mbps) and 802.11g (54Mbps) Compatible - Nothing is obsolete!<br />
• Built-in 10/100BaseT Ethernet Switch - Network up to 4 Macs/PCs!<br />
• 100% Free Technical Support - No question is too big or too small!
3. Installation<br />
Step. 1<br />
Take your IOGEAR ® <strong>Wireless</strong>-G <strong>Broadband</strong> <strong>Router</strong> out of box. Simply plug-in the included AC Adapter<br />
to the wall outlet, then to the <strong>Broadband</strong> <strong>Router</strong>. Make sure the power LED illuminates; otherwise, try<br />
another AC Wall Outlet.<br />
Step. 2<br />
For initial setup, plug your desktop or notebook computer directly into the LAN Port #1 with the<br />
included CAT5 patch cable. Please make sure that your computer LAN setting is DHCP or<br />
192.168.62.x. Submask: 255.255.255.0.<br />
Step. 3<br />
Open your Internet Browser (Internet Explorer, Netscape, or Safari), and type in the following URL in<br />
your browser's address bar: 192.168.62.10. You will be brought to Enter Network Password prompt<br />
window. The default User Name is admin; Password is admin.
Step. 4<br />
To proceed to the basic setup options, click on the Typical button.<br />
Step. 5<br />
You will now be asked for the Time Zone you are in. Select your Time Zone, and select whether you<br />
wish to enable Daylight Savings Time. Click Next to continue.<br />
Step. 6<br />
You will now be asked for which Internet Connection Type you are using. When<br />
you select the connection type, you will be asked for your ISP's configuration<br />
settings (if applicable).
a. Cable Modem and DHCP Client - If your broadband access is through a cable modem, or if your IP<br />
address is automatically assigned by your service provider or a DHCP server, you should choose<br />
this type.<br />
• If your ISP gave you a Host Name or a MAC address, you can enter them on the following page<br />
b. Static IP - xDSL - If your broadband access is through an xDSL modem and your ISP assigned<br />
you a static IP Address, you should choose this type.<br />
• Please enter the necessary information such as the IP Address, Subnet Mask, Default Gateway<br />
and DNS server that your ISP provided in the following page.<br />
c. Dynamic IP - If your broadband access is through an xDSL modem and your ISP did not assign<br />
you a static IP Address, you should choose this type.<br />
• Please enter the necessary information such as username and password your ISP provided in<br />
the following page. If your ISP gave you a service name, you should enter it in the following page.<br />
d . Dynamic IP (European countries) - If your broadband access is through an xDSL modem and your<br />
ISP did not assign you a static IP Address, you should choose this type.<br />
• If your Internet Service Provider requires the use of PPTP, enter the information. (PPTP is<br />
generally more popular in Europe.)<br />
After you have entered your ISP's configuration settings, click Next.<br />
Step. 7<br />
You will now see the <strong>Wireless</strong> Configuration Settings. You can set the SSID, channel, and wireless<br />
security for your wireless gateway here. Click Next when you are done.<br />
(For more information on SSID, channel, and wireless security, you can move the mouse cursor over<br />
the highlighted feature and an explanation will appear.)
Step. 8<br />
You will now see the Firewall settings. IOGEAR ® offers you an easy set-up package to configure a<br />
Firewall. Please note high Firewall protection will make your network securer, but may cause wireless<br />
gateway's performance to be lower. Click Next when you are done.<br />
Step. 9<br />
This is the summary page showing all configurations you've set. Click Next when you are done.<br />
Step. 10<br />
You can click the Test button to see whether your Internet connect is functioning. Please make sure<br />
your WAN port has been connected (to a xDSL, Cable modem, or Ethernet). Click Finish when you<br />
are done. When you have finished the configuration, you will be brought to the main window.
4. Firmware Upgrade<br />
From time to time, updated firmware will be released which may contain feature improvements or bug<br />
fixes. We highly recommend that you frequently check our website for any new firmware updates.<br />
(http://www.iogear.com/support/download.php).<br />
Step. 1<br />
Once you download the new firmware patch, you can update the firmware on your <strong>Wireless</strong>-G<br />
<strong>Broadband</strong> <strong>Router</strong> in the Setup menu. (Custom> System> Firmware Upgrade)<br />
Step. 2<br />
Click the Browse button, a file window will be brought up. Locate the updated Firmware file you<br />
downloaded from IOGEAR website, click Ok; it will appear in the Upgrade Firmware box.<br />
Step. 3<br />
Click Upgrade button, a warning message will pop out. Please do not unplug the power of the device<br />
or turn off your computer during firmware upgrading. It may take several minutes to complete the<br />
Firmware Upgrade. Then you can enjoy the most update features we offer to you.
5. Advanced Setup<br />
Step. 1<br />
Log-in to your <strong>Wireless</strong> <strong>Broadband</strong> <strong>Router</strong> (Default as http://192.168.62.10)<br />
Step. 2<br />
You will now be asked for User Name and Password. Unless you have changed them,<br />
they should be default as admin (user name); admin (Password).<br />
Step. 3<br />
After you have logged in, click on the Custom button.
Step. 4<br />
The Customized Configuration menu is separated into seven categories.<br />
System It includes all the basic configuration tools, such as options to control management access,<br />
upgrading system firmware and restart system.<br />
LAN The router must have an IP address for the local network. You can also enable DHCP<br />
service for dynamic IP address allocation to your clients, or configure filtering functions<br />
based on specific clients or protocols.<br />
Internet In Internet settings, you can configure the way your router connects to you ISP.<br />
<strong>Wireless</strong> In this section, you can configure all wireless related settings for your wireless access point.<br />
Firewall Your <strong>Wireless</strong>-G <strong>Broadband</strong> <strong>Router</strong> features powerful and flexible Firewall protection to<br />
keep your network secure. You can configure the strength of Firewall protection to a high<br />
or low level. If you are an advanced user, you can configure Firewall policies to meet on<br />
your needs.<br />
NAT Network Address Translation allows multiple users at your local site to access the internet<br />
over a single user account. It can also prevent hacker attacks by mapping local addresses<br />
to public addresses for key services such as Web or FTP.<br />
Summary In this section, you can check all system status, network statistics and Event Log.<br />
Please refer to the CD manual for more details.
6. Radio and TV Interference<br />
This equipment has been tested and found to comply with the limits for a Class B digital device,<br />
pursuant to Part 15 of the FCC Rules. These limits are designed to provide reasonable protection<br />
against harmful interference in a residential installation. This equipment generates, uses and can<br />
radiate radio frequency energy and if not installed and used in accordance with the instructions, may<br />
cause harmful interference to radio communications. However, there is no guarantee that<br />
interference will not occur in a particular installation<br />
IN NO EVENT SHALL THE DIRECT VENDOR'S LIABILITY EXCEED THE PRICE PAID FOR<br />
THE PRODUCT FROM DIRECT, INDIRECT, SPECIAL, INCIDENTAL, OR CONSEQUENTIAL<br />
DAMAGES RESULTING FROM THE USE OF THE PRODUCT, DISK OR ITS DOCUMENTATION.<br />
The direct vendor makes no warranty or representation, expressed, implied, or statutory with<br />
respect to the contents or use of this documentation, and especially disclaims its quality,<br />
performance, merchantability, or fitness for any particular purpose.<br />
The direct vendor also reserves the right to revise or update the device or documentation without<br />
obligation to notify any individual or entity of such revisions, or update. For further inquiries,<br />
please contact your direct vendor.<br />
7. Warranty<br />
IN NO EVENT SHALL THE DIRECT VENDOR'S LIABILITY FOR DIRECT, INDIRECT, SPECIAL,<br />
INCIDENTAL OR CONSEQUENTIAL DAMAGES RESULTING FROM THE USE OF THIS PRODUCT,<br />
DISK, OR ITS DOCUMENTATION EXCEED THE PRICE PAID FOR THE PRODUCT.<br />
The direct vendor makes no warranty or representation, expressed, implied, or statutory with respect<br />
to the contents or use of this documentation, and especially disclaims its quality, performance,<br />
merchantability, or fitness for any particular purpose.<br />
The direct vendor also reserves the right to revise or update the device or documentation without<br />
obligation to notify any individual or entity of such revisions, or updates. For further inquiries please<br />
contact your direct vendor.