Layout Tutorial - Home Design Software
Layout Tutorial - Home Design Software
Layout Tutorial - Home Design Software
You also want an ePaper? Increase the reach of your titles
YUMPU automatically turns print PDFs into web optimized ePapers that Google loves.
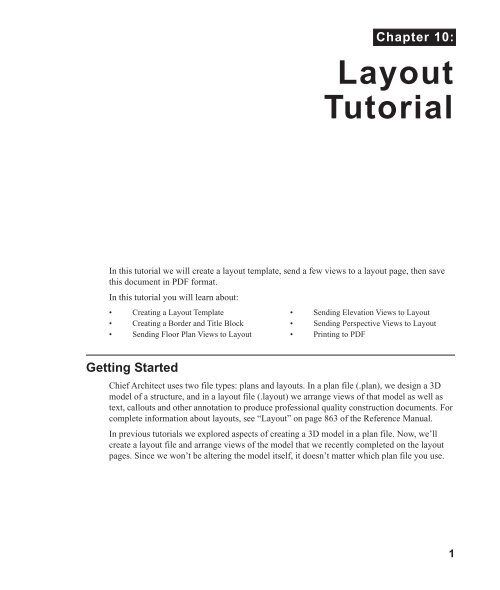
Chapter 10:<br />
<strong>Layout</strong><br />
<strong>Tutorial</strong><br />
In this tutorial we will create a layout template, send a few views to a layout page, then save<br />
this document in PDF format.<br />
In this tutorial you will learn about:<br />
• Creating a <strong>Layout</strong> Template<br />
• Creating a Border and Title Block<br />
• Sending Floor Plan Views to <strong>Layout</strong><br />
• Sending Elevation Views to <strong>Layout</strong><br />
• Sending Perspective Views to <strong>Layout</strong><br />
• Printing to PDF<br />
Getting Started<br />
Chief Architect uses two file types: plans and layouts. In a plan file (.plan), we design a 3D<br />
model of a structure, and in a layout file (.layout) we arrange views of that model as well as<br />
text, callouts and other annotation to produce professional quality construction documents. For<br />
complete information about layouts, see “<strong>Layout</strong>” on page 863 of the Reference Manual.<br />
In previous tutorials we explored aspects of creating a 3D model in a plan file. Now, we’ll<br />
create a layout file and arrange views of the model that we recently completed on the layout<br />
pages. Since we won’t be altering the model itself, it doesn’t matter which plan file you use.<br />
1
<strong>Home</strong> <strong>Design</strong>er Pro 2014 User’s Guide<br />
Creating a Border and Title Block<br />
Once the page setup of the layout sheet is established, you can use CAD tools to create a border<br />
and title block for your layout page. For information about the printable area of the drawing<br />
sheet, see “Show Sheet” on page 845 of the Reference Manual.<br />
Drawing borders may be simplified by making a few changes in the Preferences dialog and<br />
your plan defaults. When you have finished creating borders you may want to reverse these<br />
changes.<br />
To set up the layout sheet<br />
1. Select File> New <strong>Layout</strong> to open a new, blank layout file.<br />
2. Select File> Print> Page Setup to open the Page Setup dialog.<br />
3. Click the Printer button and specify the printer.<br />
• If you have a local printer/plotter you will be using, select it from the list.<br />
• If you do not have a local printer, you can select a PDF driver as your printer. See<br />
“Printing to PDF” on page 215.<br />
4. Specify the Size and Orientation for the Printer Paper and Drawing Sheet. The sizes<br />
available will be limited by the current printer. In most cases, the printer paper and the<br />
2
Creating a Border and Title Block<br />
drawing sheet should be the same size. If you would like to print a test page or if you<br />
would like to tape smaller pieces of paper together to create a larger sheet, the printer paper<br />
and the drawing sheet can be different dimensions.<br />
5. The Drawing Scale for layout files should always be 1 in = 1 in (1 mm = 1 mm for metric<br />
plans). For more information, see “Page Setup Dialog” on page 853 of the Reference<br />
Manual. Click OK when you are finished.<br />
To create a layout border<br />
1. Make sure that Object Snaps are enabled, particular Endpoint snaps.<br />
2. Select Window> Fill Window or zoom out so that you can see the entire drawing<br />
sheet.<br />
3. Select CAD> Boxes> Rectangular Polyline , then click and drag a rectangle<br />
beginning at one corner of the drawing sheet and ending at the opposite corner.<br />
• Watch for the red snap indicators that will display at each corner when Endpoint snaps<br />
are enabled.<br />
4. Select Edit> Preferences , then go to the Behaviors panel of the Preferences dialog.<br />
5. Select Concentric Edit Type, and specify the Jump value as the distance you would like<br />
your border to be drawn from the edge of the drawing sheet. In our example, 1/2" is used.<br />
For more information, see “Behaviors Panel” on page 78 of the Reference Manual.<br />
6. Select the rectangular polyline, then click and slowly drag a corner edit handle towards the<br />
center of the polyline. When you reach the your specified Concentric Jump distance, the<br />
polyline will resize so that its edges are that distance from the drawing sheet edges.<br />
• Make sure that your border is entirely within the printable area.<br />
7. You can create a double border in the same manner. Click the Copy/Paste edit button,<br />
then click and slowly drag one of the corner edit handles towards the polyline center. A<br />
concentric copy of the polyline is made when you reach your Concentric Jump distance.<br />
3
<strong>Home</strong> <strong>Design</strong>er Pro 2014 User’s Guide<br />
8. When you are finished concentrically resizing and copying your border objects, it is a good<br />
idea to return to the Behaviors panel of the Preferences dialog and return to the Default<br />
Edit Type.<br />
9. You can adjust the line weight, style and color for any CAD object in its specification<br />
dialog. See “Line Style Tab” on page 781 of the Reference Manual.<br />
10. To see the final product, you may find it helpful to turn off the display of the Snap and<br />
Reference Grids. See “<strong>Layout</strong> Defaults” on page 863 of the Reference Manual.<br />
To create filleted corners<br />
1. Select one of your rectangular polylines and double-click the Fillet Two Lines edit<br />
button<br />
2. In the Chamfer/Fillet dialog, specify a Fillet Radius value. A value of 1" fillets one inch<br />
of each intersecting edge.<br />
3. Select one side of the rectangle, click the Fillet Two Lines edit button and then select<br />
an adjacent side. The two lines fillet where they meet.<br />
4. Repeat step 3 until all corners are filleted.<br />
Title Block<br />
Create the title block using CAD objects and Text. A company logo can be added to a layout by<br />
importing it as an image. You can also embed the image in the layout file. For more<br />
information, see “Importing Pictures” on page 812 of the Reference Manual.<br />
4
Creating a <strong>Layout</strong> Template<br />
Creating a <strong>Layout</strong> Template<br />
Template files save defaults, layer and page setup settings and then apply them to new, blank<br />
files - saving you the time and work of specifying them every time you begin a new project.<br />
1. Select Edit> Default Settings from the menu to open the Default Settings dialog.<br />
Make any changes that you wish to the Text, CAD and <strong>Layout</strong> Defaults. This tutorial will<br />
simply use the default settings, but you can customize the defaults to suit your own tastes.<br />
See “Preferences & Default Settings” on page 55 of the Reference Manual. Click Done<br />
when you are finished to close the Default Settings dialog.<br />
2. Select Tools> Display Settings> Display Options to open the <strong>Layout</strong> Page Display<br />
Options dialog. Here you can set up line weights, styles, and colors for the layers in your<br />
layout template. See “<strong>Layout</strong> Page Display Options” on page 872 of the Reference<br />
Manual. These settings do not affect objects within layout views - they only affect CAD,<br />
Text, Dimensions and layout box borders placed on the layout page. Click OK when you<br />
are finished.<br />
3. Save your new layout template with a short, descriptive name such as "My 18 x 24<br />
Template.layout".<br />
5
<strong>Home</strong> <strong>Design</strong>er Pro 2014 User’s Guide<br />
To use a custom layout template<br />
1. Select File> Open <strong>Layout</strong> and browse to the custom layout template file that you<br />
created, above.<br />
2. When the new layout file is open, select File> Save As . In the Save Plan File dialog:<br />
• Click the Save in drop-down and browse to the folder where the plan that you intend<br />
to send views to the layout is saved.<br />
• Type a short, descriptive File name for the layout page.<br />
• Click Save.<br />
3. You are now ready to send views from a plan file to this layout.<br />
Sending Floor Plan Views to <strong>Layout</strong><br />
In order to send any view to layout, first open both the destination layout file and the plan file.<br />
It is recommended that these two files have the same name and be saved in the same folder in<br />
your computer. See “Organizing Your Files” on page 40 of the Reference Manual and<br />
“Managing <strong>Layout</strong> Links” on page 873 of the Reference Manual.<br />
To send a floor plan view to layout<br />
1. Select File> Open Plan and open a plan such as the Walkout Basement <strong>Tutorial</strong> plan.<br />
2. Select File> Save As and save the file using a new name.<br />
3. Select Window> Fill Window .<br />
4. Select Tools> Display Settings> Display Options and turn on or off any layers as<br />
needed so that only the objects that you want to see in the layout view display.<br />
5. Select File> Print> Page Setup and make sure that your Drawing Scale is correct in<br />
the Page Setup dialog. This will be the scale of the view once it is sent to layout.<br />
The information in the Page Setup dialog is view-specific. When you<br />
open the dialog in floor plan view, its settings only apply to floor plan<br />
views of the current plan. When you open it in a cross section view window,<br />
its settings apply only to the current view.<br />
6. Select File> Send to <strong>Layout</strong> to open the Send to <strong>Layout</strong> dialog.<br />
• Confirm that the view is being sent to layout using the same Scale as in the Page<br />
Setup dialog.<br />
• Select Entire Plan/View under Send Options.<br />
6
Sending Floor Plan Views to <strong>Layout</strong><br />
• Set the scale to 1/16in=1ft, under Send Position, leave Show <strong>Layout</strong> Page checked so<br />
that when we click OK, the layout window will become active.<br />
7. Click OK to send the view to layout.<br />
8. Once sent to layout, the view can be selected and moved using its edit handles or edit<br />
buttons, and its edges can be edited like a CAD box. See “Editing Box-Based Objects” on<br />
page 141 of the Reference Manual.<br />
9. Select Window> Previous Window (or press Ctrl + Tab) to return to floor plan view.<br />
7
<strong>Home</strong> <strong>Design</strong>er Pro 2014 User’s Guide<br />
It is important that we switch from the Plot Plan Set so that we don’t<br />
make unwanted changes to our site plan view on the layout page.<br />
Sending Elevation Views to <strong>Layout</strong><br />
Cross Section/Elevation , Backclipped Cross Section and Wall Elevation views<br />
can also be sent to layout.<br />
To send an elevation view to layout<br />
1. Select 3D> Create Orthographic View> Cross Section/Elevation , then click and<br />
drag to create a side elevation view. See “Cross Section/Elevation Views” on page 675 of<br />
the Reference Manual.<br />
2. You may want to Zoom in on the house.<br />
3. In the elevation view, click the CAD Configuration button to access the CAD toolbar<br />
(see “Toolbar Configurations” on page 98 of the Reference Manual) and add any<br />
annotations such as roof heights, pitches, material specifications or other notes.<br />
4. Select 3D> Save Active Camera so that the camera and your annotations are retained.<br />
See “Saving & Printing 3D Views” on page 690 of the Reference Manual.<br />
5. Select 3D> Edit Active Camera , and in the Cross Section/Elevation Camera<br />
Specification dialog, give the Cross Section view a short descriptive name, such as<br />
"Exterior Elevation - Right".<br />
8
Sending Elevation Views to <strong>Layout</strong><br />
6. Select File> Print> Page Setup and specify a Drawing Scale for the elevation view in<br />
the Page Setup dialog. 1/4 in = 1 ft should work well. Click OK to close the Page Setup<br />
dialog.<br />
7. Select File> Send to <strong>Layout</strong> to open the Send to <strong>Layout</strong> dialog.<br />
• Confirm that the view is being sent to layout using the same Scaling as in the Page<br />
Setup dialog.<br />
• Select Current Screen under Send Options.<br />
• Under Send Position, leave Show <strong>Layout</strong> Page checked.<br />
• When Orthogonal Views (including cross section/elevation views) are sent to layout,<br />
you can specify line weights for surface edge lines and pattern lines. You can also<br />
leave these boxes unchecked to use the line weight settings assigned to the individual<br />
objects and patterns in the view. See “Send To <strong>Layout</strong> Dialog” on page 867 of the<br />
Reference Manual.<br />
9
<strong>Home</strong> <strong>Design</strong>er Pro 2014 User’s Guide<br />
8. Click OK.<br />
9. Return to the elevation view, then select File> Close to close the view. In the Update View<br />
to <strong>Layout</strong> dialog, click OK. If you had made changes in the elevation view, clicking OK<br />
would update those changes to the layout view. In this case, no changes were made, so it<br />
doesn’t matter.<br />
10. Return to floor plan view. A camera symbol now displays, indicating the position of your<br />
saved elevation camera.<br />
11. Repeat this process for any additional desired elevation views. If sending more than one<br />
elevation view to the same page, keep in mind that the elevation views will need to be<br />
selected and repositioned so that they are not stacked on top of one another on the page.<br />
Sending Perspective Views to <strong>Layout</strong><br />
Perspective views add visual appeal and clarity to your documentation. They are converted to<br />
bitmap images when sent to layout, which means that they increase your file size considerably.<br />
As a result, you should send perspective views to layout sparingly.<br />
To send a perspective view to layout<br />
1. Return to floor plan view.<br />
2. Select 3D> Create Perspective View> Full Camera and create a 3D view.<br />
3. In the camera view, use the Move, Orbit and Tilt Camera tools available in the 3D menu to<br />
adjust the view to your liking. See “Editing 3D Views” on page 684 of the Reference<br />
Manual.<br />
10
Sending Perspective Views to <strong>Layout</strong><br />
4. Click the Restore button at the top right corner of the view window, between the Minimize<br />
and Close buttons, then adjust the shape of the window so that it includes the information<br />
that you want and has a height to width ratio similar to the space you want it to fill on the<br />
layout page.<br />
5. Select 3D> Camera View Options> Final View to redraw the view at a higher quality<br />
according to your settings in the Preferences dialog. See “Previews vs Final Views” on<br />
page 698 of the Reference Manual<br />
11
<strong>Home</strong> <strong>Design</strong>er Pro 2014 User’s Guide<br />
6. Select File> Send to <strong>Layout</strong> to open the Send to <strong>Layout</strong> dialog. When perspective<br />
views are sent to layout our options are limited because they cannot be scaled. This is why<br />
we do not need to access the Page Setup dialog before sending the view to layout.<br />
7. Select and resize the image as needed.<br />
8. Repeat this process for any other camera views you may want to send to your layout sheet.<br />
12
Printing to PDF<br />
Printing to PDF<br />
A PDF, or Portable Document Format, file saves all of the printable information associated<br />
with a document such as a layout and makes it available for both viewing and printing without<br />
using the software originally used to create it. PDFs are easy to create and provide you with an<br />
efficient way to share your work with others or send documents to a print service.<br />
In order to create a PDF, you must first have a PDF printer driver installed on your computer.<br />
Many options are available, including PDF995, which is available for download. Select Help><br />
Download PDF Printer Driver from the program menu or visit www.pdf995.com.<br />
Creating a PDF is a printing function, and the PDF driver installed on your computer should be<br />
treated like any other printer. Set up page size and orientation information in its Properties<br />
dialog and select your PDF writer as your printer in the Page Setup and Print dialogs. For<br />
more information, see “Printing to a PDF File” on page 848 of the Reference Manual.<br />
13
<strong>Home</strong> <strong>Design</strong>er Pro 2014 User’s Guide<br />
14


