Installation Instructions (PDF) - Lighting Solutions
Installation Instructions (PDF) - Lighting Solutions
Installation Instructions (PDF) - Lighting Solutions

You also want an ePaper? Increase the reach of your titles
YUMPU automatically turns print PDFs into web optimized ePapers that Google loves.
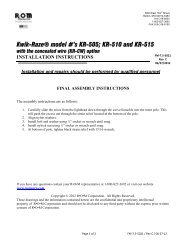
Attach all OEM dash panels and accessories.<br />
This photo shows the OEM Airbag cut off switch relocated into the new<br />
lower dash panel.<br />
** If your vehicle does not have this switch, plate # CM003865 and<br />
three (3) # 8 x ¼ screws are provided to cover opening.**<br />
Other OEM options (RE: accessory pocket) may not fit this opening.<br />
Run all wiring as needed.<br />
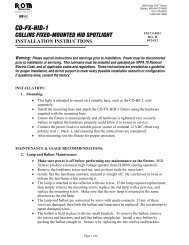
If truck has OEM center console, it will be a tight fit<br />
depending on control heads. This may require<br />
installation of lower faceplates into console prior to<br />
console housing mounting.<br />
The cup holder on OEM console can be temporarily<br />
removed to create more space during installation.<br />
Remove two Phillips screws under armrest and<br />
unclip gray plastic front cap.<br />
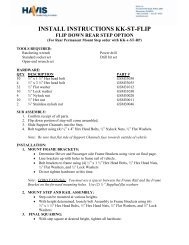
Wire and mount all control heads.<br />
Note: <strong>Installation</strong> of lower faceplate screws may<br />
require a T-20 Torx bit in a ratchet wrench with a ¼”<br />
hex socket.<br />
Optional cup holder model C-CUP2-E-C mounted<br />
on side of console. Mount holes must be drilled in<br />
desired location.<br />
Optional Mic Clip brackets model C-MCB mount to<br />
side accessory nuts.<br />
4<br />
C-VS-1100-F250-1_INST_8-10.docx