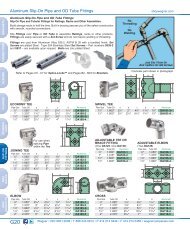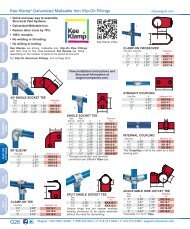
Assembly & Installation Manual Aluminum Ball Railing Fittings .
Assembly & Installation Manual Aluminum Ball Railing Fittings .
Assembly & Installation Manual Aluminum Ball Railing Fittings .

Create successful ePaper yourself
Turn your PDF publications into a flip-book with our unique Google optimized e-Paper software.
Available from the Wagner Companies<br />
10600 W Brown Deer Rd<br />
Milwaukee, WI 53224<br />
1-888-243-6914<br />
<strong>Assembly</strong> & <strong>Installation</strong> <strong>Manual</strong> <strong>Aluminum</strong> <strong>Ball</strong> <strong>Railing</strong> <strong>Fittings</strong> .<br />
Please read the following instructions carefully to ensure the best possible performance from<br />
your investment.<br />
• <strong>Assembly</strong> and <strong>Installation</strong> of the Kalamazoo Rail system can be a simple process. “Preparation is the key”.<br />
Study the respective product manuals and videos, gather the necessary tools and materials, and perform the<br />
assembly in planned steps on a suitable work surface.<br />
• The railing should be dry assembled prior to making any adhesive connections to identify fitment issues and<br />
confirm that all necessary components are present.<br />
• All connections must slip freely to their fully inserted positions. If any of the connections will not slip freely, a<br />
file or sandpaper should be used to remove the burr or obstruction from pipe or fitting.<br />
• Plan out the order in which the components will be assembled and the connections made. Adjoining (linked)<br />
connections often need to be made at the same time and within the working time of the adhesive. If the design<br />
includes a SADDLE connection, it should be made first.<br />
• Do not make an adhesive connection that once made, will prevent applying adhesive to another connection.<br />
• Have a series of connections ready to make so you can maximize the yield from each adhesive cartridge and<br />
limit the number of mixing nozzles required. Each 50ml adhesive cartridge should make 4 to 6 connections.<br />
• Connections should be made with the assembly on a flat work surface. Use standard 2x4 blocks, parallels or<br />
other suitable spacers under the pipe rails to support the assembly above the work surface. This will hold the<br />
assembly straight and flat while creating clearance for the fittings.<br />
• If necessary, the adhesive bond can be softened and the fittings disassembled by heating to 400f. This heat will<br />
damage most coatings. Caution: <strong>Aluminum</strong> has a melting temperature between 1000f and 1100f.<br />
• LORD 403/406 acrylic adhesives used in the system require little to no substrate preparation. Remove grease,<br />
loose contamination or poorly adhering oxides from metal surfaces. Bonds metal to metal, powder coated<br />
metal to metal as well as powder coated metals together. Working temperature range - 40f to 300f.<br />
• LORD 406 Working time is 6-10 minutes/Time to Handling strength is 12-17 minutes/Full cure in 24hrs.<br />
• LORD 403 Working time is 2-4 minutes/Time to Handling strength is 4-6 minutes/Full cure in 24hrs.<br />
• Before using this or any LORD product, refer to the Material Safety Data Sheet (MSDS) and label for safe use<br />
and handling instructions.<br />
Required for assembly:<br />
Flat work surface<br />
Spacer blocks<br />
Adhesive dispenser gun<br />
-or-<br />
Caulk gun with Adapter<br />
Mixing paddle<br />
Mixing pallet/Waste pallet<br />
Duct tape<br />
File (half round)<br />
Sandpaper<br />
Mallet (soft face)<br />
Rags<br />
Vice grip pliers<br />
Hacksaw<br />
Required for SADDLE connection:<br />
Hand drill<br />
1/4” & 19/64” twist drill bits<br />
Rivet Nut Tool<br />
Hex keys - standard<br />
Wrench – 1/2”<br />
Kalamazoo Rail Company<br />
Supporting instructional videos can be<br />
found on the internet at YouTube.com<br />
kalamazoorail’s Channel<br />
(www.youtube/user/kalamazoorail.com)<br />
1 of 9 Version 1.7.11
Available from the Wagner Companies<br />
10600 W Brown Deer Rd<br />
Milwaukee, WI 53224<br />
1-888-243-6914<br />
‘Saddle’ Connection .<br />
If the railing design includes a SADDLE connection, it should be made first.<br />
1. Dry assemble the fittings and pipe for the portion of railing adjoining the saddle.<br />
2. I necessary, tape fittings in place at the correct and fully inserted positions. Use O-rings to hold positions<br />
of any pass connections.<br />
3. Square up the dry assembly and determine the correct location for the saddle. (the bolt and nut fastening<br />
the saddle to the plug should be somewhat tight to keep the assembly aligned)<br />
4. Mark the saddle position on the pipe to verify that the saddle remains in the correct location during steps<br />
4, 5 and 6.<br />
5. Wrap a length of duct tape around pipe and saddle to hold saddle securely in position. (it is fine to tape<br />
over holes in saddle)<br />
6. Carefully disassemble all components leaving only the saddle taped in position.<br />
7. Using the (2) predrilled holes in the saddle as a guide, pilot drill the pipe with a 1/4” twist drill bit. Drill<br />
squarely into pipe and through one wall only.<br />
8. Remove the saddle and tape from the pipe.<br />
9. Enlarge the (2) 1/4” pilot holes in the pipe with a 19/64” twist drill bit. Do not enlarge the holes in the<br />
saddle.<br />
10. Insert threaded insert into the drilled holes in the pipe and set with a rivet nut tool.<br />
11. Option #1 - MIXING PADDLE method- Purge adhesive directly from adhesive cartridge onto waste pallet<br />
until both components come out equally. Dispense about 1/2 Tbsp. of adhesive onto mixing pallet. Use<br />
mixing paddle to mix the two components until adhesive appears an even color.<br />
Option #2 - MIXING NOZZLE method - Purge adhesive from adhesive cartridge through a mixing nozzle<br />
onto a waste pallet until adhesive appears an even color.<br />
12. Apply adhesive to the surface of the saddle that will contact pipe.<br />
13. Fasten the saddle to pipe with (2) flat head screws. If necessary, strike saddle with a soft face mallet to fix<br />
tightly against pipe.<br />
14. Wipe excess adhesive from the joint area while forcing adhesive into any visible voids at joint line. (best<br />
done with a gloved finger - excess adhesive may be used on another connection)<br />
15. Allow adhesive to cure to handling strength before moving or proceeding with assembly. Time to handling<br />
strength varies between 6-17 minutes.<br />
2 of 9 Version 1.7.11
Available from the Wagner Companies<br />
10600 W Brown Deer Rd<br />
Milwaukee, WI 53224<br />
1-888-243-6914<br />
16. Remove remaining adhesive from the exterior of the assembly before the adhesive cures further. Usually<br />
all that is required to remove uncured adhesive is wiping with a dry rag. If necessary, use hot water and<br />
detergent or an organic solvent; ketones (MEK, Acetone etc.) have shown to work best.<br />
‘Pocket’ Connection .<br />
The fitting and pipe that make the pocket connection must be separated to apply the adhesive. <strong>Assembly</strong> of this<br />
connection may require that adjoining connections be made at the same time and within the working time of the<br />
adhesive. It can be made by mixing the adhesive through a mixing nozzle –or- with a mixing paddle.<br />
1. Insert a Type ‘H’ cap into end of pipe to be inserted into the pocket.<br />
2. Dry fit pipe into pocket and mark pipe at joint line to witness full insertion when adhesive connection is<br />
made.<br />
3. Option #1 - MIXING PADDLE method- Purge adhesive directly from adhesive cartridge onto waste pallet<br />
until both components come out equally. Dispense about 1-1/2 Tbsp. of adhesive onto mixing pallet. Use<br />
mixing paddle to mix the two components until adhesive appears an even color.<br />
Option #2 - MIXING NOZZLE method - Purge adhesive from adhesive cartridge through a mixing nozzle<br />
onto a waste pallet until adhesive appears an even color.<br />
4. Apply adhesive directly through a mixing nozzle –or- with a mixing paddle into the pocket. Spread<br />
adhesive in a thick bead completely around the inside lip of pocket.<br />
5. Insert pipe into pocket and apply pressure until pipe is completely inserted into pocket. Strike with soft<br />
face mallet if necessary. The adhesive will be pushed to the bottom of the pocket and any excess adhesive<br />
will be forced back up and out of the joint. If possible, rotate the fitting or pipe slightly to distribute<br />
adhesive.<br />
6. Wipe excess adhesive from the joint area while forcing adhesive into any visible voids at joint line. (best<br />
done with a gloved finger - excess adhesive may be used on another connection)<br />
7. Allow adhesive to cure to handling strength before moving or proceeding with assembly. Time to handling<br />
strength varies between 6-17 minutes.<br />
8. Remove remaining adhesive from the exterior of the assembly before the adhesive cures further. Usually<br />
all that is required to remove uncured adhesive is wiping with a dry rag. If necessary, use hot water and<br />
detergent or an organic solvent; ketones (MEK, Acetone etc.) have shown to work best.<br />
3 of 9 Version 1.7.11
Available from the Wagner Companies<br />
10600 W Brown Deer Rd<br />
Milwaukee, WI 53224<br />
1-888-243-6914<br />
‘Plug’ Connection .<br />
The fitting and pipe that make the plug connection must be separated to apply the adhesive. <strong>Assembly</strong> of this<br />
connection may require that adjoining connections be made at the same time and within the working time of the<br />
adhesive. It can be made by mixing the adhesive through a mixing nozzle –or- with a mixing paddle.<br />
1. Option #1 - MIXING PADDLE method- Purge adhesive directly from adhesive cartridge onto waste pallet<br />
until both components come out equally. Dispense about 1-1/2 Tbsp. of adhesive onto mixing pallet. Use<br />
mixing paddle to mix the two components until adhesive appears an even color.<br />
Option #2 - MIXING NOZZLE method - Purge adhesive from adhesive cartridge through a mixing nozzle<br />
onto a waste pallet until adhesive appears an even color.<br />
1. Apply adhesive directly from a mixing nozzle –or- with a mixing paddle onto the plug. Spread adhesive<br />
inside the groove and completely around body of the plug.<br />
2. Insert plug into pipe and apply pressure until plug is completely inserted. Strike with soft face mallet if<br />
necessary. The adhesive will be pushed to the bottom of the groove and the excess adhesive will be forced<br />
back up and out of the joint. If possible, rotate the fitting or pipe slightly to help distribute adhesive.<br />
3. Wipe excess adhesive from the joint area while forcing adhesive into any visible voids at joint line. (best<br />
done with a gloved finger - excess adhesive may be used on another connection)<br />
4. Allow adhesive to cure to handling strength before moving or proceeding with assembly. Time to handling<br />
strength varies between 6-17 minutes.<br />
5. Remove remaining adhesive from the exterior of the assembly before the adhesive cures further. Usually<br />
all that is required to remove uncured adhesive is wiping with a dry rag. If necessary, use hot water and<br />
detergent or an organic solvent; ketones (MEK, Acetone etc.) have shown to work best.<br />
4 of 9 Version 1.7.11
Available from the Wagner Companies<br />
10600 W Brown Deer Rd<br />
Milwaukee, WI 53224<br />
1-888-243-6914<br />
‘Pass’ Connection .<br />
The fitting and pipe that make the pass connection must be assembled and in position to apply the adhesive.<br />
<strong>Assembly</strong> of this connection may require that adjoining connections be made at the same time and within the<br />
working time of the adhesive. This connection is made by injecting the adhesive with the mixing nozzle directly<br />
into the fitting through a port hole. This connection cannot be made with a mixing paddle.<br />
1. To retain the fitting in its correct location during this process, rubber O-rings rolled onto the pipe and<br />
pushed against the fitting will hold its position.<br />
2. MIXING NOZZLE method - Purge adhesive from adhesive cartridge through a mixing nozzle onto a waste<br />
pallet until adhesive appears an even color.<br />
3. Insert mixing nozzle into port hole of fitting and force adhesive directly into joint. Inject adhesive until it<br />
emerges from joint area.<br />
4. Rotate pipe or fitting 180 degrees to distribute adhesive.<br />
5. Re- Insert mixing nozzle into port hole of fitting and force adhesive directly into joint. Inject adhesive until<br />
it emerges from joint area.<br />
6. Wipe excess adhesive from the joint area while forcing adhesive into any visible voids at joint line. (best<br />
done with a gloved finger - excess adhesive may be used on another connection)<br />
7. Allow adhesive to cure to handling strength before moving or proceeding with assembly. Time to handling<br />
strength varies between 6-17 minutes.<br />
8. Remove remaining adhesive from the exterior of the assembly before the adhesive cures further. Usually<br />
all that is required to remove uncured adhesive is wiping with a dry rag. If necessary, use hot water and<br />
detergent or an organic solvent; ketones (MEK, Acetone etc.) have shown to work best.<br />
5 of 9 Version 1.7.11
Available from the Wagner Companies<br />
10600 W Brown Deer Rd<br />
Milwaukee, WI 53224<br />
1-888-243-6914<br />
‘Dowel’ Connection .<br />
The dowel and pipe that make this connection must be separated to apply the adhesive. <strong>Assembly</strong> of this<br />
connection does not require that any adjoining connections be made at the same time. This connection is made to<br />
eliminate nuisance rattling between dowel and post. It can be made by mixing the adhesive through a mixing<br />
nozzle –or- with a mixing paddle.<br />
1. Option #1 - MIXING PADDLE method- Purge adhesive directly from adhesive cartridge onto waste pallet<br />
until both components come out equally. Dispense about 2-4 Tbsp. of adhesive onto mixing pallet. Use<br />
mixing paddle to mix the two components until adhesive appears an even color.<br />
Option #2 - MIXING NOZZLE method - Purge adhesive from adhesive cartridge through a mixing nozzle<br />
onto a waste pallet until adhesive appears an even color.<br />
1. Apply adhesive directly from a mixing nozzle –or- with a mixing paddle onto one side of the dowel. Spread<br />
adhesive down the length of the dowel in a single thick bead.<br />
2. Insert the dowel into the bottom (or base) of post. The dowel should end flush or slightly inset. Do not<br />
rotate the dowel to avoid spreading the adhesive around the inside of the post and sealing the passage for<br />
moisture to drain past the dowel and out of the post.<br />
3. Wipe excess adhesive from the joint area while forcing adhesive into any visible voids at joint line. (best<br />
done with a gloved finger - excess adhesive may be used on another connection)<br />
4. Allow adhesive to cure to handling strength before moving or proceeding with assembly. Time to handling<br />
strength varies between 6-17 minutes.<br />
5. Remove remaining adhesive from the exterior of the assembly before the adhesive cures further. Usually<br />
all that is required to remove uncured adhesive is wiping with a dry rag. If necessary, use hot water and<br />
detergent or an organic solvent; ketones (MEK, Acetone etc.) have shown to work best.<br />
6 of 9 Version 1.7.11
Available from the Wagner Companies<br />
10600 W Brown Deer Rd<br />
Milwaukee, WI 53224<br />
1-888-243-6914<br />
Fitting a ‘Kalamazoo Rail’ to a Stair flange mounting .<br />
Following are two methods used in fitting a flange mounted railing to a stair. The process hinges on determining<br />
the correct height of the posts to accommodate the layout of the stair and establish the vertical members in plumb.<br />
A stair post is often mounted below the pitch line on a tread, making it difficult to calculate its height.<br />
The FIRST method is a ‘expert’ approach to achieve a ‘good’ fit. This process does not require test fitting to the<br />
stair during fabrication but relies more on the accurate transfer of measurements from field to shop. Complete<br />
and accurate site measurements are required, as well as moderate layout skills.<br />
1. Transfer plumb and level field measurements of the stair in full scale to a layout table.<br />
2. Assemble the entire railing based on this layout.<br />
3. Apply paint/coating per coating manufacturer instruction.<br />
4. Install finished railing to the site with suitable fasteners. (see Appendix A - Fasteners)<br />
The SECOND method is a ‘novice’ approach to achieve a ‘perfect’ fit. This process does require test fitting to the<br />
stair during fabrication but relies less on the accurate transfer of measurements from site to shop. Very few<br />
site measurements are required, and good results can be achieved without special skills.<br />
1. The upper post is cut to its finished height.<br />
2. The lower post is cut tall - approx. 6” taller than the upper post.<br />
3. Partially assemble the railing to a point that it can be test fitted to the stair. Do not make the flange or<br />
dowel connections on the lower post (or any mid posts).<br />
4. Place the partially assembled railing on stair and raise the upper post to bring it into plumb.<br />
5. Capture this measurement (as well as the measurements of any mid posts).<br />
6. Trim the lower post the same amount as the upper post was raised into plumb.<br />
7. Make any remaining flange and dowel connections.<br />
8. Apply paint/coating per coating manufacturer instruction.<br />
9. Install finished railing to the site with suitable fasteners. (see Appendix A - Fasteners)<br />
Site Preparation .<br />
7 of 9 Version 1.7.11
Available from the Wagner Companies<br />
10600 W Brown Deer Rd<br />
Milwaukee, WI 53224<br />
1-888-243-6914<br />
Survey the condition and stability of the substrate the railing is to be mounted to, or embedded in. Evaluate<br />
concrete and masonry substrates, repair as necessary. Existing wooden structures may need repair, reinforcement<br />
or structural members added to support a handrail and secure the anchors. Treated lumber scabbed in under the<br />
deck at each mounting location is usually all that is necessary. The lumber should be layered up to provide a total<br />
of 5-1/2” for lag screws to bite into, or 4” to connect through with carriage bolts. (Use stainless steel deck screws<br />
to tie into the structure and orient the lumber to avoid end-grain lagging.)<br />
Fitting a ‘Kalamazoo Rail’ to a Stair concrete embedment .<br />
Following are two methods used in fitting an Embedded Post railing to a stair. This process hinges on determining<br />
the correct location to bore the holes to match post spacing of the railing when plumb. These methods of fitting the<br />
railing to stair are very similar to Flange Mounting with the additional length added to all posts for embedment<br />
and the order of some of the steps have changed.<br />
The FIRST method does not require test fitting and does not require trimming of any posts at the time of<br />
installation. This approach relies more on the accurate transfer of measurements while requiring complete<br />
and accurate field measurements as well as moderate layout skills.<br />
1. Transfer field measurements of the stair in full scale to a layout table.<br />
2. Assemble the railing based on this layout - adding 6” to all posts for embedment.<br />
3. Apply paint per coating manufacturer’s instruction.<br />
4. Install railing with a suitable core boring/grouting process, following the respective manufacturer<br />
instruction.<br />
The SECOND method does not require test fitting but does require trimming of select post(s) at the time of<br />
installation. This approach relies less on the accurate transfer of measurements and requires very few field<br />
measurements.<br />
1. The upper post is cut to its finished height plus 6” for embedment.<br />
2. The lower post and mid post(s) are cut tall – 6” taller than the upper post. (12” taller than the finished<br />
height = 6” for embedment + 6” to trim)<br />
3. Assemble the railing. Do not make any dowel connections.<br />
4. Apply paint per coating manufacturer’s instruction.<br />
5. Place the assembled railing on the stair and raise the upper post to bring it into plumb.<br />
6. Capture this measurement (as well as the measurements of any mid posts).<br />
7. Trim the lower post the same amount as the upper post was raised into plumb.<br />
8. Make the remaining dowel connections.<br />
9. Install the railing with a suitable core bore/grouting process following manufacturer instruction.<br />
Installing a ‘Kalamazoo Rail’ to a Stair concrete embedment .<br />
1. Prepare the posts for embedment. (see ‘Controlling Corrosion’)<br />
2. Place the railing on the stair and determine where it will be installed.<br />
3. Mark the post location on the stair with a permanent marker. Expand the marks to indicate the<br />
outside edge of the core bit to be used.<br />
4. Use the correct size core bit to provide the clearance required by the grout manufacturer.<br />
5. Prepare to control the mess created by the core bore operation. If using a wet bit you will need to<br />
protect anything close by from the slurry that will be flung from the core bit during drilling.<br />
6. core bore to depth, remove core, water rinse, vacuum and dry out the bore.<br />
8 of 9 Version 1.7.11
Available from the Wagner Companies<br />
10600 W Brown Deer Rd<br />
Milwaukee, WI 53224<br />
1-888-243-6914<br />
7. Place the railing on the stair with the posts in bores.<br />
8. If a cover flange is being used, position it high on the post with tape.<br />
9. plumb up the railing and brace with grout stands or other suitable props, stakes and guy lines. The<br />
railing must be firmly supported in its final position before proceeding with grout.<br />
10. Grout in post and caulk joint per manufacturer specification.<br />
11. Drill a 1/4” hole at 1/4” above grade through post to allow drainage.<br />
Controlling Corrosion .<br />
The Kalamazoo Rail Company cautions against installing aluminum components in direct contact with concrete or<br />
dissimilar metals. <strong>Aluminum</strong> is known to react with alkali found in cementitious materials which results in a<br />
number of corrosive chemical reactions. <strong>Aluminum</strong> in contact or proximity to dissimilar metals in the presence of<br />
moisture will produce a galvanic cell which also leads to an accelerated rate of corrosion.<br />
• Stainless Steel is recommended for ALL fasteners. It is ideally suited for exterior applications and compatible<br />
for use in direct contact with aluminum, concrete, dissimilar metals, treated lumber and moisture. Use in<br />
accordance with the respective manufacturers instruction and within loading specifications.<br />
• Embedding aluminum into concrete can be executed safely if preventative measures are taken to isolate the<br />
aluminum from concrete, dissimilar metals and moisture. These precautions will include protecting the<br />
aluminum from standing water that is in contact with concrete.<br />
OPTION #1 – Embed the post with an epoxy grout. This type of grout is most commonly packaged in a two<br />
component cartridge system that is more expensive than traditional cementitious grouts but is easy to use<br />
will provide adequate isolation and corrosion protection when subjected to moderate service.<br />
Make dowel connection in base of post prior to embedment.<br />
Slope the surface of the grout away from the aluminum post to avoid water from gathering at the<br />
grout/post interface.<br />
Caulk the aluminum/concrete interface with an aluminum impregnated caulking compound.<br />
(alumilastic, or equal)<br />
OPTION #2 – Apply a protective coating to the portion of the post to be embedded into concrete prior to<br />
grouting in place. Either a cementitious grout –or- an epoxy grout may be used after coating.<br />
ASPHALT BASED / BITUMINOUS COATING per manufacturer’s instruction. This should provide<br />
adequate protection when subjected to semi-severe and severe service.<br />
UNMODIFIED EPOXY CHROMATE PRIMER per manufacturer’s instruction. This should provide<br />
adequate protection when subjected to semi-severe and severe service.<br />
ALKYD ZINC CHROMATE PRIMER per manufacturer’s instruction. This should provide adequate<br />
protection when subjected to moderate service.<br />
CLEAR URETHANE per manufacturer’s instruction. This should provide adequate protection when<br />
subjected to dry, light service.<br />
OPTION #3 - Graft a stainless steel dowel into base of post. This dowel will need to be long enough to<br />
reinforce the post as well as provide a 6” foot of stainless steel to be embedded into the concrete. When<br />
installed, the aluminum body of the post should not be in contact with the concrete. A grout cover may be<br />
implemented to finish the install and conceal the grafted joint in the post.<br />
9 of 9 Version 1.7.11