Art Gallery (Tandy).pdf - TRS-80 Color Computer Archive
Art Gallery (Tandy).pdf - TRS-80 Color Computer Archive
Art Gallery (Tandy).pdf - TRS-80 Color Computer Archive

Create successful ePaper yourself
Turn your PDF publications into a flip-book with our unique Google optimized e-Paper software.
LIMITED WARRANTY<br />
RADIO SHACK Software is licensed on an "AS IS" basis, without warranty. The original<br />
CUSTOMER'S exclusive remedy, in the event of a Software manufacturing defect, is its repair or<br />
replacement within thirty (30) calendar days of the date of the Radio Shack sales document<br />
received upon license of the Software. The defective Software shall be returned to a Radio Shack<br />
<strong>Computer</strong> Center, a Radio Shack retail store, participating Radio Shack franchisee or Radio Shack<br />
dealer along with the sales document.<br />
Except as provided herein, RADIO SHACK MAKES NO WARRANTIES, INCLUDING<br />
WARRANTIES OF MERCHANTABILITY OR FITNESS FOR A PARTICULAR PURPOSE.<br />
Some states do not allow limitations on how long an implied warranty lasts, so the above<br />
limitation(s) may not apply to CUSTOMER.<br />
RADIO SHACK SHALL HAVE NO LIABILITY OR RESPONSIBILITY TO CUSTOMER OR ANY<br />
OTHER PERSON OR ENTITY WITH RESPECT TO ANY LIABILITY, LOSS OR DAMAGE CAUSED OR<br />
ALLEGED TO BE CAUSED DIRECTLY OR INDIRECTLY BY "SOFTWARE" LICENSED OR<br />
FURNISHED BY RADIO SHACK, INCLUDING, BUT NOT LIMITED TO, ANY INTERRUPTION OF<br />
SERVICE, LOSS OF BUSINESS OR ANTICIPATORY PROFITS OR INDIRECT, SPECIAL, OR<br />
CONSEQUENTIAL DAMAGES.<br />
Some states do not allow the limitation or exclusion of incidental or consequential damages, so<br />
the above limitation(s) or exclusion(s) may not apply to CUSTOMER.<br />
RADIO SHACK SOFTWARE LICENSE<br />
RADIO SHACK grants to CUSTOMER anon-exclusive, paid-up license to use the RADIO SHACK<br />
Software on one computer, subject to the following provisions:<br />
A. Except as otherwise provided in this Software License, applicable copyright laws shall apply to<br />
the Software.<br />
B. Title to the medium on which the Software is recorded (cassette and/or diskette) or stored<br />
(ROM) is transferred to CUSTOMER, but not title to the Software.<br />
C. CUSTOMER shall not use, make, manufacture, or reproduce copies of Software except for use<br />
on one computer and as is specifically provided in this Software License. Customer is<br />
expressly prohibited from disassembling the Software.<br />
D. CUSTOMER is permitted to make additional copies of the Software only for backup or archival<br />
purposes or if additional copies are required in the operation of one computer with the<br />
Software, but only to the extent the Software allows a backup copy to be made.<br />
E. All copyright notices shall be retained on all copies of the Software.<br />
The warranties granted herein give the original CUSTOMER specific legal rights, and the<br />
original CUSTOMER may have other rights which vary from state to state.
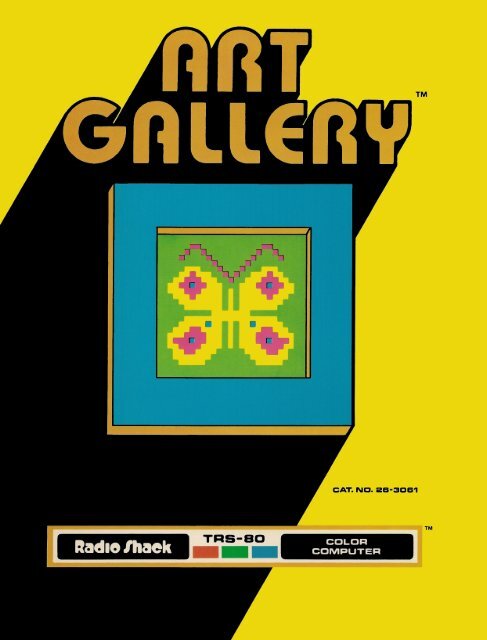
<strong>Art</strong> <strong>Gallery</strong> <br />
!ladle IhaeK<br />
A DIVISION OF TANDY CORPORATION<br />
FORT WORTH. TEXAS 76102
<strong>Art</strong> <strong>Gallery</strong> Program:<br />
© 1981 Robert G. Kilgus<br />
Licensed to <strong>Tandy</strong> Corporation.<br />
All Rights Reaserved.<br />
This applications software for the <strong>TRS</strong>-<strong>80</strong> <strong>Color</strong><br />
microcomputer is retained in a read-only memory (ROM)<br />
format. All portions of this software, whether in the ROM<br />
format or other source code form format, and the ROM<br />
circuitry, are copyrighted and are the proprietary and trade<br />
secret information of <strong>Tandy</strong> Corporation and/or its licensor.<br />
Use, reproduction or publication of any portion of this material<br />
without the prior written autorization by <strong>Tandy</strong> Corporation is<br />
strictly prohibited. The license for using this software is printed<br />
on the inside front cover of this manual.<br />
<strong>Art</strong> <strong>Gallery</strong> Program Manual:<br />
© 1981 <strong>Tandy</strong> Corporation<br />
All Rights Reserved.<br />
Reproduction or use, without express written permission from<br />
<strong>Tandy</strong> Corporation, of any portion ofthis manual is prohibited.<br />
While reasonable efforts have been taken in the preparation of<br />
this manual to assure its accuracy, <strong>Tandy</strong> Corporation assumes<br />
no liability resulting from any errors or omissions in this<br />
manual, or from the use of the information contained herein.<br />
1098765432
Table of Contents<br />
Introduction . . . . . . . . . . . . . . . . . . . . . . . . . . . . . . . . . . . . . . . . . . . .. 1<br />
Loading the Program. . . . . . . . . . . . . . . . . . . . . . . . . . . . . . . . . . .. 3<br />
The <strong>Art</strong> <strong>Gallery</strong> Data Tape. . . . . . . . . . . . . . . . . . . . . . . . . . . . .. 3<br />
The Template. . . . . . . . . . . . . . . . . . . . . . . . . . . . . . . . . . . . . . . . .. 4<br />
Running the Program 5<br />
Draw or Change Picture 5<br />
The Arrow Keys . . . . . . . . . . . . . . . . . . . . . . . . . . . . . . . . . .. 5<br />
Changing <strong>Color</strong>s . . . . . . . . . . . . . . . . . . . . . . . . . . . . . . . . . .. 5<br />
Changing the Size of the Cursor. . . . . . . . . . . . . . . . . . . . .. 6<br />
Connecting Lines. . . . . . . . . . . . . . . . . . . . . . . . . . . . . . . . . .. 6<br />
Filling an Outlined Area with <strong>Color</strong> 6<br />
Drawing Triangles. . . . . . . . . . . . . . . . . . . . . . . . . . . . . . . . .. 7<br />
Shrinking a Picture. . . . . . . . . . . . . . . . . . . . . . . . . . . . . . . .. 7<br />
Using Joysticks 7<br />
Printing Letters on the Picture . . . . . . . . . . . . . . . . . . . . . .. 8<br />
Highlighting Characters. . . . . . . . . . . . . . . . . . . . . . . . . . . .. 8<br />
Saving Your Creation. . . . . . . . . . . . . . . . . . . . . . . . . . . . . . . . . .. 9<br />
Loading a Picture from Tape . . . . . . . . . . . . . . . . . . . . . . . .. 9<br />
For 16K Users Only 11<br />
Edit Text and Controls 11<br />
Changing Controls 12<br />
Changing the <strong>Color</strong> 12<br />
Deleting Characters 13<br />
Changing the Character Size 13<br />
Changing Space Between Lines 14<br />
Shadows 14<br />
Multiple <strong>Color</strong>ed Lines 15<br />
Changing the Scrolling Speed 15<br />
Horizontal Scrolling 15<br />
Adjusting the Horizontal Line Placement 16<br />
Tips on Using Horizontal Scrolling 16<br />
Stop the Scrolling 17<br />
Preparing Multi-Load Presentations 17<br />
Appendices<br />
A - More Fun with the Data Tape 19<br />
B - Data Tape Pictures 21
Introduction<br />
Introduction<br />
You now have the opportunity to utilize your artistic talents without the mess of<br />
paints and bother of stretching canvas. <strong>Art</strong> <strong>Gallery</strong> gives you the freedom to<br />
create pictures with your video display as the canvas, the keyboard as your palette,<br />
and the cursor as your brush.<br />
Leonardo da Vinci, Vincent van Gogh, and Henri Matisse would surely be jealous<br />
if they could see you using your <strong>Color</strong> <strong>Computer</strong> to create masterpieces. And your<br />
art can be preserved in your own personal art gallery - in the form of a cassette<br />
tape.<br />
For those with aAK or 16K <strong>Color</strong> <strong>Computer</strong>, <strong>Art</strong> <strong>Gallery</strong> lets you draw color<br />
images on the screen and save them on tape for later touchups and viewing. (You<br />
do not have to have a cassette recorder to use <strong>Art</strong> <strong>Gallery</strong>, but you cannot save<br />
art for later viewing without one.) You can also type block letters in the size you<br />
choose and view those later.<br />
Also, if you have a 16K <strong>Color</strong> <strong>Computer</strong> you have a text editing screen, where you<br />
type text in your choice of size and then have it scroll horizontally or vertically.<br />
If you have drawn a picture in the DRAW OR CHANGE PICTURE section, the<br />
message you write in EDIT TEXT AND CONTROLS will be scrolled across the<br />
picture. This way you can make graphics with captions for public or private presentations.<br />
These presentations can be stored on tape and shown later.<br />
1
Loading the Program<br />
Loading the Program<br />
First, make sure the cassette recorder is connected properly. Turn on your TV<br />
and insert the cartridge in the slot in the right side of the computer. Now turn the<br />
computer on by pressing the On/Off button at the left rear of your color<br />
computer and the <strong>Art</strong> <strong>Gallery</strong> Menu shows:<br />
ARTGALLERY<br />
(C) R.G. KILGUS 1981<br />
LICENSED TO TANDY CORP.<br />
(TYPE CHOICE NUMBER)<br />
1 DRAW OR CHANGE PICTURE<br />
2 SAVE RESULTS ON TAPE<br />
3 LOAD FROM TAPE<br />
4 EDIT TEXT AND CONTROLS<br />
5 DISPLAY DYNAMIC RESULTS<br />
6 LOAD & RUN PRESENTATION<br />
DRAW OR CHANGE PICTURE lets you make pictures and graphic illustrations<br />
for your own pleasure or formal presentations.<br />
2 SAV E RES U LTS 0 N TAP E lets you save your artwork on cassette tape for<br />
retouches, or when you're ready to show those fastidious critics your "new<br />
masterpiece".<br />
3 LOAD FROM TAP E lets you see a picture that you previously saved on tape.<br />
4 EDIT TEXT AND CONTROLS (only available on 16K <strong>Color</strong> <strong>Computer</strong>)<br />
lets you type and revise scrolling text.<br />
5 DISPLAY DYNAMIC RESULTS (also only available on 16K <strong>Color</strong><br />
<strong>Computer</strong>) lets you see the results of the scrolling techniques that you<br />
organized in Edit Text and Controls. You can make your edited text scroll<br />
over an illustration.<br />
6 LOAD & RUN PRESENTATION (only available on 16K <strong>Color</strong> <strong>Computer</strong>) .<br />
lets you play back a series of pictures and text in a continous presentation.<br />
The <strong>Art</strong> <strong>Gallery</strong> Data Tape<br />
The Data tape, included as part of the <strong>Art</strong> <strong>Gallery</strong> package, should give you an<br />
idea of the versatility you have in drawing and storing your finished "attempts".<br />
Unfortunately, those without a cassette player cannot view the Data tape.<br />
Make sure that your cassette player is properly connected to your <strong>Color</strong><br />
<strong>Computer</strong>. Insert the cassette in the recorder and rewind the tape.<br />
3
Loading the Program (continued)<br />
If you have a 4K <strong>Color</strong> <strong>Computer</strong>, you will have to load the Data tape presentation<br />
one picture at a time. Press rn at the Menu.<br />
The screen will show:<br />
PREPARE RECORDER TO PLAY<br />
PUSH "ENTER" WHEN READY<br />
(OR "BREAK" TO GO BACK TO MENU)<br />
Press (ENTER) and the screen will show: LOAD ING (with an @ sign at the bottom<br />
of the screen). After the picture is loaded, the Menu will return. Press CD to<br />
see the picture. After the first picture has been viewed, press (BREAK) to return<br />
to the Menu. Repeat this process until you have seen all 27 pictures on the Data<br />
tape. The 27 images on the Data tape are listed in Appendix B on page 21.<br />
If you have a 16K <strong>Color</strong> <strong>Computer</strong>, you should refer to the last instruction,<br />
6 LOAD & RUN PRESENTATION. Using this procedure, all of the images<br />
are displayed without interruption. Those with a 16K <strong>Color</strong> <strong>Computer</strong> have the<br />
option of using 3 LOAD FROM TAP E to view the Data tape pictures one at a<br />
time.<br />
After you finish learning the key functions of <strong>Art</strong> <strong>Gallery</strong>, see Appendix A to<br />
find how to use the Data tape to experiment with the key functions.<br />
The Template<br />
A template is provided with key labels to help you locate and memorize the<br />
various functions of <strong>Art</strong> <strong>Gallery</strong>. Place the overlay on the keyboard.<br />
4
Running the Program<br />
Running the Program<br />
It takes practice to become adept at drawing pictures the way you want them to<br />
look. Let's go over the different key functions before you begin drawing.<br />
Draw or Change Picture<br />
Press m for DRAW OR CHANGE PICTURE. A small blinking cursor (a light<br />
dot) will appear in the upper left comer of your color video screen.<br />
Pressing ~ will return you to the Menu.<br />
The Arrow Keys<br />
The four arrow keys will move the cursor in the direction of the arrow. Press<br />
CSHfrr) and an arrow key to make the picture move in the direction of that<br />
arrow. You can even scroll the picture off the screen in any direction. If you<br />
scroll the picture off to the left, it will reappear from the right, so this is no way<br />
to make a bad drawing disappear.<br />
The (ENTER) key returns the cursor to the left side of the screen.<br />
Changing <strong>Color</strong>s<br />
<strong>Art</strong> <strong>Gallery</strong> has two color screens. The first screen is green. The cursor is clear<br />
until you press one of the keys to transform it to color. To change the cursor to<br />
a color, you press one of four color keys.<br />
For red, press 00.<br />
For blue, press m.<br />
For green, press CID.<br />
For yellow, press CD.<br />
By pressing ®, the screen changes to a buff color. Red becomes orange. Blue<br />
becomes magenta. Green becomes buff. Yellow becomes cyan.<br />
If you don't like quasi-psychedelic colors, press ®<br />
screen.<br />
again to return to the green<br />
The mAID key makes the cursor colorless. After pressing the (CLEAR) key, you<br />
can move the cursor around to the desired point on your drawing without<br />
affecting what you've already drawn. Then you press one of the color keys to<br />
continue drawing.<br />
5
Running the Program (continued)<br />
Changing the Size of the Cursor<br />
The CD, (]J, 00, and [[) keys will change the cursor size. The cursor,<br />
unchanged, is one unit. You can increase the cursor size up to 19 units in width<br />
and height.<br />
Press the CD key and the cursor will become wider. Press the (]J key to<br />
return the cursor to its normal size.<br />
You can also make the cursor taller by pressing the 00 key. To return the<br />
cursor to its normal size, press the [[) key.<br />
Each time you press the m or 00 key, two units are added to the size of<br />
the cursor. You may enlarge the cursor up to nine times. The larger the cursor,<br />
the slower it moves around the screen.<br />
Connecting Lines<br />
keys may be used to connect two points on the screen with<br />
the straightest possible line. Pressing CID will cause the computer to remember<br />
the position of the cursor. You may then move the cursor to another point on the<br />
screen without leaving a trail of color.<br />
The CO and CID<br />
key will also cause the<br />
computer to remember the current cursor position so you can connect it with<br />
the next point. When you connect lines horizontally or vertically, a straight line<br />
is produced. Connecting points diagonally will produce a "lightning bolt" effect.<br />
This comes in real handy when you draw severe thunderstorms.<br />
Pressing CO will connect the two points. The CO<br />
Filling an Outlined Area with <strong>Color</strong><br />
You can use the m key to fill an outlined area with the color of the outline.<br />
To use this feature, first draw an outline. Press (CLEAR) to move the cursor inside<br />
the outline. Press m and the area will be colored in.<br />
Depending on the shape of the outline, the outline may not be completely filled<br />
with color the first time you use this option. Press (CLEAR) again, and move the<br />
cursor to the area you want colored. Press m to complete the coloration.<br />
6
Running the Program (continued)<br />
Drawing Triangles<br />
You can draw triangles by using the 00, CD, m, and 00 keys. The<br />
triangle expands outward from the cursor in a direction corresponding with the<br />
position of the key in the block. The 00 key will cause the triangle to expand<br />
to the top of the screen and to the left.<br />
The CD key will cause the triangle to expand to the top of the screen and to<br />
the right. The m key will cause the cursor to expand to the bottom of the<br />
screen and to the left. The 00 key will cause the triangle to expand to the<br />
bottom of the screen and to the right.<br />
Triangle expansion continues while the key is held down and expansion stops<br />
when you release the key. Triangles will only expand to a certain point and then<br />
stop whether the key is held down or not. You can also use any of the keys<br />
simultaneously, change colors, and change the size of the cursor while drawing<br />
a triangle.<br />
The (]J key makes a diamond, acting as if you pushed all four triangle keys at<br />
once. You can maneuver the cursor just as you do in making triangles.<br />
Shrinking a Picture<br />
After drawing a picture, you may want to shrink it to make it a small part of a<br />
larger picture. Pressing the (SHIFT) and ® keys will shrink the picture to one<br />
half its original size. You may then use the (SHIFT) and arrow keys to move the<br />
shrunken drawing anywhere on the screen. An excellent way to start over,<br />
without pressing the reset button, is to press the ~ and @ keys until your<br />
drawing disappears.<br />
Using Joysticks<br />
The left joystick can be used to move the cursor. Pressing (]J will transfer<br />
control of the cursor to the joystick. The cursor will move in the direction you<br />
move the joystick's lever.<br />
Holding the joystick's red button will make the cursor clear. Releasing the button<br />
will make the cursor leave a trail of color. All of the functions may be activated<br />
while the joystick is being used. To return control to the keyboard, simply press<br />
one of the arrow keys.<br />
Note: The keyboard functions will not work while the joystick's button is pushed.<br />
7
Running the Program (continued)<br />
Printing Letters on the Picture<br />
<strong>Art</strong> <strong>Gallery</strong> lets you print letters and symbols in your choice of colors and sizes<br />
Gust like buying shirts). To print letters, you must first decide on the cursor size.<br />
Each time you press the CD or (]j keys, two units are added to the cursor's<br />
size. For the smallest letter you can print, press the CD key twice to make the<br />
cursor 5 units wide. Press the rn key three times to make the cursor 7 units tall.<br />
You can make the letters tall and thin, short and wide, or any other combination.<br />
When you have decided what size you want the letters, select a color. To select<br />
a color, you press the (CLEAR) key, then the key for the desired color. If you do<br />
not press the (CLEAR) key before selecting the color, the cursor will type color<br />
blocks, rather than color letters.<br />
To make letters, press the~key and the letter key. You can press the<br />
(SHIIIJ and the CD) keys to lock the keyboard into an upper case mode, but you<br />
must remember to press them again to change colors or cursor size.<br />
For dual charact r keys (1, !), the bottom character will print without the SHIFT<br />
key and the top character will print when the (SHIFT) key is pressed.<br />
The cursor will move to the right when a character is printed. When you get to<br />
the end of a line press (ENTER) for the cursor to return to the left. You then need<br />
to use the arrow keys to move the cursor up or down for the next line of letters.<br />
Highlighting Characters<br />
You can give your characters depth by reprinting the same letters in a different<br />
color, one position lower than the first line. Follow this example:<br />
1. Select a large character size by pressing the CD and rn keys<br />
several times.<br />
2. Select yellow as the first color by pressing the (CLEAR) and OJ<br />
keys together.<br />
3. Move the cursor to the beginning of a line.<br />
4. Press the (SHIFT) key and type a line of characters.<br />
5. Press (ENTER) to return the cursor to the left, then carefully position<br />
the cursor over the first letter. (Check the upper left corner of the<br />
cursor and the character.)<br />
6. Press the (CLEAR) and CD keys together to change the color to blue.<br />
7. Move the cursor down by pressing the m key once. Then move<br />
the cursor to the right by pressing the 8 key once.<br />
8<br />
8. Hold down the (SHIFT) key and type the same letters again.
Running the Program (continued)<br />
Saving Your Creation<br />
After you draw a picture, you may want to save it on tape. Press ~ for the<br />
Menu. Press rn for SAVE RESU LTS ON TAPE. Make sure the cassette recorder<br />
is properly connected.<br />
The screen will show:<br />
PREPARE RECORDER TO RECORD<br />
PUSH "ENTER" WHEN READY<br />
(OR "BREAK" TO GO BACK TO MENU)<br />
Press "Record" and "Play" on your tape recorder simultaneously. Set the tape<br />
recorder counter to zero. When the tape and recorder are both set, press (ENTER).<br />
If everything is correct, the screen will show:<br />
RECORDING<br />
An @ sign will appear at the bottom left of the screen while the picture is being<br />
saved. The Menu will appear when the drawing is recorded.<br />
Be sure to identify the tape's contents by writing the counter number of each<br />
recorded entry on the label.<br />
Loading a Picture from Tape<br />
To load a picture you have previously saved, make sure the recorder is connected<br />
properly, and insert the tape. Set the counter to zero, and if the picture you want<br />
is not the first one on the tape, press the "Fast Forward" button to get to the<br />
desired counter number. Press the "Rewind" button if you pass the precise number.<br />
Press "Play" on your tape recorder.<br />
When everyt:ling is set, press rn at the Menu for LOAD FROM TAPE.<br />
The screen will show:<br />
PREPARE RECORDER TO PLAY<br />
PUSH "ENTER" WHEN READY<br />
(OR "BREAK" TO GO BACK TO MENU)<br />
Press (ENTER), and the screen will show: LOADI NG. An @ sign will appear at the<br />
bottom of the screen while the picture is being loaded. The screen then returns<br />
to the Menu. If there is a problem in loading, the screen will say READ ERR0 R.<br />
If there is a problem, rewind the tape and press (ENTER). If your second attempt<br />
does not work, you need to start over by pressing ~ for the Menu.<br />
9
For 16K Users Only<br />
For 16K Users Only<br />
If you are using a 16K computer, you have access to a text editing function. Using<br />
this function, you can type words in your choice of sizes and colors and make<br />
them scroll horizontally or vertically on the screen at a speed you designate.<br />
If you have already drawn a picture in the DRAW OR CHANGE PICTURE section<br />
the message you type in EDIT TEXT AND CONTROLS will scroll over the picture.<br />
These features will let you add movement to the screen and allow you to make<br />
full presentations using <strong>Art</strong> <strong>Gallery</strong>.<br />
Edit Text and Controls<br />
Press (BREAK) to return to the Menu. Pressm for EDIT TEXT AND CONTROLS.<br />
The screen will have a cursor flashing in the upper left corner. Each time you type<br />
a letter, the cursor moves to the next space. Anything typed will appear in upper<br />
case letters.<br />
This feature of <strong>Art</strong> <strong>Gallery</strong> lets you type and edit text. You may type and edit up<br />
to 191 lines. When you have finished typing the message or story, the text will be<br />
displayed when you press(BREAKhnd rn for DISPLAY DYNAMIC RESULTS at<br />
the Menu. If you drew a picture in DRAW OR CHANGE PICTURE, the message<br />
will scroll over that picture.<br />
<strong>Color</strong>, size, scrolling direction and scrolling speed of the message are your decisions.<br />
Unless you enter control information (described later), the text that follows an<br />
asterisk (*) will be scrolled vertically in red and will be 5 points wide and 7 points<br />
high.<br />
For example, type an asterisk (0) and oomcoco(]J. Press (BREAK) .<br />
At the Menu, press rn for DISPLAY DYNAMIC RESULTS. A red HELLO<br />
should scroll vertically up the screen. The message will repeat until you press<br />
(BREAK) to return to the Menu. Procedures of how to choose size, color,<br />
direction, and speed of the scrolling message are given next.<br />
11
For 16K Users Only (continued)<br />
Changing Controls<br />
You may change the dimensions at any time by inserting control information in<br />
front of the text you just entered.<br />
First, press the (SHIFT) and (3 keys four times to move the existing text to the<br />
right. Don't move it too far or it will not be visible on the screen.<br />
The slash (0) is a control key like the asterisk. The slash comes before the<br />
asterisk. It tells the program that more control information follows. Anything to<br />
the left of the asterisk will not be scrolled when you display the picture.<br />
Anything to the right of the asterisk will be scrolled when you display your picture.<br />
The different control options will always be between the slash and the asterisk.<br />
You can have one control area that will govern the color, size, and spacing of the<br />
next lines. To make all lines have the same size, color, etc., there should be a control<br />
area in the first line. The rest of the lines only need an asterisk before the first<br />
letter of each line. Lines will not be displayed if they do not have an asterisk before<br />
the first letter of each line.<br />
Position the cursor over the asterisk. Press the (SHIFT) and (3 keys to move the<br />
asterisk and text over several spaces. Now press the 8 key enough times to move<br />
the cursor to the flush left position on the screen. Type the slash mark. The area<br />
between the slash and the asterisk is called the control area.<br />
Note: If you enter any incorrect information in the control area, it will be<br />
detected when you "Display Dynamic Results." The line containing the error<br />
will be ignored and a question mark will be placed in the first position of the<br />
line. If you see a question mark while you "Edit Text and Controls", correct<br />
your error and change the question mark back to a slash. Then try again.<br />
Changing the <strong>Color</strong><br />
Let's start by changing the color of the text. Type either a ([) for blue, ([) for<br />
green, Wfor yellow or an (]J for red in any space between the slash and the<br />
asterisk. The text will always be red unless you choose another color. The background<br />
screen will be green or whatever colors you used when you drew your<br />
background picture. If you choose green as your text color, the message will not<br />
show up on the screen unless you have already made the background another color<br />
in Option 1 of the Menu.<br />
You can also change the displayed colors to orange, magenta, buff and cyan as you<br />
did earlier in this manual (remember psychedelic?). To do this, press (BREAK) andCI)<br />
at the Menu. Press m to change the screen colors to orange, magenta, buff and<br />
cyan. Press (BREAK)and rn at the Menu. If you type (]J for redin the control<br />
area, the message will be displayed as orange on a buff background, etc.<br />
Press (BREAK) to go back to the Menu. Then press rn to view the results.<br />
12
For 16K Users Only (continued)<br />
The same color is repeated unless you change the color in the following control<br />
areas. For example, if you chose blue letters (by typing 000 0 in the<br />
first line), any lines following would be blue. You could make the next line<br />
yellow by typing 0CYJ0. If you want to change the color for a line, you<br />
need to insert your new color choice inside each line's control area.<br />
For example:<br />
0CYJ0 (for a yellow line) CIDwCTICTICID<br />
0000 (for a red line). CIDWCTICTICID<br />
o (following lines will be red until all lines<br />
have been scrolled) CIDWCTICTICID<br />
Press (BREAK) and rn to view the results. Press (BREAK) and GJ for the editing<br />
screen.<br />
Deleting Characters<br />
You may delete letters by pressing the (SHIFT)and 8<br />
keys. If you are in the first<br />
space (flush left) and press the (SHIFT) and 8 keys, the entire line will be deleted.<br />
To insert a blank line, place the cursor over the last space of a line (flush right) and<br />
press the (SHIFT) and 8 keys. The blank line will be below the cursor.<br />
Changing the Character Size<br />
You can control the letter size of the scrolling message. The character size<br />
displayed will always be 5 by 7 if you do not designate a particular character<br />
size. You can control the letter size of the scrolling message..<br />
Characters can be no smaller than 5 by 7. The first number is the width and the<br />
second number is the height. As you did when printing letters on the screen, you<br />
can choose your own combination of character sizes.<br />
You choose the desired character size inside the slash and asterisk. For 9 by 11,<br />
you would type CIDOOCDCDwith no spaces. Use the (SHIFT) and 8 keys to<br />
add the necessary spaces for your line measurement. Lines following will be<br />
9 by 11 unless you insert different character sizes for each line.<br />
Now press (BREAK) and rn in the Menu. The messages each have the same height<br />
but are different colors on different lines.<br />
Press (BREAK) and GJ at the Menu.<br />
Ifyou want to change the width alone, type one number in the control area.<br />
For example, 0CDrn 0 would have a character width of 21 and a character<br />
height of 7. Another example would be 000CID0, which<br />
means a character width of 5 and a character height of 9.<br />
13
For 16K Users Only (continued)<br />
The wider the characters, the fewer will fit on the screen when you are scrolling<br />
vertically. This table should be helpful.<br />
Character Width: 5<br />
Letters per Line: 21<br />
7<br />
16<br />
9<br />
11<br />
11<br />
10<br />
13<br />
8<br />
15<br />
7<br />
17<br />
6<br />
19<br />
5<br />
21<br />
5<br />
Changing Space Between Lines<br />
Changing character height may necessitate your changing the spacing between<br />
lines. This is only used for vertical scrolling. If characters are 7 points high,<br />
you usually should have 10 or more points between lines. A new spacing is<br />
indicated inside the control area by typing a plus sign followed by a number<br />
between 1 and 99.<br />
/+ 10* indicates a 5 by 7 character size with 10 point spacing between each line.<br />
!7X 15+20* shows a 7 by 15 character size with a 20 point spacing between<br />
each line.<br />
Shadows<br />
You can make your scrolled message (vertical only) look three-dimensional by<br />
adding shadows. Type a line of text with one color and only advance one or two lines.<br />
Then type the same text choosing different color and advance the usual distance<br />
between lines.<br />
Continuing with the example, use the(SHIFThnd (3 keys to make room in the<br />
control area for the added characters. For the first line, make the line spacing<br />
BCD. For the second line make the line spacing GCDc[). Your text screen<br />
should look like this:<br />
/B9X11+1 *HELLO<br />
!Y+lO*HELLO<br />
Press (BREAK) andrn at the Menu to see the result.<br />
Press (BREAK) and rn at the Menu.<br />
14
For 16K Users Only (continued)<br />
Multiple <strong>Color</strong>ed Lines<br />
Multiple colors can be printed on the same line only during vertical scrolling.<br />
This process involves making line spacings for several lines in text editing so that<br />
they will appear on the same line on the display screen in different colors. Let's<br />
see how the alphabet would look in multicolored letters:<br />
IRX 11+0<br />
IB * B<br />
IY +10 * C<br />
D G J<br />
E H<br />
F I<br />
Follow this procedure anytime you want to have multicolored lines. Make sure<br />
the asterisks are in line. Make sure you have the letters spaced so that the words<br />
can be read diagonally.<br />
Changing the Scrolling Speed<br />
You can change the scrolling speed. The number must be between 1 and 99.<br />
The lower the number, the faster the scrolling. Vertical scrolling works best<br />
with a speed between 6 and 15. Horizontal scrolling works best at a speed<br />
between 1 and 5.<br />
To change the scrolling speed, first press the (SHIFT) and 8<br />
keys enough times<br />
to make room for "S" and the desired number. Without leaving a space between<br />
them, type rn and 00. Press (BREAK) and rn at the Menu to view the<br />
results.<br />
Press (BREAK) and @<br />
at the Menu to learn some more editing tips.<br />
Horizontal Scrolling<br />
You can make your edited text scroll horizontally. All characters will be displayed<br />
when using horizontal scrolling. To change the scrolling direction to horizontal,<br />
type anCIDbefore or after the character size and inside the control area.<br />
Horizontal scrolling can be placed in any position on the screen. You create your<br />
horizontal line placement by inserting a G and a number between 1 and 96<br />
inside the control area. The top of the screen is +1. The bottom of the screen is<br />
+96. The line will scroll at the +15 position unless you choose another position.<br />
For your example, press the (SHIFT) and 8<br />
keys to make room in the control<br />
area for the "H". If you want all of the text to scroll horizontally, you only need<br />
to insert CID on one line. After you type the (]J in the control area, press (BREAK)<br />
and rn at the Menu.<br />
Press~ and @<br />
at the Menu.<br />
15
For 16K Users Only (continued)<br />
Adjusting the Horizontal Line Placement<br />
If you have an illustration for the background of the scrolled message, you might<br />
want the message to scroll in a particular area. To make the line scroll at the middle<br />
of the screen, type.GC!)(]J. To make the line scroll at the bottom of<br />
the screen, you have to consider the character size. If the character size is 7, you<br />
would use GJOO(]J (96 - 7). If the character size is 21, you would use<br />
GJ mm (96 - 21).<br />
For the example, make the line scroll across the bottom of the screen. To arrive at<br />
this figure, you subtract the character height 11 from 96. To make room in your<br />
control area, press the CSBIrr) and 8 keys three times. Then type <strong>80</strong>0m<br />
in the space. Press (mAK) and m at the Menu to see the results.<br />
Press CB8UK) and C!) at the Menu.<br />
Tips on Using Horizontal Scrolling<br />
Since all characters are displayed in horizontal scrolling, you will need to allow for<br />
extra spaces at the end of some lines. To eliminate these spaces, position the cursor<br />
over the asterisk. Press the CSHIr1) and 8 keys until the text reaches the end of<br />
the line.<br />
Since nothing to the left of the asterisk IS displayed, empty space to the left of the<br />
asterisk will not affect your displayed text.<br />
Making one line scroll horizontally and the next line scroll vertically is done just by<br />
inserting an (]J in the first line~s control area and a rn in the second line's control<br />
area. You can repeat this process throughout your text.<br />
To return to vertical scrolling, either type over the (]J in the control area with a<br />
rn, or delete the (]J by pressing the (SHIFT) and (3 keys. <strong>Art</strong> <strong>Gallery</strong> scrolls<br />
vertically unless an (]J is in a control area.<br />
If you insert an (][) in the first control area and do not insert a rn in the following<br />
control area, the rest of the text will be scrolled horizontally. If you insert an<br />
(]J in the first control area and arn in the second control area, the rest of the<br />
text will be scrolled vertically.<br />
16
For 16K Users Only (continued)<br />
Stop the Scrolling<br />
When you select m at the Menu, the message will repeat until you press any key.<br />
Press any key again to resume the scrolling. Press~ to return to the Menu.<br />
By placing a rn in the last control area you can make the text stop at the end of<br />
the message ancf'return to the Menu. This feature is necessary when you have Multi<br />
Load Presentations as described next.<br />
Preparing Multi-Load Presentations<br />
If you want to prepare a presentation that includes several pictures or requires<br />
more text than you can fit in the 191 lines in EDIT TEXT AND CONTROLS,<br />
recording several presentations lets you save additional information.<br />
1. Start with a new tape, making sure your tape is completely erased.<br />
2. Prepare the first part of your presentation. Ifyou want an illustration<br />
behind your text, use Option 1, DRAW OR CHANGE PICTURE. Then<br />
prepare the first piece of text.<br />
3. Check your presentation in Option 5 and make sure it is the way you<br />
want it.<br />
4. Press rn to record the presentation on tape. Once recorded, do not<br />
rewind the tape until the entire presentation is finished.<br />
5. Prepare the next part of your presentation. Change the picture or make<br />
a new one. Type your new text. Remember that previously entered text<br />
can be deleted by pressing the~and 8 keys when the cursor is at<br />
the first letter of a line.<br />
6. Before recording the last part of your presentation, add a rn control in<br />
the last control area. No other parts of the presentation should contain<br />
a "Z" in the control area.<br />
7. When you have finished recording all sections, rewind the tape. Press<br />
cmEAK) and press C6J to LOAD & RUN PRESENTATION at the<br />
Menu. Push "Play" on your tape recorder. The video should show your<br />
presentation in living color. The presentation will not stop until it<br />
reaches the "Z" control.<br />
If things do not happen the way you want the first time, repeat the above process<br />
again. Picasso made a few mistakes too.<br />
17
Appendix A -<br />
More Fun with the Data Tape<br />
More Fun with the Data Tape<br />
Now that you're familiar with all of the various key functions of <strong>Art</strong> <strong>Gallery</strong>, let's<br />
use some of those key functions and experiment with the Data tape.<br />
You must have a cassette recorder and the necessary connection cables to view the<br />
Data tape.<br />
Load the Data tape according to the instructions on page 3 making sure the<br />
counter is set at 000. When the tape is loaded, the <strong>Art</strong> <strong>Gallery</strong> Menu will appear.<br />
Press m for DRAW OR CHANGE PICTURE to view the first image.<br />
All of the images available in the Data tape are listed in Appendix B. The smiling<br />
cartoon character with his hand extended has a "balloon" space for something to<br />
say. Let's practice typing letters, using the method learned on page 8, by giving<br />
the character something to say.<br />
The cursor is flashing in the upper left corner of the screen. Move the cursor inside<br />
arrow keys. Remember, you must enlarge the cursor<br />
the box with the rn and 8<br />
so that you can type letters. Press the m and OD keys (making the cursor<br />
expand), until you decide on letter size. Press the (CLEAR) key. Press a color key.<br />
Now let's type a message in the "balloon".<br />
Hold thelSHIFT)key down and type LET ME OUT OF HERE. You'll probably<br />
need to move the cursor to the next line to get all of the message inside of the<br />
"balloon".<br />
Press the "Fast Forward" key on your tape recorder. Watch the counter turn and<br />
when it reaches number 038, press "Stop". If you pass 038, press "stop". Rewind<br />
the tape until it reaches 038 and press "Stop". Press (BREAK)on your <strong>Color</strong> <strong>Computer</strong>.<br />
Press "Play" on your tape recorder then rn .Press CENTER) to load the image.<br />
When the Menu returns, press m .The checkerboard frame should be displayed.<br />
If not, press "Rewind" on your recorder and try to load the picture again.<br />
This time, use your creativity and draw a picture inside of the frame. Remember,<br />
you have the versatility of the keys of your keyboard or you can transfer control<br />
to your Joystick.<br />
You can make additions to any of the 27 images on the <strong>Art</strong> <strong>Gallery</strong> Data tape. Use<br />
the counter numbers provided in Appendix B to arrive at the desired image.<br />
Note: Do not save results on tape when using the Data tape. Any changes made on<br />
the Data tape will be permanently stored if you save results on tape.<br />
19
Appendix A -<br />
More Fun with the Data Tape (continued)<br />
For 16K only<br />
With your 16K <strong>Color</strong> <strong>Computer</strong>, you can make messages scroll down or across the<br />
images of the Data tape by using the text editing function of <strong>Art</strong> <strong>Gallery</strong>. Let's<br />
find a suitable image candidate on the Data tape.<br />
Press "Fast Forward" on your tape recorder. Watch the counter and press "Stop"<br />
when the counter reaches the 186. Press "Play" on your tape recorder. Press (BREAK)<br />
and C3J and then (ENTER) .<br />
After the image is loaded, the Menu will return. Press rn .For 186 on the counter,<br />
the reindeer and Christmas tree should be displayed.<br />
The cursor is waiting in the upper left corner of the screen. You can make additions<br />
to the image if you like. For now, press C8.BEAK) to return to the Menu. Press rn .<br />
You can type a message, using the necessary control keys, and make it scroll over<br />
the image. Because the Christmas scene is a traditional red and green, you will<br />
probably want to make the message scroll in a different color.<br />
The cursor is waiting in the upper left hand corner of your text editing screen. The<br />
first character you type is the slash 0 . To indicate a color, press CD for yellow.<br />
Type(])I) for the speed at which the message will scroll.<br />
Type OD to indicate a horizontally scrolled message. Remember, if you do not<br />
indicate horizontal, the message will scroll vertically. Type the character size in the<br />
format(]JOO(]J .<br />
Now you must type the asterisk ( 0 ). Anything to the.1eft of the asterisk will<br />
not be scrolled. Anything to the right of the asterisk will be scrolled. At this point,<br />
your text editing screen should appear like this:<br />
/YSl H9X9*<br />
After the control area, type the message, SEASON'S GREETINGS. MERRY<br />
CH R ISTMAS FROM TH E (insert your last name).<br />
This message requires at least two lines. For the second line all you have to do is type<br />
an asterisk at the beginning of the line and then the remainder of the message.<br />
Your editing screen should look like this:<br />
Press (BREAK) and then rn .<br />
/YSl H9X9*SEASON'S GR EETI NGS.<br />
*MERRY CHRISTMAS FROM THE (your name).<br />
20
Appendix B -<br />
Data Tape Pictures<br />
Data Tape Pictures<br />
Below is a list of the twenty-seven images you will see on the Data tape. The numbers<br />
to the right of them are the counter numbers you use to load a desired image.<br />
Due to differences in cassette tapes and cassette tape players, these numbers may<br />
vary accordingly.<br />
If the images do not load properly on your first attempt, try rewinding the tape to<br />
a slightly lower counter number. For instance, if the Butterfly doesn't load at the<br />
018 counter number, try 016 the next time. The message, READ ERROR will<br />
appear if the image is not loading correctly.<br />
1. Cartoon figure with "balloon" 000<br />
2. Butterfly 018<br />
3. Miniature mountain scene 028<br />
4. Checkerboard frame 038<br />
5. Mountain scene 047<br />
6. Rose 056<br />
7. Miniature rose 065<br />
8. USA map 074<br />
9. Miniature map of the USA 082<br />
10. City scene 091<br />
11. Miniature city scene with frame 099<br />
12. Viking ship 107<br />
13. Lion 114<br />
14. Football scene 122<br />
15. Eagle 130<br />
16. Card King 138<br />
17. Miniature King Card 145<br />
18. Card King 160<br />
21
Appendix B -<br />
Data Tape Pictures (continued)<br />
19. Geometric Design 167<br />
20. Old Glory 174<br />
21. Miniature Old Glory 1<strong>80</strong><br />
22. Leaping reindeer/Christmas tree 186<br />
23. Pointing hound 192<br />
24. Miniature pointing hound 199<br />
25. Heart 204<br />
26. Guitar 210<br />
27. Miniature Guitar 216<br />
22
RADIO SHACK, A DIVISION OFTANDY CORPORATION<br />
AUSTRALIA<br />
2<strong>80</strong>-316 VICTORIA ROAD<br />
RYDALMERE. N.S.W. 2116<br />
U.S.A.: FORT WORTH, TEXAS 76102<br />
CANADA: BARRIE, ONTARIO L4M 4W5<br />
TANDY CORPORATION<br />
BELGIUM<br />
PARe INDUSTRIEL DE NANINNE<br />
5140 NANINNE<br />
U.K.<br />
BILSTON ROAD WEDNESBURY<br />
WEST MIDLANDS WS10 7JN<br />
PRINTED IN U.S.A.