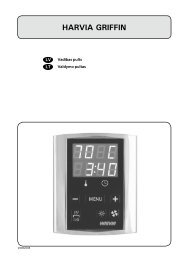
4328 ECON H2 en
4328 ECON H2 en
4328 ECON H2 en

You also want an ePaper? Increase the reach of your titles
YUMPU automatically turns print PDFs into web optimized ePapers that Google loves.
<strong>ECON</strong> <strong>H2</strong><br />
GB<br />
Assembly and operating instruction<br />
Made in Germany<br />
IP x4<br />
D<br />
Druck Nr. 2934<strong>4328</strong><strong>en</strong>/ - 24.12<br />
1
English<br />
Table of Cont<strong>en</strong>ts<br />
Package cont<strong>en</strong>ts ....................................................................................................4<br />
Technical data ..........................................................................................................4<br />
G<strong>en</strong>eral information concerning sauna bathing .......................................................5<br />
G<strong>en</strong>eral safety precautions ......................................................................................6<br />
Installation of the control unit ...................................................................................7<br />
Wall mount fixture ................................................................................................7<br />
Wall mounting ......................................................................................................7<br />
Wall recessing .....................................................................................................8<br />
Connecting the s<strong>en</strong>sor cables .............................................................................9<br />
Installation of the heater s<strong>en</strong>sor ..........................................................................9<br />
Electrical connection ..............................................................................................11<br />
Connecting a load switch (LSG)........................................................................11<br />
Connecting the sauna heater ............................................................................11<br />
Connecting the vaporizer ..................................................................................11<br />
Connecting the sauna lamp ...............................................................................11<br />
Connecting a fan ...............................................................................................11<br />
Installation diagram ...........................................................................................12<br />
Terminal arrangem<strong>en</strong>t on the circuit board. .......................................................12<br />
Connecting the sauna heater (max. 9 kW) ........................................................13<br />
Connection of sauna heater > 9 kW ..................................................................13<br />
Connection of vaporizer ....................................................................................14<br />
Operation ...............................................................................................................15<br />
G<strong>en</strong>eral ..............................................................................................................15<br />
The user interface .........................................................................................15<br />
Operating buttons .........................................................................................15<br />
Default display Stand-by ...............................................................................16<br />
Default display in operation...........................................................................16<br />
Energy-saving display ...................................................................................16<br />
Cabin lighting ................................................................................................17<br />
Initial commissioning .....................................................................................18<br />
Change language..........................................................................................19<br />
Change time..................................................................................................19<br />
Activating the Life - Guard ............................................................................20<br />
Activate / deactivate the child lock ................................................................20<br />
Switching on the sauna unit ..........................................................................21<br />
Switching off the sauna unit in the ...................................................................<br />
2 GB
Finnish mode ................................................................................................21<br />
Switching on the sauna unit with Life - Guard...............................................21<br />
Individual settings ..............................................................................................22<br />
Cabin temperature ........................................................................................22<br />
Humidity operation ........................................................................................23<br />
Humidity int<strong>en</strong>sity ..........................................................................................24<br />
Switching off the sauna unit during humidity operation .................................25<br />
Auto-Stop ......................................................................................................26<br />
Preselection time ..........................................................................................28<br />
Activate the preselection time .......................................................................29<br />
Deactivate the preselection time ...................................................................29<br />
Life - Guard ...................................................................................................30<br />
Ext<strong>en</strong>d the time setting for sauna time ...................................................................31<br />
Unit fuses ...............................................................................................................31<br />
Error messages ......................................................................................................32<br />
The device switch (Switch-off) ...............................................................................33<br />
Service Address: ....................................................................................................34<br />
Guarantee ..............................................................................................................34<br />
Handling procedures for return shipm<strong>en</strong>ts (RMA) - Details for all returns ! ...........35<br />
GB<br />
3
Package cont<strong>en</strong>ts<br />
(subject to change)<br />
Included with the control unit are<br />
1. an ov<strong>en</strong>-s<strong>en</strong>sor board with overheat shutoff protection, KTY-s<strong>en</strong>sors with s<strong>en</strong>sor housing,<br />
two 3x25 mm fast<strong>en</strong>ing screws and a 2,0 m long s<strong>en</strong>sor cable.<br />
2. a plastic bag with three 4 x 20 mm fast<strong>en</strong>ing screws.<br />
3. a replacem<strong>en</strong>t overheat protection module<br />
Technical data<br />
Rated voltage:<br />
Breaking capacity:<br />
Heating time limit:<br />
Display:<br />
Dim<strong>en</strong>sions (HxWxD):<br />
Protection type:<br />
Control range, sauna operation:<br />
400 V 3 N 50 Hz AC<br />
4 GB<br />
max 9 kW resistive load (AC 1 operation) Climatic operation:<br />
6 kW + 3 kW for vaporizer unit, upgrade to 36<br />
kW possible through connection to circuit breakers<br />
6 h, 12 h<br />
Display 65 x 37 mm<br />
220 x 250 x 67 mm<br />
IPx4 in accordance with EN 60529, Splashproofing<br />
30 to 115° C<br />
Control range, steam operation: 30 to 70°<br />
Humidity control:<br />
proportional to time<br />
S<strong>en</strong>sor system: KTY s<strong>en</strong>sor with safety temperature limiter 142°C<br />
Water level monitor: Lack of water results in sauna being switched off after 2<br />
minutes<br />
Type of regulation:<br />
V<strong>en</strong>tilation capacity:<br />
Light:<br />
Reheating:<br />
Environm<strong>en</strong>tal temperature<br />
Storage temperatures:<br />
Digital two-point control<br />
max. 100 W<br />
max. 100 W<br />
30 mins / 90°C.after humidity programme switches off<br />
-10°C bis +40°C<br />
-20°C bis +70°C
G<strong>en</strong>eral information concerning sauna bathing<br />
Dear customer,<br />
with purchase of this sauna control unit you<br />
opted for a superior quality, high-tech electronic<br />
device which was developed and<br />
manufactured according to the highest standards<br />
and guidelines.<br />
Please note that an optimal interaction of<br />
sauna cabin, sauna ov<strong>en</strong> and sauna control<br />
unit is mandatory for a pleasant sauna climate<br />
in your cabin.<br />
With this superior sauna control unit you can<br />
„operate“ your sauna system, and thanks to<br />
the many individual programming settings<br />
you will surely soon fi nd the setting that suits<br />
you best.<br />
Perception in the sauna is very subjective,<br />
therefore it really requires your own perception,<br />
or that of your family to fi nd the most<br />
suitable settings.<br />
By default the fi nnish sauna is preset to<br />
95°C. For steam operation the values are<br />
set to 60°C and 60% humidity.<br />
The following operation instructions describe<br />
how to pre-select „your“ climate in the cabin.<br />
Read these instructions carefully, so that you<br />
quickly and easily fi nd your way though the<br />
programming process.<br />
Please note the variation in temperatures in<br />
the cabin while sauna bathing. The hottest<br />
area is directly under the cabin ceiling, whereas<br />
there is a steady temperature gradi<strong>en</strong>t<br />
towards the fl oor of the cabin. Inversely, the<br />
relative humidity is lowest directly under the<br />
cabin ceiling and the highest on the cabin<br />
fl oor.<br />
For safety reasons the temperature s<strong>en</strong>sor<br />
with the overheat safety shutdown is located<br />
on the cabin ceiling above the ov<strong>en</strong>, since<br />
this is the hottest area in the cabin.<br />
Therefore there will always be temperature<br />
variations betwe<strong>en</strong> the temperature s<strong>en</strong>sor<br />
of the control unit and the thermometer in<br />
the cabin.<br />
GB<br />
For the cabin light use only light bulbs. Do<br />
not use fl uoresc<strong>en</strong>t lamps, <strong>en</strong>ergy saving<br />
lamps and gas discharge lamps.<br />
For example, wh<strong>en</strong> pre-setting the cabin<br />
temperature to 100°C, the thermometer inside<br />
the cabin may easily show 85°C - 90°C.<br />
This complies with the typical climate inside<br />
the cabin.<br />
Always observe hygi<strong>en</strong>e. Always use handor<br />
bathing towels, to avoid getting perspiration<br />
on the wood.<br />
To protect your cabin from possible damages<br />
due to steam operation, we recomm<strong>en</strong>d<br />
reheating or drying the cabin after every<br />
steam bath.<br />
In addition, a fan can help to dissipate used<br />
humid air in badly v<strong>en</strong>tilated areas.<br />
To avoid the perception of draft, you should<br />
avoid using any v<strong>en</strong>tilation system while<br />
sauna bathing. It should only be used if recomm<strong>en</strong>ded<br />
by the cabin manufacturer<br />
Always make sure no objects are<br />
located on the sauna ov<strong>en</strong> before<br />
starting the heating cycle.<br />
5
G<strong>en</strong>eral safety precautions<br />
• his device has not be<strong>en</strong> designed for being<br />
used by persons (including childr<strong>en</strong>) that<br />
are physically or m<strong>en</strong>tally handicapped<br />
or have s<strong>en</strong>sory disabilities. Moreover, it<br />
is not allowed to use this device without<br />
suffi ci<strong>en</strong>t experi<strong>en</strong>ce and/or knowledge,<br />
unless these persons will be supervised<br />
by persons responsible for their security<br />
or in case they have be<strong>en</strong> instructed how<br />
to use this device.<br />
• Childr<strong>en</strong> are to be supervised in order to<br />
make sure that they do not play with this<br />
device.<br />
• Att<strong>en</strong>tion: It is forbidd<strong>en</strong> to install<br />
the control box in a closed switch cabinet<br />
or behind a wood<strong>en</strong> panelling!<br />
• The electrical installation may be done<br />
only by a qualifi ed electrical technician.<br />
• You must comply with the regulations of<br />
your power supply company and applicable<br />
VDE regulations (DIN VDE 0100).<br />
• WARNING: Never attempt repairs<br />
or installations yourself, as this could<br />
result in serious injury or death. Only a<br />
qualifi ed technician may remove the housing<br />
cover.<br />
• Please note the dim<strong>en</strong>sions in the assembly<br />
instructions, especially wh<strong>en</strong> installing<br />
the temperature s<strong>en</strong>sor. The temperature<br />
above the ov<strong>en</strong> is critical for the temperature<br />
setting. The temperature can be held<br />
within operating parameters and a minimal<br />
temperature gradi<strong>en</strong>t inside the b<strong>en</strong>ch<br />
area of the sauna cabin can be achieved<br />
only if unit is assembled correctly.<br />
• The device may only be used as int<strong>en</strong>ded<br />
as a control unit for sauna ov<strong>en</strong>s up to 9<br />
kW. (Up to 36 kW wh<strong>en</strong> combined with a<br />
breaking capacitor).<br />
• Completely disconnect the control unit<br />
from the electrical circuit, i.e. fl ip all circuit<br />
breakers or the main circuit breaker during<br />
each installation or repair.<br />
• Please note the safety and installation information<br />
from the sauna ov<strong>en</strong> manufacturer.<br />
• Always heed the specifications and instructions<br />
of the cabin manufacturer, too.<br />
Wh<strong>en</strong> using control units that offer the<br />
possibility of external access (GSM-module,<br />
remote button, etc.) or time-delayed switching<br />
(preselection time, weekly timer, or<br />
similar) a trigger guard with covered heating<br />
unit is required. (cover protection type 1-5 or<br />
S-Guard).<br />
Att<strong>en</strong>tion!<br />
Dear customer,<br />
according to the valid regulations, the<br />
electrical connection of the sauna heater<br />
and the control box has to be carried<br />
out through the specialist of an authorized<br />
electric shop<br />
We would like to m<strong>en</strong>tion to the fact<br />
that in case of a warr<strong>en</strong>ty claim, you<br />
are kindly requested to pres<strong>en</strong>t a copy<br />
of the invoice of the executive electric<br />
shop.<br />
6 GB
Installation of the control unit<br />
Wall mount fixture<br />
The control unit may only be mounted outside<br />
the cabin. It is advisable to select the outside<br />
wall of the cabin to which the sauna heater<br />
is fixed from the inside as mounting position.<br />
If ductwork is already provided for electrical<br />
installations th<strong>en</strong> the position of the control<br />
unit is predetermined by that. Please follow<br />
the instructions for installation:<br />
Fast<strong>en</strong> the housing bottom at the two bottom<br />
op<strong>en</strong>ings (Fig. 4) firmly to the cabin<br />
wall.<br />
Eye level<br />
Fig. 3<br />
approx. 34 cm<br />
17 cm<br />
Fig. 1<br />
Remove the control device cover. In order<br />
to do this loos<strong>en</strong> the screw at the top of the<br />
housing and pull the housing top upward while<br />
swivelling (Fig. 1).<br />
Wall mounting<br />
17.7 cm<br />
Eye level<br />
Fig. 3.1<br />
Mounting holes<br />
Upper mounting hole<br />
3<br />
Fig. 3.2<br />
1. The 3 mm diameter boreholes for the supplied<br />
wood screws 4 x 20 mm are drilled<br />
according to the dim<strong>en</strong>sions shown in Fig.<br />
3 + 3.1.<br />
2. Insert one of the wood screws into the top<br />
c<strong>en</strong>ter hole. The control unit is hooked<br />
onto this screw. Therefore, leave the<br />
screw out by approx. 3 mm (Fig. 3.2).<br />
3. Hook the control unit onto the 3 mm protruding<br />
screw in the upper mounting hole.<br />
Insert the supplied rubber grommets<br />
into the op<strong>en</strong>ings at the rear wall of the<br />
housing and insert the connecting cable<br />
through these op<strong>en</strong>ings.<br />
GB<br />
Feed-through for:<br />
Mains cable<br />
Heater cable<br />
Evaporator cable<br />
Lamp<br />
Fan<br />
Feedthrough<br />
for s<strong>en</strong>sor<br />
lines<br />
Fig. 4<br />
7
Wall recessing<br />
1. Cut out a wall section that is at least 3.5<br />
cm deep according to the dim<strong>en</strong>sion in<br />
Fig. 5.<br />
21 cm<br />
Eye level<br />
20 cm<br />
Fig. 5<br />
Insert the supplied rubber grommets into<br />
the op<strong>en</strong>ings at the rear wall of the housing<br />
and insert the connecting cables through<br />
these op<strong>en</strong>ings.<br />
Place the control unit into the wall op<strong>en</strong>ing<br />
and fast<strong>en</strong> it with 4 wood screws.<br />
Holes to fast<strong>en</strong> the control<br />
unit inside the wall<br />
op<strong>en</strong>ing.<br />
Feed-through for:<br />
Mains cable<br />
Heater cable<br />
Evaporator cable<br />
Lamp<br />
Fan<br />
Feedthrough<br />
for s<strong>en</strong>sor<br />
lines<br />
Fig. 6<br />
8 GB
Connecting the s<strong>en</strong>sor cables<br />
You should not install s<strong>en</strong>sor and power supply<br />
lines together, or lead them through the<br />
same feedthrough. This can lead to interfer<strong>en</strong>ces<br />
in the electronics, such as "fl uttering"<br />
in the relays. If it is necessary to lay the cables<br />
down together, or if the line is longer<br />
than 3m, use a shielded s<strong>en</strong>sor cable (4 x<br />
0.5 mm²).<br />
Connect the shielding to ground in the control<br />
unit.<br />
Please observe that the following dim<strong>en</strong>sions<br />
relate to the values stipulated during<br />
the unit inspection acc. EN 60335-2-53. The<br />
heater s<strong>en</strong>sor must always be installed at<br />
the point where the highest temperatures<br />
are to be expected. Illust. 7-9 give you an<br />
overview of the mounting point of the s<strong>en</strong>sor.<br />
2. Drill a hole to lead the cable through, preferably<br />
through the middle of one of the<br />
wood<strong>en</strong> boards.<br />
3. Lead the s<strong>en</strong>sor cable through the drilled<br />
hole and attach it to the s<strong>en</strong>sor line according<br />
to Illust. 10.<br />
4. The cables for the limiter (white) and the<br />
temperature s<strong>en</strong>sor (red) are connected to<br />
the s<strong>en</strong>sor circuit board acc. Fig. 10. Engage<br />
the s<strong>en</strong>sor board into the casing.<br />
5. Lead the s<strong>en</strong>sor cables through the<br />
right cable intake into the control unit.<br />
Install the s<strong>en</strong>sor cables inside the<br />
control unit as shown in Fig. 11.<br />
Connect the s<strong>en</strong>sor cables as shown in<br />
Fig. 12. In order to do this, pull the plug X2<br />
from the circuit board and plug it back in<br />
after the connection.<br />
Installation of the heater<br />
s<strong>en</strong>sor<br />
S<strong>en</strong>sor circuit board<br />
1. Mount the ov<strong>en</strong> s<strong>en</strong>sor in cabins up to 2<br />
x 2m according to Illust. 7 and 8, in larger<br />
cabins according to Illust. 7 and 9.<br />
20 cm<br />
Housing<br />
white (Limiter)<br />
Red<br />
Red S<strong>en</strong>sor<br />
white (Limiter)<br />
Illust. 10<br />
Fig. 7<br />
Fig. 8 Fig. 9<br />
GB<br />
9
Hole<br />
Sauna ceiling<br />
C<strong>en</strong>tre s<strong>en</strong>sor housing<br />
on middle section<br />
X2<br />
X1<br />
F1<br />
S<strong>en</strong>sor cables<br />
Fig. 11<br />
S<strong>en</strong>sor<br />
Limiter<br />
X2<br />
KTY 10/5<br />
142°C<br />
White<br />
Red<br />
Fig. 12<br />
6. After completed installation and correct<br />
operation of the control unit, the line<br />
for overtemperature protection must be<br />
checked for short-circuits. In order to do<br />
this, disconnect one of the white cables<br />
in the s<strong>en</strong>sor casing. The respective error<br />
message appears in the display.<br />
Thermal<br />
fuse<br />
12:00<br />
10 GB
Electrical connection<br />
The electrical connection may only be<br />
done by a certified electrician in compliance<br />
with the guidelines of the local utility<br />
company and the VDE.<br />
In g<strong>en</strong>eral, there may be only one fi xed connection<br />
to the network; therefore equipm<strong>en</strong>t<br />
should be provided that makes it possible<br />
to disconnect the system with all poles from<br />
the network with a contact op<strong>en</strong>ing width of<br />
minimum 3 mm.<br />
All electrical installations and all connection<br />
lines that are installed inside the cabin must<br />
be suitable for an ambi<strong>en</strong>t temperature of at<br />
least 170 °C.<br />
Ṭhe power supply line is run to the load control<br />
unit and connected to the power input<br />
terminals.<br />
Connecting the<br />
sauna heater<br />
Install the sauna heater and the vaporizer in<br />
front of the air intake according to the manufacturer’s<br />
installation instructions.<br />
Run the silicone line through the ductwork<br />
to the power unit and connect it to the appropriate<br />
terminals as directed in the wiring<br />
diagram.<br />
Note: In case there is no ductwork available<br />
drill a hole next to the air intake op<strong>en</strong>ing and<br />
run the heater line through this hole to the<br />
outside and to the appropriate terminals in<br />
the control unit. The silicone line must be<br />
buried to protect it from outside infl u<strong>en</strong>ces.<br />
Therefore, use a suitable cable-duct or a<br />
PVC-pipe through which you can run the line<br />
up to the power unit.<br />
Connecting a load switch<br />
(LSG)<br />
LSG<br />
For details refer to the installation instructions<br />
of the LSG.<br />
To connect the vaporizer, use silicone connecting<br />
lines 4 x 1,5 mm² as well.<br />
Warning: Wh<strong>en</strong> connecting<br />
the vaporizer make sure it is<br />
correctly attached to the water bath<br />
(WB) and low water shutoff (WM). If<br />
you switch these connections, you disable<br />
the water defici<strong>en</strong>cy function and<br />
bypass the thermostat. As a result, the<br />
vaporizer will overheat.<br />
Risk of fire!<br />
Connecting the vaporizer<br />
The control unit can detect water defi cit if<br />
there is a zero-pot<strong>en</strong>tial feed at the WM-input.<br />
Connecting the sauna lamp<br />
The sauna lamp must be weatherproof protected<br />
(IPx4) and resistant to the ambi<strong>en</strong>t temperature.<br />
The sauna lamp may be installed<br />
at any location but never in the vicinity of the<br />
rising hot air of the heater.<br />
Connecting a fan<br />
The fan must be weatherproof protected<br />
(IPx4) and resistant to the ambi<strong>en</strong>t temperature.<br />
The fan can be mounted at any point, but<br />
never near to rising hot air from the heater<br />
and as far as possible from the installation<br />
position of the IR lamp (may not be in the<br />
direct beam).<br />
GB<br />
11
Installation diagram<br />
4<br />
= alternativ<br />
<strong>ECON</strong><br />
5<br />
oder<br />
or<br />
max. 3 kW<br />
4 5 4<br />
3<br />
3<br />
LSG<br />
4<br />
5<br />
400 V 3 N AC 50 Hz<br />
Terminal arrangem<strong>en</strong>t on the circuit board.<br />
X2<br />
Plug for<br />
s<strong>en</strong>sor connection<br />
F2<br />
X1<br />
F1<br />
u n d e r -<br />
neath the<br />
c i r c u i t<br />
board<br />
12 GB
Connecting the sauna heater (max. 9 kW)<br />
<strong>ECON</strong><br />
X1<br />
L1 L2 L3 U V W N N N N N S1 WB WM<br />
max. 100 W<br />
max. 100 W<br />
LSG<br />
P max. 9 kW<br />
max. 3000 W<br />
400 V 3 N AC 50 Hz Warning: Always connect the neutral conductor of the<br />
sauna ov<strong>en</strong>. During steam operation, one phase of the ov<strong>en</strong><br />
is shut down; therefore the heating load is no longer symmetrical.<br />
The result is that the neutral wire is no longer curr<strong>en</strong>t-free.<br />
Connection of sauna heater > 9 kW<br />
<strong>ECON</strong><br />
X1<br />
Light<br />
L1 L2 L3 U V W N N N N N S1 WB WM<br />
Fan<br />
max. 100 W<br />
max. 100 W<br />
P max. 9 kW<br />
LSG<br />
400 V 3 N AC 50 Hz<br />
400 V 3 N AC 50 Hz<br />
GB<br />
13
Connection of vaporizer<br />
<strong>ECON</strong><br />
X1<br />
Light<br />
L1 L2 L3 U V W N N N N N S1 WB WM<br />
Fan<br />
120°<br />
max. 3000 W<br />
CAUTION<br />
Wh<strong>en</strong> connecting<br />
the vaporizer the output<br />
“W” is switched from<br />
the sauna heater to the<br />
terminal “Wb” to the<br />
vaporizer.<br />
In this case, the sauna<br />
heater heats only with<br />
two thirds of the power.<br />
400 V 3 N AC 50 Hz<br />
14 GB
Operation<br />
Once the system has be<strong>en</strong> installed with all compon<strong>en</strong>ts and all covers have be<strong>en</strong> fixed, you<br />
can put your sauna unit into operation.<br />
Over the following pages we will show you the options provided to you with the control.<br />
G<strong>en</strong>eral<br />
The user interface<br />
emotion of sauna<br />
MODE<br />
Operating buttons<br />
= System On - Off<br />
= Cabin lighting<br />
MODE<br />
= Programming mode<br />
= Increase the value<br />
= Decrease the value<br />
GB<br />
15
Default display Stand-by<br />
is shown if the system is in Stand-by mode.<br />
Reset to this display takes place from other<br />
m<strong>en</strong>u items if no activity is carried out > 15 s.<br />
Temperature<br />
Humidity<br />
Auto-stop<br />
Start time<br />
12:00<br />
30°C<br />
5 : 59<br />
- - : - -<br />
Default display in operation<br />
is shown if the system is in operation.<br />
Reset to this display takes place from other<br />
m<strong>en</strong>u items if no activity is carried out > 15 s.<br />
Illustration of the heating performance:<br />
During the heating phase the bars behind<br />
the temperature display fill continuously.<br />
Once the target temperature is reached,<br />
these bars are shown filled<br />
Energy-saving display<br />
If the unit is not used, it will switch into <strong>en</strong>ergy-saving<br />
mode. A moving time is shown<br />
after 5 minutes, similar to a PC scre<strong>en</strong>saver.<br />
After additional 15 minutes the<br />
back light of the display is switched off.<br />
By pushing any key you can return to the default<br />
display Stand-by.<br />
Temperature<br />
Humidity<br />
Auto-stop<br />
Start time<br />
30°C<br />
30°C<br />
12:15<br />
30°C<br />
5 : 59<br />
- - : - -<br />
The following applies for all settings:<br />
The following is shown in the top area of the<br />
display:<br />
The light symbol<br />
(wh<strong>en</strong> the light is switched on)<br />
12:34<br />
The clock symbol<br />
12 : 00 Curr<strong>en</strong>t time<br />
In addition, the following symbols can be displayed<br />
dep<strong>en</strong>ding on the operating mode selected.<br />
Reheat phase<br />
(after humidity operation)<br />
Child lock active<br />
Preselection time<br />
16 GB
In order to adjust the individual values to<br />
the particular desires, briefly push the MODE<br />
-button out of Stand-by.<br />
The modifi able parameter will th<strong>en</strong> be highlighted<br />
in black and it is possible to select<br />
with the or - buttons the desired<br />
parameter.<br />
Temperature<br />
Humidity<br />
Auto-stop<br />
Start time<br />
12:15<br />
30°C<br />
5 : 59<br />
- - : - -<br />
Parameters that blink on the display can be<br />
changed and are shown in these instructions<br />
as displayed.<br />
By pushing the MODE -button again you will<br />
arrive at the programming level.<br />
The name of the parameter is now blinking<br />
and the modifi able value is highlighted in<br />
black.<br />
The value highlighted in black can now be<br />
changed with the or - buttons.<br />
All settings out of Stand-by are confi rmed by<br />
pressing MODE > 3 s and saved in the unit.<br />
Temperature<br />
Humidity<br />
Auto-stop<br />
Start time<br />
Modifiable parameter<br />
Temperature<br />
Modifiable value<br />
12:15<br />
30°C<br />
5 : 59<br />
- - : - -<br />
The blinking of the parameter <strong>en</strong>ds and the<br />
new value is now authoritative until another<br />
change is made.<br />
Temperature<br />
Humidity<br />
Auto-stop<br />
Start time<br />
12:15<br />
30°C<br />
5 : 59<br />
- - : - -<br />
If no key is pressed for > 15 s., the unit<br />
switches back into the default display.<br />
Changes made up to th<strong>en</strong> are not saved<br />
Cabin lighting<br />
The cabin lighting automatically is switched<br />
on as soon as the sauna unit is switched on.<br />
The - Symbol is shown in the top left of<br />
the display. Wh<strong>en</strong> the sauna unit is switched<br />
off, the cabin lighting switches off with a delay<br />
of 30 minutes.<br />
Irrespective of the status of the sauna unit,<br />
the cabin lighting can be switched on or off<br />
anytime with the button.<br />
Temperature<br />
Humidity<br />
Auto-stop<br />
Start time<br />
12:15<br />
30°C<br />
5 : 59<br />
- - : - -<br />
GB<br />
17
Initial commissioning<br />
12:00<br />
DE<br />
NL<br />
I<br />
GB<br />
PL<br />
RU<br />
12:15<br />
Life - Guard<br />
12:00<br />
DE<br />
NL<br />
I<br />
GB<br />
PL<br />
RU<br />
12:15<br />
MODE > 3 s<br />
00:00<br />
Time of day<br />
0 : 00<br />
00:00<br />
Time of day<br />
12 : 00<br />
Life - Guard<br />
Temperature<br />
Humidity<br />
Auto-stop<br />
Start time<br />
MODE > 3 s<br />
12:00<br />
30°C<br />
5 : 59<br />
- - : - -<br />
MODE<br />
Time of day<br />
12 : 00<br />
00:00<br />
00:00<br />
Time of day<br />
12 : 15<br />
MODE > 3 s<br />
18 GB
Change language<br />
Change time<br />
12:00<br />
12:00<br />
Temperatur<br />
Feuchte<br />
Auto-Stop<br />
Vorwahlzeit<br />
30°C<br />
5 : 59<br />
- - : - -<br />
Temperature<br />
Humidity<br />
Auto-stop<br />
Start time<br />
30°C<br />
5 : 59<br />
- - : - -<br />
MODE &<br />
MODE &<br />
Tageszeit<br />
12 : 15<br />
12:15<br />
Time of day<br />
12 : 00<br />
12:00<br />
MODE<br />
12:00<br />
Time of day<br />
00:00<br />
DE<br />
GB<br />
NL<br />
PL<br />
I<br />
RU<br />
0 : 00<br />
MODE<br />
12:00<br />
00:00<br />
Time of day<br />
DE<br />
GB<br />
NL<br />
PL<br />
I<br />
RU<br />
12 : 00<br />
MODE<br />
00:00<br />
DE<br />
GB<br />
NL<br />
PL<br />
I<br />
RU<br />
12:00<br />
Time of day<br />
12 : 00<br />
MODE > 3 s<br />
00:00<br />
Time of day<br />
0 : 00<br />
00:00<br />
Time of day<br />
12 : 15<br />
MODE > 3 s<br />
GB<br />
19
Activating the Life - Guard<br />
Life - Guard is a settable relatively short<br />
time, e.g. 20 minutes, after which the sauna<br />
unit is switched off, except for the cabin lighting.<br />
After this time has expired the unit can<br />
be switched on again by pushing the MODE -<br />
button for the set time.<br />
Temperature<br />
Humidity<br />
Auto-stop<br />
Start time<br />
12:00<br />
30°C<br />
5 : 59<br />
- - : - -<br />
Activate / deactivate the child lock<br />
If the child lock is activated (the key symbol<br />
is visible in the top section of the display)<br />
only the cabin lighting can be switched. All<br />
other buttons are without function. The child<br />
lock can be activated / deactivated in Standby<br />
as well as in operation. The unit can still<br />
be switched off wh<strong>en</strong> in operation.<br />
Activate<br />
MODE &<br />
12:15<br />
Time of day<br />
12 : 15<br />
Stand-by<br />
Temperature<br />
Humidity<br />
Auto-stop<br />
Start time<br />
12:00<br />
30°C<br />
5 : 59<br />
- - : - -<br />
&<br />
Temperature<br />
Humidity<br />
Auto-stop<br />
Start time<br />
Operation<br />
> 3 s<br />
12:15<br />
30°C<br />
5 : 59<br />
- - : - -<br />
12:00<br />
12:15<br />
Life - Guard<br />
12:15<br />
Temperature<br />
Humidity<br />
Auto-stop<br />
Start time<br />
30°C<br />
5 : 59<br />
- - : - -<br />
Temperature<br />
Humidity<br />
Auto-stop<br />
Start time<br />
30°C<br />
5 : 59<br />
- - : - -<br />
Deactivate<br />
12:00<br />
12:15<br />
12:15<br />
Temperature<br />
Humidity<br />
Auto-stop<br />
Start time<br />
30°C<br />
5 : 59<br />
- - : - -<br />
Temperature<br />
Humidity<br />
Auto-stop<br />
Start time<br />
30°C<br />
5 : 59<br />
- - : - -<br />
Life - Guard<br />
&<br />
> 3 s<br />
Temperature<br />
Humidity<br />
Auto-stop<br />
Start time<br />
Life - Guard<br />
MODE > 3 s<br />
12:00<br />
30°C<br />
5 : 59<br />
- - : - -<br />
20 min<br />
Temperature<br />
Humidity<br />
Auto-stop<br />
Start time<br />
12:00<br />
30°C<br />
5 : 59<br />
- - : - -<br />
Temperature<br />
Humidity<br />
Auto-stop<br />
Start time<br />
12:15<br />
30°C<br />
5 : 59<br />
- - : - -<br />
20 GB
Switching on the sauna unit<br />
Temperature<br />
Humidity<br />
Auto-stop<br />
Start time<br />
12:00<br />
30°C<br />
5 : 59<br />
- - : - -<br />
Switching on the sauna unit with<br />
Life - Guard<br />
Temperature<br />
Humidity<br />
Auto-stop<br />
Start time<br />
Life - Guard<br />
12:00<br />
30°C<br />
5 : 59<br />
- - : - -<br />
20 min<br />
> 3 s > 3 s<br />
Temperature<br />
Humidity<br />
Auto-stop<br />
Start time<br />
12:15<br />
30°C<br />
5 : 59<br />
- - : - -<br />
Temperature<br />
Humidity<br />
Auto-stop<br />
Start time<br />
Life - Guard<br />
12:15<br />
30°C<br />
5 : 59<br />
- - : - -<br />
20 min<br />
Switching off the sauna unit in the<br />
Finnish mode<br />
Temperature<br />
Humidity<br />
Auto-stop<br />
Start time<br />
Auto-Stop-Time<br />
12:15<br />
30°C<br />
5 : 59<br />
- - : - -<br />
The sauna heater will now heat normal, without<br />
„Life - Guard „- time. To activate the function „Life<br />
- Guard".<br />
MODE<br />
Temperature<br />
Humidity<br />
Auto-stop<br />
Start time<br />
Life - Guard<br />
12:15<br />
30°C<br />
5 : 59<br />
- - : - -<br />
20 min<br />
After the „Life - Guard" - time has expired,<br />
the sauna heater is switched off and the <strong>en</strong>tire<br />
display blinks.<br />
Temperature<br />
Humidity<br />
Auto-stop<br />
Start time<br />
12:00<br />
30°C<br />
5 : 59<br />
- - : - -<br />
Temperature<br />
Humidity<br />
Auto-stop<br />
Start time<br />
Life - Guard<br />
12:15<br />
30°C<br />
5 : 59<br />
- - : - -<br />
20 min<br />
Restart<br />
Temperature<br />
Humidity<br />
Auto-stop<br />
Start time<br />
Life - Guard<br />
MODE<br />
12:15<br />
30°C<br />
5 : 59<br />
- - : - -<br />
20 min<br />
or switch off the system<br />
Temperature<br />
Humidity<br />
Auto-stop<br />
Start time<br />
12:00<br />
30°C<br />
5 : 59<br />
- - : - -<br />
GB<br />
21
Individual settings<br />
Hereafter we are showing you options that allow you to adjust the controls to your individual<br />
needs. The various parameters can be changed in Stand-by or in operation and the changes<br />
are saved in the unit. Changes made in operation are effective directly.<br />
Cabin temperature<br />
In Stand-by<br />
Temperature<br />
Humidity<br />
Auto-stop<br />
Start time<br />
Setting range: Finnish mode 30 - 115°C<br />
Humidity mode 30 - 70°C<br />
In operation<br />
12:00<br />
30°C<br />
5 : 59<br />
- - : - -<br />
Temperature<br />
Humidity<br />
Auto-stop<br />
Start time<br />
12:15<br />
30°C<br />
5 : 59<br />
- - : - -<br />
MODE<br />
MODE<br />
12:15<br />
12:15<br />
Temperature<br />
Humidity<br />
Auto-stop<br />
Start time<br />
30°C<br />
5 : 59<br />
- - : - -<br />
Temperature<br />
Humidity<br />
Auto-stop<br />
Start time<br />
30°C<br />
5 : 59<br />
- - : - -<br />
MODE<br />
MODE<br />
12:15<br />
12:15<br />
Temperature<br />
Humidity<br />
Auto-stop<br />
Start time<br />
30°C<br />
5 : 59<br />
- - : - -<br />
Temperature<br />
Humidity<br />
Auto-stop<br />
Start time<br />
30°C<br />
5 : 59<br />
- - : - -<br />
12:15<br />
12:15<br />
Temperature<br />
Humidity<br />
Auto-stop<br />
Start time<br />
85°C<br />
5 : 59<br />
- - : - -<br />
Temperature<br />
Humidity<br />
Auto-stop<br />
Start time<br />
85°C<br />
5 : 59<br />
- - : - -<br />
MODE > 3 s<br />
MODE > 3 s<br />
Temperature<br />
Humidity<br />
Auto-stop<br />
Start time<br />
12:15<br />
85°C<br />
5 : 59<br />
- - : - -<br />
Temperature<br />
Humidity<br />
Auto-stop<br />
Start time<br />
12:15<br />
85°C<br />
5 : 59<br />
- - : - -<br />
15 s<br />
> 3 s<br />
15 s<br />
Temperature<br />
Humidity<br />
Auto-stop<br />
Start time<br />
12:00<br />
85°C<br />
5 : 59<br />
- - : - -<br />
Temperature<br />
Humidity<br />
Auto-stop<br />
Start time<br />
12:15<br />
85°C<br />
5 : 59<br />
- - : - -<br />
Temperature<br />
Humidity<br />
Auto-stop<br />
Start time<br />
12:15<br />
85°C<br />
5 : 59<br />
- - : - -<br />
22 GB
Humidity operation<br />
The prerequisite for humidity operation is<br />
the connection of a suitable evaporator unit<br />
up to max. 3 kW to 230 V AC. The control<br />
"clocks" the evaporator, dep<strong>en</strong>d<strong>en</strong>t on the<br />
set nominal humidity value.<br />
These achievable values lie higher than the<br />
values which are actually required. Therefore,<br />
after heating up, please lower them.<br />
Please observe that the cabin temperature<br />
is highest directly under the cabin ceiling,<br />
whereas the relative air humidity is low. The<br />
relative air humidity increases as the temperature<br />
sinks towards the cabin fl oor.<br />
The following diagram shows you the relative<br />
air humidity temperature values for the<br />
standard bath forms and comfort zones.<br />
Temperature in °C<br />
Note: Whilst the evaporator is being<br />
switched on, the heater only works with 2<br />
phases, meaning that part of the power is<br />
switched to the evaporator. On symmetrically<br />
wired heaters (same heating output per<br />
phase) 1/3 of the heating output of the sauna<br />
heater is therefore switched off. This serves<br />
on the one hand to protect the user from excessive<br />
temperatures, but also to limit the<br />
switching capacity to 3.5 kW per phase.<br />
The humidity to be achieved is strongly dep<strong>en</strong>d<strong>en</strong>t<br />
on the geometry of the sauna cabin,<br />
the sauna heater used and the evaporator<br />
power. Therefore, you will have to fi nd your<br />
own personal climatic zone. Always select<br />
the temperature fi rst (from 30 to 70°C) and<br />
th<strong>en</strong> the humidity.<br />
Heaters and evaporators which are optimally<br />
adapted to the sauna cabins can be used<br />
to achieve the humidity values giv<strong>en</strong> in the<br />
table with a 100% duty cycle.<br />
Temperature<br />
rel. air humidity<br />
60°C 50 %<br />
50°C 60 %<br />
40°C 70 %<br />
30°C 80 %<br />
Sauna<br />
Hot air bath<br />
Herbal bath/<br />
Humid-warm air<br />
bath<br />
Rel. air humidity in %<br />
The humidity int<strong>en</strong>sity shown in the display<br />
corresponds to the time proportional evaporator<br />
setting. Therefore, the relative air humidity<br />
is not preselected or shown on the<br />
display, but rather the switch-on frequ<strong>en</strong>cy<br />
of the evaporator in perc<strong>en</strong>t. The graphic is<br />
int<strong>en</strong>ded to clarify this.<br />
min<br />
10<br />
8<br />
6<br />
4<br />
2<br />
0<br />
20 40 60 80 100 %<br />
The evaporator is always activated if a value<br />
is displayed in the field „Humidity“. Please<br />
also observe that the evaporator does not<br />
switch on until the temperature has dropped<br />
to this value.<br />
GB<br />
23
Humidity int<strong>en</strong>sity<br />
In Stand-by<br />
If a value is <strong>en</strong>tered here the sauna unit automatically goes into<br />
humidity operation wh<strong>en</strong> switched on.<br />
In operation<br />
12:00<br />
12:15<br />
Temperature<br />
Humidity<br />
Auto-stop<br />
Start time<br />
30°C<br />
5 : 59<br />
- - : - -<br />
Temperature<br />
Humidity<br />
Auto-stop<br />
Start time<br />
30°C<br />
5 : 59<br />
- - : - -<br />
MODE<br />
MODE<br />
12:15<br />
12:15<br />
Temperature<br />
Humidity<br />
Auto-stop<br />
Start time<br />
30°C<br />
5 : 59<br />
- - : - -<br />
Temperature<br />
Humidity<br />
Auto-stop<br />
Start time<br />
30°C<br />
5 : 59<br />
- - : - -<br />
Temperature<br />
Humidity<br />
Auto-stop<br />
Start time<br />
12:15<br />
30°C<br />
5 : 59<br />
- - : - -<br />
Temperature<br />
Humidity<br />
Auto-stop<br />
Start time<br />
12:15<br />
30°C<br />
5 : 59<br />
- - : - -<br />
Temperature<br />
Humidity<br />
Auto-stop<br />
Start time<br />
MODE<br />
12:15<br />
30°C<br />
5 : 59<br />
- - : - -<br />
Temperature<br />
Humidity<br />
Auto-stop<br />
Start time<br />
MODE<br />
12:15<br />
30°C<br />
5 : 59<br />
- - : - -<br />
12:15<br />
12:15<br />
Temperature<br />
Humidity<br />
Auto-stop<br />
Start time<br />
30°C<br />
5 : 59<br />
- - : - -<br />
Temperature<br />
Humidity<br />
Auto-stop<br />
Start time<br />
30°C<br />
5 : 59<br />
- - : - -<br />
Temperature<br />
Humidity<br />
Auto-stop<br />
Start time<br />
MODE > 3 s<br />
12:15<br />
30°C<br />
5 : 59<br />
- - : - -<br />
MODE > 3 s<br />
Temperature<br />
Humidity<br />
Auto-stop<br />
Start time<br />
12:15<br />
30°C<br />
5 : 59<br />
- - : - -<br />
15 s<br />
> 3 s<br />
15 s<br />
12:00<br />
12:15<br />
12:15<br />
Temperature<br />
Humidity<br />
Auto-stop<br />
Start time<br />
30°C<br />
5 : 59<br />
- - : - -<br />
Temperature<br />
Humidity<br />
Auto-stop<br />
Start time<br />
30°C<br />
5 : 59<br />
- - : - -<br />
Temperature<br />
Humidity<br />
Auto-stop<br />
Start time<br />
30°C<br />
5 : 59<br />
- - : - -<br />
24 GB
Switching off the sauna unit during<br />
humidity operation<br />
In order to dry out the sauna cabin after<br />
the humidity operation, a reheating phase<br />
is activated after the humidity operation is<br />
switched off. The cabin is heated here to<br />
90°C for ca. 30 minutes. This is shown in the<br />
upper section of the display with the blinking<br />
symbol . In addition, an optionally installed<br />
fan is switched on for the duration of<br />
the reheating phase.<br />
The sauna unit automatically turns off once<br />
this time has expired.<br />
If you wish to interrupt the reheating phase<br />
beforehand, push the<br />
-button again.<br />
Temperature<br />
Humidity<br />
Auto-stop<br />
Start time<br />
12:15<br />
30°C<br />
5 : 59<br />
- - : - -<br />
Auto-Stop.<br />
Temperature<br />
Humidity<br />
Auto-stop<br />
Start time<br />
12:00<br />
90°C<br />
0 : 29<br />
- - : - -<br />
Auto-Stop.<br />
Temperature<br />
Humidity<br />
Auto-stop<br />
Start time<br />
12:00<br />
30°C<br />
5 : 59<br />
- - : - -<br />
GB<br />
25
Auto-Stop<br />
Auto-Stop is the time to which the heating time is limited. The sauna unit automatically turns<br />
off once this time has expired.<br />
Dep<strong>en</strong>ding on the confi guration of the control, the time is adjustable from 0:01 to 6:00 or<br />
12:00 hours.<br />
In Stand-by<br />
In operation<br />
Temperature<br />
Humidity<br />
Auto-stop<br />
Start time<br />
12:00<br />
30°C<br />
5 : 59<br />
- - : - -<br />
Temperature<br />
Humidity<br />
Auto-stop<br />
Start time<br />
12:15<br />
30°C<br />
5 : 59<br />
- - : - -<br />
Temperature<br />
Humidity<br />
Auto-stop<br />
Start time<br />
MODE<br />
12:15<br />
30°C<br />
5 : 59<br />
- - : - -<br />
Temperature<br />
Humidity<br />
Auto-stop<br />
Start time<br />
MODE<br />
12:15<br />
30°C<br />
5 : 59<br />
- - : - -<br />
Temperature<br />
Humidity<br />
Auto-stop<br />
Start time<br />
12:15<br />
30°C<br />
5 : 59<br />
- - : - -<br />
Temperature<br />
Humidity<br />
Auto-stop<br />
Start time<br />
12:15<br />
30°C<br />
5 : 59<br />
- - : - -<br />
Temperature<br />
Humidity<br />
Auto-stop<br />
Start time<br />
MODE<br />
12:15<br />
30°C<br />
5 : 59<br />
- - : - -<br />
Temperature<br />
Humidity<br />
Auto-stop<br />
Start time<br />
MODE<br />
12:15<br />
30°C<br />
5 : 59<br />
- - : - -<br />
12:15<br />
12:15<br />
Temperature<br />
Humidity<br />
Auto-stop<br />
Start time<br />
30°C<br />
3 : 59<br />
- - : - -<br />
Temperature<br />
Humidity<br />
Auto-stop<br />
Start time<br />
30°C<br />
53 : 59<br />
- - : - -<br />
MODE<br />
MODE<br />
12:15<br />
12:15<br />
Temperature<br />
Humidity<br />
Auto-stop<br />
Start time<br />
30°C<br />
3 : 59<br />
- - : - -<br />
Temperature<br />
Humidity<br />
Auto-stop<br />
Start time<br />
30°C<br />
53 : 59<br />
- - : - -<br />
26 GB
12:15<br />
12:15<br />
Temperature<br />
Humidity<br />
Auto-stop<br />
Start time<br />
30°C<br />
3 : 30<br />
- - : - -<br />
Temperature<br />
Humidity<br />
Auto-stop<br />
Start time<br />
30°C<br />
53 : 30<br />
- - : - -<br />
MODE > 3 s<br />
MODE > 3 s<br />
12:15<br />
12:15<br />
Temperature<br />
Humidity<br />
Auto-stop<br />
Start time<br />
30°C<br />
3 : 30<br />
- - : - -<br />
Temperature<br />
Humidity<br />
Auto-stop<br />
Start time<br />
30°C<br />
3 : 30<br />
- - : - -<br />
15 s<br />
> 3 s<br />
15 s<br />
Temperature<br />
Humidity<br />
Auto-stop<br />
Start time<br />
12:00<br />
30°C<br />
3 : 30<br />
- - : - -<br />
Temperature<br />
Humidity<br />
Auto-stop<br />
Start time<br />
12:15<br />
30°C<br />
3 : 29<br />
- - : - -<br />
Temperature<br />
Humidity<br />
Auto-stop<br />
Start time<br />
12:15<br />
30°C<br />
3 : 29<br />
- - : - -<br />
Temperature<br />
Humidity<br />
Auto-stop<br />
Start time<br />
12:00<br />
30°C<br />
3 : 30<br />
- - : - -<br />
GB<br />
27
Preselection time<br />
Using the time preselection, you can preselect a switch-on time within 24 hours for your<br />
sauna heater.<br />
Always make sure that there are no objects on the sauna unit before the<br />
heating process begins. Fire risk!<br />
Please remember however that the cabin must heat up for approx. 40-50 minutes in order<br />
to achieve a pleasant climate in the cabin. If, for example. you wish to start with your sauna<br />
bath at 18:00 hrs, please select 17:10 hrs as your preselection time.<br />
If the sauna unit is to be used without preselection time, -- : -- must be <strong>en</strong>tered in the display<br />
under preselection time.<br />
In Stand-by<br />
In operation<br />
Temperature<br />
Humidity<br />
Auto-stop<br />
Start time<br />
12:00<br />
30°C<br />
5 : 59<br />
- - : - -<br />
Temperature<br />
Humidity<br />
Auto-stop<br />
Start time<br />
12:15<br />
30°C<br />
5 : 59<br />
- - : - -<br />
Temperature<br />
Humidity<br />
Auto-stop<br />
Start time<br />
MODE<br />
12:15<br />
30°C<br />
5 : 59<br />
- - : - -<br />
Temperature<br />
Humidity<br />
Auto-stop<br />
Start time<br />
MODE<br />
12:15<br />
30°C<br />
5 : 59<br />
- - : - -<br />
Temperature<br />
Humidity<br />
Auto-stop<br />
Start time<br />
12:15<br />
30°C<br />
5 : 59<br />
- - : - -<br />
Temperature<br />
Humidity<br />
Auto-stop<br />
Start time<br />
12:15<br />
30°C<br />
5 : 59<br />
- - : - -<br />
Temperature<br />
Humidity<br />
Auto-stop<br />
Start time<br />
MODE<br />
12:15<br />
30°C<br />
5 : 59<br />
- - : - -<br />
Temperature<br />
Humidity<br />
Auto-stop<br />
Start time<br />
MODE<br />
12:15<br />
30°C<br />
5 : 59<br />
- - : - -<br />
12:15<br />
12:15<br />
Temperature<br />
Humidity<br />
Auto-stop<br />
Start time<br />
30°C<br />
5 : 59<br />
17 : - -<br />
Temperature<br />
Humidity<br />
Auto-stop<br />
Start time<br />
30°C<br />
5 : 59<br />
17 : - -<br />
MODE<br />
MODE<br />
28 GB
12:15<br />
12:15<br />
Temperature<br />
Humidity<br />
Auto-stop<br />
Start time<br />
30°C<br />
5 : 59<br />
17 : - -<br />
Temperature<br />
Humidity<br />
Auto-stop<br />
Start time<br />
30°C<br />
5 : 59<br />
17 : - -<br />
Temperature<br />
Humidity<br />
Auto-stop<br />
Start time<br />
12:15<br />
30°C<br />
5 : 59<br />
17 : 10<br />
Temperature<br />
Humidity<br />
Auto-stop<br />
Start time<br />
12:15<br />
30°C<br />
5 : 59<br />
17 : 10<br />
Temperature<br />
Humidity<br />
Auto-stop<br />
Start time<br />
MODE > 3 s<br />
12:15<br />
30°C<br />
5 : 59<br />
17 : 10<br />
Temperature<br />
Humidity<br />
Auto-stop<br />
Start time<br />
MODE > 3 s<br />
12:15<br />
30°C<br />
5 : 59<br />
17 : 10<br />
15 s<br />
15 s<br />
Temperature<br />
Humidity<br />
Auto-stop<br />
Start time<br />
12:15<br />
30°C<br />
5 : 59<br />
17 : 10<br />
Temperature<br />
Humidity<br />
Auto-stop<br />
Start time<br />
12:15<br />
30°C<br />
5 : 59<br />
17 : 10<br />
Temperature<br />
Humidity<br />
Auto-stop<br />
Start time<br />
12:15<br />
30°C<br />
5 : 59<br />
17 : 10<br />
Temperature<br />
Humidity<br />
Auto-stop<br />
Start time<br />
12:15<br />
30°C<br />
5 : 59<br />
17 : 10<br />
To the preselection time<br />
Temperature<br />
Humidity<br />
Auto-stop<br />
Start time<br />
12:15<br />
30°C<br />
3 : 29<br />
17 : 10<br />
Deactivate the preselection time<br />
Activate the preselection time<br />
12:15<br />
Temperature<br />
Humidity<br />
Auto-stop<br />
Start time<br />
30°C<br />
5 : 59<br />
17 : 10<br />
Temperature<br />
Humidity<br />
Auto-stop<br />
Start time<br />
12:15<br />
30°C<br />
5 : 59<br />
17 : 10<br />
To the preselection time<br />
Temperature<br />
Humidity<br />
Auto-stop<br />
Start time<br />
12:15<br />
30°C<br />
3 : 29<br />
17 : 10<br />
GB<br />
Temperature<br />
Humidity<br />
Auto-stop<br />
Start time<br />
12:15<br />
30°C<br />
5 : 59<br />
17 : 10<br />
If the sauna unit is to be used without preselection<br />
time, -- : -- must be <strong>en</strong>tered in the<br />
display under preselection time.<br />
29
Life - Guard<br />
Here you can set after what time the sauna unit is switched off and by pushing the MODE - button<br />
again you can restart the „Life - Guard“ time.<br />
This setting can only be selected in Stand-by wh<strong>en</strong> the function „Life - Guard“ is activated.<br />
In Stand-by<br />
12:00<br />
12:00<br />
Temperature<br />
Humidity<br />
Auto-stop<br />
Start time<br />
Life - Guard<br />
30°C<br />
5 : 59<br />
- - : - -<br />
20 min<br />
Temperature<br />
Humidity<br />
Auto-stop<br />
Start time<br />
Life - Guard<br />
30°C<br />
5 : 59<br />
- - : - -<br />
15 min<br />
Temperature<br />
Humidity<br />
Auto-stop<br />
Start time<br />
Life - Guard<br />
MODE<br />
12:00<br />
30°C<br />
5 : 59<br />
- - : - -<br />
20 min<br />
Temperature<br />
Humidity<br />
Auto-stop<br />
Start time<br />
Life - Guard<br />
15 s<br />
12:00<br />
30°C<br />
5 : 59<br />
- - : - -<br />
15 min<br />
Temperature<br />
Humidity<br />
Auto-stop<br />
Start time<br />
Life - Guard<br />
> 3 s<br />
12:15<br />
30°C<br />
5 : 59<br />
- - : - -<br />
15 min<br />
Temperature<br />
Humidity<br />
Auto-stop<br />
Start time<br />
Life - Guard<br />
12:00<br />
30°C<br />
5 : 59<br />
- - : - -<br />
20 min<br />
MODE<br />
Temperature<br />
Humidity<br />
Auto-stop<br />
Start time<br />
Life - Guard<br />
12:00<br />
30°C<br />
5 : 59<br />
- - : - -<br />
20 min<br />
Temperature<br />
Humidity<br />
Auto-stop<br />
Start time<br />
Life - Guard<br />
12:00<br />
30°C<br />
5 : 59<br />
- - : - -<br />
15 min<br />
MODE<br />
30 GB
Ext<strong>en</strong>d the time setting for sauna time<br />
By switching a jumper you can ext<strong>en</strong>d the time setting for sauna time from 6:00 to 12:00<br />
hours.<br />
Such work must be left exclusively to an expert. Prior to any kind of work disconnect all<br />
poles on the op<strong>en</strong>ed control unit from the power supply. (Switch off main switch, or trip the<br />
Fi-switch). Risk of electric shock!!<br />
Loos<strong>en</strong> the four screws on the op<strong>en</strong>ed unit that hold the circuit board.<br />
Loos<strong>en</strong> the screws<br />
X2<br />
F2<br />
X1<br />
F1<br />
You will fi nd a jumper on the backside of the circuit board.<br />
Jumper op<strong>en</strong><br />
6:00 hours heating time limitation<br />
Jumper closed<br />
12:00 hours heating time limitation<br />
F2<br />
Jumper<br />
socket<br />
X2<br />
F1<br />
Unit fuses<br />
You will also fi nd 2 micro fuses on the backside of the circuit board<br />
F1 = T 2A Fuse primary electronics and light and fan<br />
F2 = T 250 mA Fuse secondary electronics<br />
GB<br />
31
Error messages<br />
The control unit continuously monitors the s<strong>en</strong>sor for short circuits and interruptions. At the<br />
same time it checks if there is <strong>en</strong>ough water in the evaporator container.<br />
The error messages appear as follows:<br />
Display Cause Remedy<br />
= Interruption in the room s<strong>en</strong>sor circuit<br />
The temperature s<strong>en</strong>sor (KTY) is<br />
defective or the line to the temperature<br />
s<strong>en</strong>sor is interrupted.<br />
Have cables and KTY<br />
checked by an expert.<br />
KTY at 20°C ca. 2 k <br />
may have to be replaced.<br />
= Short-circuit in the room s<strong>en</strong>sor circuit<br />
The temperature s<strong>en</strong>sor (KTY) is defective,<br />
or the line to the temperature<br />
s<strong>en</strong>sor is short-circuited.<br />
Have cables and KTY<br />
checked by an expert.<br />
= Interruption in the limiter circuit<br />
The thermal fuse (142°C)<br />
has tripped or the line to the<br />
thermal fuse is interrupted.<br />
Have cables and thermal<br />
fuses checked by an expert.<br />
Water<br />
shortage<br />
Water<br />
shortage<br />
12:00<br />
12:00<br />
= Water shortage<br />
The water in the evaporator container<br />
is used up.<br />
Refi ll water.<br />
Warning. There are<br />
hot compon<strong>en</strong>ts inside<br />
the container. There may<br />
be strong steam g<strong>en</strong>eration<br />
wh<strong>en</strong> refi lling with<br />
cold water. Danger of<br />
scalding!<br />
If no water is refilled the<br />
system switches off after<br />
2 minutes.<br />
In order to put the system<br />
back into operation, it<br />
must first be switched<br />
off with the - button, th<strong>en</strong><br />
refill the evaporator container,<br />
and th<strong>en</strong> the unit<br />
can be switched on again<br />
as usual.<br />
32 GB
The device switch (Switch-off)<br />
The unit switch is located at the top of the<br />
control unit. You can disconnect the electronics<br />
from the mains using this switch in<br />
case of a fault.<br />
.<br />
Unit switch<br />
Unit switch<br />
= Unit<br />
switched on<br />
I 0 II<br />
In case of faults push the unit switch on<br />
the left side of the rocker to the fi rst latch<br />
(switch setting 0). The unit is now completely<br />
switched off.<br />
I 0 II<br />
= Unit<br />
switched off<br />
To turn the light on in the cabin wh<strong>en</strong> the<br />
unit is disconnected, push the left part of<br />
the rocker to the second <strong>en</strong>gagem<strong>en</strong>t point<br />
(switch setting II).<br />
To make the unit ready for operation, switch<br />
back to the initial position (switch setting I).<br />
I 0 II<br />
I 0 II<br />
= Lamp<br />
switched on<br />
GB<br />
33
Guarantee<br />
The guarantee is tak<strong>en</strong> over according to<br />
the legal regulations at pres<strong>en</strong>t.<br />
Please keep this address in a safe place together<br />
with the installation guide.<br />
To help us answer your questions quickly<br />
and compet<strong>en</strong>tly, please provide data printed<br />
on the ID plate, to include system type,<br />
article no. and serial no., in all inquiries.<br />
Service Address:<br />
EOS Saunatechnik GmbH<br />
Adolf-Weiß-Straße 43<br />
35759 Driedorf-Mademühl<strong>en</strong>, Germany<br />
Fon: +49 (0)2775 82-514<br />
Fax: +49 (0)2775 82-431<br />
servicec<strong>en</strong>ter@eos-sauna.de<br />
www.eos-sauna.de<br />
Manufacturer’s warr<strong>en</strong>ty<br />
- The period of warr<strong>en</strong>ty starts from the<br />
date of purchase and lasts up to 2 years<br />
for commercial use and 3 years for private<br />
use.<br />
- Always include the completed warr<strong>en</strong>ty<br />
certifi cate wh<strong>en</strong> returning equipm<strong>en</strong>t.<br />
- The warr<strong>en</strong>ty expires for appliances<br />
which have be<strong>en</strong> modified without<br />
manufacturer’s explicit agreem<strong>en</strong>t.<br />
- Damages caused by incorrect operation<br />
or handling through non-authorized persons<br />
are not covered under the terms of<br />
warranty.<br />
- In the ev<strong>en</strong>t of a claim, please indicate the<br />
serial number as well as the article code<br />
number and type name with expressive<br />
description of the fault.<br />
- This warr<strong>en</strong>ty covers damaged parts but<br />
no defects due to wear and tear.<br />
In case of complaint please return the<br />
equipm<strong>en</strong>t in its original packaging or other<br />
suitable packaging (caution: danger of<br />
transport damage) to our service departm<strong>en</strong>t.<br />
Always include the completed warr<strong>en</strong>ty<br />
certifi cate wh<strong>en</strong> returning equipm<strong>en</strong>t.<br />
Possible shipping costs arising from the<br />
transport to and from point of repair cannot<br />
be borne by us.<br />
Outside of Germany please contact your<br />
specialist dealer in case of warranty claims.<br />
Direct warranty processing with our service<br />
departm<strong>en</strong>t is in this case not possible.<br />
Equipm<strong>en</strong>t start-up date:<br />
Stamp and signature of the authorized<br />
electrician:<br />
34 GB
Handling procedures for return shipm<strong>en</strong>ts (RMA) - Details for all returns !<br />
Dear customer<br />
we hope that you will rejoice in the ordered articles. Just in case that you are not <strong>en</strong>tirely cont<strong>en</strong>ted as an<br />
exeption, please follow the procedures specifi ed below.This <strong>en</strong>abling us to <strong>en</strong>sure a quick and smooth<br />
handling of the return shipm<strong>en</strong>t.<br />
Please absolutely respect for all returns!<br />
• Please add the available RMA-voucher always completely filled out together with an<br />
invoice copy to the return shipm<strong>en</strong>t! Do not stick it on the goods or on the packaging.<br />
We do not accept the return shipm<strong>en</strong>t without these papers.<br />
• Not prepaid parcels will be refused and returned to S<strong>en</strong>der! Please always ask for the<br />
RMA-No. for the cheapest return.<br />
• Please pay att<strong>en</strong>tion that the goods have to be s<strong>en</strong>t back without visible marks of<br />
use in the original scope of delivery and in original packing.<br />
• We recomm<strong>en</strong>d to use an additional solid and break-proof covering box which<br />
should be padded out with styrofoam, paper or similar. Transport damages as a result of<br />
faulty packing are for the s<strong>en</strong>der‘s account.<br />
Form of complaint:<br />
1) Transport damage<br />
• Do not use damaged<br />
goods!<br />
• Please check the cont<strong>en</strong>t<br />
of your parcel immediately<br />
and advise the forwarding<br />
company of a claim (parcel<br />
service/ freight forwarder)<br />
• Ask the forwarder for a<br />
writt<strong>en</strong> acknowledgem<strong>en</strong>t<br />
of the damages.<br />
• Report the claim promptly<br />
by phone to your<br />
dealer. He will discuss<br />
with you how to act in this<br />
case.<br />
• If the transport box has<br />
be<strong>en</strong> damaged, please<br />
use an additional covering<br />
box. Do not forget to add<br />
the acknowledgem<strong>en</strong>t of<br />
the damage of the forwarding<br />
company !<br />
2) Faulty goods<br />
• The implied warr<strong>en</strong>ty period<br />
is 2 years.Please<br />
contact your dealer in<br />
case of faulty or wrong<br />
articles or missing accessories.<br />
He will discuss<br />
with you the individual<br />
case and try for immediate<br />
and customer-fri<strong>en</strong>dly solution.<br />
• For economic returns<br />
within Germany you will<br />
get an RMA-number<br />
from the manufacturer.<br />
• All returns have to be in<br />
the original packing of<br />
the goods with corresponding<br />
accessories.<br />
Please repack the goods<br />
to avoid damages. In case<br />
of wrong delivery, please<br />
do not use this article !<br />
3) Problems of installation<br />
and functioning<br />
• Please read the manual<br />
carefully first of all and<br />
pay att<strong>en</strong>tion to the indicated<br />
assembly or installing<br />
instructions.<br />
• Your dealer should be<br />
the first contact person<br />
because he knows his<br />
products best and also<br />
knows possible problems.<br />
• In case of function<br />
problems with an article,<br />
please check at first<br />
whether there is an obvious<br />
material defect. The<br />
quality system in our factory<br />
reduces malfunctions<br />
of new appliances to almost<br />
zero.<br />
.<br />
GB<br />
35