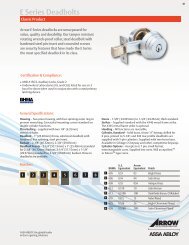
Touchpad Access Cylindrical Lock Installation Instructions - Arrow ...
Touchpad Access Cylindrical Lock Installation Instructions - Arrow ...
Touchpad Access Cylindrical Lock Installation Instructions - Arrow ...

Create successful ePaper yourself
Turn your PDF publications into a flip-book with our unique Google optimized e-Paper software.
<strong>Touchpad</strong> <strong>Access</strong> <strong>Cylindrical</strong> <strong>Lock</strong><br />
<strong>Installation</strong> <strong>Instructions</strong><br />
INSTALLER NOTE:<br />
Failure to follow these instructions could result in<br />
damage to the lock and void the factory warranty.<br />
For Technical Assistance contact contact ARROW LOCK<br />
1-800-221-6529 • www.arrowlock.com<br />
This document is available on our website in printed Spanish and French. Go to www.arrowlock.com.<br />
Click "Liternature Req"".<br />
Este documento está disponible en español en nuestra página de internet. Vaya a www.arrowlock.com.<br />
Presione "Información del Producto y Documentación".<br />
Ce document est disponible sur notre site Web dans le français imprimé. Allez à www.arrowlock.com.<br />
Cliquez sur le " ; Information sur le produit et Documentation".<br />
© ARROW <strong>Lock</strong> & Door Hardware • 80-9150-0066-010 Rev C
TABLE OF CONTENTS<br />
Warnings..........................................................................................................................2<br />
Introduction......................................................................................................................2<br />
<strong>Installation</strong><br />
Components and Tools.............................................................................................3<br />
Door Preparation.......................................................................................................4<br />
Prepare <strong>Lock</strong> for <strong>Installation</strong>................................................................................. 5-6<br />
Install <strong>Lock</strong>............................................................................................................ 7-8<br />
Hardware Troubleshooting........................................................................................8<br />
Programming<br />
Programming Features-Menus-Keys-Definitions................................................ 9-11<br />
Operating Modes.............................................................................................. 12-16<br />
Easy Mode................................................................................................ 12-13<br />
Advanced Mode........................................................................................ 14-16<br />
Miscellaneous Information......................................................................................17<br />
Programming Troubleshooting................................................................................18<br />
Sample Pin Code Management Sheets..................................................................19<br />
WARNINGS<br />
CAUTION: Changes or modifications to this unit not expressly approved by the party<br />
responsible for compliance could void the user’s authority to operate the equipment.<br />
IMPORTANT: The accuracy of the door preparation is critical for the proper functioning<br />
and security of this cylindrical product. Misalignment can cause premature wear and a<br />
lessening of security.<br />
Finish Care: This lockset is designed to provide the highest standard of product quality<br />
and performance. Care should be taken to insure a long-lasting finish. When cleaning<br />
is required use a soft, damp cloth. Using lacquer thinner, caustic soaps, abrasive cleaners<br />
or polishes could damage the coating and result in tarnishing.<br />
INTRODUCTION<br />
<strong>Arrow</strong>® Revolution Stand-alone Touchscreen <strong>Access</strong> <strong>Lock</strong> combines robust cylindrical<br />
locksets with a contemporary electronic aesthetic.<br />
Users benefit from an interactive touchscreen that makes day-to-day access effortless and<br />
offers voice-guided programming for simple updates to user information in the event of<br />
staffing changes or security breaches.<br />
Revolution is engineered for quick and easy installation and fits into the standard ANSI/<br />
BHMA A156.115 cylindrical locks with lever door prep with only one additional 3/4" hole<br />
and 7 screws including latchbolt and strike.<br />
Revolution features the choice of "Easy" or "Advanced" operating modes. <strong>Lock</strong>s are<br />
shipped as a default from the factory in "Easy" mode. The desired operating mode should<br />
be determined before the completion of lock installation, but can be changed at a later time<br />
if required.<br />
2<br />
© ARROW <strong>Lock</strong> & Door Hardware • 80-9150-0066-010 Rev C
COMPONENTS AND TOOLS<br />
In the box, you should find. . .<br />
Quick Start <strong>Instructions</strong><br />
<strong>Installation</strong> <strong>Instructions</strong><br />
Door Marker<br />
Outside Touchscreen Assembly<br />
Inside Escutcheon Assembly:<br />
• Inside Support Assembly<br />
• Inside Escutcheon<br />
• Inside Lever Handle<br />
• Battery Cover<br />
4 AA Alkaline Batteries<br />
Latchbolt<br />
Strike<br />
Allen Wrench 3/32" (2.5mm)<br />
Lever Removal Tool<br />
Screw Pack (7 screws)<br />
2 Keys (If cylinder included)<br />
Parts Illustrations<br />
Outside<br />
Touchscreen<br />
Assembly<br />
Inside<br />
Support<br />
Assembly<br />
Inside<br />
Escutcheon<br />
Inside<br />
Lever<br />
Handle<br />
Battery Cover<br />
4 AA Alkaline<br />
Batteries<br />
Latchbolt<br />
Strike<br />
Tools<br />
Door Prep<br />
• 2-1/8" (54mm) hole saw<br />
• 1" (26mm) boring bit<br />
• 5/16" (8mm) drill bit<br />
• 7/64" (2.5mm) drill bit<br />
• Chisel and hammer<br />
<strong>Lock</strong> <strong>Installation</strong><br />
• #2 phillips screw driver<br />
• Lever removal tool (supplied)<br />
• 3/8" or 1/2" drill<br />
• 3/32" Allen wrench (supplied)<br />
© ARROW <strong>Lock</strong> & Door Hardware • 80-9150-0066-010 Rev C<br />
3
DOOR PREPARATION<br />
Mark Door<br />
Verify backset before marking and drilling door.<br />
A. Mark horizontal line across edge of door 40-5/16"<br />
(1024mm) from floor.<br />
B. Fold door marker over the edge of the door, centering<br />
on the horizonal line.<br />
C. Mark centers of holes at proper backset. For beveled<br />
and square edge doors, mark both sides of the door.<br />
C<br />
3/4" Diameter<br />
3-1/2"<br />
A<br />
B<br />
Drill Door<br />
Backset 2-3/8" or 2-3/4"<br />
A. Drill 2-1/8" (54mm) dia. hole through the door.<br />
Cut notches as shown on template.<br />
Note: To avoid splintering wood doors, drill holes (A) and<br />
(D) from both sides of the door.<br />
B. Drill 3/4" (19mm) diameter hole through the door according<br />
to door marker.<br />
C. Drill 1" (25mm) diameter hole in edge of door. Mortise for<br />
latchbolt front 1-1/8" (29mm) wide x 2-1/4" (57mm) high<br />
by 5/32" deep.<br />
D. Drill two (2) 5/16" (8mm) diameter holes through door<br />
(see note, above).<br />
E. Drill pilot holes for latchbolt screws. 7/64" (2.5mm).<br />
Prepare and Install Strike (Wood Frames Only)<br />
C<br />
A<br />
Strikes<br />
E<br />
B<br />
V18<br />
Standard<br />
Strike Box<br />
D<br />
A. Close the door and mark a horizontal line from the center<br />
of the template to the frame of the door.<br />
B. Measure half the thickness of the door. Mark this same<br />
distance with a vertical line starting from the stop side<br />
of the frame. Where both lines cross make a 1" (25mm)<br />
diameter hole, 1/2" (13 mm) in depth.<br />
C. Align the holes of the strike with the vertical line.<br />
Trace the outline of the strike and mortise with<br />
a 1/16" (1.6mm) depth. Attach the strike with<br />
two screws (provided).<br />
Attaching Screws<br />
81-2012-0416<br />
#8-8-32x3/4"<br />
V14<br />
Optional Strike<br />
Box #V10<br />
Attaching Screws<br />
81-2012-0620<br />
#12-12-24x1"<br />
4<br />
© ARROW <strong>Lock</strong> & Door Hardware • 80-9150-0066-010 Rev C
PREPARE LOCK FOR INSTALLATION<br />
Unpack the <strong>Lock</strong><br />
The lock is packed representative of how it will install on the door.<br />
Before installation:<br />
A. Disassemble the inside escutcheon<br />
1. Remove the inside lever with the lever removal tool provided<br />
2. Separate the inside support assembly from the inside escutcheon<br />
B. Remove the battery cover<br />
1. Unscrew the hex screw using the Allen wrench provided. The hex screw does<br />
not come completely out.<br />
2. Slide the battery cover off.<br />
The outside assembly stays assembled.<br />
Inside<br />
Support<br />
Assembly<br />
Support<br />
Assembly<br />
Screws<br />
Inside<br />
Escutcheon<br />
Battery<br />
Cover<br />
Inside<br />
Lever<br />
Handle<br />
Determine Hand of the Door<br />
Face the door from the secure side to determine it’s hand. The secure side is the touchscreen<br />
side of an entrance door or the corridor side of a room door.<br />
Note: Revolution locks are non-handed; the lever can be flipped around to the desired handing.<br />
Left Hand Reverse<br />
Hinges on left.<br />
Opens outward.<br />
For handed locks,<br />
specify LHR.<br />
Left Hand<br />
Hinges on left.<br />
Opens inward.<br />
For handed locks,<br />
specify LH.<br />
Right Hand<br />
Hinges on right.<br />
Opens inward.<br />
for handed locks,<br />
specify RH.<br />
Right Hand Reverse<br />
Hinges on right.<br />
Opens outward.<br />
For handed locks,<br />
specify RHR.<br />
5<br />
© ARROW <strong>Lock</strong> & Door Hardware • 80-9150-0066-010 Rev C
Adjust <strong>Lock</strong> for Door Thickness (If Necessary)<br />
<strong>Lock</strong> is packed pre-adjusted for 1-3/4" (44mm) doors.<br />
To adjust for thinner door:<br />
A. Remove (2) screws from outside<br />
support assembly.<br />
B. Slide outside assembly away<br />
from the lock body.<br />
C. Disengage plate from assembly<br />
by sliding to the side and removing.<br />
D. Re-seat plate on outside assembly.<br />
Plate hole is slightly off center<br />
(gray area). Slide plate over<br />
assembly and slide to the center<br />
until seated in one of the two grooves.<br />
E. Adjust for door thickness by D<br />
seating plate in grooves on<br />
assembly to match door thickness.<br />
F. Re-seat plate on assembly.<br />
G. Fasten plate and outside assembly to lock body with (2) screws.<br />
How to Replace, Re-Key or Install Cylinder<br />
1. Remove cylinder handle:<br />
A. Insert key and rotate 45 degrees counterclockwise.<br />
B. Insert lever retainer tool and push.<br />
C. Slide lever off lock.<br />
2. Remove the plastic sleeve from the old cylinder.<br />
3. Slide new cylinder into sleeve.<br />
4. Insert key into cylinder.<br />
Important: Make sure the key cut side of key lines<br />
up facing towards the end of the lever. If the key is<br />
inserted incorrectly, the lock will reassemble and<br />
might appear to properly work; however, when the<br />
key is removed, the latchbolt will remain retracted.<br />
5. Rotate key 45 degrees counterclockwise.<br />
Depress retainer plate, push the handle onto the shank until fully seated.<br />
Pull on handle to insure properly seated.<br />
2-5/8" (66.5) For 6 pin cylinders, 1-3/8" thick doors<br />
2-7/8" (73) For 6 pin cylinders, 1-3/4" thick doors ONLY<br />
1-3/16" (30) For 6 pin cylinders, 1-3/8" thick doors<br />
1-7/16" (36.5) For 6 pin cylinders, 1-3/4" thick doors ONLY<br />
C<br />
Slide Plate to re-seat in grooves<br />
B<br />
A<br />
G<br />
B<br />
F<br />
E<br />
Position for 1-3/4"<br />
thick doors<br />
Position for 1-3/8"<br />
thin doors<br />
C<br />
Key cut<br />
A<br />
CAUTION: The cylinders furnished with Revolution lock for use in 1-3/8" doors have a tailpiece<br />
that is 1/4" shorter than the standard cylinders that are furnished for 1-3/4" doors. Trying to<br />
install a standard cylinder in 1-3/8" will DAMAGE the lock body.<br />
6<br />
© ARROW <strong>Lock</strong> & Door Hardware • 80-9150-0066-010 Rev C
INSTALL LOCK<br />
Outside Assembly<br />
Touchscreen<br />
Cable<br />
Inside Assembly<br />
Escutcheon Screw<br />
(1) 10-32 x 3/4" Pan Head<br />
With Star Washer Screw<br />
13<br />
3b<br />
9<br />
12<br />
3<br />
5<br />
10<br />
3a<br />
4<br />
1<br />
Motor Cable<br />
Support Assembly Screws<br />
(2) 10-32 x 2-1/2" Flat<br />
Head Machine Screws<br />
11<br />
1<br />
(2) 8-32 x 3/4"<br />
Flat Head<br />
Combination Screws<br />
Latch<br />
Retractor<br />
Engages<br />
Bolt Tail(s)<br />
Easy /<br />
8 Advanced<br />
Mode<br />
7<br />
Touchscreen<br />
Cable<br />
Connector<br />
9b<br />
Touchscreen Cable<br />
Routing<br />
"Z" Fold<br />
2<br />
Frame<br />
Engages<br />
Latchcase<br />
<strong>Lock</strong> Body<br />
EASY<br />
EXT-PWR / REMOTE / MOTOR<br />
(2) 8-32 x 3/4"<br />
Flat Head<br />
Combination Screws<br />
Detail A<br />
ADVANCED<br />
6<br />
EXT-PWR / REMOTE / MOTOR<br />
Directions<br />
1. Install latchbolt in door. Be sure that bevel<br />
edge of bolt faces strike. Attach with two<br />
screws supplied.<br />
2. Install strike on the door frame.<br />
3. Insert outside assembly through door,<br />
making sure that the lock body frame<br />
hooks latch case and retractor engages<br />
bolt tail(s). DO NOT FORCE (See Detail A<br />
above). If lock body does not engage latch<br />
easily, check door preparation for errors.<br />
a. Guide motor cable (red and black wires)<br />
through 2-1/8" diameter hole.<br />
b. Guide touchscreen cable through 3/4"<br />
diameter upper hole.<br />
4. Guide motor cable through rectangular<br />
hole on inside support assembly.<br />
5. Slide inside support assembly over outside<br />
assembly, lining up top and bottom screw<br />
guides with holes in door. Secure both<br />
assemblies with (2) 10-32 x 2-1/2" flat head<br />
machine screws. Do not over-tighten.<br />
6. Attach motor cable connector to the<br />
inside escutcheon PC board header<br />
marked “MOTOR.”<br />
7. Attach the touchscreen cable connector to<br />
the inside escutcheon PC board header<br />
as illustrated.<br />
8. Select EASY or ADVANCED Mode using the<br />
switch on the back of the PC board.<br />
7<br />
© ARROW <strong>Lock</strong> & Door Hardware • 80-9150-0066-010 Rev C
Directions, Continued<br />
9. Slide inside escutcheon over inside<br />
support assembly.<br />
CAUTION:<br />
a. Position motor cable against inside<br />
support assembly. Avoid pinching wires<br />
against the steel shank of the assembly.<br />
b. “Z” fold touchscreen wire cable and lay<br />
against the back recessed area of<br />
the escutcheon assembly. Position and<br />
bend wires to prevent binding when<br />
installing the escutcheon over the<br />
support assembly.<br />
10. Install and secure the 10-32 x 3/4" pan<br />
head screw through the center of the<br />
battery housing into the barrel nut of<br />
the outside assembly.<br />
11. Slide on inside lever and push in to attach.<br />
12. Insert four (4) AA alkaline batteries. The<br />
lock responds, “Welcome to the <strong>Arrow</strong><br />
Digital World.”<br />
Note: Refer to programming instructions prior to<br />
completion of step 13.<br />
13. Install battery cover and tighten hex head<br />
screw with Allen wrench provided with lock.<br />
HARDWARE TROUBLESHOOTING<br />
Test the Operation of the <strong>Lock</strong>set<br />
Cycle the lock in both the locked and the unlocked positions. If problems are found:<br />
Door is binding<br />
Symptom<br />
Suggested Action<br />
a.Check that door and frame are properly aligned and door is free swinging.<br />
b. Check hinges: They should not be loose or have excessive wear on knuckles.<br />
Latchbolt will not deadlock<br />
Latchbolt does not retract or extend properly<br />
a. Either strike is out of alignment or the gap between the door and jamb is too great.<br />
Realign strike or shim strike out towards flat area of latchbolt.<br />
Latchbolt tail and retractor are not properly positioned:<br />
a. Remove lockset. Look though 2-1/8" hole and verify latchbolt tail is centered<br />
between top and bottom of hole.<br />
b. Remove latchbolt and insert lockset. Look though latchbolt hole and verify retractor<br />
mouth centered in hole. If not, adjust outside rose plate.<br />
c. If necessary, rebore holes to line up retractor and tail.<br />
© ARROW <strong>Lock</strong> & Door Hardware • 80-9150-0066-010 Rev C<br />
8
PROGRAMMING<br />
Programming Features-Menus-Keys-Definitions................................................ 9-11<br />
Operating Modes.............................................................................................. 12-16<br />
Easy Mode................................................................................................ 12-13<br />
Advanced Mode........................................................................................ 14-16<br />
Miscellaneous Information......................................................................................17<br />
Programming Troubleshooting................................................................................18<br />
Sample Pin Code Management Sheets..................................................................19<br />
PROGRAMMING FEATURES - MENUS - KEYS - DEFINITIONS<br />
Outside Inside<br />
Numbers<br />
" P " Key<br />
(Reurn to Previous)<br />
Touchscreen<br />
HEX Screw<br />
Battery Cover<br />
" I " Button<br />
Low<br />
Battery<br />
<strong>Lock</strong>out<br />
Mode<br />
Passage Mode<br />
Cylinder<br />
Speaker<br />
4 AA<br />
Alkaline<br />
Batteries<br />
Status LED<br />
9 Volt<br />
Emergency Power<br />
Supply Terminal<br />
9 Volt Batteries Purchased Separately<br />
© ARROW <strong>Lock</strong> & Door Hardware • 80-9150-0066-010 Rev C<br />
9
Menu and Icons<br />
~<br />
Touch the screen with palm of hand or<br />
fingers to begin and end actions.<br />
Enter Master PIN code (6 digits in length).<br />
Advanced Mode only. Factory default: 123456.<br />
Click the indicated number. S Enter Supervisor PIN code. Can be 4-12 digits<br />
in length. Factory default: 1234567890.<br />
Press the Star key on the touchscreen to<br />
Enter or Accept entry.<br />
Press the Pound key on the touchscreen to<br />
enter Menu mode.<br />
Press this key to return to the previous<br />
step or menu setting.<br />
M<br />
U<br />
Enter User PIN. Can be 4-12 digits in length.<br />
Supervisor Serial Number (00 - 19).<br />
Advanced Mode only.<br />
User Serial Number (01 - 49).<br />
Advanced mode only.<br />
Repeat operation using settings indicated.<br />
The I-Button is located under the battery<br />
cover. Remove battery cover for access .<br />
Slide the batter cover up and off.<br />
Enter value 1 - 10 (times or seconds).<br />
Enter value 1 - 255 (seconds).<br />
Voice guide.<br />
1 Low Battery 2 Passage Mode 3 <strong>Lock</strong>out Mode 4 Return to Previous Step 5 <strong>Lock</strong> and Unlock - Audio and Visual<br />
Definitions<br />
Advanced Mode: See "Advanced Mode" on page 14.<br />
All Code <strong>Lock</strong>out: Advanced mode only. This feature is enabled only by the Master code.<br />
When enabled, it restricts all user PIN code access. When the unit is in <strong>Lock</strong>out, the<br />
red locked padlock will appear on the screen.<br />
Easy Mode: See "Easy Mode" on page 12.<br />
Emergency Power Supply: 9V battery connections are located under the front of the<br />
outside escutcheon. In the case that the 4 AA alkaline batteries are completely discharged,<br />
a 9V battery can be used to supply power to the lock. While connecting the<br />
9V battery, the lock can be operated as normal, thus granting access so the 4 AA<br />
alkaline batteries can be replaced.<br />
Group <strong>Lock</strong>out: Advanced mode only. This feature can be enabled by either the Master<br />
code or the Supervisor code. If Group <strong>Lock</strong>out is enabled through the Master code,<br />
specific Supervisors and their entire group of Users will be locked out. If Group <strong>Lock</strong>out<br />
is enabled through the Supervisor code, only Users corresponding to that Supervisor<br />
are locked out.<br />
10<br />
© ARROW <strong>Lock</strong> & Door Hardware • 80-9150-0066-010 Rev C
Definitions<br />
I-Button: Easy mode only. Located under the battery cover, the “I” button is used for<br />
changing the default Supervisor code and can be used for programming.<br />
Low Battery: When battery power is low, the low battery icon will begin blinking. If battery<br />
power is completely lost, the emergency power supply can be used.<br />
Operating Modes: Revolution features the choice of Easy or Advanced operating modes.<br />
The desired operating mode should be determined before the completion of lock installation,<br />
but can be changed at a later time if required.<br />
Passage Mode: Easy and Advanced mode. Enabling Passage mode allows continuous<br />
entry for non-restricted traffic. Passage mode is enabled or disabled through feature<br />
programming by either the Master or Supervisor code. When the unit is in Passage<br />
Mode, the green unlocked padlock will appear on the screen.<br />
Master Code: Advanced mode only. The Master code is used for programming Supervisor<br />
codes and also for feature settings. The Master code will not operate the lock.<br />
Re-lock Time: After successful code entry and the unit unlocks, it will automatically relock<br />
after a default of five (5) seconds. Re-lock time is adjustable from one (1) to ten (10)<br />
seconds in Advanced mode only through feature settings.<br />
Shut Down Time: The unit will shut down for a default of one hundred and eighty (180) seconds<br />
and not allow operation after the wrong code entry limit has been met. Shut down<br />
time is adjustable from one (1) to two hundred and fifty-five (255) seconds in Advanced<br />
mode only through feature settings. When the unit is in Shut Down, the red locked padlock<br />
icon will be flashing.<br />
Silent Mode: Easy and Advanced mode. Enabling Silent mode shuts off the code confirmation<br />
tone playback for use in quiet areas. Silent mode is enabled or disabled through<br />
feature programming by either the Master or Supervisor code.<br />
Status LED: Located on inside escutcheon. Flashes green to indicate lock in Passage<br />
mode.<br />
Supervisor Code: Easy and Advanced mode. The Supervisor code is used for programming<br />
User codes and also for feature settings. The Supervisor code will operate the<br />
lock.<br />
User Code: Easy and Advanced mode. The User code is used for operating the lock.<br />
User <strong>Lock</strong>out: Advanced mode only. This feature can be enabled only by the Supervisor<br />
code. When enabled, it restricts User PIN code access only for specified User numbers<br />
corresponding to that Supervisor.<br />
Wrong Code Entry Limit: After a default of five (5) unsuccessful attempts at entering a valid<br />
PIN code the unit will shut down and not allow operation. Wrong code entry limit is adjustable<br />
from one (1) to ten (10) times in Advanced mode only through feature settings.<br />
11<br />
© ARROW <strong>Lock</strong> & Door Hardware • 80-9150-0066-010 Rev C
Easy Mode<br />
OPERATING MODES<br />
Provides a simple, easy-to-use system for general use. In Easy mode, a total of 9 PIN<br />
codes are available for access. Code assignments consist of one (1) Supervisor code<br />
and eight (8) User codes.<br />
Supervisor<br />
User 1<br />
User 2<br />
User 3<br />
User 4<br />
User 5<br />
User 6<br />
User 7<br />
User 8<br />
• Initial programming is performed by the use of the button<br />
(located under the battery cover of the inside escutcheon)<br />
and voice guided instruction. Subsequent changes to<br />
programming can be performed through the touchscreen by<br />
the use of the Supervisor code.<br />
• While in Easy mode, the lock can be programmed for<br />
Passage mode, Silent mode or alternate Language settings.<br />
Auto Re-lock time, wrong code entry limits and shut down<br />
times are not adjustable and will remain as factory default.<br />
• Note: After initial set-up, individual User PIN codes can not<br />
be added to or deleted from programming. Upon entering<br />
the Register/Change user code function, ALL existing User<br />
codes are deleted and must be re-entered if needed.<br />
• The operating mode can be changed from Easy to Advanced<br />
or visa versa for any lock. Changing the mode resets the<br />
lock to factory defaults and all prior programming and PIN<br />
codes will be lost. See page 17 for more information.<br />
Feature Supervisor User<br />
Settings<br />
Factory Defaults<br />
Entrance Authorization x x<br />
Supervisor Code 1234567890<br />
Register/Change User Code<br />
x<br />
Passage Mode<br />
Disabled<br />
Set Passage Mode<br />
x<br />
Silent Mode<br />
Disabled<br />
Set Silent Mode<br />
x<br />
Re-lock Time<br />
5 Seconds<br />
Set Language Setting Mode<br />
x<br />
Wrong Code Entry Limit<br />
5 Times<br />
Programming I-Button Touchscreen<br />
Set/Change Supervisor PIN<br />
x<br />
Set/Change User PIN (1 - 8) x x<br />
Shut Down Time<br />
Language<br />
180 Seconds<br />
English<br />
Operation of <strong>Lock</strong><br />
Touch lock with palm<br />
of hand or fingers<br />
to activate.<br />
Enter PIN code. Palm or touch the key<br />
to confirm the selection.<br />
Turn lever to<br />
open door.<br />
12<br />
© ARROW <strong>Lock</strong> & Door Hardware • 80-9150-0066-010 Rev C
Register / Change PIN Codes (including Supervisor Code) through I-Button<br />
1<br />
2<br />
3<br />
4<br />
5<br />
Unscrew battery<br />
cover hex screw<br />
using tool<br />
provided. Slide<br />
battery cover up<br />
and off to reveal<br />
the button<br />
located above the<br />
batteries.<br />
Press the<br />
time.<br />
button one<br />
Enter the new Supervisor PIN<br />
code (4 to 12 digits), followed by<br />
the key.<br />
Enter the first User PIN code (4 -<br />
12 digits) followed by the key.<br />
Press the button<br />
to complete the<br />
process after the last<br />
playback sequence.<br />
<strong>Lock</strong> Response:<br />
“Register User code.<br />
Enter one Supervisor<br />
then up to 8 users.<br />
Enter a 4 to 12 digit<br />
PIN code, each followed<br />
by the key.<br />
Press the button<br />
to complete.”<br />
<strong>Lock</strong> Response: Sounds a tone for<br />
each PIN code digit with digits<br />
flashing in the sequence entered<br />
to confirm the entry. Chime signals<br />
when playback is complete.<br />
<strong>Lock</strong> Response: Sounds a tone for<br />
each PIN code digit with digits<br />
flashing in the sequence entered<br />
to confirm the entry. Chime signals<br />
when playback is complete.<br />
Continue to enter add User<br />
PIN codes (4 to 12 digits each)<br />
followed by the key. Up to<br />
eight User PIN codes can be<br />
entered.<br />
<strong>Lock</strong> Response:<br />
“Registered."<br />
1 2 3 4 5<br />
S<br />
U<br />
Feature Programming Through Menu Mode via Supervisor Code<br />
1 - 8<br />
1. Touch the screen with the<br />
palm of your hand or<br />
fingers to acitivate .<br />
2. Enter the 4-12 digit<br />
Supervisor PIN code<br />
followed by the key.<br />
<strong>Lock</strong> Response: “Menu<br />
mode, enter number, press<br />
the key to continue.”<br />
3. Enter digit corresponding<br />
to the function to be<br />
performed followed by the<br />
key.<br />
Follow the verbal commands.<br />
4. Press the key to complete<br />
the process and conclude the<br />
programming session.<br />
1 2 3 4<br />
U<br />
S<br />
Register User Code<br />
Passage Mode<br />
Silent Mode<br />
Language Setting Mode<br />
Note: When registering User codes, the code<br />
must be entered with in 20 seconds. If time<br />
expires, no codes are registered and the process<br />
must be re-started.<br />
Enable<br />
Disable<br />
Enable<br />
Disable<br />
English<br />
Spanish<br />
French<br />
1 - 8<br />
13<br />
© ARROW <strong>Lock</strong> & Door Hardware • 80-9150-0066-010 Rev C
Advanced Mode<br />
Provides a 3-tier PIN code system for commercial use. In Advanced mode, a total of<br />
1,000 PIN codes are available for access. The 1,000 PIN codes are divided into twenty<br />
(20) Supervisor groups of fifty (50) User codes per group.<br />
Advanced mode also has a Master code which is used only for programming and does<br />
not grant access.<br />
00<br />
Master<br />
Supervisor 04 Supervisor 09 Supervisor 19 Supervisor<br />
01 User<br />
01 User<br />
01 User<br />
02 User<br />
02 User<br />
02 User<br />
03 User<br />
03 User<br />
03 User<br />
48 User<br />
48 User<br />
48 User<br />
49 User<br />
49 User<br />
49 User<br />
• All programming is performed through the<br />
touchscreen using the Master or Supervisor<br />
code and voice guided prompts. Only the<br />
Supervisor code can establish User codes.<br />
• While in Advanced mode, the lock can be<br />
programmed for Passage mode, Silent mode,<br />
<strong>Lock</strong>out mode or alternate Language settings.<br />
Auto re-lock time, wrong code entry limits<br />
and shut down times are adjustable can be<br />
changed from factory default.<br />
• The operating mode can be changed from<br />
Advanced to Easy or visa versa for any lock.<br />
Changing the mode resets the lock to factory<br />
defaults and all prior programming and PIN<br />
codes will be lost. See page 17 for<br />
more information.<br />
Settings Master Supervisor User<br />
Settings<br />
Factory Defaults<br />
Entrance Authorization x x<br />
Master Code 123456<br />
Register/Change Master Code<br />
x<br />
Register/Change/Delete Supervisor Code x<br />
Register/Change/Delete User Code<br />
x<br />
Set All Code <strong>Lock</strong>out Mode<br />
x<br />
Set Group <strong>Lock</strong>out Mode x x<br />
Set User <strong>Lock</strong>out Mode<br />
x<br />
Set Passage Mode x x<br />
Set Silent Mode x x<br />
Set Re-lock Time<br />
x<br />
Set Wrong Code Entry Limit<br />
x<br />
Set Shut Down Time<br />
x<br />
Set Language Setting Mode<br />
x<br />
<strong>Lock</strong>out Mode<br />
Passage Mode<br />
Silent Mode<br />
Re-lock Time<br />
Wrong Code Entry Limit<br />
Shut Down Time<br />
Language<br />
Disabled<br />
Disabled<br />
Disabled<br />
5 Seconds<br />
5 Times<br />
180 Seconds<br />
English<br />
Operation of <strong>Lock</strong><br />
Touch lock with palm<br />
of hand or fingers<br />
to activate.<br />
Enter PIN code. Palm or touch the key<br />
to confirm the selection.<br />
Turn lever to<br />
open door.<br />
14<br />
© ARROW <strong>Lock</strong> & Door Hardware • 80-9150-0066-010 Rev C
Change Default Master Code Before Programming<br />
1. Touch the screen with the palm of your hand or fingers to activate .<br />
2. Enter the 6-digit default Master PIN code (123456) followed by the key.<br />
<strong>Lock</strong> Response: “Menu mode, enter number, press the key to continue.”<br />
3. Enter “1” followed by the key.<br />
4. Enter new 6-digit Master PIN code followed by the key.<br />
5. Press key to complete the process and conclude the programming session.<br />
Feature Programming Through Master Code<br />
1. Touch the screen with the palm of your hand or fingers to acitivate .<br />
2. Enter the 6-digit Master PIN code followed by the key.<br />
<strong>Lock</strong> Response: “Menu mode, enter number, press the key to continue.”<br />
3. Enter digit corresponding to the function to be performed followed by the key.<br />
Follow the verbal commands.<br />
4. Press the key to complete the process and conclude the programming session.<br />
1 2 3 4<br />
M<br />
Register Master Code<br />
M<br />
Register Supervisor Code<br />
Register<br />
S<br />
Delete<br />
00-19<br />
All Code <strong>Lock</strong>out Mode<br />
Enable<br />
Disable<br />
Group <strong>Lock</strong>out Mode<br />
Passage Mode<br />
Enable<br />
Disable<br />
Enable<br />
00-19<br />
00-19<br />
Disable<br />
Silent Mode<br />
Enable<br />
Disable<br />
<strong>Lock</strong> Setting Mode<br />
Re-lock Time<br />
Wrong Code Entry Limit<br />
Shut Down Time<br />
Language Setting Mode<br />
English<br />
Spanish<br />
French<br />
15<br />
© ARROW <strong>Lock</strong> & Door Hardware • 80-9150-0066-010 Rev C
Set Up Supervisor Codes<br />
1. Touch the screen with the palm of your hand or fingers to acitivate .<br />
2. Enter the 6-digit Master PIN code followed by the key.<br />
<strong>Lock</strong> Response: “Menu mode, enter number, press the key to continue.”<br />
3. Enter "2" followed by the key.<br />
4. Enter "1" followed by the key.<br />
5. Enter the Supervisor number to register (00-19) followed by the key.<br />
6. Enter a 4-12 digit PIN code for the Supervisor number followed by the key.<br />
7. Press the key to complete the process and conclude the programming session.<br />
Feature Programming Through Supervisor Code<br />
1. Touch the screen with the palm of your hand or fingers to activate.<br />
2. Enter the 4-12 digit Supervisor PIN code followed by the key.<br />
<strong>Lock</strong> Response: "Menu mode, enter number, press the<br />
1 2 3 4<br />
U<br />
S<br />
Register User Code<br />
Register<br />
Delete<br />
key to continue."<br />
3. Enter digit corresponding to the function to be performed followed by the key.<br />
Follow the verbal commands.<br />
4. Press the key to complete the process and conclude the programming session.<br />
01-49<br />
Group User <strong>Lock</strong>out Mode<br />
Enable<br />
Disable<br />
User Code <strong>Lock</strong>out Mode<br />
Passage Mode<br />
Enable<br />
Disable<br />
Enable<br />
01-49<br />
01-49<br />
Disable<br />
Silent Mode<br />
Enable<br />
Disable<br />
To Set Up User Codes<br />
User Codes can only be programmed through Supervisor Code.<br />
1. Touch the screen with the palm of your hand or fingers to acitivate .<br />
2. Enter the 4-12 digit Supervisor PIN code followed by the key.<br />
<strong>Lock</strong> Response: “Menu mode, enter number, press the key to continue.”<br />
3. Enter "1" followed by the key.<br />
4. Enter "1" again, followed by the key.<br />
5. Enter the User number to be registered (01-49) followed by the key.<br />
6. Enter a 4-12 digit PIN code for the User number followed by the key.<br />
7. Press the key to complete the process and conclude the programming session.<br />
16<br />
© ARROW <strong>Lock</strong> & Door Hardware • 80-9150-0066-010 Rev C
MISCELLANEOUS INFORMATION<br />
To Change Operating Modes<br />
Note: Changing the operating mode from<br />
Easy to Advanced or vice versa deletes all<br />
prior programming.<br />
The outside assembly remains assembled.<br />
1. Remove inside lever.<br />
2. Remove battery cover using Allen<br />
wrench provided with lock.<br />
3. Remove four (4) AA alkaline batteries.<br />
4. Remove the 10-32 x 3/4" pan head<br />
screw from the center of the battery<br />
housing into the barrel nut of the<br />
outside assembly.<br />
5. Remove inside escutcheon.<br />
6. On the back of the PC board, change<br />
the position of the EASY/ADVANCED switch.<br />
To reassemble the lock, refer to steps<br />
9 through 13 on page 8.<br />
EASY<br />
ADVANCED<br />
6 Easy / Advanced Setting<br />
EXT-PWR / REMOTE / MOTOR<br />
EXT-PWR / REMOTE / MOTOR<br />
To Return <strong>Lock</strong> to Programming Defaults<br />
To return the lock to programming defaults without changing the operating mode:<br />
1 - 6. Follow steps 1 through 6 (above).<br />
7. Insert the four (4) AA alkaline batteries.<br />
The lock responds, "Welcome to the <strong>Arrow</strong> Digital World."<br />
8. Remove the batteries.<br />
9. Change the position of the EASY/ADVANCED switch to original state.<br />
10. Reassemble the lock by referring to steps 9 through 13 on page 8.<br />
All programming should be returned to factory defaults.<br />
Emergency Power Suppy and Battery Replacement<br />
9V battery connections are located under the front of the outside<br />
escutcheon. In the case that the 4 AA alkaline batteries are<br />
completely discharged, a 9V battery can be used to supply<br />
power to the lock. While connecting the 9V battery, the<br />
lock can be operated as normal, thus granting access<br />
so the 4 AA alkaline batteries can be replaced.<br />
Discharged batteries should be replaced right away.<br />
17<br />
© ARROW <strong>Lock</strong> & Door Hardware • 80-9150-0066-010 Rev C
TROUBLESHOOTING<br />
Symptom<br />
<strong>Lock</strong> does not respond – door is open<br />
and accessible.<br />
<strong>Lock</strong> does not respond – door is locked<br />
and inaccessible.<br />
The unit is on for a while, and then<br />
shows no reaction. Lights dim.<br />
Suggested Action<br />
• The touchscreen will become active when pressed with the palm or fingers in at least<br />
3 areas simultaneously.<br />
• Use a larger area of the palm or fingers and verify contact with at least 3 areas.<br />
• If touchscreen numbers are visible, check to see if they respond when pressed.<br />
• Check batteries are installed and oriented correctly in the battery case.<br />
• Check batteries are in good condition; replace batteries if discharged (page 17).<br />
• Check to see if touchscreen cable is properly connected and not pinched (page 7).<br />
• Batteries may be completely discharged.<br />
• Use mechanical key to gain entry and replace batteries.<br />
• Connect a 9-volt battery to the emergency power supply terminal which is<br />
located on the outside escutcheon, under the lever. With the 9-volt battery connected,<br />
palm the touchscreen, enter PIN code, and palm touchscreen<br />
again (page 17). Replace batteries.<br />
• The batteries do not have enough power. Replace the batteries.<br />
Unit chimes to indicate code acceptance,<br />
but the door will not open.<br />
Unit operates to allow access, but will<br />
not automatically re-lock.<br />
• Check to see if there is another locking device on the door (i.e. deadbolt).<br />
• Check the door gaps for any foreign objects between door and frame.<br />
• Check that the motor cable is firmly connected to the PC board header marked<br />
“MOTOR” (page 7).<br />
• Check to see if Passage Mode is enabled (pages 15-16).<br />
• If the Passage Mode icon on the touchscreen and the status indicator on the<br />
• interior escutcheon flicker for several seconds, it is set at Passage Mode<br />
(page 9). Disable Passage Mode to lock the door.<br />
• If low battery indicator is lit (page 10), change batteries.<br />
PIN codes will not register. • PIN codes must consist of 4 to 12 digits to register.<br />
Upon entering a PIN code and pressing<br />
the star (*) key, the unit displays and<br />
“invalid code” error or the lock times<br />
out without responding.<br />
• The same PIN code cannot be used for multiple users.<br />
• In Advanced Mode, registration/management of PIN codes is set at the authority of<br />
Master and/or Supervisor.<br />
• Contact the Master or Supervisor.<br />
• In Advanced mode, the Master PIN code does not unlock the door.<br />
• In Easy Mode, User codes must be entered within 20 seconds (while the touchscreen<br />
is active) or the process will have to be restarted.<br />
• In Easy Mode, the Supervisor PIN code can only be registered using the I-Button.<br />
• The star (*) or pound (#) can not be used as part of the PIN code.<br />
• Either All Code, Group or User <strong>Lock</strong>out Mode is enabled (15-16).<br />
• Only the Master or Supervisor can enable <strong>Lock</strong>out Mode.<br />
• Contact the Master user or Supervisor.<br />
Upon entering a PIN code and pressing<br />
the (*) key, the red padlock icon appears<br />
and there are different tones.<br />
The unit operates, but it makes<br />
no sound.<br />
• Check to see if either you or your group is set at <strong>Lock</strong>out Mode.<br />
• Setting/managing <strong>Lock</strong>out Mode is up to Master and Supervisor.<br />
Contact the Master user or Supervisor.<br />
• Check to see if Silent Mode is enabled (page 13, 15).<br />
The unit responds “Low Battery” • This is the voice alarm alerting that it is time to replace the batteries. Replace all<br />
four (4) batteries with new AA Alkaline batteries.<br />
Upon entering a PIN code and pressing<br />
the star (*) key, the unit responds<br />
“Wrong digit numbers.”<br />
• The digits entered were incorrect or incomplete. Re-enter the code.<br />
18<br />
© ARROW <strong>Lock</strong> & Door Hardware • 80-9150-0066-010 Rev C
PIN CODE MANAGEMENT SAMPLE SHEETS<br />
Door Number:<br />
Supervisor<br />
Easy Mode PIN Code Management<br />
Door Number:<br />
Name PIN Number User Name PIN Number<br />
Supervisor<br />
User 1 User 1<br />
User 2 User 2<br />
User 3 User 3<br />
User 4 User 4<br />
User 5 User 5<br />
User 6 User 6<br />
User 7 User 7<br />
User 8 User 8<br />
Advanced Mode PIN Code Management<br />
Location: Door Number: User User Name Group # User # PIN Code<br />
User Type User Name Group # User # PIN Code User 24<br />
Master User 25<br />
Supervisor User 26<br />
User 01 User 27<br />
User 02 User 28<br />
User 03 User 29<br />
User 04 User 30<br />
User 05 User 31<br />
User 06 User 32<br />
User 07 User 33<br />
User 08 User 34<br />
User 09 User 35<br />
User 10 User 36<br />
User 11 User 37<br />
User 12 User 38<br />
User 13 User 39<br />
User 14 User 40<br />
User 15 User 41<br />
User 16 User 42<br />
User 17 User 43<br />
User 18 User 44<br />
User 19 User 45<br />
User 20 User 46<br />
User 21 User 47<br />
User 22 User 48<br />
User 23 User 49<br />
19<br />
© ARROW <strong>Lock</strong> & Door Hardware • 80-9150-0066-010 Rev C
ARROW USA<br />
100 <strong>Arrow</strong> Drive,<br />
New Haven,CT 06536-0915<br />
Phone: (800) 839-3157<br />
Fax: (800) 421-6615<br />
customer-service@assaabloyrss.com<br />
Orders & Customer Service:<br />
<strong>Arrow</strong> <strong>Lock</strong> & Door Hardware<br />
P.O. Box 3075<br />
Salem, VA 24153<br />
Phone USA: 800-839-3157<br />
Fax: 800-421-6615<br />
Phone Canada: 905-738-2466<br />
Fax: 905-738-2678<br />
Invoice Payments Only<br />
<strong>Arrow</strong> <strong>Lock</strong> Accounts Receivable<br />
P.O. Box 640711<br />
Pittsburgh, PA 15264<br />
Return Goods Only (RGA# Required)<br />
<strong>Arrow</strong> <strong>Lock</strong> & Door Hardware<br />
100 <strong>Arrow</strong> <strong>Lock</strong> Drive<br />
New Haven, CT 06511<br />
<strong>Arrow</strong> Architectural Hardware<br />
ARROW® is a registered trademark of Arrrow Architectural Hardware, an ASSA ABLOY Group company.<br />
Revolution is a trademark of Arrrow Architectural Hardware, an ASSA ABLOY Group company.<br />
Other products’ brand names may be trademarks or registered trademarks of their respective owners and are mentioned<br />
for reference purposes only. These materials are protected under U.S. copyright laws.<br />
All contents current at time of publication.<br />
<strong>Arrow</strong> Architectural Hardware., an ASSA ABLOY Group company, reserves the right to change availability<br />
of any item in this catalog, its design, construction, and/or its materials.<br />
Copyright © 2009, <strong>Arrow</strong> Architectural Hardware, an ASSA ABLOY Group company. All rights reserved.<br />
Reproduction in whole or in part without the express written permission of <strong>Arrow</strong> Architectural Hardware is prohibited.<br />
© ARROW <strong>Lock</strong> & Door Hardware • 80-9150-0066-010 Rev C