Billing Analysis Tool Installation Instructions
Billing Analysis Tool Installation Instructions
Billing Analysis Tool Installation Instructions

Create successful ePaper yourself
Turn your PDF publications into a flip-book with our unique Google optimized e-Paper software.
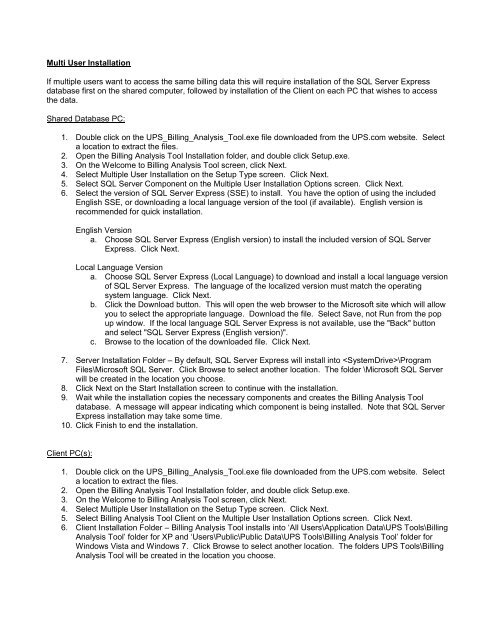
Multi User <strong>Installation</strong><br />
If multiple users want to access the same billing data this will require installation of the SQL Server Express<br />
database first on the shared computer, followed by installation of the Client on each PC that wishes to access<br />
the data.<br />
Shared Database PC:<br />
1. Double click on the UPS_<strong>Billing</strong>_<strong>Analysis</strong>_<strong>Tool</strong>.exe file downloaded from the UPS.com website. Select<br />
a location to extract the files.<br />
2. Open the <strong>Billing</strong> <strong>Analysis</strong> <strong>Tool</strong> <strong>Installation</strong> folder, and double click Setup.exe.<br />
3. On the Welcome to <strong>Billing</strong> <strong>Analysis</strong> <strong>Tool</strong> screen, click Next.<br />
4. Select Multiple User <strong>Installation</strong> on the Setup Type screen. Click Next.<br />
5. Select SQL Server Component on the Multiple User <strong>Installation</strong> Options screen. Click Next.<br />
6. Select the version of SQL Server Express (SSE) to install. You have the option of using the included<br />
English SSE, or downloading a local language version of the tool (if available). English version is<br />
recommended for quick installation.<br />
English Version<br />
a. Choose SQL Server Express (English version) to install the included version of SQL Server<br />
Express. Click Next.<br />
Local Language Version<br />
a. Choose SQL Server Express (Local Language) to download and install a local language version<br />
of SQL Server Express. The language of the localized version must match the operating<br />
system language. Click Next.<br />
b. Click the Download button. This will open the web browser to the Microsoft site which will allow<br />
you to select the appropriate language. Download the file. Select Save, not Run from the pop<br />
up window. If the local language SQL Server Express is not available, use the "Back" button<br />
and select "SQL Server Express (English version)".<br />
c. Browse to the location of the downloaded file. Click Next.<br />
7. Server <strong>Installation</strong> Folder – By default, SQL Server Express will install into \Program<br />
Files\Microsoft SQL Server. Click Browse to select another location. The folder \Microsoft SQL Server<br />
will be created in the location you choose.<br />
8. Click Next on the Start <strong>Installation</strong> screen to continue with the installation.<br />
9. Wait while the installation copies the necessary components and creates the <strong>Billing</strong> <strong>Analysis</strong> <strong>Tool</strong><br />
database. A message will appear indicating which component is being installed. Note that SQL Server<br />
Express installation may take some time.<br />
10. Click Finish to end the installation.<br />
Client PC(s):<br />
1. Double click on the UPS_<strong>Billing</strong>_<strong>Analysis</strong>_<strong>Tool</strong>.exe file downloaded from the UPS.com website. Select<br />
a location to extract the files.<br />
2. Open the <strong>Billing</strong> <strong>Analysis</strong> <strong>Tool</strong> <strong>Installation</strong> folder, and double click Setup.exe.<br />
3. On the Welcome to <strong>Billing</strong> <strong>Analysis</strong> <strong>Tool</strong> screen, click Next.<br />
4. Select Multiple User <strong>Installation</strong> on the Setup Type screen. Click Next.<br />
5. Select <strong>Billing</strong> <strong>Analysis</strong> <strong>Tool</strong> Client on the Multiple User <strong>Installation</strong> Options screen. Click Next.<br />
6. Client <strong>Installation</strong> Folder – <strong>Billing</strong> <strong>Analysis</strong> <strong>Tool</strong> installs into ‘All Users\Application Data\UPS <strong>Tool</strong>s\<strong>Billing</strong><br />
<strong>Analysis</strong> <strong>Tool</strong>’ folder for XP and ‘Users\Public\Public Data\UPS <strong>Tool</strong>s\<strong>Billing</strong> <strong>Analysis</strong> <strong>Tool</strong>’ folder for<br />
Windows Vista and Windows 7. Click Browse to select another location. The folders UPS <strong>Tool</strong>s\<strong>Billing</strong><br />
<strong>Analysis</strong> <strong>Tool</strong> will be created in the location you choose.