The National Locksmith (PDF)
The National Locksmith (PDF)
The National Locksmith (PDF)

Create successful ePaper yourself
Turn your PDF publications into a flip-book with our unique Google optimized e-Paper software.
1Touch<br />
In<br />
recent years I have written<br />
articles about a variety<br />
of different electronic<br />
locking devices. Most have been<br />
about locks with key pad entry and<br />
a few with card readers. This is the<br />
first time I have had the opportunity<br />
to get my hands on a biometric<br />
lock that uses fingerprint access.<br />
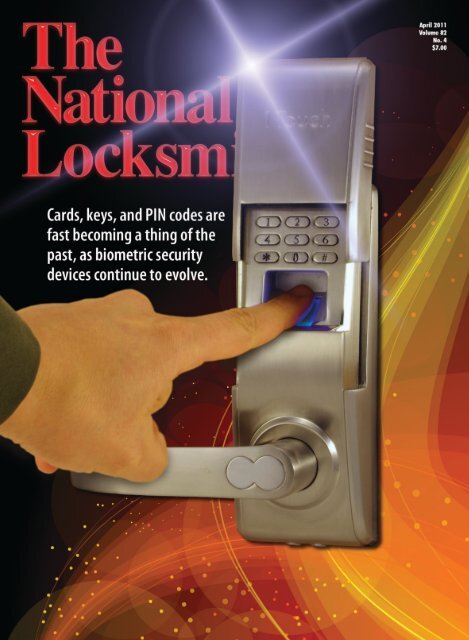
<strong>The</strong> 1TouchIQ2 (photo 1) features<br />
the latest high resolution optical<br />
sensor fingerprint recognition<br />
technology. It has a slide cover<br />
(photo 2) that not only protects the<br />
scanner from the elements, but<br />
sliding the cover up also wakes<br />
the unit to allow a user to place a<br />
finger on the scanner to unlock or<br />
use a numeric code.<br />
<strong>The</strong> US distributor for the<br />
1TouchIQ2 is Ohio based Intelligent<br />
Biometric Controls. This<br />
lock utilizes a high-performance<br />
algorithm to capture and identify<br />
each user’s biometric template<br />
data. <strong>The</strong> unit does not store the<br />
actual fingerprint, but instead it<br />
uses what is referred to as minutiae<br />
point extraction and converts<br />
the data into an encrypted<br />
mathematical string. This data<br />
cannot be removed from the<br />
1TouchIQ2 unit to recreate a<br />
copy of your fingerprint.<br />
<strong>The</strong> 1TouchIQ2 can replace<br />
your existing door handle lock in<br />
a standard door prep. It is easily<br />
installed and does not require<br />
any additional holes beyond the<br />
existing cross bore hole. <strong>The</strong><br />
lock is packaged with both a 2<br />
3/8 inch and 2 ¾ inch backset<br />
latch. It is available in three<br />
finishes: Polished Brass, Antique<br />
Brass and Brushed Nickel. I have<br />
been told that the handing of the<br />
lock is not field changeable, so<br />
you should verify the handing of<br />
the door where the installation<br />
will take place. It uses an ADA<br />
compliant lever handle. <strong>The</strong> all<br />
weather design boasts an operating<br />
temperature range of -29 to<br />
140 degrees Fahrenheit.<br />
Fingerprint<br />
Lock<br />
Lock Installation<br />
<strong>The</strong> 1TouchIQ2 lock can be<br />
installed in a standard 2 3/8 or 2<br />
¾ inch backset door prep without<br />
the need for drilling additional<br />
holes. <strong>The</strong> only real complication<br />
you might find is the high profile<br />
of the unit interfering with an<br />
existing deadbolt lock above the<br />
previous handle.<br />
Like many electronic locksets,<br />
the 1TouchIQ2 has a rather tall<br />
profile. It isn’t a problem where<br />
you are replacing a handle lock<br />
on a door with no existing deadbolt.<br />
Most doors with installed<br />
deadbolts will usually have the<br />
two locks in fairly close proximity<br />
to each other. Unless the deadbolt<br />
was intentionally installed<br />
rather high above the handle<br />
lock, you will likely contend with<br />
the need to move or remove the<br />
deadbolt (and plug the hole).<br />
That being dealt with, let’s get to<br />
the actual installation.<br />
<strong>The</strong> “brains” of the lock are<br />
contained in the front lock body<br />
(photo 3). If you need to reset<br />
the lock to factory default settings,<br />
you will need to remove<br />
the front lock body from the door<br />
to access the reset button (photo<br />
1 2 3<br />
Reprinted from THE NATIONAL LOCKSMITH April and May 2011
4 5 6<br />
7<br />
8<br />
9<br />
10 11 12<br />
4). <strong>The</strong> reset process will be explained<br />
later when I discuss that<br />
and other programming features.<br />
<strong>The</strong> lock includes both a 2 3/8<br />
and 2 ¾ inch backset latch. Your<br />
first step will be to install the correct<br />
latch for the backset of your<br />
door. <strong>The</strong> display mount had a 2 ¾<br />
inch backset (photo 5). A rubber<br />
grommet/gasket is used on each<br />
side of the door and positioned<br />
behind the front and back lock<br />
bodies. With the rubber gasket in<br />
place for the front body, position the<br />
power cable through the cross bore<br />
hole (photo 6). Another rubber<br />
gasket will be placed on the inside<br />
of the door (photo 7), to be placed<br />
beneath the back body. <strong>The</strong> power<br />
cable fits through an opening in<br />
the back lock body (photo 8) and<br />
should be positioned to connect<br />
to the battery pack. <strong>The</strong> plug end<br />
of the cable looks like it should<br />
connect to a 9 volt battery, but it<br />
connects to the battery pack which<br />
uses four AA batteries. I used rechargeable<br />
batteries for demonstration<br />
purposes, but you should use<br />
alkaline batteries for longer life and<br />
less frequent battery changing.<br />
Only two mounting screws<br />
are required (photo 9) to attach<br />
the back body. Tighten most<br />
of the way (photo 10) and then<br />
make sure both front and back<br />
lock bodies are straight before<br />
fully tightening the screws. <strong>The</strong><br />
inside handle is part of the back<br />
body so you will need to position<br />
the back body cover around the<br />
handle (photo 11) to cover the<br />
battery pack. A plastic washer is<br />
set in place (photo 12) before attaching<br />
the bezel nut (photo 13).<br />
After you hand tighten the<br />
bezel nut, you can snug it down<br />
properly with a special included<br />
bezel wrench (photo 14). It has<br />
two protruding pins that connect<br />
to matching holes in the bezel<br />
nut (photo 15). <strong>The</strong> wrench<br />
grips the bezel nut (photo 16)<br />
to tighten it or to later loosen it<br />
when it needs to be removed.<br />
Lock Operation<br />
and Programming<br />
<strong>The</strong> 1TouchIQ2 lock is primarily<br />
designed to unlock with<br />
a person’s fingerprint. It has two<br />
other alternate means of entry,<br />
but it is intended to operate by<br />
the one key that you will likely<br />
never lose or forget somewhere.<br />
Under the slide cover is a finger-<br />
Reprinted from THE NATIONAL LOCKSMITH April and May 2011
print scanner not much larger<br />
than a postage stamp (photo 17).<br />
You will also see a key pad with<br />
less than a full set of numbered<br />
keys. <strong>The</strong> available digits run<br />
from 0 to 6. That means that you<br />
can’t use the digits: 7, 8 or 9 in<br />
any numeric code that you program.<br />
That also eliminates those<br />
digits from any three digit user<br />
code identification. That may<br />
sound like a shortcoming, but it<br />
really isn’t. If your intention is to<br />
use primarily numeric codes, you<br />
probably should be installing a<br />
different lock entirely.<br />
One of the primary benefits of<br />
a “keyless” lock is that you don’t<br />
need a physical key to carry and<br />
potentially forget or lose. That<br />
is one of the primary benefits of<br />
a lock that uses a key pad and<br />
numeric codes. <strong>The</strong> biggest<br />
disadvantage of numeric codes is<br />
that someone can take that “key”<br />
from you without you missing<br />
it. Someone who shouldn’t have<br />
access could learn the code and<br />
gain entry without physically<br />
taking a “key” from you. <strong>The</strong>refore<br />
this lock is most beneficial<br />
and secure the more greatly you<br />
rely on fingerprint access over<br />
keypad access.<br />
Like many electronic locks,<br />
the 1TouchIQ2 has a clutch<br />
device for the outer handle. <strong>The</strong><br />
handle pulls down freely when in<br />
the locked mode rather than the<br />
lever handle being rigid (photo<br />
18). Although the handle will<br />
move, the latch will not retract.<br />
You will also get this same result<br />
turning the handle under the<br />
following circumstances: entering<br />
a wrong numeric code or<br />
fingerprint, waiting too long to<br />
enter your code or fingerprint, or<br />
some kind of lock malfunction or<br />
power/battery issue.<br />
As long as the lock has battery<br />
power, the act of lifting the slide<br />
cover turns on the light of the<br />
fingerprint scanner (photo 19).<br />
This wakes the unit from sleep<br />
mode and allows you to either<br />
enter a numeric code or place<br />
13 14<br />
15 16<br />
a finger on the scanner (photo<br />
20). If an enrolled fingerprint or<br />
numeric code is entered, the unit<br />
will cause the turning motion of<br />
17 18<br />
19<br />
20<br />
the outside handle to draw in the<br />
latch (photo 21).<br />
<strong>The</strong> 1TouchIQ2 lock is available<br />
in two different configurations.<br />
<strong>The</strong> IQ-AT is the audit trail<br />
version of the lock which allows<br />
you to audit who accessed the<br />
lock (with the optional USB Audit<br />
Reprinted from THE NATIONAL LOCKSMITH April and May 2011
21<br />
Trail Kit). <strong>The</strong> IQ-AT will accommodate<br />
up to 36 fingerprint users<br />
and 78 pin number users. <strong>The</strong><br />
unit is audit capable but can be<br />
used without the audit trail kit. If<br />
you think you might need audit<br />
capability later, you can choose<br />
not use that feature until a later<br />
time. When you decide to set up<br />
for audit ability, you will need to<br />
program the date and time into<br />
the lock so you can accurately<br />
audit lock usage.<br />
<strong>The</strong> IQ-HC (indicating high<br />
capacity) is outwardly nearly<br />
identical to the IQ-AT except it<br />
can accommodate up to 75 fingerprint<br />
users and 78 pin number<br />
users. As a tradeoff for additional<br />
fingerprint capacity, you lose the<br />
ability to have audit capability.<br />
Other than that, operation and<br />
programming is nearly identical<br />
between the two versions.<br />
<strong>The</strong> 1TouchIQ2 is programmed<br />
externally through<br />
the keypad. Unlike some electronic<br />
locks, programming is not<br />
uploaded to the lock through<br />
outside equipment. Even if you<br />
chose not to program any numeric<br />
codes, you would need to<br />
use the keypad for lock programming.<br />
A default master code is<br />
programmed into all 1TouchIQ2<br />
locks. <strong>The</strong> default Master Code<br />
is: 11111111. Once you set your<br />
new master code, you will need it<br />
for any lock programming. If you<br />
choose to set a numeric code,<br />
you must make it eight digits<br />
also. All numeric codes must<br />
contain eight digits. To program<br />
the lock, you will press a series<br />
of keys on the keypad. <strong>The</strong> plus<br />
(+) sign does not refer to a key<br />
on the keypad, but separates the<br />
sequence of steps.<br />
As with lock operation, programming<br />
starts by lifting the<br />
slide cover and “waking” the unit.<br />
<strong>The</strong> fingerprint scanner will light<br />
up when the cover is lifted. If you<br />
wait too long between steps you<br />
will need to restart the process<br />
by lowering the cover and sliding<br />
it up again.<br />
To change the master code,<br />
press: 0 + * + DEFAULT MAS-<br />
TER CODE + NEW 8 DIGIT<br />
MASTER CODE + NEW 8 DIGIT<br />
MASTER CODE + #<br />
Note: When programming is<br />
successful, the lock will make a<br />
solid single beep. If the process<br />
is unsuccessful, it will make<br />
three quick beeps.<br />
<strong>The</strong>re are two ways to enroll<br />
fingerprint users. One is random,<br />
where no user ID’s are set. When<br />
programmed in this manner, you<br />
cannot remove individual fingerprints<br />
from access. If someone<br />
needs to be deleted from the<br />
system, you will need to delete<br />
all fingerprints and re-enroll<br />
from scratch again. <strong>The</strong> other<br />
method is to set user ID’s. With<br />
that method, every fingerprint<br />
is individually identified by a<br />
user ID, and you can individually<br />
delete ones that should no longer<br />
have access. <strong>The</strong> first method is<br />
probably faster, but it is a much<br />
bigger hassle if you need to<br />
remove access from someone<br />
whose fingerprint had been previously<br />
enrolled.<br />
To enroll fingerprint users at<br />
random (No User ID’s), press:<br />
1 + # + MASTER CODE + #. At<br />
this point, the scanner will light<br />
up. You will need to scan twice<br />
for each fingerprint enrolled. For<br />
the first scan, place the finger to<br />
be used on the scanner when it<br />
lights up and remove it when the<br />
light turns off. <strong>The</strong> light will turn<br />
on a second time and you repeat<br />
with the same finger to confirm.<br />
You will hear a single beep if that<br />
fingerprint enrollment succeeded.<br />
In random mode, you can<br />
continue to enroll other fingerprints<br />
as long you don’t let too<br />
much time pass between steps.<br />
<strong>The</strong>n you would need to start<br />
at the beginning of the process<br />
again. If a scan fails, you will hear<br />
three beeps and the scanner light<br />
goes off.<br />
To enroll fingerprint users<br />
with user ID’s, press: 1 + # +<br />
MASTER CODE + 3 DIGIT<br />
USER ID + #. You will scan the<br />
finger twice when the scanner<br />
lights as above, but additional<br />
enrollments will require starting<br />
the process again with a new 3<br />
digit user code.<br />
I mentioned earlier that you<br />
can also program numeric codes<br />
in addition to fingerprints. <strong>The</strong><br />
process is similar to enrolling<br />
fingerprints. You will still need<br />
to assign a user ID (so you can<br />
later delete the user code), but<br />
you will enroll a numeric code<br />
instead of a fingerprint. <strong>The</strong> keys<br />
pressed will also be different. To<br />
enroll a pass code user, press: 1<br />
+ * + MASTER CODE + 3 DIGIT<br />
ID + NEW 8 DIGIT PASS CODE<br />
+ NEW 8 DIGIT PASS CODE + #.<br />
Note that you can’t use the same<br />
three digit user ID for both a<br />
fingerprint and a pass code. <strong>The</strong>y<br />
must be unique and different.<br />
<strong>The</strong> process is similar to enrolling<br />
fingerprints, but the star (*)<br />
key is used instead of the pound<br />
(#) key at the start of the process.<br />
Confirmation of a pin code<br />
is also a single long beep, and<br />
three beeps also indicate failure.<br />
Like a number of other electronic<br />
locks, it is possible to put<br />
the 1TouchIQ2 into passage<br />
mode. This allows access with<br />
neither an enrolled fingerprint or<br />
pin code. It works different from<br />
some locks in passage mode,<br />
in that you can’t just walk up to<br />
the door and turn the handle to<br />
retract the latch. You won’t need<br />
to enter a fingerprint or pin code,<br />
but you will still need to lift the<br />
slide cover and turn the handle in<br />
the same amount of time the lock<br />
Reprinted from THE NATIONAL LOCKSMITH April and May 2011
stays open when a fingerprint or<br />
code is entered. That is roughly<br />
about five seconds. However, if<br />
you wait too long and it relocks,<br />
you only need to close the cover<br />
and slide it back up again to<br />
open. You may need to wait a few<br />
seconds after closing the cover<br />
before reopening it. To enable or<br />
disable passage mode, press: * +<br />
* + MASTER CODE + #. Doing<br />
this will toggle the unit back and<br />
forth from one condition to the<br />
other. If it is already in passage<br />
mode, doing this will set it back<br />
to regular operating mode and<br />
vice versa.<br />
I mentioned earlier that fingerprint<br />
users with user ID’s can<br />
be removed individually without<br />
affecting any other users. To delete<br />
a fingerprint user in this way,<br />
press: 2 + # + MASTER CODE +<br />
USERS 3 DIGIT ID + USERS 3<br />
DIGIT ID (again) + #. If you wish<br />
to delete ALL fingerprint users,<br />
you can do it all in one process.<br />
This deletes all fingerprint users,<br />
both those that have and don’t<br />
have user ID’s. To accomplish<br />
this, press: 3 + # + MASTER<br />
CODE + #.<br />
If you wish to delete individual<br />
pass codes, press: 2 + * + MAS-<br />
TER CODE + USERS 3 DIGIT ID<br />
+ USERS 3 DIGIT ID (again) + #.<br />
To delete ALL pass code users,<br />
press: 3 + * + MASTER CODE +<br />
#.<br />
In the first part of this article<br />
when I was describing the installation,<br />
I made reference to a reset<br />
button on the back surface of<br />
the front lock body. I have just<br />
described how to delete individual<br />
fingerprint and pin users,<br />
and also how to delete either all<br />
fingerprint users or all pin code<br />
users. If you decide that you want<br />
to restore the lock to factory<br />
settings, you can not only delete<br />
all users, but you can also restore<br />
the factory default master code.<br />
In order to do this, you will need<br />
to remove the lock from the door.<br />
With the back side of the front<br />
lock body in view, first make sure<br />
that the power cable is attached<br />
to the battery pack. Because the<br />
plug end of the cable will also<br />
attach to a 9 volt battery, you can<br />
use such a battery for resetting.<br />
Never use a 9 volt battery to power<br />
the lock for everyday use, but<br />
you can use it to reset to factory<br />
defaults. With power connected,<br />
press and hold the reset button.<br />
While holding the reset button<br />
down, use your other hand to lift<br />
the slide cover up. After about 15<br />
to 20 seconds, you should hear a<br />
long beep. That indicates that the<br />
lock has been reset. To verify this<br />
has been accomplished, slide the<br />
cover up and enter the default<br />
master code: 11111111. It should<br />
open the lock.<br />
Mechanical Key Bypass<br />
As with many keyless electronic<br />
locks, the 1TouchIQ2 has<br />
a mechanical bypass cylinder<br />
in case you lose power or have<br />
some other lock malfunction.<br />
When I first looked at this lock,<br />
I had no clue where this bypass<br />
cylinder was located. <strong>The</strong> keys<br />
to the cylinder (photo 22), bear<br />
22<br />
23<br />
a strong resemblance to Mul-T-<br />
Lock high security keys. Along<br />
with the keys, you get an interesting<br />
key ring magnet that will<br />
shortly be demonstrated. <strong>The</strong><br />
magnet sticks to the figure 8<br />
outline on the front surface of the<br />
outside lever handle (photo 23).<br />
Presto... and you remove a figure<br />
8 shaped metal plate (photo 24),<br />
24<br />
that exposes the bypass cylinder.<br />
A close-up view shows how thin<br />
the plate is (photo 25).<br />
25<br />
A view of the key and keyway<br />
(photo 26), confirms the striking<br />
resemblance to a Mul-T-Lock key<br />
and cylinder. Insert the key until<br />
it stops (photo 27). <strong>The</strong> key is tip<br />
stopped, so don’t expect the key<br />
shoulders to contact the face of<br />
the cylinder plug. Rotate the key<br />
counterclockwise one quarter<br />
26<br />
Reprinted from THE NATIONAL LOCKSMITH April and May 2011
27<br />
turn (photo 28). <strong>The</strong> clutch will<br />
now engage and the latch will<br />
retract when you turn the handle<br />
(photo 29).<br />
<strong>The</strong> Audit Trail Kit<br />
28<br />
29<br />
<strong>The</strong> IQ2-AT version of the lock<br />
has audit capability. An electronic<br />
audit device (photo 30), is used<br />
30<br />
to both upload data from the lock<br />
and later download the data to<br />
your computer to identify when<br />
the lock was used and who was<br />
using it. <strong>The</strong> cable with a pin type<br />
jack is attached to the unit (photo<br />
31<br />
32<br />
33<br />
31), to connect to the lock. An<br />
on/off switch can be seen. It will<br />
plug into the lock on the bottom<br />
surface of the front lock body<br />
(photo 32). A second hole appears<br />
to be covered by a plastic<br />
piece. I’ll explain more about that<br />
later. A second cable connects to<br />
the unit which has a USB plug<br />
on the end (photo 33). This cable<br />
allows you to upload data from<br />
the device to your computer<br />
through one of its USB ports.<br />
I have been told that the audit<br />
software should run fine with<br />
Windows XP, but I was not clear<br />
if there might be driver problems<br />
if you used Vista or Windows 7.<br />
I am planning on getting a net<br />
book with XP on it, because I<br />
have been told by other makers<br />
of electronic locks that Windows<br />
XP is generally the standard operating<br />
system that will be most<br />
compatible with various brands<br />
of electronic locks.<br />
Emergency Power<br />
Battery powered locks have<br />
the unfortunate potential weakness<br />
of running out of power<br />
and leaving your keyless lock<br />
without an electronic means of<br />
access. This lock, as in most,<br />
has low battery warnings, so it<br />
shouldn’t happen. However, just<br />
in case, the 1TouchIQ2 has an<br />
extra option beside the mechanical<br />
bypass cylinder. This will only<br />
apply to the IQ2-HC that doesn’t<br />
have audit capability, but the plug<br />
hole and the plastic cover at the<br />
bottom of the front lock body<br />
is replaced by battery contacts<br />
for use externally with a 9 volt<br />
battery.<br />
If you attempted entry and<br />
realize you forgot to replace the<br />
batteries inside the lock, you<br />
would have the option of finding<br />
a 9 volt battery and touching it<br />
to the two contacts to temporarily<br />
power up the unit while you<br />
either enter a pin code or touch<br />
your finger to the reader. This<br />
lock uses non-volatile memory,<br />
so you don’t lose data when the<br />
batteries go dead. As long as you<br />
can restore power to the unit, any<br />
and all codes will still operate the<br />
lock.<br />
I found the 1TouchIQ2 lock to<br />
be very interesting and impressive.<br />
For more information on this<br />
or other biometric lock hardware,<br />
contact:<br />
Intelligent Biometric Controls,<br />
601 Brooklyn Drive, Suite A,<br />
Milford, OH 45150.<br />
Phone: 513/239-6322. Ext. 320<br />
for John Falk.<br />
FAX: 513/239-6328.<br />
Find them online at:<br />
www.fingerprintdoorlocks.com<br />
Reprinted from THE NATIONAL LOCKSMITH April and May 2011