Durastone Panels Installation Instructions - Entre Prises Climbing ...
Durastone Panels Installation Instructions - Entre Prises Climbing ...
Durastone Panels Installation Instructions - Entre Prises Climbing ...
You also want an ePaper? Increase the reach of your titles
YUMPU automatically turns print PDFs into web optimized ePapers that Google loves.
NOTE: If more than one board is needed to complete a horizontal run, the boards must be mounted so that the<br />
joint between the two falls in the center of a stud.<br />
2. Starting with the lowest mark on the wall (the height of the landing pads or the baseboard), using two<br />
screws at each stud, mount the bottom row of ledger boards so that the bottom edge of the board is<br />
at the top edge of the landing zone mark. Using a level or a chalk line, mount the ledger board to<br />
each of the wall studs with appropriate screws (not supplied) that are 3” – 3 ½” in length. When<br />
fastening ledgers, screw in both ends of ledger first, then fill in middle fasteners to ensure ledger is<br />
level (use a level as 2X material is often not straight). Use two screws for each junction of the ledger<br />
board and the wall stud.<br />
Mounting <strong>Panels</strong><br />
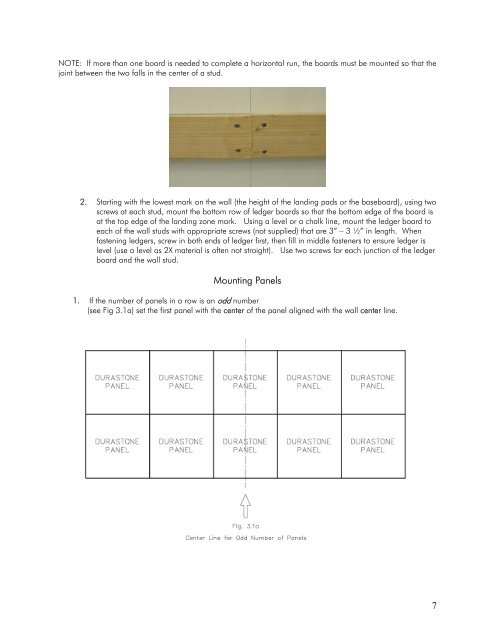
1. If the number of panels in a row is an odd number<br />
(see Fig 3.1a) set the first panel with the center of the panel aligned with the wall center line.<br />
7


