Durastone Panels Installation Instructions - Entre Prises Climbing ...
Durastone Panels Installation Instructions - Entre Prises Climbing ...
Durastone Panels Installation Instructions - Entre Prises Climbing ...

You also want an ePaper? Increase the reach of your titles
YUMPU automatically turns print PDFs into web optimized ePapers that Google loves.
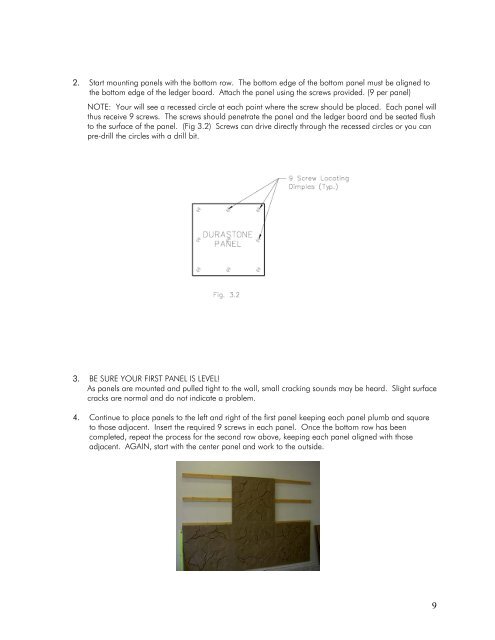
2. Start mounting panels with the bottom row. The bottom edge of the bottom panel must be aligned to<br />
the bottom edge of the ledger board. Attach the panel using the screws provided. (9 per panel)<br />
NOTE: Your will see a recessed circle at each point where the screw should be placed. Each panel will<br />
thus receive 9 screws. The screws should penetrate the panel and the ledger board and be seated flush<br />
to the surface of the panel. (Fig 3.2) Screws can drive directly through the recessed circles or you can<br />
pre-drill the circles with a drill bit.<br />
3. BE SURE YOUR FIRST PANEL IS LEVEL!<br />
As panels are mounted and pulled tight to the wall, small cracking sounds may be heard. Slight surface<br />
cracks are normal and do not indicate a problem.<br />
4. Continue to place panels to the left and right of the first panel keeping each panel plumb and square<br />
to those adjacent. Insert the required 9 screws in each panel. Once the bottom row has been<br />
completed, repeat the process for the second row above, keeping each panel aligned with those<br />
adjacent. AGAIN, start with the center panel and work to the outside.<br />
9