Yob - Laboratory and Cryostat Techniques
Yob - Laboratory and Cryostat Techniques
Yob - Laboratory and Cryostat Techniques

You also want an ePaper? Increase the reach of your titles
YUMPU automatically turns print PDFs into web optimized ePapers that Google loves.
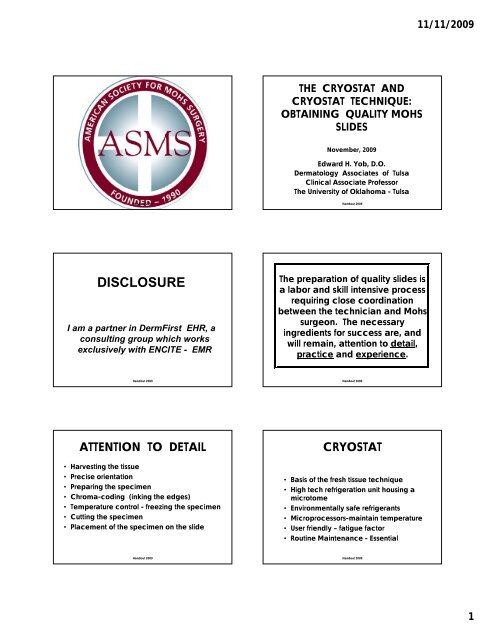
11/11/2009<br />
THE CRYOSTAT AND<br />
CRYOSTAT TECHNIQUE:<br />
OBTAINING QUALITY MOHS<br />
SLIDES<br />
November, 2009<br />
Edward H. <strong>Yob</strong>, D.O.<br />
Dermatology Associates of Tulsa<br />
Clinical Associate Professor<br />
The University of Oklahoma - Tulsa<br />
H<strong>and</strong>out 2009<br />
H<strong>and</strong>out 2009<br />
DISCLOSURE<br />
I am a partner in DermFirst EHR, a<br />
consulting group which works<br />
exclusively with ENCITE - EMR<br />
The preparation of quality slides is<br />
a labor <strong>and</strong> skill intensive process<br />
requiring close coordination<br />
between the technician <strong>and</strong> Mohs<br />
surgeon. The necessary<br />
ingredients for success are, <strong>and</strong><br />
will remain, attention to detail,<br />
practice <strong>and</strong> experience.<br />
H<strong>and</strong>out 2009<br />
H<strong>and</strong>out 2009<br />
ATTENTION TO DETAIL<br />
• Harvesting the tissue<br />
• Precise orientation<br />
• Preparing the specimen<br />
• Chroma-coding (inking the edges)<br />
• Temperature control - freezing the specimen<br />
• Cutting the specimen<br />
• Placement of the specimen on the slide<br />
CRYOSTAT<br />
• Basis of the fresh tissue technique<br />
• High tech refrigeration unit housing a<br />
microtome<br />
• Environmentally safe refrigerants<br />
• Microprocessors-maintain temperature<br />
• User friendly – fatigue factor<br />
• Routine Maintenance - Essential<br />
H<strong>and</strong>out 2009<br />
H<strong>and</strong>out 2009<br />
1
11/11/2009<br />
H<strong>and</strong>out 2009<br />
Object (Chuck) Holder<br />
Blade<br />
H<strong>and</strong>out 2009<br />
Freeze Bar<br />
H<strong>and</strong>out 2009 H<strong>and</strong>out 2009<br />
PREPARING THE SPECIMEN<br />
Preparing the Mohs Map<br />
• Precise orientation – hatch marks<br />
• Relaxing incisions<br />
• Preparing the Mohs map<br />
• Dividing the specimen<br />
• Chroma-coding the specimen<br />
• Freezing the specimen<br />
H<strong>and</strong>out 2009<br />
H<strong>and</strong>out 2009<br />
2
11/11/2009<br />
Dividing the Specimen<br />
Chroma-coding the Specimen<br />
H<strong>and</strong>out 2009<br />
H<strong>and</strong>out 2009<br />
Specimen Ready to Freeze<br />
H<strong>and</strong>out 2009<br />
CHROMA-CODING the specimen<br />
H<strong>and</strong>out 2009<br />
FREEZING AND MOUNTING<br />
• Fixed vs. adjustable object holder<br />
• Fixed vs. movable blade<br />
• Temperature control –20 to –25<br />
degrees C.<br />
epidermis / dermis – slightly warmer<br />
fat – slightly colder<br />
• Type of tissue >> technique used<br />
Adjustable Object Holder<br />
Fixed Blade<br />
H<strong>and</strong>out 2009<br />
H<strong>and</strong>out 2009<br />
3
11/11/2009<br />
DIRECT METHOD<br />
Adjusting the chuck in the OBJECT HOLDER<br />
H<strong>and</strong>out 2009<br />
• Chuck is placed on the freeze bar<br />
<strong>and</strong> coated with OCT<br />
• Specimen is turned over <strong>and</strong> placed<br />
on the semi-solid OCT<br />
• Specimen is manually flattened <strong>and</strong><br />
the lateral edges are teased up<br />
• Additional OCT is applied<br />
• Heat extractor may be used<br />
H<strong>and</strong>out 2009<br />
OCT<br />
Chuck<br />
Freeze Bar<br />
Placing the specimen on the OCT<br />
H<strong>and</strong>out 2009<br />
H<strong>and</strong>out 2009<br />
Teasing the edges<br />
H<strong>and</strong>out 2009<br />
Flattening the specimen<br />
H<strong>and</strong>out 2009<br />
4
11/11/2009<br />
FREEZE BAR TECHNIQUE - 1<br />
• Specimen is placed directly on the<br />
clean quick freeze bar<br />
• Edges are gently manipulated to<br />
assure good contact<br />
• Specimen is coated with OCT <strong>and</strong><br />
frozen<br />
• Chuck is prepared with OCT to a semisolid<br />
consistency<br />
Adding more OCT<br />
H<strong>and</strong>out 2009<br />
H<strong>and</strong>out 2009<br />
FREEZE BAR TECHNIQUE - 2<br />
• Frozen specimen is “popped” off the<br />
quick freeze bar<br />
• Specimen is inverted <strong>and</strong> frozen to the<br />
prepared chuck<br />
• Additional OCT is applied<br />
SPECIMEN IS PLACED<br />
ON THE FREEZE BAR<br />
DEEP MARGIN DOWN<br />
THE EDGES ARE<br />
GENTLY PUSHED<br />
DOWN<br />
H<strong>and</strong>out 2009<br />
H<strong>and</strong>out 2009<br />
OCT IS ADDED TO<br />
THE SPECIMEN<br />
THE OCT BEGINS<br />
TO SET<br />
H<strong>and</strong>out 2009<br />
H<strong>and</strong>out 2009<br />
5
11/11/2009<br />
AS THE OCT BEGINS<br />
TO SET UP ON THE<br />
SPECIMEN… OCT IS<br />
ADDED TO THE<br />
CHUCK<br />
OCT BEGINS TO<br />
SET-UP ON THE<br />
CHUCK<br />
H<strong>and</strong>out 2009<br />
H<strong>and</strong>out 2009<br />
SPECIMEN IS<br />
‘POPPED OFF’<br />
THE FREEZE BAR<br />
SPECIMEN IS INVERTED<br />
AND PLACED ON THE<br />
CHUCK<br />
H<strong>and</strong>out 2009<br />
H<strong>and</strong>out 2009<br />
ADDITIONAL OCT<br />
IS PLACED ON THE<br />
SPECIMEN<br />
A HEAT SINK CAN<br />
BE USED TO SPEED<br />
UP THE FREEZING<br />
H<strong>and</strong>out 2009<br />
H<strong>and</strong>out 2009<br />
6
11/11/2009<br />
H<strong>and</strong>out 2009 H<strong>and</strong>out 2009<br />
GLASS SLIDE TECHNIQUE - 1<br />
• Specimen is placed cut side down on a<br />
glass slide <strong>and</strong> inked<br />
• Lateral margins are gently pushed down to<br />
assure good contact<br />
• Slide is placed on the quick freeze bar <strong>and</strong><br />
the specimen is coated with OCT<br />
• Chuck is prepared with OCT to a semi-solid<br />
consistency<br />
H<strong>and</strong>out 2009<br />
H<strong>and</strong>out 2009<br />
GLASS SLIDE TECHNIQUE - 2<br />
• Slide <strong>and</strong> specimen are inverted <strong>and</strong><br />
frozen to the prepared chuck<br />
• Bottom of the slide is warmed with a<br />
gloved finger <strong>and</strong> the slide is slipped<br />
off<br />
• Additional OCT is applied<br />
SPECIMEN BROUGHT INTO<br />
THE LAB ON A GLASS SLIDE<br />
CUT SIDE DOWN<br />
H<strong>and</strong>out 2009<br />
H<strong>and</strong>out 2009<br />
7
11/11/2009<br />
OCT BEING APPLIED<br />
MARGINS BEING CHROMACODED<br />
(INKED)<br />
H<strong>and</strong>out 2009<br />
H<strong>and</strong>out 2009<br />
OCT SETTING UP<br />
APPLYING OCT TO<br />
THE CHUCK<br />
H<strong>and</strong>out 2009<br />
H<strong>and</strong>out 2009<br />
INVERTING THE SLIDE<br />
ON TO THE CHUCK<br />
SLIDE WITH SPECIMEN<br />
ADHERING TO THE<br />
CHUCK<br />
H<strong>and</strong>out 2009<br />
H<strong>and</strong>out 2009<br />
8
11/11/2009<br />
WARMING THE SLIDE<br />
THE SLIDE SLIPPING OFF<br />
H<strong>and</strong>out 2009<br />
H<strong>and</strong>out 2009<br />
APPLYING ADDITIONAL<br />
OCT TO THE SPECIMEN<br />
SPEEDING UP THE<br />
PROCESS WITH THE<br />
HEAT SINK<br />
H<strong>and</strong>out 2009<br />
H<strong>and</strong>out 2009<br />
H<strong>and</strong>out 2009 H<strong>and</strong>out 2009<br />
9
11/11/2009<br />
CRYOMOLD TECHNIQUE<br />
• Small amount of OCT is placed in a room<br />
temperature plastic cryomold<br />
• Specimen is placed face down in the<br />
cryomold<br />
• Cryomold is placed on the quick freeze bar<br />
<strong>and</strong> filled with OCT<br />
• When freezing begins a chuck is placed in<br />
the cryomold<br />
• When frozen the cryomold is peeled away<br />
OCT Added<br />
Specimen Placed in a<br />
Room Temp Cryomold<br />
H<strong>and</strong>out 2009<br />
H<strong>and</strong>out 2009<br />
Cryomold<br />
Placed In <strong>Cryostat</strong><br />
To Freeze<br />
Cryomold Removed<br />
From The Specimen<br />
Chuck Added<br />
H<strong>and</strong>out 2009<br />
H<strong>and</strong>out 2009<br />
The BEST technique is one that<br />
produces consistent results<br />
efficiently<br />
<strong>Techniques</strong> evolve based on<br />
the experience of the<br />
technician <strong>and</strong> the<br />
preferences of the surgeon<br />
H<strong>and</strong>out 2009 H<strong>and</strong>out 2009<br />
10
11/11/2009<br />
CUTTING THE TISSUE<br />
• Chuck is placed in the object holder<br />
• Excess OCT is rough cut away<br />
• When specimen becomes visible final<br />
alignment is accomplished<br />
• Micrometer is set to proper thickness<br />
• Anti-roll mechanism is moved into place<br />
• Specimen is cut <strong>and</strong> placed on the slide<br />
SPECIMEN READY TO<br />
BE ROUGH CUT<br />
H<strong>and</strong>out 2009<br />
H<strong>and</strong>out 2009<br />
FACING THE BLOCK<br />
Rough cutting away<br />
the OCT<br />
TISSUE BEGINS TO<br />
APPEAR<br />
H<strong>and</strong>out 2009<br />
H<strong>and</strong>out 2009<br />
BLOCK BEING ADJUSTED<br />
TO THE PROPER ANGLE<br />
WITH THE MICROMETER ADJUSTED TO THE<br />
PROPER THICKNESS THE TISSUE IS CUT<br />
H<strong>and</strong>out 2009<br />
H<strong>and</strong>out 2009<br />
11
11/11/2009<br />
USING A BRUSH TO MINIMIZE CURLING<br />
PICKING UP THE SPECIMEN WITH A SLIDE<br />
H<strong>and</strong>out 2009<br />
H<strong>and</strong>out 2009<br />
H<strong>and</strong>out 2009 H<strong>and</strong>out 2009<br />
H<strong>and</strong>out 2009 H<strong>and</strong>out 2009<br />
12
11/11/2009<br />
MICROSCOPE SLIDES<br />
• Types of slides<br />
– Frosted – color coded<br />
– Electrostatically charged<br />
• Labeling slides<br />
– Accession number? (M09-102)<br />
– Name, date, stage, piece <strong>and</strong> slide #<br />
• John Doe, 11/5/09 I 1 A<br />
H<strong>and</strong>out 2009 H<strong>and</strong>out 2009<br />
TECHNIQUE TIPS - 1<br />
• Blades must always be sharp<br />
• Microtome must be cleaned <strong>and</strong> lubricated<br />
• Microtome must be securely fastened in the<br />
unit<br />
• Blades should have blade guards in place<br />
• Align epidermis 90° to the blade<br />
• A smooth cutting motion is essential<br />
TECHNIQUE TIPS - 2<br />
• Brushes <strong>and</strong> other implements should be<br />
kept cold in the cryostat<br />
• Consistency is key when placing the<br />
specimen on the slide<br />
• Always pre-label l slides before cutting any<br />
tissue<br />
• Fresh tissue <strong>and</strong> all the associated debris is<br />
bio-hazardous – universal precautions are<br />
as essential in the lab as in the operating<br />
room<br />
H<strong>and</strong>out 2009<br />
H<strong>and</strong>out 2009<br />
BLADE GUARDS IN PLACE<br />
H<strong>and</strong>out 2009<br />
KEEP ALL BRUSHES ETC. IN THE CRYOSTAT<br />
H<strong>and</strong>out 2009<br />
13
11/11/2009<br />
The ASMS Clinical Meeting<br />
Monterey CA May 27-30, 2010<br />
H<strong>and</strong>out 2009<br />
14