Installation & Service Manual - Hill Phoenix
Installation & Service Manual - Hill Phoenix
Installation & Service Manual - Hill Phoenix

You also want an ePaper? Increase the reach of your titles
YUMPU automatically turns print PDFs into web optimized ePapers that Google loves.
<strong>Installation</strong> & <strong>Service</strong> <strong>Manual</strong><br />
LDFL<br />
Hood Assembly<br />
WARNING<br />
Make sure all power is off to the case.<br />
Electrical servicing should always be done<br />
by a qualified electrician. Improper servicing<br />
could result in product damage and/or<br />
personal injury.<br />
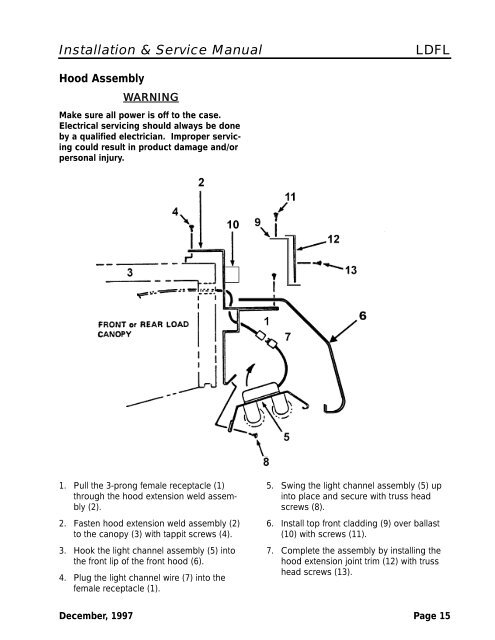
1. Pull the 3-prong female receptacle (1)<br />
through the hood extension weld assembly<br />
(2).<br />
2. Fasten hood extension weld assembly (2)<br />
to the canopy (3) with tappit screws (4).<br />
3. Hook the light channel assembly (5) into<br />
the front lip of the front hood (6).<br />
4. Plug the light channel wire (7) into the<br />
female receptacle (1).<br />
5. Swing the light channel assembly (5) up<br />
into place and secure with truss head<br />
screws (8).<br />
6. Install top front cladding (9) over ballast<br />
(10) with screws (11).<br />
7. Complete the assembly by installing the<br />
hood extension joint trim (12) with truss<br />
head screws (13).<br />
December, 1997 Page 15