


Create successful ePaper yourself
Turn your PDF publications into a flip-book with our unique Google optimized e-Paper software.
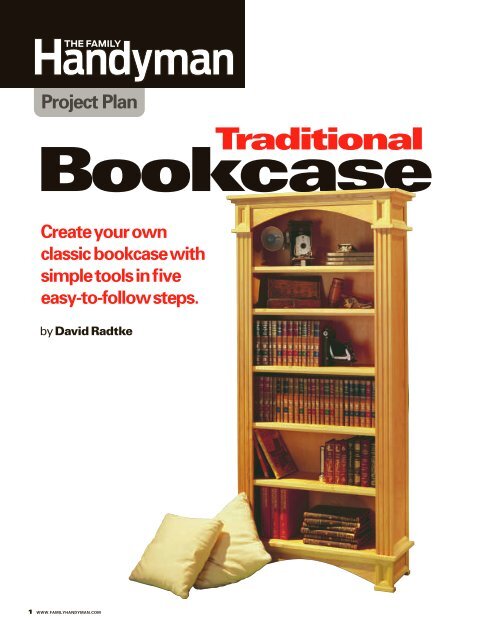
Project Plan<br />
Traditional<br />
<strong>Bookcase</strong><br />
Createyourown<br />
classic bookcasewith<br />
simpletoolsinfive<br />
easy-to-followsteps.<br />
byDavid Radtke<br />
1 WWW.FAMILYHANDYMAN.COM
Traditional<br />
<strong>Bookcase</strong><br />
Createyourownclassic<br />
bookcasewithsimpletoolsinfive<br />
easy-to-followsteps.<br />
byDavid Radtke<br />
Don’t make the same mistake I made<br />
when I moved into my new house. I<br />
left my books stacked in boxes for<br />
two years before I finally got around<br />
to building bookcases. I can’t tell you<br />
how many times I rummaged<br />
through those boxes looking for reference<br />
books or that mystery novel I<br />
wanted to revisit.<br />
When you’re ready to display<br />
your literary favorites, don’t go to a<br />
furniture store and settle for a<br />
poorly constructed bookcase with<br />
zippo for detail. For about the cost<br />
of a cheap bookcase ($300), you can<br />
build this handsome and solid heirloom-quality<br />
piece.<br />
This project is too challenging for<br />
a beginner. Don’t tackle it unless<br />
you’ve used a router and a doweling<br />
jig and feel confident with your circular<br />
saw. We’ve broken the project into<br />
five easy-to-follow steps and given<br />
you the option of selecting your own<br />
trim and finish.<br />
The bookcase construction is<br />
straightforward and basic, so it’s easy<br />
to cut and fit the pieces. The fixed<br />
shelves add stability and are designed<br />
to hold a variety of average-sized<br />
books, but you can customize the<br />
shelf heights to suit your collection.<br />
Our bookcase is made primarily<br />
from maple plywood and detailed with<br />
solid maple boards and regular lumberyard<br />
maple colonial stop molding<br />
(Fig. A). If maple isn’t your favorite<br />
wood, you could opt for birch and oak<br />
plywood and moldings. They too are<br />
commonly stocked in full-service lumberyards<br />
and good home centers.<br />
The grooved vertical front pieces<br />
on each side (fluted casing) may look<br />
challenging, but with a shop-made jig<br />
and a router, you’ll get perfect results.<br />
For details, see “Make Your Own<br />
Fluted Casing—The Easy Way,” p. 8.<br />
Figure on about a day and a half for<br />
cutting and assembling, plus a couple<br />
of evenings for sanding and finishing.<br />
This article originally appeared in The Family Handyman magazine. For subscription information, visit www.familyhandyman.com<br />
Addresses, phone numbers, prices, part numbers and other information may have changed since original publication.<br />
Copyright ©2005 Home Service Publications, Inc. All rights reserved. Unauthorized reproduction, in any manner, is prohibited. The Family Handyman, Handy Hints<br />
and Great Goofs are registered trademarks of RD Publications, Inc. Ask Handyman, Handyman Garage, How a House Works, Re.Do, Re.Mod, TFH Reports, The Home<br />
Improvement Authority, Using Tools, Woodworks, Wordless Workshop, Workshop Tips, You Can Fix It, You Can Grow It are trademarks of RD Publications, Inc.<br />
2 WWW.FAMILYHANDYMAN.COM
Step 1<br />
Buildthebasic<br />
box,p.4<br />
Step 2<br />
Makethe<br />
decorativefront<br />
pieces,p.7<br />
ALL YOU NEED ARE SIMPLE<br />
HAND AND POWER TOOLS<br />
The only power tools you’ll need are a<br />
7/8-hp router, a circular saw (Photo<br />
1) with a fine-toothed plywood blade,<br />
a drill, a power miter saw and an<br />
orbital sander. (And you could substitute<br />
a hand miter saw for the power<br />
one.) You’ll also need other woodworking<br />
tools like C-clamps, bar<br />
clamps, spring clamps, a screwdriver,<br />
drill bits and a doweling jig (Photo 5)<br />
with a 3/8-in. brad point bit.<br />
Although you could get by without it, a<br />
24-in. Clamp & Tool guide (Photo 2)<br />
is great for routing perfectly straight<br />
grooves (dadoes) to support the shelves<br />
(see the Buyer’s Guide, p. 11). This tool<br />
clamps firmly to the edges of the plywood<br />
and leaves an unobstructed path<br />
to push your router from one side to<br />
the next. It’s not a tool you’ll get and<br />
use only once. The Clamp & Tool guide<br />
has dozens of uses, such as helping you<br />
make super-straight crosscuts (perpendicular<br />
cuts to the wood grain) on lumber<br />
and plywood.<br />
Step 3<br />
Makeyourown<br />
flutedcasingthe<br />
easyway,p.8<br />
Step 4<br />
Applythefront<br />
trim,p.10<br />
Step 5<br />
Wipeona<br />
beautifulDanish<br />
oilfinish,p.11<br />
3 WWW.FAMILYHANDYMAN.COM<br />
THE FAMILY HANDYMAN APRIL 1999 3
B o o k c a s e<br />
Step1<br />
Building the basic box:<br />
Sides, shelves and back<br />
SAW<br />
BASE<br />
LOWER EDGE<br />
OF RIP GUIDE<br />
ALIGN<br />
YOUR MARK<br />
WITH THIS EDGE<br />
TOP PIECE OF<br />
RIP GUIDE<br />
RIP<br />
GUIDE<br />
FACTORY<br />
EDGE<br />
PIECE BEING CUT<br />
FROM SHEET<br />
1<br />
2<br />
RIP 3/4-in.<br />
hardwood plywood<br />
into<br />
11-1/4 in. wide<br />
pieces for the<br />
sides and the<br />
shelves. Cut<br />
these pieces to<br />
length to make<br />
the two sides<br />
and the six<br />
shelves. Also<br />
cut the 1/4-in.<br />
plywood back<br />
to width and<br />
length while<br />
you have the<br />
edge guide<br />
set up.<br />
MARK AND<br />
CUT the 1/4-in.<br />
dadoes in the<br />
sides. Use a<br />
special<br />
23/32-in. wide<br />
straight-cut<br />
router bit for a<br />
tight fit for the<br />
thinner-than-<br />
3/4-in. plywood.<br />
GET STRAIGHT RIP CUTS<br />
WITH A HOMEMADE JIG<br />
If you’ve got a fancy setup for achieving<br />
perfectly straight cuts (rips) from<br />
a sheet of plywood on a table saw or<br />
something else, all the better. If you<br />
don’t, this simple jig (Photo 1) is<br />
what you need.<br />
Construct the jig by screwing<br />
together two scraps of either 1/2- or<br />
3/4-in. plywood. The top narrow<br />
piece (2-1/2 in. wide) must have one<br />
factory straightedge. Leave the bottom<br />
piece a few inches wider than<br />
your saw base (in most cases, that will<br />
make the bottom piece about 10 in.).<br />
Screw the top piece to the bottom<br />
with drywall screws every 5 in. Now<br />
you need to trim the lower piece perfectly<br />
straight.<br />
Now, clamp the jig to the entire<br />
piece of 3/4-in. maple plywood, setting<br />
it to the correct width. Rip-cut<br />
(lengthwise) the two bookcase sides<br />
(A), then cut them to length (crosscut).<br />
Rip two additional lengths and<br />
crosscut them (outer sides “A” facing<br />
up) into 31-7/8 in. lengths for the<br />
shelves. Cut the 1/4-in. plywood back<br />
(C) to the dimensions in the Cutting<br />
List, p. 7.<br />
EDGE<br />
GUIDE<br />
4 WWW.FAMILYHANDYMAN.COM<br />
A<br />
23/32"<br />
GROOVES<br />
B<br />
A<br />
BOTTOM<br />
SHELF (B)<br />
3<br />
GLUE AND SCREW the plywood<br />
shelves to the sides<br />
with 1-5/8 in. wood screws.<br />
Drill pilot and countersink<br />
holes no more than 3/4 in.<br />
from the front and back to<br />
accept the screws. The<br />
screws will be covered by<br />
molding later. Next, align the<br />
1/4-in. plywood back (C) and<br />
square the assembly by nailing<br />
into the back of the sides<br />
and shelves.
B o o k c a s e<br />
ROUT THE 1/4-IN. DEEP SHELF<br />
SLOTS INTO THE SIDES<br />
The shelves (B) lock into 1/4-in. deep<br />
slots (dadoes) in the upright sides<br />
(A). To make the dadoes, install a<br />
23/32-in. straight-cut router bit (see<br />
Buyer’s Guide, p. 11) in your router<br />
and set the depth of cut to 1/4 in. The<br />
special 23/32-in. router bit is the<br />
same width as 3/4-in. plywood, so the<br />
slots it cuts will make a nice snug fit<br />
for the shelves. Don’t substitute a 3/4-<br />
in. bit; you’ll be unhappy with the<br />
sloppy fit.<br />
Clamp your edge guide (Photo 2) to<br />
a scrap piece of plywood and rout a test<br />
dado. Then measure the distance from<br />
the edge guide to the near edge of the<br />
dado. This will give you the distance<br />
you’ll need for setting up each dado<br />
groove. Mark and cut (see Fig. A) all the<br />
1/4-in. deep dadoes on the inside face<br />
of each part A. TIP: When you cut<br />
dadoes with a router and straightedge,<br />
clamp the edge guide to the left of your<br />
intended groove, then push the router<br />
base away from you as you rout the<br />
groove. This keeps the router tight<br />
against the edge guide as the bit rotates<br />
through the cut. Finish-sand all the plywood<br />
pieces now with 150-grit sandpaper;<br />
otherwise, you’ll struggle with<br />
sanding in tight spaces after assembly.<br />
GLUE AND SCREW THE SHELF<br />
ENDS INTO THE SLOTTED SIDES<br />
It’s essential to have a flat surface for<br />
assembly so you can align the shelves<br />
squarely to the sides. The shelves (B)<br />
should fit tightly into the grooves.<br />
Test the fit. If the shelf won’t slip into<br />
the dado, wrap some fine sandpaper<br />
(150-grit) around a 1/2-in. square<br />
block about 3 in. long and sand the<br />
sides of the grooves until you get a<br />
snug fit.<br />
Once you’re sure everything fits,<br />
you’ll have to work fast to complete<br />
the assembly. You’ll need to get the<br />
shelves glued into the dadoes and<br />
the 1/4-in. plywood back nailed<br />
APPLY the<br />
divider and stop<br />
molding to the<br />
sides of the<br />
bookcase. Glue,<br />
then nail the<br />
divider molding<br />
to the sides<br />
with 6d finish<br />
nails (two per<br />
piece). Glue the<br />
stop molding to<br />
the sides as<br />
shown in Fig. A.<br />
Further secure<br />
the molding<br />
with 7/8-in.<br />
brads spaced<br />
every 12 in. Set<br />
the brads with a<br />
nail set. You’ll<br />
fill the holes<br />
later with wood<br />
putty.<br />
4<br />
STOP<br />
MOLDING<br />
(E)<br />
into place before the glue sets<br />
(about 15 minutes). This means you<br />
need to get your drill, countersink<br />
bit and a power screwdriver and<br />
screws ready to go.<br />
Spread a light coat of glue on one<br />
shelf side and into the dado, then fit<br />
each shelf into its dado. Have a moist<br />
cotton rag handy to wipe away any<br />
oozing glue. Next, screw the shelf to<br />
the side as shown in Fig. A, p. 84. The<br />
screw holes for each shelf side must be<br />
predrilled within 3/4 in. of the front<br />
and the back. The screwheads will be<br />
covered later by the molding. Follow<br />
this procedure for each shelf.<br />
Now, before the glue sets, grab the<br />
1/4-in. plywood back (C) to square<br />
the assembly. There’s no need to glue<br />
the plywood back to the shelves or<br />
sides. First nail the back along one<br />
entire side using a 1-in. panel nail<br />
every 5 in. Then align the top of the<br />
other side flush with the top edge of<br />
the plywood; this will square the<br />
assembly. Nail along this side, then<br />
nail the rest of the back into the backside<br />
of the shelves. Let the glue dry for<br />
at least two hours before continuing.<br />
DIVIDER<br />
MOLDING<br />
(D1)<br />
DETAIL THE SIDES<br />
OF THE BOX WITH MOLDING<br />
Now it’s time to detail the sides with<br />
the divider moldings (D1 and the<br />
lower D2; Fig. A) and the colonial top<br />
moldings. The divider molding, with<br />
the stop molding (Photo 4), breaks<br />
the strong vertical line to give the<br />
bookcase a distinct architectural look.<br />
It has a base section, a main vertical<br />
section and a top section similar to<br />
the cornice of a building.<br />
To begin detailing the sides, first<br />
cut the divider molding,<br />
then glue and nail it (use<br />
6d finish nails) to the sides<br />
(Photo 4). Drill pilot holes<br />
through the molding to<br />
prevent splitting. The colonial<br />
stop molding (E) and<br />
the backside of the divider<br />
molding must be applied<br />
so they align flush with the<br />
1/4-in. plywood back. Glue<br />
and clamp this molding to<br />
the side. Drive 7/8-in. wire<br />
brads through the stop<br />
molding into the sides<br />
every 12 in., then set them.<br />
5 WWW.FAMILYHANDYMAN.COM
FIG. A<br />
6 WWW.FAMILYHANDYMAN.COM
B o o k c a s e<br />
Step 2<br />
DOWELING<br />
JIG<br />
Making the decorative front<br />
pieces: Corner blocks, curved<br />
aprons<br />
CORNER<br />
BLOCKS<br />
(F)<br />
APRON<br />
(G)<br />
CUT THE CORNER BLOCKS<br />
AND THE CURVED APRON<br />
AND GLUE THEM TOGETHER<br />
The decorative upper and lower corner<br />
blocks (Photo 6) are simple to make<br />
from 3/4-in. wide x 5-1/2 in. long<br />
pieces of solid maple. The detail on the<br />
front of the corner blocks is made by<br />
gluing mitered colonial stop molding<br />
to each block face. First cut the four<br />
corner blocks (F) and the two curved<br />
aprons (G). Use a 27-1/2 in. radius to<br />
mark the curve onto the aprons. A nail,<br />
a wire and a pencil will work fine. Drill<br />
Cutting List<br />
KEY PCS. SIZE & DESCRIPTION<br />
A 2 3/4’’ x 11-1/4’’ x 78’’ maple<br />
plywood sides<br />
B 6 3/4’’ x 11-1/4’’ x 31-7/8’’<br />
maple plywood shelves<br />
C 1 1/4’’ x 32-3/4’’ x 76’’<br />
maple plywood back<br />
D1 6 3/4’’ x 1-1/2’’ x 13’’<br />
maple divider molding*<br />
D2 2 3/4’’ x 1-1/2’’ x 35-7/8’’<br />
maple divider molding*<br />
D3 2 3/4’’ x 1-1/2’’ x 4-5/8’’<br />
maple divider caps*<br />
E 80 7/16’’ x 1-1/4’’ colonial stop<br />
ln. ft. molding (allows for waste)<br />
F 4 3/4’’ x 3-1/2’’ x 5-1/2’’ maple<br />
corner blocks<br />
G 2 3/4’’ x 5-1/2’’ x 26-3/4’’ maple<br />
curved aprons<br />
H 2 3/4’’ x 3-1/2’’ x 64-3/4’’ maple<br />
fluted casing<br />
J1 1 3/4’’ x 12-15/16’’ x 35-3/4’’<br />
maple plywood top<br />
J2 5-1/2 3/4’’ x 3/4’’maple edge<br />
ln. ft. banding*<br />
K1 2 3/4’’ x 1-1/2’’ x 4’’ maple<br />
front feet*<br />
K2 2 3/4’’ x 1-1/2’’ x 2’’ maple<br />
back feet*<br />
L 2 3/4’’ x 5-1/2’’ x 11-1/4’’<br />
support strips<br />
the dowel holes into the inside edge of<br />
the blocks and corresponding holes<br />
into the end of each apron. Don’t glue<br />
these parts together yet. Mark the<br />
backside of each block and apron so<br />
you know which piece goes where.<br />
Now to detail the corner blocks,<br />
miter the stop molding to fit the<br />
perimeter of each block. I used a<br />
wooden handsaw miter box for control.<br />
Avoid cutting small pieces with<br />
the power miter saw. Once you’ve cut<br />
all the pieces, glue them to the blocks<br />
and clamp them with spring clamps<br />
(Photo 6). When the glue is dry, sand<br />
the edges of each block clean and glue<br />
the doweled joints for each upper and<br />
lower apron assembly. Clamp each<br />
assembly for at least two hours.<br />
STOP<br />
MOLDING<br />
(E)<br />
APRON<br />
ASSEMBLY<br />
5<br />
DRILL 3/8-in. dowel holes in the corner<br />
blocks and corresponding holes in<br />
the aprons. Glue and clamp this<br />
assembly after you glue the stop<br />
moldings to the front of the blocks.<br />
6<br />
GLUE the stop molding to the front of<br />
the corner blocks. Be very precise<br />
about the miter cuts. A simple<br />
wooden handsaw miter box works<br />
great for these small, hard-to-hold<br />
pieces. After the glue is set, sand the<br />
edges of the block with 100-grit, then<br />
150-grit, sandpaper. Glue the dowel<br />
joints and clamp the corner blocks to<br />
the apron to complete the apron<br />
assemblies.<br />
STOP<br />
MOLDING<br />
(E)<br />
*Have the lumberyard cut these pieces<br />
to width from a 1x6.<br />
7 WWW.FAMILYHANDYMAN.COM
JIG<br />
BASE<br />
5/16" x 3/4"<br />
HARDWOOD<br />
RUNNERS<br />
CENTER<br />
LINE<br />
3/4" x 2"<br />
SIDES<br />
B o o k c a s e<br />
Step 3<br />
1-1/2"<br />
Makeyourown<br />
flutedcasing—<br />
theeasyway<br />
7<br />
13/16"<br />
WIDTH OF<br />
ROUTER BASE<br />
ALIGN<br />
THE SIDES<br />
TO THE BASE<br />
DRILL holes 1-1/2 in. on both sides of the center line of your jig. Keep<br />
the holes about 4 in. back from each end and spaced about 2 ft. apart<br />
toward the middle. The holes are spaced 1-1/2 in. from the center to<br />
avoid having screw holes show through your flutes. If you rout a different<br />
width or number of flutes, you may need to change the holddown<br />
screw locations. After drilling the holes, flip the jig over and<br />
countersink them to accept screws for holding the workpiece.<br />
Making decorative flutes for cabinet trim was a<br />
task I dreaded for years. My first attempts<br />
involved an edge guide attached to a router base.<br />
Invariably I’d slip up, the router would wander<br />
(usually on the last flute), and I’d have to start all<br />
over. Later I tried a router table. But as I repositioned<br />
my hands while feeding the board over the<br />
bit, burn marks would appear, and they’d take<br />
hours to sand out. But now that I’ve built this jig<br />
for my hand-held router, I’ve overcome those<br />
problems. Now I enjoy churning out perfectly<br />
fluted pieces.<br />
BUILD THE FLUTING JIG<br />
FROM 3/4-IN. PLYWOOD<br />
AND TWO HARDWOOD STRIPS<br />
Use one-third of a sheet (lengthwise) of 3/4-in.<br />
cabinet-grade plywood for the base and sides of<br />
the jig and two strips of hardwood for the runners<br />
(Photo 1). Here’s how to measure, cut and assemble<br />
the jig:<br />
■ Measure the base of your router plus two thicknesses<br />
of your plywood sides (usually 23/32 in.<br />
each, or 1-7/16 in. total) to get the right width for<br />
the jig base.<br />
■ Rip the measured jig base width lengthwise<br />
(8 ft.) from your plywood sheet. Accuracy is critical;<br />
use your cutting guide for your circular saw<br />
or a table saw.<br />
■ Rip the two plywood sides 2 in. wide.<br />
■ Rip two runners 5/16 in. wide from a 3/4-in.<br />
thick hardwood board.<br />
■ Cut the 5/16-in. wide dadoes into the two sides<br />
using either a dado blade or multiple passes with a<br />
standard table saw blade. The dadoes must be<br />
3/8 in. deep.<br />
8<br />
BLANK<br />
FLUTE<br />
LOCATIONS<br />
CENTER<br />
LINE<br />
1/2" MINIMUM<br />
FROM FRONT<br />
EDGE<br />
MARK your flute locations 1 in. apart on each end of your 1x4<br />
blank. Align the center mark of the workpiece with the center line of<br />
the jig and screw the blank to the jig from underneath. Do the same<br />
on the opposite end and be sure to install the hold-down screws<br />
toward the middle as well. If your blank has a slight bow or crook,<br />
the hold-down screws will hold it straight and flat as you rout.<br />
8 WWW.FAMILYHANDYMAN.COM
5/32" DEEP<br />
CUT<br />
9<br />
ROUT the first pass of the<br />
first flute 5/32 in. deep. Don’t<br />
try to take the whole depth<br />
at once, because you may<br />
get some tear-out and chatter.<br />
For a smooth cut, keep<br />
the router moving all the<br />
way to the other end in one<br />
continuous pass.<br />
B o o k c a s e<br />
■ Glue (carpenter’s glue works<br />
best) and screw the jig sides to<br />
the jig base (Photo 7). The sides<br />
must be flush with the base on<br />
each side. Drill pilot and countersink<br />
holes for the screws. Use<br />
a 1-1/4 in. screw every 8 in. along<br />
each side.<br />
■ Secure the hardwood runners<br />
into the dadoes using carpenter’s<br />
glue and spring clamps. Set the<br />
jig aside to dry.<br />
Once the jig is assembled, test<br />
the fit of your router base. Move<br />
it along the chute from end to<br />
end. It must glide freely along the<br />
runners without binding on the<br />
sides. You may have to sand the<br />
sides a bit if the router is too tight<br />
in the chute. Conversely, if<br />
there’s play between the router<br />
and the sides, install a strip of<br />
veneer on one side. (See the<br />
Buyer’s Guide, p. 11.)<br />
Now that you’ve made the jig,<br />
follow the instructions in Photos<br />
7 – 11 and practice on some<br />
scrap pieces. To ensure consistent<br />
depth (you’ll make two<br />
progressively deeper passes for<br />
each flute), familiarize yourself<br />
with the depth gauge on your<br />
router. It’s usually a dial or ring<br />
on the housing.<br />
ROUT a second pass<br />
with the router bit set<br />
at 5/16-in. depth. Be<br />
sure to check your<br />
router depth gauge<br />
so you can repeat the<br />
exact depth for the<br />
final pass on the next<br />
flutes.<br />
11<br />
ROUT each side flute<br />
using the same twopass<br />
method as with<br />
the center flute. When<br />
the blank is positioned<br />
to the side of the jig,<br />
only one row of holddown<br />
screws is<br />
necessary.<br />
CENTER<br />
LINE<br />
10<br />
FINAL<br />
FLUTE<br />
5/16" DEEP<br />
CUT<br />
9 WWW.FAMILYHANDYMAN.COM<br />
THE FAMILY HANDYMAN APRIL 1999 9
B o o k c a s e<br />
Step 4<br />
Applying the front<br />
trim, top and feet<br />
12<br />
DIVIDER MOLDING<br />
(FRONT) (D2)<br />
FLUTED<br />
CASING (H)<br />
APRON<br />
ASSEMBLY<br />
(BOTTOM)<br />
ALIGN the bottoms of the fluted side casing with the corner<br />
blocks. Glue, clamp and nail the casing to the bookcase<br />
sides. Use six 6d finish nails per side. Set the nails and fill the<br />
nail holes.<br />
GLUE AND NAIL YOUR DETAIL MOLDINGS<br />
TO THE BOOKCASE FRONT<br />
Turn the bookcase on its back to glue the front trim pieces<br />
in place. Start by aligning the bottom edge of the lower<br />
apron assembly even with the bottom edge of the sides (A).<br />
Let the apron overhang the sides an equal amount. Mark<br />
this location. Next, glue and clamp the assembly (Photo<br />
12) in place. Next, cut and glue the fluted casing pieces in<br />
place. Be sure they overhang the same distance as the lower<br />
apron assembly. For added insurance, nail the casing to the<br />
plywood sides with six 6d finish nails (Fig. A, p. 6) spaced<br />
evenly along the length.<br />
Now glue and nail (Photo 13) the divider caps (D3) to<br />
the top of the fluted casing and to the side pieces of divider<br />
molding (D1) with 4d finish nails. The caps are a continuation<br />
of the divider molding and establish an end point for<br />
the fluted columns. After the upper apron assembly is glued<br />
in place, glue the upper full-length divider molding (Fig. A)<br />
to the top of the apron assembly and then nail the miter<br />
joints together with 4d nails.<br />
CUT THE PLYWOOD TOP<br />
AND GLUE SOLID MAPLE<br />
STRIPS TO THE EDGE<br />
Now cut and glue the stop molding<br />
(E) to the top of the plywood<br />
back. Use spring clamps to hold it<br />
in place. While the glue is drying,<br />
cut the plywood top (J1) and the<br />
3/4 x 3/4-in. edge banding (J2) to<br />
length. Glue the molding around<br />
the front and sides of the plywood<br />
top. Use masking tape to hold the<br />
edging in place until the glue dries.<br />
Once the glue has dried, sand the<br />
edging flush to the plywood on the<br />
top and bottom. Screw the top<br />
assembly to the sides (A). Use 4d<br />
finish nails to secure the top to the<br />
stop molding in the back. Now cut<br />
the stop molding strips to cover<br />
the cut-edge shelf fronts. Secure<br />
the molding with glue and 7/8-in.<br />
brads. Set the brads and fill the<br />
holes with wood putty.<br />
10 WWW.FAMILYHANDYMAN.COM<br />
SCREW THE<br />
FEET TO THE<br />
BOTTOM FRONT<br />
AND BACK<br />
To complete the<br />
assembly, cut the<br />
front and back feet<br />
and secure each<br />
with two 1-5/8 in.<br />
wood screws. Be<br />
sure the support<br />
strips (L) are glued<br />
to the underside<br />
(Fig. A, p. 6) first to<br />
help support the<br />
feet. Cut the front<br />
and back feet and<br />
screw them to the<br />
bottom with 1-5/8<br />
in. wood screws.<br />
APRON<br />
ASSEMBLY<br />
(TOP)<br />
DIVIDER<br />
MOLDING<br />
(FRONT) (D2)<br />
1/4" PLYWOOD<br />
BACK (C)<br />
13<br />
DIVIDER<br />
CAP (D3)<br />
GLUE the upper apron assembly to the sides after nailing<br />
the divider cap molding to the top of the casing. Once the<br />
apron assembly is glued, the next step is to glue, nail and<br />
clamp the top center section of the divider molding in place.
B o o k c a s e<br />
Step 5<br />
Wipe on a beautiful<br />
Danish oil finish<br />
<strong>Bookcase</strong> projects like this are really<br />
tough to finish with a brush-on varnish<br />
after assembly, so I used a wipeon<br />
oil/varnish commonly called Danish<br />
oil. You can select colored<br />
oil/varnish or clear. The combination<br />
oil/varnish is as easy to apply as an oil<br />
and buffs to a nice luster like a<br />
brushed-on varnish. Apply the finish<br />
according to the manufacturer’s<br />
instructions, using a cotton rag and<br />
keeping a brush on hand to get into<br />
the corners. Fill all the nail holes after<br />
the first coat of finish is dry. Use colored<br />
putty sticks to match the surrounding<br />
wood tone.Two coats of<br />
finish will be adequate but a third will<br />
give you a bit more luster and depth.<br />
NOTE: Hang the oil-soaked rags outside<br />
to dry to prevent combustion.<br />
Shopping List<br />
ITEM<br />
QUANTITY<br />
3/4’’ x 4’ x 8’ maple plywood 1-1/4 sheets<br />
1/4’’ x 4’ x 8’ maple plywood 1 sheet<br />
1x4 x 7’ maple 2<br />
1x6 x 5’ maple 4<br />
Colonial stop molding<br />
80 ln. ft.<br />
7/8’’ brad nails 1 pkg.<br />
1’’ panel nails (for plywood back) 1 pkg.<br />
Carpenter’s glue<br />
1/2 pint<br />
1-5/8’’ wood screws 1 lb.<br />
6d finish nails<br />
1 lb.<br />
4d finish nails<br />
1 lb.<br />
Colored wood putty sticks 2<br />
Router bits (see Buyer’s Guide)<br />
Buyer’s Guide<br />
BOOKCASE<br />
■ Clamp & Tool guide is available from Tools<br />
on Sale (800-328-0457). Catalog No. CT24C,<br />
$24.95.<br />
■ The 23/32-in. router bit is available from<br />
Trend-lines (800-877-7899). The 1/4-in. shank<br />
is Catalog No. CT1097K, $10.95; 1/2-in. shank<br />
is Catalog No. CT1098K, $10.95.<br />
FLUTE JIG<br />
■ Pressure-sensitive veneer strips: Catalog<br />
No. 77925, $3.99.<br />
■ Polycarbonate base blanks: Catalog No.<br />
24935, $14.99.<br />
■ 1/2-in. core-box bit: Catalog No. 90924,<br />
$12.69.<br />
All available from Rockler Woodworking and<br />
Hardware, (800) 279-4441.<br />
Anchor your<br />
bookcase<br />
with a<br />
safety<br />
wire<br />
Although stable on hard flooring,<br />
tall narrow cabinets like this<br />
bookcase can be unsteady when<br />
set on wall-to-wall carpeting. The<br />
1/4-in. thick tackless wood strip<br />
below the carpeting and near the<br />
wall can slightly elevate the back<br />
of the cabinet and make the<br />
bookcase tippy. You can remedy<br />
this problem by reducing the<br />
thickness of the back feet by 1/4<br />
in. and attaching an 18-gauge<br />
steel safety wire, as shown<br />
below, near the center back of<br />
the cabinet. Fasten the other end<br />
of the wire to a stud.<br />
Mark your bookcase height on<br />
the wall. Screw in a 2-1/2 in. drywall<br />
screw with a finish washer<br />
halfway into the wall stud, wrap<br />
the wire around the screw, then<br />
tighten the screw to the drywall.<br />
Drive a 1-in. screw and finish<br />
washer near the back of the<br />
bookcase into the plywood top.<br />
Position the bookcase and wind<br />
the wire tight around the screw.<br />
Tighten the screw and finish wire<br />
down and cut the excess wire.<br />
Now you can pile on the books.<br />
2-1/2" DRYWALL SCREW<br />
FINISH<br />
SCREW WASHERS<br />
WIRE<br />
CABINET<br />
TOP<br />
WALL<br />
SURFACE<br />
DRYWALL<br />
WALL<br />
STUD<br />
11 WWW.FAMILYHANDYMAN.COM<br />
Photography • BILL ZUEHLKE<br />
Illustration • EUGENE THOMPSON<br />
Project Design • DAVID RADTKE