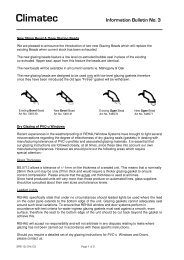
User care guide.pdf - Climatec Windows Limited
User care guide.pdf - Climatec Windows Limited
User care guide.pdf - Climatec Windows Limited

Create successful ePaper yourself
Turn your PDF publications into a flip-book with our unique Google optimized e-Paper software.
user <strong>care</strong> and<br />
operations <strong>guide</strong><br />
<strong>Windows</strong>, doors & conservatories<br />
of distinction<br />
11-14 Fletchers Square, Temple Farm Industrial Estate, Southend-on-Sea, Essex SS2 5RN<br />
Telephone: 01702 613733 / Website: www.climatec-windows.co.uk
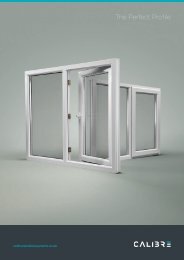
windows<br />
Thank you for choosing from our portfolio of windows, doors<br />
and conservatories. We are sure you will benefit from the quality<br />
of manufacture and installation of our products.<br />
Please take the time to read this document containing important information on<br />
how to get the best from your investment now, and for many years to come.<br />
Casement Outward Opening <strong>Windows</strong><br />
Operation<br />
All windows are provided with key-locking handles. The<br />
handles will automatically engage when the handle is in the<br />
closed position. To open the window, simply press the button<br />
before attempting to turn the handle. For added security, the<br />
handle will not move when locked by using the key.<br />
The window can be locked in a ventilation position allowing a gap for fresh air to pass<br />
between sash and frame. It must be stated, however, that in this position, the window<br />
cannot be regarded as secure.<br />
Adjustment<br />
It is possible over time, for the hinge (friction stay) to become slack or over tight. This can<br />
be rectified by gently adjusting the screw indicated to increase or reduce friction (see<br />
diagram above).<br />
egress operation<br />
For windows fitted with Defender friction hinges and easy clean option, the following<br />
instructions must be followed when cleaning the outside of the window:-<br />
1) Open the window fully and find the levers on the top<br />
and bottom window hinges.<br />
2) Press one lever and slide the window slightly towards<br />
the centre of the opening. Repeat for the second<br />
lever.<br />
3) Using both hands, slide the window evenly to gain<br />
access to clean the outside of the window.<br />
4) To reset the hinges to their normal operating mode,<br />
simply close the window.
tilt and turn <strong>Windows</strong><br />
When the window is closed the handle should be in the vertical position with the pointed<br />
end down. To place the window in the tilt position, turn the handle through 90 degrees<br />
and then pull gently towards you. The window will come to rest in the tilt position.<br />
If it is required to fully open the window for cleaning or emergency access, ensure that<br />
the window is firmly in place against the frame, before turning the handle to the open<br />
position, with the pointed end now upwards. The window can now be fully opened<br />
inwards.<br />
To close and lock, simply push the window until it is firmly in place against the frame and<br />
then rotate the handle fully 180 degrees until the handle is in the vertical position, with<br />
the pointed end down. For added security, movement of the handle can be locked by<br />
using the key.<br />
Vertical sliding <strong>Windows</strong><br />
Opening Sashes<br />
To slide lower sash up:<br />
Unlock Fitch Catch (located on top of lower sash) with key and then fully rotate lever<br />
to the right. Using the finger pulls, located on the bottom rail of lower sash, slide up to<br />
required position.<br />
To slide upper sash down:<br />
Firstly slide the lower sash up (as above). Using the D Handles, located outside on the<br />
bottom rail of upper sash, slide down to required position. You may now close the<br />
bottom sash if required.<br />
Please note: If window is fitted with Limit Stops the sashes will only slide to a<br />
predetermined point. To allow the sash to fully open, the Limit Stops have to be<br />
unscrewed anti-clockwise using the key provided (Rola type) or pressed home and<br />
locked back by turning the key (Sharks Fin type).<br />
Cleaning outside of window<br />
Slide lower sash up by approximately 50mm (2 inches). Slide the<br />
2 buttons which are located on the top of the lower sash towards<br />
each other, and gently pull top of sash into the room. The sash<br />
will stop tilting at approximately 200mm as in built restrictors<br />
are fitted. Now slide the upper sash down by 50mm. Slide the<br />
2 buttons which are located on the top of the upper sash<br />
towards each other and gently pull top of sash into the room.<br />
The sash will stop tilting at approximately 200mm. The outside<br />
of the window can now be cleaned.
doors<br />
Entrance Doors<br />
The door is normally operated by pressing the handle down from the horizontal position<br />
until the latch is released and the door will open. To close, simply press the opening sash<br />
until it meets the frame and the audible click of the latch is heard to operate.<br />
To lock the door it is necessary to raise the handle as far as it will go before turning the<br />
key. This action will engage the lock-bolts and the key will engage the deadlock to lock<br />
the door securely. If the handle is not raised sufficiently, the lock will not engage.<br />
To re-open the door, turn the key and then press the handle downwards until the door<br />
opens.<br />
An alternative to the above is to have a lock that can only be opened from the outside<br />
by using a key.<br />
In this case, the door operates from the inside in exactly the<br />
same way as above. However, from the outside, the handle<br />
will not release the catch but is used to engage the lockbolts<br />
in the same manner as above. To re-open the door, turn the<br />
key and then press the handle downwards as far as it will go.<br />
Turn the key once more to release the latch and the door will<br />
open.
French doors<br />
The first door that opens is called the Master door and the<br />
second door is called the Slave door. The Master door is<br />
operated in the same fashion as described in the first part of<br />
the entrance door section.<br />
The Slave door could have one of three types of locking method. On types 1 and 2<br />
there will be a handle only on the Master door.<br />
Type 1 (finger bolts)<br />
Once the Master door is open, simply release the Slave door by turning the finger bolts<br />
(located at the top and bottom of the door) towards the centre of the door.<br />
Type 2 (concealed shootbolts)<br />
Once the Master door is open, pull the lever (located on the Slave door) upwards,<br />
releasing the top and bottom shoot-bolts and allowing the door to open. To close,<br />
press the Slave door to the frame and then push the red lever back into the downward<br />
position to re-locate the shoot-bolts.<br />
Type 3 (passive lock)<br />
This type has a handle on both doors. Once the Master door is open, turn the key on the<br />
Slave door, then push the handle downwards to release the top and bottom shoot-bolts.<br />
To re-lock, press the door sash against the frame, lift the handle as far as it will go, before<br />
turning the key to lock the Slave door.<br />
In-line sliding patio doors<br />
To open, turn the key to unlock, push the lever downwards, and then slide the door to<br />
one side. To close, reverse this sequence.
maintenance<br />
lUBRICATION<br />
There is no such thing as a maintenance-free product. All<br />
moving parts require preventative maintenance to prolong<br />
operational life and to maintain the product guarantee.<br />
All handles, hinges, locks and friction stays should be kept clean and occasionally<br />
lubricated.<br />
Door Locks and Cylinders - A PTFE or graphite based lubricant.<br />
Friction Hinges - Vaseline or similar light grease.<br />
Window and Door Handles and Window Locks - WD40, 3-in-1 or similar.<br />
Mastic seals<br />
A high-performance mastic is used to seal between the PVCu products and the walls to<br />
prevent the possible ingress of draughts and water. It is normal that some discolouration<br />
of the mastic may occur, but this will not affect performance.<br />
Cleaning<br />
On a regular basis all PVCu surfaces should be washed down with warm soapy water<br />
- the more the better! Abrasive cleaners should NOT be used as these will remove the<br />
natural skin of the PVCu and render it less resistant to the atmosphere. For stubborn<br />
stains GENTLY use a good quality car polish. Similarly, do not use abrasive materials on<br />
painted, anodized or lacquered components.<br />
All windows and doors are provided with drainage holes. These must be kept clear<br />
otherwise the performance of the product will be affected.<br />
If you have windows with decorative leading, external astragal Georgian bar, <strong>care</strong><br />
should be taken whilst cleaning to prevent possible dislodging. All weathering gaskets<br />
and seals should be kept clean. If these are dislodged they can easily be pushed back<br />
into position, but if they become damaged they will have to be replaced to maintain<br />
product performance.<br />
Conservatory roofs should be regularly washed down with soapy water. Try to avoid it<br />
but, if you need to climb onto the roof, extreme <strong>care</strong> should be taken to avoid direct<br />
contact with the roof. Place scaffold boards to span between load bearing elements of<br />
the structure (rafters), to spread the load. Avoid leaning ladders against gutters, PVCu<br />
frames or roof sheets.<br />
Gutters and down pipe outlets must be kept clear of debris. It is normal for a small<br />
amount of standing water to be found in the gutter.
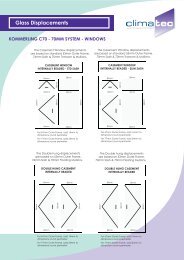
glass<br />
Because the production of glass is an exceptionally<br />
aggressive process, slight imperfections cannot be avoided<br />
and are accepted as an industry standard which states:-<br />
1. Transparent glass used in the manufacture of doubleglazed<br />
units is identical to that used in traditional single glazing and therefore will<br />
have a similar level of quality.<br />
2. Both panes of the double-glazed units shall be viewed from the room side, standing<br />
at a distance of two metres (6.5 feet) in natural daylight and not in direct sunlight. The<br />
area to be viewed is the normal vision area with the exception of a 50mm (2 inch)<br />
band around the perimeter of the unit.<br />
3. Transparent glass shall be deemed acceptable if the following phenomena are<br />
neither obtuse or bunched:-<br />
a) totally enclosed seeds<br />
b) bubbles or blisters<br />
c) hairline or blobs<br />
d) fine scratches not more than 25mm (1 inch) long<br />
e) minute embedded particles<br />
4. Obtrusiveness of blemishes shall be judged by looking through the glass and not at it,<br />
under normal lighting conditions as described as above.<br />
Extracted from the standards of the Glass and Glazing Federation.<br />
Patterned glass is manufactured in very large sheets and due to the nature of<br />
production the centralisation and matching of design in an individual unit cannot be<br />
guaranteed. It should also be pointed out that there is not a correct ‘right way up’ of<br />
pattern.<br />
Condensation<br />
Washing, cooking, bathing, even the act of breathing will produce water vapour.<br />
However, it will only normally show when in contact with a cool surface. Condensation<br />
can never be eliminated and can only be reduced by ventilation to allow the water<br />
vapour to escape. Leave windows open in the trickle ventilation position as required,<br />
bearing in mind that security may be compromised if the house is left unattended with<br />
windows in the ventilation position.
product guarantee<br />
Apart from the ongoing <strong>care</strong> and maintenance <strong>guide</strong>lines contained in this document,<br />
only authorised personnel should carry out any remedial work or adjustments to any of<br />
the products installed. Please contact us for advice and assistance - especially if the<br />
item is covered by warranty.<br />
11-14 Fletchers Square, Temple Farm Industrial Estate, Southend-on-Sea, Essex SS2 5RN<br />
Telephone: 01702 613733 / Website: www.climatec-windows.co.uk<br />
<strong>User</strong> Care Guide - REV 06-14