
You also want an ePaper? Increase the reach of your titles
YUMPU automatically turns print PDFs into web optimized ePapers that Google loves.
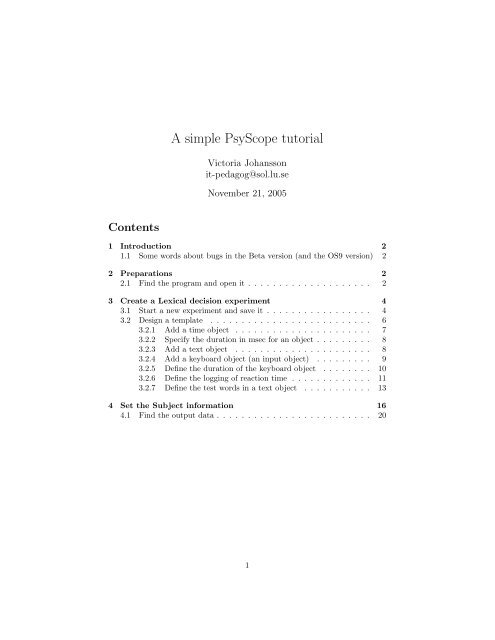
A <strong>simple</strong> <strong>PsyScope</strong> <strong>tutorial</strong><br />
Victoria Johansson<br />
it-pedagog@sol.lu.se<br />
November 21, 2005<br />
Contents<br />
1 Introduction 2<br />
1.1 Some words about bugs in the Beta version (and the OS9 version) 2<br />
2 Preparations 2<br />
2.1 Find the program and open it . . . . . . . . . . . . . . . . . . . . 2<br />
3 Create a Lexical decision experiment 4<br />
3.1 Start a new experiment and save it . . . . . . . . . . . . . . . . . 4<br />
3.2 Design a template . . . . . . . . . . . . . . . . . . . . . . . . . . 6<br />
3.2.1 Add a time object . . . . . . . . . . . . . . . . . . . . . . 7<br />
3.2.2 Specify the duration in msec for an object . . . . . . . . . 8<br />
3.2.3 Add a text object . . . . . . . . . . . . . . . . . . . . . . 8<br />
3.2.4 Add a keyboard object (an input object) . . . . . . . . . 9<br />
3.2.5 Define the duration of the keyboard object . . . . . . . . 10<br />
3.2.6 Define the logging of reaction time . . . . . . . . . . . . . 11<br />
3.2.7 Define the test words in a text object . . . . . . . . . . . 13<br />
4 Set the Subject information 16<br />
4.1 Find the output data . . . . . . . . . . . . . . . . . . . . . . . . . 20<br />
1
A <strong>simple</strong> <strong>PsyScope</strong> <strong>tutorial</strong> 2<br />
1 Introduction<br />
<strong>PsyScope</strong> is a program that can be used to create experiments without knowing<br />
any programming skills.<br />
This is a short <strong>tutorial</strong>, written for MacOSX, 10.3.9, and <strong>PsyScope</strong>XB40,<br />
that will teach you how to set up a <strong>simple</strong> prime experiment. For a more<br />
extensive <strong>tutorial</strong>, and more details on how to design different experiment, please<br />
read the <strong>PsyScope</strong> manual, which can be found - along with the program - on<br />
the program site<br />
http://psyscope.psy.cmu.edu/ (the OS9 version)<br />
If you want a <strong>PsyScope</strong> version that works on the OSX-system (i.e., the<br />
version used for this <strong>tutorial</strong>), you will have to use a Beta version (November<br />
2005). This can be downloaded from:<br />
http://psy.ck.sissa.it.<br />
The program works on Mac platform, and it is free to use.<br />
1.1 Some words about bugs in the Beta version (and the<br />
OS9 version)<br />
The program is still a Beta version, which means that some bugs still can appear.<br />
It is especially important to close all the windows, in the right order, when you<br />
create the experiment. It might also be a problem to replace old target items<br />
with new one, if you want to copy a new experiment, and, for instance, just<br />
change the prime words. A solution would be to start making the experiment<br />
from scratch.<br />
2 Preparations<br />
2.1 Find the program and open it<br />
1. Start the computer, and log in with your username and password.<br />
2. Go to the Dock on the bottom of the screen and click on the ”Finder”-<br />
symbol (the symbol to the very left in the Dock, see figure 1).<br />
Figure 1: Click on the Finder symbol in the Dock.<br />
3. A window will open on the screen.<br />
4. Look to the left ’column’ in the window, and find the the symbol for the<br />
application folder (an ”A”, see figure 2, n:o 1).
A <strong>simple</strong> <strong>PsyScope</strong> <strong>tutorial</strong> 3<br />
5. Then look at the right part of the window, and locate the folder named<br />
”<strong>PsyScope</strong>XB40”. Double click on it (see figure 2, n:o 2).<br />
Figure 2: Locate <strong>PsyScope</strong> by clicking on the Program symbol, and then double<br />
click on the <strong>PsyScope</strong> Folder.<br />
6. In the window you will see two <strong>PsyScope</strong> symbols. Choose to double click<br />
on the one ending on ”dep”.<br />
7. The program will start, and you will notice this in two ways:<br />
ˆ There are other menu options on the top of the screen (e.g., ”File”,<br />
”Edit”, ”Utilities”, ”Design”, ”Windows”...)<br />
ˆ The icon for <strong>PsyScope</strong> appears in the Dock on the bottom of the<br />
screen.<br />
8. Now, go to the <strong>PsyScope</strong> symbol on the dock, and click on it once (see<br />
figure 3).<br />
9. A meny shows, giving several options.<br />
Choose the option ”Behåll i Dock”. This will keep the <strong>PsyScope</strong> symbol<br />
in the dock also when you have quit the program, which will make it easier<br />
to start the program next time.<br />
If you want to move between any (open) program it is easiest just to click<br />
the program symbols in the dock.
A <strong>simple</strong> <strong>PsyScope</strong> <strong>tutorial</strong> 4<br />
Figure 3: Click on the <strong>PsyScope</strong> symbol in the dock, and choose the option<br />
”Behåll i Dock (’Keep in Dock’).<br />
3 Create a Lexical decision experiment<br />
We will start with guiding you through how to set up a <strong>simple</strong> lexical decision<br />
experiment. In this experiment words are visible on the screen, but the basic<br />
design can be varied with sounds or pictures.<br />
This is an experiment where the test persons should press a yes-button if<br />
they are presented with a real word on the screen, and a no-button if it is not<br />
a real word. The reaction times are measured and collected within a file, that<br />
can be opened and analysed afterwards.<br />
3.1 Start a new experiment and save it<br />
1. Make sure you are in the <strong>PsyScope</strong> program (click on the <strong>PsyScope</strong> symbol<br />
in the dock, if you are not sure).<br />
2. Go to the ”Design” menu in the top of the screen and choose the option<br />
”New Experiment”.<br />
3. A window opens, where you are asked to name your experiment. Give<br />
your experiment a name, for instance ”Test”, and klick OK.<br />
4. A new window opens, where you are asked to define where you want to<br />
save your experiment.<br />
5. You should choose to save the experiment on ”your” place on the server.<br />
Do like this (cf figure 4):<br />
(a) In the top of the open window is a white field saying ”Test 1 Script”.<br />
To the right of the field is a button with an arrow pointing downwards<br />
(see figure 4, n:o 1). Click on this button.<br />
(b) The window will expand (like the window in figure 4 is expanded).<br />
1 That is, the name you have given your experiment.
A <strong>simple</strong> <strong>PsyScope</strong> <strong>tutorial</strong> 5<br />
Figure 4: How to proceed to save your experiment in a folder called ”<strong>PsyScope</strong>”<br />
on your place on the server.<br />
(c) In the left ’column’ of the window are several shortcuts. One points<br />
to your place on the server. It has the same name as the ID you used<br />
to log in on the computer 2 . Click on this shortcut (see figure 4, n:o<br />
2).<br />
(d) Since <strong>PsyScope</strong> will produce several files from your experiment (both<br />
when you create it, and when you run it) it is best to save your<br />
experiment file in a separate folder. Create a new folder by clicking<br />
the button ”New folder” in the bottom left corner of the window (see<br />
figure 4, n:o 3).<br />
(e) A window will open, where you can give your new folder a name.<br />
Give it the name ”<strong>PsyScope</strong>”, and then click the ”Create”-button in<br />
the bottom right corner of the window.<br />
(f) The window closes, and you can notice that a new folder, named<br />
”<strong>PsyScope</strong>” has been created in your directory on the server (see 4,<br />
n:o 4).<br />
(g) Now, click on the ”Save”-button in the bottom right corner of the<br />
window (see figure 4, n:o 5).<br />
2 In figure 4 the student log in is ”stud-vjo”, but this varies from person to person.
A <strong>simple</strong> <strong>PsyScope</strong> <strong>tutorial</strong> 6<br />
6. The window will close and a new, ”Design”-window for <strong>PsyScope</strong> will show<br />
on the screen (see figure 5). From this window we will start building the<br />
experiment.<br />
Figure 5: The <strong>PsyScope</strong> Design Window. From this, you start building your<br />
experiment.<br />
3.2 Design a template<br />
To the left of the design window (see figure 5) there is a toolbar with symbols.<br />
When you create an experiment in <strong>PsyScope</strong> you will often click on one of these<br />
symbols to the left, and drag it into the right part of the window.<br />
1. Click on the ”Template”-symbol among the tools to the left of the Design<br />
window (see figure 6.<br />
2. Then click somewhere in the right space of the window.<br />
3. A window will appear, where you are asked to name your template.<br />
4. Give it the name ”TestTemplate”, and click OK to close the window.<br />
Figure 6: The Template symbol.<br />
5. A template symbol will appear in the right part of the window.
A <strong>simple</strong> <strong>PsyScope</strong> <strong>tutorial</strong> 7<br />
6. At the same time, the mouse cursor turns automatically into a ”drag<br />
and connect” symbol (see figure 7). This makes it possible to connect<br />
the ”TestTemplate” with the <strong>PsyScope</strong> symbol, called ”Test”. Place the<br />
cursor on the ”TestTemplate”, and click, and drag to connect the template<br />
with the <strong>PsyScope</strong> Symbol. Release the mouse then the <strong>PsyScope</strong> Symbol<br />
darkens. You should now have connected the two symbols 3 .<br />
Figure 7: The ”Drag and connect” symbol.<br />
7. The design window should now look like in figure 8.<br />
Figure 8: The Design window, with the Template connected to the <strong>PsyScope</strong><br />
symbol.<br />
8. Now, double click on the ”TestTemplate” symbol.<br />
9. The TestTemplate window opens.<br />
This is the window where you specify the details of the experiment.<br />
3.2.1 Add a time object<br />
10. Now, click on the symbol for ”Time” (the hourglass, see figure 9) in the<br />
very left column of the window.<br />
11. Then click on the middle column of the window.<br />
12. A window will appear, where you are asked to name your time object.<br />
3 If it does not work, try again, by clicking the ”Drag” symbol (see figure 7) in the tool<br />
field to the left, and, again, use the mouse to press, drag and release between two objects.
A <strong>simple</strong> <strong>PsyScope</strong> <strong>tutorial</strong> 8<br />
Figure 9: The symbol for adding a time object to the experiment.<br />
13. Name it ”Wait”, and click OK to close the window.<br />
14. Click once on the symbol ”Wait” in the middle part of the window (see<br />
figure 10, n:o 1).<br />
Figure 10: Set the duration of the time object ”Wait”.<br />
3.2.2 Specify the duration in msec for an object<br />
15. In the bottom of the window, there will now appear information on when<br />
and for how long the time object ”Wait” will show (cf. figure 10).<br />
It says that ”Wait” will start at 0 milliseconds after the start of trial, i.e.,<br />
that is at the beginning of the trial.<br />
It further specifies the duration to 500 msec.<br />
16. Change the duration time to 1000 msec by highlighting ”500” in the box,<br />
and type ”1000” instead.<br />
17. Notice how the time bar (in the right part of the window) expands, and<br />
compare your settings with the settings in figure 10.<br />
3.2.3 Add a text object<br />
18. Now, click on the symbol for adding a text object (the letter ”A”, see<br />
figure 11) in the very left column of the window.
A <strong>simple</strong> <strong>PsyScope</strong> <strong>tutorial</strong> 9<br />
Figure 11: The symbol for adding a text object to the experiment.<br />
19. Then click on the middle column of the window.<br />
20. A window will appear, where you are asked to name your text object.<br />
21. Name it ”Prime”, and click OK to close the window.<br />
22. Click once on the symbol ”Prime” in the middle part of the window.<br />
23. Look at the bottom of the window to check the settings of the duration<br />
for the ”Prime” object.<br />
It says that ”Prime” will start at 0 milliseconds after the end of event<br />
wait, i.e., that is right after your first time object.<br />
It further specifies the duration to 500 msec. Change the duration to 1000<br />
msec.<br />
3.2.4 Add a keyboard object (an input object)<br />
24. Now, click on the symbol for adding a keyboard event (the finger pressing<br />
a key, see figure 12) in the very left column of the window.<br />
Figure 12: The symbol for adding a keyboard event to the experiment.<br />
25. Then click on the middle column of the window.<br />
26. A window will appear, where you are asked to name your keyboard object.<br />
27. Name it ”Press”, and click OK to close the window.<br />
28. Click once on the symbol ”Press” in the middle part of the window.<br />
29. Look at the bottom of the window to check the settings of the duration<br />
for the ”Press” object.<br />
It says that ”Press” will start at 0 milliseconds after the end of event<br />
Prime, i.e., that is right after your text object.<br />
It further specifies the duration to 500 msec.<br />
Now we will change this!<br />
30. Set the object to start at 0 msec after the start of event Prime, by clicking<br />
and selecting from the drag menus in the bottom of the window.<br />
31. This will result in that the Press object starts at the same time as the<br />
Prime object.
A <strong>simple</strong> <strong>PsyScope</strong> <strong>tutorial</strong> 10<br />
3.2.5 Define the duration of the keyboard object<br />
32. Now double click on the object ”Press”.<br />
33. A window will open.<br />
34. Check the circle in front of ”Event Attribs”.<br />
35. Then click once on the drag menu after ”Duration” (i.e., on the words<br />
”Set to”).<br />
36. A menu opens, where you, again, should click on the option ”Set to”.<br />
37. A window opens.<br />
38. From the drag menu that now says ”msec”, you should choose ”Conditions”.<br />
39. The options in the window below the drag menu will now be available to<br />
choose from.<br />
40. Check the box in front of ”Key” (see figure 13).<br />
Figure 13: Check the box in front of ”Key”, to enable a key registration.<br />
41. To the left of ”Key”, the option ”Any” has appeared.<br />
42. Double click on ”Any”.<br />
43. A window opens (see figure 14).<br />
44. Highlight ”Any” in the left colum, and click the Delete button in the right<br />
column.<br />
45. Click the ”Add” button in the right column.<br />
46. Three question marks (”???”) will appear in the left column.
A <strong>simple</strong> <strong>PsyScope</strong> <strong>tutorial</strong> 11<br />
47. Highlight the question marks (they might be automatically highlighted).<br />
48. Change the question marks into the letter ”y” (for ”Yes”).<br />
49. Again, click the ”Add” button in the right column.<br />
50. Three question marks (”???”) will appear in the left column.<br />
51. Highlight the question marks (they might be automatically highlighted).<br />
52. Change the question marks into the letter ”n” (for ”No”).<br />
53. Check your settings against figure 14.<br />
Figure 14: Define the keys to be used for experiment input.<br />
54. Click OK to close the window.<br />
55. The window ”Duration for Press” is still open. After the option ”Key”,<br />
should now have appeared the letters ”y”, and ”n”.<br />
56. Click the red cirle in the upper left corner to close the window ”Duration<br />
for Press”.<br />
57. Now you are back in the window ”Press Event Attributes”.<br />
3.2.6 Define the logging of reaction time<br />
58. Look at the option ”Actions”.<br />
59. Click on the drag menu after ”Actions”, and choose the option ”Set to”.<br />
60. A window called ”EventAction for Press” will open.
A <strong>simple</strong> <strong>PsyScope</strong> <strong>tutorial</strong> 12<br />
61. Click on the button ”New” in the upper right corner of the window.<br />
62. Two squares have appeared in the window. The left box says ”Never” (Cf.<br />
figure 15).<br />
Figure 15: Define the action condition for the keyboard event.<br />
63. Double click on the word ”Never”.<br />
64. A window, called ”Conditions for EventActions” will open. You will now<br />
repeat the settings you made for the duration of the event 4 .<br />
65. Check the box in front of ”Key” (cf. with figure figure 13).<br />
66. To the left of ”Key”, the option ”Any” has appeared.<br />
67. Double click on ”Any”.<br />
68. A window opens (see figure 14).<br />
69. Highlight ”Any” in the left colum, and click the Delete button in the right<br />
column.<br />
70. Click the ”Add” button in the right column.<br />
71. Three question marks (”???”) will appear in the left column.<br />
72. Highlight the question marks (they might be automatically highlighted).<br />
73. Change the question marks into the letter ”y” (for ”Yes”).<br />
74. Again, click the ”Add” button in the right column.<br />
75. Three question marks (”???”) will appear in the left column.<br />
76. Highlight the question marks (they might be automatically highlighted).<br />
77. Change the question marks into the letter ”n” (for ”No”).<br />
4 The reason for doing this is that we want the duration of the window to last exactly until<br />
the moment the test person presses the keys ”y”, or ”n” as a reaction to what is presented on<br />
the screen.
A <strong>simple</strong> <strong>PsyScope</strong> <strong>tutorial</strong> 13<br />
78. Check your settings against figure 14.<br />
79. Close the window by clicking OK.<br />
80. Then, close the window ”Conditions for EventActions” by clicking in the<br />
red circle in the upper left corner of the window.<br />
81. You are back at the window ”EventActions for Press”.<br />
82. Now, click on the button ”New” that is followed by an arrow pointing<br />
downwards (cf. figure 16).<br />
83. From the drag meny, choose the option ”RT” (”ReactionTime”).<br />
84. The window should now look like in figure 16.<br />
Figure 16: Define that the action condition for the keyboard event should log<br />
the reaction time.<br />
85. Close the window ”EventActions for Press” by clicking in the red circle in<br />
the upper left corner of the window.<br />
86. Close the window ”Press Event Attributes” by clicking in the red circle in<br />
the upper left corner of the window.<br />
87. Now, you are back in the Test Template window.<br />
3.2.7 Define the test words in a text object<br />
We will now define the words that will appear on the screen, i.e., the words<br />
that the text persons should react on.<br />
88. Double click on the text item ”Prime”.<br />
89. A window, called ”Prime Event Attributes” will open.
A <strong>simple</strong> <strong>PsyScope</strong> <strong>tutorial</strong> 14<br />
90. Make sure that the circle in front of ”Stimulus Attribs” is checked.<br />
91. Go to the drag menu after ”Stimulus” (from the beginning it should be<br />
set to ”Default”).<br />
92. Click on it, and choose the option ”Vary by”, and then ”List”.<br />
93. A window will open and tell you that there are currently no lists. Click<br />
on the button ”Create”.<br />
94. A window will appear where you are asked to name your list. Give it the<br />
name ”List”.<br />
95. Let the list type be set to ”Regular” (this should be the default option).<br />
96. Click OK.<br />
97. A window will prompt you to give a ”New Field Name”. Just let the<br />
default option ”Stimulus” be here, and click OK.<br />
98. A window, called ”List” opens.<br />
99. Now, you should define the words you want to have in your experiment.<br />
100. Click on the button ”New” to the left of the window.<br />
101. In the fields in the bottom of the window there will appear the words<br />
”Item1”, ”1” (to the right), and ”???” (to the left).<br />
102. Repeat pressing the ”New” button seven times, so that you have in total<br />
four lines (Item1-Item7) in the bottom of the window.<br />
103. Then double click on the first line with ”???”.<br />
104. A window will open (at the top of the screen), showing four fields, where<br />
you can fill in the words you want to be part of your experiment.<br />
105. Fill in four real words (e.g., ”cat”, ”rat”, ”hat”, and ”sat”) and four<br />
nonwords (e.g., ”wat”, ”lat”, ”zat”, ”dat”, and ”jat”). You can use tab<br />
to move between the fields. Press enter when you have filled in the last<br />
word.<br />
106. Loot at the drag meny ”Item Order”.<br />
107. It has the default value ”Sequential”. Change this to ”Random”. This<br />
will make the words appear on the screen in random order.<br />
108. Your window should now look like in figure 17.<br />
109. Close the window ”List” by clicking in the red circle in the upper left<br />
corner of the window.<br />
110. You are back in the window ”Prime Event Attributes”.
A <strong>simple</strong> <strong>PsyScope</strong> <strong>tutorial</strong> 15<br />
Figure 17: Define the words in the experiment by adding words to your list.<br />
111. Click on the drag menu to the right of ”Font”, and choose ”Set to”.<br />
112. A window opens where you can change the font.<br />
113. Change the font (e.g., to ”Arial”) by using the drag menu in the window.<br />
114. Click OK to close the window.<br />
115. You are back in the window ”Prime Event Attributes”.<br />
116. Click on the drag menu to the right of ”Size”, and choose ”Set to”.<br />
117. A window opens where you can change the font.<br />
118. Change the font (e.g., to ”40”) by using the drag menu in the window, or<br />
by typing in the numbers.<br />
119. Click OK to close the window.<br />
120. You are back in the window ”Prime Event Attributes”, close it by clicking<br />
in the red circle in the upper left corner of the window.<br />
121. You are back in the TestTemplate window. This window should now look<br />
like in figure 18<br />
122. Now, close the window TestTemplate window by clicking in the red circle<br />
in the upper left corner of the window.<br />
123. You are back in the Design window.<br />
124. It is time to save your experiment (if you have not done that yet). Do this<br />
by going to the File meny and choose ”Save Script”, or (better) press the<br />
Apple key (to the very left of the Space bar) and ”S” at the same time.
A <strong>simple</strong> <strong>PsyScope</strong> <strong>tutorial</strong> 16<br />
Figure 18: The TestTemplate window after the experimental design is finished.<br />
125. Then, double click on the <strong>PsyScope</strong> symbol in the Design window.<br />
126. A window opens, where you can specify the number of trials that should<br />
appear in each block.<br />
127. Type ”8” in the upper field (where the default value is ”1”). Since you<br />
have 8 words in your experiment, this will mean that every word is shown<br />
once.<br />
128. Close the window by clicking in the red circle in the upper left corner of<br />
the window.<br />
129. Then, close the design window by clicking in the red circle in the upper<br />
left corner of the window.<br />
130. You are now in the <strong>PsyScope</strong> Window.<br />
131. Press the button ”Run” to run your experiment. .<br />
132. Does it work? Does all your words appear one after another on the screen?<br />
Do they appear in random order (i.e., not in the same order that they are<br />
listed)? Does the experiment wait to move on until you have pressed either<br />
”y”, or ”n”? If anything of this goes wrong, you will have to go back and<br />
ajust your script.<br />
4 Set the Subject information<br />
If you want to get the output, i.e., the results from the experiments (which you<br />
probably want in the end), you have to fill in what kind of subject information<br />
the program should log. By doing this, a file is created with information on,<br />
e.g., reaction times to each item after every trial.<br />
Do like this:
A <strong>simple</strong> <strong>PsyScope</strong> <strong>tutorial</strong> 17<br />
1. Go to the Design window (i.e., click on the red circle in the upper left<br />
corner of the Template window, if you still have this open), and click on<br />
the symbol called ”Subject info” in the upper left corner of the window<br />
(see figure 19).<br />
Figure 19: Click on the Subject Info symbol to specify what kind of subject<br />
information the program should log with each trial.<br />
2. A new window will open, see figure 20.<br />
Figure 20: In this window you can specify what kind of subject information the<br />
program should log with each trial<br />
3. Go to the first line ”Subject Name, and check the following boxes: ”Data<br />
file” and ”Log file” (see figure 20). (If a window opens to ask you to<br />
specify any option, just click OK.)<br />
4. Go the the second line ”Subject Number”, and check the following boxes:<br />
”Data file”, ”Log file” and ”Group by” (see figure 20). (If a window opens<br />
to ask you to specify any option, just click OK.)<br />
5. Then click on the button ”Data file...” (see figure 20, n:o 1).<br />
6. A new window opens, see figure 21.<br />
7. Look at the box in the right corner of the window, named. ”Subject Info<br />
Items” (see figure 21, n:o 1).<br />
8. Click on the line ”SubjectName”, and then on the ”Add”-button (see<br />
figure 21, n:o 2).<br />
9. ”SubjectName” will now appear in the box in the left corner, named ”Data<br />
File Items”.<br />
10. Check the box in front of ”SubjectName” for ”Use Initials” (see figure 21,<br />
n:o 3).
A <strong>simple</strong> <strong>PsyScope</strong> <strong>tutorial</strong> 18<br />
Figure 21: In this window you can specify what information that should be<br />
shown in the output files after the experiment.<br />
11. Then click on the button ”Separator...” (see figure 21, n:o 4).<br />
12. A window will open, with the pre-defined separator ”-”.<br />
13. Choose this one by just clicking ”OK”, to close the window.<br />
14. Then click on ”SubjectNumber” in the right box in the window.<br />
15. Click ”Add”, to move ”SubjectNumber to the left box.<br />
16. Look at the header ”Calculate name” in the bottom of the window.<br />
17. Choose ”Experiment is run” from the menu(see figure 21, n:o 5).<br />
18. Click OK to close the window.<br />
19. You still have a window (called ”Test Subject info) open. Click on the<br />
button ”Schedule” (see figure 20, n:o 2).<br />
20. This will open a window called ”Prompt & Log Schedule”. Here you define<br />
the order of the various tasks in the experiment.<br />
21. Use the mouse to click and drag the options to this order (cf. figure 22).<br />
Open Script or Project<br />
Open Experiment<br />
Run<br />
Prompt SubjectName<br />
Assign Group
A <strong>simple</strong> <strong>PsyScope</strong> <strong>tutorial</strong> 19<br />
Figure 22: Define when and what information should be prompted during the<br />
experiment in the Prompt & Log Schedule window.<br />
Practice<br />
Log SubjectName<br />
Log SubjectNumber<br />
Calculate Data File Name<br />
End of Run<br />
End of Practice<br />
Break from Run<br />
Break from Practice<br />
Close Experiment<br />
Close Script or Project<br />
Never<br />
Prompt SubjectNumber<br />
Prompt RunNumber<br />
Log RunNumber<br />
22. Close the ”Prompt & Log Schedule” window by clicking on the red circle<br />
in the upper left corner of the window.<br />
23. Close the ”Test subject info” window by clicking on the red circle in the<br />
upper left corner of the window.<br />
24. Save your experiment by pressing the apple key (next to space bar) and<br />
”S” at the same time.
A <strong>simple</strong> <strong>PsyScope</strong> <strong>tutorial</strong> 20<br />
25. Then go to ”Run” in the menu at the top of the screen and test run your<br />
experiment.<br />
4.1 Find the output data<br />
The result from the test run is saved in a file with the subject’s initials. The<br />
file is saved in the same folder as the experiment. If a subject takes several<br />
experiments, these will be saved in the same file.<br />
Do like this to find and look at the output data:<br />
1. Click on the ”Finder”-symbol in the dock (cf figure ??).<br />
2. Press the apple key and N at the same time if you don’t see a finder<br />
window.<br />
3. When a finder window is open, look at the column to the left, and click<br />
on the symbol for your place on the server (i.e., the link with the same<br />
name as the id you used to log in on the computer).<br />
4. Then double click on the folder ”<strong>PsyScope</strong>” that you have saved in your<br />
folder.<br />
5. This is where you saved the experiment, and this is where, by default, the<br />
data output files will end up. Now, look at a file with a name created out<br />
of the initials of your test subject, for instance ”VJ”, if your subject is<br />
named ”Victoria Johansson”.<br />
6. Double click on the file, and it will open.<br />
7. The file will contain information on reaction times, and which item (i.e.,<br />
which test word) that was presented for each trial.<br />
You can use for instance Excel (available on this computer by going to<br />
the program folder - follow the instructions as how to find the <strong>PsyScope</strong><br />
in the beginning of this <strong>tutorial</strong>, section 2.1) to organise your data.