INMARSAT MINI-C MOBILE EARTH STATION - Furuno
INMARSAT MINI-C MOBILE EARTH STATION - Furuno
INMARSAT MINI-C MOBILE EARTH STATION - Furuno

You also want an ePaper? Increase the reach of your titles
YUMPU automatically turns print PDFs into web optimized ePapers that Google loves.
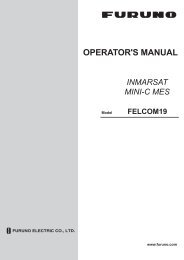
<strong>INMARSAT</strong> <strong>MINI</strong>-C<br />
<strong>MOBILE</strong> <strong>EARTH</strong> <strong>STATION</strong><br />
MODEL FELCOM 16
SAFETY INSTRUCTIONS<br />
WARNING<br />
Do not open the equipment.<br />
Hazardous voltage which can<br />
cause electrical shock, burn<br />
or serious injury exists inside<br />
the equipment. Only qualified<br />
personnel should work inside<br />
the equipment.<br />
Hazardous microwave.<br />
Do not approach within<br />
60 cm of the antenna radome<br />
when it is transmitting.<br />
Microwave radiation can be<br />
harmful to the human body,<br />
particularey the eyes.<br />
CAUTION<br />
Use the proper fuse.<br />
Use of a wrong fuse can result in fire or<br />
permanent damage to the equipment.<br />
WARNING LABEL<br />
A warning label is attached to the<br />
communication unit. Do not remove the<br />
label. If the label is missing or damaged,<br />
contact your dealer about replacement.<br />
WARNING<br />
To avoid electrical shock, do not<br />
remove cover. No user-serviceable<br />
parts inside.<br />
Name: Warning Label (1)<br />
Type: 86-003-1011<br />
Code No.: 100-236-741<br />
Radiation Level At<br />
10W/m<br />
2<br />
60 cm<br />
Do not disassemble or modify the<br />
equipment.<br />
Fire, electrical shock or serious injury can<br />
result.<br />
Turn off the power immediately if water<br />
leaks into the equipment or the equipment<br />
is emitting smoke or fire.<br />
Continued use of the equipment can cause<br />
fire or electrical shock.<br />
Any repair work must be done by a<br />
licensed radio technician.<br />
Improper repair work can cause electrical<br />
shock or fire.<br />
i
TABLE OF CONTENTS<br />
FOREWORD.........................................................................................................vi<br />
SYSTEM CONFIGURATION ..............................................................................viii<br />
<strong>INMARSAT</strong> C SYSTEM OVERVIEW ...................................................................ix<br />
1. OPERATIONAL OVERVIEW .........................................................................1-1<br />
1.1 Communication Unit .................................................................................................. 1-1<br />
1.1.1 Turning the power on/off.................................................................................. 1-1<br />
1.1.2 Diagnostics ..................................................................................................... 1-1<br />
1.2 Terminal Unit (PC) ..................................................................................................... 1-2<br />
1.2.1 Installing software ........................................................................................... 1-2<br />
1.2.2 Starting, quitting the application....................................................................... 1-2<br />
1.2.3 Controls description ........................................................................................ 1-3<br />
1.2.4 Shortcut keys .................................................................................................. 1-4<br />
1.2.5 Function keys.................................................................................................. 1-4<br />
1.3 Standby Display......................................................................................................... 1-5<br />
1.3.1 Display indications .......................................................................................... 1-6<br />
1.4 Menu Overview........................................................................................................ 1-10<br />
1.6 Error Messages and Alerts....................................................................................... 1-12<br />
2. SYSTEM INITIALIZATION.............................................................................2-1<br />
2.1 System Settings......................................................................................................... 2-1<br />
2.2 Terminal Setup........................................................................................................... 2-4<br />
2.3 Login and Logout....................................................................................................... 2-6<br />
2.3.1 Login............................................................................................................... 2-6<br />
2.3.2 Logout............................................................................................................. 2-8<br />
2.4 EGC Settings............................................................................................................. 2-9<br />
2.4.1 What is the EGC (Enhanced Group Call) service? .......................................... 2-9<br />
2.4.2 EGC setup .................................................................................................... 2-11<br />
2.4.3 Adding EGC channels................................................................................... 2-14<br />
2.4.4 Saving, printing EGC messages automatically .............................................. 2-16<br />
2.5 Adding NCS Channels............................................................................................. 2-18<br />
2.6 LES List................................................................................................................... 2-20<br />
2.6.1 Displaying toll charges .................................................................................. 2-20<br />
2.6.2 Registering LES to LES list ........................................................................... 2-22<br />
2.6.3 Editing the LES list ........................................................................................ 2-23<br />
2.6.4 Printing the LES list....................................................................................... 2-24<br />
2.7 Station List............................................................................................................... 2-25<br />
2.7.1 Adding stations to the station list ................................................................... 2-25<br />
2.7.2 Editing the station list .................................................................................... 2-28<br />
2.7.3 Printing the station list ................................................................................... 2-29<br />
2.8 Entering Own Ship’s Position................................................................................... 2-30<br />
2.9 Creating A Directory................................................................................................. 2-31<br />
2.9.1 Creating a directory where to store messages .............................................. 2-31<br />
2.9.2 Specifying directory where to store messages............................................... 2-33<br />
ii
2.10 E-mail Service List ...................................................................................................2-34<br />
2.11 E-mail Setup ............................................................................................................2-37<br />
2.12 Saving, Loading System Settings.............................................................................2-38<br />
2.12.1 Saving system settings to a floppy disk .........................................................2-38<br />
2.12.2 Loading system settings to the terminal unit ..................................................2-38<br />
3. FILE OPERATIONS.......................................................................................3-1<br />
3.1 Files and Working Areas ............................................................................................3-1<br />
3.2 Preparing Files...........................................................................................................3-2<br />
3.2.1 Preparing a routine file.....................................................................................3-2<br />
3.2.2 Preparing a confidential file..............................................................................3-3<br />
3.2.3 Editor menu setup ...........................................................................................3-4<br />
3.2.4 Working with text .............................................................................................3-5<br />
3.3 Saving Files .............................................................................................................3-10<br />
3.3.1 Formatting a floppy disk................................................................................. 3-11<br />
3.3.2 Saving files ....................................................................................................3-12<br />
3.4 Opening Files...........................................................................................................3-14<br />
3.4.1 Opening files .................................................................................................3-14<br />
3.4.2 Switching between files .................................................................................3-14<br />
3.4.3 Opening a file when both working areas are occupied...................................3-15<br />
3.5 Saving a File Under a New Name ............................................................................3-16<br />
3.6 Printing Files on Floppy Disks ..................................................................................3-17<br />
3.7 Combining Files .......................................................................................................3-17<br />
3.8 Deleting Files ...........................................................................................................3-18<br />
3.9 Renaming Files........................................................................................................3-19<br />
3.10 Decoding E-mail Attachment ....................................................................................3-20<br />
4. <strong>INMARSAT</strong> C COMMUNICATIONS ..............................................................4-1<br />
4.1 Transmitting ...............................................................................................................4-1<br />
4.1.1 Code description..............................................................................................4-1<br />
4.1.2 Transmitting prepared message ......................................................................4-2<br />
4.1.3 Transmitting a file stored on a floppy disk ......................................................4-15<br />
4.1.4 Canceling transmission on a message awaiting transmission........................4-16<br />
4.1.5 Requesting delivery status.............................................................................4-17<br />
4.1.6 Accessing the 2-digit code services...............................................................4-20<br />
4.1.7 Displaying the send message log ..................................................................4-22<br />
4.2 Receiving.................................................................................................................4-23<br />
4.2.1 When a message is received.........................................................................4-23<br />
4.2.2 Setting the receive alarm ...............................................................................4-24<br />
4.2.3 Displaying, printing received messages.........................................................4-25<br />
4.2.4 Automatically printing received messages .....................................................4-28<br />
4.2.5 Saving received messages to a floppy disk ...................................................4-28<br />
4.2.6 Automatically saving received messages to a floppy disk ..............................4-29<br />
4.2.7 Deleting received messages..........................................................................4-30<br />
4.3 Display Log ..............................................................................................................4-31<br />
4.3.1 Displaying and printing the display log...........................................................4-31<br />
4.3.2 Automatic printing of display log ....................................................................4-32<br />
iii
4.4 EGC Messages ....................................................................................................... 4-33<br />
4.4.1 Displaying and reprinting EGC messages ..................................................... 4-33<br />
4.4.2 Displaying EGC closed network ID (ENID).................................................... 4-34<br />
4.4.3 Receiving EGC distress, urgent message ..................................................... 4-35<br />
4.4.4 Displaying the EGC message log.................................................................. 4-35<br />
5. DATA REPORTING AND POLLING ...............................................................5-1<br />
5.1 Data Reporting .......................................................................................................... 5-1<br />
5.1.1 Setting a data report........................................................................................ 5-2<br />
5.1.2 Setting a message report ................................................................................ 5-4<br />
5.1.3 Automatic printing of data report, polling command......................................... 5-7<br />
5.2 Polling ....................................................................................................................... 5-8<br />
5.2.1 Polling commands........................................................................................... 5-8<br />
5.2.2 Other polling commands ................................................................................. 5-8<br />
5.2.3 Polling reception............................................................................................ 5-10<br />
5.3 DNID (Data Network Identification).......................................................................... 5-11<br />
5.3.1 Displaying DNID............................................................................................ 5-11<br />
5.3.2 Enabling/Disabling DNID............................................................................... 5-12<br />
6. OTHER FUNCTIONS.....................................................................................6-1<br />
6.1 Aborting an Operation................................................................................................ 6-1<br />
6.2 Scanning NCS Common Channel.............................................................................. 6-2<br />
6.3 Choosing EGC Receiving Channel............................................................................ 6-3<br />
6.4 Choosing NCS Channel............................................................................................. 6-4<br />
6.5 LES Information......................................................................................................... 6-5<br />
7. MAINTENANCE, TROUBLESHOOTING......................................................7-1<br />
7.1 General Checking and Maintenance.......................................................................... 7-1<br />
7.2 Diagnostics................................................................................................................ 7-2<br />
7.2.1 Self test at power on ....................................................................................... 7-2<br />
7.2.2 Testing the communication unit through the keyboard, displaying program<br />
version no. ...................................................................................................... 7-2<br />
7.3 Performance Verification (PV) Test ............................................................................ 7-3<br />
7.3.1 PV test sequence............................................................................................ 7-3<br />
7.3.2 PV test procedure ........................................................................................... 7-4<br />
7.3.3 Results of PV test............................................................................................ 7-5<br />
7.4 System Status Monitor............................................................................................... 7-6<br />
7.5 Replacing the Fuse.................................................................................................... 7-7<br />
7.6 Error Messages ......................................................................................................... 7-8<br />
7.6.1 Equipment trouble messages.......................................................................... 7-8<br />
7.6.2 Warning messages.......................................................................................... 7-9<br />
iv
APPENDIX.......................................................................................................AP-1<br />
Menu Tree.......................................................................................................................AP-1<br />
International Telex/Telephone Country Code List............................................................. AP-9<br />
LES List......................................................................................................................... AP-17<br />
International Telex Abbreviations ................................................................................... AP-18<br />
International Telegraphy Alphabet ................................................................................. AP-19<br />
Messages...................................................................................................................... AP-20<br />
Parts List....................................................................................................................... AP-23<br />
Parts Location ............................................................................................................... AP-25<br />
SPECIFICATIONS ...........................................................................................SP-1<br />
INDEX ............................................................................................................... IN-1<br />
v
FOREWORD<br />
Introduction<br />
FURUNO Electric Company thanks you for considering and purchasing the<br />
FELCOM 16 Inmarsat Mini-C Mobile Earth Station. We are confident you will<br />
discover why the FURUNO name has become synonymous with quality and<br />
reliability.<br />
Mainly consisting of a communication unit, the FELCOM 16 provides a wide<br />
range of communication services for mobile and fixed terrestrial subscribers in<br />
the Inmarsat C communication network. Its compact size permits installation<br />
where space is limited.<br />
FURUNO designs and manufactures this equipment with much attention to<br />
operation and maintenance simplicity. However, please read and follow the<br />
recommended procedures for operation and maintenance to get the most out of<br />
the equipment.<br />
This manual provides a brief introduction to the Inmarsat C system (pages ix thru<br />
6). For more detailed information, refer to the information below.<br />
Inmarsat C Maritime Customer Relations Officer<br />
Maritime Services Operations Department<br />
International Maritime Satellite Organization (Inmarsat)<br />
Address: 99 City Road, London, EC1Y 1AX, UK<br />
Telephone: +44 20 7728 1777 (Switchboard)<br />
Fax: +44 20 7728 1142<br />
URL: www.inmarsat.com<br />
E-mail customer_care@inmarsat.com<br />
vi
Features<br />
• E-mail facility. (To transmit E-mail, register with an LES provider which<br />
provides e-mail services. E-mail charges are calculated separately.)<br />
• Built-in Enhanced Group Call (EGC) receiver permits operation as EGC-only<br />
receiver.<br />
• Store-and-forward telex communication (public telex network)<br />
• Data reporting and Polling<br />
• Diagnostic programs for maintenance<br />
• Menu driven operation<br />
Program Number<br />
PC Board Program No. Version No. Date of Modification<br />
RF CON CPU 1650160 01<br />
vii
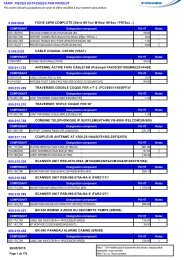
SYSTEM CONFIGURATION<br />
ANTENNA<br />
UNIT<br />
IC-116<br />
SHIP'S MAINS<br />
100/115/220/230 VAC<br />
1φ, 50/60 Hz<br />
SHIP'S MAINS<br />
12-24 VDC<br />
AC/DC<br />
Power Supply<br />
PR-240-CE<br />
CATEGORY OF UNITS<br />
Antenna Unit: Exposed to Weather<br />
Communication Unit: Protected from Weather<br />
Other Units: Protected from Weather<br />
FURUNO<br />
O POWER I<br />
<strong>INMARSAT</strong>-C <strong>MOBILE</strong> <strong>EARTH</strong> <strong>STATION</strong><br />
GPS Receiver<br />
OP16-24 (internal)<br />
POWER<br />
LOGIN<br />
TX<br />
ERROR<br />
COMMUNICATION UNIT<br />
IC-216<br />
PERSONAL<br />
COMPUTER<br />
(PC/AT compatible)<br />
: Standard<br />
: Option<br />
: Local Supply<br />
viii
<strong>INMARSAT</strong> C SYSTEM OVERVIEW<br />
Introduction<br />
The Inmarsat C system provides worldwide telex and data transmission and<br />
reception of written information to owners of an Inmarsat C transceiver or a<br />
terrestrial telex network via satellite. Further, e-mail may be sent via the internet.<br />
Communication mode is store-and-forward telex, which means all information<br />
sent are first stored at an LES and then delivered to designated party.<br />
An EGC (Enhanced Group Call) receiver is built in the FELCOM to receive the<br />
following types of messages, broadcast by LESs:<br />
• SafetyNET TM -governments and maritime authorities can use this service to<br />
distribute maritime safety information to ships within selected areas.<br />
• FleetNET TM -commercial subscription organizations or shipping companies<br />
can use this service to transmit trade information (for example, company<br />
news or market prices) simultaneously to a selected group of ships, to<br />
provide up-to-the-minute information.<br />
• EGC system-related is sent by Inmarsat to certain shipping companies and<br />
geographical areas.<br />
Besides its primary application of ship-shore, shore-ship or ship-ship<br />
communications, the Inmarsat C service has also proved beneficial to trucking<br />
firms who have found it indispensable for communicating with their vehicles. In<br />
this manual, however, we will concentrate on ship applications, the main<br />
application.<br />
ix
Inmarsat C System Configuration<br />
OCC<br />
NCS<br />
SCC<br />
LES LES LES<br />
Same as left Same as left Same as left<br />
Satellite<br />
MES<br />
0.0 m<br />
0.0 m<br />
0.0 m<br />
-/+: To set option<br />
-/+: To set option<br />
-/+: To set option<br />
AOR-West AOR-East IOR POR<br />
OCC: Operation Control Center<br />
SCC: Satellite Control Center<br />
NCS: Network Coordination Station<br />
MES: Mobile Earth Station<br />
LES: Land Earth Station<br />
Inmarsat C system configuration<br />
x
<strong>INMARSAT</strong> C SYSTEM<br />
The Inmarsat C system consists of the Operation Control Center (OCC), Satellite<br />
Control Centers (SCC), Network Coordination Stations (NCS), Land Earth<br />
Stations (LES) and Mobile Earth Stations (MES). The OCC, located at Inmarsat’s<br />
London headquarters, coordinates a wide range of activities in the Inmarsat<br />
system, including commissioning of mobile earth stations.<br />
The Inmarsat C system divides the world into four regions and each region is<br />
covered by its own satellite.<br />
Inmarsat system satellites<br />
Region Satellite Satellite Position<br />
AOR-West Inmarsat 3, F4 54.0°W<br />
AOR-East Inmarsat 3, F2 15.5°W<br />
IOR Inmarsat 3, F1 64.0°E<br />
POR Inmarsat 3, F3 178.0°E<br />
In each region there is one NCS and several LESs. The NCS keeps track of all<br />
Inmarsat C transceivers in its region and broadcasts information such as<br />
navigational warnings, weather reports and news. The LESs provide the link<br />
between the MES and the terrestrial telecommunications networks via satellite.<br />
xi
Coverage area of Inmarsat satellites<br />
AREA<br />
POR<br />
IOR<br />
AOR-EAST<br />
AOR-WEST<br />
SATELLITE NAME<br />
<strong>INMARSAT</strong>-3, F3<br />
<strong>INMARSAT</strong>-3, F1<br />
<strong>INMARSAT</strong>-3, F2<br />
<strong>INMARSAT</strong>-3, F4<br />
POSITION<br />
178°E<br />
64.0°E<br />
15.5°W<br />
54.0°W<br />
xii
Communications Network<br />
<strong>INMARSAT</strong> C SYSTEM<br />
The illustration below shows the Inmarsat C communications network.<br />
NCS/LES<br />
Signaling Link<br />
Network<br />
Coordination<br />
Station (NCS)<br />
NCS/NCS Signaling Link<br />
NCS Common Channel<br />
Data<br />
Communications<br />
Network<br />
Telex Network<br />
Land Earth<br />
Station<br />
(LES)<br />
Terrestrial<br />
Communications<br />
Network<br />
MES Signaling<br />
Channel<br />
MES Message<br />
Channel<br />
LES TDM<br />
Channel<br />
Data Circuit<br />
Terminating<br />
Equipment<br />
(DCE)<br />
Mobile Earth<br />
Station (MES)<br />
Data Terminal<br />
Equipment (DTE)<br />
Enhanced Group<br />
Calling (EGC) Receiver<br />
Inmarsat C communications network<br />
NCS common channel<br />
NCS/LES signaling link<br />
LES TDM channel<br />
MES message channel<br />
MES signaling channel<br />
NCS/NCS signaling link<br />
MES interface<br />
Terrestrial network<br />
interface<br />
The NCS has two major functions:<br />
1) Transmitting information on a common channel.<br />
2) Transmitting EGC messages to MESs.<br />
This is the link between NCS and all LESs in its<br />
region. All EGC messages pass through this link.<br />
This channel carries the circuit control signal for<br />
MES and transmits messages from LES to MES.<br />
This channel carries messages from MES to LES.<br />
This channel transmits requests, distress alerts, data<br />
reports, etc. In addition, it carries login and logout<br />
from MES to NCS.<br />
This is the link between NCSs. It exchanges data<br />
between MESs operating in different ocean regions.<br />
The MES consists of the Data Circuit Terminating<br />
Equipment (DCE) and the Data Terminal Equipment<br />
(DTE). The DCE consists of the antenna unit, and<br />
the DTE consists of the communications unit and<br />
terminal unit (PC).<br />
The major functions of the LESs are:<br />
1) Telex store-and-forward conversion<br />
2) Handling EGC messages<br />
3) Handling distress alerts<br />
4) Data Reporting and Polling<br />
xiii
Types of MES<br />
There are three types of MES: class 1, class 2 and class 3. This FELCOM is<br />
a class 2 MES.<br />
Class 1:<br />
Class 2:<br />
Class 3:<br />
1) Transmits messages to LES<br />
2) Receives messages from LES<br />
1) The functions of class 1 plus operation as an EGC receiver<br />
when not transmitting or receiving.<br />
2) EGC-only receiver<br />
The function of class 1 plus simultaneous operation as an<br />
EGC-only receiver.<br />
xiv
1. OPERATIONAL OVERVIEW<br />
1.1 Communication Unit<br />
The communication unit is the heart of the FELCOM system, creating,<br />
transmitting and receiving messages via the Inmarsat system.<br />
POWER<br />
Switch<br />
1.1.1 Turning the power on/off<br />
Communication unit IC-216<br />
Status LEDs<br />
POWER: Green when power is on.<br />
LOGIN: Green when logged in;<br />
flashing in red in other<br />
instances.<br />
TX: Green when transmitting.<br />
ERROR: Flashes in red for<br />
equipment error.<br />
Press the [POWER] switch to power the communication unit and antenna on or<br />
off.<br />
Note: The example screens shown in this manual may not match the screens<br />
you see on your display. The screen you see depends on your system<br />
configuration and equipment settings.<br />
1.1.2 Diagnostics<br />
When the communication unit is turned on it automatically conducts a series of<br />
diagnostic tests to check itself for proper operation. For further details, see<br />
Chapter 7.<br />
1-1
1. OPERATIONAL OVERVIEW<br />
1.2 Terminal Unit (PC)<br />
All operations are carried out from the terminal unit (local supply), through an<br />
easy-to-follow menu system.<br />
PC requirements<br />
• Operating system: Windows98, 2000, ME or XP<br />
• Memory: 32 MB<br />
• Free space in hard disk: 20 MB<br />
• CPU: Pentium 100 MHz<br />
• Floppy disk drive<br />
1.2.1 Installing software<br />
After the equipment has been installed, install the application software F16PC in<br />
the terminal unit as follows:<br />
1. Turn on the PC.<br />
2. Insert the supplied FD-ROM into the floppy disk drive.<br />
3. Make a folder and copy the application software F16PC to the folder.<br />
4. If desired, make a shortcut of the F16PC icon.<br />
<br />
1.2.2 Starting, quitting the application<br />
For information about PC operation see the PC’s owner’s manual.<br />
1. Turn on the communications unit.<br />
2. Turn on the PC.<br />
3. Double-click the F16PC icon to start the application. After the program has<br />
been loaded the standby display appears. For details about the standby<br />
display see paragraph 1.3.<br />
F16PC icon<br />
Note: The example screens shown in this manual may not match the<br />
screens you see on your display. The screen you see depends on your<br />
system configuration and equipment settings.<br />
4. To quit the application, press the [F12] key while pressing the [Alt] key.<br />
OK to quit system?<br />
Yes<br />
No<br />
5. Press the [←] key to choose Yes and then press the [Enter] key.<br />
6. Turn off the PC in accordance to Windows operating procedure.<br />
7. Turn off the communications unit.<br />
1-2
1. OPERATIONAL OVERVIEW<br />
1.2.3 Controls description<br />
The FELCOM is almost 100% keyboard controlled. Operation is carried out with<br />
the function keys, numbered F1-F10 at the top of the PC keyboard.<br />
Controls<br />
Esc<br />
F1-F10<br />
Backspace<br />
Insert<br />
Cancels key input and returns to previous display screen.<br />
These are the function keys. They choose menus.<br />
Deletes the character to the left of the cursor.<br />
Works the same as “paste.” See “Copying and pasting text” in<br />
paragraph 3.2.4.<br />
Delete Deletes the character selected with the cursor.<br />
Home<br />
Moves the cursor to the top of the message being edited.<br />
End<br />
Moves the cursor to the bottom of the message being edited.<br />
PgUp<br />
Goes to the previous page of the edit screen.<br />
PgDn<br />
Goes to the next page of the edit screen.<br />
[↑], [↓], [←], [→] Control the cursor.<br />
Enter<br />
Registers key input.<br />
Shift<br />
Chooses upper or lower case alphabet. Press and hold down<br />
the key and then press the [Caps Lock] to get upper or lower<br />
case alphabet. Note that only upper case alphabet are used in<br />
telex.<br />
Alt<br />
Executes the shortcut key operation when combined with an<br />
alphabet key. See paragraph 1.2.2.<br />
Space Bar Inserts a space. In addition, it displays the file list, a partial<br />
view of a file, etc., depending on menu.<br />
Caps Lock Turns upper case alphabet input on or off. The Caps Lock LED<br />
lights when upper case input is on.<br />
Tab<br />
Inserts horizontal tab characters. The number of tab characters<br />
the key can insert per line of text can be programmed for two,<br />
four or eight tabs.<br />
Ctrl<br />
Works in combination with alphabet keys as follows:<br />
Ctrl + [M]: Same as Enter.<br />
Ctrl + [H]: Same As Back Space.<br />
Ctrl + [I]: Same as Insert.<br />
Ctrl + [V]: Same as Overwrite+Insert.<br />
Fn<br />
Combined with an arrow key, it scrolls screen (↑, ↓), or shifts<br />
cursor (←, →).<br />
Num Lock Turns numeric input on or off. Note that you cannot enter<br />
alphabet when the Num LED is lit.<br />
Note 1: In telex, lower case, #, &, *, $ and % are not used. A full list of characters<br />
useable in telex appears in the Appendix. For e-mail any character or<br />
symbol may be used.<br />
Note 2: € (Euro mark) on the 5<br />
%C key cannot be used.<br />
1-3
1. OPERATIONAL OVERVIEW<br />
1.2.4 Shortcut keys<br />
The FELCOM provides the keyboard shortcuts shown below for commonly used<br />
functions.<br />
Shortcut keys<br />
Shortcut key<br />
[Alt]+[N]<br />
[Alt]+[O]<br />
[Alt]+[Q]<br />
[Alt]+[D]<br />
[Alt]+[S]<br />
[Alt]+[P]<br />
[Alt]+[X]<br />
[Delete]<br />
[Alt]+[C]<br />
[Insert]<br />
[Fn] + ←<br />
[Fn] + →<br />
[Alt]+[V]<br />
Function<br />
Same as New in File menu<br />
Same as Open in File menu<br />
Same as Close in File menu<br />
Same as Delete in File menu<br />
Same as Save in File menu<br />
Same as Print in File menu<br />
Same as Undo<br />
Same as Cut in Edit menu<br />
Same as Copy in Edit menu<br />
Same as Paste in Edit menu<br />
Same as Top of Text in Edit menu<br />
Same as End of Text in Edit menu<br />
Same as Change Window in Edit menu<br />
1.2.5 Function keys<br />
The function menus, which you access by pressing the function keys (F1-F10) at<br />
the top of the keyboard, control most operations of this unit.<br />
File<br />
Edit<br />
Transmit<br />
Options Position<br />
EGCReports<br />
Logs Setup StopAlarm<br />
Esc F1 F2 F3 F4 F5 F6 F7 F8 F9 F10 Num<br />
Lock<br />
Prt Sc<br />
SysRq<br />
S<br />
L<br />
~ ! @ # $ % ^ & 7 8 )<br />
Keyboard<br />
Function key description<br />
* ( 9 *<br />
Menu<br />
File (F1)<br />
Edit (F2)<br />
Transmit (F3)<br />
EGC (F4)<br />
Reports (F5)<br />
Logs (F6)<br />
Options (F7)<br />
Setup (F8)<br />
Position (F9)<br />
Stop Alarm (F10)<br />
Description<br />
Processes files.<br />
Provides text editing facilities.<br />
Transmits messages.<br />
Sets up EGC message facilities.<br />
Sets up data reporting function.<br />
Displays sent and received message logs.<br />
Login, logout; testing facilities.<br />
Sets up the system.<br />
Enter your ship’s position manually.<br />
Silences audio alarm.<br />
1-4
1.3 Standby Display<br />
1. OPERATIONAL OVERVIEW<br />
After the equipment is turned on and the diagnostic test has been conducted, the<br />
standby display appears, showing the system status monitor. The system status<br />
monitor provides various operating information. For a detailed description, see<br />
paragraph 7.4.<br />
File Edit Transmit EGC Reports Logs Options Setup Position StopAlarm<br />
Date<br />
Time<br />
Position<br />
Waypoint<br />
Course<br />
Speed<br />
Current NCS<br />
Current Channel<br />
Current TDM<br />
MES Status<br />
GPS Status<br />
DCE Memory<br />
02-02-25<br />
01:32 (UTC)<br />
LAT 34:30.00N<br />
LON 135:00.00E<br />
LAT<br />
LON<br />
345 DEG<br />
10.2 KTS<br />
344 (IOR) LOGOUT<br />
NCS CC<br />
NCS CC<br />
Idle<br />
****<br />
32818 Bytes free<br />
BBER<br />
C/N<br />
Send Level<br />
Rx AGC Level<br />
REF Offset Freq<br />
Synthe<br />
Antenna Power Supply<br />
Water Temperature<br />
Water Current<br />
Direction<br />
Speed<br />
Depth<br />
IMN:<br />
443156710<br />
000<br />
OK ( 0dB)<br />
OK ( 0)<br />
OK (135)<br />
OK ( 0Hz)<br />
OK<br />
OK<br />
68.2 DEG<br />
232 DEG<br />
1.9 KTS<br />
Current State: IDLE<br />
DCE F16 Ver. ##<br />
UNSYNC<br />
02-02-25 01:32 (UTC)<br />
NCS: IOR LOGOUT LAT: 34:30.00N<br />
LON: 135:00.00E<br />
## = Version No.<br />
Standby display<br />
After the diagnostic test has been completed, the equipment automatically starts<br />
synchronizing itself with a satellite. When the indication “Retuning” is replaced<br />
with “ SYNC(NCS), the synchronization process is completed. Then, you are<br />
ready to receiving EGC messages. For further details see paragraph 2.4.<br />
1-5
1. OPERATIONAL OVERVIEW<br />
1.3.1 Display indications<br />
The display is divided in three sections:<br />
1) The function menu area<br />
2) The working area<br />
3) The operating status area<br />
File Edit Transmit EGC Reports Logs Options Setup Position StopAlarm<br />
(1) (2)<br />
1) Function<br />
Menu<br />
2) WORKING AREA<br />
3) Operating<br />
Status<br />
(3)<br />
(4a)<br />
(4b)<br />
(5)<br />
(6) (7)<br />
(8)<br />
(9)<br />
(10)<br />
(10)<br />
Location of display indications<br />
Below are the indications and meanings of the items in parentheses in the<br />
illustration above.<br />
(1) Distress alert test activated<br />
This message appears when distress alert test has been activated.<br />
(2) Communication network mode<br />
No display<br />
Restoration Mode<br />
(Flashing)<br />
Restoration Mode<br />
(Reverse video)<br />
Normal operation<br />
Problem at NCS<br />
Previously designated LES is transmitting the<br />
NCS common channel signal.<br />
1-6
1. OPERATIONAL OVERVIEW<br />
(3) Communication unit status<br />
IDLE<br />
IDLE (PENDING)<br />
SENDING<br />
RECEIVING<br />
LOGIN<br />
LOGOUT<br />
DISTRESS ALERT<br />
Data Report<br />
TESTING<br />
TEST SETUP<br />
SCANNING<br />
EGC RECEIVER<br />
(Reverse video)<br />
Delivery Status Req.<br />
Forced Clearing<br />
Idle (awaiting receiving, awaiting transmitting)<br />
Awaiting reply from LES<br />
Sending<br />
Receiving<br />
Logged in with NCS<br />
Logging out with NCS<br />
When own vessel is transmitting the distress alert<br />
Sending data report<br />
PV testing<br />
Requesting PV testing<br />
NCS scanning<br />
EGC-only receiver operation<br />
Transmitting delivery status request<br />
Stopping receiving, transmitting, or scanning<br />
(4a) Communication status<br />
CALLING<br />
Now calling<br />
WAITING FOR ACKNOWLEDGEMENT Waiting for acknowledgement from<br />
LES.<br />
RECEIVING EGC MESSAGE Now receiving EGC message<br />
WAITING FOR BACKOFF<br />
Waiting to transmit data report<br />
Successful Login.<br />
Login was successful<br />
Login failed.<br />
Login failed<br />
Successful Logout.<br />
Logout was successful<br />
Logout failed.<br />
Logout failed<br />
Successful Distress Alert.<br />
Distress alert successfully<br />
Distress Alert Failed<br />
Distress alert could not be transmitted.<br />
Successful Forced Clearing.<br />
Forced clearing successful<br />
Forced Clearing Failed.<br />
Forced clearing unsuccessful<br />
SENDING MESSAGE PACKETS. Sending TX message packets<br />
WAITING FOR ACKNOWLEDGEMENT Waiting for acknowledgement from LES<br />
Successful sending to LES.<br />
Message successfully sent to LES<br />
Sending message failed.<br />
Message could not be sent to LES<br />
Call rejected.<br />
LES rejected your message<br />
Call pending.<br />
LES temporarily suspending<br />
communications<br />
Received Call.<br />
Call received from LES<br />
Received Call(ITA2).<br />
Call(ITA2) received from LES<br />
RECEIVING MESSAGE PACKETS Receiving message packets<br />
CLEARING<br />
Clearing TX sequence<br />
Successful receiving.<br />
You successfully received message<br />
Receiving failed.<br />
You could not receive message<br />
Successful Data Report.<br />
Data report successfully sent.<br />
Data Report failure.<br />
Data report could not be sent.<br />
PV TEST CALL is rejected.<br />
PV test call rejected by NCS<br />
1-7
1. OPERATIONAL OVERVIEW<br />
PV TEST CALL is pending.<br />
TEST-RECEIVING MESSAGE<br />
TEST-SENDING MESSAGE<br />
TEST-DISTRESS ALERT<br />
WAITING FOR ACTIVATION<br />
WAITING FOR TEST RESULT<br />
CLEARING<br />
PV TEST is Completed.<br />
PV TEST Failure.<br />
PV test pending by LES<br />
Receiving test message from LES<br />
Sending test message to LES<br />
Sending test distress alert to LES<br />
Waiting start of PV test<br />
Waiting for results of PV test<br />
Clearing PV test<br />
PV test is completed.<br />
PV test failed.<br />
(4b) RF CON CPU program version number<br />
DCE F16 Ver. XX (XX = Version Number)<br />
(5) Frame synchronization<br />
Blank<br />
SYNC (NCS)<br />
SYNC (LES)<br />
UNSYNC<br />
Retuning<br />
Changing channel, or during transmission<br />
Synchronizing with NCS<br />
Synchronizing with LES<br />
Out of synchronization<br />
Synchronizing with NCS or LES<br />
(6) Ocean region receiving<br />
No display<br />
AOR-W<br />
AOR-E<br />
IOR<br />
POR<br />
Out of synch with satellite<br />
Atlantic Ocean Region-West<br />
Atlantic Ocean Region-East<br />
Indian Ocean Region<br />
Pacific Ocean Region<br />
(7) Logging status<br />
LOGOUT<br />
LOGIN<br />
LOGIN (Flashing)<br />
Logged out with ocean region<br />
Logged in with ocean region<br />
Logging in with ocean region<br />
1-8
1. OPERATIONAL OVERVIEW<br />
(8) Other information<br />
No display<br />
No receive message in memory, or printer is<br />
operating.<br />
REC. MESSAGE EXISTS Displayed when a routine message has<br />
(Reverse video)<br />
not been printed, or a confidential message is<br />
received.<br />
Data Report<br />
When data reporting is activated.<br />
(Reverse video)<br />
Message Report<br />
Message report setting is activated.<br />
(Reverse video)<br />
(9) Date and time display<br />
With connection of a navigator (internal GPS navigator or external navigator),<br />
date and time are displayed. Manually input date and time are also displayed.<br />
(10) Ship’s position<br />
With connection of a navigator (internal GPS navigator or external navigator),<br />
ships position is displayed in latitude and longitude and updated every 30<br />
seconds. Manually input position is also displayed.<br />
1-9
1. OPERATIONAL OVERVIEW<br />
1.4 Menu Overview<br />
Operation of the FELCOM is carried out through a menu system which you<br />
access with the functions keys at the top of the screen. The example below<br />
shows how to choose menu options from the Editor Setup menu.<br />
1. Press the [F8] key to display the Setup menu.<br />
File Edit Transmit EGC Reports Logs Options Setup Position StopAlarm<br />
Setup<br />
1. Distress Alert Setup<br />
2. System Setup<br />
3. Editor Setup<br />
4. Terminal Setup<br />
5. EGC Setup<br />
6. Auto Mode Setup<br />
7. E-Mail Setup<br />
8. Directories<br />
9. Configuration<br />
Setup menu<br />
2. Choose desired menu by pressing appropriate numeric key. For example,<br />
press the [3] key to show the Editor Setup menu.<br />
Note: You may also choose a menu by pressing the [↑] or [↓] key to choose it<br />
and then pressing the [Enter] key.<br />
File Edit Transmit EGC Reports Logs Options Setup Position StopAlarm<br />
Setup<br />
Editor Setup<br />
2. Text System Mode Setup Ascii<br />
3. Editor Mode Setup Insert<br />
4. Word Terminal Wrap Setup ON<br />
5. Line EGC No. Setup ON<br />
6. Tab Auto Width Mode Setup4 Char<br />
7. Column E-Mail Setup Width 69<br />
8. Cursor Directories Type Block<br />
9. Scroll Configuration Full Screen<br />
Editor setup menu<br />
3. Choose desired menu item by pressing the [↑] or [↓] keys followed by the<br />
[Enter] key. A window displaying the options for the item selected or a<br />
alphanumeric data entry window appears depending on your selection. For<br />
example, choose Word Wrap.<br />
ON<br />
OFF<br />
Word wrap options window<br />
1-10
1. OPERATIONAL OVERVIEW<br />
4. Press the [↑] or [↓] key to choose option desired and press the [Esc] key.<br />
Note 1: On some menus the update window appears after you press the [Esc]<br />
key. This is done to ask you to confirm settings. Yes is selected; press<br />
the [Enter] key to register settings, or press [→] to choose No and press<br />
the [Enter] key to escape.<br />
Update<br />
Yes<br />
No<br />
Note 2: The following functions are not available:<br />
Keying Sequence Item<br />
F1-8 Format Disk<br />
F3-1 Selection of Distress priority on Transmit<br />
Message<br />
F8-1 Distress Alert Setup<br />
F8-2 NAV PORT, MESSAGE OUTPUT PORT, ACTIVE<br />
PORT, EGC OUTPUT PORT, NETWORK SETUP<br />
on System Setup menu<br />
1-11
1. OPERATIONAL OVERVIEW<br />
1.6 Error Messages and Alerts<br />
The terminal unit displays error messages and alerts to call your attention to<br />
misoperation, failed operation and system error. A list of error messages appears<br />
in Chapter 7 and alerts appear in the Appendix.<br />
To erase an error message or alert, press the [Esc] key.<br />
File Edit Transmit EGC Reports Logs Options Setup Position StopAlarm<br />
Log<br />
1. Send Message Log<br />
2. Receive Message Log<br />
Send Message Log<br />
No. Message File Station LES Priority Send Status Delivery<br />
No Message.<br />
CAUTION<br />
<br />
Location of error messages and alerts<br />
1-12
2. SYSTEM INITIALIZATION<br />
This chapter provides the information necessary for initializing the FELCOM.<br />
Once the equipment is initialized, you need do no more than press a few keys to<br />
get fully automatic transmission and reception.<br />
Inmarsat assigns an MES an Inmarsat Mobile Number (IMN) when it applies for<br />
Inmarsat registration. The IMN is necessary to communicate in the Inmarsat<br />
system. Enter the IMN as shown below.<br />
2.1 System Settings<br />
The System Setup menu provides for input of date, time, operating mode, and<br />
port function.<br />
1. Press the [F8] key to choose the Setup menu.<br />
File Edit Transmit EGC Reports Logs Options Setup Position StopAlarm<br />
Setup<br />
1. Distress Alert Setup<br />
2. System Setup<br />
3. Editor Setup<br />
4. Terminal Setup<br />
5. EGC Setup<br />
6. Auto Mode Setup<br />
7. E-Mail Setup<br />
8. Directories<br />
9. Configuration<br />
Setup menu<br />
2. Press the [2] key to display the System Setup menu.<br />
Not used.<br />
Setup<br />
System Setup<br />
System Date & Time 03:11 02-02-25 (YY-MM-DD)<br />
IMN<br />
MES Operation Mode <strong>INMARSAT</strong>-C<br />
Nav Port<br />
OFF<br />
Active Port<br />
INT<br />
Message Output Port INT<br />
EGC Output Port INT<br />
9. Network Configuration Setup<br />
Command Window<br />
System setup menu<br />
2-1
2. SYSTEM INITIALIZATION<br />
3. System Date & Time is selected; press the [Enter] key to open the date entry<br />
window.<br />
Setup<br />
System Setup<br />
System Date & Time 02-02-25 (YY-MM-DD)<br />
IMN<br />
MES Operation Mode <strong>INMARSAT</strong>-C<br />
Nav Port<br />
OFF<br />
Active Port<br />
INT<br />
Message Output Port INT<br />
EGC Output Port INT<br />
9. Network Configuration Setup<br />
Command Window<br />
System setup menu, date entry window<br />
4. Enter the date with the numeric keys. (Entry of date is not necessary if the<br />
internal GPS navigator is outputting date and time.)<br />
5. Press the [Enter] key to close the window.<br />
6. Press the [↓] key to choose IMN.<br />
7. Press the [Enter] key to open the IMN window.<br />
8. Enter IMN number assigned by Inmarsat and then press the [Enter] key to<br />
close the window.<br />
Note: Be sure to enter the correct number; it cannot be changed once<br />
entered.<br />
13. Press the [↓] key to choose MES Operation Mode.<br />
14. Press the [Enter] key to open the MES operation mode options window.<br />
Setup<br />
System Setup<br />
System Date & Time 01:53 02-02-25 (YY-MM-DD)<br />
IMN<br />
MES Operation Mode IOR <strong>INMARSAT</strong>-C<br />
Nav Port<br />
<strong>INMARSAT</strong>-C<br />
EGC<br />
Active Port<br />
OFF<br />
Message Output Port INT<br />
EGC Output Port EXT<br />
9. Network Configuration Setup<br />
EXT<br />
Command Window<br />
System setup menu, MES operation mode options window<br />
15. Press the [↓] or [↑] key to choose operating mode, <strong>INMARSAT</strong>-C or EGC.<br />
The <strong>INMARSAT</strong>-C setting provides telex communications and operates as an<br />
EGC receiver when the equipment is not transmitting or receiving. The EGC<br />
setting enables EGC-only operation. In this case, “Current State: EGC<br />
RECEIVER” (in reverse video) at the bottom of the screen.<br />
16. Press the [Enter] key to close the window.<br />
2-2
2. SYSTEM INITIALIZATION<br />
17. Press the [Esc] key to open the update window.<br />
Setup<br />
System Date & Time<br />
IMN<br />
MES Operation Mode<br />
Nav Port<br />
Active Port<br />
Message Output Port<br />
EGC Output Port<br />
9. Network Configuration Setup<br />
Command Window<br />
System Setup<br />
01:53 02-02-25 (YY-MM-DD)<br />
<strong>INMARSAT</strong>-C<br />
OFF<br />
INT<br />
INT<br />
INT<br />
Yes<br />
Update<br />
No<br />
18. Yes is selected; press the [Enter] key to update system settings.<br />
19. Press the [Esc] key to return to the standby display.<br />
2-3
2. SYSTEM INITIALIZATION<br />
2.2 Terminal Setup<br />
The Terminal Setup menu provides for selection of date display format, currency<br />
unit, screensaver on/off and window colors.<br />
1. Press the [F8] key to choose the Setup menu.<br />
2. Press the [4] key to display the Terminal Setup screen.<br />
Date Disp. Form<br />
Currency Unit<br />
Screen Saver<br />
Window Color<br />
Terminal Setup<br />
YY-MM-DD<br />
US$<br />
ON<br />
Terminal Setup menu<br />
3. Date Disp. Form is selected; press the [Enter] key to open its options window.<br />
YY-MM-DD<br />
MMM-DD-YY<br />
DD-MMM-YY<br />
Date options<br />
4. Press the [↓] or [↑] key to choose date display format desired and then press<br />
the [Enter] key to close the window.<br />
5. Press the [↓] key to choose Currency Unit.<br />
6. Press the [Enter] key to open the currency unit options window.<br />
SDR<br />
US$<br />
EUR<br />
YEN<br />
OTHER<br />
Currency unit options<br />
7. Press the [↓] or [↑] key to choose the currency unit to use to calculate toll<br />
charges. SDR means Special Drawing Right and it is the common unit<br />
charge used by all LES to assess toll charges. For OTHER, enter currency<br />
unit name (4 characters max.). Your selection appears next to Currency Unit<br />
in the Terminal Setup menu.<br />
8. Press the [Enter] key to close the window.<br />
9. Press the [↓] key to choose Screen Saver.<br />
9. Press the [Enter] key to open the screen saver options window.<br />
11. Press the [↓] or [↑] key to choose “ON” or “OFF” as appropriate. ON to use<br />
screen saver, OFF to disable the screen saver. The screen saver<br />
automatically starts up 10 minutes after there is no key operation. To release<br />
the screen saver, press any key.<br />
12. Press the [Enter] key to close the window.<br />
13. Press the [↓] key to choose Window Color and press the [Enter] key.<br />
Window Color<br />
Window Color Setup<br />
Default Color<br />
Window color menu<br />
2-4
2. SYSTEM INITIALIZATION<br />
14. You may change the background and foreground colors for the various<br />
display screens on the terminal unit as follows:<br />
a) Choose Window Color Setup.<br />
Window Color Setup<br />
Window : Base Window<br />
Fore Color : L_WHITE<br />
Back Color : BLUE<br />
To Change: ENTER To Change Value: LR<br />
Window color setup menu<br />
b) Window is selected; press the [→] or [←] key to choose the item to adjust and<br />
then press the [Enter] key.<br />
BASE WINDOW: Standby display<br />
RCV Message Display: Communications memory display<br />
EGC Message Display: Communications display<br />
EDIT1 – EDIT 2<br />
Editor screens<br />
Function:<br />
Menu<br />
Sub Menu1 – Sub Menu4: Sub menus<br />
Message:<br />
Status message<br />
EDIT<br />
BASE WINDOW<br />
File Edit Transmit EGC Reports Logs Options Setup Position StopAlarm<br />
MENU<br />
1:<br />
2:<br />
|<br />
|<br />
|<br />
|<br />
|<br />
|<br />
|<br />
< [1] UNTITLED1 ><br />
CAUTION<br />
MESSAGE<br />
Location of items<br />
c) Press the [↓] key to choose Fore Color.<br />
d) Press the [↓] or [↑] key to choose foreground color desired and then press the<br />
[Enter] key.<br />
e) Repeat steps b-d to set color for other items.<br />
f) Press the [↓] key to choose Back Color. Press the [→] or [←] key to choose<br />
color.<br />
Note: To restore all default color settings, choose Window Color from the<br />
Terminal Setup menu, choose Default Color and then press the [Enter]<br />
key. Yes is selected; press the [Enter] key.<br />
15. Press the [Esc] key three to return to the standby display.<br />
2-5
2. SYSTEM INITIALIZATION<br />
2.3 Login and Logout<br />
Each time the terminal unit is turned on, register your vessel with the Inmarsat C<br />
system to enable communications between your vessel and an LES. This is<br />
called login. The first time you login you must do it manually; thereafter is it done<br />
automatically, even when you move to another ocean region.<br />
Note that you cannot transmit the distress alert or receive EGC messages<br />
unless you are logged in.<br />
2.3.1 Login<br />
If you will not be using the FELCOM for a prolonged period, you should logout<br />
from the Inmarsat C system, before turning off the terminal unit. The Inmarsat C<br />
system will then register you as inactive, notifying anyone trying to call you that<br />
you are currently unavailable. If you do not log out before turning off the power,<br />
some LESs may attempt to send a message to you. They may charge your<br />
correspondent, even if you don’t receive the message.<br />
1. Confirm that “SYNC (NCS)” appears at the bottom of the screen.<br />
2. Press the [F7] key to display the Options menu.<br />
File Edit Transmit EGC Reports Logs Options Setup Position StopAlarm<br />
Options<br />
1. Login<br />
2. Logout<br />
3. Abort<br />
4. Select NCS<br />
5. Ocean Region<br />
6. LES Information<br />
7. Test<br />
Options menu<br />
3. Press the [1] key to display the Login screen.<br />
Options<br />
Login<br />
Start<br />
Yes<br />
No<br />
Login screen<br />
Note: The terminal unit must be “idle” to login. (“Current State: IDLE”<br />
appears at the bottom of the screen.) When it is not idle, “Ignored:<br />
MES is not idle.” appears. Press the [Esc] key to return to the standby<br />
display. Wait until the terminal unit becomes idle. The terminal is<br />
“occupied” when any menu or file is opened or the equipment is in the<br />
process of completing some function.<br />
4. Yes is selected; press the [Enter] key to start login.<br />
2-6
2. SYSTEM INITIALIZATION<br />
5. Login begins and the screen should now look something like the illustration<br />
below, with “LOGIN” flashing.<br />
File Edit Transmit EGC Reports Logs Options Setup Position StopAlarm<br />
Options<br />
Login<br />
Starting Login Process.<br />
Press any key to escape.<br />
LOGIN replaces IDLE.<br />
Flashing during login<br />
Current State: LOGIN<br />
CALLING<br />
DCE F15 Ver. **<br />
SYNC ( NCS )<br />
NCS: IOR LOGIN<br />
02-02-25 02:02 (UTC)<br />
LAT: 34:30.00N<br />
LON: 135:30.00E<br />
Appearance of display screen during login<br />
When login is completed, the message “Successful login.” appears. Then,<br />
the terminal unit goes into “Idle” status and LOGIN stops blinking.<br />
6. Press any key to return to the standby display.<br />
2-7
2. SYSTEM INITIALIZATION<br />
2.3.2 Logout<br />
1. Press the [F7] key to display the Options menu.<br />
2. Press the [2] key to display the logout screen.<br />
Note: The terminal unit must be “idle” to logout. When it is not idle, “Ignored:<br />
MES is not idle.” appears. Press the [Esc] key to return to the standby<br />
display. Wait until the terminal unit becomes idle.<br />
File Edit Transmit EGC Reports Logs Options Setup Position StopAlarm<br />
Options<br />
Logout<br />
Start<br />
Yes<br />
No<br />
Current State: IDLE<br />
Successful Login.<br />
DCE F16 Ver.**<br />
SYNC ( NCS )<br />
NCS: IOR LOGIN<br />
02-02-25 02:04 (UTC)<br />
LAT: 34:30.00N<br />
LON: 135:30.00E<br />
Options menu, logout screen<br />
3. Yes is selected; press the [Enter] key to start logout. The screen now looks<br />
something like the illustration below.<br />
File Edit Transmit EGC Reports Logs Options Setup Position StopAlarm<br />
Options<br />
Logout<br />
Starting Logout Process.<br />
Press any key to escape.<br />
Current State: LOGOUT<br />
CALLING<br />
DCE F16 Ver. **<br />
SYNC ( NCS )<br />
NCS: IOR LOGIN<br />
02-02-25 02:02 (UTC)<br />
LAT: 34:30.00N<br />
LON: 135:30.00E<br />
Appearance of display screen during logout<br />
4. When logout is completed, “Successful Logout.” appears. “Current State”<br />
then returns to IDLE.<br />
5. Turn off the FELCOM.<br />
2-8
2.4 EGC Settings<br />
2.4.1 What is the EGC (Enhanced Group Call) service?<br />
2. SYSTEM INITIALIZATION<br />
The EGC service enables EGC information providers to send SafetyNET TM ,<br />
FleetNET TM and System messages via an LES to a specific groups of ships, or<br />
to all ships within a defined geographical area.<br />
Each type of EGC service is sent as follows:<br />
1) The information provider prepares the message, and then accesses the<br />
appropriate Country of the international telex network to send the message<br />
to an LES.<br />
2) The LES processes and forwards it to the NCS for the ocean region<br />
designated by the provider.<br />
3) Then, the NCS broadcasts the message throughout the ocean region. (The<br />
operator may choose the EGC messages to receive by position (one<br />
position) and geographical position (nine areas). For further details see<br />
paragraph 2.4.2.)<br />
Satellite<br />
Information Provider<br />
* Meteorological body<br />
* Navtex station<br />
* Coast guard<br />
* Rescue enter<br />
* Shipping company,<br />
etc<br />
LES1<br />
LES2<br />
LES3<br />
Ch1<br />
Ch2<br />
Ch3<br />
NCS<br />
NCS common channel<br />
MES<br />
MES<br />
MES<br />
Three EGC services are available:<br />
Ch1-Ch2 are dedicated<br />
channels for each LES.<br />
The EGC system<br />
1) SafetyNET TM<br />
This provides a means for information providers to distribute Maritime Safety<br />
Information (MSI) from shore-to-ship. Authorized information providers<br />
include:<br />
a) Hydrographic Offices, for navigational warnings<br />
b) National Weather Services, for meteorological warnings and forecasts<br />
c) Rescue Co-ordination Center, for shore-to-ship distress alerts and other<br />
urgent information<br />
d) International Ice Patrol, for North Atlantic ice hazards<br />
2-9
2. SYSTEM INITIALIZATION<br />
2) FleetNET TM<br />
This service allows authorized information providers such as commercial<br />
subscription services, shipping companies and governments, which have<br />
registered with a LES that supports FleetNET TM , to broadcast messages to<br />
selected group of MESs. Typical applications of FleetNET TM are<br />
a) Fleet or company broadcasts<br />
b) News broadcasts<br />
c) Commercial weather services<br />
d) Market quotations<br />
e) Government broadcasts to all vessels on a country’s registration<br />
3) System<br />
EGC system-related is sent by Inmarsat to certain shipping companies and<br />
geographical areas.<br />
2-10
2. SYSTEM INITIALIZATION<br />
2.4.2 EGC setup<br />
The FELCOM receives EGC messages directed to its present position and<br />
Navarea without further programming. The EGC Setup screen lets you choose<br />
additional areas for which to receive messages and also the Navtex station and<br />
type of message for Coastal Warning (NAVTEX Re-broadcast).<br />
1. Press the [F8] key to display the Setup menu.<br />
File Edit Transmit EGC Reports Logs Options Setup Position StopAlarm<br />
Setup<br />
1. Distress Alert Setup<br />
2. System Setup<br />
3. Editor Setup<br />
4. Terminal Setup<br />
5. EGC Setup<br />
6. Auto Mode Setup<br />
7. E-Mail Setup<br />
8. Directories<br />
9. Configuration<br />
Setup menu<br />
2. Press the [5] key to display the EGC Setup menu.<br />
Setup<br />
Receive EGC Area<br />
Additional Position<br />
Navarea<br />
Fixed Area<br />
Waypoint (from NAV Equipment)<br />
EGC Setup<br />
OFF<br />
: :<br />
NAVTEX<br />
Station Code<br />
Type of Message (Can't reject other report)<br />
Ice reports<br />
Meteo. forecasts<br />
Pilot service<br />
DECCA messages<br />
LORAN messages<br />
OFF<br />
OFF<br />
OFF<br />
OFF<br />
OFF<br />
OMEGA messages<br />
SATNAV messages<br />
Other navaid msg<br />
QRU (no message)<br />
OFF<br />
OFF<br />
OFF<br />
OFF<br />
EGC setup menu<br />
3. The cursor is selecting Additional Position, where you can enter the L/L<br />
position of an ocean region you want to receive broadcasts about. Press the<br />
[Enter] key to open the additional position entry window.<br />
4. Enter position as follows:<br />
a) Enter latitude (XX° XX).<br />
b) Press the [N] or [S] key as appropriate to enter coordinate.<br />
c) Enter longitude (XXX° XX).<br />
d) Press the [E] or [W] key as appropriate enter coordinate.<br />
5. Press the [Enter] key to close the additional position entry window.<br />
6. Press the [↓] key to choose Navarea.<br />
2-11
2. SYSTEM INITIALIZATION<br />
7. Press the [Enter] key to open the navarea entry window.<br />
Setup<br />
Receive EGC Area<br />
Additional Position<br />
Navarea<br />
Fixed Area<br />
Waypoint (from NAV Equipment)<br />
EGC Setup<br />
OFF<br />
: :<br />
NAVTEX<br />
Station Code<br />
Type of Message (Can't reject other report)<br />
Ice reports<br />
Meteo. forecasts<br />
Pilot service<br />
DECCA messages<br />
LORAN messages<br />
OFF<br />
OFF<br />
OFF<br />
OFF<br />
OFF<br />
OMEGA messages<br />
SATNAV messages<br />
Other navaid msg<br />
QRU (no message)<br />
OFF<br />
OFF<br />
OFF<br />
OFF<br />
EGC setup menu, Navarea entry window<br />
8. Enter additional Navarea(s) (I-XVI, up to nine) in two digits, referring to the<br />
illustration below for code number.<br />
Navareas<br />
9. Press the [Enter] key to close the navarea entry window.<br />
Note: “Fixed Area” is where you enter fixed areas (max. 3) for chart<br />
correction service. However, this service is not yet available; enter no<br />
data.<br />
10. Press the [↓] key to choose Waypoint.<br />
2-12
2. SYSTEM INITIALIZATION<br />
11. Press the [Enter] key to open the Waypoint options window.<br />
Setup<br />
EGC Setup<br />
Receive EGC Area<br />
Additional Position<br />
: :<br />
Navarea<br />
Fixed Area<br />
Waypoint (from NAV Equipment) OFF ON<br />
OFF<br />
NAVTEX<br />
Station Code<br />
Type of Message (Can't reject other report)<br />
Ice reports<br />
Meteo. forecasts<br />
Pilot service<br />
DECCA messages<br />
LORAN messages<br />
OFF<br />
OFF<br />
OFF<br />
OFF<br />
OFF<br />
OMEGA messages<br />
SATNAV messages<br />
Other navaid msg<br />
QRU (no message)<br />
OFF<br />
OFF<br />
OFF<br />
OFF<br />
EGC setup menu, waypoint options window<br />
12. Choose ON to receive broadcasts for the area which contains the destination<br />
waypoint set on the navigator.<br />
13. Press the [Enter] key to close the waypoint options window.<br />
14. Press the [↓] key to choose Station Code.<br />
15. Press the [Esc] key to open the station code entry window.<br />
Setup<br />
Receive EGC Area<br />
Additional Position<br />
Navarea<br />
Fixed Area<br />
Waypoint (from NAV Equipment)<br />
EGC Setup<br />
OFF<br />
: :<br />
NAVTEX<br />
Station Code<br />
Type of Message (Can't reject other report)<br />
Ice reports<br />
Meteo. forecasts<br />
Pilot service<br />
DECCA messages<br />
LORAN messages<br />
OFF<br />
OFF<br />
OFF<br />
OFF<br />
OFF<br />
OMEGA messages<br />
SATNAV messages<br />
Other navaid msg<br />
QRU (no message)<br />
OFF<br />
OFF<br />
OFF<br />
OFF<br />
EGC setup menu, station code entry window<br />
16. Enter the navtex station code (A-Z) of the navarea, in upper case alphabet.<br />
For details about navtex stations, consult the operator’s manual of the navtex<br />
receiver.<br />
17. Press the [Enter] key to close the station code entry window.<br />
18. Choose message type to receive: Use the arrow keys to choose message<br />
type, press the [Enter] key, choose ON or OFF as appropriate, and press the<br />
[Enter] key.<br />
Note: Navtex messages “Coastal navigational information”, “Meteorological<br />
warning” and “Search and rescue alert” (they do not appear on the<br />
EGC Setup menu) must always be received.<br />
2-13
2. SYSTEM INITIALIZATION<br />
19. Press the [Esc] key to open the update window.<br />
Setup<br />
EGC Setup<br />
Receive EGC Area<br />
Additional Position<br />
Navarea<br />
Fixed Area<br />
Waypoint (from NAV Equipment)<br />
:<br />
OFF<br />
:<br />
NAVTEX<br />
Station Code<br />
Type of Message (Can't reject other report)<br />
Ice reports<br />
Meteo. forecasts<br />
Pilot service<br />
DECCA messages<br />
LORAN messages<br />
OFF<br />
OFF<br />
OFF<br />
OFF<br />
OFF<br />
OMEGA messages OFF<br />
SATNAV messages Update OFF<br />
Other navaid msg OFF<br />
QRU (no message) YesOFF<br />
No<br />
EGC setup menu, update window<br />
20. Yes is selected; press the [Enter] key to update EGC settings.<br />
21. Press the [Esc] key to return to the standby display.<br />
2.4.3 Adding EGC channels<br />
The EGC Channel List stores EGC channels. There are currently four EGC<br />
channels, one for each satellite. These four channels are pre-programmed into<br />
the unit and marked in the EGC Channel List with asterisks. When more EGC<br />
channels become available you can add them to the list as below.<br />
1. Press the [F8] key to display the Setup menu.<br />
2. Press the [9] key to display the Configuration menu.<br />
3. Press the [3] key to display the EGC Channel List.<br />
File Edit Transmit EGC Reports Logs Options Setup Position StopAlarm<br />
Setup<br />
Configuration<br />
EGC Channel List<br />
ENTER: Set ESC: Quit<br />
11080*<br />
12580* 10840* 11088*<br />
EGC channel list<br />
4. Using the arrow keys, place the cursor where there is no data entered.<br />
Current EGC channels are marked with an asterisk. These channels cannot<br />
be changed.<br />
2-14
2. SYSTEM INITIALIZATION<br />
5. Press the [Enter] key to open the EGC channel list entry screen.<br />
Setup<br />
Configuration<br />
EGC Channel List<br />
ENTER: Set ESC: Quit<br />
11080* 12580* 10840* 11088*<br />
EGC channel list entry screen<br />
6. Enter EGC channel frequency code. The EGC channel frequency code range<br />
is 8000-14000.<br />
7. Press the [Enter] key to close the text window.<br />
8. Press the [Esc] key to open the update window.<br />
Setup<br />
Configuration<br />
EGC Channel List<br />
ENTER: set ESC: quit<br />
11080* 12580* 10840* 11088*<br />
Update<br />
Yes<br />
No<br />
EGC channel list, update window<br />
9. Yes is selected; press the [Enter] key to register input.<br />
Note: If the EGC channel frequency code entered is invalid, the message "Input<br />
Error: Channel No." appears. Clear the error message by pressing the<br />
[Esc] key. Place the cursor at the invalid frequency, press the [Enter] key<br />
and enter correct frequency.<br />
10. Press the [Esc] key twice to return to the standby display.<br />
2-15
2. SYSTEM INITIALIZATION<br />
2.4.4 Saving, printing EGC messages automatically<br />
You may save and print EGC messages automatically as below.<br />
Automatically saving EGC messages<br />
1. Press the [F8] key to display the Setup menu.<br />
2. Press the [6] key to display the Auto Mode Setup menu.<br />
Auto Mode Setup<br />
Auto Log Print<br />
Receive Alarm<br />
Auto Receive Message Save<br />
Auto Receive Message Print<br />
Data Report & Polling Print<br />
Auto EGC Message Save<br />
Auto EGC Message Print<br />
OFF<br />
OFF<br />
OFF<br />
OFF<br />
OFF<br />
Auto EGC message save menu<br />
3. Press the [↓] or [↑] key to choose Auto EGC Message Save and then press<br />
the [Enter] key.<br />
Auto Mode Setup<br />
Auto EGC Message Save<br />
System<br />
OFF<br />
FleetNET<br />
OFF<br />
SafetyNET (Routine) OFF<br />
SafetyNET (Safety)<br />
OFF<br />
SafetyNET (Urgent & Distress) ON<br />
Auto EGC message print menu<br />
4. Press the [↓] or [↑] key to choose message type and then press the [Enter]<br />
key.<br />
5. Choose ON or OFF as appropriate and press the [Enter] key to close the<br />
window. (When OFF is selected for an item its corresponding item on the<br />
Auto EGC Message Print menu is turned ON.)<br />
6. Press the [Esc] key three times to return to the standby display.<br />
2-16
2. SYSTEM INITIALIZATION<br />
Automatically printing EGC messages<br />
1. Press the [F8] key to display the Setup menu.<br />
2. Press the [6] key to display the Auto mode setup menu.<br />
3. Press the [↓] key to choose Auto EGC Message Print and then press the<br />
[Enter] key.<br />
Auto Mode Setup<br />
Auto EGC Message Print<br />
System<br />
OFF<br />
FleetNET<br />
OFF<br />
SafetyNET (Routine) OFF<br />
SafetyNET (Safety)<br />
OFF<br />
Auto EGC message print menu<br />
4. Press the [↓] or [↑] key to choose message type and then press the [Enter]<br />
key.<br />
5. Choose ON or OFF as appropriate and press the [Enter] key to close the<br />
window. (When OFF is selected for an item its corresponding item on the<br />
Auto EGC Message Save menu is turned ON.)<br />
6. Press the [Esc] key three times to return to the standby display.<br />
2-17
2. SYSTEM INITIALIZATION<br />
2.5 Adding NCS Channels<br />
This section shows you how to add NCS channels to the NCS Channel List. 19<br />
channels can be listed per each ocean region. Currently, there are four NCS<br />
channels, and they are marked with asterisks in the list. Add NCS channels to<br />
the list as below when they become operational.<br />
1. Press the [F8] key to display the Setup menu.<br />
2. Press the [9] key to display the Configuration menu.<br />
3. Press the [4] key to display the NCS Channel List.<br />
Setup<br />
Configuration<br />
NCS Channel List<br />
ENTER: Set ESC: Quit<br />
No<br />
AOR (WEST)<br />
ID FREQ<br />
AOR (EAST)<br />
ID FREQ<br />
ID<br />
POR<br />
FREQ<br />
ID<br />
IOR<br />
FREQ<br />
1<br />
2<br />
3<br />
4<br />
5<br />
6<br />
7<br />
8<br />
044<br />
0<br />
0<br />
0<br />
0<br />
0<br />
0<br />
0<br />
11080*<br />
144<br />
1<br />
1<br />
1<br />
1<br />
1<br />
1<br />
1<br />
12580*<br />
244<br />
2<br />
2<br />
2<br />
2<br />
2<br />
2<br />
2<br />
12580*<br />
344<br />
3<br />
3<br />
3<br />
3<br />
3<br />
3<br />
3<br />
10840*<br />
NCS channel list<br />
4. Use the arrow keys to place the cursor in a blank ID column.<br />
5. Press the [Enter] key to open the data entry window.<br />
6. Enter NCS channel ID number, in two digits. (Entry of leading zero is not<br />
necessary.) The ID number range is 45-63.<br />
7. Press the [Enter] key to close the window.<br />
8. With the [→] key, choose the frequency column.<br />
9. Press the [Enter] key to open the frequency entry window.<br />
10. Enter NCS channel frequency code. The frequency code range is<br />
8000-14000.<br />
11. Press the [Enter] key to close the window.<br />
12. Press the [Esc] key to open the update window.<br />
Setup<br />
Configuration<br />
NCS Channel List<br />
ENTER: Set ESC: Quit<br />
No<br />
AOR (WEST)<br />
ID FREQ<br />
AOR (EAST)<br />
ID FREQ<br />
ID<br />
POR<br />
FREQ<br />
ID<br />
IOR<br />
FREQ<br />
1<br />
2<br />
3<br />
4<br />
5<br />
6<br />
7<br />
8<br />
044<br />
0<br />
0<br />
0<br />
0<br />
0<br />
0<br />
0<br />
11080*<br />
144<br />
1<br />
1<br />
1<br />
1<br />
1<br />
1<br />
1<br />
12580*<br />
244<br />
2<br />
2<br />
2<br />
2<br />
2<br />
2<br />
2<br />
12580*<br />
344 10840*<br />
3<br />
3<br />
3<br />
3 Update<br />
3<br />
Yes 3 No<br />
3<br />
NCS channel list, update window<br />
2-18
2. SYSTEM INITIALIZATION<br />
13. Yes is selected; press the [Enter] key to register input.<br />
Note: If the ID or frequency entered is invalid the message "Input Error: NCS<br />
ID" (for invalid ID) or "Input Error: Channel No." (for invalid frequency)<br />
appears. Clear the error message by pressing the [Esc] key. Place the<br />
cursor at the invalid ID or frequency code. Then, press the [Enter] key<br />
and enter correct ID or frequency.<br />
14. Press the [Esc] key twice to return to the standby display.<br />
2-19
2. SYSTEM INITIALIZATION<br />
2.6 LES List<br />
The LES List provides for storage of 44 LES names per ocean region. By<br />
entering approximate toll charges in the LES list, you can see that information on<br />
the Transmit message menu.<br />
2.6.1 Displaying toll charges<br />
Main LES (LES name and ID) are already registered; but, toll charges are not.<br />
To display toll charges when transmitting do the following:<br />
1. Press the [F8] key to display the Setup menu<br />
File Edit Transmit EGC Reports Logs Options Setup Position StopAlarm<br />
Setup<br />
1. Distress Alert Setup<br />
2. System Setup<br />
3. Editor Setup<br />
4. Terminal Setup<br />
5. EGC Setup<br />
6. Auto Mode Setup<br />
7. E-Mail Setup<br />
8. Directories<br />
9. Configuration<br />
Setup menu<br />
2. Press the [9] key to display the Configuration menu.<br />
Setup<br />
Configuration<br />
1. Station List<br />
2. LES List<br />
3. EGC Channel List<br />
4. NCS Channel List<br />
5. E-Mail Service List<br />
6. Save/Load<br />
8. Directories<br />
9. Configuration<br />
Configuration menu<br />
2-20
2. SYSTEM INITIALIZATION<br />
3. Press the [2] key to display the LES List.<br />
LES List<br />
Ctrl+P: Print ENTER: List Entry ESC: Quit<br />
No<br />
AOR (WEST)<br />
Name<br />
AOR (EAST)<br />
Name<br />
POR<br />
Name<br />
IOR<br />
Name<br />
01<br />
02<br />
03<br />
04<br />
05<br />
06<br />
07<br />
08<br />
Telenor S.S.Inc<br />
Stratos M.N.<br />
KDDI<br />
Telenor S.S.AS<br />
Telenor S.S.Inc<br />
Stratos M.N.<br />
KDDI<br />
Telenor S.S.AS<br />
Telecom Italia<br />
Telenor S.S.Inc<br />
Stratos M.N.<br />
KDDI<br />
Telenor S.S.AS<br />
Korea Telecom<br />
Stratos M.N.<br />
KDDI<br />
Telenor S.S.AS<br />
OTE<br />
VSNL<br />
Korea Telecom<br />
LES list<br />
4. Using the arrow keys, choose the LES for which you want to enter toll<br />
charges. For example, choose YAMAGUCHI (Japan).<br />
5. Press the [Enter] key.<br />
Setup<br />
Configuration<br />
LES List<br />
Ctrl+P: Print ENTER: List Entry ESC: Quit<br />
No<br />
AOR (WEST)<br />
Name<br />
AOR (EAST)<br />
Name<br />
POR<br />
Name<br />
IOR<br />
Name<br />
01<br />
02<br />
03<br />
04<br />
05<br />
06<br />
07<br />
08<br />
Telenor S.S.Inc<br />
Stratos M.N.<br />
KDDI<br />
Telenor S.S.AS<br />
Telenor S.S.Inc<br />
GOONHILLY<br />
Name :<br />
BURUM/YAMAGUCHI<br />
ID : 303<br />
EIK/TELENOR<br />
Remarks :<br />
FUCINO<br />
Charge<br />
Telenor S.S.Inc<br />
NETELY/BT/TELEN<br />
YAMAGUCHI<br />
(US$/256bit)<br />
TELEX *****.**<br />
FAX *****.**<br />
E-Mail *****.**<br />
KUMSAN<br />
CSDN *****.**<br />
PSDN *****.**<br />
X400 *****.**<br />
DNID *****.**<br />
SPEC *****.**<br />
Stratos M.N.<br />
KDDI<br />
Telenor S.S.NS<br />
OTE<br />
VSNL<br />
Korea Telecom<br />
Erase the Name to delete this LES.<br />
LES list, LES data entry window<br />
6. Press the [↓] key to choose TELEX and press the [Enter] key to open the text<br />
entry window.<br />
7. Enter telex charges (per 256 bit) and press the [Enter] key.<br />
Enter the toll charges assigned by LES. For example, the toll charges<br />
assessed by the LES Yamaguchi as of 11/2002 are as follows:<br />
Japanese landline: 26 yen/256 bit<br />
Inmarsat services: 30 yen/256 bit<br />
8. Enter toll charges for other items similarly.<br />
9. Press the [Esc] key to return to the LES list.<br />
10. Press the [Esc] key three times to return to the standby display.<br />
2-21
2. SYSTEM INITIALIZATION<br />
2.6.2 Registering LES to LES list<br />
Follow the procedure below to register an LES. For LES ID see the Appendix.<br />
1. Press the [F8], [9] and [2] keys to show the LES list.<br />
2. Use the arrow keys to place the cursor where desired. For example, choose<br />
05 in the AOR(WEST) column.<br />
Setup<br />
Configuration<br />
LES List<br />
Ctrl+P: Print ENTER: List Entry ESC: Quit<br />
No<br />
AOR (WEST)<br />
Name<br />
AOR (EAST)<br />
Name<br />
POR<br />
Name<br />
IOR<br />
Name<br />
01<br />
02<br />
03<br />
04<br />
05<br />
06<br />
07<br />
08<br />
Telenor S.S.Inc<br />
Stratos M.N.<br />
KDDI<br />
Telenor S.S.AS<br />
Telenor S.S.Inc<br />
Stratos M.N.<br />
KDDI<br />
Telenor S.S.AS<br />
Telecom Italia<br />
Telenor S.S.Inc<br />
Stratos M.N.<br />
KDDI<br />
Telenor S.S.AS<br />
Telenor S.S.AS<br />
Korea Telecom<br />
Stratos M.N.<br />
KDDI<br />
Telenor S.S.AS<br />
OTE<br />
VSNL<br />
Korea Telecom<br />
LES ID: XXX<br />
3. Press the [Enter] key.<br />
Place cursor here.<br />
No. (00-43)<br />
0: AOR(WEST)<br />
1: AOR(EAST)<br />
2: POR<br />
3: IOR<br />
Configuration menu<br />
Setup<br />
Configuration<br />
LES List<br />
Ctrl+P: Print ENTER: List Entry ESC: Quit<br />
No<br />
AOR (WEST)<br />
Name<br />
AOR (EAST)<br />
Name<br />
POR<br />
Name<br />
IOR<br />
Name<br />
01<br />
02<br />
03<br />
04<br />
05<br />
06<br />
07<br />
08<br />
Telenor S.S.Inc<br />
Stratos M.N.<br />
KDDI<br />
Telenor S.S.AS<br />
Telenor S.S.Inc<br />
GOONHILLY<br />
Name :<br />
BURUM/YAMAGUCHI<br />
ID : 303<br />
EIK/TELENOR<br />
Remarks :<br />
FUCINO<br />
Charge<br />
Telenor S.S.Inc<br />
NETELY/BT/TELEN<br />
YAMAGUCHI<br />
(US$/256bit)<br />
TELEX *****.**<br />
FAX *****.**<br />
E-Mail *****.**<br />
KUMSAN<br />
CSDN *****.**<br />
PSDN *****.**<br />
X400 *****.**<br />
DNID *****.**<br />
SPEC *****.**<br />
Stratos M.N.<br />
KDDI<br />
Telenor S.S.NS<br />
OTE<br />
VSNL<br />
Korea Telecom<br />
Erase the Name to delete this LES.<br />
LES list options<br />
4. Name is selected; press the [Enter] key to open the text entry window.<br />
2-22
2. SYSTEM INITIALIZATION<br />
Name :<br />
ID :<br />
Remarks :<br />
Charge (US$/256bit)<br />
TELEX *****.**<br />
FAX *****.**<br />
E-Mail *****.**<br />
CSDN *****.**<br />
PSDN *****.**<br />
X400 *****.**<br />
DNID *****.**<br />
SPEC *****.**<br />
Erase the Name to delete this LES.<br />
LES list, text entry window<br />
5. Enter LES name (maximum 15 characters).<br />
6. Press the [Enter] key.<br />
7. Press the [↓] key twice to choose Remarks.<br />
Note: ID is preprogrammed; it is not necessary to enter ID.<br />
8. Press the [Enter] key.<br />
9. Enter remarks (up to 20 characters).<br />
10. Press the [Enter] key.<br />
11. Press the [↓] key to choose TELEX and press the [Enter] key.<br />
12. Enter TELEX toll charges (per 256 bit) and press the [Enter] key.<br />
13. Enter toll charges for other items similarly.<br />
14. Press the [Esc] key to return to the LES list.<br />
15. Repeat steps 2-14 to enter another LES.<br />
16.Press the [Esc] key three times to return to the standby display.<br />
2.6.3 Editing the LES list<br />
1. Press the [F8], [9] and [2] keys to shown the LES list.<br />
2. Use the arrow keys to choose the LES you want to edit.<br />
3. Press the [Enter] key.<br />
4. Do the following:<br />
Change station name: Press the [↓] or [↑] key to choose Name and then<br />
press the {Enter} key. Press the [Backspace] key to erase name and then<br />
enter new name. Press the [Enter] key.<br />
Delete station: Press the [↓] or [↑] key to choose Name and then press the<br />
{Enter} key. Press the [Backspace] key to erase name and then press the<br />
[Enter] key.<br />
5. Press the [Esc] key to quit.<br />
6. Press the [Esc] key three times to return to the standby display.<br />
2-23
2. SYSTEM INITIALIZATION<br />
2.6.4 Printing the LES list<br />
1. Press [F8], [9] and [2] to display the LES list.<br />
2. To print the LES list, press the [P] key while pressing the [Ctrl] key.<br />
LES List ( Printed at 02-02-25 02:33 )<br />
+++++ AOR (WEST) ++++<br />
No. Name<br />
01 Telenor S.S.Inc<br />
02 Stratos M.N.<br />
03 KDDI<br />
04 Telenor S.S.AS<br />
12 Xantic (NED)<br />
21 France Telecom<br />
22 Xantic (AUS)<br />
LES ID<br />
001<br />
002<br />
003<br />
004<br />
012<br />
021<br />
022<br />
Remarks<br />
USA<br />
CANADA<br />
JAPAN<br />
NORWAY<br />
NETHERLANDS<br />
FRANCE<br />
AUSTRALIA<br />
+++++ AOR (EAST) +++++<br />
No.<br />
01<br />
Name<br />
Telenor S.S.Inc<br />
LES ID<br />
101<br />
Remarks<br />
USA<br />
Sample LES list printout<br />
3. To return to the standby display, press the [Esc] key three times.<br />
2-24
2.7 Station List<br />
2.7.1 Adding stations to the station list<br />
2. SYSTEM INITIALIZATION<br />
The FELCOM provides an “address book” for storing 64 station IDs. Enter<br />
station IDs as below.<br />
1. Press the [F8] key to display the Setup menu.<br />
2. Press the [9] key to display the Configuration menu.<br />
3. Press the [1] key to display the Station List.<br />
File Edit Transmit EGC Reports Logs Options Setup Position StopAlarm<br />
Setup<br />
Configuration<br />
Station List<br />
Group Station Name Type Code ID / Address<br />
01<br />
02<br />
03<br />
04<br />
05<br />
06<br />
07<br />
08<br />
abc<br />
xyz<br />
Seagull<br />
E-Mail<br />
E-Mail<br />
TELEX<br />
abc@ furuno.co.jp<br />
xyz@ furuno.co.jp<br />
584 463609999<br />
Page Up, Page Down: Move<br />
Ctrl+P: Print<br />
Sort (Ctrl+G: Group, Ctrl+N: Station Name, Ctrl+T: Type)<br />
Sample station list<br />
Note: You may sort the list by group name, station name or communication<br />
type as follows:<br />
Group name: Each press of [Ctrl] + [G] sorts the list by group name,<br />
ascending or descending order.<br />
Station name: Each press of [Ctrl] + [N] sorts the list by station name,<br />
in ascending or descending order.<br />
Comm. type: Each press of [Ctrl] + [T] sorts the list by communication<br />
type, in ascending or descending order.<br />
4. Operate the [↓] key to place the cursor on a blank line.<br />
5. Press the [Enter] key.<br />
Station Group<br />
Station Name<br />
Destination Type TELEX<br />
Prefix Code<br />
Country Code<br />
Station ID<br />
Modem Type<br />
E-Mail Address<br />
Remarks<br />
Erase the Name to delete this station.<br />
Station list items<br />
6. Press the [Enter] key to open the station group entry window.<br />
2-25
2. SYSTEM INITIALIZATION<br />
7. Enter station group name, using up to five characters.<br />
8. Press the [Enter] key to close the window.<br />
9. Press the [↓] key to choose Station Name.<br />
10. Press the [Enter] key to open the station name entry window.<br />
11. Enter station name, using up to 15 characters.<br />
12. Press the [Enter] key to close the window.<br />
13. Press the [↓] key to choose Destination Type.<br />
14. Press the [Enter] key to open the destination type window.<br />
TELEX<br />
FAX<br />
E-Mail<br />
CSDN<br />
PSDN<br />
X400<br />
DNID<br />
SPEC<br />
TELEX (Prefixed)<br />
FAX (Prefixed)<br />
PSDN (Prefixed)<br />
X400 (Prefixed)<br />
DNID (Prefixed)<br />
SPEC (Prefixed)<br />
Destination (communication) type options<br />
TELEX: Telex communication<br />
FAX: Facsimile service<br />
E-Mail: E-mail (electronic mail) Service<br />
CSDN: Circuit Switched Data Network-not used.<br />
PSDN: Packet Switched Data Network<br />
- to an office computer via a data network using X.25 standard.<br />
X400: For future use<br />
DNID: Data Network ID. Not used.<br />
SPEC: Ship-to shore requests for safety service, accessed by using special<br />
2-digit codes<br />
15. Press the [↓] or [↑] key to choose destination type desired.<br />
16. Press the [Enter] key to close the window. Follow appropriate procedure on<br />
the next several pages.<br />
Procedure for Telex<br />
1. Press the [↓] key to choose Country Code.<br />
2. Press the [Enter] key.<br />
3. For ship-to-shore telex, enter international telex country code; ship-to-ship<br />
telex, enter ocean region. A list of international telex country codes appears<br />
in the Appendix.<br />
Ocean Region<br />
AOR-East: 581 POR: 582<br />
IOR: 583 AOR-West: 584<br />
4. Press the [Enter] key.<br />
5. Press the [↓] key to choose Station ID.<br />
6. Press the [Enter] key to open the station ID entry window.<br />
2-26
2. SYSTEM INITIALIZATION<br />
7. Enter telex subscriber number (for ship-to-shore) or MES Inmarsat Mobile<br />
Number (for ship-to-ship). Up to 15 characters, including space, can be<br />
entered.<br />
8. Press the [Enter] key to close the window.<br />
9. Press the [↓] key to choose Remarks.<br />
10. Press [Enter] to open the remarks entry window.<br />
11. Enter remarks, using up to 20 characters.<br />
12. Press the [Enter] key to close the window.<br />
13. Press the [Esc] key to return to the station list.<br />
14. To enter another “Telex” station repeat the procedure from step 4 on page<br />
2-24.<br />
15. Press the [Esc] key three times to return to the standby display.<br />
Procedure for FAX<br />
1. Press the [↓] key to choose Country Code.<br />
2. Press the [Enter] key to open the country code entry window.<br />
3. Enter international telephone code of subscriber. See the Appendix for list of<br />
telephone codes.<br />
4. Press the [Enter] key to close the window.<br />
5. Press the [↓] key to Station ID.<br />
6. Press the [Enter] key to open the station ID entry window.<br />
7. Enter fax number.<br />
8. Press the [Enter] key to close the window.<br />
9. Press the [↓] key to choose Modem Type.<br />
10. Press the [Enter] key to open the modem type options window.<br />
T30<br />
V21<br />
V22<br />
V22B<br />
V23<br />
V26B<br />
V26T<br />
V27T<br />
V32<br />
Other<br />
Modem Type<br />
FAX<br />
V.21<br />
V.22<br />
V.22bis<br />
V.23<br />
V.26bis<br />
V.26ter<br />
V.27ter<br />
V.32<br />
300bps Duplex<br />
1200bps Duplex<br />
2400bps Duplex<br />
600/1200bps<br />
2400/1200bps<br />
2400bps Duplex<br />
4800/2400bps<br />
9600bps Duplex<br />
Modem type options window<br />
11. Press the [↓] or [↑] key to choose mode type of subscriber. For landline fax,<br />
choose “T30 FAX.”<br />
12. Press the [Enter] key to close the window.<br />
13. Press the [↓] to choose Remarks.<br />
14. Press the [Enter] key.<br />
15. Enter remarks, using up to 20 characters.<br />
16. Press the [Enter] key to close the window.<br />
17. Press the [Esc] key to return to the station list.<br />
18. To enter another “Fax” station repeat the procedure from step 4 on page<br />
2-24.<br />
19. Press the [Esc] key three times to return to the standby display.<br />
2-27
2. SYSTEM INITIALIZATION<br />
Procedure for E-mail<br />
1. Press the [↓] key to choose E-mail Address.<br />
2. Press the [Enter] key to open the e-mail address entry window.<br />
3. Enter recipient’s e-mail address.<br />
4. Press the [Enter] key to close the window.<br />
5. Press the [↓] to choose Remarks.<br />
6. Press the [Enter] key.<br />
7. Enter remarks, using up to 20 characters.<br />
8. Press the [Enter] key to close the window.<br />
9. Press the [Esc] key to return to the station list.<br />
10. To enter another “E-mail” station repeat the procedure from step 4 on page<br />
2-24.<br />
11. Press the [Esc] key three times to return to the standby display.<br />
2.7.2 Editing the station list<br />
1. Press [F8], [9] and [1] to display the Station List.<br />
File Edit Transmit EGC Reports Logs Options Setup Position StopAlarm<br />
Setup<br />
Configuration<br />
Station List<br />
Group Station Name Type Code ID / Address<br />
01<br />
02<br />
03<br />
04<br />
05<br />
06<br />
07<br />
08<br />
abc<br />
xyz<br />
Seagull<br />
E-Mail<br />
E-Mail<br />
TELEX<br />
abc@ furuno.co.jp<br />
xyz@ furuno.co.jp<br />
584 463609999<br />
Page Up, Page Down: Move<br />
Ctrl+P: Print<br />
Sort (Ctrl+G: Group, Ctrl+N: Station Name, Ctrl+T: Type)<br />
Station list<br />
Note: You may sort the list by group name, station name or communication<br />
type as follows:<br />
Group name: Each press of [Ctrl] + [G] sorts the list by group name,<br />
ascending or descending order.<br />
Station name: Each press of [Ctrl] + [N] sorts the list by station name,<br />
in ascending or descending order.<br />
Comm. type: Each press of [Ctrl] + [T] sorts the list by communication<br />
type, in ascending or descending order.<br />
2. Press the [↓] or [↑] key to choose a station and then press the [Enter] key.<br />
2-28
2. SYSTEM INITIALIZATION<br />
3. Do one of the following:<br />
Change station name: Press the [↓] or [↑] key to choose Station Name and<br />
then press the {Enter} key. Press the [Backspace] key to erase station name<br />
and then enter new data. Press the [Enter] key.<br />
Delete station: Press the [↓] or [↑] key to choose Station Name and then<br />
press the {Enter} key. Press the [Backspace] key to erase station name and<br />
then press the [Enter] key.<br />
4. Press the [Esc] key to save changes.<br />
5. Press the [Esc] key three times to return to the standby display.<br />
2.7.3 Printing the station list<br />
1. Press [F8], [9] and [1] to display the Station List.<br />
2. press the [P] key while pressing the [Ctrl] key.<br />
No.<br />
01<br />
02<br />
03<br />
Station List ( Printed at 02-02-25 02:38 )<br />
Group Name Type Dest, ID, Modem / Address<br />
x1 abc E-Mail abc@ furuno.co.jp<br />
x2 xyz E-Mail xyz@ furuno.co.jp<br />
x3 Seagull TELEX 584 463609999<br />
Remarks<br />
Station Name<br />
Group Name<br />
Country Code<br />
Subscriber's Number<br />
Sample station list printout<br />
3. Press the [Esc] key three times to return to the standby display.<br />
2-29
2. SYSTEM INITIALIZATION<br />
2.8 Entering Own Ship’s Position<br />
When there is no navigation data or Nav Port in the System Setup menu is set<br />
for OFF, enter ship’s position manually as follows:<br />
1. Press the [F9] key to display the Position menu.<br />
File Edit Transmit EGC Reports Logs Options Setup Position StopAlarm<br />
LAT<br />
LON<br />
Ship Position<br />
34:30.00N<br />
135:30.00E<br />
Ship position window<br />
2. Press the [Enter] key to open the latitude entry window.<br />
LAT<br />
LON<br />
Ship Position<br />
00:00.00N 34:30.00N<br />
000:00.00E<br />
Latitude entry window<br />
3. Enter latitude (XX° XX) and then press the [N] or [S] key as appropriate to<br />
enter coordinate.<br />
4. Press the [Enter] key to close the window.<br />
5. Press the [↓] key to choose LON.<br />
6. Press the [Enter] key to open the longitude entry window.<br />
LAT<br />
LON<br />
Ship Position<br />
00:00.00N<br />
000:00.00E 135:30.00E<br />
Longitude entry window<br />
7. Enter longitude (XXX° XX) and then press the [E] or [W] key as appropriate<br />
to enter coordinate.<br />
8. Press the [Enter] key to close the window.<br />
9. Press the [Esc] key to open the update window.<br />
File Edit Transmit EGC Reports Logs Options Setup Position StopAlarm<br />
LAT<br />
LON<br />
Ship Position<br />
34:50.00N<br />
000:00.00E<br />
Update<br />
Yes<br />
No<br />
Ship position, update<br />
10. Yes is selected; press the [Enter] key to update position and close the Ship<br />
Position menu. The position entered appears at the bottom right corner of the<br />
system status monitor screen.<br />
2-30
2.9 Creating A Directory<br />
2. SYSTEM INITIALIZATION<br />
You can create and specify the directory where to save incoming and outgoing<br />
messages to a floppy disk. If no directory is made, the messages are saved to<br />
the root directory of the floppy disk.<br />
2.9.1 Creating a directory where to store messages<br />
The procedure below shows how to create a directory on the root directory of a<br />
floppy disk.<br />
1. Insert a floppy disk in the disk drive.<br />
2. Press the [F8] key to display the Setup menu.<br />
3. Press the [8] key to display the Directories menu.<br />
Directories<br />
Message Directory<br />
EGC Message Directory<br />
Directories menu<br />
4. Press the [↑] key to choose Message Directory and then press the [Enter]<br />
key.<br />
File Edit Transmit EGC Reports Logs Options Setup Position StopAlarm<br />
Setup<br />
Message Directory<br />
[A:\ Directories<br />
]<br />
Message Filename Directory Size Date & Time<br />
EGC <br />
2002-02-28 20:53<br />
e
2. SYSTEM INITIALIZATION<br />
6. Enter directory name and press the [Enter] key. Entered name appears.<br />
Root directory<br />
(Top of floppy disk hierarchy)<br />
<br />
Setup<br />
Message Directory<br />
[A:\ ABC\ Directories . ]<br />
Message Filename Directory Size Date & Time<br />
EGC ABC281 M456ABC<br />
.<br />
2002-02-28 20:54<br />
e
2. SYSTEM INITIALIZATION<br />
2.9.2 Specifying directory where to store messages<br />
You may specify the directory where to store messages on a floppy disk as<br />
follows:<br />
1. Press the [F8] and [8] keys to show the Directories menu.<br />
2. Press the [↑] key to choose Message Directory and press the [Enter] key.<br />
Root directory<br />
(Top of floppy disk hierarchy)<br />
<br />
Setup<br />
Message Directory<br />
[A:\ ABC\ Directories . ]<br />
Message Filename Directory Size Date & Time<br />
EGC ABC281 M456ABC<br />
.<br />
2002-02-28 20:54<br />
e
2. SYSTEM INITIALIZATION<br />
2.10 E-mail Service List<br />
The E-mail service list provides for e-mail service provider set up. E-mail service<br />
providers are already registered in the FELCOM. To add new e-mail service<br />
providers follow the procedure below.<br />
1. Press the [F8] key to display the Setup menu.<br />
2. Press the [9] key to display the Configuration menu.<br />
Setup<br />
Configuration<br />
1. Station List<br />
2. LES List<br />
3. EGC Channel List<br />
4. NCS Channel List<br />
5. E-Mail Service List<br />
6. Save/Load<br />
8. Directories<br />
9. Configuration<br />
Setup menu, configuration<br />
3. Press the [5] key to display the E-mail Service List.<br />
Setup<br />
Configuration<br />
E-Mail Service List<br />
1. Station List<br />
2. LES List Station Name AOR.W AOR.E POR IOR<br />
3. EGC Channel List<br />
4. NCS<br />
01<br />
Channel<br />
Telenor<br />
List<br />
S.S.Inc<br />
001 101 201 321<br />
5. E-Mail<br />
02<br />
Service<br />
Xantic<br />
List<br />
(NED)<br />
012 112 212 312<br />
03 Stratos M.N.<br />
002 102 202 302<br />
8. Directories 04 Telenor S.S.AS<br />
004 104 304<br />
9. Configuration 05 KDDI<br />
003 103 203 303<br />
06 Singapore T.<br />
210 328<br />
07<br />
08<br />
Setup menu, E-mail service list<br />
2-34
2. SYSTEM INITIALIZATION<br />
4. Press the [↓] to choose a blank line in the Station Name column and then<br />
press the [Enter] key.<br />
Service Station Name<br />
Service ID<br />
LES ID(AORW)<br />
(AORE)<br />
(POR)<br />
(IOR)<br />
To:<br />
Cc:<br />
Subject:<br />
Separator<br />
Attach File(MIME)<br />
OFF<br />
Enter data for LES which offers e-mail services. For<br />
details contact LES directly.<br />
Example<br />
Enter data of the KDDI LES as follows:<br />
Service Station Name KDDI<br />
Service ID 28<br />
LES ID (AORW) 003<br />
(AORE) 103<br />
(POR) 203<br />
(IOR) 303<br />
To:<br />
TO:<br />
Cc:<br />
CC:<br />
Subject:<br />
SUBJECT:<br />
Separator<br />
Blank<br />
Attach File(MIME) ON(UUENCODE)<br />
E-mail setup items<br />
5. Press the [Enter] key to open the service station name entry window.<br />
Service Station Name<br />
Service ID<br />
LES ID(AORW)<br />
(AORE)<br />
(POR)<br />
(IOR)<br />
To:<br />
Cc:<br />
Subject:<br />
Separator<br />
Attach File(MIME)<br />
OFF<br />
Service station list, service station name entry window<br />
6. Type in LES which provides e-mail service.<br />
7. Press the [Enter] key to close the window.<br />
8. Press the [↓] key to choose Service ID.<br />
9. Press the [Enter] key to open the service ID entry window.<br />
10. Type in Service ID.<br />
11. Press the [Enter] key to close the window.<br />
12. Press the [↓] key to choose LES ID.<br />
13. Press the [Enter] key to open the LES ID entry window.<br />
14. Type LES ID of AOR-W.<br />
15. Press the [Enter] key to close the window.<br />
16. Enter LES ID for AOR-E, POR and IOR.<br />
17. Press the [↓] key to choose “To:”.<br />
18. Press the [Enter] key to open the “to” header entry window.<br />
2-35
2. SYSTEM INITIALIZATION<br />
19. Type appropriate “To” header (for example, TO:, to+, etc.).<br />
20. Press the [Enter] key to close the window.<br />
21. Press the [↓] key to choose “Cc:.”<br />
22. Press the [Enter] key to open the “cc” header entry window.<br />
23. Type appropriate “Cc” header (for example, CC:, cc+, etc.).<br />
24. Press the [Enter] key to close the window.<br />
25. Press the [↓] key to choose “Subject:.”<br />
26. Press the [Enter] key to open the subject entry window.<br />
27. Type appropriate Subject header (for example, Subject:, subject+, etc.).<br />
28. Press the [Enter] key to close the window.<br />
29. Press the [↓] key to choose “Separator.”<br />
30. Press the [Enter] key to open the separator entry window.<br />
31. Type appropriate Separator (for example, blank space, STX:, etc.).<br />
32. Press the [Enter] key to close the window.<br />
33. Press the [↓] key to choose “Attach File (MIME).”<br />
34. Press the [Enter] key to open the Attach File (MIME).window.<br />
35. Choose ON(BASE64), ON(UUENCODE) or OFF as appropriate.<br />
BASE64: General text converter<br />
UUENCODE: UNIX text converter<br />
36. Press the [Enter] key to close the window.<br />
37. Press the [Esc] key four times to return to the standby display.<br />
2-36
2. SYSTEM INITIALIZATION<br />
2.11 E-mail Setup<br />
Choose the LES where to forward e-mail. Also, you may need to register with an<br />
LES which provides e-mail services.<br />
1. Press the [F8] key to display the Setup menu.<br />
2. Press the [7] key to choose E-mail Setup.<br />
Setup<br />
E-Mail Setup<br />
Station Name AOR.W AOR.E POR IOR<br />
01 Telnor ComsatS.S.Inc 001 101 201 321<br />
6. Auto Mode Setup<br />
7. E-Mail Setup<br />
8. Directories<br />
9. Configuration<br />
E-mail setup<br />
3. Press the [Enter] key to open the e-mail station list.<br />
E-Mail Setup<br />
Station Name AOR.W AOR.E POR IOR<br />
01<br />
02<br />
03<br />
04<br />
05<br />
06<br />
07<br />
08<br />
Telenor S.S.Inc<br />
Xantic (NED)<br />
Stratos M.N.<br />
Telenor S.S.AS<br />
KDDI<br />
Singapore T.<br />
001 101 201 321<br />
012 112 212 312<br />
002 102 202 302<br />
004 104 204 304<br />
003 103 303<br />
210 328<br />
E-mail station list<br />
4. Press the [↓] or [↑] key to choose the LES where e-mail is to be sent.<br />
5. Press the [Enter] key.<br />
6. Press the [Esc] key twice to return to the standby display.<br />
2-37
2. SYSTEM INITIALIZATION<br />
2.12 Saving, Loading System Settings<br />
You can save system settings to a floppy disk and load them into the terminal<br />
unit. This is useful for having a backup copy of system settings.<br />
2.12.1 Saving system settings to a floppy disk<br />
1. Insert a formatted floppy disk in the disk drive. (For how to format a floppy<br />
disk, see paragraph 3.3.1.)<br />
2. Press the [F8] key to show the Setup menu.<br />
3. Press the [9] key to open the Configuration menu.<br />
4. Press the [6] key to choose Save/Load.<br />
Save/Load<br />
Save to FD<br />
Load from FD<br />
5. Save to FD is selected; press the [Enter] key. You are asked what settings<br />
you want to save.<br />
1. ALL<br />
2. Station List<br />
3. LES List<br />
4. E-Mail Service List<br />
5. Other<br />
6. Press appropriate numeric key to choose the item to save and then press the<br />
[Enter] key.<br />
7. The “OK to save?” window appears; press the [Enter] key to save system<br />
settings to the floppy disk.<br />
2.12.2 Loading system settings to the terminal unit<br />
1. Insert floppy disk which contains system settings in the disk drive.<br />
2. Press the [F8] key to show the Setup menu.<br />
3. Press the [9] key to open the Configuration menu.<br />
4. Press the [6] key to choose Save/Load.<br />
5. Press the [↓] key to choose Load from FD and press the [Enter] key. You are<br />
asked what settings you want to load.<br />
1. ALL<br />
2. Station List<br />
3. LES List<br />
4. E-Mail Service List<br />
5. Other<br />
6. Press appropriate numeric key to choose the item to load and then press the<br />
[Enter] key.<br />
7. The “OK to load?” window appears; press the [Enter] key to load system<br />
settings.<br />
2-38
3. FILE OPERATIONS<br />
This chapter describes how to prepare, edit, save and print files (messages).<br />
3.1 Files and Working Areas<br />
To create a new message it is necessary to open a new file. After a new file is<br />
opened, one of two working areas in the internal memory is secured to create<br />
the message. The term “open a file” also refers to the loading of a prepared file<br />
into a working area.<br />
When you remove a file from a working area this is called “closing a file.”<br />
INTERNAL MEMORY<br />
FLOPPY DISK MEMORY<br />
FILE 1<br />
FILE 2<br />
FILE 3<br />
TWO WORKING AREAS<br />
1<br />
FELCOM’s<br />
memory<br />
2<br />
LCD<br />
Display<br />
Can select one<br />
for display.<br />
(Change Window<br />
on Edit menu)<br />
Internal memory<br />
3-1
3. FILE OPERATIONS<br />
3.2 Preparing Files<br />
There are two types of files: routine and confidential. Files can be assigned a file<br />
name and saved to a floppy disk for later use. A message may contain maximum<br />
32 Kbytes of characters.<br />
3.2.1 Preparing a routine file<br />
1. Press the [F1] key to display the File menu.<br />
File Edit Transmit EGC Reports Logs Options Setup Position StopAlarm<br />
1. New<br />
2. Open<br />
3. Close<br />
4. Save<br />
File<br />
ALT-N<br />
ALT-O<br />
ALT-Q<br />
ALT-S<br />
5. Delete<br />
6. Rename<br />
7. Print<br />
ALT-D<br />
ALT-P<br />
8. Format Disk<br />
9. MIME (Decode)<br />
File menu<br />
2. Press the [1] key to choose New. The display should now look something like<br />
the illustration below.<br />
File Edit Transmit EGC Reports Logs Options Setup Position StopAlarm<br />
0001|<br />
<br />
Cursor can be a square or an underline.<br />
----*---------+---------+---------+---------+---------+---------+---------<<br />
TELEX<br />
1 Char. [ Line 1/ 1 Col. 1 ] [Insert ]<br />
Text editor screen<br />
Note: When two working areas are opened and you try to open a third file,<br />
the message “Save this message” appears. When this occurs close an<br />
open file to free a working area.<br />
3. The cursor is on the first line. Type your message.<br />
4. To transmit the message you have just prepared, go to paragraph 4.1.2. To<br />
save it to a floppy disk, for future transmission, go to paragraph 3.3.2.<br />
3-2
3. FILE OPERATIONS<br />
3.2.2 Preparing a confidential file<br />
If communicating with another FELCOM, you can prepare a confidential<br />
message by entering “S???-addressee code(-password):” in the first line of the<br />
message text. You can also receive confidential messages containing this<br />
header from a land subscriber or any MES which uses the FELCOM.<br />
There are two types of confidential messages: message with addressee code<br />
and message with both addressee code and password.<br />
When the FELCOM receives a confidential message, the message is not<br />
displayed and printed immediately. To display or print the contents of a<br />
confidential message, the recipient executes the procedure shown in paragraph<br />
4.2.3.<br />
Addressee code and password<br />
Caller and recipient agree beforehand on both the addressee code and the<br />
password. The addressee code might be the title of the recipient; for example,<br />
CAPTAIN. The password could be the classification of the message; for example,<br />
SECRET.<br />
Preparing message with addressee code<br />
Type the addressee code as shown in the illustration below and then type the<br />
text of message.<br />
Be sure to enter colon.<br />
S???-addressee code: (text of message)<br />
maximum 8 characters<br />
Addressee code<br />
Preparing message with both addressee code and password<br />
Type the addressee code and password as shown in the illustration below and<br />
then type the text of message.<br />
Be sure to enter colon.<br />
S???-addressee code-password: (text of message)<br />
maximum 8 characters<br />
Addressee code and password<br />
When the recipient receives a message with both addressee code and password,<br />
he must enter the password to view contents of the message.<br />
3-3
3. FILE OPERATIONS<br />
3.2.3 Editor menu setup<br />
The Editor menu sets the parameters of the text editor.<br />
1. Press the [F8] key to display the Setup menu.<br />
2. Press the [3] key to display the Editor Setup menu.<br />
File Edit Transmit EGC Reports Logs Options Setup Position StopAlarm<br />
Setup<br />
Editor Setup<br />
2. Text System Mode Setup Ascii<br />
3. Editor Mode Setup Insert<br />
4. Word Terminal Wrap Setup ON<br />
5. Line EGC No. Setup ON<br />
6. Tab Auto Width Mode Setup4 Char<br />
7. Column E-Mail Setup Width 69<br />
8. Cursor Directories Type Block<br />
9. Scroll Configuration Full Screen<br />
Editor setup menu<br />
3. The illustration above shows the default editor setup settings. To change<br />
settings:<br />
a) Press the [↓] or [↑] key to choose item.<br />
b) Press the [Enter] key to open corresponding options window.<br />
c) Press the [↓] or [↑] key to choose setting.<br />
d) Press the [Enter] key to register setting.<br />
e) Press the [Esc] key twice to return to the standby display.<br />
Text Mode: Choose “Telex” when creating a telex message. Only upper<br />
case alphabet is permitted in telex. Use “ASCII” when<br />
creating an e-mail message. Upper and lower case alphabet<br />
may be used in an e-mail.<br />
Edit Mode:<br />
Word Wrap:<br />
Line No.:<br />
Choose “Insert” (insert character at cursor location) or<br />
“Overwrite” (write over character at cursor location).<br />
Turns on/off automatic hyphenation at the end of a line.<br />
Turns line number display on or off.<br />
Tab Width:<br />
Sets horizontal tab width; two, four or eight tabs per line.<br />
Column Width: Choose Telex (69 (Fixed)) or ASCII (40 to 80).<br />
Cursor Type: Chooses cursor configuration, “■“ or underline.<br />
Scroll:<br />
Sets how much the screen moves up over the page (Full<br />
Screen or Half Screen) when [PgUp] or [PgDn] key is<br />
operated.<br />
3-4
3. FILE OPERATIONS<br />
File Edit Transmit EGC Reports Logs Options Setup Posirion StopAlarm<br />
0001|<br />
<br />
Cursor can be a square or an underline.<br />
Line Number<br />
Displayed if Line No. is turned on in<br />
Editor Setup menu.<br />
---- * ---------+---------+---------+---------+---------+---------+---------<<br />
TELEX<br />
1 Char. [ Line 1/ 1 Col. 1 ] [Insert ]<br />
3.2.4 Working with text<br />
Cutting and pasting text<br />
Text editor screen<br />
1. Use the arrow keys to place the cursor on the first character of the text to be<br />
cut.<br />
2. Highlight the text to be cut by pressing the [→] key while pressing and<br />
holding the [Shift] key. You can use the [←] or [→] key to adjust the highlight.<br />
The figure below shows the appearance of highlighted text.<br />
<br />
0001 WE ARE CONFIDENT THAT YOU WILL ENJOY MANY YEARS OF OPERATION WITH<br />
0002 THIS <strong>INMARSAT</strong> STANDARD C <strong>MOBILE</strong> <strong>EARTH</strong> <strong>STATION</strong> CONGRATULATIONS<br />
0003 CONGRATULATIONS ON YOUR CHOICE OF FURUNO FELCOM<br />
Highlight<br />
----*---------+---------+---------+---------+---------+---------+---------<<br />
TELEX<br />
173 Char. [ Line 2/ 3 Col. 55 ] [Insert ]<br />
Appearance of highlighted text<br />
3. Press the [F2] key to choose the Edit menu.<br />
Edit<br />
1. Cut<br />
DEL<br />
2. Copy<br />
ALT-C<br />
3. Paste<br />
INS<br />
4. Insert (With Citation)<br />
5. Select All ALT-A<br />
6. Search or Replace<br />
7. Goto Line<br />
8. Time or Pos. Ins<br />
9. Change Window ALT-V<br />
Edit menu<br />
4. Press the [1] key to choose Cut. The highlighted text is cut and the remaining<br />
text is reformatted. If a mistake is made, you can immediately restore the text<br />
by pressing the [Insert] key.<br />
3-5
3. FILE OPERATIONS<br />
5. To move text to a new location after it has been cut, place the cursor at the<br />
exact spot in the message where the cut text is to start. When the text cursor<br />
is placed correctly, press the [F2] key and then the [3] (Paste) key.<br />
Copying and pasting text<br />
1. Choose the text you want to copy.<br />
<br />
0001 THE FURUNO FELCOM <strong>INMARSAT</strong> STANDARD C <strong>MOBILE</strong> <strong>EARTH</strong> <strong>STATION</strong>, A<br />
0002 SATELLITE COMMUNICATIONS UNIT PACKAGE FOR VIRTUALLY EVERY VESSEL.<br />
----*---------+---------+---------+---------+---------+---------+---------<<br />
TELEX<br />
131 Char. [ Line 2/ 2 Col. 66 ] [Insert ]<br />
Appearance of highlighted text<br />
2. Press the [F2] key to display the Edit menu.<br />
3. Press the [2] key to choose Copy. The text selected is copied to the<br />
clipboard.<br />
4. Place the cursor at the exact spot on the message where the copied text is to<br />
start.<br />
<br />
0001 THE FURUNO FELCOM <strong>INMARSAT</strong> STANDARD C <strong>MOBILE</strong> <strong>EARTH</strong> <strong>STATION</strong>, A<br />
0002 SATELLITE COMMUNICATIONS UNIT PACKAGE FOR VIRTUALLY EVERY VESSEL.<br />
0003<br />
Cursor<br />
----*---------+---------+---------+---------+---------+---------+---------<<br />
TELEX<br />
131 Char. [ Line 2/ 2 Col. 66 ] [Insert ]<br />
Cursor selects location where to paste text<br />
5. Press the [F2] key followed by the [3] key. The text is placed at the cursor<br />
location.<br />
<br />
0001 THE FURUNO FELCOM <strong>INMARSAT</strong> STANDARD C <strong>MOBILE</strong> <strong>EARTH</strong> <strong>STATION</strong>, A<br />
0002 SATELLITE COMMUNICATIONS UNIT PACKAGE FOR VIRTUALLY EVERY VESSEL.<br />
0003 UNIT<br />
----*---------+---------+---------+---------+---------+---------+---------<<br />
TELEX<br />
137 Char. [ Line 3/ 3 Col. 5 ] [Insert ]<br />
Text pasted at cursor location<br />
3-6
3. FILE OPERATIONS<br />
Insert (with Citation)<br />
When you reply to a received message, you can insert the received message.<br />
“>” is placed at the head of the received message to distinguish it from your<br />
message.<br />
Select All<br />
Chooses the entire current file for cut and copy.<br />
Search and Replace<br />
Searching text<br />
The Search feature lets you search for text in a forward or backward direction.<br />
1. At the Edit menu, press the [6] key to choose 6 Search or Replace.<br />
Search or Replace<br />
1. Search Alt-F<br />
2. Replace Alt-R<br />
Search and replace menu<br />
2. Press the [1] key to choose 1. Search.<br />
Search<br />
Search Word<br />
Direction Forward<br />
Search window<br />
3. Search Word is selected; press the [Enter] key to show the search word entry<br />
window.<br />
4. Type the word to find and press the [Enter] key.<br />
5. Press the [↓] key to choose Direction and press the [Enter] key.<br />
Search Word<br />
Direction<br />
Search<br />
Forward<br />
Back<br />
Direction window<br />
6. Press the [↓] or [↑] key to choose direction to search from the cursor location;<br />
Forward or Back and press the [Enter] key.<br />
7. Press the [Esc] key.<br />
Search Start?<br />
Yes<br />
No<br />
Search start window<br />
3-7
3. FILE OPERATIONS<br />
8. Yes is selected; press the [Enter] key.<br />
When the unit finds the word, the cursor stops at the first character of the<br />
word. If the string could not be found, the message “Not Found (To Quit:<br />
ESC)” appears. Press the [Esc] key to quit.<br />
8. To continue the search, press the [Enter] key.<br />
Replacing text<br />
The Replace feature helps you replace every occurrence of a word or phase with<br />
another word or phase in a file.<br />
1. At the Edit menu, press the [6] key to choose 6 Search or Replace.<br />
Search or Replace<br />
1. Search Alt-F<br />
2. Replace Alt-R<br />
Search and replace menu<br />
2. Press the [2] key to choose 2. Replace.<br />
Replace<br />
Search Word<br />
Replace Word<br />
Direction Forward<br />
Query or ALL Query<br />
Replace menu<br />
3. Search Word is selected; press the [Enter] key to open the search word entry<br />
window.<br />
4. Enter search word and then press the [Enter] key.<br />
5. Press the [↓] key to choose Replace Word and press the [Enter] key..<br />
6. Enter replace word and then press the [Enter] key.<br />
7. Press the [↓] key to choose Direction and then press the [Enter] key.<br />
Replace<br />
Search Word ABC<br />
Replace Word 123<br />
Direction Forward<br />
Forward<br />
Query or ALL Query<br />
Back<br />
Replace menu, direction menu<br />
8. Press the [↓] or [↑] key to choose direction to search from the cursor location<br />
and press the [Enter] key.<br />
9. Press the [↓] key to choose Query or All and then press the [Enter] key.<br />
Replace<br />
Search Word ABC<br />
Replace Word 123<br />
Direction<br />
Query or ALL Query<br />
All<br />
Replace menu, query or all<br />
3-8
3. FILE OPERATIONS<br />
10. Press the [↓] or [↑] key to choose Query or All.<br />
Query: Stop at each occurrence of word to answer yes or no to<br />
replacement.<br />
All: Replace every occurrence of word without stopping to confirm.<br />
11. Press the [Esc] key.<br />
Replace OK? (OK: ENTER Pass: SPACE To quit: ESC)<br />
Replace start window<br />
12. Yes is selected; press the [Enter] key to start the replacement. If you selected<br />
“All” at step 10 all occurrences of the search word are replaced with the<br />
replace word. If the string could not be found, the message “Not Found (To<br />
quit: ESC)” appears. Press the [Esc] key to quit.<br />
If you selected “Query” at step 10, the message below appears when the<br />
search word is found. Press the [Enter] key to replace the word, or hit the<br />
Space bar to go to the next occurrence of the search word.<br />
Replace OK? (OK: ENTER Pass: SPACE To quit: ESC)<br />
Go to line<br />
Moves the cursor to the desired line in the current file.<br />
Goto Line<br />
1. Top of Text HOME<br />
2. End of Text END<br />
3. Goto Line<br />
Goto line options<br />
1. Top of text: Go to top of text<br />
2. End of text: Go to end of text<br />
3. Go to line: Specify line number to go to<br />
Time or Pos. Ins<br />
Inserts time or position in a sentence.<br />
1. At the Edit menu, press the [8] key to choose 8. Time or Pos. Ins.<br />
Time or Pos. Ins.<br />
1. Time<br />
2. Position<br />
Time or position insert options<br />
2. Press the [1] key to insert time; [2] key to insert position.<br />
3-9
3. FILE OPERATIONS<br />
3.3 Saving Files<br />
After you have created a message you may wish to save it to a floppy disk, for<br />
future use. The types of floppy disk used with the system are 2HD and 2DD.<br />
Inserting a floppy disk<br />
Gently insert a floppy disk in the disk drive on the PC. Handle floppy disks<br />
carefully to prevent damage to the disk, which could cause loss of data.<br />
Ejecting a floppy disk<br />
Press the eject button on the right side of the drive and then remove the disk.<br />
<br />
Care and handling of floppy disks<br />
• Do not remove a floppy disk from the drive while the operating lamp on the<br />
disk drive is lit. Damage to the disk may result.<br />
• The tab on the disk slides up to reveal a hole in the housing (or slides down,<br />
to cover the hole). Open the hole to write-protect the disk.<br />
Hole opened: Write protect<br />
Tab<br />
Floppy disk<br />
3-10
3. FILE OPERATIONS<br />
3.3.1 Formatting a floppy disk<br />
To save a message to a floppy disk the disk must first be formatted. Formatting<br />
prepares the disk so that information can be written to its surface.<br />
1. Insert a blank floppy disk into the disk drive.<br />
2. Press the [F1] key.<br />
3. Press the [8] key (Format Disk).<br />
File<br />
Format Disk<br />
Insert new disk.<br />
And select media type.<br />
2HD (1.44MB)<br />
2DD (720kB)<br />
6. Rename<br />
7. Print<br />
8. Format Disk<br />
9. MIME (Decode)<br />
Format disk, disk type options<br />
4. Press the [↓] or [↑] key to choose appropriate media type.<br />
5. Press the [Enter] key.<br />
Format Disk<br />
Insert new disk.<br />
And select media type.<br />
Yes<br />
Start<br />
No<br />
Format disk, format start window<br />
6. Press the [←] key to choose Yes and then press the [Enter] key to format the<br />
disk. The screen shows a progress bar as below. When formatting is<br />
completed, the floppy disk drive lamp goes off.<br />
Format Disk<br />
8%<br />
If there is no floppy disk in the drive, the message “FD access failure: Drive<br />
not ready.” appears. Press the [Esc] key to erase the message and then<br />
insert a floppy disk in the drive.<br />
Note: If formatting failed, the message (flashing) “Format failed, press any key to<br />
continue.” appears.<br />
3-11
3. FILE OPERATIONS<br />
3.3.2 Saving files<br />
You can save a message two ways: Save it without losing your place on the<br />
screen (called “save”), or save it before clearing the screen (called “close”).<br />
Save file, retain place on screen<br />
1. Press the [F1] key to display the File menu.<br />
2. Press the [4] key. The screen should look something like the one below.<br />
File Edit Transmit EGC Reports Logs Options Setup Position StopAlarm<br />
File<br />
<br />
0001|THE FURUNO ALT-N FELCOM 12 Save <strong>INMARSAT</strong> STANDARD C <strong>MOBILE</strong> <strong>EARTH</strong> <strong>STATION</strong>, A<br />
0002|SATELLITE [A:\ ALT-O COMMUNICATIONS UNIT PACKAGE FOR VIRTUALLY ]<br />
EVERY VESSEL.<br />
Filename ALT-Q Size Date & Time<br />
E0970715.001 ALT-S 868 02-02-25 02:33<br />
E0970715.002 372 02-02-25 02:52<br />
E0970715.003 ALT-D 6794 02-02-25 02:59<br />
E0970715.004 864 02-02-25 03:13<br />
4 Files ALT-P exist 579584 bytes free<br />
---- To * ---------+---------+---------+---------+---------+---------+---------<<br />
View: SPACE Make Dir: INS Remove Dir: DEL<br />
Col. 4 ] [Insert ]<br />
Save screen<br />
3. Enter a file name, up to eight characters with extension name (three<br />
characters). You may not use a colon, quotation mark or semicolon or vertical<br />
line.<br />
(file name) . (extension name)<br />
3 characters<br />
period<br />
8 characters<br />
Configuration of file menu<br />
4. Press the [Enter] key to save the file to the disk and keep it on the screen.<br />
3-12
3. FILE OPERATIONS<br />
Save file, clear screen<br />
1. Press the [F1] key to display the File menu.<br />
2. Press the [3] key. The message “Save this message?” appears on the<br />
screen.<br />
File Edit Transmit EGC Reports Logs Options Setup Position StopAlarm<br />
1. New<br />
2. Open<br />
3. Close<br />
4. Save<br />
File<br />
ALT-N<br />
ALT-O<br />
ALT-Q<br />
ALT-S<br />
<br />
NT THAT YOU WILL ENJOY MANY YEARS OF OPERATION WITH<br />
STANDARD C <strong>MOBILE</strong> <strong>EARTH</strong> <strong>STATION</strong> FELCOM<br />
S ON YOUR CHOICE OF FURUNO FELCOM.<br />
5. Delete<br />
6. Rename<br />
7. Print<br />
8. Format Disk<br />
ALT-D<br />
ALT-P<br />
Save this message?<br />
Yes<br />
No<br />
9. MIME (Decode)<br />
---- * ---------+---------+---------+---------+---------+---------+---------<<br />
TELEX 178 Char. [ Line 3/ 3 Col. 52 ] [Insert ]<br />
File menu, close file prompt<br />
3. Yes is selected; press the [Enter] key.<br />
File Edit Transmit EGC Reports Logs Options Setup Position StopAlarm<br />
Type file<br />
name here<br />
File<br />
<br />
1. New<br />
2. [A:\ Open<br />
ALT-N<br />
ALT-O<br />
NT THAT Save YOU WILL ENJOY MANY YEARS OF OPERATION WITH<br />
STANDARD C <strong>MOBILE</strong> <strong>EARTH</strong> ] <strong>STATION</strong> FELCOM<br />
3. Close Filename ALT-Q S Size ON YOUR CHOICE Date & Time IF FURUNO FELCOM.<br />
4. Save ABC281 ALT-S . 901 02-02-25 20:54<br />
COIEKI .<br />
42 02-02-25 02:13<br />
5. Delete COMTEST. ALT-D 42 02-02-25 05:42<br />
6. Rename E0970715.001 868 02-02-25 02:33<br />
7. Print E0970715.002 ALT-P 372 02-02-25 02:52<br />
E0970715.003 6794 02-02-25 02:59<br />
8. Format E0970715.004 Disk 864 02-02-25 03:13<br />
E0970715.005 1910 02-02-25 03:48<br />
9. MIME (Decode)<br />
---- * ---------+---------+---------+---------+---------+---------+---------<<br />
74 Files exist 578560 bytes free<br />
ASCII To View: SPACE Make Dir: INS Remove Dir: DEL Col. 4 } [Insert ]<br />
Save screen<br />
4. Enter a file name.<br />
5. Press the [Enter] key to save the file name and clear the screen.<br />
3-13
3. FILE OPERATIONS<br />
3.4 Opening Files<br />
3.4.1 Opening files<br />
1. Set the floppy disk containing the file you wish to open in the disk drive.<br />
2. Press the [F1] key to display the File menu.<br />
3. Press the [2] key. The screen shows a list of the files stored in the floppy disk.<br />
4. Press the [↓] or [↑] key to choose a file.<br />
To view a portion of a file, press the space bar. After confirming, press the [Esc]<br />
key.<br />
File<br />
1. New ALT-N Open<br />
2. Open ALT-O<br />
SEIZOU<br />
3. Close THE FURUNO ALT-QFELCOM <strong>INMARSAT</strong> STANDARD C <strong>MOBILE</strong> <strong>EARTH</strong> <strong>STATION</strong>, A<br />
4. Save SATELLITE ALT-S COMMUNICATIONS UNIT PACKAGE FOR VIRTUALLY EVERY VESSEL.<br />
UNIT<br />
5. Delete ALT-D<br />
6. Rename<br />
7. Print<br />
ALT-P<br />
8. Format Disk<br />
9. MIME (Decode)<br />
Partial view of a file<br />
5. Press the [Enter] key.<br />
A few moments later the contents of the file appear on the screen and the<br />
title bar shows the file name. You may repeat this procedure to load a second<br />
file into a working area.<br />
3.4.2 Switching between files<br />
You can switch between files by pressing the [9] key (Change Window) on the<br />
Edit menu ([F2]), or pressing Alt+V on the editor screen.<br />
ABC<br />
FURUNO<br />
1<br />
2<br />
[F2]<br />
9: Change Window<br />
or [ALT] + [V]<br />
How to alternate display of files in working area 1 and 2.<br />
How to switch between files<br />
3-14
3. FILE OPERATIONS<br />
3.4.3 Opening a file when both working areas are occupied<br />
If both working areas in the memory are occupied when you attempt to open a<br />
file, you are asked if you want to save the file currently chosen before clearing it<br />
to open another file.<br />
Save this message?<br />
Yes<br />
No<br />
Prompt for closing a file<br />
1. To save the file, press the [Enter] key. (Choose “No” and press the [Enter]<br />
key if you do not need to save the file. Go to step 4.) The file screen is<br />
erased and then the untitled window appears.<br />
File Edit Transmit EGC Reports Logs Options Setup Position StopAlarm<br />
File<br />
<br />
1. New ALT-N NT THAT Save YOU WILL ENJOY MANY YEARS OF OPERATION WITH<br />
2. [A:\SEIZOSE Open ALT-O<br />
3. Close Filename ALT-Q<br />
STANDARD C <strong>MOBILE</strong> <strong>EARTH</strong> <strong>STATION</strong> ] FELCOM<br />
S Size ON YOUR CHOICE Date & Time IF FURUNO FELCOM.<br />
4. Save ABC281 ALT-S . 901 02-02-25 20:54<br />
COIEKI .<br />
42 02-02-25 02:13<br />
5. Delete COMTEST. ALT-D 42 02-02-25 05:42<br />
6. Rename E0970715.001 868 02-02-25 02:33<br />
7. Print E0970715.002 ALT-P 372 02-02-25 02:52<br />
E0970715.003 6794 02-02-25 02:59<br />
8. Format E0970715.004 Disk 864 02-02-25 03:13<br />
E0970715.005 1910 02-02-25 03:48<br />
9. MIME (Decode)<br />
---- * ---------+---------+---------+---------+---------+---------+---------<<br />
74 Files exist 578560 bytes free<br />
ASCII To View: SPACE Make Dir: INS Remove Dir: DEL Col. 4 } [Insert ]<br />
Save screen<br />
2. Enter file name followed by the [Enter] key. You are asked if you are sure to<br />
overwrite the file name.<br />
File already exists. Overwrite?<br />
Yes No<br />
Overwrite file window<br />
3. Yes is selected; press the [Enter] key.<br />
4. Press the [↑] or [↓] key to choose file to open and then press the [Enter] key.<br />
3-15
3. FILE OPERATIONS<br />
3.5 Saving a File Under a New Name<br />
1. Open a file referring to paragraph 3.4.1.<br />
2. Edit the file.<br />
3. Press the [F1] key.<br />
4. Press the [3] (Close) or [4] (Save) key depending on your objective. [3] saves<br />
the file and closes the screen; [4] saves file and keeps position on the<br />
screen.<br />
File Edit Transmit EGC Reports Logs Options Setup Position StopAlarm<br />
1. New<br />
2. Open<br />
3. Close<br />
4. Save<br />
File<br />
ALT-N<br />
ALT-O<br />
ALT-Q<br />
ALT-S<br />
<br />
NT THAT YOU WILL ENJOY MANY YEARS OF OPERATION WITH<br />
STANDARD C <strong>MOBILE</strong> <strong>EARTH</strong> <strong>STATION</strong> FELCOM<br />
S ON YOUR CHOICE OF FURUNO FELCOM.<br />
5. Delete<br />
6. Rename<br />
7. Print<br />
8. Format Disk<br />
ALT-D<br />
ALT-P<br />
Save this message?<br />
Yes<br />
No<br />
9. MIME (Decode)<br />
---- * ---------+---------+---------+---------+---------+---------+---------<<br />
TELEX 178 Char. [ Line 3/ 3 Col. 52 ] [Insert ]<br />
Save screen, prompt for saving a message before closing<br />
5. For “Close,” press the [Enter] key.<br />
6. Press the [Backspace] key to delete original file name. Enter file name for<br />
new file.<br />
File Edit Transmit EGC Reports Logs Options Setup Position StopAlarm<br />
File<br />
<br />
1. New ALT-N NT THAT Save YOU WILL ENJOY MANY YEARS OF OPERATION WITH<br />
2. [A:\SEIZOSE Open ALT-O<br />
3. Close Filename ALT-Q<br />
STANDARD C <strong>MOBILE</strong> <strong>EARTH</strong> <strong>STATION</strong> ] FELCOM<br />
S Size ON YOUR CHOICE Date & Time IF FURUNO FELCOM.<br />
4. Save ABC281 ALT-S . 901 02-02-25 20:54<br />
COIEKI .<br />
42 02-02-25 02:13<br />
5. Delete COMTEST. ALT-D 42 02-02-25 05:42<br />
6. Rename E0970715.001 868 02-02-25 02:33<br />
7. Print E0970715.002 ALT-P 372 02-02-25 02:52<br />
E0970715.003 6794 02-02-25 02:59<br />
8. Format E0970715.004 Disk 864 02-02-25 03:13<br />
E0970715.005 1910 02-02-25 03:48<br />
9. MIME (Decode)<br />
----*---------+---------+---------+---------+---------+---------+---------<<br />
74 Files exist 578560 bytes free<br />
ASCII To View: SPACE Make Dir: INS Remove Dir: DEL Col. 4 } [Insert ]<br />
Save screen<br />
7. Press the [Enter] key.<br />
Note: Should you decide to save the file under the<br />
original name, skip step 6. The screen shown<br />
at the top of the next page appears. Overwrite<br />
the file by pressing the [Enter] key, or choose<br />
“No” and press the [Enter] key to escape.<br />
File already exists. Overwrite?<br />
Yes No<br />
3-16
3.6 Printing Files on Floppy Disks<br />
You can print out a hard copy of a file stored on a floppy disk.<br />
1. Press the [F1] key to display the File menu.<br />
2. Press the [7] key. A list of files stored on the disk appears.<br />
Print<br />
[A:\R0970729 ]<br />
Filename Size Date & Time<br />
R0970729.001 412 02-01-10 07:21<br />
SEIZOU . 139 02-01-10 06:22<br />
SEIZOUSE. 117 02-02-25 06:29<br />
T0715 . 836 02-02-23 04:53<br />
T7170 .<br />
20 02-02-18 08:55<br />
TEST .TXT 29 02-01-14 10:03<br />
TESTCAL . 128 02-02-11 15:02<br />
YANOT<br />
146 02-02-10 17:37<br />
75 Files exist 578560 bytes free<br />
To View: SPACE Make Dir: INS<br />
Remove Dir: DEL<br />
3. FILE OPERATIONS<br />
Sample print screen<br />
3. Press the [↑] or [↓] key to choose a file. To get a partial display of the file, tap<br />
the space bar. After confirming the file, press the [Esc] key.<br />
4. Press the [Enter] key to print the file.<br />
3.7 Combining Files<br />
In the procedure below we’ll combine file A and B.<br />
1. Open file A.<br />
2. Open file B.<br />
3. Place the cursor at the beginning of file B. While pressing and holding down<br />
the [Shift] key, press the [↓] key to highlight the entire file. (You can also<br />
choose a portion of the file.)<br />
4. Press the [C] key while holding down the [Alt] key to place file B on the<br />
clipboard.<br />
5. Press the [V] key while holding down the [Alt] key to switch to File A.<br />
6. Press the [→] key while holding down the [Fn] key followed by the [Enter] key<br />
to place the cursor at the end of the file A.<br />
7. Press the [Insert] key. File B is inserted at the end of the file A.<br />
3-17
3. FILE OPERATIONS<br />
3.8 Deleting Files<br />
1. Press the [F1] key to display the File menu.<br />
2. Press the [5] key. A list of files stored on the disk appears.<br />
File<br />
1. New ALT-N<br />
Delete<br />
[A:\ABC28 ]<br />
2. Open ALT-O<br />
Filename Size Date & Time<br />
3. Close ALT-Q<br />
ABC28 . 901 02-01-10 20:53<br />
4. Save ALT-S<br />
ABC281 . 901 02-01-10 20:54<br />
5. COIEKI Delete . ALT-D<br />
6. COMTEST. Rename<br />
42<br />
42<br />
02-02-25 02:13<br />
02-02-23 05:42<br />
E0970715.001 868 02-02-18 02:33<br />
7.<br />
E0970715.002<br />
Print ALT-P<br />
372 02-01-14 02:52<br />
8. E0970715.003<br />
Format Disk<br />
E0970715.004<br />
6794<br />
864<br />
02-02-11 02:59<br />
02-02-10 03:13<br />
9. MIME 75 (Decode) Files exist 578560 bytes free<br />
To View: SPACE Make Dir: INS<br />
Remove Dir: DEL<br />
Sample delete screen<br />
3. Press the [↑] or [↓] key to choose the file you want to delete. To verify the<br />
contents of that file, tap the space bar. After confirming the contents, press<br />
the [Esc] key.<br />
4. Press the [Enter] key. The prompt “OK to delete file?” appears.<br />
File<br />
1. New ALT-N<br />
Delete<br />
[A:\ABC28 ]<br />
2. Open ALT-O<br />
Filename Size Date & Time<br />
3. Close ALT-Q<br />
ABC28 . 901 02-01-10 20:53<br />
4. Save ALT-S<br />
ABC281 . 901 02-01-10 20:54<br />
5. COIEKI Delete . ALT-D<br />
6. COMTEST. Rename<br />
42<br />
42<br />
02-02-25 02:13<br />
02-02-23 05:42<br />
E0970715.001 868 97-07-15 02:52<br />
7.<br />
E0970715.002<br />
Print ALT-P<br />
372 97-07-15 02:59<br />
OK to delete file?<br />
8. E0970715.003<br />
Format Disk<br />
E0970715.004<br />
6794<br />
864<br />
97-07-15 03:13 Yes No<br />
9. MIME 75 (Decode) Files exist 578560 bytes free<br />
To View: SPACE Make Dir: INS<br />
Remove Dir: DEL<br />
Prompt for verification of file delete<br />
5. Press the [Enter] key to delete the file, or press the [↓] and [Enter] keys to<br />
escape.<br />
3-18
3. FILE OPERATIONS<br />
3.9 Renaming Files<br />
Do the following to rename a file.<br />
1. Press the [F1] key.<br />
2. Press the [6] key.<br />
File<br />
1. New ALT-N<br />
Rename<br />
[A:\Test ]<br />
2. Open ALT-O<br />
Filename Size Date & Time<br />
3. Close ALT-Q<br />
Test<br />
901 02-01-10 20:53<br />
4. Save ALT-S<br />
ABC281 . 901 02-01-10 20:54<br />
5. COIEKI Delete . ALT-D<br />
6. COMTEST. Rename<br />
42<br />
42<br />
02-02-25 02:13<br />
02-02-23 05:42<br />
E0970715.001 868 02-02-18 02:33<br />
7.<br />
E0970715.002<br />
Print ALT-P<br />
372 02-01-14 02:52<br />
8. E0970715.003<br />
Format Disk<br />
E0970715.004<br />
6794<br />
864<br />
02-02-11 02:59<br />
02-02-10 03:13<br />
9. MIME 75 (Decode) Files exist 578560 bytes free<br />
To View: SPACE Make Dir: INS<br />
Remove Dir: DEL<br />
File, rename<br />
3. Press the [↑] or [↓] key to choose the file you want to rename.<br />
4. Press the [Enter] key.<br />
Rename<br />
Enter new filename<br />
Test<br />
Rename window<br />
5. Delete old file name and then type new file name.<br />
6. Press the [Enter] key.<br />
<br />
3-19
3. FILE OPERATIONS<br />
3.10 Decoding E-mail Attachment<br />
When you can't read an e-mail attachment because it has been coded by MIME<br />
(Multipurpose Internet Mail Extensions), you may decode it as below.<br />
1. Save the MIME-coded file to a floppy disk. (See paragraph 4.2.5 for the<br />
procedure.) This step is not necessary if Auto Receive Message Save is<br />
turned on in the Auto Mode Setup menu.<br />
2. Press the [F1] key to open the File menu.<br />
3. Press the [9] key to choose MIME(Decode).<br />
File Edit Transmit EGC Reports Logs Options Setup Position StopAlarm<br />
File<br />
1. New ALT-N<br />
Decode<br />
[A:\E0970715 ]<br />
2. Open ALT-O<br />
3. Close<br />
Filename<br />
ALT-Q<br />
Size Date & Time<br />
4.<br />
E0970715.001 868 02-02-25 02:33<br />
Save ALT-S<br />
E0970715.002 372 02-02-25 02:52<br />
5. E0970715.003<br />
Delete ALT-D<br />
6. E0970715.004<br />
Rename<br />
6794<br />
864<br />
02-02-25 02:59<br />
02-02-25 03:13<br />
7. Print ALT-P<br />
8. Format 4 Disk Files exist 579584 bytes free<br />
To View: SPACE Make Dir: INS Remove Dir: DEL<br />
9. MIME (Decode)<br />
Decode window<br />
4. Press the [↑] or [↓] key to choose the file you want to decode.<br />
5. Press the [Enter] key.<br />
File chosen at step 4<br />
MIME Decode<br />
Checking 'E0970715.001' . . .<br />
Decode 'ABC.ini'?<br />
Yes<br />
Decode<br />
No<br />
File attachment<br />
Decode window<br />
6. Yes is selected; press the [Enter] key to decode the file.<br />
File<br />
1. New ALT-N<br />
Save<br />
[A:\ABC.ini ]<br />
2. Open ALT-O<br />
3. Close<br />
Filename<br />
ALT-Q<br />
Size Date & Time<br />
4.<br />
E0970715.001<br />
Save ALT-S<br />
868 2002-02-25 02:33<br />
E0970715.002 372 2002-02-25 02:52<br />
5. E0970715.003<br />
Delete ALT-D<br />
6. E0970715.004<br />
Rename<br />
6794<br />
864<br />
2002-02-25 02:59<br />
2002-02-25 03:13<br />
7. Print ALT-P<br />
8. Format 4 Disk Files exist 579584 bytes free<br />
To View: SPACE Make Dir: INS Remove Dir: DEL<br />
9. MIME (Decode)<br />
<br />
Save window<br />
3-20
3. FILE OPERATIONS<br />
7. To change file name, press the [Backspace] key to erase the file name, new<br />
file name and then press the [Enter] key. After decoding the file the screen<br />
looks something like the one shown below.<br />
MIME Decode<br />
Checking 'E0970715.001' . . .<br />
Decode 'ABC.ini'?<br />
Now decoding . . .<br />
Complete.<br />
Decoded 1 file (s).<br />
Press any key to escape.<br />
<br />
MIME decode screen<br />
8. Press the [Esc] key twice to return to the standby display.<br />
9. Press the [F1] and [2] keys in that order.<br />
10. Press the [↑] or [↓] key to choose the file selected at step 7 and then press<br />
the [Enter] key.<br />
3-21
3. FILE OPERATIONS<br />
(This page intentionally left blank.)<br />
3-22
4. <strong>INMARSAT</strong> C COMMUNICATIONS<br />
This chapter explains how to transmit and receive. Before conducting any<br />
communications, be sure to login with the NCS in your area, following the<br />
instructions in paragraph 2.3.1.<br />
To transmit e-mail, you may need to register for e-mail services with an LES<br />
which provides such services.<br />
4.1 Transmitting<br />
To transmit a message, create the message, attach the address of the recipient<br />
and then send it to the LES. The address of the recipient in the Inmarsat C<br />
system is his telex number, for transmission via landline, or MES Inmarsat<br />
Mobile Number (IMN), when transmitting to a ship.<br />
The message can be one you’ve just prepared or one stored on a floppy disk.<br />
(Messages cannot be transmitted by direct keyboard input.)<br />
4.1.1 Code description<br />
Code can be specified at the terminal unit.<br />
IA5: International alphabet No. 5, ASCII code (7 bit).<br />
Specify this code to transmit English containing lower case alphabet.<br />
ITA2: No. 2 international communications alphabet (5 bit). Specify this code for<br />
message which contains only No. 2 international communications<br />
alphabet (see A-11). ITA2 code is transmitted faster than IA5 code.<br />
Land-based telex equipment uses ITA2. The LES converts all codes into<br />
ITA2. Code which cannot be converted is shown with the question mark<br />
(?).<br />
DATA: Data (8 bit). Use this code to transmit data.<br />
4-1
4. <strong>INMARSAT</strong> C COMMUNICATIONS<br />
Message, subscriber, destination type and code<br />
Message Subscriber Destination Type Code Remarks<br />
English Inmarsat C MES Telex IA5<br />
Telex Telex ITA2<br />
Fax PSTN IA5 Modem type “T30 FAX”<br />
E-mail E-mail IA5<br />
Russian Inmarsat C MES PSDN DATA<br />
Telex TELEX ITA2 OTE (305) and Xantic (222)<br />
Fax<br />
Not available<br />
E-mail E-mail DATA<br />
Japanese Inmarsat C MES PSDN DATA<br />
Telex<br />
Not available<br />
Fax<br />
Not available<br />
E-mail E-mail DATA<br />
Data Inmarsat C. MES PSDN DATA<br />
Land Network PSDN DATA<br />
4.1.2 Transmitting prepared message<br />
This section explains how to transmit a message you have just prepared. For<br />
2-digit code services, see the table in paragraph 4.1.6.<br />
Transmitting a message to a station registered on station list<br />
1. Prepare message on the screen. For e-mail, set Text Mode in the Editor<br />
Setup menu to Ascii. See paragraph 3.2.3. For e-mail attachment, prepare<br />
the attachment and save it to a floppy disk.<br />
2. Press the [F3] key to display the Transmit menu.<br />
File Edit Transmit EGC Reports Logs Options Setup Position StopAlarm<br />
Transmit<br />
1. Transmit Message<br />
2. Cancel<br />
3. Request Delivery Status<br />
<br />
---- * ---------+---------+---------+---------+---------+---------+---------<<br />
TELEX<br />
25 Char. [ Line 2/ 2 Col. 1 ] [Insert ]<br />
Transmit menu<br />
3. Press the [1] key to display the Transmit Message menu.<br />
4-2
4. <strong>INMARSAT</strong> C COMMUNICATIONS<br />
Displays communication charge. See paragraph 2.6.1.<br />
File Edit Transmit EGC Reports Logs Options Setup Position StopAlarm<br />
Transmit<br />
<br />
1. Transmit Message<br />
2. Priority Cancel<br />
Transmit Message<br />
Normal<br />
3. Message Request File Delivery Status Message now being edited Size 24<br />
Station Name<br />
Cost ********.**(US$)<br />
Destination Type TELEX<br />
Prefix Code<br />
Country/Ocean Code<br />
Station ID<br />
Modem Type<br />
---- * ---------+---------+---------+---------+---------+---------+---------<<br />
Address<br />
Subject<br />
25 Char. [ Line 2/ 2 Col. 1 ] [Insert ]<br />
Attach File<br />
LES ID<br />
Option<br />
Confirmation<br />
Send Delay<br />
Delivery Delay<br />
Code<br />
ON<br />
00:00<br />
Immediate<br />
IA5<br />
[ TRANSMIT ]<br />
Transmit message menu<br />
4. Press the [↓] key twice to choose Station Name.<br />
5. Press the [Enter] key to open the Station List.<br />
File Edit Transmit EGC Reports logs Options Setup StopAlarm<br />
Transmit<br />
1. Date Transmit Message 97-08-04 Transmit Message BBER<br />
003<br />
2. Time Priority Cancel 01:32 (UTC) Normal<br />
C/N<br />
OK ( 36dB)<br />
3. Message Request FDelivery Status<br />
Station Send List level Size OK 0 ( 0)<br />
Position Station Na Group LAT Station Name Type RxIF CodeAGC ID / Level Address OK (135)<br />
Destination LON TELEX<br />
REF Offset Freq OK ( 0Hz)<br />
Waypoint Country 01 LAT FURUNO 82 TELEX Synthe 81 1st 321local<br />
OK<br />
Station 02 LON FRNINMBTSTS 65-2111 TELEX 583 3rd 343199999 local OK<br />
Course Modem 03 Seagull DEG E-Mail Seagull@furuno.co.jp<br />
Synthesizer OK<br />
Speed Address 04 whale KTS E-Mail whale@furuno.co.jp<br />
TX2nd Local OK<br />
Current Subject NCS 05 344 (IOR) LOGOUT Antenna Power Supply OK<br />
Current Attach LES Channel 06 NCS CC<br />
Current Option TDM07<br />
25 NCS Char. CC 303 [(YAMAGUCHI)<br />
Line 2/ 2 Water Col. Temperature 1 ] [Insert ] DEG<br />
MES Confirm Status 08 Idle<br />
Water Current<br />
GPS Send Status D ****<br />
Direction<br />
DEG<br />
: Select SPACE: Select Stations B.SPACE: Cancel Mark INS: Edit<br />
Deliver ENTER: Station List DEL: Speed<br />
KTS<br />
Sort (Ctrl+G: Group, Ctrl+N: Station Name, Ctrl+T: Type)<br />
DCE Code Memory 32818 Bytes free Depth<br />
[ TRANSMIT ]<br />
Transmit message menu, station list<br />
4-3
4. <strong>INMARSAT</strong> C COMMUNICATIONS<br />
6. Press the [↑] or [↓] key to choose station and then press the [Enter] key. To<br />
choose multiple stations (you may choose nine stations), choose a station<br />
and then press the Space bar. Selected stations are marked with an asterisk<br />
(in case of Telex or FAX). For e-mail address, press the Space bar to choose<br />
“To” “Cc,” Blank, “To”… consecutively.<br />
Station List<br />
Group Station Name Type Code ID / Address<br />
* 01<br />
* 02<br />
03<br />
04<br />
05<br />
06<br />
07<br />
08<br />
FURUNO<br />
FRNINMBTSTS<br />
Seagull<br />
whale<br />
TELEX<br />
TELEX<br />
81<br />
583<br />
321<br />
343199999<br />
E-Mail Seagull@furuno.co.jp<br />
E-Mail whale@furuno.co.jp<br />
: Select SPACE: Select Stations B.SPACE: Cancel Mark INS: Edit<br />
Sort (Ctrl+G: Group, Ctrl+N: Station Name, Ctrl+T: Type)<br />
Station list<br />
Note 1: Messages having different communication format or prefix code<br />
(two digit code) cannot be sent simultaneously.<br />
Note 2: To stop simultaneous transmission (erase asterisk, To or Cc), press<br />
the [Backspace] key.<br />
Note 3: You may sort the list by group name, station name or<br />
communication type as follows:<br />
Group name: Each press of [Ctrl] + [G] sorts the list by group name,<br />
ascending or descending order.<br />
Station name: Each press of [Ctrl] + [N] sorts the list by station<br />
name, in ascending or descending order.<br />
Comm. type: Each press of [Ctrl] + [T] sorts the list by<br />
communication type, in ascending or descending order.<br />
Note 4: You may edit the communication charges (see paragraph 2.7.1)<br />
from the Station List by pressing the [Insert] key. After editing<br />
charges, press the [Esc] key. “OK to save” appears; press the<br />
[Enter] key.<br />
7. For E-mail follow the procedure below. For other communication formats go<br />
to step 8.<br />
(1) Press the [↓] key to choose Subject.<br />
(2) Press the [Enter] key to open subject entry window.<br />
(3) Type subject.<br />
(4) Press the [Enter] key to close the window.<br />
(5) To attach a file, press the [↓] key to choose Attach File.<br />
4-4
4. <strong>INMARSAT</strong> C COMMUNICATIONS<br />
(6) Press the [Enter] key to open the attach file window.<br />
Transmit<br />
<br />
1. Transmit Message<br />
2. Priority Cancel<br />
Transmit Message<br />
Normal<br />
3. Message Request File Delivery Status Message now being edited Size 24<br />
Station Name<br />
Cost ********.**(US$)<br />
Destination Type E-Mail<br />
Prefix Code<br />
Country/Ocean Code<br />
Select File<br />
Station ID<br />
Modem Type<br />
---- * ---------+---------+---------+---------+---------+---------+---------<<br />
Address<br />
Subject<br />
25 Char. [ Line 2/ 2 Col. 1 ] [Insert ]<br />
Attach File 201 (SANTA PAULA)<br />
LES ID<br />
Option<br />
Confirmation<br />
Send Delay<br />
Delivery Delay<br />
Code<br />
ENTER: Select DEL: Remove<br />
[ TRANSMIT ]<br />
Transmit message menu, select file window opened<br />
(7) Press the [Enter] key to open the file list window.<br />
(8) Press the [↑] or [↓] key to choose a file and then press the [Enter] key.<br />
(9) Press the [Esc] key to close the window.<br />
8. Press the [↓] key to choose LES ID. If the communication format is e-mail the<br />
LES set in paragraph 2.11 appears.<br />
9. Press the [Enter] key to close the window.<br />
Transmit<br />
<br />
1. Transmit Message<br />
2. Priority Cancel<br />
Transmit Message<br />
Normal<br />
3. Message Request File Delivery Status Message now being edited Size 24<br />
Station Name<br />
Cost ********.**(US$)<br />
Destination Type TELEX<br />
Prefix Code<br />
Country/Ocean Code<br />
Station ID<br />
Modem Type<br />
Address<br />
Subject<br />
25 Char.<br />
Attach File<br />
[ Line 2/ 2 Col. 1 ]<br />
[Insert ]<br />
LES ID<br />
201 Name (SANTA PAULA) LES ID Remarks<br />
Option<br />
Telenor S.S.Inc 201 USA<br />
Confirmation<br />
202<br />
Send Delay<br />
KDDI<br />
203 JAPAN<br />
Delivery Delay Korea Telecom 208 KOREA<br />
Code<br />
Singapore Telecom 210 SINGAPORE (NCS, ID244)<br />
[ TRANSMIT ]<br />
LES ID options<br />
10. Press the [↑] or [↓] key to choose LED desired.<br />
Note: You may edit the communication charges (see paragraph 2.7.1) from<br />
the Station List by pressing the [Insert] key. After editing charges,<br />
press the [Esc] key. “OK to save” appears; press the [Enter] key.<br />
11. Press the [Enter] key to close the window.<br />
12. Press the [↓] key to choose Confirmation.<br />
4-5
4. <strong>INMARSAT</strong> C COMMUNICATIONS<br />
13. Press the [Enter] key to open the confirmation window.<br />
14. To request notification of delivery from the LES, choose ON. If not necessary<br />
choose OFF.<br />
15. Press the [Enter] key to close the window.<br />
16. Press the [↓] key to choose Send Delay.<br />
17. Press the [Enter] key to open the send delay entry window.<br />
18. To send a message after a certain delay, enter a time up to 99 hours 59<br />
minutes. (The Send Delay is used to time message arrival to suit recipient’s<br />
office hours.)<br />
19. Press the [Enter] key to close the window.<br />
20. Press the [↓] key to choose Delivery Delay.<br />
21. Press the [Enter] key to open the delivery delay options window.<br />
22. Delivery Delay requests the LES for “Immediate” or “Deferred” transmission<br />
to the recipient designated. Press the [↑] or [↓] key to choose Immediate or<br />
Deferred. For information on this service, consult with LES where message is<br />
to be sent.<br />
23. Press the [Enter] key to close the window.<br />
24. Press the [↓] key to choose Code and press the [Enter] key.<br />
25. Press the [↑] or [↓] key to choose “IA5 (for e-mail, fax) ”, “ITA2 (for telex)” or<br />
“DATA” as appropriate.<br />
26. Press the [Enter] key to close the window.<br />
27. Press the [↓] key to place the cursor on TRANSMIT.<br />
28. Press the [Enter] key to open the start window.<br />
Date<br />
97-08-04 Transmit Message BBER<br />
Time Priority<br />
Message File<br />
01:32 (UTC) Normal<br />
SEISETU.TXT<br />
C/N<br />
Send level Size 46<br />
Position Station Name LAT FURUNO RxIF AGC Cost ********.** Level (US$)<br />
Destination Type LON TELEX<br />
REF Offset Freq<br />
Waypoint Prefix Code LAT<br />
Synthe 1st local<br />
Country/Ocean Code LON<br />
Course Station ID<br />
Speed Modem Type<br />
81<br />
321 DEG<br />
KTS<br />
3rd local<br />
Synthesizer<br />
TX2nd Local<br />
Current Address NCS<br />
Current Subject Channel<br />
Current Attach TDM File<br />
344 (IOR) LOGOUT<br />
NCS CC<br />
NCS CC<br />
Antenna Power Supply<br />
Water Temperature<br />
MES LES Status ID<br />
GPS Option Status<br />
Idle<br />
****<br />
303 (KDDI) Water Current<br />
Direction<br />
Start<br />
Confirmation ON<br />
Speed Yes No<br />
DCE Send Memory Delay<br />
Delivery Delay<br />
Code<br />
[ TRANSMIT ]<br />
3281800:00<br />
Bytes free<br />
Immediate<br />
IA5<br />
Depth<br />
4-6<br />
Transmit message screen<br />
29. Press the [Enter] key to send the message to the message queue. (To<br />
escape, choose “No” and press the [Enter] key.) The message “Message is<br />
entered in sending Queue. Press any key.” appears.<br />
Note 1: If some data has not been entered, the message “Input Error: xx.”<br />
(xx: error content) appears.<br />
Note 2: A message sent to the message queue may contain 32 KB of data.<br />
If it is larger than 32 KB, the message “Cannot enter this message<br />
to sending Queue. Press any key.” appears.
4. <strong>INMARSAT</strong> C COMMUNICATIONS<br />
Note 3: When you send a message which contains more than 32 KB of data,<br />
the message “Message file is too large (but sent only with 32 KB)<br />
appears. The message is sent with only 32KB of data.<br />
30. Press the [Esc] key twice to return to the standby display.<br />
The message(s) will be transmitted according to the Send Delay setting.<br />
“Current State: SENDING” appears at the bottom of the screen while the<br />
message is being transmitted. If the message was transmitted successfully,<br />
“Successful Sending message” appears and the TX message is printed (if<br />
“Confirmation is ON).<br />
Sent Message<br />
DELIVERY CONFIRMATION OFF<br />
Message File : 00FOX.TXT Message Size : 277 characters<br />
LES : Stratos M.N. Date : 02-03-10<br />
Priority : Normal Time : 06:06 (UTC)<br />
Destination : TELEX (Prefixed) 00111222222222222222 (IA5)<br />
00111333333333333333<br />
00111444444444444444<br />
Display log printout example (“Confirmation” OFF)<br />
When Confirmation is ON and you receive a delivery status message, the<br />
message “Delivery Status received for (file name).” appears and the delivery<br />
status message is printed.<br />
Sent Message<br />
DELIVERY CONFIRMED<br />
Message File : 00FOX.TXT Message Size : 277 characters<br />
LES : Stratos M.N. Date : 02-03-10<br />
Priority : Normal Time : 06:06 (UTC)<br />
Destination : TELEX (Prefixed) 00111222222222222222 (IA5)<br />
<br />
Display log printout example (“Confirmation” ON, delivery confirmed)<br />
Sent Message but not delivered<br />
DELIVERY FAILURE : xxx<br />
Message File : 00FOX.TXT Message Size : 277 characters<br />
LES : Stratos M.N. Date : 02-03-10<br />
Priority : Normal Time : 06:06 (UTC)<br />
Destination : TELEX (Prefixed) 00111222222222222222 (IA5)<br />
<br />
Display log printout example (“Confirmation” ON, delivery failed)<br />
Sent Message but not delivered<br />
DELIVERY STATUS NOT RECEIVED (In case of timeout)<br />
Message File : 00FOX.TXT Message Size : 277 characters<br />
LES : Stratos M.N. Date : 02-03-10<br />
Priority : Normal Time : 06:06 (UTC)<br />
Destination : TELEX (Prefixed) 00111222222222222222 (IA5)<br />
Display log printout example (“Confirmation” ON, delivery status not received)<br />
4-7
4. <strong>INMARSAT</strong> C COMMUNICATIONS<br />
TRANSMIT MESSAGE STATUS<br />
The terminal unit displays transmit message status as follows:<br />
Message Send failed. This appears if the message could not<br />
be transmitted because of technical reasons such as satellite<br />
malfunction, signal degradation, or no reply from LES. Try to<br />
transmit the message again.<br />
Message Send rejected. This appears when the LES rejects<br />
the message because of non-technical reasons such as unpaid<br />
subscriber’s fee.<br />
Message Send pending.This appears when the circuits at the<br />
LES are busy. Your message will be transmitted when a circuit<br />
becomes clear.<br />
Transmitting a message to a station not registered on station list<br />
1. Prepare message. For e-mail, set Text Mode in the Editor Setup menu to<br />
Ascii. See paragraph 3.2.3. For e-mail attachment, prepare the attachment<br />
and save it to a floppy disk.<br />
2. Press the [F3] key to display the Transmit menu.<br />
3. Press the [1] key to show the Transmit Message menu.<br />
Displays communication charge. See paragraph 2.6.1.<br />
File Edit Transmit EGC Reports Logs Options Setup Position StopAlarm<br />
Transmit<br />
<br />
1. Transmit Message<br />
2. Priority Cancel<br />
Transmit Message<br />
Normal<br />
3. Message Request File Delivery Status Message now being edited Size 24<br />
Station Name<br />
Cost ********.**(US$)<br />
Destination Type TELEX<br />
Prefix Code<br />
Country/Ocean Code<br />
Station ID<br />
Modem Type<br />
----*---------+---------+---------+---------+---------+---------+---------<<br />
Address<br />
Subject<br />
25 Char. [ Line 2/ 2 Col. 1 ] [Insert ]<br />
Attach File<br />
LES ID<br />
Option<br />
Confirmation<br />
Send Delay<br />
Delivery Delay<br />
Code<br />
ON<br />
00:00<br />
Immediate<br />
IA5<br />
[ TRANSMIT ]<br />
Transmit message menu<br />
4-8
4. <strong>INMARSAT</strong> C COMMUNICATIONS<br />
4. Press the [↓] key three times to choose the Destination Type.<br />
5. Press the [Enter] key to open the destination type options window.<br />
Transmit<br />
<br />
1. Transmit Message<br />
2. Priority Cancel<br />
Transmit Message<br />
Normal<br />
3. Message Request File Delivery Status Message now being edited Size 24<br />
Station Name<br />
Cost ********.**(US$)<br />
Destination Type TELEX<br />
TELEX<br />
Prefix Code<br />
FAX<br />
Country/Ocean Code E-Mail<br />
Station ID<br />
Modem Type<br />
CSDN<br />
PSDN<br />
----*---------+---------+---------+---------+---------+---------+---------<<br />
Address<br />
X400<br />
Subject<br />
DNID<br />
25 Char. [ Line 2/ 2 Col. 1 ] [Insert ]<br />
Attach File<br />
SPEC<br />
TELEX (Prefixed)<br />
LES ID<br />
FAX (Prefixed)<br />
Option<br />
PSDN (Prefixed)<br />
Confirmation X400 (Prefixed)<br />
Send Delay<br />
DNID (Prefixed)<br />
Delivery Delay SPEC (Prefixed)<br />
Code<br />
IA5<br />
[ TRANSMIT ]<br />
Transmit message menu, destination type options window<br />
6. Press the [↑] or [↓] key to choose Destination Type among “TELEX,” “FAX” or<br />
“E-mail” as appropriate.<br />
7. Press the [Enter] key to close the window.<br />
8. Continue the procedure according to destination type:<br />
TELEX (Prefixed): Page 4-10<br />
FAX: Page 4-12<br />
E-mail: Page 4-13<br />
4-9
4. <strong>INMARSAT</strong> C COMMUNICATIONS<br />
4-10<br />
Communication type: TELEX (Prefixed)<br />
1. Press the [↓] key to choose Country/Ocean Code.<br />
2. Press the [Enter] key to open the country/ocean code entry window.<br />
Transmit<br />
<br />
1. Transmit Message<br />
2. Priority Cancel<br />
Transmit Message<br />
Normal<br />
3. Message Request File Delivery Status Message now being edited Size 24<br />
Station Name<br />
Cost ********.**(US$)<br />
Destination Type TELEX<br />
Prefix Code<br />
Country/Ocean Code<br />
Station ID<br />
Modem Type<br />
----*---------+---------+---------+---------+---------+---------+---------<<br />
Address<br />
Subject<br />
25 Char. [ Line 2/ 2 Col. 1 ] [Insert ]<br />
Attach File<br />
LES ID<br />
Option<br />
Confirmation<br />
Send Delay<br />
Delivery Delay<br />
Code<br />
ON<br />
00:00<br />
Immediate<br />
IA5<br />
[ TRANSMIT ]<br />
Transmit message menu, country/ocean code window<br />
3. For ship-to-shore telex, enter recipient’s telex country code. For example, to<br />
use KDDI (Japan) enter 720. For ship-to-ship telex, enter recipient’s ocean<br />
region.<br />
Ocean Region<br />
AOR-East: 581<br />
POR: 582<br />
IOR: 583<br />
AOR-West: 584<br />
4. Press the [Enter] key to close the window.<br />
5. Press the [↓] key to choose Station ID.<br />
6. Press the [Enter] key to open the station ID entry window.<br />
Transmit<br />
<br />
1. Transmit Message<br />
Transmit Message<br />
2. Cancel Priority<br />
Normal<br />
3. Request Message Delivery File Status Message now being edited Size 24<br />
Station Name<br />
Cost ********.**(US$)<br />
Destination Type TELEX<br />
Prefix Code<br />
Country/Ocean Code<br />
Station ID<br />
Modem Type<br />
---- * ---------+---------+---------+---------+---------+---------+---------<<br />
Address<br />
Subject<br />
Attach File<br />
LES ID<br />
Option<br />
25 Char. [ Line 2/ 2 Col. 1 ] [Insert ]<br />
Confirmation<br />
Send Delay<br />
Delivery Delay<br />
Code<br />
ON<br />
00:00<br />
Immediate<br />
IA5<br />
[ TRANSMIT ]<br />
Transmit message menu, station ID window opened
4. <strong>INMARSAT</strong> C COMMUNICATIONS<br />
7. Type either recipient’s telex subscriber number (ship-to-shore) or IMN<br />
(ship-to-ship).<br />
8. Press the [Enter] key to close the window.<br />
9. Press the [↓] key to choose LES ID.<br />
10. Press the [Enter] key to open the LES ID entry window.<br />
Transmit<br />
<br />
1. Transmit Message<br />
2. Priority Cancel<br />
Transmit Message<br />
Normal<br />
3. Message Request File Delivery Status Message now being edited Size 24<br />
Station Name<br />
Cost ********.**(US$)<br />
Destination Type TELEX<br />
Prefix Code<br />
Country/Ocean Code<br />
Station ID<br />
Modem Type<br />
Address<br />
Subject<br />
25 Char.<br />
Attach File<br />
[ Line 2/ 2 Col. 1 ]<br />
[Insert ]<br />
LES ID<br />
201 Name (SANTA PAULA) LES ID Remarks<br />
Option<br />
Telenor S.S.Inc 201 USA<br />
Confirmation<br />
202<br />
Send Delay<br />
KDDI<br />
203 JAPAN<br />
Delivery Delay Korea Telecom 208 KOREA<br />
Code<br />
Singapore Telecom 210 SINGAPORE (NCS, ID244)<br />
[ TRANSMIT ]<br />
LED ID entry window<br />
11. Press the [↑] or [↓] key to choose LES.<br />
12. Press the [Enter] key to close the LES ID entry window.<br />
13. Follow from step 12 on page 4-5.<br />
4-11
4. <strong>INMARSAT</strong> C COMMUNICATIONS<br />
Communication type: FAX<br />
1. Press the [↓] key to choose Country/Ocean Code.<br />
2. Press the [Enter] key to open the country/ocean code entry window.<br />
3. Enter country code of recipient, referring to the list in the Appendix.<br />
4. Press the [Enter] key to close the window.<br />
5. Press the [↓] key to choose to choose Station ID.<br />
6. Press the [Enter] key to open the station ID entry window.<br />
7. Enter recipient’s fax number.<br />
8. Press the [Enter] key to close the window.<br />
9. Press the [↓] key to choose Modem Type.<br />
10. Press the [Enter] key to open the modem type options window.<br />
Transmit<br />
<br />
1. Transmit Message<br />
2. Priority Cancel<br />
Transmit Message<br />
Normal<br />
3. Message Request File Delivery Status Message now being edited Size 24<br />
Station Name<br />
Cost ********.**(US$)<br />
Destination Type FAX<br />
Prefix Code<br />
Country/Ocean Code<br />
Station ID<br />
T30<br />
Modem Type<br />
FAX<br />
Modem Type V21 V.21 300bps Duplex<br />
----*---------+---------+---------+---------+---------+---------+---------<<br />
Address<br />
V22 V.22 1200bps Duplex<br />
Subject<br />
25 Char.<br />
V22B<br />
[ Line<br />
V.22bis<br />
2/<br />
2400bps<br />
2 Col.<br />
Duplex<br />
1 ] [Insert ]<br />
Attach File 201 V23 (SANTA V.23 PAULA) 600/1200bps<br />
LES ID<br />
Option<br />
Confirmation<br />
Send Delay<br />
Delivery Delay<br />
Code<br />
V26B<br />
V26T<br />
V27T<br />
V32<br />
Other<br />
IA5<br />
V.26bis<br />
V.26ter<br />
V.27ter<br />
V.32<br />
2400/1200bps<br />
2400bps Duplex<br />
4800/2400bps<br />
9600bps Duplex<br />
[ TRANSMIT ]<br />
Transmit message menu, modem type options window<br />
11. Press the [↑] or [↓] key to choose modem type. For transmission to landline<br />
fax, choose “T30.”<br />
12. Press the [Enter] key to close the window.<br />
13. Press the [↓] key to choose LES ID.<br />
14. Press the [Enter] key to open the LES ID window.<br />
15. Press the [↑] or [↓] key to choose LES ID.<br />
16. Press the [Enter] key to close the window.<br />
17.Follow from step 12 on page 4-5.<br />
4-12
4. <strong>INMARSAT</strong> C COMMUNICATIONS<br />
Communication type: E-mail<br />
1. Press the [↓] key to choose Address.<br />
2. Press the [Enter] key to open the address entry window.<br />
Transmit<br />
<br />
1. Transmit Message<br />
2. Priority Cancel<br />
Transmit Message<br />
Normal<br />
3. Message Request File Delivery Status Message now being edited Size 24<br />
Station Name<br />
Cost ********.**(US$)<br />
Destination Type E-Mail<br />
Prefix Code<br />
Country/Ocean Code<br />
Station ID<br />
INET<br />
Modem Type<br />
---- * ---------+---------+---------+---------+---------+---------+---------<br />
Address<br />
Subject<br />
25 Char. [ Line 2/ 2 Col. 1 ]<br />
Attach File<br />
LES ID<br />
201 (Telenor S.S.Inc)<br />
Option<br />
Confirmation<br />
Send Delay<br />
Delivery Delay<br />
Code<br />
ON<br />
00:00<br />
Immediate<br />
IA5<br />
[ TRANSMIT ]<br />
Transmit message menu, address entry window<br />
3. Type recipient’s e-mail address.<br />
4. Press the [Enter] key to close the window.<br />
5. Press the [↓] key to choose Subject.<br />
6. Press the [Enter] key to open the subject entry window.<br />
Transmit<br />
<br />
1. Transmit Message<br />
2. Priority Cancel<br />
Transmit Message<br />
Normal<br />
3. Message Request File Delivery Status Message now being edited Size 24<br />
Station Name<br />
Cost ********.**(US$)<br />
Destination Type E-Mail<br />
Prefix Code<br />
Country/Ocean Code<br />
Station ID<br />
INET<br />
Modem Type<br />
----*---------+---------+---------+---------+---------+---------+---------<br />
Address<br />
Subject<br />
25 Char. [ Line 2/ 2 Col. 1 ]<br />
Attach File<br />
LES ID<br />
201 (Telenor S.S.Inc)<br />
Option<br />
Confirmation<br />
Send Delay<br />
Delivery Delay<br />
Code<br />
ON<br />
00:00<br />
Immediate<br />
IA5<br />
[ TRANSMIT ]<br />
Transmit message menu, subject entry window opened<br />
7. Type subject.<br />
8. Press the [Enter] key to close the window.<br />
9. If you want to attach a file, press the [↓] key to choose Attach File.<br />
4-13
4. <strong>INMARSAT</strong> C COMMUNICATIONS<br />
10. Press the [Enter] key to open the select file window.<br />
Transmit<br />
<br />
1. Transmit Message<br />
2. Priority Cancel<br />
Transmit Message<br />
Normal<br />
3. Message Request File Delivery Status Message now being edited Size 24<br />
Station Name<br />
Cost ********.**(US$)<br />
Destination Type E-Mail<br />
Prefix Code<br />
Country/Ocean Code<br />
Select File<br />
Station ID<br />
Modem Type<br />
----*---------+---------+---------+---------+---------+---------+---------<<br />
Address<br />
Subject<br />
25 Char. [ Line 2/ 2 Col. 1 ] [Insert ]<br />
Attach File 201 (SANTA PAULA)<br />
LES ID<br />
Option<br />
Confirmation<br />
Send Delay<br />
Delivery Delay<br />
Code<br />
ENTER: Select DEL: Remove<br />
[ TRANSMIT ]<br />
Transmit message menu, select file window<br />
11. Press the [Enter] key to open the file list window.<br />
12. Press the [↑] or [↓] key to choose a file and then press the [Enter] key to<br />
close the window.<br />
13. Press the [Esc] key to open the select file window. The LES ID selected at<br />
paragraph 2.11 appears.<br />
14. Follow from step 12 on page 4-5.<br />
4-14
4. <strong>INMARSAT</strong> C COMMUNICATIONS<br />
4.1.3 Transmitting a file stored on a floppy disk<br />
1. Close any open files.<br />
2. Insert floppy disk containing file to be sent.<br />
3. Press the [F3] key to display the Transmit menu.<br />
File Edit Transmit EGC Reports Logs Options Setup Position StopAlarm<br />
Transmit<br />
1. Transmit Message<br />
2. Cancel<br />
3. Request Delivery Status<br />
Transmit menu<br />
4. Press the [1] key to choose Transmit Message.<br />
File Edit Transmit EGC Reports Logs Options Setup Position StopAlarm<br />
Transmit<br />
1. Date Transmit Message 97-08-04 Transmit Message BBER<br />
2. Time Priority Cancel 01:32 (UTC) Normal<br />
C/N<br />
3. Message Request File Delivery Status<br />
Send level Size 24<br />
Position Station Name LAT<br />
RxIF AGC Cost Level ********.**(US&)<br />
Destination Type LON TELEX<br />
REF Offset Freq<br />
Waypoint Prefix Code LAT<br />
Synthe 1st local<br />
Country/Ocean Code LON<br />
Course Station ID<br />
Speed Modem Type<br />
82<br />
65-2111 DEG<br />
KTS<br />
3rd local<br />
Synthesizer<br />
TX2nd Local<br />
Current Address NCS<br />
Current Subject Channel<br />
Current Attach TDM File<br />
344 (IOR) LOGOUT<br />
NCS CC<br />
NCS CC<br />
Antenna Power Supply<br />
Water Temperature<br />
MES LES Status ID<br />
GPS Option Status<br />
Confirmation<br />
Idle<br />
****<br />
303 (KDDI)<br />
ON<br />
00:00<br />
Water Current<br />
Direction<br />
Speed<br />
DCE Send Memory Delay<br />
Delivery Delay<br />
Code<br />
[ TRANSMIT ]<br />
32818 Bytes Immediate free<br />
IA5<br />
Depth<br />
Transmit message menu<br />
5. Press the [↓] key to choose Message File and press the [Enter] key.<br />
Send<br />
[A:\SEIZOUSE ]<br />
Filename Size Date & Time<br />
IIT . 9078 02-01-08 19:30<br />
JJJ .<br />
13 02-01-28 20:57<br />
R0970714.001 4973 02-01-29 05:56<br />
R0970718.001 313 02-02-25 00:25<br />
R0970729.001 412 02-02-25 07:21<br />
SEIZOU . 139 02-02-25 06:22<br />
SEIZOU .TXT 39 02-02-25 21:22<br />
SEIZOUSE. 178 02-02-25 01:44<br />
70 Files exist 590848 bytes free<br />
To View: SPACE Make Dir: INS<br />
Remove Dir: DEL<br />
File list<br />
6. Press the [↑] or [↓] key to choose a file and press the [Enter] key. (You can<br />
view a part of a file by tapping the space bar. After confirming the contents,<br />
press the [Esc] key.)<br />
4-15
4. <strong>INMARSAT</strong> C COMMUNICATIONS<br />
Note: When an e-mail with attachment is transmitted, the file volume<br />
increases by 1.5 times because of MIME coding. In this case, you can<br />
do the following to lower toll charges:<br />
a) Select file to attach from Message File.<br />
b) Choose DATA from Code.<br />
7. To transmit the message to a station registered on the station list, follow from<br />
step 12 on page 4-5. To transmit to a station not listed on the station list,<br />
follow from step 4 on page 4-9.<br />
4.1.4 Canceling transmission on a message awaiting transmission<br />
As noted earlier a transmit message is held in the buffer, usually until it is<br />
transmitted satisfactorily. To cancel transmission on a message held in the buffer,<br />
do the following:<br />
1. Press the [F3] key to display the Transmit menu.<br />
2. Press the [2] key to display the Cancel screen.<br />
File Edit Transmit EGC Reports Logs Options Setup Position StopAlarm<br />
Transmit<br />
1. Transmit Message<br />
2. Cancel<br />
Message File<br />
edit_msg.001<br />
No.<br />
01<br />
Station<br />
<br />
Cancel<br />
LES<br />
SANTA PAUL<br />
Priority<br />
Normal<br />
Send Status<br />
Waiting<br />
Delivery<br />
---- * ---------+---------+---------+---------+---------+---------+---------<<br />
TELEX<br />
25 Char. [ Line 2/ 2 Col. 1 ] [Insert ]<br />
Cancel screen<br />
Send status<br />
Waiting: Waiting to transmit message.<br />
Sending: Now sending message.<br />
Fail: Failed transmission<br />
Rejected: Message rejected by LES.<br />
Pending: LES circuits occupied.<br />
3. Press the [↑] or [↓] key to choose the message you want to cancel.<br />
4-16
4. <strong>INMARSAT</strong> C COMMUNICATIONS<br />
4. Press the [Enter] key to open the cancel window.<br />
File Edit Transmit EGC Reports Logs Options Setup Position StopAlarm<br />
No.<br />
01<br />
02<br />
Transmit<br />
1. Transmit Message<br />
Message File<br />
ABC<br />
FELCOM<br />
Station<br />
FURUNO<br />
FUSA<br />
<br />
Cancel<br />
LES<br />
Telenor S.S.Inc<br />
Telenor S.S.Inc<br />
Priority<br />
Normal<br />
Normal<br />
Send Status<br />
Waiting<br />
Sending<br />
Delivery<br />
Cancel<br />
Yes No<br />
---- * ---------+---------+---------+---------+---------+---------+---------<<br />
ASCII<br />
25 Char. [ Line 2/ 2 Col. 1 ] [Insert ]<br />
Cancel window<br />
5. Press the [Enter] key to cancel a message, or choose “No” and press the<br />
[Enter] key to escape from the Cancel menu.<br />
6. Press the [Esc] key twice to return to the standby display.<br />
4.1.5 Requesting delivery status<br />
Automatically receiving delivery status<br />
You can automatically receive delivery status of messages you send to a LES,<br />
by selecting “Confirming ON” in the Transmit Message menu. Transmitted<br />
messages which request delivery status appear in the Message Status List.<br />
The Message Status List holds delivery status information for 30 messages.<br />
When the list is full, the oldest entry is deleted to make room for the latest.<br />
1. Press the [F3] key to show the Transmit menu.<br />
File Edit Transmit EGC Reports Logs Options Setup Position StopAlarm<br />
Transmit<br />
1. Transmit Message<br />
2. Cancel<br />
3. Request Delivery Status<br />
Transmit menu<br />
2. Press the [3] key to display the Request Delivery Status list. If no messages<br />
are present “No message.” appears.<br />
No.<br />
01<br />
02<br />
03<br />
04<br />
05<br />
06<br />
07<br />
Message File<br />
ABC<br />
DEF<br />
GHI<br />
JKL<br />
MNO<br />
edit msg.002<br />
edit msg.001<br />
Station<br />
FURUNO<br />
FURUNO<br />
ASDFASDF<br />
ABCDEFGHIJ<br />
Request Delivery Status<br />
LES<br />
KDDI<br />
KDDI<br />
KDDI<br />
KDDI<br />
KDDI<br />
KDDI<br />
KDDI<br />
Priority<br />
Normal<br />
Normal<br />
Normal<br />
Normal<br />
Normal<br />
Normal<br />
Normal<br />
Send Status<br />
Waiting<br />
Sending<br />
02-02-26 9:40<br />
02-02-25 20:16<br />
02-01-23 16:09<br />
02-01-22 9:48<br />
02-01-20 12:34<br />
Delivery<br />
OCC(002)<br />
Complete<br />
EEE(001)<br />
?????<br />
Sample request delivery states<br />
4-17
4. <strong>INMARSAT</strong> C COMMUNICATIONS<br />
Message status list description<br />
No.:<br />
Message number<br />
Message File: File name. For no file name, “edit msg. 00X” appears (X =<br />
number from 001-999).<br />
Station: Name of remote party (recipient)<br />
LES:<br />
The LES which received the message.<br />
Priority: Normal or distress<br />
Send Status: The transmission status from the MES (own ship) to the LES;<br />
waiting or sending, and data and time of transmission for<br />
messages transmitted.<br />
Delivery: The delivery status from the LES to the recipient.<br />
Complete: Message transmitted successfully<br />
White space: Delivery status not yet received<br />
Reason for no delivery:<br />
OCC(002): Delivery tried (twice), but recipient busy.<br />
ABS: Absent subscriber<br />
BK: Message aborted<br />
BMC: No end of message or end of transmission received<br />
DER: Out of Order<br />
DTE: Remote DTE clearing<br />
EOS: Element of Service not subscribed (E-mail)<br />
FMT: Format error<br />
IAB: Invalid answerback<br />
INC: Inconsistent Request (E-mail)<br />
INF: Call the Network Information service<br />
INV: Invalid Call<br />
ITD: Awaiting delivery<br />
LDE: Maximum message length exceeded<br />
LPE: Local Procedure Error<br />
NA: Access Barred<br />
NC: Network Congestion<br />
NCH: Subscriber’s number has been changed<br />
NP: Not Obtainable<br />
NRC: Reverse charging acceptance not subscribed<br />
RIS: Recipient Improperly Specified (E-mail)<br />
RDI: Redirected call<br />
RPE: Remote Procedure Error<br />
RSB: Retransmission still being attempted<br />
TMD: Maximum number of addresses exceeded<br />
UNK: Unknown status (for example when the Logical<br />
channel number is zero)<br />
Note: Some codes may not be used depending on LES.<br />
4-18
4. <strong>INMARSAT</strong> C COMMUNICATIONS<br />
Manually requesting delivery status<br />
You can manually request an LES for delivery status of a message you have<br />
transmitted within the past 24 hours.<br />
1. Press the [F3] key to display the Transmit menu.<br />
2. Press the [3] key to display the Request Delivery Status list.<br />
No.<br />
01<br />
02<br />
Message File<br />
ABC<br />
edit msg.002<br />
Station<br />
FURUNO<br />
FURUNO<br />
Request Delivery Status<br />
LES<br />
KDDI<br />
KDDI<br />
Priority<br />
Normal<br />
Normal<br />
Send Status Delivery<br />
02-02-25 16:10<br />
Request delivery status display<br />
3. Press the [↑] or [↓] key to choose a file.<br />
4. Press the [Enter] key. The start window appears.<br />
No.<br />
01<br />
02<br />
Message File<br />
ABC<br />
edit msg.002<br />
Station<br />
FURUNO<br />
FURUNO<br />
Request Delivery Status<br />
LES<br />
KDDI<br />
KDDI<br />
Priority<br />
Normal<br />
Normal<br />
Send Status Delivery<br />
02-02-25 16:10<br />
Start<br />
Yes<br />
No<br />
Sample message file list<br />
5. Yes is selected; press the [Enter] key to request status. If request was<br />
successful the message “Successful Deliver Status Request.” appears.<br />
6. Press the [Esc] key twice to return to the standby display.<br />
Several minutes later the message “Delivery status received for (file name)”<br />
appears on the display. The reply from the LES appears in the Delivery column<br />
of the Request Delivery Status list.<br />
4-19
4. <strong>INMARSAT</strong> C COMMUNICATIONS<br />
4.1.6 Accessing the 2-digit code services<br />
A range of special safety and general maritime services, known as the 2-digit<br />
code services, may be transmitted. The list on the next page shows the 2-digit<br />
code services available.<br />
To access a 2-digit code service do the following:<br />
1. Using the text editor, prepare message requesting a 2-digit code service.<br />
2. Press the [F3] key to open the Transmit menu.<br />
3. Press the [1] key to display the Transmit Message menu.<br />
Displays communication charge. See paragraph 2.6.1.<br />
File Edit Transmit EGC Reports Logs Options Setup Position StopAlarm<br />
Transmit<br />
<br />
1. Transmit Message<br />
2. Priority Cancel<br />
Transmit Message<br />
Normal<br />
3. Message Request File Delivery Status Message now being edited Size 24<br />
Station Name<br />
Cost ********.**(US$)<br />
Destination Type TELEX<br />
Prefix Code<br />
Country/Ocean Code<br />
Station ID<br />
Modem Type<br />
---- * ---------+---------+---------+---------+---------+---------+---------<<br />
Address<br />
Subject<br />
25 Char. [ Line 2/ 2 Col. 1 ] [Insert ]<br />
Attach File<br />
LES ID<br />
Option<br />
Confirmation<br />
Send Delay<br />
Delivery Delay<br />
Code<br />
ON<br />
00:00<br />
Immediate<br />
IA5<br />
[ TRANSMIT ]<br />
Transmit message menu<br />
4. Press the [↓] key three times to choose Destination Type.<br />
5. Press the [Enter] key to open the destination type options window.<br />
6. Press the [↓] or [↑] key to choose SPEC (Special).<br />
7. Press the [Enter] key to close the window.<br />
8. Press the [↓] key to choose Station ID.<br />
9. Press the [Enter] key to open the station ID entry window.<br />
10. Key in 2-digit code referring to the table on the next page.<br />
11. Press the [Enter] key to close the window.<br />
4-20
4. <strong>INMARSAT</strong> C COMMUNICATIONS<br />
Maritime safety service 2-digit code<br />
Code Content Remarks<br />
31 Maritime enquiries Desirable for requesting information<br />
including service offerings.<br />
32 Medical advice Used for requesting medical advice.<br />
33 Technical assistance Desirable for addressing technical enquiries<br />
to appropriate personnel.<br />
37 Time and charges<br />
requested at end of call<br />
Desirable for mobile operator when sending<br />
traffic for a third party.<br />
38 Medical assistance Used for requesting medical assistance.<br />
39 Maritime assistance Used for requesting maritime search and<br />
rescue assistance<br />
41 Meteorological reports Necessary for ease of addressing weather<br />
reports from ship to meteorological centers.<br />
42 Navigational hazards and<br />
warnings<br />
Used for making urgent navigational<br />
meteorological danger reports.<br />
43 Ship position reports Used for routing of messages to ship safety<br />
reporting systems.<br />
12. Press the [↓] key to choose LES ID.<br />
13. Press the [Enter] key to open the LES window.<br />
14. Press the [↑] or [↓] key to choose appropriate LES and press the [Enter] key.<br />
15. Press the [↓] key to choose TRANSMIT.<br />
16. Press the [Enter] key to show the start window.<br />
17. Press the [Enter] key to transmit the message prepared.<br />
Note: If some data is missing the message “Input error.xx (xx: error) is<br />
displayed.<br />
18. Press the [Esc] key twice to return to the standby display.<br />
The message “Current State: SENDING” appears at the bottom of the screen<br />
during transmission. If the message was transmitted successfully “Successful<br />
Sending message” appears and the message is printed (Confirmation is<br />
turned ON). You can see the contents on the Display Log.<br />
Note 1: At present, not all LESs are offering the 2-digit code services. Contact<br />
the LES Operations Coordinator directly for information.<br />
Note 2: Some 2-digit code services may be provided free of charge by LESs,<br />
while other services are available for a fee, in some cases at reduced<br />
rates. For information, contact the LES directly.<br />
4-21
4. <strong>INMARSAT</strong> C COMMUNICATIONS<br />
4.1.7 Displaying the send message log<br />
1. Press the [F6] key to display the Logs menu.<br />
Logs<br />
1. Send Message Log<br />
2. Receive Message Log<br />
3. EGC Log<br />
4. Log<br />
Logs menu<br />
2. Press the [1] key show the Send Message Log. The contents are the same<br />
as the Request Deliver Status list. (See page 4.17.)<br />
No.<br />
01<br />
02<br />
03<br />
04<br />
05<br />
Message File<br />
ABC<br />
DEF<br />
GHI<br />
JKL<br />
MNO<br />
Station<br />
FURUNO<br />
FURUNO<br />
ASDFASDF<br />
ABCDEFGHIJ<br />
Send Message Log<br />
LES<br />
KDDI<br />
KDDI<br />
KDDI<br />
KDDI<br />
KDDI<br />
Priority Send Status<br />
Normal Waiting<br />
Normal Sending<br />
Normal 02-02-26 9:40<br />
Normal 02-02-25 20:16<br />
Normal 02-01-23 16:09<br />
Delivery<br />
OCC(002)<br />
Complete<br />
ENTER: Show Details<br />
Send message log<br />
3. Press the [↑] or [↓] key to choose a file.<br />
4. Press the [Enter] key to show data.<br />
Up to 9 stations displayed<br />
in case of multiple addressees<br />
Destination Type: E-Mail<br />
Station<br />
abc@furuno.co.jp<br />
Send Message Detail<br />
Attachment file<br />
Attach File<br />
ABC<br />
DEF<br />
Subject<br />
Test<br />
LES ID: 203 (KDDI) Message Ref. No. : 00001125<br />
Number assigned by LES<br />
Send message details (example: e-mail<br />
5. Press the [Esc] key three times to return to the standby display.<br />
4-22
4.2 Receiving<br />
4.2.1 When a message is received<br />
4. <strong>INMARSAT</strong> C COMMUNICATIONS<br />
Each time the FELCOM receives a telex or e-mail it displays the message<br />
“Successful Receiving message.” If Auto Receive Message Save and Auto<br />
Receive Message Print in the Auto Mode Setup are set for ON, the message is<br />
automatically saved and printed (except confidential and password affixed<br />
messages).<br />
Received message alarm<br />
If Receive Alarm in the Auto Mode Setup menu is set for ON, the audio sounds<br />
when a telex or e-mail is received. You may silence the alarm with the [F10] key.<br />
Registration<br />
Each message received is assigned a message number. This number is also<br />
used when saving the file to a floppy disk.<br />
R<br />
0<br />
0 2<br />
0 2<br />
2 5.<br />
0 0 1<br />
Receive<br />
0: main DTE<br />
1: ext. DTE<br />
year<br />
month<br />
day<br />
receive<br />
message no.<br />
Log<br />
Message number<br />
The Log (see paragraph 4.3) shows message number, priority, date and time of<br />
transmission, LES ID and file size (in bytes) of the latest 50 received and<br />
transmitted messages.<br />
Printing<br />
When Auto Receive Message Print in the Auto Mode Setup menu is set for ON,<br />
received messages (except confidential and password affixed messages) are<br />
automatically printed. Manual printing is also available.<br />
Saving and filing<br />
The terminal unit saves and files a received message to the Display Message<br />
List. The Display Message List shows the following:<br />
Received message no.<br />
LES ID<br />
Priority<br />
File size (in bytes)<br />
Message classification<br />
Password for confidential messages<br />
Date and time of transmission<br />
Status<br />
4-23
4. <strong>INMARSAT</strong> C COMMUNICATIONS<br />
4.2.2 Setting the receive alarm<br />
An audio alarm may be set to sound when a routine or confidential message is<br />
received. The factory setting is OFF.<br />
1. Press the [F8] key to display the Setup menu.<br />
2. Press the [6] key to display the Auto Mode Setup menu.<br />
Auto Mode Setup<br />
Auto Log Print<br />
Receive Alarm<br />
Auto Receive Message Save<br />
Auto Receive Message Print<br />
Data Report & Polling Print<br />
Auto EGC Message Save<br />
Auto EGC Message Print<br />
OFF<br />
OFF<br />
OFF<br />
OFF<br />
OFF<br />
Auto mode setup menu<br />
3. Press the [↓] key to choose Receive Alarm.<br />
4. Press the [Enter] key to open the Receive Alarm options window.<br />
5. To enable the audio alarm, choose ON. The alarm will be released for one<br />
second when a routine or confidential message is received.<br />
6. Press the [Enter] key to close the window.<br />
7. Press the [Esc] key twice.<br />
4-24
4. <strong>INMARSAT</strong> C COMMUNICATIONS<br />
4.2.3 Displaying, printing received messages<br />
Received messages (except confidential or password affixed) are automatically<br />
printed when the Auto Receive Message Print in the Auto Mode Setup is turned<br />
on. To print confidential or password affixed messages follow the procedure<br />
below.<br />
If you cannot read an e-mail attachment, because it is MIME-coded, go to<br />
paragraph 3.10.<br />
1. Press the [F6] key to show the Logs menu.<br />
Logs<br />
1. Send Message Log<br />
2. Receive Message Log<br />
3. EGC Log<br />
4. Log<br />
Logs menu<br />
2. Press the [2] key to display the list of received messages.<br />
Received Message Log<br />
Message No.<br />
R0971106.001<br />
R0971105.002<br />
R0971105.001<br />
R0971024.001<br />
LES<br />
KDDI<br />
KDDI<br />
KDDI<br />
KDDI<br />
Priority<br />
Normal<br />
Normal<br />
Distress<br />
Normal<br />
Size<br />
32767<br />
200<br />
1234<br />
8251<br />
Addressee<br />
CAPTAIN<br />
Rec date & Time<br />
02-02-06 16:10<br />
02-02-05 17:30<br />
02-02-05 14:15<br />
02-01-24 13:20<br />
Status<br />
Saved<br />
Printed<br />
Saved<br />
Memory Available: 12345 Bytes<br />
ENTER: Display S: Save D: Delete<br />
Receive message log<br />
Display message list description<br />
Message No.:<br />
LES:<br />
Priority:<br />
Size:<br />
Addressee:<br />
Rec date & time:<br />
Status:<br />
Memory available:<br />
Received message no.<br />
LES name<br />
Normal<br />
Size of file in bytes<br />
Addressee code appears for confidential messages.<br />
Nothing appears for routine messages.<br />
Date and time message was received.<br />
Printed: message printed<br />
Saved: message saved to floppy disk<br />
No display: not yet printed confidential message, or<br />
printer malfunction<br />
Memory available in the terminal unit<br />
3. Choose a file. To get a partial display of a file selected, tap the space bar. A<br />
part of the file appears in the View Window. Press the [Esc] key to return.<br />
4-25
4. <strong>INMARSAT</strong> C COMMUNICATIONS<br />
4. Press the [Enter] key for routine messages and messages with addressee<br />
code (no password).<br />
Display Receive Message <br />
FROM FURUNO<br />
TO FRONTIER<br />
THE QUICK BROWN FOX JUMPS OVER LAZY DOG.<br />
ABCDEFGHIJKLMNOPQRSTUVWXYZ. 1234567890<br />
Ctrl+P: Print<br />
Sample received message<br />
For messages with both addressee code and password, the password entry<br />
window appears. Enter the password and then press the [Enter] key. If the<br />
password is entered incorrectly, the buzzer sounds. Reenter the password.<br />
Receive Message Log<br />
Message No.<br />
R0021106.001<br />
R0021105.002<br />
R0021105.001<br />
R0021101.001<br />
R0021024.001<br />
LES<br />
KDDI<br />
KDDI<br />
KDDI<br />
KDDI<br />
KDDI<br />
Priority<br />
Normal<br />
Normal<br />
Distress<br />
Normal<br />
Normal<br />
Size<br />
32767<br />
200<br />
1234<br />
3256<br />
8251<br />
Addressee<br />
CAPTAIN<br />
OFFICER<br />
Rec date & Time<br />
02-11-06 16:10<br />
02-11-05 17:30<br />
02-11-05 14:15<br />
02-11-01 3:45<br />
02-10-24 13:20<br />
Status<br />
Saved<br />
Printed<br />
Printed<br />
Printed<br />
Saved<br />
PASS WORD:<br />
Memory Available: 3317 Bytes<br />
Enter: Display S: Save D: Delete<br />
Location of password<br />
5. To print a message, press the [P] key while pressing the [Ctrl] key.<br />
Receive Message (SECRET)<br />
Message No. : R0970323.001<br />
Message Ref. No. : 00000000<br />
LES<br />
: LES or LES ID<br />
Priority<br />
: Normal (or Distress)<br />
Message Size : 205 characters<br />
Receive Date & Time : 02-02-25<br />
abcdefghijklmnopqrstuvwxyz........<br />
Appears only for confidential messages<br />
Text<br />
Sample printout<br />
6. Press the [Esc] key three times to return to the standby display.<br />
4-26
4. <strong>INMARSAT</strong> C COMMUNICATIONS<br />
About attachments<br />
The FELCOM receives a file with an attachment over a landline two ways. (The<br />
method depends on the LES.)<br />
• Mail main text and text mail which includes information about the attachment.<br />
• Attachment data<br />
Mail and attachment file data<br />
Attachment data<br />
Message No.<br />
R0021105.002<br />
R0021105.001<br />
R0021104.001<br />
R0021101.001<br />
R0021024.001<br />
LES<br />
KDDI<br />
KDDIDDI<br />
KDDI<br />
KDDI<br />
KDDI<br />
Receive Message Log<br />
Priority<br />
Normal<br />
Normal<br />
Distress<br />
Normal<br />
Normal<br />
Size<br />
18<br />
210<br />
1234<br />
3256<br />
8251<br />
Addressee<br />
OFFICER<br />
Rec date & Time<br />
02-11-05 17:40<br />
02-11-05 17:30<br />
02-11-04 14:15<br />
02-11-01 3:45<br />
02-10-24 13:20<br />
Status<br />
Printed<br />
Printed<br />
Printed<br />
Printed<br />
Saved<br />
Memory Available: 3317 Bytes<br />
Enter: Display S: Save D: Delete<br />
Receive message log<br />
Some files stored on the Receive Message Log may not be readable. Choose<br />
the file and press the [Enter] key. If the file is unreadable, because it is in a<br />
language other than English, press the [Esc] key to return to the Receive<br />
Message Log. Insert a floppy disk in the disk drive and press the [S] key. Insert<br />
the floppy disk in a PC and open the file from the PC.<br />
One attachment<br />
Display Receive Message <br />
FROM : FURUNO<br />
TO: FRONTIER<br />
1 attachment<br />
18 bytes, test<br />
Text<br />
Ctrl+P: Print<br />
Attachment name<br />
Example of main text and text mail with attachment data<br />
4-27
4. <strong>INMARSAT</strong> C COMMUNICATIONS<br />
4.2.4 Automatically printing received messages<br />
You may automatically print received messages (except confidential or password<br />
affixed) as follows:<br />
1. Press the [F8] key to display the Setup menu.<br />
2. Press the [6] key to display the Auto Mode Setup menu.<br />
Auto Mode Setup<br />
Auto Log Print<br />
Receive Alarm<br />
Auto Receive Message Save<br />
Auto Receive Message Print<br />
Data Report & Polling Print<br />
Auto EGC Message Save<br />
Auto EGC Message Print<br />
OFF<br />
OFF<br />
OFF<br />
OFF<br />
OFF<br />
Auto mode setup menu<br />
3. Press the [↑] or [↓] key to choose Auto Receive Message Print.<br />
4. Press the [Enter] key.<br />
5. Press the [↑] key to choose ON.<br />
6. Press the [Enter] key to close the window.<br />
7. Press the [Esc] key twice.<br />
4.2.5 Saving received messages to a floppy disk<br />
1. Press the [F6] key.<br />
2. Press the [2] key to display the Receive Message Log.<br />
Receive Message Log<br />
Message No.<br />
R0971106.001<br />
R0971105.002<br />
R0971105.001<br />
R0971101.001<br />
R0971024.001<br />
LES<br />
KDDI<br />
KDDI<br />
KDDI<br />
KDDI<br />
KDDI<br />
Priority<br />
Normal<br />
Normal<br />
Distress<br />
Normal<br />
Normal<br />
Size<br />
32767<br />
200<br />
1234<br />
3256<br />
8251<br />
Addressee<br />
CAPTAIN<br />
OFFICER<br />
Rec date & Time<br />
02-02-04 16:10<br />
02-02-05 17:30<br />
02-02-05 14:15<br />
02-02-01 3:45<br />
02-01-24 13:20<br />
Status<br />
Saved<br />
Printed<br />
Printed<br />
Printed<br />
Saved<br />
Memory Available: 3317 Bytes<br />
ENTER: Display S: Save D: Delete<br />
Sample delete message screen<br />
3. Press the [↑] or [↓] key to choose a file. To confirm contents of a file, press the<br />
[Enter] key. For confidential messages, the password entry window appears<br />
after pressing the [Enter] key. Enter the password and press the [Enter] key.<br />
4. Press the [S] key to copy the file to the floppy disk. For confidential<br />
messages the password entry window appears. Enter password and press<br />
the [Enter] key. The password is saved to the floppy disk.<br />
Note: If a file by that name already exists on the floppy disk, “Already exists on<br />
FD.” appears.<br />
4-28
4. <strong>INMARSAT</strong> C COMMUNICATIONS<br />
4.2.6 Automatically saving received messages to a floppy disk<br />
You may automatically save received messages to a floppy disk as follows:<br />
1. Press the [F8] key.<br />
2. Press the [6] key to display the Auto Mode Setup menu.<br />
Auto Mode Setup<br />
Auto Log Print<br />
Receive Alarm<br />
Auto Receive Message Save<br />
Auto Receive Message Print<br />
Data Report & Polling Print<br />
Auto EGC Message Save<br />
Auto EGC Message Print<br />
OFF<br />
OFF<br />
OFF<br />
OFF<br />
OFF<br />
Auto mode setup menu<br />
3. Press the [↑] or [↓] key to choose Auto Receive Message Save.<br />
4. Press the [Enter] key to open the auto receive message save options<br />
window.<br />
5. Press the [↑] key to choose “ON/22.<br />
6. Press the [Enter] key to close the window.<br />
7. Press the [Esc] key twice.<br />
Note: To designate directory where to store receive messages, see paragraph<br />
2.9.2.<br />
4-29
4. <strong>INMARSAT</strong> C COMMUNICATIONS<br />
4.2.7 Deleting received messages<br />
1. Press the [F6] key to display the Logs menu.<br />
2. Press the [2] key to choose Receive Message Log.<br />
Message No.<br />
R0971106.001<br />
R0971105.002<br />
R0971105.001<br />
R0971101.001<br />
R0971024.001<br />
LES<br />
KDDI<br />
KDDI<br />
KDDI<br />
KDDI<br />
KDDI<br />
Receive Message Log<br />
Priority<br />
Normal<br />
Normal<br />
Distress<br />
Normal<br />
Normal<br />
Size<br />
32767<br />
200<br />
1234<br />
3256<br />
8251<br />
Addressee<br />
CAPTAIN<br />
OFFICER<br />
Rec date & Time<br />
02-02-04 16:10<br />
02-02-05 17:30<br />
02-02-05 14:15<br />
02-02-01 3:45<br />
02-01-24 13:20<br />
Status<br />
Saved<br />
Printed<br />
Printed<br />
Printed<br />
Saved<br />
Memory Available: 3317 Bytes<br />
ENTER: Display S: Save D: Delete<br />
Sample receive message log<br />
3. Press the [↑] or [↓] key to choose the message you want to delete. You can<br />
confirm the contents of the message by pressing the [Enter] key. For<br />
password-affixed messages, the password entry window appears. Enter the<br />
password and press the [Enter] key. After confirming the contents, press the<br />
[Esc] key.<br />
4. Press the [D] key. You are asked if you are sure to delete the message. For<br />
password affixed-message, the password entry window appears. Enter<br />
password and press the [Enter] key.<br />
Message No.<br />
R0021106.001<br />
R0021105.002<br />
R0021105.001<br />
R0021101.001<br />
R0021024.001<br />
LES<br />
KDDI<br />
KDDII<br />
KDDI<br />
KDDI<br />
KDDI<br />
Receive Message Log<br />
Priority<br />
Normal<br />
Normal<br />
Distress<br />
Normal<br />
Normal<br />
Size<br />
32767<br />
200<br />
1234<br />
3256<br />
8251<br />
Addressee<br />
CAPTAIN<br />
OFFICER<br />
Rec date & Time<br />
02-11-06 16:10<br />
02-11-05 17:30<br />
02-11-05 14:15<br />
02-11-01 3:45<br />
02-10-24 13:20<br />
Status<br />
Saved<br />
Printed<br />
Printed<br />
Printed<br />
Saved<br />
Delete<br />
Memory Available: 3317 Bytes Yes No<br />
Enter: Display S: Save D: Delete<br />
Delete window<br />
5. Press the [Enter] key to delete the message, or choose No and then press<br />
the [Enter] key to escape.<br />
6. Press the [Esc] key twice to return to the standby display.<br />
4-30
4.3 Display Log<br />
4. <strong>INMARSAT</strong> C COMMUNICATIONS<br />
The Display Log stores the particulars of the latest 50 received and transmitted<br />
messages. When the log becomes full, the oldest message is automatically<br />
deleted.<br />
4.3.1 Displaying and printing the display log<br />
1. Press the [F6] key to display the Logs menu.<br />
2. Press the [4] key to show the Display Log.<br />
1<br />
2 3 4 5 6 7 8 9 10 11<br />
Log<br />
01<br />
02<br />
S/R<br />
S<br />
R<br />
Message No. Type<br />
T0971110.001 TELEX<br />
R0971110.001 TELEX<br />
Pri<br />
Nrm<br />
Dis<br />
Date<br />
02-02-25<br />
02-02-25<br />
Time<br />
19:10<br />
19:25<br />
LES<br />
302<br />
302<br />
Station<br />
FURUNO<br />
Size<br />
12345<br />
365<br />
Cond<br />
Success<br />
Success<br />
.<br />
50 (max)<br />
Ctrl+P: Print<br />
Sample display log<br />
3. To scroll the Display Log screen, press the [↓] key several times.<br />
4. To print the log, press the [P] key while pressing the [Ctrl] key and press the<br />
[P] key. To stop printing, press the [Esc] key.<br />
Display log description<br />
1) Log no.<br />
2) S/R S: Send message, R: Received message<br />
3) Message No.: Message no. or file name<br />
4) Type: Message type (Telex, e-mail, etc.)<br />
5) Pri: Priority; Normal or Distress<br />
6) Date: Date message was received (transmitted).<br />
7) Time: Time message was received (transmitted).<br />
8) LES: ID of LES which handled the message<br />
9) Station: Transmitting station name. Blank for unregistered station or<br />
received message.<br />
10) Size: Size of message in bytes<br />
11) Cond: Transmission results. Blank if a received message.<br />
Success: Successful transmission<br />
Fail: Failed transmission<br />
Rejected: Message rejected by LES<br />
4-31
4. <strong>INMARSAT</strong> C COMMUNICATIONS<br />
4.3.2 Automatic printing of display log<br />
The Display Log can be automatically printed every 24 hours as follows:<br />
1. Press the [F8] key to display the Setup menu.<br />
2. Press the [6] key to display the Auto Mode Setup menu.<br />
Auto Mode Setup<br />
Auto Log Print<br />
Receive Alarm<br />
Auto Receive Message Save<br />
Auto Receive Message Print<br />
Data Report & Polling Print<br />
Auto EGC Message Save<br />
Auto EGC Message Print<br />
OFF<br />
OFF<br />
OFF<br />
OFF<br />
OFF<br />
Auto mode setup menu<br />
3. Auto Log Print is selected; press the [Enter] key.<br />
4. Press the [↑] key to choose ON.<br />
5. Press the [Enter] key to close the window.<br />
6. Press the [Esc] key twice to return to the standby display. The log will be<br />
printed at 00:00 (UTC) each day.<br />
4-32
4.4 EGC Messages<br />
4. <strong>INMARSAT</strong> C COMMUNICATIONS<br />
When an EGC message is received, RECEIVING EGC MESSAGE appears at<br />
the bottom left corner of the display. If Auto Message Save in the Auto Mode<br />
Setup is ON, EGC messages are automatically printed. EGC messages are<br />
automatically received, printed and saved to the terminal unit selected with EGC<br />
Output Port on the System Setup menu. The memory capacity for EGC<br />
message is 32k bytes. When the EGC message memory becomes full, the<br />
oldest EGC message is automatically deleted.<br />
4.4.1 Displaying and reprinting EGC messages<br />
1. Press the [F4] key.<br />
EGC<br />
1. Display EGC Message<br />
2. EGC Network ID<br />
EGC menu<br />
2. Press the [1 key to show the Display EGC Message screen.<br />
File Edit Transmit EGC Reports Logs Options Setup Position StopAlarm<br />
Display EGC Message <br />
EGC Message --- MET Navarea Warning or MET Forecast ---<br />
Message Sequence No. : 00472<br />
LES<br />
: KDDI<br />
Priority<br />
: Urgent<br />
Size<br />
: 285 characters<br />
Receive Date & Time : 02-11-02 06:08 (UTC)<br />
ZCZC<br />
NAVAREA XI WARNING<br />
NAVAREA XI 0752.<br />
ARAFURA SEA.<br />
DERELICT F/V PARTIALLY SUBMERGED ADRIFT<br />
IN 10-12.6S 133-19.6E, GEODETIC DATUM<br />
UNKNOWN, AT 180200Z NOV.<br />
CANCEL 0749/02.<br />
Ctrl+P: Print Ctrl+S: Save ¬: Previous ®: Next<br />
Sample display EGC message screen<br />
3. Press the [↑] or [↓] key to scroll the screen.<br />
4. To print a message, press the [P] key while pressing the [Ctrl] key and press<br />
the [P] key. To stop printing, press the [Esc] key.<br />
5. Press the [Esc] key to return to the standby display.<br />
EGC messages can be automatically saved to a floppy disk. See paragraph<br />
2.4.4 for details.<br />
4-33
4. <strong>INMARSAT</strong> C COMMUNICATIONS<br />
4.4.2 Displaying EGC closed network ID (ENID)<br />
To join a FleetNET TM service, an MES must be registered with an information<br />
provider. The information provider adds the MES to the group which is to receive<br />
the service, by downloading a Group Call ID (via an LES which supports<br />
FleetNET TM broadcasts), uniquely addressed to the MES. The MES stores the<br />
ID and can accept broadcasts from the information provider. The MES operator<br />
cannot change this stored EGC closed network IDs (ENIDs). Up to 64 ENIDs are<br />
stored on a non-volatile memory.<br />
The ENID stored can be accessed for downloading and deleting via the satellite<br />
path. It is possible for an MES operator to inhibit (or activate as required), via the<br />
terminal unit, selected ENIDs previously downloaded.<br />
Along with the ENID the name of the information provider is stored. In the event<br />
that a download command is received and the ENID storage area is full, an<br />
ENID which has been inhibited (de-activated) by the MES operator will be written<br />
over. If none has been inhibited, then the new download is not accepted.<br />
Follow the procedure below to inhibit or activate an ENID.<br />
1. Press the [F4] key to display EGC menu.<br />
2. Press the [2] key to display the EGC Network ID List.<br />
File Edit Transmit EGC Reports Logs Options Setup Position StopAlarm<br />
EGC<br />
1. Display EGC Message EGC Network ID List<br />
2. EGC ENTER: Network Activate ID SPACE: Inhibit Ctrl+P: Print ESC: Quit<br />
Mark '*' means activation<br />
01<br />
02<br />
03<br />
04<br />
05<br />
06<br />
07<br />
08<br />
*<br />
*<br />
*<br />
*<br />
*<br />
*<br />
*<br />
*<br />
00001<br />
00002<br />
04001<br />
04002<br />
04003<br />
04005<br />
04006<br />
04007<br />
202<br />
202<br />
202<br />
202<br />
202<br />
202<br />
202<br />
202<br />
FURUNO<br />
FURUNO<br />
FURUNO<br />
FURUNO<br />
FURUNO<br />
FURUNO<br />
FURUNO<br />
FURUNO<br />
EGC network ID list<br />
3. Press the [↑] or [↓] key to choose the ENID you want inhibit (or activate).<br />
4. Press the space bar to inhibit, or the [Enter] key to activate. The asterisk<br />
mark disappears when an ENID is inhibited.<br />
5. Press the [Esc] key to return to the standby display.<br />
4-34
4. <strong>INMARSAT</strong> C COMMUNICATIONS<br />
4.4.3 Receiving EGC distress, urgent message<br />
When the FELCOM receives an EGC distress or an urgent message, the audio<br />
alarm sounds. To silence the alarm, press the [F10 key.<br />
4.4.4 Displaying the EGC message log<br />
1. Press the [F6] key to show the Logs menu.<br />
2. Press the [3] key to display the EGC message log.<br />
EGC Message Log<br />
Message No. LES Priority Size Seq. No. Rec date&Time Type<br />
E0021118.028 KDDI Urgent 428 01641 02-11-18 10:27 MET<br />
E0021117.002 KDDI Safety 1455 02035 02-11-17 05:23 U.M Rct<br />
Memory available: 32767 Bytes<br />
_ _ _ _ _ _ _ _ _ _ _ _ _ _ _ _ _ _ _ _ _ _ _ _ _ _ _ _ _ _ _ _ _ _ _ _ _ _ _ _ _ _ _ _ _ _ _ _<br />
ENTER: Display S: Save D: Delete<br />
EGC message log<br />
3. Use the [↑] or [↓] key to scroll the display.<br />
4. Press the [Esc] key twice to return to the standby display.<br />
4-35
4. <strong>INMARSAT</strong> C COMMUNICATIONS<br />
(This page intentionally left blank.)<br />
4-36
5. DATA REPORTING AND POLLING<br />
This chapter provides the information necessary for data reporting and polling<br />
reception. Data reporting provides automatic data transmission at regular<br />
intervals from your ship to your home office. When your ship receives a polling<br />
command from your home office; that is, a request for navigation data from your<br />
ship, it automatically transmits this data to your home office.<br />
No operator intervention is required during polling reception.<br />
Satellite<br />
Data report<br />
Message report<br />
Polling<br />
Mobile Earth Station Land Earth Station Subscriber<br />
5.1 Data Reporting<br />
Data reporting provides automatic data transmission at predetermined intervals<br />
from your ship to your home office. The data are position, speed, bearing and<br />
other data sent from the internal GPS navigator.<br />
The data transmitted from the FELCOM is temporarily stored in a data reporting<br />
file at the LES. When an operator at your home office accesses the LES, the<br />
LES delivers the data to your home office. Some LESs may deliver it without<br />
being accessed.<br />
Data reporting can be initiated by setting a data report on the FELCOM or<br />
receiving a polling command from your home office.<br />
FELCOM offers two types of reports as follows:<br />
• Data report (on MES signaling channel)<br />
Refer to paragraph 5.1.1.<br />
• Message report (on MES message channel)<br />
Refer to paragraph 5.1.2.<br />
5-1
5. DATA REPORTING AND POLLING<br />
5.1.1 Setting a data report<br />
1. Press the [F5] key to display the Position Reports menu.<br />
Reports<br />
1. Data Report<br />
2. Message Report<br />
3. Data Network ID<br />
Position reports menu<br />
2. Press the [1] key to choose Data Report.<br />
Data Report<br />
1. Data Report 1<br />
2. Data Report 2<br />
3. Data Report 3<br />
4. Data Report 4<br />
5-2<br />
Data report menu<br />
3. Press [1], [2], [3] or [4] as appropriate.<br />
Data Report<br />
Data Report Programming<br />
OFF<br />
2<br />
Status<br />
Report Length<br />
Destination<br />
DNID<br />
LES ID<br />
Member No.<br />
Activation<br />
Interval Time<br />
Report Times<br />
Start Time1 - - : - -<br />
Start Time2 - - : - -<br />
Start Time3 - - : - -<br />
Start Time4 - - : - -<br />
Regular Interval<br />
00:10<br />
1 (---: No Limit)<br />
Data report menu<br />
4. Status is selected; press the [Enter] key to open the status options window.<br />
5. Press the [↓] or [↑] key to choose “ON” or “OFF” as appropriate.<br />
ON: Data report on<br />
OFF: Data report off<br />
6. Press the [Enter] key to close the window.<br />
7. Press the [↓] key to choose Report Length.<br />
8. Press the [Enter] key to open the report length options window.<br />
9. Press the [↓] or [↑] key to choose “1”, “2” or “3” as appropriate.<br />
1: Position<br />
2: Position, speed, course, depth<br />
3: Spare (not used)<br />
10. Press the [Enter] key to close the window.<br />
11. Press the [↓] key to choose Destination.<br />
12. Press the [Enter] to show the DNID list.<br />
13. Choose DNID desired and press the [Enter] key. (LES ID and Member No.<br />
are automatically selected according to DNID.).<br />
14. Press the [↓] key to choose Activation.<br />
15. Press the [Enter] key to open the activation options window.
5. DATA REPORTING AND POLLING<br />
16. Press the [↓] or [↑] key to choose “Regular Interval” or “Daily” as appropriate.<br />
17. Press the [Enter] key to close the window.<br />
18. Do one of the following depending on the selection you made at step 16.<br />
“Regular Interval” selected at step 16<br />
(1) Press the [↓] key to choose Interval Time.<br />
(2) Press the [Enter] key to open the interval time entry window.<br />
(3) Key in the interval time.<br />
(4) Press the [Enter] key to close the window.<br />
(5) Press the [↓] key to choose Report Times.<br />
(6) Press the [Enter] key to open the report times entry window.<br />
(7) Key in the report times, or press the [Back Space] key to display “---“ to<br />
choose<br />
“No Limit.”<br />
(8) Press the [Enter] key to close the window.<br />
“Daily” selected at step 16<br />
(1) Press the [↓] key to choose Start Time 1.<br />
(2) Press the [Enter] key to open the start time entry window.<br />
(3) Key in the start time, in 24-hour notation.<br />
(4) Press the [Enter] key to close the window.<br />
(5) If necessary enter start times for Start Time 2-4.<br />
19. Press the [Esc] key to show the update window.<br />
Data Report<br />
Data Report Programming<br />
OFF<br />
2<br />
Status<br />
Report Length<br />
Destination<br />
DNID<br />
LES ID<br />
Member No.<br />
Activation<br />
Interval Time<br />
Report Times<br />
Start Time1<br />
Start Time2<br />
Start Time3<br />
Start Time4<br />
Regular Interval<br />
01:00<br />
24 (---: No Limit)<br />
--:--<br />
--:--<br />
--:--<br />
--:--<br />
Yes<br />
Update<br />
Data report menu (regular interval reporting)<br />
20. Yes is selected; press the [Enter] key to register settings.<br />
21. Press the [Esc] key to return to the standby display.<br />
No<br />
5-3
5. DATA REPORTING AND POLLING<br />
5.1.2 Setting a message report<br />
1. Press the [F5] key to display the Position Reports menu.<br />
Reports<br />
1. Data Report<br />
2. Message Report<br />
3. Data Network ID<br />
Position reports menu<br />
2. Press the [2] key to display the Message Report menu. Four addresses may<br />
be registered.<br />
Message Report<br />
1. Message Report 1<br />
2. Message Report 2<br />
3. Message Report 3<br />
4. Message Report 4<br />
Message report menu<br />
3. Press [1], [2], [3] or [4] as appropriate<br />
Message Report<br />
PIN Code<br />
Message Report Programming<br />
Status<br />
OFF<br />
Station Name<br />
Destination Type TELEX<br />
Prefix Code<br />
Country/Ocean Code<br />
Station ID<br />
Modem Type<br />
Address<br />
Subject<br />
LES ID<br />
Activation<br />
Regular Interval<br />
Interval Time 00:10<br />
Report Times 1 (---: No Limit)<br />
Start Time1 --:--<br />
Start Time2 --:--<br />
Start Time3 --:--<br />
Start Time4 --:--<br />
Report Contents NAV<br />
File<br />
Message report menu<br />
PIN code is unrelated to data reporting, however it is necessary for polling<br />
(see paragraph 5.2). Enter PIN code as shown below.<br />
4. PIN Code is selected; press the [Enter] key to open the PIN code entry<br />
window.<br />
5. Key in PIN code, using up to eight digits. The PIN code is a password used in<br />
message reports. When a ship receives a polling command w/PIN code from<br />
a shore subscriber and the code matches that of the ship, the ship sends a<br />
message report.<br />
6. Press the [Enter] key to close the window.<br />
7. Press the [↓] key to choose Status.<br />
8. Press the [Enter] key to open the status options window.<br />
5-4
5. DATA REPORTING AND POLLING<br />
9. Press the [↓] or [↑] key to choose “ON” or “OFF” as appropriate.<br />
ON: Message report on<br />
OFF: Message report off<br />
10. Press the [Enter] key to close the window.<br />
11. Press the [↓] key to choose Station Name.<br />
12. Press the [Enter] key to display the Station List.<br />
13. Press the [↓] or [↑] key to choose a station.<br />
Note: You may sort the list by group name, station name or communication<br />
type as follows:<br />
Group name: Each press of [Ctrl] + [G] sorts the list by group name,<br />
ascending or descending order.<br />
Station name: Each press of [Ctrl] + [N] sorts the list by station name,<br />
in ascending or descending order.<br />
Comm. type: Each press of [Ctrl] + [T] sorts the list by communication<br />
type, in ascending or descending order.<br />
14. Press the [Enter] key to close the window.<br />
15. For e-mail following a)-d) below. For other communication formats, go to step<br />
16.<br />
a) Press the [↓] key to choose Subject.<br />
b) Press the [Enter] key to show the title window.<br />
c) Type title.<br />
d) Press the [Enter] key to close the window.<br />
16. Press the [↓] key to choose LES ID.<br />
17. Press the [Enter] key to display the LES List.<br />
18. Press the [↓] or [↑] key to choose an LES.<br />
19. Press the [Enter] key to close the window.<br />
20. Press the [↓] key to choose Activation.<br />
21. Press the [Enter] key to open the activation options window.<br />
22. Press the [↓] or [↑] key to choose “Regular Interval” or “Daily” as appropriate.<br />
23. Press the [Enter] key to close the window.<br />
24. Do one of the following depending on the selection you made at step 22.<br />
“Regular Interval” selected at step 22<br />
(1) Press the [↓] to choose Interval Time.<br />
(2) Press the [Enter] key to open the interval time entry window.<br />
(3) Key in the interval time.<br />
(4) Press the [Enter] key to close the window.<br />
(5) Press the [↓] key to choose Report Times.<br />
(6) Press the [Enter] key to open the report times entry window.<br />
(7) Key in the report times, or press the [Back Space] key to display “---“ to<br />
choose “No Limit.”<br />
(8) Press the [Enter] key to close the window.<br />
5-5
5. DATA REPORTING AND POLLING<br />
“Daily” is selected at step 22<br />
(1) Press the [↓] to choose Start Time 1.<br />
(2) Press the [Enter] key to open the start time entry window.<br />
(3) Key in the start time.<br />
(4) Press the [Enter] key to close the window.<br />
(5) If necessary, key in the start time of Start Times 2-4.<br />
25. Press the [↓] key to choose Report Contents.<br />
26. Press the [Enter] key to open the report contents options window.<br />
27. Press the [↓] or [↑] key to choose the contents of message report and press<br />
the [Enter] key to close the window.<br />
NAV: Position, speed, course<br />
NAV+SEA INF: Position, speed, course, water temperature, current, depth<br />
NAV(R): Position, speed, course. The difference between this and “NAV”<br />
above is that blank areas in data are shortened to lessen toll<br />
charge.<br />
FILE: Choose a file. (When chosen “FILE” is activated. Choose file<br />
with cursor and press the [Enter] key.)<br />
28. Press the [Esc] key to show the update window.<br />
Message Report<br />
PIN Code<br />
12345678<br />
Message Report Programming<br />
ON<br />
FRNINMBTSTSES<br />
TELEX<br />
Status<br />
Station Name<br />
Destination Type<br />
Prefix Code<br />
Country/Ocean Code<br />
Station ID<br />
Modem Type<br />
Subject<br />
LES ID<br />
Activation<br />
Interval Time<br />
Report Times<br />
Start Time1<br />
Start Time2<br />
Start Time3<br />
Start Time4<br />
Report Contents<br />
File<br />
583<br />
343199710<br />
303 (KDDI)<br />
Daily<br />
01:00<br />
24 (---: No Limit)<br />
08:00<br />
NAV<br />
Yes<br />
Update<br />
No<br />
Message report screen<br />
29.Yes is selected; press the [Enter] key.<br />
30. Press the [Esc] key twice to return to the standby display.<br />
5-6
5. DATA REPORTING AND POLLING<br />
5.1.3 Automatic printing of data report, polling command<br />
Data reports and polling commands are automatically printed, in the default state.<br />
If you do not require automatic printing of data reports or polling commands do<br />
the following:<br />
1. Press the [F8] key to open the Setup menu.<br />
2. Press the [6] key to choose Auto Mode Setup.<br />
Auto Mode Setup<br />
Auto Log Print<br />
Receive Alarm<br />
Auto Receive Message Save<br />
Auto Receive Message Print<br />
Data Report & Polling Print<br />
Auto EGC Message Save<br />
Auto EGC Message Print<br />
OFF<br />
OFF<br />
OFF<br />
OFF<br />
OFF<br />
Auto mode setup menu<br />
3. Press the [↓] or [↑] key to choose Data Report & Polling Print.<br />
4. Press the [Enter] key to open the options window.<br />
5. Press the [↓] key to choose OFF. (Choose ON for automatic printing of data<br />
report, polling command.)<br />
6. Press the [Enter] key to close the window.<br />
7. Press [Esc] key twice.<br />
5-7
5. DATA REPORTING AND POLLING<br />
5.2 Polling<br />
When the FELCOM receives a polling command from your home office it<br />
automatically transmits data to your home office. The data are position, speed,<br />
bearing and other data sent from a navigator or an interface unit.<br />
A polling command from your home office can also activate a data report or<br />
message report if the corresponding setting is completed on the FELCOM. If a<br />
polling command with a file name is received, the FELCOM transmits the file to<br />
your home office.<br />
5.2.1 Polling commands<br />
This paragraph shows you how to make the polling command at your home<br />
office.<br />
There are two kinds of polling commands: one is sent on the MES signalling<br />
channel and the other is sent on the MES message channel.<br />
Polling command on MES signalling channel<br />
Request a land station to make the polling command because the format varies<br />
with land station.<br />
Polling command on MES message channel<br />
To make the polling command, enter D???, hyphen, PIN code (max. 8 digits),<br />
hyphen, file name (stored in the floppy disk of the FELCOM), colon and text of<br />
message.<br />
To send file data, type a hyphen and file name. If no hyphen and file name is<br />
entered, MES automatically transmits nav data (own ship position, course,<br />
speed, etc). For PIN Code setting, refer to paragraph 5.1.2.<br />
D???-XXXXXXXX-XXXXX:<br />
5.2.2 Other polling commands<br />
Telex<br />
PIN code File name<br />
Polling command<br />
P???/PIN Code/TELEX/LES number/Country number/Subscriber’s number/File<br />
name:<br />
E-mail<br />
P???/PIN Code/EMAIL/LES number/ E-mail address/File name:<br />
5-8
5. DATA REPORTING AND POLLING<br />
Public Switched Telephone Network<br />
P???/PIN Code/PSTN/Modem type/LES number/Country number/Subscriber’s<br />
number/File name:<br />
Modem type is selected from T30, V21, V22B, V22, V23, V26B, V26T, V27T or<br />
V32.<br />
Packet Switched Data Network<br />
P???/PIN Code/PSDN/LES number/Country number/Subscriber’s number/File<br />
name:<br />
Data Network Identification<br />
P???/PIN Code/DNID/LES number/Subscriber’s number/File name:<br />
Facsimile<br />
P???/PIN Code/FAX/LES number/Country number/Subscriber’s number/File<br />
name:<br />
Special<br />
P???/PIN Code/SPEC/LES number/Country number/Subscriber’s number/File<br />
name:<br />
For ship-to-ship communication, country number is ocean region number.<br />
Subscriber’s number includes Station ID, Telex ID, etc.<br />
If file name is not specified (/:), position, speed, bearing, water temperature,<br />
current and depth are transmitted. Furthermore, / is deleted (:), position, speed<br />
and bearing are transmitted.<br />
For example, you transmit polling command to MES of PIN code 12345678 via<br />
Yamaguchi station (Pacific Ocean: 203). Then, that MES transmits position,<br />
speed, bearing, water temperature, current and depth to telex number<br />
720-5644325.<br />
P???/12345678/TELEX/203/720/5644325/:<br />
Mobile earth station transmit position, speed and bearing to e-mail address, for<br />
example, abc@furuno.co.jp.<br />
P???/12345678/EMAIL/203/abc@furuno.co.jp:<br />
5-9
5. DATA REPORTING AND POLLING<br />
5.2.3 Polling reception<br />
TX start frame (time)<br />
No operator intervention is required during polling reception.<br />
The printer (printer PP-510 optionally available) prints the status of polling<br />
reception and transmits data in response to polling request as shown below.<br />
Data reporting<br />
POLLING Message - - - Program Unreserved Data Reporting - - -<br />
DNID : 0004 LES ID : 101 (Telnor S.S.Inc)<br />
Sub Address : 000 Member Number : 001 Response: No Response<br />
Receive Data & Time: 02-02-25 00:01 (UTC)<br />
Start Frame: 00030 Interval: 00030<br />
02-02-25 00:01 (UTC)<br />
Data Report Program has been initiated by Polling.<br />
TX interval<br />
Received<br />
Polling<br />
Command<br />
Receive Message<br />
Message No. : R0020205.002<br />
Message Ref. No. : 00616923<br />
LES<br />
: KDDI<br />
Priority<br />
: Normal<br />
Message Size : 121 characters<br />
Receive Data & Time : 02-02-25 04:07 (UTC)<br />
Received<br />
Polling<br />
Command<br />
POLLING Message - - - Initiate Unreserved Data Reporting - - -<br />
DNID :0004 LES ID :101 (Telnor S.S.Inc)<br />
Sub Address : 000 Member Number :001 Response: Data Report<br />
Receive Data & Time: 02-02-25 00:01 (UTC)<br />
TX data set on Data<br />
Start Frame: 00030 Interval: 00030 Report<br />
KDD <strong>INMARSAT</strong>-C SERVICE 25-FEB-02 04:02:28 UTC REF:616923<br />
XXXXXXXXX ABCD X via KDDI LES<br />
D???-12345678-test:test<br />
Data Reported (Poll Response)<br />
LES :Telnor S.S.Inc Date : 02-02-25<br />
DNID :00004 Time : 00:03 (UTC)<br />
Member No. :001<br />
Position LAT 10:14.03N<br />
LON 124:36.81E<br />
02-02-25 00:06 (UTC)<br />
Successful Data Report Sending.<br />
Tx message<br />
recipient and<br />
TX data<br />
02-02-25 04:09 (UTC)<br />
Successful Sending message.<br />
Sent Message<br />
DELIVERY CONFIRMATION OFF<br />
Tx message<br />
recipient and<br />
TX data<br />
Message File : Report Message Size : 284 characters<br />
LES : KDDI Date : 02-02-25<br />
Priority : Normal Time : 04:09 (UTC)<br />
Destination : TELEX 582 (IA5)<br />
582+<br />
Date & Time 02-02-25 04:07 (UTC)<br />
Position LAT 12:34.56N Water Temp 32.1<br />
LON 123:45.67E Water Current 22.3 KTS<br />
Course 321.1 111.0<br />
Speed 1.1 KTS Depth 123.4FT<br />
Sample MES message channel printout<br />
5-10
5. DATA REPORTING AND POLLING<br />
5.3 DNID (Data Network Identification)<br />
When you make a contract with an information provider, DNIDs are downloaded<br />
from the information provider to your FELCOM, via the appropriate LES.<br />
Up to 64 DNIDs can be downloaded to the FELCOM. You can see which DNIDs<br />
are stored as below.<br />
5.3.1 Displaying DNID<br />
It is necessary to contract with an LES to exchange data within a group. The<br />
LES sends a DNID (Data Network Identification) number to each member of the<br />
group. The FELCOM can store 64 DNIDs.<br />
1. Press the [F5] key to display the Position Reports menu.<br />
2. Press the [3] key to display the Data Network ID list.<br />
Sub address<br />
Data Network ID<br />
RET: Activate SPACE: Inhibit Ctrl+P: Print ESC: Quit<br />
Mark '*' means activation.<br />
Member number using DNID<br />
No.<br />
Act<br />
DNID<br />
LES<br />
Subaddr<br />
Member<br />
Text<br />
01<br />
02<br />
03<br />
04<br />
05<br />
06<br />
07<br />
08<br />
09<br />
10<br />
*<br />
*<br />
*<br />
*<br />
*<br />
*<br />
*<br />
00004<br />
00004<br />
23456<br />
03333<br />
03333<br />
07777<br />
09999<br />
101<br />
101<br />
101<br />
101<br />
101<br />
101<br />
101<br />
000<br />
002<br />
002<br />
002<br />
000<br />
000<br />
000<br />
001<br />
003<br />
223<br />
044<br />
044<br />
099<br />
088<br />
* DNID effective<br />
Data network ID list<br />
Note: Asterisk-marked DNIDs are available for use.<br />
Sample MES signaling channel printout<br />
5-11
5. DATA REPORTING AND POLLING<br />
5.3.2 Enabling/Disabling DNID<br />
DNID can be enabled or disabled as follows:<br />
1. Press the [F5] key followed by the [3] key to show the Data Network ID list.<br />
2. Press the [↓] or [↑] key to choose desired DNID from the data network ID list.<br />
3. Press the [Enter] key to enable or disable the DNID as appropriate. An<br />
asterisk appears next to the DNID when it is enabled.<br />
Note: When a DNID is disabled “running data program (poll)” is displayed<br />
and polling is cancelled.<br />
4. Press the [Esc] key to close the window.<br />
5. Press the [Esc] key twice to return to the standby display.<br />
5-12
6. OTHER FUNCTIONS<br />
This chapter describes how to abort operation, scan NCS, choose EGC and<br />
NCS channels and display LES information.<br />
6.1 Aborting an Operation<br />
You can abort transmission, receiving or scanning (on the NCS common<br />
channel) as follows:<br />
1. Press the [F7] key to display the Options menu.<br />
Options<br />
1. Login<br />
2. Logout<br />
3. Abort<br />
4. Select NCS<br />
5. Ocean Region<br />
6. LES Information<br />
7. Test<br />
Options menu (when FELCOM functions as Inmarsat MES)<br />
2. Press the [3] key to choose Abort.<br />
Options<br />
1. Login<br />
2. Logout<br />
3. Abort<br />
4. Select NCS<br />
5. Ocean Region<br />
6. Test<br />
Abort<br />
Yes<br />
Start<br />
No<br />
Abort screen<br />
3. Yes is selected; press the [Enter] key to abort current operation.<br />
The message “FORCED CLEARING” replaces “SENDING” or “RECEIVING”<br />
at the bottom of the screen. When the process has been aborted, the<br />
message “Process Aborted. Press any key to escape.” appears.<br />
Note: If aborting is attempted in modes other than those mentioned above, the<br />
message “Ignored: Can not abort current process.” appears.<br />
6-1
6. OTHER FUNCTIONS<br />
6.2 Scanning NCS Common Channel<br />
Scanning is possible when the FELCOM is in idle state and functions as an<br />
Inmarsat C receiver. If the FELCOM is not in idle state the message “Ignored:<br />
MES is not idle.” appears. Wait until the equipment becomes idle.<br />
1. Press the [F7] key to display the Options menu.<br />
2. Press the [5] key to display the Ocean Region menu.<br />
Options<br />
1. Login Ocean Region<br />
2. Logout Auto<br />
3. Abort West-Atlantic<br />
4. Select East-Atlantic NCS<br />
5. Ocean Pacific Region<br />
6. Test Indian<br />
NCS you are currently tuned to appears in reverse video.<br />
Ocean region menu<br />
3. Press the [↓] or [↑] key to choose another NCS and press the [Enter] key. If<br />
Auto is selected, FELCOM scans all ocean regions in turn.<br />
Options<br />
1. Login Ocean Region<br />
2. Logout Auto<br />
3. Abort West-Atlantic<br />
4. Select East-Atlantic NCS<br />
Start<br />
5. Ocean Pacific Region<br />
6. Test Indian<br />
Yes No<br />
NCS scan confirmation screen<br />
4. Yes is selected; press the [Enter] key to start the scanning.<br />
The message “Starting Scan Process. Press any key to escape.”<br />
appears during the scanning.<br />
5. Press the [Esc] key twice to return to the standby display.<br />
6-2
6.3 Choosing EGC Receiving Channel<br />
6. OTHER FUNCTIONS<br />
EGC channel can be selected when the terminal unit is set to operate as an<br />
EGC-only receiver. However, this procedure is shown for reference only;<br />
currently there is only one EGC channel per NCS.<br />
1. Press the [F7] key to display the Options menu.<br />
Options<br />
1. Login<br />
2. Logout<br />
3. Abort<br />
4. Select EGC Ch.<br />
5. LES Information<br />
6. Test<br />
Options menu (when FELCOM functions as EGC receiver)<br />
2. Press the [4] key to choose Select EGC Ch.<br />
11080*<br />
EGC Channel List<br />
ENTER: Set ESC: Quit<br />
35:00.00N<br />
12580* 10840* 135:00.00E 11088*<br />
EGC channel list<br />
3. Choose desired channel and then press the [Enter] key.<br />
4. Press the [Esc] key to return to the standby display.<br />
6-3
6. OTHER FUNCTIONS<br />
6.4 Choosing NCS Channel<br />
You may select NCS common channel as shown below. Currently, each satellite<br />
transmits one global beam. In the future, the satellites will transmit multiple spot<br />
beams, namely, the NCS will have multiple channels.<br />
1. Press the [F7] key to display the Options menu.<br />
2. Press the [4] key to display the NCS Channel List.<br />
Options<br />
1. Login<br />
2. Logout<br />
3. Abort<br />
4. Select NCS<br />
No AOR (WEST)<br />
5. Ocean Region<br />
ID FREQ<br />
6. Test<br />
01<br />
02<br />
03<br />
04<br />
05<br />
06<br />
07<br />
08<br />
044<br />
0<br />
0<br />
0<br />
0<br />
0<br />
0<br />
0<br />
11080*<br />
NCS Channel List<br />
AOR (EAST)<br />
ID FREQ<br />
144<br />
1<br />
1<br />
1<br />
1<br />
1<br />
1<br />
1<br />
12580*<br />
ID<br />
244<br />
2<br />
2<br />
2<br />
2<br />
2<br />
2<br />
2<br />
ENTER: Set ESC: Quit<br />
POR<br />
FREQ<br />
12580*<br />
ID<br />
344<br />
3<br />
3<br />
3<br />
3<br />
3<br />
3<br />
3<br />
IOR<br />
FREQ<br />
10840*<br />
NCS channel list<br />
3. Choose desired channel and then press the [Enter] key.<br />
4. Press the [Esc] key to return to the standby display.<br />
6-4
6.5 LES Information<br />
6. OTHER FUNCTIONS<br />
Each time you log in LES data is automatically downloaded through the NCS<br />
common channel to the FELCOM, and saved to the LES Information display.<br />
You may view this display as follows:<br />
1. Press the [F7] key to show the Option menu.<br />
Options<br />
1. Login<br />
2. Logout<br />
3. Abort<br />
4. Select NCS<br />
5. Ocean Region<br />
6. LES Information<br />
7. Test<br />
Options<br />
1. Login<br />
2. Logout<br />
3. Abort<br />
4. Select EGC Ch.<br />
5. LES Information<br />
6. Test<br />
FELCOM functions as<br />
Inmarsat MES<br />
FELCOM functions as<br />
EGC receiver<br />
Options menu<br />
2. Press the [6] key to show the LES Information display.<br />
B8-B1<br />
LES Information<br />
LES ID Name Status Services TDM Ch.<br />
201 Telnor S.S.Inc 11111000 AS-----EL 11982<br />
202 Stratos M.N. 11111000 AS-----EL 11826<br />
203 KDDI 11111000 AS-----EL 11806<br />
204 Telnor S.S.AS 11111000 AS-----EL 11762<br />
208 Korea Telecom 11111000 AS-----EL 11778<br />
210 Singapore T. 11111000 AS-----EL 11842<br />
211 Beijing Marine 11111000 AS-----EL 11754<br />
212 Xantic 11111000 AS-----EL 11802<br />
LES information display<br />
3. Use the [↑] or [↓] key to scroll the list.<br />
4. Press the [Esc] key twice to return to the standby display.<br />
Description of LES information table<br />
Bit No. Status Flag Meaning<br />
B8 Return link speed<br />
1 600 bps<br />
0 300 bps<br />
B7 Operational or spare satellite 1 Operational<br />
operation 0 Spare<br />
B6 LES status<br />
1 In service<br />
0 Out of service<br />
B5 LES status<br />
1 Clear<br />
0 Congested<br />
B4 Used only by land earth stations 1 Terrestrial links open<br />
0 Terrestrial links closed<br />
B3-1 Spare<br />
6-5
6. OTHER FUNCTIONS<br />
Services:<br />
Bit No. Flag Meaning Display<br />
1B8 1 Maritime distress alerting A<br />
0 Maritime distress alerting None<br />
1B7 1 SafetyNET traffic S<br />
0 No SafetyNET traffic None<br />
1B6 1 Inmarsat-C traffic C<br />
0 No Inmarsat-C traffic None<br />
1B5 1 Store and Forward T<br />
0 No Store and Forward None<br />
1B4 1 Half Duplex H<br />
0 No Half Duplex None<br />
1B3 1 Full Duplex D<br />
0 No Full Duplex None<br />
1B2 1 Closed Network N<br />
0 No Closed Network None<br />
1B1 1 FleetNET Traffic F<br />
0 No FleetNET Traffic None<br />
2B8 1 Prefixed store and forward message supported P<br />
0 Prefixed store and forward message not supported None<br />
2B7 1 Land mobile alerting<br />
Not used<br />
0 No Land mobile alerting<br />
2B6 1 Aero-C service supported<br />
0 Aero-C service not supported<br />
2B5 1 ITA2 transmission supported I<br />
0 ITA2 transmission not supported None<br />
2B4 1 Data transmission supported B<br />
0 Data transmission not supported None<br />
2B3 1 Basic X.400 supported X<br />
0 Basic X.400 not supported None<br />
2B2 1 Enhanced X.400 supported E<br />
0 Enhanced X.400 not supported None<br />
2B1 1 Low power C MES supported L<br />
0 Low power C MES not supported None<br />
TDM Ch.: TDM channel used by LES to transmit.<br />
6-6
7. MAINTENANCE,<br />
TROUBLESHOOTING<br />
This chapter provides the information necessary for the maintenance and<br />
checking of the FELCOM. Please read the safety information at the beginning of<br />
this manual before attempting any maintenance procedure.<br />
7.1 General Checking and Maintenance<br />
Turn off the power before conducting any maintenance procedures other than<br />
the cleaning of the communication unit.<br />
Cleaning the communication unit<br />
Dust and dirt can be removed from the communication unit with a soft, dry cloth.<br />
DO NOT use chemical cleaners. They may remove paint and markings or<br />
deform the equipment.<br />
Checking connectors and earth terminal on the communication unit<br />
Check that the connectors and earth terminal on the communication unit are<br />
tightly fastened. If the earth terminal has rusted, clean it.<br />
When the power can’t be turned on<br />
When the communication unit cannot be turned on do the following:<br />
• Check that the power cable connector on the rear panel of the<br />
communication unit for tightness.<br />
• Check if the ship’s mains switchboard is turned on.<br />
• Have a qualified technician check the power voltage at the power connector<br />
on the rear of the communication unit.<br />
7-1
7. MAINTENANCE, TROUBLESHOOTING<br />
7.2 Diagnostics<br />
The system is equipped with a diagnostic test which check it for proper<br />
operation.<br />
7.2.1 Self test at power on<br />
The terminal unit performs the ROM sum test and RAM read and write test when<br />
turned on. If the test results are normal the equipment goes into standby. If error<br />
is found you cannot transmit.<br />
7.2.2 Testing the communication unit through the keyboard,<br />
displaying program version no.<br />
The communication unit must be idle to execute the test.<br />
1. Press the [F7] key to display the Options menu.<br />
Options<br />
1. Login<br />
2. Logout<br />
3. Abort<br />
4. Select NCS<br />
5. Ocean Region<br />
6. LES Information<br />
7. Test<br />
FELCOM functions as<br />
Inmarsat MES<br />
Options<br />
1. Login<br />
2. Logout<br />
3. Abort<br />
4. Select EGC Ch.<br />
5. LES Information<br />
6. Test<br />
FELCOM functions as<br />
EGC receiver<br />
Options menu<br />
2. Press the [7] key ([6] key if the FELCOM functions as an EGC receiver) to<br />
display the Test menu.<br />
3. Press the [3] key to choose Diagnostic Test.<br />
Options<br />
1. Login Test<br />
2. 1. Logout PV Test<br />
Diagnostic Test<br />
3. 2. Abort PV Test Result<br />
4. 3. Select Self Test NCS<br />
5. 4. Ocean Distress Region Alarm Button Test<br />
6. Test<br />
Yes<br />
Start<br />
No<br />
Start window<br />
4. Yes is selected; press the [Enter] key to start the test. The message “Now<br />
testing” (flashing) appears during the testing.<br />
When the test is completed, the screen shows the test results as shown at<br />
the top of the next page.<br />
7-2
7. MAINTENANCE, TROUBLESHOOTING<br />
Options<br />
1. Login Test<br />
2. 1. Logout PV Test Diagnostic Test<br />
3. 2. Abort<br />
TERMINAL PV Test Result 1650164-**<br />
4. 3. Select Self Test NCS<br />
RFCON CPU 1650160-**<br />
5. 4. Ocean Distress Region Alarm Button Test ROM OK<br />
6. Test<br />
RAM OK<br />
EEPROM OK<br />
GPS OK<br />
Program No.<br />
** = Version no.<br />
Sample communication unit self test results<br />
The results are shown as OK or NG (No Good), and any NG is accompanied<br />
by the audio alarm. For any NG, contact your dealer for advice.<br />
5. Press the [Esc] key to stop the test and return to the Test menu.<br />
Note: Diagnostic test-related error messages appear at the bottom of the screen<br />
as follows:<br />
TROUBLE: RFCON CPU ROM NG<br />
TROUBLE: RFCON CPU RAM NG,<br />
TROUBLE: RFCON CPU EEPROM NG<br />
7.3 Performance Verification (PV) Test<br />
After the FELCOM is installed, the installer usually confirms that it is functioning<br />
properly, by logging in and conducting the PV test. This test consists of the<br />
receiving a test message from an LES, transmitting a message to an LES and a<br />
distress alert test.<br />
The results of the test appear on the PV test result display.<br />
The PV test cannot be conducted from an auxiliary terminal unit. Note that the<br />
test can also be initiated by an NCS.<br />
7.3.1 PV test sequence<br />
1. Choose PV Test from the Test menu.<br />
2. The MES requests an NCS to conduct the PV test.<br />
3. NCS acknowledges request for testing.<br />
4. The MES, upon receiving acknowledgment from NCS, goes into pending<br />
state.<br />
5. NCS will choose an LES to perform the test.<br />
6. The LES transmits a test message to the MES.<br />
7. The MES transmits a test message to the LES.<br />
8. The LES receives test message.<br />
9. The MES automatically transmits the distress alert test within two minutes<br />
after completion of step 8.<br />
10. When the distress alert test is finished, the LES sends the results of the test<br />
to the MES.<br />
7-3
7. MAINTENANCE, TROUBLESHOOTING<br />
7.3.2 PV test procedure<br />
1. Confirm that the communication unit is in idle condition and logged in.<br />
2. Press the [F7] key to display the Options menu.<br />
3. Press the [7] key to choose Test.<br />
4. Press the [1] key to choose PV Test.<br />
Options<br />
1. Login Test<br />
2. 1. Logout PV Test<br />
PV Test<br />
3. 2. Abort PV Test Result<br />
4. 3. Select Self Test NCS<br />
5. 4. Ocean Distress Region Alarm Button Test<br />
6. Test<br />
Yes<br />
Start<br />
No<br />
PV test screen<br />
5. Yes is selected; press the [Enter] key to transmit the PV test request to NCS.<br />
Options<br />
1. Login Test<br />
2. 1. Logout PV Test<br />
PV Test<br />
3. 2. Abort Starting PV Test PV Result Test Process.<br />
4. 3. Select Press Self Test NCS any key to escape.<br />
5. 4. Ocean Distress Region Alarm Button Test<br />
6. Test<br />
PV test screen<br />
Note: If the terminal unit is not idle when the test is initiated, the screen<br />
displays “Ignored: MES is not idle now. Cannot start PV Test.” And if<br />
you are not logged in, “Ignored: MES is not Login. Please operate<br />
Login.” appears.<br />
6. Press the [Esc] key to return to the standby display.<br />
7. The (automatic) testing sequence is as follows:<br />
a) The screen displays “Current State: Idle (pending!)” when you receive the<br />
acknowledge signal from the NCS.<br />
b) When preparations for testing have been completed, “Current State:<br />
TESTING” appears at the bottom of the screen. Further, the following<br />
message appears.<br />
Automatic test mode: Normal communication disabled.<br />
Do not press any distress button unless you are in distress.<br />
c) Receive a message from the LES. Send a test message to the LES.<br />
d) Then, the distress alert test is automatically conducted after you have sent a<br />
test message. Do not operate the equipment at this time.<br />
e) When testing has been completed, “Current State: IDLE” appears at the<br />
bottom of the screen.<br />
8. The test results appear on the PV Test Result screen. See the next section<br />
for how to interpret the results.<br />
7-4
7. MAINTENANCE, TROUBLESHOOTING<br />
7.3.3 Results of PV test<br />
1. At the standby display, press the [F7] key to display the Options menu.<br />
2. Press the [7] key to display the Test menu.<br />
Options<br />
1. Login Test<br />
2. 1. Logout PV Test<br />
3. 2. Abort PV Test Result<br />
4. 3. Select Diagnostic NCS Test<br />
5. 4. Ocean Distress Region Alarm Button Test* * = Not used.<br />
6. Test<br />
Test menu<br />
3. Press the [2] key to display the results of the PV test.<br />
Options<br />
1. Login Test<br />
2. 1. Logout PV Test<br />
PV Test Result<br />
3. 2. Abort PV Test Result<br />
Ctrl+P: Print ESC: Quit<br />
4. 3. Select Self Test NCS<br />
5. 4. Ocean Test Distress Date Region Alarm & Time Button Test02-02-25 01:58 (UTC)<br />
6. Test<br />
Attempts<br />
First attempt<br />
BBER<br />
Pass<br />
Shore-to-Ship Attempts First attempt<br />
Ship-to Shore Attempts First attempt<br />
Distress Alert<br />
Pass (Test OK)<br />
Signal strength<br />
Pass (Greater than Std level + 10dB)<br />
Overall Result<br />
Pass (Applicable tests pass)<br />
Sample PV test results<br />
4. To return to the standby display, press any key.<br />
Interpreting the PV test results display<br />
Test Date & Time: Date and time of test<br />
Attempts:<br />
Number of times the PV test was conducted.<br />
BBER:<br />
Bulletin Board Error Rate (%). “Pass” appears for no<br />
error.<br />
Shore-to-Ship Attempts: Number of tests initiated by LES.<br />
Ship-to-Shore Attempts: Number of tests initiated by MES.<br />
Distress Alert:<br />
“Pass (Test OK)” appears for successful testing.<br />
Signal Strength: “Pass” appears if signal strength is greater than<br />
standard level.<br />
Overall Result:<br />
“Pass” appears for satisfactory completion of the<br />
test.<br />
7-5
7. MAINTENANCE, TROUBLESHOOTING<br />
7.4 System Status Monitor<br />
The system status monitor, which is always displayed, provides date, time,<br />
equipment status and navigation data.<br />
File Edit Transmit EGC Reports Logs Options Setup Position StopAlarm<br />
Date<br />
Time<br />
Position<br />
Waypoint<br />
Course<br />
Speed<br />
Current NCS<br />
Current Channel<br />
Current TDM<br />
MES Status<br />
GPS Status<br />
DCE Memory<br />
02-02-25<br />
06:12 (UTC)<br />
LAT 35:00.00N<br />
LON 135:00.00E<br />
LAT<br />
LON<br />
DEG<br />
KTS<br />
344 (IOR) LOGIN<br />
LES TDM<br />
LES TDM<br />
Busy<br />
****<br />
32818 Bytes free<br />
BBER<br />
C/N<br />
Send Level<br />
Rx AGC Level<br />
REF Offset Freq<br />
Synthe Local<br />
IMN :<br />
Antenna Power Supply<br />
Water Temperature<br />
Water Current<br />
Direction<br />
Speed<br />
Depth<br />
443156710<br />
000<br />
OK ( 0dB)<br />
OK ( 0)<br />
OK (133)<br />
OK ( 0Hz)<br />
OK<br />
OK<br />
DEG<br />
DEG<br />
KTS<br />
Current State: IDLE<br />
DCE FEL 16 Ver. ##<br />
SYNC ( LES )<br />
NCS: IOR<br />
LOGIN<br />
02-02-25 06:12 (UTC)<br />
LAT: 35:00.00N<br />
LON: 135:00.00E<br />
## = Version no.<br />
System status monitor display<br />
Interpreting the system status monitor<br />
Date:<br />
Time:<br />
Position:<br />
Waypoint:<br />
Course:<br />
Speed:<br />
Current NCS:<br />
Current Channel:<br />
Current TDM:<br />
MES Status:<br />
GPS Status:<br />
Current date<br />
Current time<br />
Own ship’s L/L position (either manual entry or<br />
automatic input by navigator)<br />
L/L position of destination waypoint set on navigator<br />
Course<br />
Ship’s speed<br />
NCS your vessel is logged in with<br />
Channel in use<br />
Channel TDM<br />
Operational status of MES<br />
Receiving signal status from GPS receiver.<br />
CST: Cold Start<br />
ACK: Acquired; Almanac data acquired<br />
IMP: Impossible; cannot receive GPS signal<br />
INT: Interrupted; object interfering with reception<br />
of GPS signal<br />
ALM: Receiving the almanac<br />
2D, 3D: Position-fixing method by 2D or 3D<br />
7-6
7. MAINTENANCE, TROUBLESHOOTING<br />
DCE Memory:<br />
Memory remaining in communication unit<br />
BBER: Bulletin Board Error Rate (%)<br />
C/N:<br />
Check of circuit status with LES, receiving circuit in<br />
antenna unit and RF CON/CPU Board in<br />
communication unit. OK appears for figure greater<br />
than 31.<br />
Send Level:<br />
TX level check. At transmission, OK appears for<br />
figure greater than 123. At reception, OK appears for<br />
figure lower than 32.<br />
RX AGC Level:<br />
Check of the receiving circuit of the antenna unit and<br />
the RF CON/CPU Board in the communication unit.<br />
OK appears for figure greater than 80.<br />
REF Offset Freq: OK appears for figure lower than 150.<br />
Synthe:<br />
Check of RF CON/CPU Board.<br />
Antenna Power Supply: NG appears for discontinuity or short in antenna<br />
cable. OK is shown if the antenna is receiving<br />
electrical power.<br />
Temperature*:<br />
Water temperature<br />
Water Current*<br />
Direction:<br />
Tidal current direction<br />
Speed:<br />
Tidal current speed<br />
Depth*:<br />
Depth of water<br />
* = Requires data from appropriate sensor.<br />
7.5 Replacing the Fuse<br />
The 10A fuse in the power cable protects the equipment from overvoltage and<br />
reverse polarity. If the fuse blows, find out the case before replacing it. If it blows<br />
again after replacement, contact your dealer for advice. Be sure to use the<br />
correct fuse. Use of a wrong will damage the equipment and void the warranty.<br />
Use the proper fuse.<br />
CAUTION<br />
Use of a wrong fuse can result in damage<br />
to the equipment.<br />
Fuse<br />
Type: FGBO 10A 125 VAC<br />
Code No.: 000-549-065<br />
7-7
7. MAINTENANCE, TROUBLESHOOTING<br />
7.6 Error Messages<br />
This section describes the more commonly seen error messages and the means<br />
to restore normal operation. If normal operation cannot be restored, contact your<br />
dealer for advice.<br />
7.6.1 Equipment trouble messages<br />
Messages in this category are prefixed with “TROUBLE:”.<br />
Equipment trouble messages<br />
Error Message Meaning Action<br />
ANT power voltage<br />
abnormality.<br />
Carrier power level.<br />
DISTRESS ALERT<br />
UNIT Fault.<br />
DMC connection<br />
abnormality.<br />
Antenna power voltage.<br />
Carrier power level too high or<br />
too low.<br />
Trouble at Distress Alert<br />
Unit/Received Call Unit IC-305.<br />
Trouble at Distress Message<br />
Controller DMC-5.<br />
Have a licensed<br />
radiocommunications<br />
technician check the set.<br />
Have a licensed<br />
radiocommunications<br />
technician check the set.<br />
Check that the IC-305 is<br />
powered and connected to<br />
the FELCOM.<br />
Check that the DMC-5 is<br />
powered and connected to<br />
the FELCOM.<br />
EEPROM ERROR. EEPROM trouble. Contact a FURUNO agent<br />
or dealer for advice.<br />
ALARM UNIT<br />
Fault.<br />
Invalid MES ID, This<br />
equipment is<br />
defected. Please<br />
contact FURUNO.<br />
Synthesizer<br />
UNLOCK.<br />
Trouble at Alarm Unit IC-306.<br />
MES ID is corrupted.<br />
Synthesizer unlock.<br />
Check that the IC-306 is<br />
powered and connected to<br />
the FELCOM.<br />
Have a licensed<br />
radiocommunications<br />
technician check the set.<br />
Have a licensed<br />
radiocommunications<br />
technician check the set.<br />
7-8
7. MAINTENANCE, TROUBLESHOOTING<br />
7.6.2 Warning messages<br />
Messages in this category are prefixed with “WARNING:”<br />
Warning messages<br />
Error Message Meaning Action<br />
BBER over 80%.<br />
Scanning NCS start<br />
manually.<br />
Cannot enter new<br />
DNID. Memory full for<br />
DNIDs.<br />
Cannot enter new<br />
ENID. Memory full for<br />
ENIDs.<br />
Cannot find NCS CC in<br />
all region. Scanning is<br />
continued.<br />
Cannot find NCS CC in<br />
preferred region.<br />
Scanning all region is<br />
started.<br />
Internal GPS UNIT<br />
failure.<br />
Synchronization loss.<br />
Please change EGC<br />
channel.<br />
Synchronization loss.<br />
Please check the<br />
current NCS.<br />
BBER (Bulletin Board Error<br />
Rate) exceeded 80%.<br />
Memory for DNIDs is full.<br />
Memory for ENIDs is full.<br />
No NCS found in region.<br />
NCS could not be found in<br />
region selected. Scanning<br />
started to find NCS.<br />
GPS signal could not be<br />
detected.<br />
Your station is not<br />
synchronized with selected<br />
EGC channel.<br />
Your station is not<br />
synchronized with selected<br />
NCS.<br />
Select NCS manually.<br />
Delete unnecessary<br />
DNIDs to enter new ones.<br />
Delete unnecessary<br />
ENIDs to enter new ones.<br />
Scanning automatically<br />
continues.<br />
If NCS could not be<br />
found, contact you dealer<br />
for advice.<br />
Internal GPS receiver<br />
may be damaged if this<br />
message appears<br />
frequently. Contact your<br />
dealer for advice.<br />
Change EGC channel.<br />
Change NCS.<br />
7-9
7. MAINTENANCE, TROUBLESHOOTING<br />
(This page intentionally left blank.)<br />
7-10
APPENDIX<br />
Menu Tree<br />
F1: File<br />
1. New<br />
2. Open<br />
3. Close<br />
4. Save<br />
5. Delete<br />
6. Rename<br />
7. Print<br />
8. Format Disk<br />
9. MIME (Decode)<br />
2HD (1.44MB), 2DD (720kB)<br />
F2: Edit<br />
1. Cut<br />
2. Copy<br />
3. Paste<br />
4. Insert (With Citation)<br />
5. Select All<br />
6. Search or Replace<br />
7. Goto Line<br />
8. Time or Pos. Ins<br />
9. Change Window<br />
1. Search<br />
2. Replace<br />
1. Top of Text<br />
2. End of Text<br />
3. Goto Line<br />
1. Time<br />
2. Position<br />
Search Word<br />
Direction<br />
Search Word<br />
Replace Word<br />
Direction<br />
Query or All<br />
Chooses line to go to.<br />
Forward, Back<br />
Forward, Back<br />
Query, All<br />
AP-1
APPENDIX<br />
F3: Transmit<br />
1. Transmit Message<br />
Priority<br />
Message File<br />
Station Name<br />
Destination Type<br />
Prefix Code (Prefix selected)<br />
Country/Ocean Code<br />
Station ID<br />
Modem Type<br />
(FAX, FAX prefixed selected)<br />
Address (For e-mail)<br />
Subject (For e-mail)<br />
Attach File (For e-mail)<br />
LED ID<br />
Normal, Distress<br />
TELEX<br />
FAX<br />
E-Mail<br />
CSDN<br />
PSDN<br />
X400<br />
DNID<br />
SPEC<br />
TELEX (Prefixed)<br />
FAX (Prefixed)<br />
PSDN (Prefixed)<br />
X400 (Prefixed)<br />
DNID (Prefixed)<br />
SPEC (Prefixed)<br />
T30 FAX<br />
V21 V.21 300bps Duplex<br />
V22 V.22 1200bps Duplex<br />
V22B V.22bis 2400bps Duplex<br />
V23 V.23 600/1200bps<br />
V26B V.26bis 2400/1200bps<br />
V26T V.26ter 2400bps Duplex<br />
V27T V.27ter 4800bps/2400bps<br />
V32 V.32 9600bps Duplex<br />
Other<br />
Option<br />
Confirmation ON, OFF<br />
Send Delay 00:00 - 99:59; 00:00<br />
Delivery Delay Immediate, Deferred<br />
Code<br />
IA5, ITA2, DATA<br />
TRANSMIT<br />
2. Cancel<br />
3. Request Delivery Status<br />
Select Message<br />
Select Message<br />
F4: EGC<br />
1. Display EGC Message<br />
2. EGC Network ID<br />
AP-2
APPENDIX<br />
F5: Reports<br />
1. Data Report<br />
2. Message<br />
Report<br />
1. Data Report 1<br />
2. Data Report 2<br />
3. Data Report 3<br />
4. Data Report 4<br />
1. Message Report 1<br />
Status<br />
Report Length<br />
Destination<br />
Activation<br />
Interval Time<br />
(Regular Interval chosen)<br />
Report Times<br />
Start Time 1 (Daily chosen)<br />
Start Time 2 (Daily chosen)<br />
Start Time 3 (Daily chosen)<br />
Start Time 4 (Daily chosen)<br />
Same as Data Report 1<br />
Same as Data Report 1<br />
same as Data Report 1<br />
PIN Code<br />
Status<br />
Station Name<br />
Destination Type<br />
Prefix Code (Prefix chosen)<br />
Country/Ocean Code<br />
Station ID<br />
Modem Type<br />
FAX, FAX Prefixed chosen)<br />
Address (E-Mail chosen)<br />
Subject (E-Mail chosen)<br />
ON, OFF<br />
1, 2, 3<br />
DNID selection<br />
Regular Interval, Daily<br />
00:01-99:59; 00:10<br />
1 - 999; 1, - - - (No Limit)<br />
00:00 - 23:59<br />
00:00 - 23:59<br />
00:00 - 23:59<br />
00:00 - 23:59<br />
Max. 8 digits<br />
ON, OFF<br />
Subscriber selection<br />
TELEX<br />
FAX<br />
E-Mail<br />
CSDN<br />
PSDN<br />
X400<br />
DNID<br />
SPEC<br />
TELEX (Prefixed)<br />
FAX (Prefixed)<br />
PSDN (Prefixed)<br />
X400 (Prefixed)<br />
DNID (Prefixed)<br />
SPEC (Pefixed)<br />
T30 FAX<br />
V21 V.21 300bps Duplex<br />
V22 V.22 1200bps Duplex<br />
V22B V.22bis 2400bps Duplex<br />
V23 V.23 600/1200bps<br />
V26B V.26bis 2400/1200bps<br />
V26T V.26ter 2400bps Duplex<br />
V27T V.27ter 4800/2400bps<br />
V32 V.32 9600bps Duplex<br />
Other<br />
AP-3
APPENDIX<br />
3. Data Network ID<br />
2. Message Report 2<br />
3. Message Report 3<br />
4. Message Report 4<br />
LES ID<br />
Activation<br />
Interval Time<br />
(Regular Interval chosen)<br />
Report Times<br />
Start Time 1 (Daily chosen)<br />
Start Time 2 (Daily chosen)<br />
Start Time 3 (Daily chosen)<br />
Start Time 4 (Daily chosen)<br />
Report Contents<br />
FILE (FILE chosen)<br />
Same as Message Report 1<br />
Same as Message Report 1<br />
Same as Message Report 1<br />
LES selection<br />
Regular Interval, Daily<br />
00:01 - 99:59; 00:10<br />
1 - 999; 1, - - - (No Limit)<br />
00:00 - 23:59<br />
00:00 - 23:59<br />
00:00 - 23:59<br />
00:00 - 23:59<br />
NAV, NAV+SEA INF,<br />
NAV (R), FILE<br />
File selection<br />
F6: Logs<br />
1. Send Message Log<br />
2. Receive Message Log<br />
3. EGC Log<br />
4. Log<br />
F7: Options (FELCOM functions as Inmarsat MES)<br />
1. Login<br />
2. Logout<br />
3. Abort<br />
4. Select NCS<br />
5. Ocean Region<br />
6. LES Information<br />
7. Test<br />
Yes, No<br />
Yes, No<br />
Yes, No<br />
Auto, West-Atlantic, East-Atlantic, Pacific, Indian<br />
1. PV Test<br />
2. PV Test Result<br />
3. Diagnostic Test<br />
4. Distress Alert Button Test<br />
F7: Options (FELCOM functions as EGC receiver)<br />
1. Login<br />
2. Logout<br />
3. Abort<br />
4. Select EGC Ch.<br />
5. LES Information<br />
6. Test<br />
Yes, No<br />
Yes, No<br />
Yes, No<br />
1. PV Test<br />
2. PV Test Result<br />
3. Diagnostic Test<br />
4. Distress Alert Button Test<br />
Yes, No<br />
Yes, No<br />
Not used.<br />
Yes, No<br />
Yes, No<br />
Not used.<br />
AP-4
APPENDIX<br />
F8: Setup<br />
1. Distress Alert Setup<br />
2. System Setup<br />
LES ID<br />
Update Time<br />
Position<br />
Protocol<br />
Nature<br />
Course<br />
Speed<br />
System Date & Time<br />
IMN<br />
MES Operation Mode<br />
Nav Port<br />
Active Port<br />
Message Output Port<br />
EGC Output Port<br />
Network Setup<br />
Command Window<br />
(For service technicians.)<br />
LES selection<br />
00:00 - 23:59<br />
Latitude and longitude input<br />
Maritime<br />
Undesignated, Fire/Explosion, Flooding,<br />
Collision, Grounding, Listing, Sinking,<br />
Disabled & Adrift, Abandoning ship<br />
Further assistance required,<br />
Piracy or Armed attack<br />
0 - 999; 0<br />
0 - 99; 0<br />
Date input<br />
<strong>INMARSAT</strong>-C, EGC<br />
Not used.<br />
Not used.<br />
Not used.<br />
Not used.<br />
Not used.<br />
AP-5
APPENDIX<br />
3. Editor Setup<br />
4. Terminal Setup<br />
5. EGC Setup<br />
Text Mode<br />
Edit Mode<br />
Word Wrap<br />
Line No.<br />
Tab Width<br />
Column Width<br />
Cursor Type<br />
Scroll<br />
Date Disp. Form<br />
Currency Unit<br />
Screen Saver<br />
Window Color<br />
Additional Position<br />
Navarea<br />
Fixed Area<br />
Waypoint<br />
Telex, Ascii<br />
Insert, Overwrite<br />
ON, OFF<br />
ON, OFF<br />
2 Char, 4 Char, 8 Char<br />
Telex (Fixed at 69), ASCII (40 - 80)<br />
Block, Underline<br />
Full Screen, Half Screen<br />
YY-MM-DD, MMM-DD-YY, DD-MMM-YY<br />
SDR, US$, EUR, YEN, OTHER (Currency unit input, 4 digits max.)<br />
ON, OFF<br />
Window Color Setup<br />
Default Color<br />
1 position<br />
9 areas max.<br />
ON, OFF<br />
(Destination waypoint set<br />
on navigator)<br />
Station Code A - Z<br />
Type of Message<br />
Ice reports<br />
Meteo. forecasts<br />
Pilot service<br />
DECCA messages<br />
LORAN messages<br />
OMEGA messages<br />
SATNAV messages<br />
Other navaid msg<br />
QRU (no message)<br />
ON, OFF<br />
ON, OFF<br />
ON, OFF<br />
ON, OFF<br />
ON, OFF<br />
ON, OFF<br />
ON, OFF<br />
ON, OFF<br />
ON, OFF<br />
Window<br />
Fore Color<br />
Back Color<br />
Yes, No<br />
RCV Message Display,<br />
EGC Message Display,<br />
EDIT 1, EDIT 2,<br />
Function, SUB Menu 1,<br />
SUB Menu 2,<br />
SUB Menu 3,<br />
SUB Menu 4,<br />
Message,<br />
Base Window<br />
L-WHITE, YELLOW,<br />
L-MAGENTA, L-RED,<br />
L-CYAN, L-GREEN,<br />
L-BLUE, GRAY,<br />
WHITE, BROWN,<br />
MAGENTA, RED,<br />
CYAN, GREEN,<br />
BLUE, BLACK<br />
AP-6
APPENDIX<br />
6. Auto Mode<br />
Setup<br />
7. E-mail Setup<br />
8. Directories<br />
9. Configuration<br />
Auto Log Print<br />
Receive Alarm<br />
Auto Receive Message Save<br />
Auto Receive Message Print<br />
Data Report & Polling Print<br />
Auto EGC Message Save<br />
Auto EGC Message Print<br />
LES setting<br />
Message Directory<br />
EGC Message Directory<br />
1. Station List<br />
(Max. 99 stations)<br />
ON, OFF<br />
ON, OFF<br />
ON, OFF<br />
ON, OFF<br />
ON, OFF<br />
System<br />
FleetNET<br />
SafetyNET<br />
(Routine)<br />
SafetyNET<br />
(Safety)<br />
SafetyNET<br />
(Urgent&Distress)<br />
System<br />
FleetNET<br />
SafetyNET<br />
(Routine)<br />
SafetyNET<br />
(Safety)<br />
Station Group<br />
Station Name<br />
Destination Type<br />
Prefix Code<br />
(Prefix chosen)<br />
Country Code<br />
Station ID<br />
Modem Type<br />
(FAX, FAX<br />
prefixed chosen)<br />
E-Mail Address<br />
(E-Mail chosen)<br />
Remarks<br />
ON, OFF<br />
ON, OFF<br />
ON, OFF<br />
ON, OFF<br />
ON, OFF<br />
ON, OFF<br />
ON, OFF<br />
ON, OFF<br />
ON, OFF<br />
Max. 5 characters<br />
Max. 5 characters<br />
TELEX<br />
FAX<br />
E-Mail<br />
CSDN<br />
PSDN<br />
X400<br />
DNID<br />
SPEC<br />
TELEX (Prefixed)<br />
FAX (Prefixed)<br />
PSDN (Prefixed)<br />
X400 (Prefixed)<br />
DNID (Prefixed)<br />
SPEC (Prefixed)<br />
T30 FAX<br />
V21 V.21 300bps Duplex<br />
V22 V.22 1200bps Duplex<br />
V22B V.22bis 2400bps Duplex<br />
V23 V.23 600/1200bps<br />
V26B V.26bis 2400/1200bps<br />
V26T V.26ter 2400bps Duplex<br />
V27T V.27ter 4800/2400bps<br />
V32 V.32 9600bps Duplex<br />
Other<br />
Max. 20 characters<br />
AP-7
APPENDIX<br />
2. LES List<br />
(44 per ocean<br />
region)<br />
Name<br />
Remarks<br />
Charge (TELEX - SPEC)<br />
3. EGC Channel List (20 per ocean region)<br />
4. NCS Channel List (20 per ocean region)<br />
5. E-Mail Service List<br />
(Max. 16)<br />
6. Save/Load<br />
Service Station Name<br />
Service ID<br />
LES ID (AORW)<br />
LES ID (AORE)<br />
LES ID (POR)<br />
LES ID (IOR)<br />
To:<br />
Cc:<br />
Subject:<br />
Separator<br />
Attach File (MIME)<br />
Save to FD<br />
Load from FD<br />
Max. 15 characters<br />
Max. 20 characters<br />
Enter charges per 256 bit<br />
Max. 19 characters<br />
Max. 9 characters<br />
3 digits<br />
3 digits<br />
3 digits<br />
3 digits<br />
Max. 9 characters<br />
Max. 9 characters<br />
Max. 9 characters<br />
Max. 9 characters<br />
OFF, ON (BASE64)<br />
ON (UUENCODE)<br />
F9: Position<br />
LAT<br />
LON<br />
F10: Stop Alarm<br />
AP-8
APPENDIX<br />
International Telex/Telephone Country Code List<br />
Area and Country<br />
Telephone<br />
Country Code<br />
Telex Country<br />
Code<br />
Remarks for Telex Code<br />
Afghanistan<br />
93<br />
79<br />
Alaska<br />
1<br />
200<br />
Albania<br />
355<br />
604<br />
Algeria<br />
21<br />
408<br />
American Samoa<br />
684<br />
770<br />
American Virgin Is.<br />
1<br />
208<br />
Telex calls to former WUI subscribers, insert the figure<br />
"9" after the destination code "208".<br />
Andorra<br />
33<br />
590<br />
Angola<br />
244<br />
991<br />
Anguilla<br />
1<br />
391<br />
Antigua & Barbuda<br />
2<br />
393<br />
Argentina<br />
54<br />
33<br />
Disregard the figure "0" at head of subscriber number.<br />
Armenia<br />
7<br />
684<br />
Aruba<br />
297<br />
303<br />
Subscriber numbers are 2XXX or 5XXX<br />
Ascension<br />
247<br />
939<br />
Manual calls 3XXX<br />
Australia<br />
61<br />
71<br />
Australian External<br />
Territories<br />
672<br />
766<br />
Austria<br />
43<br />
47<br />
Azerbaijani<br />
994<br />
784<br />
Azores Is.<br />
351<br />
404<br />
Destination code is the same as for Portugal.<br />
Bahamas<br />
1<br />
297<br />
Bahrain<br />
973<br />
490<br />
Bangladesh<br />
880<br />
780<br />
Barbados<br />
1<br />
392<br />
Belarus<br />
7<br />
681<br />
Belgium<br />
32<br />
46<br />
Belize<br />
501<br />
371<br />
Benin<br />
229<br />
972<br />
Bermuda<br />
1<br />
290<br />
Bhutan<br />
975<br />
890<br />
Bolivia (Rep. of)<br />
591<br />
371<br />
Bolivia (ENTAL)<br />
309<br />
Bosnia-Hercegovina<br />
387<br />
600<br />
Botswana<br />
267<br />
962<br />
Brazil<br />
55<br />
38<br />
Disregard the figure "0" at head of subscriber number.<br />
British Virgin Is.<br />
1<br />
292<br />
Brunei Darussalam<br />
673<br />
809<br />
Bulgaria<br />
359<br />
67<br />
Burkina Faso<br />
226<br />
978<br />
Burundi<br />
257<br />
903<br />
AP-9
APPENDIX<br />
Area and Country<br />
Telephone<br />
Country Code<br />
Telex Country<br />
Code<br />
Remarks for Telex Code<br />
Cambodia<br />
855<br />
807<br />
Kampuchea Rep.<br />
Cameroon<br />
237<br />
970<br />
Canada<br />
1<br />
21<br />
Disregard the figure "0" at head of subscriber number.<br />
26<br />
Canary Is.<br />
34<br />
52<br />
Destination code is the same as for Spain.<br />
Cape Verde<br />
238<br />
993<br />
Cayman Is.<br />
1<br />
293<br />
Central Africa Rep.<br />
236<br />
971<br />
Chad<br />
235<br />
976<br />
TCH subscribers 2XXXXX<br />
ENTEL subscribers 5XXXXX<br />
Chile<br />
56<br />
34<br />
TRA subscribers 3XXXXX<br />
TECOM subscribers 6XXXXX<br />
VTR CM subscribers 4XXXXX<br />
China<br />
86<br />
85<br />
Christmas Is. (Aus)<br />
672<br />
766<br />
CIS (formerly USSR)<br />
7<br />
64<br />
Cocos-Keeling Is.<br />
672<br />
766<br />
Colombia<br />
57<br />
35<br />
Disregard the figure "0" at head of subscriber number.<br />
Comoros<br />
269<br />
994<br />
Manual calls<br />
Congo<br />
242<br />
981<br />
Cook Is.<br />
682<br />
772<br />
Costa Rica<br />
506<br />
376<br />
Cote d' lvoire<br />
225<br />
983<br />
Ivory Coast<br />
Croatia<br />
385<br />
599<br />
Cuba<br />
53<br />
28<br />
Cyprus<br />
357<br />
605<br />
Czechoslovakia<br />
42<br />
66<br />
Denmark<br />
45<br />
55<br />
Diego Garcia<br />
246<br />
938<br />
Djibouti<br />
253<br />
979<br />
Dominica<br />
1<br />
394<br />
201<br />
RCA subscribers 4XXXXX<br />
Dominican Rep.<br />
1<br />
202<br />
For subscriber number beginning with 346, disregard<br />
"346" at head of subscriber number.<br />
241<br />
AGEM IR subscribers 61XX<br />
Ecuador<br />
593<br />
308<br />
Egypt<br />
20<br />
91<br />
El Salvador<br />
503<br />
373<br />
Estonia<br />
(formerly USSR)<br />
372<br />
537<br />
Ethiopia<br />
251<br />
980<br />
AP-10
APPENDIX<br />
Area and Country<br />
Telephone<br />
Country Code<br />
Telex Country<br />
Code<br />
Remarks for Telex Code<br />
Falkland Is. (Malvinas)<br />
500<br />
306<br />
Faroe Is.<br />
298<br />
502<br />
Fiji<br />
679<br />
701<br />
Finland<br />
358<br />
57<br />
France<br />
33<br />
42<br />
French Guiana<br />
594<br />
300<br />
French Polynesia<br />
689<br />
702<br />
Gabon<br />
241<br />
973<br />
Gambia<br />
220<br />
996<br />
Georgia<br />
7<br />
683<br />
Germany (Fed, Rep. of)<br />
49<br />
69<br />
formerly East Germany<br />
49<br />
41<br />
formerly West Germany<br />
Ghana<br />
233<br />
94<br />
Gibraltar<br />
350<br />
405<br />
Greece<br />
30<br />
601<br />
Greenland<br />
299<br />
503<br />
Grenada<br />
1<br />
395<br />
Guadeloupe<br />
590<br />
299<br />
Guam (RCA)<br />
671<br />
700<br />
Guatemala<br />
502<br />
372<br />
Guiana<br />
594<br />
300<br />
Guinea Conakry<br />
224<br />
995<br />
Manual calls<br />
Guinea Bissau<br />
245<br />
969<br />
Guyana<br />
592<br />
295<br />
Haiti<br />
509<br />
203<br />
RCA subscribers 9XXX<br />
704<br />
RCA subscribers 8XXX or 2968XX<br />
705<br />
ITT subscribers 743XXX<br />
Hawaii<br />
1<br />
708<br />
WUI subscribers 63XXX or 63XXXX<br />
709<br />
WUH subscribers 39XXXX<br />
(773)<br />
Telex calls to HTC subscribers can be made using<br />
Semi-automatic calls.<br />
Honduras<br />
504<br />
374<br />
Hong Kong<br />
852<br />
802<br />
Hungary<br />
36<br />
61<br />
Iceland<br />
354<br />
501<br />
India<br />
91<br />
81<br />
Indonesia<br />
62<br />
73<br />
Disregard the figure "0" at head of subscriber number.<br />
Iran<br />
98<br />
88<br />
Iraq<br />
964<br />
491<br />
Ireland<br />
353<br />
500<br />
Israel<br />
972<br />
606<br />
Disregard the figure "0" at head of subscriber number.<br />
Italy<br />
39<br />
43<br />
AP-11
APPENDIX<br />
Area and Country<br />
Telephone<br />
Country Code<br />
Telex Country<br />
Code<br />
Remarks for Telex Code<br />
Jamaica<br />
1<br />
291<br />
Japan<br />
72<br />
KDD (for 5 digits)<br />
81<br />
720<br />
NTT<br />
Jordan<br />
962<br />
493<br />
Kazakhstan<br />
7<br />
785<br />
Kenya<br />
254<br />
987<br />
Kiribati<br />
686<br />
761<br />
Subscriber numbers are 770XX<br />
Korea (Demo, People's<br />
Rep. of)<br />
850<br />
(899)<br />
Korea (Rep. of)<br />
82<br />
801<br />
Kuwait<br />
965<br />
496<br />
Kyrgyzstan<br />
7<br />
788<br />
Lao<br />
856<br />
804<br />
Latvia (formerly USSR)<br />
371<br />
538<br />
Lebanon<br />
961<br />
494<br />
Lesotho<br />
266<br />
963<br />
Liberia<br />
231<br />
997<br />
Libya<br />
21<br />
901<br />
Liechtenstein<br />
41<br />
45<br />
Lithunia<br />
(formerly USSR)<br />
370<br />
539<br />
Luxembourg<br />
352<br />
402<br />
Macao<br />
853<br />
808<br />
Macedonia<br />
389<br />
597<br />
Madagascar<br />
261<br />
986<br />
Subscriber number beginning with 4, 5, 7, 8 and 9 can<br />
be reached by Manual Calls.<br />
Madeira Is.<br />
351<br />
404<br />
Destination code is the same as for Portugal.<br />
Malawi<br />
265<br />
904<br />
Malaysia<br />
60<br />
84<br />
Maldives Is.<br />
960<br />
896<br />
Mali<br />
223<br />
985<br />
Malta<br />
356<br />
406<br />
Subscriber number beginning with 11XX can be<br />
reached by Semi-automatic calls.<br />
403<br />
Mariana Is.<br />
671<br />
760<br />
Marshall Is.<br />
692<br />
765<br />
Maritinique<br />
596<br />
298<br />
Mauritania<br />
222<br />
974<br />
Mauritius<br />
230<br />
966<br />
Mexico<br />
52<br />
22<br />
Disregard the figure "0" at head of subscriber number.<br />
Micronesia<br />
691<br />
764<br />
Moldova<br />
373<br />
682<br />
Monaco<br />
33<br />
42<br />
Destination code is the same as for France.<br />
Mongolia<br />
976<br />
800<br />
AP-12
APPENDIX<br />
Area and Country<br />
Telephone<br />
Country Code<br />
Telex Country<br />
Code<br />
Remarks for Telex Code<br />
Montserrat<br />
1<br />
396<br />
Morocco<br />
21<br />
407<br />
Mozambique<br />
258<br />
992<br />
Myanmar<br />
(formerly Burma)<br />
95<br />
83<br />
Namibia<br />
264<br />
908<br />
Nauru<br />
674<br />
775<br />
Nepal<br />
977<br />
891<br />
Netherlands<br />
31<br />
44<br />
Netherlands Antilles<br />
599<br />
390<br />
New Caledonia<br />
687<br />
706<br />
New Zealand<br />
64<br />
74<br />
Nicaragua<br />
505<br />
375<br />
Niger<br />
227<br />
975<br />
2XXXX other numbers are for Semi-automatic calls.<br />
Nigeria<br />
234<br />
905<br />
Niue Is.<br />
683<br />
776<br />
Northern Mariana Is.<br />
670<br />
Norfolk Is.<br />
672<br />
766<br />
Norway<br />
47<br />
56<br />
Oman<br />
968<br />
498<br />
Pakistan<br />
92<br />
82<br />
Palau<br />
680<br />
763<br />
377<br />
TRT subscribers<br />
Panama<br />
507<br />
378<br />
AACR subscribers<br />
379<br />
INTEL subscribers<br />
Papua New Guinea<br />
675<br />
703<br />
Paraguay<br />
595<br />
305<br />
Peru<br />
51<br />
36<br />
PHILCOM subscribers 2XXXX<br />
RCPI subscribers 7XXXX<br />
Philippines<br />
63<br />
75<br />
GMCR subscribers 4XXXX<br />
ETPI subscribers 6XXXX<br />
CAPWIRE subscribers 1XXXX<br />
For PTT subscribers, insert the figure "8" after the<br />
destination code "75".<br />
Poland<br />
48<br />
63<br />
Disregard the figure "0" at head of subscriber number.<br />
Portugal<br />
351<br />
404<br />
205<br />
RCA subscribers 2XXX<br />
Puerto Rico<br />
1<br />
206<br />
ITT subscribers 345XXX<br />
207<br />
C&W, WUI subscribers<br />
209<br />
ACPR (PRCA) subscribers<br />
Qatar<br />
974<br />
497<br />
AP-13
APPENDIX<br />
Area and Country<br />
Telephone<br />
Country Code<br />
Telex Country<br />
Code<br />
Remarks for Telex Code<br />
Reunion<br />
262<br />
961<br />
Subscriber numbers are 916XXX<br />
Romania<br />
40<br />
65<br />
Disregard the figure "0" at head of subscriber number.<br />
Russian Federation<br />
7<br />
64<br />
Rwanda<br />
250<br />
909<br />
Saipan<br />
670<br />
760<br />
San Marino<br />
378<br />
505<br />
Sao Tome & Principe<br />
239<br />
967<br />
Manual calls<br />
Saudi Arabia<br />
966<br />
495<br />
Senegal<br />
221<br />
906<br />
Seychelles<br />
248<br />
965<br />
Sierra Leone<br />
232<br />
998<br />
Singapore<br />
65<br />
87<br />
Slovak<br />
42<br />
66<br />
Slovenia<br />
386<br />
598<br />
Solomon Is.<br />
677<br />
778<br />
Somalia<br />
252<br />
900<br />
Cape Town subscribers XXXXXX<br />
South Africa<br />
27<br />
95<br />
Bophuthatswana subscribers 08XXXX<br />
Transkei subscribers 09XXX<br />
Spain<br />
34<br />
52<br />
Spanish North Africa<br />
34<br />
52<br />
Sri Lanka<br />
94<br />
803<br />
St. Helena<br />
290<br />
(960)<br />
Manual calls 4XXX<br />
St. Kitts & Nevis<br />
1<br />
397<br />
St. Lucia<br />
1<br />
398<br />
St. Pierre & Miquelon<br />
508<br />
204<br />
St. Vincent &<br />
the Grenadines<br />
1<br />
399<br />
Sudan<br />
249<br />
984<br />
Suriname<br />
597<br />
304<br />
Swaziland<br />
268<br />
964<br />
Sweden<br />
46<br />
54<br />
Switzerland<br />
41<br />
45<br />
Syria<br />
963<br />
492<br />
Tajikistan<br />
7<br />
787<br />
Taiwan<br />
886<br />
769<br />
Tanzania<br />
255<br />
989<br />
Thailand<br />
66<br />
86<br />
Togo<br />
228<br />
977<br />
Tokelau<br />
690<br />
762<br />
Tonga<br />
676<br />
777<br />
Trinidad & Tobago<br />
296<br />
294<br />
Tunisia<br />
21<br />
409<br />
Turkey<br />
90<br />
607<br />
Turkmenistan<br />
7<br />
789<br />
AP-14
APPENDIX<br />
Area and Country<br />
Telephone<br />
Country Code<br />
Telex Country<br />
Code<br />
Remarks for Telex Code<br />
Turks & Caicos Is.<br />
1<br />
296<br />
Tuvalu<br />
688<br />
774<br />
U. A. E.<br />
971<br />
893<br />
Abu Dhabi<br />
2XXXX, 3XXXX, 5XXXX<br />
Ajman<br />
695XX<br />
Dubai<br />
4XXXX<br />
Fujairah<br />
8XXXX<br />
Ras Al Khaimah<br />
9XXXX<br />
Sharjah<br />
68XXX<br />
Umm Al Qaiwain<br />
697XX<br />
Uganda<br />
256<br />
988<br />
Ukraine<br />
7<br />
680<br />
United Kingdom<br />
44<br />
51<br />
United Arab Emirates<br />
971<br />
893<br />
Upper Volta<br />
226<br />
978<br />
Same as "Burkina Faso".<br />
Uruguay<br />
598<br />
32<br />
Uzbekistan<br />
7<br />
786<br />
CCI subscribers 7XXXXXX<br />
U. S. A.<br />
1<br />
23<br />
ITT subscribers 4XXXXX, 4XXXXXX, 4XXXXXXXXX<br />
RCA subscribers 2XXXXX<br />
WUI subscribers 6XXXX, 6XXXXX, 6XXXXXX<br />
23<br />
TRT subscribers 1XXXXX, 1XXXXXXXXX<br />
FTCC subscribers 8XXXX, 8XXXXX<br />
U. S. A. (Mainland)<br />
GRPHNET subscribers 36XXXXX, 37XXXXX<br />
For WUT subscribers, insert the figure "0" after the<br />
destination code "23".<br />
25<br />
Telex calls to TWX subscribers whose numbers do not<br />
contain "0" as the third figure of the 10 figure code can<br />
be made as Semi-automatic calls.<br />
U. S. S. R. (Former)<br />
7<br />
640<br />
Russian Federation<br />
Vanuatu<br />
678<br />
771<br />
Vatican<br />
379<br />
504<br />
Venezuela<br />
58<br />
31<br />
Viet Nam<br />
84<br />
805<br />
Subscriber number beginning with 561XXX can be<br />
made using manual calls<br />
Wallis & Futuna Is.<br />
681<br />
707<br />
Western Samoa<br />
685<br />
779<br />
Yemen (Rep. of)<br />
969<br />
806<br />
Formerly Yemen (P. D. Rep. of)<br />
Yugoslavia (Former)<br />
967<br />
895<br />
Formerly Yemen (Arab Rep.)<br />
AP-15
APPENDIX<br />
Area and Country<br />
Telephone<br />
Country Code<br />
Telex Country<br />
Code<br />
Remarks for Telex Code<br />
Zaire<br />
243<br />
982<br />
Telex calls to places other than Kinshasa Subscriber<br />
beginning with 2XXXX can be made as Semi-automatic<br />
calls.<br />
Zambia<br />
260<br />
902<br />
Zanzibar<br />
259<br />
990<br />
Zimbabwe<br />
263<br />
907<br />
Ocean Area<br />
Telephone<br />
Ocean Region<br />
Access Code<br />
Telex Ocean<br />
Region Access<br />
Remarks<br />
AOR-W<br />
874<br />
584<br />
Atlantic Ocean-W<br />
AOR-E<br />
871<br />
581<br />
Atlantic Ocean-E<br />
POR<br />
872<br />
582<br />
Pacific Ocean<br />
IOR<br />
873<br />
583<br />
Indian Ocean<br />
AP-16
APPENDIX<br />
LES List<br />
Land earth station operator Country AOR- E AOR- W IOR POR<br />
Beijing Marine China 311 211<br />
Bezeq Israel 127 327<br />
CAT Thailand 319<br />
CP Radio Marconi Portugal 118<br />
Embratel Brazil 114<br />
France Telecom France 121 021 321 221<br />
France Telecom (Ex DeteSat) France 115 333<br />
KDDI Japan 103 003 303 203<br />
Korea Telecom South Korea 308 208<br />
Morviasputnik (Nudel Les) Russia 117 317<br />
OTE Greece 120 305<br />
Polish Telecom Poland 116 316<br />
Saudi Telecom Co Saudi Arabia 125 325<br />
Singapore Telecom Singapore 328 210<br />
Stratos Mobile Networks Canada 102 002 302 202<br />
Telecom Company of Iran Iran 314<br />
Telecom Italia Italy 105 335<br />
Telenor Satellite Services Inc USA 101 001 201<br />
Telenor Satellite Services AS Norway 104 004 304 204<br />
Turk Telecom Turkey 110 310<br />
Vishipel Vietnam 330<br />
VSNL India 306<br />
Xantic Netherlands 112 012 312 212<br />
Xantic Australia 122 022 322 222<br />
AP-17
APPENDIX<br />
AP-18<br />
International Telex Abbreviations<br />
bbreviation<br />
A<br />
g<br />
Meanin<br />
DV<br />
A<br />
e<br />
Advis<br />
CK<br />
A<br />
e<br />
Acknowledg<br />
GN<br />
A<br />
n<br />
Agai<br />
(GS)<br />
I<br />
B<br />
e<br />
by<br />
Good<br />
K<br />
B .<br />
off<br />
cut<br />
I<br />
FN<br />
C<br />
m<br />
Confir<br />
OL<br />
C<br />
n<br />
Collatio<br />
RV<br />
C ?<br />
receive<br />
you<br />
How do<br />
ER<br />
D<br />
r<br />
orde<br />
of<br />
Out<br />
WN<br />
D<br />
n<br />
Dow<br />
EE<br />
E<br />
r<br />
Erro<br />
M<br />
F<br />
m<br />
Fro<br />
A<br />
G .<br />
ahead<br />
Go<br />
NS<br />
M<br />
s<br />
Minute<br />
OM<br />
M )<br />
(Waiting<br />
Wait<br />
UTI<br />
M<br />
d<br />
Mutilate<br />
A<br />
N .<br />
admitted<br />
not<br />
is<br />
subscriber<br />
this<br />
to<br />
Correspondence<br />
C<br />
N<br />
s<br />
circuit<br />
No<br />
CH<br />
N .<br />
changed<br />
been<br />
has<br />
number<br />
Snbscriber’s<br />
P<br />
N .<br />
subscriber<br />
a<br />
is<br />
longer<br />
no<br />
or<br />
not<br />
is<br />
party<br />
called<br />
The<br />
R<br />
N .<br />
number<br />
call<br />
your<br />
Indicate<br />
CC<br />
O .<br />
engaged<br />
is<br />
Subscriber<br />
K<br />
O .<br />
Agreed<br />
0)<br />
(or<br />
P .<br />
transmission<br />
your<br />
Stop<br />
LS (PSE)<br />
P<br />
e<br />
Pleas<br />
PR<br />
P<br />
r<br />
Pape<br />
(RCD)<br />
P<br />
d<br />
Receive<br />
AP<br />
R .<br />
again<br />
you<br />
call<br />
will<br />
I<br />
D<br />
R<br />
d<br />
Ree<br />
E<br />
R<br />
o<br />
t<br />
Referring<br />
PT<br />
R<br />
t<br />
Repea<br />
RY<br />
S<br />
y<br />
Sorr<br />
VP<br />
S<br />
e<br />
Pleas<br />
AX<br />
T ?<br />
charge<br />
the<br />
is<br />
What<br />
EST MSG<br />
T ?<br />
message<br />
test<br />
a<br />
send<br />
Please<br />
HRU<br />
T<br />
n<br />
positio<br />
telex<br />
with<br />
communication<br />
in<br />
are<br />
You<br />
KS (TNX)<br />
T<br />
s<br />
Thank<br />
LX<br />
T<br />
x<br />
Tele
APPENDIX<br />
AP-19<br />
International Telegraphy Alphabet<br />
No.<br />
1<br />
2<br />
3<br />
4<br />
5<br />
6<br />
7<br />
8<br />
9<br />
10<br />
11<br />
12<br />
13<br />
14<br />
15<br />
16<br />
FIGURES<br />
?<br />
:<br />
3<br />
8<br />
BELL<br />
(<br />
)<br />
.<br />
,<br />
9<br />
0<br />
LETTERS<br />
A<br />
B<br />
C<br />
D<br />
E<br />
F<br />
G<br />
H<br />
I<br />
J<br />
K<br />
L<br />
M<br />
N<br />
O<br />
P<br />
No.<br />
17<br />
18<br />
19<br />
20<br />
21<br />
22<br />
23<br />
24<br />
25<br />
26<br />
27<br />
28<br />
29<br />
30<br />
31<br />
32<br />
FIGURES<br />
1<br />
4<br />
'<br />
5<br />
7<br />
=<br />
2<br />
/<br />
6<br />
+<br />
LETTERS<br />
Q<br />
R<br />
S<br />
T<br />
U<br />
V<br />
W<br />
X<br />
Y<br />
Z<br />
CARRIAGE RETURN<br />
LINE FEED<br />
LETTERS<br />
FIGURES<br />
SPACE<br />
BLANK
APPENDIX<br />
Messages<br />
Below are the various operational messages and their meanings. Messages are arranged<br />
according to function key.<br />
[F1] File<br />
1. "Overwrite?"<br />
You are asked if you are sure to overwrite file name entered.<br />
2. "OK to save?"<br />
You are asked if you are sure to save a file.<br />
3. "OK to delete file?"<br />
You are asked if it is OK to delete selected file.<br />
4. "Can't delete."<br />
File cannot be deleted.<br />
5. "Enter new filename"<br />
Enter a new file name (to save file under new name.)<br />
6. "Can't rename."<br />
Cannot rename file.<br />
7. "Insert new disk for drive "<br />
You are asked to insert a floppy disk in the disk drive.<br />
8. "And select media type"<br />
Select media type of floppy disk.<br />
9. "Format start."<br />
Formatting of the disk begins.<br />
10. "xx% Completed."<br />
Percentage of floppy disk formatted.<br />
11. "Format completed. "<br />
Formatting of floppy disk completed.<br />
12. "Format failed."<br />
Could not format floppy disk.<br />
13. "Press any key to escape."<br />
Press any key to escape and erase message shown.<br />
14. "Abort process."<br />
Formatting aborted.<br />
15. "Drive not ready."<br />
No floppy disk in disk drive.<br />
16. "Write protected."<br />
Floppy disk is write protected.<br />
17. "Drive error."<br />
Floppy disk may be defective.<br />
18. "Checking "<br />
Checking MIME-coded file.<br />
20. "Decode ?"<br />
Decode Base64 coded file.<br />
21. "Now decoding..."<br />
Decoding file.<br />
22. "Complete."<br />
File decoding completed.<br />
AP-20
APPENDIX<br />
23. "Decode failed. "<br />
File could not be decoded.<br />
24. "This terminal not support this code."<br />
File could not be decoded because type of code not supported.<br />
25. "Decoded %d file(s)."<br />
Decode MIME coded file.<br />
26. "This file is not encoding."<br />
Cannot encode file selected.<br />
27. "File is already exist. Overwrite?"<br />
You are asked if it is OK to write over MIME-coded file.<br />
[F3]: Transmit<br />
1. "Input Error : Message File."<br />
Invalid message selected for transmission.<br />
2. "Input Error : Country/Ocean Code."<br />
Invalid country/ocean code entered.<br />
3. "Input Error : Station ID."<br />
Invalid station ID entered.<br />
4. "Input Error : Modem Type."<br />
Invalid mode type entered. (For FAX, choose T30.)<br />
5. "Input Error : E-Mail Address."<br />
Invalid e-mail address entered.<br />
6. "Input Error : LES ID."<br />
Invalid LES ID entered.<br />
7. "Input Error : Send Delay."<br />
Invalid send delay time entered.<br />
8. "Input Error : Prefix Code."<br />
Invalid prefix code entered.<br />
9. "Invalid character detected in message."<br />
Invalid character found in TX message.<br />
10. "Don't support E-Mail service in this NCS."<br />
Selected NCS does not handle e-mail.<br />
11. "Input Error : Too many stations."<br />
More than 10 stations selected to receive your message.<br />
12. "Message file is too large (but send only with 32KB)."<br />
The size of the file you want to send is larger than 32,000 bytes. (The file can be<br />
sent, but only the first 32,000 bytes of information will be received.)<br />
13. "Attach file is too large."<br />
The size of the attachment you want to send is larger than 32,000 bytes.<br />
14. "Attach file '%s' is not found."<br />
Cannot find attached file.<br />
15. "Message is entered in sending Queue. Press any key."<br />
Tx message entered into queue.<br />
16. "Can't enter this message to sending Queue. Press any key."<br />
Could not enter TX message into queue.<br />
AP-21
APPENDIX<br />
[F5]: Data report<br />
1. "Input Error : Country/Ocean Code."<br />
Invalid country/ocean code entered.<br />
2. "Input Error : Station ID."<br />
Invalid station ID entered.<br />
3. "Input Error : LES ID."<br />
Invalid LES ID entered.<br />
4. "Input Error : Interval Time"<br />
Invalid interval time entered.<br />
5. "Input Error : Start Time"<br />
Invalid start time entered.<br />
6. "Input Error : Modem Type"<br />
Invalid modem type entered.<br />
7. "Input Error : Report Contents"<br />
Invalid report contents entered.<br />
8. "Input Error : Report Times"<br />
Invalid number of report times entered.<br />
9. "Input Error : Destination"<br />
Invalid destination entered.<br />
10. "Input Error : E-Mail Address"<br />
Invalid e-mail address entered.<br />
11. "Don't support E-Mail service in this NCS."<br />
NCS does not handle e-mail.<br />
12. "Input Error : Prefix Code"<br />
Invalid prefix code entered.<br />
[F7]: PV test<br />
1. "Starting PV Test Process."<br />
Going into PV test mode.<br />
2. "Automatic test mode: Normal communication disabled."<br />
Going into automatic test mode – all communications are disabled.<br />
3. "Do not press any distress button unless you are in distress."<br />
Do not operate the [DISTRESS] button except in an emergency.<br />
Printing<br />
1."Can't enter in Print Que."<br />
2."Print Que is Full."<br />
3."Can't print. PRINTER NOT READY."<br />
4."Can't print. Paper Low."<br />
5."Disk full. Can't enter in Print Que."<br />
AP-22
Parts List<br />
APPENDIX<br />
This equipment contains complex modules in which fault diagnosis and repair down to<br />
component level are not practical (IMO A.694(17)/8.3.1. Only some discrete components<br />
are used. FURUNO Electric Co., Ltd. believes identifying these components is of no value<br />
for shipboard maintenance; therefore, they are not listed in the manual. Major modules can<br />
be located on the parts location photos on the next several pages.<br />
F U R U N O Model FELCOM 16<br />
Unit<br />
COMMUNICATION UNIT IC-216<br />
ELECTRICAL PARTS LIST Ref.Dwg. C5638-K01-A<br />
Oct-02 Blk.No.<br />
Page<br />
SYMBOL TYPE CODE No. REMARKS SHIPPABLE<br />
ASSEMBLY<br />
PRINTED CIRCUIT BOARD<br />
B2 16P0208B, RF CON/CPU 004-439-430 X<br />
B3 16P0217, PWR 004-439-590 X<br />
B10 16P0227, PWR C 004-146-276 X<br />
ASSEMBLY<br />
B4 GN-79L5A-N, GN-79 (option) 000-146-179 X<br />
AP-23
APPENDIX<br />
F U R U N O Model FELCOM 16<br />
Unit<br />
ANTENNA UNIT IC-116<br />
ELECTRICAL PARTS LIST Ref.Dwg. C5638-K03-A<br />
Oct-02 Blk.No.<br />
Page<br />
SYMBOL TYPE CODE No. REMARKS SHIPPABLE<br />
ASSEMBLY<br />
PRINTED CIRCUIT BOARD<br />
B2 16P0206, ANT B 004-439-020<br />
X<br />
B3 16P0216, ANT RF 004-439-050<br />
X<br />
AP-24
APPENDIX<br />
Parts Location<br />
Communication unit<br />
PWR C Board<br />
(16P0227)<br />
RF CON/CPU<br />
Board<br />
(16P0208B)<br />
Communication unit, cover opened<br />
PWR Board<br />
(16P0217)<br />
INT GPS Assy.<br />
(Option)<br />
(GN-79L5A-N)<br />
Communication unit, cover opened, INT GPS Assy. installed<br />
AP-25
APPENDIX<br />
Antenna unit<br />
ANT RF Board<br />
(16P0216)<br />
ANT B Board<br />
(16P0206)<br />
Antenna unit, cover opened<br />
AP-26
INDEX<br />
A<br />
Aborting....................................................... 6-1<br />
C<br />
Colors<br />
background ............................................. 2-5<br />
foreground............................................... 2-4<br />
Communication unit<br />
description............................................... 1-1<br />
testing...................................................... 7-2<br />
Currency unit............................................... 2-4<br />
D<br />
Data report<br />
preparing................................................. 5-2<br />
printing .................................................... 5-7<br />
Date<br />
format...................................................... 2-4<br />
manual input ........................................... 2-2<br />
Delivery status<br />
automatic confirmation.......................... 4-17<br />
manual confirmation ............................. 4-19<br />
Diagnostics. ................................................ 7-2<br />
Directory<br />
creating ................................................. 2-31<br />
specifying directory for message<br />
storage .............................................. 2-33<br />
Display indications ...................................... 1-6<br />
DNID<br />
displaying ...............................................5-11<br />
enabling/disabling ................................. 5-12<br />
E<br />
Editor setup................................................. 3-4<br />
EGC<br />
description............................................... 2-9<br />
EGC channels....................................... 2-14<br />
ENID...................................................... 4-34<br />
message log.......................................... 4-35<br />
message printing................................... 4-33<br />
printing messages automatically .......... 2-17<br />
receiving channel selection .................... 6-3<br />
saving messages automatically............ 2-16<br />
setup ......................................................2-11<br />
E-mail<br />
service list..............................................2-34<br />
setup......................................................2-37<br />
ENID ..........................................................4-34<br />
Error messages ...........................................7-8<br />
F<br />
Files<br />
combining ..............................................3-17<br />
decoding MIME files..............................3-20<br />
deleting ..................................................3-18<br />
opening..................................................3-14<br />
printing files on floppy disks ..................3-17<br />
renaming................................................3-19<br />
saving ....................................................3-12<br />
saving under new name ........................3-16<br />
switching between two ..........................3-14<br />
Floppy disks<br />
ejecting ..................................................3-10<br />
formatting............................................... 3-11<br />
handling .................................................3-10<br />
inserting .................................................3-10<br />
printing files on ......................................3-17<br />
Formatting floppy disk ............................... 3-11<br />
Function key description .............................1-4<br />
Fuse replacement........................................7-7<br />
I<br />
IMN entry.....................................................2-2<br />
Inmarsat C system ........................................ ix<br />
International telegraphy alphabet...........AP-19<br />
International telex abbreviations ............AP-18<br />
International telex/telephone country<br />
code list.................................................AP-9<br />
L<br />
LES<br />
displaying toll charges...........................2-20<br />
editing stations.......................................2-23<br />
information...............................................6-5<br />
list .......................................................AP-17<br />
printing LES list .....................................2-24<br />
registering stations ................................2-22<br />
IN-1
INDEX<br />
Log<br />
displaying .............................................. 4-31<br />
printing (automatic)............................... 4-32<br />
printing (manual)................................... 4-31<br />
Logging in ................................................... 2-6<br />
Logging out ................................................. 2-8<br />
M<br />
Maintenance ............................................... 7-1<br />
Menu overview.......................................... 1-10<br />
Menu tree................................................. AP-1<br />
Message report........................................... 5-4<br />
Messages<br />
deleting received................................... 4-30<br />
preparation of confidential ...................... 3-3<br />
preparation of routine.............................. 3-2<br />
printing received automatically ............. 4-28<br />
saving received automatically............... 4-29<br />
Messages (alerts) .........................................20<br />
MIME......................................................... 3-20<br />
N<br />
NCS<br />
adding channels.................................... 2-18<br />
channel selection .................................... 6-4<br />
scanning.................................................. 6-2<br />
P<br />
Parts list ................................................. AP-23<br />
Parts location ......................................... AP-25<br />
Polling<br />
commands .............................................. 5-8<br />
printing commands ................................. 5-7<br />
reception ............................................... 5-10<br />
Position input ............................................ 2-30<br />
POWER switch (Communication unit)........ 1-1<br />
Printing<br />
data report............................................... 5-7<br />
EGC messages..................................... 4-33<br />
EGC messages automatically .............. 2-17<br />
files on floppy disks............................... 3-17<br />
LES list.................................................. 2-24<br />
log (automatic) ...................................... 4-32<br />
log (manual).......................................... 4-31<br />
polling command..................................... 5-7<br />
received messages (automatically) ...... 4-28<br />
station list .............................................. 2-29<br />
Program no. list............................................. vii<br />
PV test<br />
procedure ................................................7-4<br />
results ......................................................7-5<br />
sequence.................................................7-3<br />
R<br />
Receiving<br />
attachments ...........................................4-27<br />
description .............................................4-23<br />
displaying received messages ..............4-25<br />
EGC distress or urgent message..........4-35<br />
printing received messages<br />
(automatically) ...................................4-28<br />
receive alarm.........................................4-24<br />
receive alarm on/off...............................4-24<br />
saving received messages to floppy<br />
disk (automatically)............................4-29<br />
Replacing text..............................................3-8<br />
S<br />
Saving<br />
EGC messages automatically...............2-16<br />
file under new name..............................3-16<br />
files ........................................................3-12<br />
received messages to floppy disk<br />
(automatically) .......................................4-29<br />
received messages to floppy disk<br />
(manually)..............................................4-28<br />
Screensaver ................................................2-4<br />
Searching text .............................................3-7<br />
Send message log.....................................4-22<br />
Shortcut key ................................................1-4<br />
Software installation ....................................1-2<br />
Standby display ...........................................1-5<br />
Station list<br />
adding stations ......................................2-25<br />
editing stations.......................................2-28<br />
printing...................................................2-29<br />
System configuration....................................viii<br />
System settings<br />
loading ...................................................2-38<br />
saving ....................................................2-38<br />
System setup...............................................2-1<br />
System status monitor.................................7-6<br />
IN-2
INDEX<br />
T<br />
Terminal setup............................................. 2-4<br />
Terminal unit<br />
application startup, quitting..................... 1-2<br />
controls.................................................... 1-3<br />
Text<br />
copying and pasting................................ 3-6<br />
cutting and pasting.................................. 3-5<br />
go to line ................................................. 3-9<br />
inserting .................................................. 3-7<br />
inserting time or position......................... 3-9<br />
replacing ................................................. 3-8<br />
searching ................................................ 3-7<br />
selecting all ............................................. 3-7<br />
Transmitting<br />
2-digit code services ............................. 4-20<br />
canceling............................................... 4-16<br />
delivery status (automatic receipt)........ 4-18<br />
file stored on floppy disk ....................... 4-15<br />
message to station not on station list ..... 4-8<br />
message to station on station list ........... 4-2<br />
W<br />
Warning messages ..................................... 7-9<br />
Window color .............................................. 2-4<br />
IN-3