International Greenhouse Company www.igcusa.com 1 Greenhouse ...
International Greenhouse Company www.igcusa.com 1 Greenhouse ...
International Greenhouse Company www.igcusa.com 1 Greenhouse ...

Create successful ePaper yourself
Turn your PDF publications into a flip-book with our unique Google optimized e-Paper software.
<strong>International</strong> <strong>Greenhouse</strong> <strong>Company</strong><br />
<strong>www</strong>.<strong>igcusa</strong>.<strong>com</strong><br />
of the pad to the other. Make several passes with the screed board to<br />
even out the pad and knock down the high spots. Make several passes<br />
with the screed board to even out the pad and knock down the high spots.<br />
Fill any low spots with fresh concrete and screed the pad until the top is<br />
flush with the form.<br />
4. While the concrete is still wet, use a wooden or metal float to smooth the<br />
pad. Move the float in a semicircular motion along the top of the pad. Hold<br />
the leading edge of the float slightly above the concrete to avoid gouging<br />
the surface. As you float the surface, the gravel is forced down and excess<br />
water and air pockets rise to the top. Continue floating until the slab is<br />
smooth.<br />
5. After the concrete begins to set, use an edging tool along the sides of the<br />
pad. The edging tool breaks the pad loose from the form and <strong>com</strong>pacts<br />
the sides of the pad. For large pads, use a grooving tool every 6' to 8' to<br />
make control joints in the pad.<br />
6. Surface the pad. One of the most popular and simplest surfaces for<br />
concrete is the broom finish. Dampen the bristles of an ordinary street<br />
broom and drag it lightly across the pad's entire surface. The broom<br />
makes small ridges in the concrete and provides traction to the surface of<br />
the pad.<br />
Cure and Seal the Pad<br />
Proper curing and sealing promotes high strength and long life in the concrete.<br />
Follow these steps to protect your pad:<br />
1. Cover the pad with plastic for forty-eight hours to prevent it from flash<br />
drying on top.<br />
2. Uncover the pad and remove the forming boards. Allow the pad to<br />
continue curing according to the manufacturer's instructions.<br />
3. After the pad cures, apply concrete sealer to protect it.<br />
The above section on concrete slabs was provided courtesy of Lowes.<strong>com</strong><br />
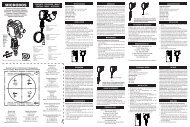
Anchoring <strong>Greenhouse</strong> to Pad<br />
Once the pad is finished, the greenhouse can be secured to the pad using<br />
concrete anchoring bolts (see right). Using a special tool, these bolts are<br />
driven into the concrete leaving the threaded end of the bolt sticking up<br />
out of the slab. These bolts are then used to secure one or more<br />
structural <strong>com</strong>ponents of the greenhouse frame (typically the base or<br />
arches) to the concrete slab.<br />
7