Mig-29 Fulcrum - rc-easy.com
Mig-29 Fulcrum - rc-easy.com
Mig-29 Fulcrum - rc-easy.com
Create successful ePaper yourself
Turn your PDF publications into a flip-book with our unique Google optimized e-Paper software.
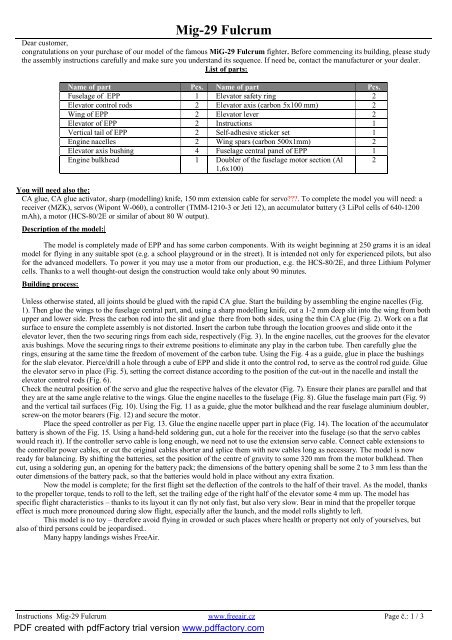
<strong>Mig</strong>-<strong>29</strong> <strong>Fulcrum</strong><br />
Dear customer,<br />
congratulations on your pu<strong>rc</strong>hase of our model of the famous MiG-<strong>29</strong> <strong>Fulcrum</strong> fighter. Before <strong>com</strong>mencing its building, please study<br />
the assembly instructions carefully and make sure you understand its sequence. If need be, contact the manufacturer or your dealer.<br />
List of parts:<br />
Name of part Pcs. Name of part Pcs.<br />
Fuselage of EPP 1 Elevator safety ring 2<br />
Elevator control rods 2 Elevator axis (carbon 5x100 mm) 2<br />
Wing of EPP 2 Elevator lever 2<br />
Elevator of EPP 2 Instructions 1<br />
Vertical tail of EPP 2 Self-adhesive sticker set 1<br />
Engine nacelles 2 Wing spars (carbon 500x1mm) 2<br />
Elevator axis bushing 4 Fuselage central panel of EPP 1<br />
Engine bulkhead 1 Doubler of the fuselage motor section (Al<br />
1,6x100)<br />
2<br />
You will need also the:<br />
CA glue, CA glue activator, sharp (modelling) knife, 150 mm extension cable for servo???. To <strong>com</strong>plete the model you will need: a<br />
receiver (MZK), servos (Wipont W-060), a controller (TMM-1210-3 or Jeti 12), an accumulator battery (3 LiPol cells of 640-1200<br />
mAh), a motor (HCS-80/2E or similar of about 80 W output).<br />
Description of the model:|<br />
The model is <strong>com</strong>pletely made of EPP and has some carbon <strong>com</strong>ponents. With its weight beginning at 250 grams it is an ideal<br />
model for flying in any suitable spot (e.g. a school playground or in the street). It is intended not only for experienced pilots, but also<br />
for the advanced modellers. To power it you may use a motor from our production, e.g. the HCS-80/2E, and three Lithium Polymer<br />
cells. Thanks to a well thought-out design the construction would take only about 90 minutes.<br />
Building process:<br />
Unless otherwise stated, all joints should be glued with the rapid CA glue. Start the building by assembling the engine nacelles (Fig.<br />
1). Then glue the wings to the fuselage central part, and, using a sharp modelling knife, cut a 1-2 mm deep slit into the wing from both<br />
upper and lower side. Press the carbon rod into the slit and glue there from both sides, using the thin CA glue (Fig. 2). Work on a flat<br />
surface to ensure the <strong>com</strong>plete assembly is not distorted. Insert the carbon tube through the location grooves and slide onto it the<br />
elevator lever, then the two securing rings from each side, respectively (Fig. 3). In the engine nacelles, cut the grooves for the elevator<br />
axis bushings. Move the securing rings to their extreme positions to eliminate any play in the carbon tube. Then carefully glue the<br />
rings, ensuring at the same time the freedom of movement of the carbon tube. Using the Fig. 4 as a guide, glue in place the bushings<br />
for the slab elevator. Pie<strong>rc</strong>e/drill a hole through a cube of EPP and slide it onto the control rod, to serve as the control rod guide. Glue<br />
the elevator servo in place (Fig. 5), setting the correct distance according to the position of the cut-out in the nacelle and install the<br />
elevator control rods (Fig. 6).<br />
Check the neutral position of the servo and glue the respective halves of the elevator (Fig. 7). Ensure their planes are parallel and that<br />
they are at the same angle relative to the wings. Glue the engine nacelles to the fuselage (Fig. 8). Glue the fuselage main part (Fig. 9)<br />
and the vertical tail surfaces (Fig. 10). Using the Fig. 11 as a guide, glue the motor bulkhead and the rear fuselage aluminium doubler,<br />
screw-on the motor bearers (Fig. 12) and secure the motor.<br />
Place the speed controller as per Fig. 13. Glue the engine nacelle upper part in place (Fig. 14). The location of the accumulator<br />
battery is shown of the Fig. 15. Using a hand-held soldering gun, cut a hole for the receiver into the fuselage (so that the servo cables<br />
would reach it). If the controller servo cable is long enough, we need not to use the extension servo cable. Connect cable extensions to<br />
the controller power cables, or cut the original cables shorter and splice them with new cables long as necessary. The model is now<br />
ready for balancing. By shifting the batteries, set the position of the centre of gravity to some 320 mm from the motor bulkhead. Then<br />
cut, using a soldering gun, an opening for the battery pack; the dimensions of the battery opening shall be some 2 to 3 mm less than the<br />
outer dimensions of the battery pack, so that the batteries would hold in place without any extra fixation.<br />
Now the model is <strong>com</strong>plete; for the first flight set the deflection of the controls to the half of their travel. As the model, thanks<br />
to the propeller torque, tends to roll to the left, set the trailing edge of the right half of the elevator some 4 mm up. The model has<br />
specific flight characteristics – thanks to its layout it can fly not only fast, but also very slow. Bear in mind that the propeller torque<br />
effect is much more pronounced during slow flight, especially after the launch, and the model rolls slightly to left.<br />
This model is no toy – therefore avoid flying in crowded or such places where health or property not only of yourselves, but<br />
also of third persons could be jeopardised..<br />
Many happy landings wishes FreeAir.<br />
Instructions <strong>Mig</strong>-<strong>29</strong> <strong>Fulcrum</strong> www.freeair.cz Page č.: 1 / 3<br />
PDF created with pdfFactory trial version www.pdffactory.<strong>com</strong>
Pictures<br />
1<br />
2<br />
3 4<br />
5 6<br />
7 8<br />
Instructions <strong>Mig</strong>-<strong>29</strong> <strong>Fulcrum</strong> www.freeair.cz Page č.: 2 / 3<br />
PDF created with pdfFactory trial version www.pdffactory.<strong>com</strong>
Pictures<br />
9 10<br />
11 12<br />
13 14<br />
15 16<br />
Instructions <strong>Mig</strong>-<strong>29</strong> <strong>Fulcrum</strong> www.freeair.cz Page č.: 3 / 3<br />
PDF created with pdfFactory trial version www.pdffactory.<strong>com</strong>


