AAMA Publishes Forensic Water Testing Guideline - Architectural ...
AAMA Publishes Forensic Water Testing Guideline - Architectural ...
AAMA Publishes Forensic Water Testing Guideline - Architectural ...

You also want an ePaper? Increase the reach of your titles
YUMPU automatically turns print PDFs into web optimized ePapers that Google loves.
Informational Bulletin<br />
Bulletin #46<br />
<strong>AAMA</strong> <strong>Publishes</strong> <strong>Forensic</strong> <strong>Water</strong> <strong>Testing</strong> <strong>Guideline</strong><br />
This Informational Bulletin provides an<br />
overview of the recently published forensic<br />
water testing protocol <strong>AAMA</strong> 511-08<br />
“Voluntary <strong>Guideline</strong> for <strong>Forensic</strong> <strong>Water</strong><br />
Penetration <strong>Testing</strong> of Fenestration<br />
Products.”<br />
The Need for a New Protocol<br />
The last Informational Bulletin article<br />
provided an update on the recently revised<br />
<strong>AAMA</strong> 502-08 and 503-08 documents,<br />
designed for field testing of newly installed<br />
fenestration products. The aforementioned<br />
<strong>AAMA</strong> documents were often misused in<br />
determining the source of water penetration<br />
in existing buildings. The <strong>AAMA</strong> 502 and<br />
503 documents do not provide the guidance<br />
necessary to perform a systematic forensic<br />
investigation, which is necessary to properly<br />
identify the source of water leakage in<br />
exterior walls. Additionally, the industry<br />
has not had a standard forensic guideline to<br />
follow, which has added to the confusion<br />
and the need for a new protocol.<br />
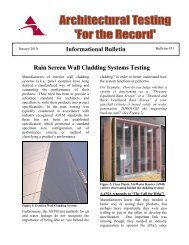
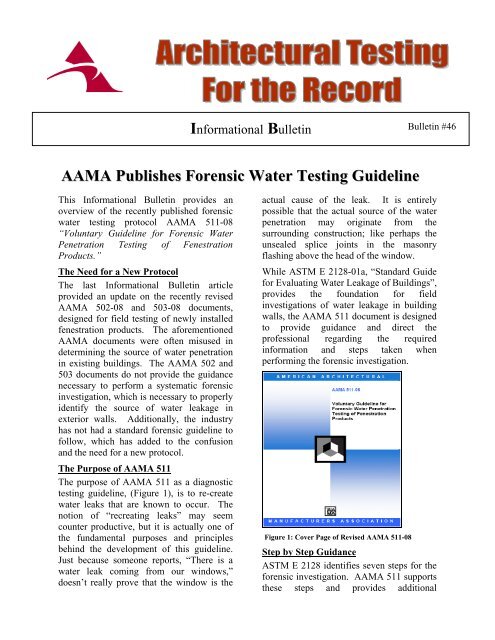
The Purpose of <strong>AAMA</strong> 511<br />
The purpose of <strong>AAMA</strong> 511 as a diagnostic<br />
testing guideline, (Figure 1), is to re-create<br />
water leaks that are known to occur. The<br />
notion of “recreating leaks” may seem<br />
counter productive, but it is actually one of<br />
the fundamental purposes and principles<br />
behind the development of this guideline.<br />
Just because someone reports, “There is a<br />
water leak coming from our windows,”<br />
doesn’t really prove that the window is the<br />
actual cause of the leak. It is entirely<br />
possible that the actual source of the water<br />
penetration may originate from the<br />
surrounding construction; like perhaps the<br />
unsealed splice joints in the masonry<br />
flashing above the head of the window.<br />
While ASTM E 2128-01a, “Standard Guide<br />
for Evaluating <strong>Water</strong> Leakage of Buildings”,<br />
provides the foundation for field<br />
investigations of water leakage in building<br />
walls, the <strong>AAMA</strong> 511 document is designed<br />
to provide guidance and direct the<br />
professional regarding the required<br />
information and steps taken when<br />
performing the forensic investigation.<br />
Figure 1: Cover Page of Revised <strong>AAMA</strong> 511-08<br />
Step by Step Guidance<br />
ASTM E 2128 identifies seven steps for the<br />
forensic investigation. <strong>AAMA</strong> 511 supports<br />
these steps and provides additional
Informational Bulletin Bulletin #46<br />
<strong>AAMA</strong> <strong>Publishes</strong> <strong>Forensic</strong> <strong>Water</strong> <strong>Testing</strong> <strong>Guideline</strong> Page 2 of 3<br />
information regarding each step. The steps<br />
are grouped into two main categories,<br />
including four steps “prior to testing” and<br />
three steps “during and after testing”.<br />
Starting with information gathering, the<br />
forensic investigator performs the following:<br />
• Review project documents (specs, shop<br />
drawings, installation instructions, etc.);<br />
• Evaluate the design concept, water<br />
management concept, and critical details<br />
(flashing, sealant, weeps and interfaces);<br />
• Review the building service history<br />
(maintenance records, interview building<br />
personnel, etc.);<br />
• Perform a visual inspection; (Figure #2).<br />
This includes observation of the interior<br />
and exterior of the building while<br />
considering possible workmanship and<br />
product deficiency issues; with the intent<br />
of developing a hypothesis regarding the<br />
possible water leakage source.<br />
Figure 2: Visual Inspection of the Building Façade<br />
After completing the information gathering<br />
additional steps are taken from the testing<br />
process to the writing of the report. These<br />
steps include:<br />
• Investigative testing;<br />
• Analysis of the observations during<br />
testing;<br />
• Development of the report, including the<br />
recording of all findings and the<br />
substantiation of any opinions expressed<br />
in the report.<br />
Objective of this Process<br />
The objective of this process is to identify<br />
the leak path(s) through simulation (testing)<br />
of the weather events that produced the<br />
reported water penetration issues. This<br />
requires gathering actual weather data and<br />
information regarding when and where the<br />
water leaks were noticed. In the end, the<br />
intent is to line-up the actual weather events<br />
and conditions with the observance of water<br />
penetration, (e.g. Heavy rains measuring<br />
over 2”; along with 35 mph winds, occurred<br />
during a 12-hour period on April 10 th and<br />
11 th , 2008. During that time, the<br />
maintenance department witnessed water on<br />
the 1 st floor at the North end of the lobby.)<br />
After gathering the actual weather data, the<br />
forensic investigator can calculate the<br />
approximate differential air pressures the<br />
exterior wall experienced during the actual<br />
wind-driven rain events that produced the<br />
reported water penetration. This information<br />
is then used to establish water test pressures.<br />
Per the guideline, water testing starts<br />
without the application of a pressure<br />
differential, to establish a baseline of<br />
performance. This is then followed by<br />
testing with pressure.<br />
Maximum Pressure Differential<br />
After the test pressure differential is<br />
determined from actual weather data it is<br />
used to calculate the maximum air pressure<br />
differential applied during testing. If<br />
however; and this is really important, the<br />
maximum air pressure difference exceeds<br />
2/3rds of the rated water penetration<br />
resistance test pressure of the fenestration<br />
product”, at least one test is required to be<br />
conducted at the 2/3rds performance rating<br />
first. This is meant to determine if the<br />
fenestration product performs at the required<br />
field performance level stipulated in <strong>AAMA</strong><br />
502 and 503 prior to testing at higher levels.<br />
If the calculated maximum value exceeds<br />
the rated performance value of the product<br />
and the specimen is tested at the calculated<br />
value, the investigator is to consider the fact
Informational Bulletin Bulletin #46<br />
<strong>AAMA</strong> <strong>Publishes</strong> <strong>Forensic</strong> <strong>Water</strong> <strong>Testing</strong> <strong>Guideline</strong> Page 3 of 3<br />
that the product was tested beyond its rated<br />
performance value when drawing any<br />
conclusions on product performance.<br />
Isolation Procedures Used During <strong>Testing</strong><br />
It is critical to use isolation procedures<br />
during testing to differentiate between<br />
“fenestration product performance” and<br />
“interface and/or construction performance”.<br />
To accomplish this, the guideline stipulates<br />
that a sequence be established which<br />
includes isolation water testing (Figure 3).<br />
Figure 3: Using Field Isolation Procedures<br />
The forensic investigator has the<br />
responsibility to make every attempt to<br />
ascertain the exact path of water penetration,<br />
from the exterior of the wall, through the<br />
wall components onto the surfaces of the<br />
wall components that are not intended to<br />
manage or control water. Using isolation<br />
procedures will aid in this effort.<br />
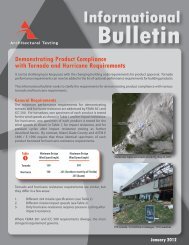
The Sill Dam Test is Still Alive<br />
Some industry experts have poked a little<br />
fun about the sill dam test (“Dam sill test”)<br />
over the years (Figure 4), but it does have<br />
merit and has been used effectively many<br />
times when properly applied. While it was<br />
removed from <strong>AAMA</strong> 502 and 503, because<br />
it does not relate to product labeled<br />
performance, <strong>AAMA</strong> 511 includes it as an<br />
“optional” investigative test.<br />
Figure 4: Photo of Sill Dam Test in Use<br />
When observation and initial water testing<br />
leads the investigator to believe that the leak<br />
is due to a defective fenestration product, the<br />
optional sill dam test offers an additional<br />
way to investigate the leak path.<br />
Considering that this test may subject the<br />
fenestration product to pressures exceeding<br />
that of the known weather event, it is not to<br />
be used as the sole means of establishing<br />
weather or not the product is defective.<br />
Conclusion<br />
We believe this new guideline provides<br />
significant improvement to the way proper<br />
forensic investigations will be performed.<br />
We encourage you to be a part of the<br />
solution by advising those discussing the<br />
need for field testing of an existing building<br />
about this new procedure.<br />
Need More Information?<br />
<strong>Architectural</strong> <strong>Testing</strong> has a staff of highly<br />
skilled and qualified engineers available to<br />
answer your questions regarding forensic<br />
testing services.<br />
The purpose of this <strong>Architectural</strong> <strong>Testing</strong><br />
Informational Bulletin is to update you on<br />
the new guideline. The information<br />
contained herein is not manufacturer or<br />
product specific, and is provided as advisory<br />
information to our customers.<br />
Regional laboratories and offices are located<br />
Corporate Headquarters<br />
throughout North America (labs in PA, MN, TX, <strong>Architectural</strong> <strong>Testing</strong>, Inc.<br />
CA, WI, WA, MA, and FL; offices in GA, NC, WI, IN 130 Derry Court<br />
MO, CA & VA) York, PA 17406-8405<br />
Visit www.archtest.com for the location nearest you. Phone: 717-764-7700<br />
Fax: 717-764-4129