TOWERRAID TR4U-B|TR4U - Sans Digital
TOWERRAID TR4U-B|TR4U - Sans Digital
TOWERRAID TR4U-B|TR4U - Sans Digital

Create successful ePaper yourself
Turn your PDF publications into a flip-book with our unique Google optimized e-Paper software.
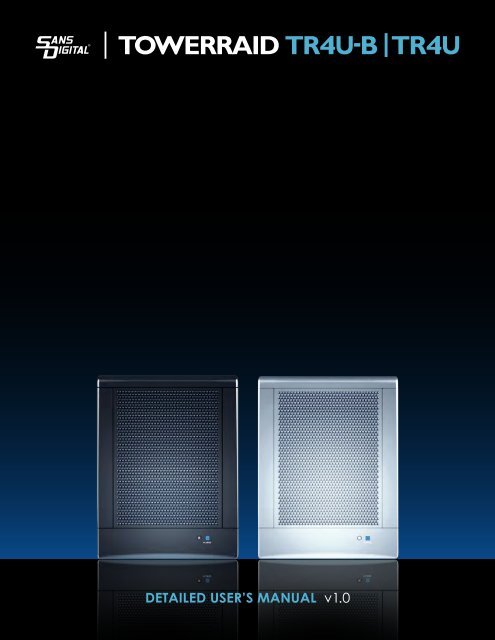
<strong>TOWERRAID</strong> <strong>TR4U</strong>-B |<strong>TR4U</strong><br />
DETAILED USER’S MANUAL v1.0
Table of Contents<br />
CHAPTER 1 -WELCOME ....................................................................................................................................3<br />
1.1 INTRODUCTION ........................................................................................................................................3<br />
1.2 PRECAUTION ..............................................................................................................................................3<br />
1.3 FEATURES .....................................................................................................................................................3<br />
1.4 SYSTEM REQUIREMENTS ........................................................................................................................4<br />
1.5 PRODUCT CONTENTS ............................................................................................................................4<br />
CHAPTER 2 - INSTALLATION ......................................................................................................................5<br />
2.1 BEFORE INSTALLING ...............................................................................................................................5<br />
2.2 INSTALLING HARD DISK DRIVE ...........................................................................................................5<br />
2.3 UNINSTALLING HARD DISK DRIVE ....................................................................................................6<br />
2.4 POWER ON / OFF .......................................................................................................................................7<br />
CHAPTER 3 - MODE SETTING .....................................................................................................................8<br />
3.1 INTRODUCTION ........................................................................................................................................8<br />
3.2 DISK DRIVE MODE .....................................................................................................................................8<br />
3.3 POWER MODE .............................................................................................................................................9<br />
3.4 UNPLUG PROCEDURE ...........................................................................................................................10<br />
CHAPTER 4 - ALLOCATING PARTITION ...............................................................................................13<br />
4.1 ALLOCATING PARTITION ON WINDOWS 2000 ..........................................................................13<br />
4.2 ALLOCATING PARTITION ON WINDOWS XP AND SERVER 2003 (32/64BITS).................17<br />
4.3 ALLOCATING PARTITION ON WINDOWS VISTA (32/64BITS)...............................................22<br />
4.4 ALLOCATING PARTITION ON MACINTOSH OS X .....................................................................27<br />
CHAPTER 5 - FAQ ...........................................................................................................................................31<br />
2
Chapter 1 - WELCOME<br />
1.1 INTRODUCTION<br />
Thank you for choosing SANS DIGITAL <strong>TR4U</strong> storage appliance. Using a revolutionary 4 bay design, it creates a versatile<br />
USB storage box that will fulfill you never-ending storage need.<br />
Power Outlet<br />
1.2 PRECAUTION<br />
Please read the precautions carefully before you using SANS DIGITAL <strong>TR4U</strong> storage appliance. Ensure that you use the<br />
product correctly according to the procedure described in this guide.<br />
The following safety precautions are intended to remind you to operate the product safely and correctly. Please read and<br />
ensure that you understand them before you proceed to the other sections of this guide.<br />
• Do not attempt to disassemble or alter any part of the product that is not describe in this guide.<br />
• Do not allow the product to come into contact with water or other liquids. In the event that water or other liquids<br />
enter the interior, immediately unplug the product from the computer. Continued use of the product may result in<br />
fire or electrical shock. Please consult your product distributor or the closest support center.<br />
• Do not handle the product near a heat source or expose them to direct flame or heat.<br />
• Never place the product in close to equipment generating storage electromagnetic fields. Exposure to strong<br />
magnetic fields may cause malfunctions or corrupt data.<br />
• Windows 3.x/ 95/ 98SE/ ME/ NT is not supported<br />
• Please be noted the following product is not supported:<br />
Toshiba DynaBook, Satellite series (All K6 CPU models).<br />
IBM Aptiva E series (All K6 CPU models).<br />
Sotec E-note M260 series.<br />
All AMD K6 system.<br />
PC with sis7000/ 7001/ 7002 PCI to USB host controller.<br />
1.3 FEATURES<br />
• Four 3.5-inch SATA hard disk drives to USB interface.<br />
• Selectable USB mode: Hard Drives can combine (Spanning mode) or individually access (JBOD).<br />
• Selectable Power mode: Auto Power Mode (Automatic On/Off with the computer) or Normal Power Mode (manual<br />
On/Off)<br />
• Supports Plug & Play automatic system configuration.<br />
• Supports USB high-speed (480 Mbps), and backward-compatibilies to full-speed (12 Mbps) data transfer modes.<br />
3
• Supports Plug & Play for easy installation.<br />
• Compact Enclosure with Dust-Free Cover.<br />
• 150 watts power supply.<br />
1.4 SYSTEM REQUIREMENTS<br />
Please make sure your system meet the following requirements:<br />
• IBM PC/AT Compatible, iMac, Mac mini, Mac Pro, Macbook, Macbook Pro, G5, Power Macintosh, eMac, iMac,<br />
PowerBook G4, iBook G4.<br />
• Windows 2000/ XP/ Vista/ Server 2003, Mac OS X 10.3 or higher operation system with latest service pack installed.<br />
• An available USB port.<br />
1.5 PRODUCT CONTENTS<br />
The following parts are content.<br />
• SANS DIGITAL <strong>TR4U</strong> x 1<br />
• USB2.0 Cable x 1<br />
• AC Cable x 1<br />
• Tool-less Screw x 8<br />
• Setup and Installation Driver<br />
• User Manual & Utilities CD x 1<br />
<strong>TR4U</strong> Unit<br />
User Manual & Utility CD<br />
4
Chapter 2 - INSTALLATION<br />
2.1 BEFORE INSTALLING<br />
Before plug-in the power cable, switch the VAC to the correct position (For example, 115 for USA/JAPAN, 230 for UK)<br />
before installing. Fail to do so will result in malfunctions or damage.<br />
2.2 INSTALLING HARD DISK DRIVE<br />
Please refer below procedure to complete the HDD installation:<br />
1. Remove the Tool-less screws on the back panel.<br />
2. Remove the upper chassis cover backwards and lifts it upwards.<br />
3. Open the front door and install the HDDs in order from the top to the bottom. Please refer to the diagram.<br />
5
4. Fasten the tool-less screws to secure the hard drive.<br />
5. Close the front door and the chassis cover, fasten the tool-less screws on the back panel.<br />
2.3 UNINSTALLING HARD DISK DRIVE<br />
• Release the tool-less screw<br />
• Remove the Hard Drive from the SATA connector by use the tool-less screw<br />
6
2.4 POWER ON / OFF<br />
• Power ON: Push the power switch located in the front to switch on the power.<br />
• Power OFF: Push and hold power switch more than 3 secends to switch off the power.<br />
7
Chapter 3 - MODE SETTING<br />
3.1 INTRODUCTION<br />
The SANS DIGITAL <strong>TR4U</strong> storage appliance is an easy-to-use storage that provides variety of modes; you can simplely set<br />
up the mode by hardware DIP switch on the back panel. The mode shows as seen below.<br />
3.2 DISK DRIVE MODE<br />
Please read the notics carefully before you change disk drive mode. The following notices are intended to remind you to<br />
operate the product correctly. Please read and ensure that you understand them before you proceed to change disk drive<br />
mode.<br />
• Data will be lost, when the mode change.<br />
• Turn off the power of storage device before change mode.<br />
• 2TB capacity is the limitation for each disk volume.<br />
Switch the DIP 1 to setup the disk drive mode on the back panel. Please refer to the diagrams.<br />
• Standard Drive Mode: It is a JBOD mode, where the unit will access each hard drive individually. The number of<br />
Hard Drive avalible to computer equal to the number of hard drive you installed.<br />
• Combine Drive Mode: It is a Spanning mode, where the unit will combine all of the hard drives installed and<br />
access it like one large hard drive. There is only one hard drive show on the computer.<br />
8
3.3 POWER MODE<br />
Switch the DIP 2 on the back panel to set up the NORMAL POWER MODE or AUTO POWER MODE; In NORMAL<br />
POWER MODE, SANS DIGITAL <strong>TR4U</strong> operates in manual on and off. Press once on the power button, power will turn<br />
on. Hold power button for more than 3 seconds, power will turn off.<br />
In AUTO POWER MODE operating, SANS DIGITAL <strong>TR4U</strong> will automatically power on when PC system is on, and power<br />
off when PC system is off.<br />
9
3.4 UNPLUG PROCEDURE<br />
1. Right click on the “Safely Remove Hardware” icon<br />
2. Click on the “Safely Remove Hardware”.<br />
10
3. Select “USB Mass Storage Device”, click on on “Stop”.<br />
4. Select “Century EX35SW4_SB4-A USB Device”, click “OK”.<br />
5. Click on “Close” to finish.<br />
11
WARNING: To assure no data will be lost, always follow the unplug procedure. Fail to do so will<br />
result in data lost.<br />
12
Chapter 4 - ALLOCATING PARTITION<br />
4.1 ALLOCATING PARTITION ON WINDOWS 2000<br />
Before creating any partitions, disk drive mode must be selected using the DIP switch on the back panel. Turn on the<br />
computer and open the Control Panel window (located at: Start > Settings > Control Panel).<br />
1. Double-click on Administrative Tools.<br />
2. Double-click on Computer Management.<br />
3. Select Disk Management under Storage to view the disk drives.<br />
4. Right-click on each Unallocated partition and select Create Partition from the pop-up menu.<br />
13
5. Click Next to create a partition on a basic disk.<br />
6. Select the partition type you want to create, than click Next.<br />
7. Specify the partition size you want to create, than click Next.<br />
14
8. Assign the drive letter or path you want to create, click Next.<br />
9. Click Format this partition with the following settings and Perform a Quick Format, setup the File<br />
system to use, Allocation unit size, Volume label, than click Next.<br />
10. When the Create Partition Wizard has completed, click Finish.<br />
15
11. Restart your computer after completed the steps ablove.<br />
The status of the created partition in the Disk Management window will change to “Formatting”. The percentage<br />
complete will be displayed. Depending upon the size of the partition, the format process may take several minutes. When<br />
completed, the status will change to “Healthy” and the name and drive letter will be updated. Once the disk reports<br />
Healthy, it appears to the computer and ready to use.<br />
Repeat the above procedure if there are any other partitions. Close the Data Management window by clicking on the<br />
small boxed “X” in the top right corner of the window. Click on the “My Computer” icon on the Desktop. The new<br />
drives will be display and properly named. The new disks are now available for use.<br />
16
4.2 ALLOCATING PARTITION ON WINDOWS XP AND SERVER 2003 (32/64BITS)<br />
Before creating any partitions, disk drive mode must be selected using the DIP switch on the back panel. Turn on the<br />
computer and open the Control Panel window (located at: Start > Control Panel).<br />
1. Double-click on Administrative Tools.<br />
17
2. Double-click on Computer Management.<br />
3. Select Disk Management under Storage to view the disk drives.<br />
4. Right-click on each Unallocated partition and select New Partition from the pop-up menu.<br />
5. Click Next to create a partition on a basic disk.<br />
18
6. Select the partition type you want to create, click Next.<br />
7. Specify the partition size you want to create, click Next.<br />
8. Assign the drive letter or path you want to create, click Next.<br />
19
9. Click Format this partition with the following settings and Perform a quick format, select the File<br />
system, Allocation unit size, Volume label, and click Next.<br />
10. When the New Partition Wizard has completed, click Finish, and restart your computer.<br />
20
The status of the created partition in the Disk Management window will change to “Formatting”. The percentage<br />
complete will be displayed. Depending upon the size of the partition, the format process may take several minutes. When<br />
completed, the status will change to “Healthy” and the name and drive letter will be updated. Once the disk reports<br />
Healthy, it appears to the computer and ready to use.<br />
Repeat the above procedure if there are any other partitions. Close the Data Management window by clicking on the<br />
small boxed “X” in the top right corner of the window. Click on the “My Computer” icon on the Desktop. The new<br />
drives will be display and properly named. The new disks are now available for use.<br />
21
4.3 ALLOCATING PARTITION ON WINDOWS VISTA (32/64BITS)<br />
Before creating any partitions, disk drive mode must first be created using the DIP switch on the rear panel. Once the sets<br />
have been created, allow the system to load Windows. Once Windows is running, open the Computer Management<br />
window.<br />
1. Right-click on Computer and select Manage from the pop-up menu.<br />
2. Select Disk Management under Storage to view the disk drives.<br />
22
3. Right-click on each Unallocated partition and select New Simple Volume from the pop-up menu.<br />
23
4. Click Next to create a simple volume.<br />
5. Select the Simple volume size you want to create, click Next.<br />
6. Assign the drive letter or path you want to create, click Next.<br />
24
7. Click Format this volume with the following settings and Perform a quick format, select the File system,<br />
Allocation unit size, Volume label, click Next.<br />
8. When the New Simple Volume Wizard has completed, click Finish.<br />
25
The status of the created partition in the Disk Management window will change to “Formatting”. The percentage<br />
complete will be displayed. Depending upon the size of the partition, the format process may take several minutes. When<br />
completed, the status will change to “Healthy” and the name and drive letter will be updated. Once the disk reports<br />
Healthy, it appears to the computer and ready to use.<br />
Repeat the above procedure if there are any other partitions. Close the Data Management window by clicking on the<br />
small boxed “X” in the top right corner of the window. Click on the “My Computer” icon on the Desktop. The new<br />
drives will be display and properly named. The new disks are now available for use.<br />
26
4.4 ALLOCATING PARTITION ON MACINTOSH OS X<br />
1. Click Go, click on Utilities.<br />
2. Double-click Disk Utility.<br />
27
3. In the windows on the left, Select the newly added Storage<br />
4. In the windows on the right, click Partition to go to partition window.<br />
28
5. Select Volumes Scheme.<br />
6. Enter Volumes Information, such as “Name” and “Format” click Partition.<br />
29
7. Confirm to partition the disk by click Partition.<br />
8. The newly formatted disk with the Volume name will display on the windows in the left.<br />
9. Repeat the above procedure as needed for any other disks.<br />
10. Close the Disk Utility window upon completion.<br />
11. The new disks will appear on the desktop and ready for use..<br />
30
Chapter 5 - FAQ<br />
1. The unit is not recognizing in the disk management/disk utility.<br />
Make sure USB and Power cables are connected properly. Reconnect the cables and power on the unit.<br />
2. The unit is not working consistently with the computer.<br />
Windows 3.x/ 95/ 98SE/ ME/ NT is not supported. Please check with your computer’s operating systems versions.<br />
3. When copying files, the transfer speed is slow.<br />
The transfer spend is slow when connect to USB1.1 interface. In order to increase the transfer rate, using USB 2.0 is<br />
recommended.<br />
4. When format in the Windows 2000/ XP/ Vista/ Server 2003, the dialog box appear “Unfinished<br />
formatting”<br />
Windows 2000/ XP/ Vista/ Server 2003 can not format HDD over 32GB by FAT32, Please format by NTFS<br />
5. When using different capacity or brand HDD, can we still using Combine mode?<br />
Yes.<br />
6. When Hard Drive failure on Combine mode, is it possible to recover the data in other hard drive?<br />
It depends on the location of the failure hard drive. The “Sample 2” image below, the entire disk can not be read.<br />
Failure hard drive and any hard drive afterward will fail to read, hence data in those hard drive will be loss.<br />
In Sample 1, data can be read from disk 1 to disk 2, while any data on the disk 3 and 4 will be loss.<br />
In Sample 2, no data can be read from any disk.<br />
31