Assembly Instructions - Antennas Direct
Assembly Instructions - Antennas Direct
Assembly Instructions - Antennas Direct

You also want an ePaper? Increase the reach of your titles
YUMPU automatically turns print PDFs into web optimized ePapers that Google loves.
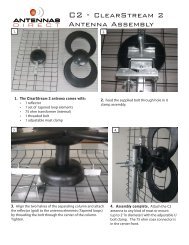
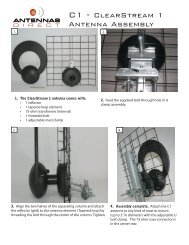
5.<br />
5. Both halves of antenna joined with cross braces<br />
attached to the rear of the reflectors.<br />
Note: adjustable U bolt mast clamps face the rear<br />
6.<br />
6. Attach the buss bars to the terminals on each<br />
half of the antenna using the supplied wingnuts. This<br />
electrically connects both halves of the antenna.<br />
7.<br />
7. <strong>Assembly</strong> Complete. 75 Ohm<br />
coax “F” connection is at center.<br />
C4 shown with optional J mount<br />
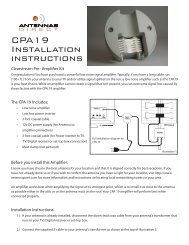
Helpful Tips:<br />
• If your cable run is greater than 75’, A pre-amplifier may be required.<br />
• UHF signals are line of sight. Get as much elevation as practical.<br />
• Attic Installations will cut 40% -50% of your signal strength.<br />
• KEEP ANTENNA AWAY FROM POWER LINES<br />
877-825-5572<br />
1699 West Fifth Street<br />
Eureka, MO 63025<br />
www.antennasdirect.com