BelAir Wall® Collection - A.S.P. Enterprises, Inc
BelAir Wall® Collection - A.S.P. Enterprises, Inc
BelAir Wall® Collection - A.S.P. Enterprises, Inc

You also want an ePaper? Increase the reach of your titles
YUMPU automatically turns print PDFs into web optimized ePapers that Google loves.
<strong>BelAir</strong> Wall <strong>Collection</strong><br />
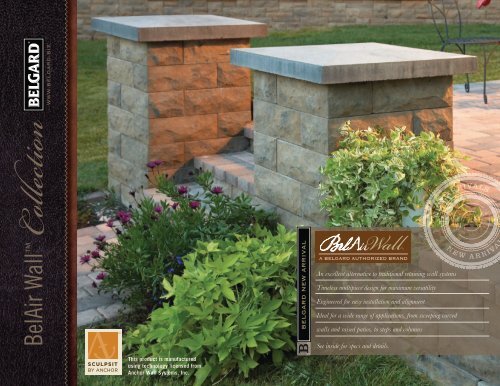
This product is manufactured<br />
using technology licensed from<br />
Anchor Wall Systems, <strong>Inc</strong>.<br />
B belgard new arrival www.belgard.biz<br />
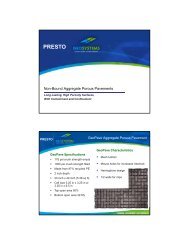
<strong>BelAir</strong> Wall ® <strong>Collection</strong><br />
An excellent alternative to traditional retaining wall systems<br />
Timeless multipiece design for maximum versatility<br />
Engineered for easy installation and alignment<br />
Ideal for a wide range of applications, from sweeping curved<br />
walls and raised patios, to steps and columns<br />
See inside for specs and details.<br />
N e w a r r iva
N e w a r r iva l s<br />
<strong>BelAir</strong> Free-standing Wall<br />
<strong>BelAir</strong> Retaining Wall<br />
B<br />
<strong>BelAir</strong> Wall <strong>Collection</strong><br />
2<br />
<strong>BelAir</strong> Free-standing Wall<br />
When to Use a Pattern<br />
for Free-standing Walls<br />
You can install the <strong>BelAir</strong> Wall free-standing wall system in a random pattern using any<br />
combination of units. Just avoid vertical lines that span more than 18 inches in height. If<br />
you are building a straight wall, use a pattern for inspiration or follow a pattern exactly.<br />
Pleasing random patterns can be built using an equal square footage of 3- and 6-inchhigh<br />
units. The estimating formulas in this brochure are based on using an equal square<br />
footage of units of each size in each height. When using a pattern, begin at one edge<br />
laying the units as indicated. Install at least one repeat of the pattern to establish the<br />
pattern before proceeding to the next course.<br />
Please see your local representative for color samples available in your area.<br />
B elAir Wall offers designers, contractors and homeowners<br />
the ideal solution for residential and light commercial<br />
retaining and free-standing wall construction where pleasing aesthetics<br />
are a key consideration. The attractive multipiece design and blended<br />
colors offer an alternative look to traditional retaining wall units.<br />
The design of this easy-to-use product allows for sweeping curves.<br />
The system can be used in applications ranging from curves to corners,<br />
terraces to raised patios, or steps to columns.<br />
visit www.belairwall.com for more details,<br />
including information on installation training videos.
I N T R O D U C I N G T H E<br />
<strong>Collection</strong><br />
Laying Patterns<br />
18 INCH<br />
Dimensions<br />
18"<br />
REPEATING PATTERN<br />
6'-0"<br />
18-INCH BY 6-FOOT RETAINING WALL PATTERN<br />
This illustrates an 18-inch-high by 6-foot-long repeating pattern. When your plan requires<br />
reinforcement, this pattern is ideal because it eliminates cutting if the grid is at 18 inches.<br />
Retaining Wall Units 6" x 16" 6" x 8" 3" x 16" 3" x 8"<br />
Approx. Dimensions* 6" x 16" x 8" 6" x 8" x 8" 3" x 16" x 8" 3" x 8" x 8"<br />
Approx. Weight 52 lbs. 26 lbs. 25 lbs. 13 lbs.<br />
Coverage .67 sq. ft. .33 sq. ft. .33 sq. ft. .17 sq. ft.<br />
Setback/Batter 1"/9.5° 1"/9.5° 1/2"/9.5° 1/2"/9.5°<br />
REPEATING PATTERN<br />
6'-0"<br />
12 INCH<br />
12-INCH BY 6-FOOT RETAINING WALL PATTERN<br />
This illustrates a 12-inch-high by 6-foot-long repeating pattern. When your plan requires<br />
reinforcement at 12 or 24 inches, this pattern is ideal because it eliminates cutting.<br />
7'-4"<br />
REPEATING PATTERN<br />
Free-Standing Wall Units 6" x 16" 6" x 8" 3" x 16" 3" x 8"<br />
Approx. Dimensions* Front, 6" x 16" x 11" Front, 6" x 8" x 11" Front, 3" x 16" x 11" Front, 3" x 8" x 11"<br />
rear, 6" x 14" x 11" Rear, 6" x 6" x 11" Rear, 3" x 14" x 11" Rear, 3" x 6" x 11"<br />
Approx. Weight 63 lbs. 27 lbs. 27 lbs. 13 lbs.<br />
Coverage Front, .67 sq. ft. Front, .33 sq. ft. Front, .33 sq. ft. Front, .17 sq. ft.<br />
rear, .58 sq. ft. Rear, .25 sq. ft. Rear, .29 sq. ft. Rear, .13 sq. ft.<br />
1'-6"<br />
3x7 3x16 3x14 6x8<br />
3x8 3x14<br />
3x7<br />
6x14<br />
6x8<br />
3x14<br />
3x7<br />
3x7<br />
6x16<br />
3x14 3x7<br />
6x16<br />
6x8<br />
3x8<br />
6x14<br />
3x14 3x8<br />
3x14 3x8<br />
3x16<br />
6x6 6x16<br />
3x7<br />
6x8 3x14 3x8<br />
6x14<br />
3x8 3x14 3x8 3x14 3x7 3x16<br />
BASE COURSE CONSTRUCTED<br />
FROM 6" HIGH UNITS<br />
18-INCH BY 7-FEET, 4-INCH FREE-STANDING WALL PATTERN<br />
This illustrates an 18-inch-high by 7-foot, 4-inch-long repeating pattern.<br />
Finished Grade<br />
Accessories Cap Unit Corner/Column Unit<br />
Approx. Dimensions* Front, 3" x 8" x 13-1/2" 6" x 16" x 8"<br />
rear, 3" x 7" x 13-1/2"<br />
Approx. Weight 22 lbs. 67 lbs.<br />
Coverage<br />
.625 linear ft.<br />
*<br />
Dimensions may vary. Please check with your local Belgard representative for exact product specifications.<br />
When to Use a Pattern<br />
for Retaining Walls<br />
You can install the <strong>BelAir</strong> Wall retaining wall system in a random pattern using any<br />
combination of units. Just avoid vertical lines that span more than 18 inches in height. If<br />
you are building a wall without geosynthetic reinforcement, use a pattern for inspiration<br />
or follow a pattern exactly. Pleasing random patterns can be built using an equal number<br />
of 3- and 6-inch-high units. The estimating formulas in this brochure are based on using<br />
an equal number of units of each size in each height. When building a wall that includes<br />
geosynthetic reinforcement, using a pattern at the appropriate spacing eliminates the<br />
need to cut the grid. When using a pattern, begin at one edge laying the units as<br />
indicated. Install at least one repeat of the pattern to establish the pattern before<br />
proceeding to the next course.<br />
3
BELGARD BELAIR RETAINING WALLS Geogrid Estimating Chart<br />
No Slopes / No Surcharges<br />
CLAY AND SILT SOIL SILTY /CLAYEY SAND SOIL CLEAN SAND AND GRAVEL SOIL<br />
<strong>BelAir</strong> Wall INSTALLATION TIPS<br />
Retaining Wall<br />
GETTING STARTED<br />
Use best practices to lay out and build walls. See Belgard.biz for standard installation<br />
details. The information in this brochure will help you get started using<br />
<strong>BelAir</strong> Wall .<br />
BASE COURSE<br />
Since the 6-inch units are palletized together, it is easiest to use both the 6" x<br />
16" and 6" x 8" units to build the base. This will help maintain the ratio of oneto-one<br />
with the units and will eliminate the need to pick around the smaller units<br />
on the pallet and save time. Remove the rear lip from the unit to ensure proper<br />
contact with the gravel base. Due to the manufacturing process of this unit,<br />
pitch the base course back slightly to keep the wall level on higher courses.<br />
COMPACTION<br />
Compaction is critical to the success of any wall and this is no different with<br />
the <strong>BelAir</strong> Wall product. Keep heavy compaction equipment 4 feet away from<br />
the face of the wall and make sure you are compacting in proper lifts according<br />
to your equipment. After compaction, tap the back of the units with a rubber<br />
mallet or dead-blow hammer to ensure the unit has remained seated against<br />
the unit below.<br />
90˚ CORNERS<br />
Corners are built by using the corner/column unit in an alternating fashion.<br />
Reversing the unit direction back and forth also allows them to be integrated<br />
into the patterns with little effort. Depending on the wall layout, there may be<br />
a need to go off the pattern and randomize wall units near the corner to blend<br />
together. Glue should be applied to every corner unit from bottom to top. Corner<br />
units should be set back to reflect the batter of the wall units.<br />
USING 8-INCH UNITS IN CONSTRUCTION<br />
The 8-inch-wide units in both the 3-inch and 6-inch heights have two shapes.<br />
One has an offset angle on the left side and the other has an offset on the right.<br />
Either unit can be used in most situations. In a curved wall, it may be necessary<br />
to select one shape or the other. An easy rule of thumb would be that on a<br />
curve, if two 8-inch units of either height meet on a 16-inch unit, put the two<br />
90-degree sides together to form a 16-inch unit.<br />
4<br />
BUILDING AN OUTSIDE RADIUS CURVE<br />
A function of geometry with battered, multiple-height walls is that the outside<br />
radius gets smaller and smaller as the wall gets taller. As a result, the spaces<br />
between the units also shrink. This requires some shaving or trimming of the<br />
units to fit. Plan to shave 3-inch units as you build. This will save time and<br />
saw blades. When removing a 1/2 inch or less, a small handheld grinder will be<br />
easier and quicker to use than a large saw.
BELGARD BELAIR RETAINING WALLS Geogrid Estimating Chart<br />
100 PSF Surcharge<br />
CLAY AND SILT SOIL SILTY /CLAYEY SAND SOIL CLEAN SAND AND GRAVEL SOIL<br />
BUILDING AN INSIDE RADIUS CURVE<br />
When building an inside curve, the radius gets bigger as the wall gets taller.<br />
This gapping is a function of geometry and batter and will happen with<br />
any multiple-height system. If the gaps created are small, space the gaps<br />
out over several units to minimize the openings. If this doesn’t work, fill the<br />
opening with two units. This will require going off pattern for a while. For<br />
the best appearance, do not use pieces smaller than 4 inches. For example,<br />
a space that would be 8 inches in the pattern is 9 inches on an inside radius.<br />
This would require cutting a 16-inch piece to 9 inches instead of using<br />
an 8-inch piece and a 1-inch sliver.<br />
USING GEOSYNTHETIC REINFORCEMENT<br />
For walls that are less than 4 feet, use a light-weight grid. Miragrid 2XT is<br />
a good example of a grid that would work well. It is thinner and can be used<br />
in either direction for a strong wall. Use best practices for installing grid.<br />
Lay grid perpendicular to the wall face, bringing it to within 1 inch from the<br />
wall face. Pull the grid tight before backfilling. Cut off the salvage edge on<br />
grid to eliminate any unevenness of grid.<br />
STEPS<br />
When constructing steps, consider whether it is a fill or a cut grade<br />
situation. Construction is similar but varies in the amount of dummy units<br />
required.<br />
A fill step solution will have a base course of dummy units in the entire<br />
footprint of the steps. For each additional step, add dummy units behind<br />
the facing units for stability. The facing units on the steps should alternate<br />
between 8-inch and 16-inch units glued to the dummy units.<br />
A cut grade set of steps will use one layer of dummy units under each step,<br />
effectively stepping up the grade. Both applications will require some sort<br />
of tread to cover the facing units. The double-sided cap is a great solution.<br />
ALTERNATIVE TO GEOSYNTHETIC REINFORCEMENT<br />
Stabilized aggregate is a porous backfill material that can be used as an<br />
alternative to geogrid when building with <strong>BelAir</strong> Wall in cut wall situations<br />
where you don’t have room to excavate for geogrid. Excavation time<br />
can be reduced by around 40%. Reducing excavation also means reducing<br />
backfill time and eliminating the need to compact all the backfill soil.<br />
Stabilized aggregate effectively increases the depth of the facing unit and<br />
creates a permeable concrete mass that can resist the weight of the soil<br />
wedge behind the wall. It is a proven system with several million square<br />
feet built with this method. For more information, refer to the Stabilized<br />
Aggregate Manual. (Continued on following page)<br />
visit www.belairwall.com for more details,<br />
including information on installation training videos.<br />
5
BELGARD BELAIR RETAINING WALLS Geogrid Estimating Chart<br />
3:1 Crest Slope<br />
CLAY AND SILT SOIL SILTY /CLAYEY SAND SOIL CLEAN SAND AND GRAVEL SOIL<br />
WALL ABUTTING A COLUMN (Continued from previous page)<br />
Whether building a free-standing wall or a retaining wall with column accents,<br />
the wall is abutted to the column. When constructed as a pilaster at the end of<br />
a free-standing wall, cutting the wall pieces to fit against the column is the only<br />
work required. When abutting the wall in the middle of the column face, some<br />
sculpting of the units will be needed to give a clean finished look to a project.<br />
The hand-cut look of the units gives a soft, round appearance to each unit. If<br />
you butt the edge of a unit to the rounded face, gapping appears at the top and<br />
bottom of the unit. The best way to finish this is to mark or scribe the unit to fit<br />
the face of the column unit into the edge of the wall unit. This is easily achieved<br />
with a small handheld grinder with a diamond blade.<br />
CAPPING<br />
The double-sided cap has a right-angle side and an offset angle side. The caps<br />
can be used in any of four directions since there is no specific top or bottom.<br />
There is an arrow on the side to guide capping straight walls. Just place the<br />
arrows in the same direction and touch them together as the caps are laid. On<br />
a radius that usually requires extensive cutting, the fact that the unit can be<br />
turned any of four ways will reduce cutting dramatically. For example, on an arc<br />
of about 25 feet, a standard trapezoidal or rectangular cap would require cutting<br />
every other cap or about 10 caps. With this product, only four caps needed<br />
to be cut. This again saves time, saw wear and tear and diamond blades.<br />
Free-standing Wall<br />
BASE COURSE<br />
Since the 6-inch units are palletized together, it is easiest to use both the 6"<br />
x 16" and 6" x 8" units to build the base. This will help maintain the ratio of<br />
one-to-one with the units and will eliminate the need to pick around the smaller<br />
units on the pallet and save time. Flip the units over so the lug is down when<br />
building the base.<br />
ADDITIONAL COURSES<br />
When building additional courses, use pattern if desired. Alternate units up and<br />
down as needed to maintain vertical wall.<br />
FREE-STANDING WALL CORNERS<br />
A free-standing wall corner would typically be built by putting a column in the<br />
corner and building away from it. In some cases, this will not happen and a series<br />
of units needs to be mitered to create the corner. Begin with a 16-inch unit.<br />
Use a speed square to mark a 45-degree angle off the formed edge on top of the<br />
unit from the corner to the back of the unit. Make the cut and repeat.<br />
On the second course, use an 8-inch unit to stagger the bond. Mark and cut in<br />
the same fashion. Fill in the inside corner with two 16-inch pieces by cutting the<br />
corners off to fill the inside of your corner. You may flip units over or knock off the<br />
locator if needed to fit the units. All units should be glued bottom to top.<br />
6<br />
visit www.belairwall.com for more details,<br />
including information on installation training videos.
Retaining Wall<br />
For project material estimating, use the formulas listed in each step. The wall product is palletized<br />
in pairs. The pallets of 6-inch-high product have an equal number of 6" x 16" and 6" x 8" units.<br />
The pallets of 3-inch-high product have an equal number of 3" x 16" and 3" x 8" units.<br />
1 BURIED BASE PALLET ESTIMATING<br />
Build buried base course using alternating 6" x 16" and 6" x 8" units. Determine the length (L)<br />
of the base in linear feet (LF). Divide LF by 60, the linear feet on a pallet.<br />
LF ÷ 60 = # pallets of 6-inch-high product<br />
2 EXPOSED WALL PALLET ESTIMATING<br />
Determine the square footage of the exposed wall:<br />
Exposed wall length (L) x height (H) = square feet (SF). Multiply SF by .022 for the number of<br />
pallets of 6-inch-high product. Multiply SF by .011 for the number of 3-inch product pallets.<br />
SF x .022 = # pallets of 6-inch-high product<br />
SF x .011 = # pallets of 3-inch-high product<br />
3 CAP PALLET ESTIMATING<br />
Determine the length of the wall in linear feet (LF). Divide LF by 90, the linear feet on a pallet.<br />
For curved walls, add 10%<br />
<strong>BelAir</strong> Wall ESTIMATING FORMULAS<br />
PROJECT ESTIMATING EXAMPLE<br />
The wall is 50 feet long and 2.5 feet high. There is no toe or<br />
crest slope, and the soils are clean sand and gravel.<br />
1 BURIED BASE PALLETS<br />
50 LF ÷ 60 = .83 pallets of 6-inch-high product<br />
2 EXPOSED WALL PALLETS<br />
50' L x 2' H = 100 SF<br />
100 SF x .022 = 2.2 pallets of 6-inch-high product<br />
100 SF x .011 = 1.1 pallets of 3-inch-high product<br />
TOTAL PALLETS OF PRODUCT REQUIRED<br />
6-inch-high product<br />
Pallets for exposed wall 2.2<br />
Pallets for base .83<br />
Total pallets of 6-inch-high product 3.03<br />
3-inch-high product<br />
Pallets 1.1<br />
3 CAP PALLETS<br />
50 LF ÷ 90 = .55 pallets of caps<br />
LF ÷ 90 = # pallets of caps<br />
Free-standing Wall<br />
For project material estimating, use the formulas listed in each step. The pallets of 6-inch-high product<br />
have an equal number of 6” x 16” and 6” x 8” units. The pallets of 3-inch-high product have an equal<br />
number of 3" x 16" and 3" x 8" units.<br />
1 BURIED BASE UNIT ESTIMATING<br />
Build buried base course using alternating 6" x 16"<br />
and 6" x 8" units. Determine the length (L) of the<br />
base in linear feet (LF). Divide LF by 33, the number<br />
of linear feet on a pallet of 6-inch-high product.<br />
LF ÷ 33 = # pallets of 6-inch-high product<br />
Add 10% for curves.<br />
2 EXPOSED WALL PALLET ESTIMATING<br />
Straight Walls<br />
Determine the square footage of the exposed wall:<br />
Exposed wall length (L) x height (H) = square feet (SF)<br />
Multiply the SF by .03 for the number of pallets of<br />
each height product.<br />
Straight Walls<br />
SF x .03 = # pallets 6-inch-high product<br />
SF x .03 = # pallets 3-inch-high product<br />
Curved Walls<br />
SF x .033 = # pallets 6-inch-high product<br />
SF x .033 = # pallets 3-inch-high product<br />
3 COLUMN ESTIMATING<br />
Estimate the quantity needed for a column by<br />
multiplying the height (H) in feet, including buried<br />
course, x 8.<br />
H x 8 = # units per column<br />
4 CAP PALLET ESTIMATING<br />
Determine the length of the wall in linear feet (LF).<br />
Divide LF by 90, the number of linear feet on a<br />
pallet.<br />
LF ÷ 90 = # pallets of caps<br />
Add 10% for curved walls.<br />
PROJECT ESTIMATING EXAMPLE<br />
The straight wall is 50 feet long and 2 feet high. There are<br />
6 columns that are 3 feet high.<br />
1 BURIED BASE PALLETS<br />
50 L ÷ 33 = 1.5 pallets of 6-inch-high product<br />
2 EXPOSED WALL PALLETS<br />
75 SF x .03 = 2.25 pallets of 6-inch-high product<br />
75 SF x .03 = 2.25 pallets of 3-inch-high product<br />
TOTAL PALLETS OF PRODUCT REQUIRED<br />
6-inch-high product<br />
Pallets for exposed wall 2.25<br />
Pallets for base 1.5<br />
Total 3.75<br />
3-inch-high product<br />
Pallets 2.25<br />
3 COLUMN UNITS<br />
3’ x 8 = 24 column units per column<br />
Total column units needed<br />
per column 24<br />
x number of columns 6<br />
Total column units 144<br />
144 units ÷ 20 = 7.2 pallets<br />
4 CAP PALLETS<br />
50 LF ÷ 90 = .55 pallets of caps<br />
7
375 NORTHRIDGE RD., SUITE 350 ATLANTA, GA 30350<br />
WWW.BELGARD.BIZ<br />
<br />
For more information on <strong>BelAir</strong> Wall tm and Belgard Pavers, visit WWW.BELGARD.BIZ