
Create successful ePaper yourself
Turn your PDF publications into a flip-book with our unique Google optimized e-Paper software.
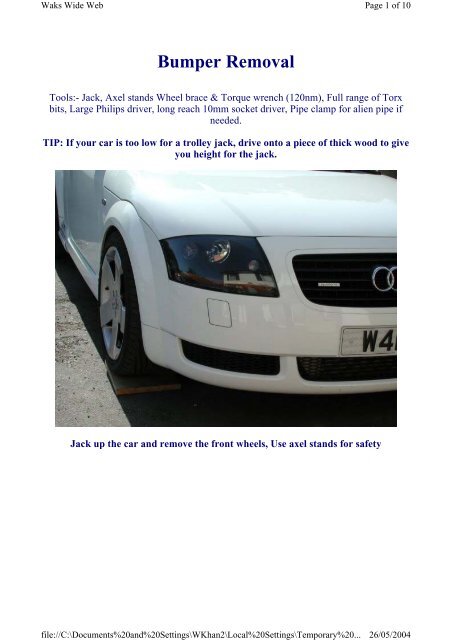
<strong>Wak</strong>s Wide Webfile://C:\Documents%20and%20Settings\WKhan2\Local%20Settings\Temporary%20...Page 1 of 1026/05/2004<strong>Bumper</strong> <strong>Removal</strong>Tools:- Jack, Axel stands Wheel brace & Torque wrench (120nm), Full range of Torxbits, Large Philips driver, long reach 10mm socket driver, Pipe clamp for alien pipe ifneeded.TIP: If your car is too low for a trolley jack, drive onto a piece of thick wood to giveyou height for the jack.Jack up the car and remove the front wheels, Use axel stands for safety
<strong>Wak</strong>s Wide Webfile://C:\Documents%20and%20Settings\WKhan2\Local%20Settings\Temporary%20...Page 2 of 1026/05/2004TIP: get an empty plastic box or tray to collect your screws as you go along.Remove the water bottle cover
<strong>Wak</strong>s Wide Webfile://C:\Documents%20and%20Settings\WKhan2\Local%20Settings\Temporary%20...Page 3 of 1026/05/2004Remove the Battery Cover and all six pegs holding the front cross member coverpanel in.
<strong>Wak</strong>s Wide Webfile://C:\Documents%20and%20Settings\WKhan2\Local%20Settings\Temporary%20...Page 4 of 1026/05/2004TIP: the pegs are 2 stage then they drop out which you don't want to happen.....
<strong>Wak</strong>s Wide Webfile://C:\Documents%20and%20Settings\WKhan2\Local%20Settings\Temporary%20...Page 5 of 1026/05/2004Use a small rod but hold your finger tight against the rod around 5mm back, whenyou push the peg let your finger be the stop point to avoid the peg dropping into theengine bay.TIP: Once the pegs are pushed, use 2 flat tools to lever the head and entire peg bodyout, as they are under tension, they could pop out, make sure a thumb or finger isstopping them to catch them before they fly off and disappear into the engine bayRemove the entire plastic cover across the front of the car, you will then have accessto the 6 Torx screws at the front holding the bumper....remove them, slide off themetal clamping strip and put it to one side.
<strong>Wak</strong>s Wide Webfile://C:\Documents%20and%20Settings\WKhan2\Local%20Settings\Temporary%20...Page 6 of 1026/05/2004Remove the indicated Torx Screws to release the front of the wheel arch liner andpush it to one side to allow access to the chamber behind the bumper.
<strong>Wak</strong>s Wide Webfile://C:\Documents%20and%20Settings\WKhan2\Local%20Settings\Temporary%20...Page 7 of 1026/05/2004Remove the 2 large Philips screws from the lower front bumper
<strong>Wak</strong>s Wide Webfile://C:\Documents%20and%20Settings\WKhan2\Local%20Settings\Temporary%20...Page 8 of 1026/05/2004There are 2 10mm bolts either side, 1 is accessible from the top half of a chamber,the other from the lower chamber, loosen and remove these bolts.
<strong>Wak</strong>s Wide Webfile://C:\Documents%20and%20Settings\WKhan2\Local%20Settings\Temporary%20...Page 9 of 1026/05/2004Below is a picture of the bumper pulled out to show you, just inside the wing there isa single torx screw facing vertically down which must be releasedThere are also 2 more torx screws that must be loosened from inside the wing...
<strong>Wak</strong>s Wide Webfile://C:\Documents%20and%20Settings\WKhan2\Local%20Settings\Temporary%20...Page 10 of 1026/05/2004.....Shown below from insideTIP: With all the above screws undone on both sides at this stage the bumper coveris fully released and only the connection pipe for the "aliens" needs disconnecting sothe front could be removed (this can be done on the passenger side of the bumpercover, use a pipe clamp to stop the washer tank draining).