
You also want an ePaper? Increase the reach of your titles
YUMPU automatically turns print PDFs into web optimized ePapers that Google loves.
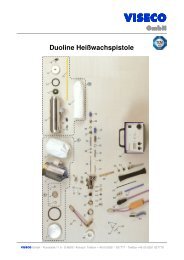
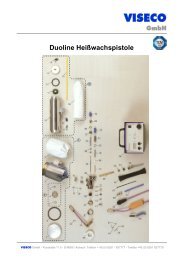
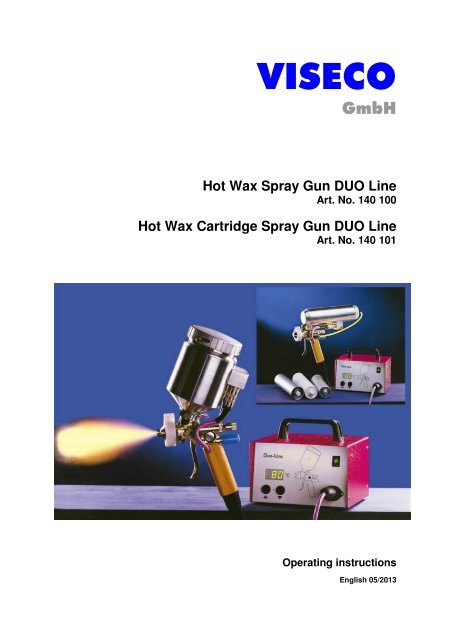
<strong>Hot</strong> <strong>Wax</strong> <strong>Spray</strong> <strong>Gun</strong> & <strong>Hot</strong> <strong>Wax</strong> Cartridge <strong>Spray</strong> <strong>Gun</strong> <strong>DUO</strong> <strong>Line</strong><strong>VISECO</strong><strong>VISECO</strong> <strong>GmbH</strong>Flurstr. 11 bD-86551 AichachPhone: +49 (0) 8251 – 82 77 77Fax: +49 (0) 8251 – 82 77 79info@viseco.dewww.viseco.de1
<strong>Hot</strong> <strong>Wax</strong> <strong>Spray</strong> <strong>Gun</strong> & <strong>Hot</strong> <strong>Wax</strong> Cartridge <strong>Spray</strong> <strong>Gun</strong> <strong>DUO</strong> <strong>Line</strong><strong>VISECO</strong>2 Description2.1 Temperature Adjustment <strong>DUO</strong> <strong>Line</strong>104106105102107101109108103Pos.Designation101 Mains plug102 Temperature display / failure code display103 LED heating nozzle104 LED heating cup / cartridge105 LED collective failure106 Mains switch ON / OFF107 Flange socket for link circuit108 Key button reduce temperature109 Key button increase temperature6
<strong>Hot</strong> <strong>Wax</strong> <strong>Spray</strong> <strong>Gun</strong> & <strong>Hot</strong> <strong>Wax</strong> Cartridge <strong>Spray</strong> <strong>Gun</strong> <strong>DUO</strong> <strong>Line</strong><strong>VISECO</strong>2.2 <strong>Hot</strong> <strong>Wax</strong> <strong>Spray</strong> <strong>Gun</strong> <strong>DUO</strong> <strong>Line</strong>205204206207203202208201210209Pos.Designation201 Four bore air head202 Nozzle cover <strong>DUO</strong> <strong>Line</strong>203 Coupling ring204 Flow cup <strong>DUO</strong> <strong>Line</strong>205 Bayonet cover206 Nozzle heating plug207 Cup heating plug208 Adjusting screw material needle209 Trigger210 Air control valve7
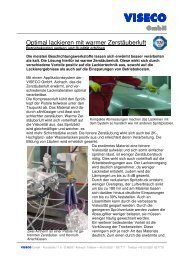
<strong>Hot</strong> <strong>Wax</strong> <strong>Spray</strong> <strong>Gun</strong> & <strong>Hot</strong> <strong>Wax</strong> Cartridge <strong>Spray</strong> <strong>Gun</strong> <strong>DUO</strong> <strong>Line</strong><strong>VISECO</strong>2.4 Technical DataMains voltage230 vac-50/60HzFuse protection10 ATPower250 VAOutput voltage40 VDC max.Transformer isolating transformer acc. to VDE 0551Protective insulationshockproofClassification IP 54Temperature adjustmentmicroprocessor controlMax. filling amount flow cup version0,4 lMax. filling amount cartridge version0,3 lMax. material pressure cartridge system3 barMax. material temperature 95°CMax. air pressure of atomizer6 barHose length7 mTemperature 20° to 95°C3 Putting into operationWork on electrical installations and equipment may only be performed by adequatelytrained qualified personnel and in conformity with the applicable national rules andregulations (in Germany: VDE regulations, among others).DANGEROnly connect and install electrical equipment when the device is switched-off and novoltage is applied. Mortal danger by electric shock!CAUTIONIf electric heatings are intended for unsupervised operation (operation at night), theapplicable safety regulations and the corresponding regulations of the relevantEmployer´s Liability Insurance Association (in Germany: regulations of VDE(Sicherheit in Elektro-Wärmeanlagen DIN EN 60619-2 [VDE 0721, Teil 441]) and“Berufsgenossenschaft”) have to be observed. These regulations possibly demandthermal monitoring (or thermal limitation) or inherent safety for this kind of use.Lacquers and solvent-containing colours must not be used. The <strong>DUO</strong> <strong>Line</strong> is notexplosion-proof. It must not be used within explosion-endangered areas (zones 0 to 2according to ATEX).Never direct the <strong>Spray</strong> <strong>Gun</strong> toward humans!While cleaning the <strong>Hot</strong> <strong>Wax</strong> <strong>Spray</strong> <strong>Gun</strong> with solvents you will not allowed any ignitionsource within the working area, as easily inflammable gas compounds may begenerated. The mains plug of the equipment has to be disconnected.Bare metal parts heat up during operation. Use protective gloves and thermoinsulationpos. 8 or 18.Be sure to observe the UW VBG 1 and 23 (German rules for preventions of accidents)when operating the <strong>Hot</strong> <strong>Wax</strong> <strong>Spray</strong> <strong>Gun</strong> <strong>DUO</strong> <strong>Line</strong>.Pay attention to it that no material arrives at the electrical contacts. Use termal isolation pos.8 or 18 and change these, if material deposits are on it.The <strong>Hot</strong> <strong>Wax</strong> <strong>Spray</strong> <strong>Gun</strong>s <strong>DUO</strong> <strong>Line</strong> are manufactured in keeping with the latesttechnological development. Improper use e.g. exceeding operation data (see technical data)may provoke hazards. The user will be liable for operating the equipment in perfect conditiononly. Therefore, regular checks by expert personnel are indispensable. Transformations ormodifications by not-authorized persons are not allowed. We exclusively agree to the use oforiginal spare parts and accessories.9
<strong>Hot</strong> <strong>Wax</strong> <strong>Spray</strong> <strong>Gun</strong> & <strong>Hot</strong> <strong>Wax</strong> Cartridge <strong>Spray</strong> <strong>Gun</strong> <strong>DUO</strong> <strong>Line</strong><strong>VISECO</strong>3.2 Putting into operation of the <strong>Hot</strong> <strong>Wax</strong> Cartridge <strong>Spray</strong> <strong>Gun</strong> <strong>DUO</strong> <strong>Line</strong>1. Install the <strong>Hot</strong> <strong>Wax</strong> <strong>Spray</strong> <strong>Gun</strong> <strong>DUO</strong> <strong>Line</strong> at the desired place of work.2. Insert plug pos. 101.3. Connect cable plug of spray gun to electronic control <strong>DUO</strong> <strong>Line</strong> pos. 107.4. Remove air hose pos. 305 from threaded elbow joint. Fasten cartridge lid pos. 303.5. Cut off top of plastic cartridge (maximum excess 10 mm) and slip over o-ring pos. 11. Insert cartridgein cartridge holder and tighten cartridge lid. Fix air hose pos. 305 to threaded elbow joint pos. 304.6. Switch on mains switch pos. 106 (ON).• Now mains switch display, LED pos. 103 and 104 as well as temperature display pos. 102 are litup.• Temperature adjustment <strong>DUO</strong> <strong>Line</strong> is set to 80°C by <strong>VISECO</strong>.• In order to control material temperatures, adjust desired value by means of cursorspos. 108 and 109.8. Couple the compressed air hose to air line (cleaned compressed air) and/or an air cleaner and adjustthe desired atomizer air pressure (0,5 - 1 bar, max. 3 bar! Air pressure may not be exceeded!) at thepressure-reducing valve. When trigger pos. 209 is actuated, the air valve will be opened first(atomizer air) and the material needle will be taken back afterwards. Reasoning takes place in reverseorder. The liquid hot wax is torn with drawn up pistol by the injector effect of atomizer air into the jetspray. Material amounts can be controlled by in or unscrewing of the set screw pos. 208.• Heating period about 10 min.• Equipment is now ready for operation.4 Maintenance and cleaningBefore starting maintenance interrupt air and power supply!DANGERWith cleaning the hot wax spray gun with solvent no ignition source may be in the work area,since easy-inflammatory mixtures develop. The power supply plug of the controller must betaken off.CAUTIONWhen using solvents or detergents on the basis of halogenised hydrocarbon as e.g. 1,1,1-trichloroethane and methylene chloride (dichlormethane) chemical reactions may occur at thealuminium cup, at the gun, as well as at electroplated parts. These parts may become oxidized.<strong>VISECO</strong> will not be liable for damages resulting from the usage of improper detergents.NOTEAfter the cleaning the material-prominent parts may exhibit no more deposits.It is advisable to lubricate all sliding parts and bearings with an acidless and a not resinthat fat or oil. The mobile interior is to be cleaned at least once weekly. The feathers /springs should be constantly provided with a light fat coat.Pay attention to it that no material arrives at the electrical contacts. Use Termal isolationpos. 8 or 18 and change these, if material deposits are on it.11
<strong>Hot</strong> <strong>Wax</strong> <strong>Spray</strong> <strong>Gun</strong> & <strong>Hot</strong> <strong>Wax</strong> Cartridge <strong>Spray</strong> <strong>Gun</strong> <strong>DUO</strong> <strong>Line</strong><strong>VISECO</strong>4.1 Cleaning of the <strong>Hot</strong> <strong>Wax</strong> <strong>Spray</strong> <strong>Gun</strong> <strong>DUO</strong> <strong>Line</strong>For cleaning the <strong>Hot</strong> <strong>Wax</strong> <strong>Spray</strong> <strong>Gun</strong> fill the remaining material by a fine-meshed sieve (also a stockingpossible ) and rinse with hot oil (food oil). Fill the cold <strong>Spray</strong> <strong>Gun</strong> with cleaning dilution. Operate the triggerpos. 209 till the cleaning dilution withdraws at the nozzle. Depending upon degree of pollution let thecleaning dilution 1-2 hours influence and remove the wax remainders with a brush. Fill and rinse the <strong>Spray</strong><strong>Gun</strong> with fresh cleaning dilution. Blow out the <strong>Spray</strong> <strong>Gun</strong> with compressed air.Conserve the material channel with a neutral oil during longer interruption of work. In the case of strongcontamination the material channel can after unscrewing the air head pos. 201 and unscrewing of thematerial nozzle pos. 28 as well as development of the material needle pos. 34 to be opened. Do not cleanprecision parts with hard articles.4.2 Cleaning of the <strong>Hot</strong> <strong>Wax</strong> Cartridge <strong>Spray</strong> <strong>Gun</strong> <strong>DUO</strong> <strong>Line</strong>Screw on cartridge cover pos. 303 and take material cartridge. Set up the cartridge chamber pos. 302perpendicularly and fill with cleaning dilution. Operate the trigger pos. 209 till the cleaning dilutionwithdraws at the nozzle. Depending upon degree of pollution let the cleaning dilution 1-2 hours influence.Fill and rinse the <strong>Spray</strong> <strong>Gun</strong> with fresh cleaning dilution. Screw on cartridge cover pos. 303 and stick onair hose pos. 305 at screwed angle fitting pos. 304. Blow out the <strong>Spray</strong> <strong>Gun</strong> with compressed air.4.3 Cleaning of the strainer (only with the cup version)Turn off screw pos. 401 with box spanner (size 10). Holdstrainer fixing pos. 402 with steel pin and dismantle thestrainer pos. 403. Clean strainer and strainer fixing withcleaning dilution and a brush and blow them out withcompressed air. Please pay attention to it that in the strainerfixing are small openings by which the wax penetrates intothe <strong>Spray</strong> <strong>Gun</strong>. These openings must be free.Mounting in a general manner reverse order.CAUTIONOnly parts of the pistol body may be insert into solventcleaner. The cup may be filled with solvents for cleaningpurposes. This may take place only in cold condition. Allother parts may only be cleaned with a soaked cloth,however not be inserted into any liquids. This destroys theelectrical contacts. Because such are also in theconnection housing of the cup, a sleeve (see photo right)is always to be pulled over the complete cup duringworking. Otherwise material can penetrate the housingand destroy the contacts.5 Transport and storageAfter distribution ex factory the <strong>Spray</strong> <strong>Gun</strong> may be only transported in packaging which is suitable forelectronic devices.Permissible temperatures for storage and transport: -20°C to 50°CPermissible relative air humidity:max. 90%, non-condensing12
<strong>Hot</strong> <strong>Wax</strong> <strong>Spray</strong> <strong>Gun</strong> & <strong>Hot</strong> <strong>Wax</strong> Cartridge <strong>Spray</strong> <strong>Gun</strong> <strong>DUO</strong> <strong>Line</strong><strong>VISECO</strong>6 Failures and errorsIt is strongly recommended to test spray patterns on a clean sheet of paper before starting spraying work.All eventual discrepancies will immediately be visible and can be eliminated before you start waxing.6.1 Failures at the <strong>Hot</strong> <strong>Wax</strong> <strong>Spray</strong> <strong>Gun</strong> <strong>DUO</strong> <strong>Line</strong>Problem Possible cause SolutionNo material flowing out. a) No wax in flow cup.a) Fill in wax.b) Strainer pos. 403 blocked. b) Dismantle and clean(see chapter 4).c) Temperature too low. c) Working temperature not yetreached or increasetemperature (see chapter 6.3).d) Strainer fixing pos. 402 d) Dismantle and clean<strong>Gun</strong> dropping.Material leakage at gland.Air leakage at gun head,gun blowing at idle.<strong>Spray</strong> jet adjustment.(Not for rotary jet nozzle!)Pulsating spray jet or nomaterial flowing.blocked.a) Material pin or nozzle soiled.b) Material needle or nozzledamaged.c) Foreign matter in materialnozzle.d) Gland pos. 28 too muchtightened.e) Needle spring pos. 35 out oforder; evt. broken.f) Adjustment screw pos. 39 toofar back.g) Setting of needle nut pos. 35misadjusted.a) Gland not tight enough.b) Needle package pos. 28 wornout.a) Valve cone pos. 48 not tight.b) Valve shaft pos. 47 sluggish.Before mounting the air head,material nozzle outside andcontact surface of air head have tobe cleaned. <strong>Wax</strong> remains may sitbetween nozzle and air head anddisturb air supply.a) Not enough material in flowcup.b) Flow cup too much inclined.c) Material nozzle pos. 28 loose.d) Material temperature too low.e) Strainer pos. 4 blocked.<strong>Spray</strong> jet one-sided. Horn bore at air head pos. 27soiled.Faulty spray jet becauseof wrong setting.(see chapter 4).a) Dismantle and clean.b) Replace with spare part.c) Dismantle and clean.d) Loosen gland bolt pos. 30slightly.e) Dismantle and replace withspare part if neccessary.f) Turn in adjustment screw.g) Adjust setting (see chapter 7).a) Tighten gland nut slightly.b) Replace with spare part.a) Replace with spare part.b) Replace with spare part.Dismantle and clean.a) Fill in material.b) Keep gun vertically or fill inmaterial.c) Tighten material nozzle.d) Working temperature not yetreached or increasetemperature (see chapter 6.3).e) Dismantle and clean.Dismantle and clean.When spray jet is split, amount ofmaterial may be too low and spraypressure too high at the sametime.<strong>Spray</strong> pattern correct.<strong>Gun</strong> does not heat. Heating or control failure. See chapter 6.3.Reduce atomizer pressure or openadjustment screw pos. 39.13
<strong>Hot</strong> <strong>Wax</strong> <strong>Spray</strong> <strong>Gun</strong> & <strong>Hot</strong> <strong>Wax</strong> Cartridge <strong>Spray</strong> <strong>Gun</strong> <strong>DUO</strong> <strong>Line</strong><strong>VISECO</strong>6.2 Failures at the <strong>Hot</strong> <strong>Wax</strong> Cartridge <strong>Spray</strong> <strong>Gun</strong> <strong>DUO</strong> <strong>Line</strong>Problem Possible cause SolutionNo material flowing out. a) Cartridge empty.b) Temperature too low.c) Nozzle is blocked.d) Air hose pos. 305 notattached.e) Cartridge lid pos. 303 loose.f) Cartridge lid sealing pos. 12soiled or defect.a) Replace cartridge.b) Working temperature not yetreached or increasetemperature (see chapter 6.3).c) Dismantle and clean.d) Attach air hose.e) Tighten cartridge lid.f) Dismantle and clean orreplace with spare part.<strong>Gun</strong> does not heat. Heating or control failure. See chapter 6.3.For more failures see chapter 5.1.6.3 Failures at the Temperature Adjustment <strong>DUO</strong> <strong>Line</strong>The Temperature Adjustment <strong>DUO</strong> <strong>Line</strong> is equipped with a diagnostic display. In case of trouble, collectivefault pos. 105 will be blinking and the resp. error code will be shown in the digital display pos. 102.Problem Possible cause Solution<strong>Gun</strong> does not heat. a) Mains plug not connected. a) Insert plug, switch on supplypos. 106.b) No power supply.b) Check mains supply.Failure code E01a) Plug pos. 107 not connected.b) Plug pos. 58 not connected.a) Plug in pos. 107.b) Plug in pos. 58.c) Nozzle, cup heating andsensor defect.c) Replace nozzles and cupheating.Failure code E02a) Nozzle heating pos. 6 notplugged in.b) Nozzle heating sensor defect.a) Plug in.b) Replace nozzle heating.Failure code E03 Flow cup sensor defect. Replace flow cup.Failure code E04Electronic control circuit 1 defect Temperature Adjustment <strong>DUO</strong> <strong>Line</strong>(control circuit nozzle heating).Failure code E05Electronic control circuit 2 defect(control circuit cup heating).Failure code E06 Nozzle heating defect. Replace nozzle heating.Failure code E07 Flow cup heating defect. Replace flow cup heating.must be repaired.Temperature Adjustment <strong>DUO</strong> <strong>Line</strong>must be repaired.14
<strong>Hot</strong> <strong>Wax</strong> <strong>Spray</strong> <strong>Gun</strong> & <strong>Hot</strong> <strong>Wax</strong> Cartridge <strong>Spray</strong> <strong>Gun</strong> <strong>DUO</strong> <strong>Line</strong><strong>VISECO</strong>7 Replacement of components1. Replacement of the nozzle heating pos. 202:a) Loosen plug pos. 206.b) Loosen bolt pos. 25 of nozzle heating pos. 202.c) Pull off nozzle heating together with nozzle casing.Mount in reverse order.2. Replacement of material nozzle:a) See par. 1.b) Loosen air head nut pos. 26.c) Remove air head pos. 27.d) Loosen material nozzle pos. 28 with spanner SW 12 from gun body.Mount in reverse order.3. Replacement of material needle:a) Loosen adjustment screw pos. 208.b) Screw off spring bushing pos. 37.c) Remove needle spring pos. 36.d) Tear out material needle pos. 34.e) Setting of material needle for antichamber air has to be 64 mm from needle cup to the first needlenut pos. 35. The second nut is for safety.Mount in reverse order.4. Remplacement of the flow cup pos. 204a) Unscrew plugs pos. 206 and 207.b) Loosen union nut pos. 203 with open-end spanner 22.Mount in reverse order.5. Replacement of the needle packing:After dismounting the material needle both the gland bolts pos. 30 have to be screwed off the gunbody. Needle packing pos. 29 can now be removed.Mount in reverse order.8 Converting <strong>Hot</strong> <strong>Wax</strong> <strong>Spray</strong> <strong>Gun</strong> into <strong>Hot</strong> <strong>Wax</strong> Cartridge <strong>Spray</strong> <strong>Gun</strong>The <strong>Hot</strong> <strong>Wax</strong> <strong>Spray</strong> <strong>Gun</strong> <strong>DUO</strong> <strong>Line</strong> can easily be converted into a <strong>Hot</strong> <strong>Wax</strong> Cartridge <strong>Spray</strong> <strong>Gun</strong>. In orderto do this you will need retrofit kit art. no. 101.270042.1. Dismantle flow cup (see chapter 7).2. Unscrew blind plug pos. 44.3. Insert threaded elbow joints pos. 16 into gun body pos. 33.4. Tighten cartridge holder <strong>DUO</strong> <strong>Line</strong> by means of union nut pos. 31.5. Screw down plug pos. 206 and 207.6. Attach air hose pos. 305 to threaded elbow joint pos. 16.For putting into operation of <strong>Hot</strong> <strong>Wax</strong> Cartridge <strong>Spray</strong> <strong>Gun</strong> see chapter 3.2.15
<strong>Hot</strong> <strong>Wax</strong> <strong>Spray</strong> <strong>Gun</strong> & <strong>Hot</strong> <strong>Wax</strong> Cartridge <strong>Spray</strong> <strong>Gun</strong> <strong>DUO</strong> <strong>Line</strong><strong>VISECO</strong>9 Spare parts16
<strong>Hot</strong> <strong>Wax</strong> <strong>Spray</strong> <strong>Gun</strong> & <strong>Hot</strong> <strong>Wax</strong> Cartridge <strong>Spray</strong> <strong>Gun</strong> <strong>DUO</strong> <strong>Line</strong><strong>VISECO</strong>Pos. Disignation Art. No.1 Bayonet cover with sealing 100.270030S2 Flow cup sealing 100.2700313 Strainer fixing with screw 103.10.0184 Strainer II 103.50.0685 Bolt 103.50.0716 Complete strainer (pos. 3+4)7 Flow cup <strong>DUO</strong> <strong>Line</strong> 100.2700328 Thermocoating flow cup (5 pieces) 100.2700339 Flow cup retrofit kit pos. 1-8 + 17 100.27003410 Cartridge casing <strong>DUO</strong> <strong>Line</strong> 101.27004611 Cartridge sealing (2 pieces) 101.27003612 Cartridge cover sealing 101.27003713 Cartridge cover complete 101.27002514 Threaded elbow joint G1/8“ 101.27003815 Air hose 6/4 101.27003916 Threaded elbow joint G1/8“ 101.27003817 Sealing plug 101.27004018 Thermocoating cartridge (5 pieces) 101.27004119 Cartridge retrofit kit pos. 10-18 101.27004223 Nozzle cover <strong>DUO</strong> <strong>Line</strong> 100.27002724 Nozzle heating <strong>DUO</strong> <strong>Line</strong> 100.270026o25 Bolt for nozzle heating 100.27005226 Air head nut V 01 101 03 00027 Air head V 01 101 02 12428 Material nozzle V 01 101 10 12129 Needle packing V 09 101 74 00030 Glandbolt (2 pieces) V 10 441 03 00031 Union nut 3/8“ 100.2700932 Male thread end nipple 100.2700833 <strong>Gun</strong> body G 1/8 100.27005434 Material needle V 10 406 01 12335 Needle nut (2 pieces) V 10 206 02 00036 Needle spring V 10 206 04 00037 Spring bushing V 10 206 06 00038 Locknut V 11 506 07 00039 Adjusting screw V 10 206 05 00040 Adjusting screw insulation 100.27004741 Complete air control valve V 00 101 74 75042 Valve bushing V 10 201 06 00043 Packing ever 4 discs V 09 101 15 00044 Blind plug 1/8“ 100.27004845 Sealing 1/8“ 100.27004946 Air pipe V 00 101 09 00047 Valve shaft V 10 444 01 00048 Valve cone V 10 904 02 00017
<strong>Hot</strong> <strong>Wax</strong> <strong>Spray</strong> <strong>Gun</strong> & <strong>Hot</strong> <strong>Wax</strong> Cartridge <strong>Spray</strong> <strong>Gun</strong> <strong>DUO</strong> <strong>Line</strong><strong>VISECO</strong>Pos. Designation Art. No.49 Valve spring V 10 204 03 00050 Sealing V 09 101 14 00051 Valve casing V 10 204 14 00052 Insulation cap 103.50.05953 Spring for trigger fixing V 10 101 19 00054 Trigger bolt (2 pieces) V 10 101 18 00055 U-bolt V 00 103 07 00056 Nut for U-bolt V 00 103 04 00057 Insulated trigger V 00 103 06 00058 Complete hose and cable set 100.27006059 Coupler plug NG 8 103.50.06260 Compressed air hose 8/6 103.50.06361 Cable binder black (2 pieces) 100.27005162 Tissue coating 103.50.06163 Air pipe nut V 00 101 08 00064 Reducer V 00 101 05 00065 Screw joint 103.50.07566 Temperature Adjustment <strong>DUO</strong> <strong>Line</strong> 100.27002467 Repair kit (pos. 4, 27-29, 34-36, 43, 48, 49) 103.50.07310 Nozzle tableThe standard nozzle kit will be appropriate for most applications. Moreover, the following nozzle kits areavailable as rotary spray jet kit.For mounting and dismounting see chapter 7.Nozzle Size Flat-round Jet Nozzle Rotary Jet Nozzle0,8 mm Ø V 15 004 02 081 V 15 044 21 0811,0 mm Ø V 15 004 02 101 V 15 044 21 101***1,2 mm Ø V 15 004 02 121*** V 15 044 21 1211,5 mm Ø V 15 004 02 151 V 15 044 21 1511,8 mm Ø V 15 004 02 181 V 15 044 21 1812,0 mm Ø V 15 004 02 201 V 15 044 21 2012,5 mm Ø V 15 004 02 251 V 15 044 21 251The nozzle kit marked with *** is standard.18
<strong>Hot</strong> <strong>Wax</strong> <strong>Spray</strong> <strong>Gun</strong> & <strong>Hot</strong> <strong>Wax</strong> Cartridge <strong>Spray</strong> <strong>Gun</strong> <strong>DUO</strong> <strong>Line</strong><strong>VISECO</strong>11 Warranty<strong>VISECO</strong> guarantees that all devices made by <strong>VISECO</strong> and wearing the name <strong>VISECO</strong> are free of materialand production faults at the time they are sold by authorized sales representatives to the original buyer.<strong>VISECO</strong> will repair or replace all parts of the device which have been accepted by <strong>VISECO</strong> to be faultywithin a period of 12 months after the date of sale.This warranty is only valid if the device has been installed, operated and maintained according to thewritten instructions issued by <strong>VISECO</strong>.This warranty does not include general wear or any kind of malfunction or damage caused by incorrectinstallation or operation, abrasion, corrosion, inadequate or incorrect maintenance, negligence,unauthorized modifications or fitting of parts that are not original <strong>VISECO</strong> parts. Moreover, <strong>VISECO</strong> willnot be liable for any malfunctions, damages or wear causes this way.Furthermore, <strong>VISECO</strong> will not be responsible for malfunctions, damages or wear resulting fromincompatibility of <strong>VISECO</strong> devices with structures, spare parts, devices or materials not supplied by<strong>VISECO</strong> or those resulting from improper design, production, installation, operation or maintenance orwhich are caused by structures, spare parts, devices or materials not supplied by <strong>VISECO</strong>.This warranty will be valid under the condition that the device to be guaranteed is sent free of charge to<strong>VISECO</strong> to repair the indicated fault. If the indicated fault is confirmed, <strong>VISECO</strong> will repair or replace anykind of faulty part free of charge. The device will be sent back to the sender not free. If no material orproduction defect should be found during testing we will repair the device according to our valid priceswhich include the costs for spare parts, work and transport.<strong>VISECO</strong>´s sole liability as well as the purchaser´s only appeal in case of lacking warranty result from theabove said. The purchaser agrees to the fact that no other appeal will be admitted (inclusively but notexclusively claims for damages following profit losses, not concluded sales, personal and materialdamages or other). Any kind of lacking warranty has to be claimed within two (2) years after date of sale.<strong>VISECO</strong>´s warranty does not include any accessory parts, materials or components delivered by <strong>VISECO</strong>but not produced by <strong>VISECO</strong>. Those parts delivered by <strong>VISECO</strong> but not produced by <strong>VISECO</strong> are subjectof guarantee bonds of the respective producers, as far as available. Should such a producer not fulfil hiswarranty, <strong>VISECO</strong> will support the purchaser with any kind of adequate assistance.LIMITATION OF LIABILITY<strong>VISECO</strong> will not be liable in any case for indirect damages following or for particular damages resultingfrom the delivery of devices by <strong>VISECO</strong>, neither for damages resulting from the breach of a contract orfrom the lacking of warranty nor for damages due to negligence by <strong>VISECO</strong> or other circumstances. Thisalso applies to damages possibly resulting form the design, the product features or the use of <strong>VISECO</strong>devices or other devices delivered by <strong>VISECO</strong> but not produced by <strong>VISECO</strong>.19
<strong>Hot</strong> <strong>Wax</strong> <strong>Spray</strong> <strong>Gun</strong> & <strong>Hot</strong> <strong>Wax</strong> Cartridge <strong>Spray</strong> <strong>Gun</strong> <strong>DUO</strong> <strong>Line</strong><strong>VISECO</strong>12 CE Declaration of ConformityAccording to EU-machine directive 2006/42/ECappendix II AHereby the manufacturer<strong>VISECO</strong> <strong>GmbH</strong>Flurstr. 11bD-86551 Aichachdeclares that the following deviceDesignation:<strong>DUO</strong> <strong>Line</strong> <strong>Hot</strong> <strong>Wax</strong> <strong>Spray</strong> <strong>Gun</strong>Article Number: 140-100 (140-101)Serial Number: starting from 06103430is manufactured according to the following regulations:2006/42/EC2006/95/EC2004/108/EC97/23/EC89/655/ECEU-machine directiveLow voltage directiveEMV-directivewith their change directives.Pressure device directiveDevice use directiveApplied harmonized European standards*EN 12100-1/2EN 60204-1Machine SafetyMachine Safety* A complete listing is present the manufacturer.In the case of not authorized modifications of the machine this declaration loses its validity.The manual in the available version is a component of this declaration.<strong>VISECO</strong> <strong>GmbH</strong>Heißwachstechnik und mehr…Flurstr. 11 bD-86551 AichachAichach, 19th January 2007______________________________________Vinko Sebalj (Managing Director)20
<strong>Hot</strong> <strong>Wax</strong> <strong>Spray</strong> <strong>Gun</strong> & <strong>Hot</strong> <strong>Wax</strong> Cartridge <strong>Spray</strong> <strong>Gun</strong> <strong>DUO</strong> <strong>Line</strong><strong>VISECO</strong>13 Notes<strong>VISECO</strong> <strong>GmbH</strong>Flurstr. 11 bD-86551 AichachPhone: +49 (0) 8251 – 82 77 77Fax: +49 (0) 8251 – 82 77 79info@viseco.dewww.viseco.de21