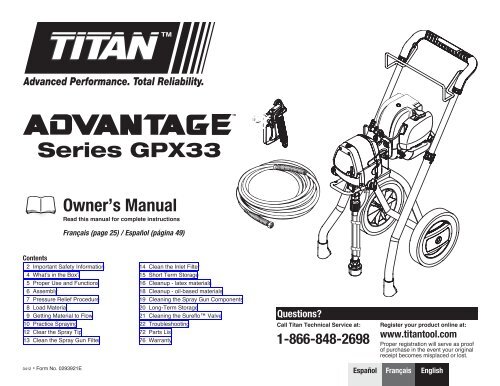
Advantage GPX 33 - Paint Sprayers, HVLP Sprayers, Powered Rollers
Advantage GPX 33 - Paint Sprayers, HVLP Sprayers, Powered Rollers
Advantage GPX 33 - Paint Sprayers, HVLP Sprayers, Powered Rollers
You also want an ePaper? Increase the reach of your titles
YUMPU automatically turns print PDFs into web optimized ePapers that Google loves.
Proper useand functionsSPRAYPRIMEPRIME/SPRAY knob:The PRIME/SPRAY knob directsmaterial to the material returntube when set to PRIME or tospray hose when set to SPRAY.Controls and FunctionsDirectLink:Spraying pressure is determinedby the motor throttle. The throttleis regulated by adjusting theDirectLink pressure controlknob. The higher the throttle, thehigher the spraying pressure.StartCapability:Sprays a variety of paints (oil-based andlatex), primers, stains, preservatives and othernonabrasive materials.Spray hose:The spray hose connects thespray gun to the pump.WIDENARROWTR 2 spray tip:The TR 2 spray tip can beadjusted based on your sprayingneeds.Do not use. . .This pump should not be used with texturedmaterials, block filler, asphalt sealer ormaterials containing HHC. See coating supplierif flash point is not listed on the containerSafety features:Spray gun trigger lock and pressure diffuser;built-in tip safety guard; PRIME/SPRAY knobfor safe pressure release.Specifications:Power .................................Ruitao 37.7 ccengine, 1.6 HpGas capacity .......................0.65 l(approximately 1hour spraying time)Oil capacity .........................0.08 lMaximum pressure .............3000 PSIFlow rate .............................0.<strong>33</strong> gal/min (1.25 l)Max tip size.........................0.017”Burn hazard. When collapsed,the cart handle is very close tothe exhaust port of the engine,which can be very hot afteruse. It is recommended thatthe cart handle NOT becollapsed until after the enginehas cooled.Spray gun:The spray gun controls thedelivery of the material beingpumped.AutoOiler:The AutoOiler is designed toprovide lubrication to the fluidsection of the pump.Sureflo Valve:The Sureflo Valve is designedto keep the inlet valve open andfrom sticking to dried materials.The Sureflo Valve is activatedmanually by the user.Collapsible handle:The cart handle can be collapsedfor easier storage.Turn the cart knobs counterclockwiseto unlock the handle.Turn the cart knobs clockwise tolock the handle into place.LX-50(a)(b)Trigger lock:Engage the trigger lock wheneverthe gun is not in use.LX-50 - The gun is lockedwhen the trigger lock is at a90º angle (perpendicular to thetrigger in either direction).Suction tube (a):The suction tube draws the fluidfrom the original container intothe pump.Material return tube (b):Fluid is sent out through thereturn tube and back into theoriginal container when thePRIME/SPRAY knob is in thePRIME position.5English
1. Assembly1 2 3StartYou will need:• Two adjustable wrenchesNote: It will be much easier toattach the hose to the sprayer ifyou uncoil it first.1. Insert the ends of the hosebracket into the holes of thehandle as shown.2. Remove the plug from insidethe hose fittings and remove thecap on the outlet valve. Discardboth.3. Thread one end of the highpressure spray hose to thespray hose port.454. Hold the port with anadjustable wrench, andtighten the hose with theother.5. Thread the other end of thehose to the spray gun. Holdthe gun with one adjustablewrench, and tighten the hosenut with the other.English6
Pressure Safety ReliefProcedure**Perform when instructedImportant Safety WarningBe careful when handling the spray gun so you don’taccidently spray yourself. The high pressure paintstream could pierce your skin causing serious injury. Ifan accident happens see detail procedures in the SafetyInformation section on pages 2-3. See physicianimmediately and bring this instruction manual.1 23StartImportant SafetyWarningBe sure to follow the Pressure ReliefProcedure when shutting the unit offfor any purpose. This procedure isused to relieve pressure from thespray hose. Failure to do so couldresult in serious injury.SPRAYPRIMEYou will need:• A waste bucket1. Lock the spray gun. 2. Turn the DirectLink pressurecontrol knob to minimum.3. Turn the PRIME/SPRAY knobto PRIME.4 54. Press and hold the red engine shutoff switch untilthe engine stops running.5. Unlock the spray gun. Briefly pull the triggerto fully relieve pressure from the system.Lock the spray gun.7English
2. LoadMaterial1 2 3(a)StartYou will need:• The material you plan to spray• Flat blade screwdriver• Piston Lube• Waste bucket1. Remove AutoOiler cap with aflat blade screwdriver.Squirt Piston Lube into theAutoOiler. Replace cap.2. Push AutoOiler button 2-5 timesto lubricate the fluid section.Press button 2-3 times beforeevery use. Be sure to checkreservoir level (a) and refill asnecessary.4 56 7 83. Fully depress the Sureflo valveto make sure the inlet ball isfree.(a)SPRAYPRIME(b)4. Place a full containerof spraying materialunderneath the suctiontube (a).Hold the return tube into awaste container (b).5. Turn the PRIME/SPRAYknob to PRIME.6. Attach the suppliedgrounding wire to agrounded object.Start the engine (seedirections on page 4).7. Increase the pressure tomaximum (+).Allow pump to run untilyou see spray materialflowing from the returntube.8. Shut the engine off. Placereturn tube back intomaterial container and clipreturn tube and suction tubetogether.English8
Start4. PracticeSprayingYou will need:Tip:Trigger gun after starting thestroke. Release the triggerbefore ending the stroke. Thespray gun should be movingwhen the trigger is pulled andreleased. Overlap each strokeby about 50%. This will ensurean even coating.• Scrap material / cardboardNotes:If the spray pattern becomes distorted orstops completely while the gun is triggered,follow any or all the procedures listed onpages 12-14.Practice on a piece of scrap material/cardboardIf you plan to be away from your sprayproject for more than one hour, follow theShort Term Storage instructions on page 15.If you have difficulty achieving a good spraypattern, your spray tip and gun filter maynot be ideal for the type of material you arespraying.SprayTipSizeFilterColor311 Red313413415515Yellow517 WhiteHold the Spray Gun LevelcorrectSprayInitialMaterialPressureSettingThin stains,sealersMinimumLatex paints,stainsMaximum10” - 12” 10” - 12”(25 - 30 cm) (25 - 30 cm)Thick latexpaints, stains MaximumincorrectEnglish10
Spray TechniquecorrectcorrectTip:Flex your wrist asyou move in order tokeep gun parallel tothe surfaceinCorrectStartstrokePulltriggerMovesteadilyReleasetriggerEndstrokeSpray PatternOverlap Your StrokesGOOD SPRAY PATTERN BAD SPRAY PATTERN: TAILING correct8” - 10”(20 - 25 cm)50% Overlap!See page 12-1411English
SprayingTroubleshooting -Clear theSpray TipStartYou will need:• Scrap material / cardboard1 2Note: If spray tip is difficultto rotate, relieve pressureby 1) slowly turn PRIME/SPRAY knob to PRIME, 2)unlock the spray gun and3) squeeze trigger whilepointing at scrap material/cardboard. Releasetrigger, lock the spray gun,and try rotating spray tipagain.Do not attempt to unclog orclean the tip with your finger.High pressure fluid can causeinjection injury.OR1. Lock the spray gun. 2. Rotate spray tip 180 degrees from itscurrent position.3 4 5NARROWSPRAYPRIMEWIDEOR3. Make sure the PRIME/SPRAY knob is turned toSPRAY.Unlock the spray gun.4. Point at a piece of scrap material /cardboard and squeeze trigger untilmaterial comes out in a high pressurestream. Release the trigger and lock thespray gun.5. Rotate spray tip forward to oneof the SPRAY positions.Unlock the spray gun andresume spraying.English12
SprayingTroubleshooting -123Clean the SprayGun FilterSPRAYPRIMEStartYou will need:• Wrench• Warm, soapy water for latex material• Mineral spirits for oil based materials• Replacement spray gun filter (if necessary)(a)important: Never clean the filter bypoking it with a sharp object.1. Peform the PressureRelief Procedure, page 7.2. Pull trigger guardfrom filter housing.3. Tighten the wrench over thewrench flats (a). Unscrew thefilter housing using a wrench.Note: You DO NOT need toremove the spray hose from the gunto clean the filter.45674. Remove the filter from thehousing. Clean with appropriatecleaning solution (warm, soapywater for latex materials; mineralspirits for oil-based materials).5. Inspect the filter fordamage. Replace if anyholes or tears are found.6. Replace cleaned filter, taperedend first, into the gun housing.Note: It is important to placetapered end first to ensure propersprayer operation.7. Reassemble the spray gun.13English
SprayingTroubleshooting -Clean theInlet Filter12StartYou will need:• Warm, soapy water for latex material• Mineral spirits for oil based materialsimportant: Make sure your floors andfurnishings are covered with drop clothsto prevent accidental drips.1. Unscrew the inlet filter from the fittingon the end of the suction tube.2. Clean the filter using the appropriatecleaning solution (warm, soapywater for latex materials, mineralspirits for oil-based materials).3Note: If after completing all of the stepsin Spraying Troubleshooting you are stillexperiencing problems spraying, refer tothe Troubleshooting section (page 22).3. Replace the cleaned filter bythreading it back into the fitting on theend of the suction tube.English14
Short TermStorageShutdown1SPRAYPRIME23StartYou will need:• Water• Plastic bag or bucket• Rags• Stir stickORThis procedure should be used when takinga short term break or when ending yourproject for the day. If your break is longerthan 16 hours follow Cleanup instructions,page 16.Instructions are for latexmaterials onlyNote: If using oil based material followinstructions for Cleanup on page 16.1. Peform the Pressure ReliefProcedure, page 7.Startup12. Place spray gun in plasticbag or immerse into bucket ofwater.23. Pour 1/2 cup water slowly onthe top of the paint to preventthe paint from drying.Place the entire sprayingsystem out of the sun.3Page 91. Remove the spray gun fromthe plastic bag or the water.2. If water was added duringshut down, stir water intomaterial with the stir stick.3. Follow Getting Material toFlow instructions, page 9.15English
StartCleanupMINERALSPIRITSorYou will need:• A water source that can be delivered witha garden hose (latex materials only)• Mineral spirits if using oil-based material• Empty waste container• A container with warm, soapy waterCleaning notes - read before cleaning• When using latex material, clean sprayer and components with warm, soapy water. For oil based material usemineral spirits. Never use mineral spirits with latex materials.• NEVER use gasoline to clean sprayer.• Dispose of used cleaning solution properly.• Thorough cleaning and lubrication of sprayer is important to ensure proper operation after storage.• If you flush your sprayer with mineral spirits, repeat Cleanup instructions using warm, soapy water.Follow these steps whenever cleaning with mineral spirits:• If spraying or cleaning with oil-based materials, the spray gun must be grounded while preparing the spray hose orcleaning.• Ground the gun by holding it against the edge of a metal container while purging. Failure to do so may lead to astatic electric discharge which may cause a fire.• Always flush spray gun at least one hose length from spray pump.• If collecting flushed solvent in one gallon metal container, place it into an empty five gallon container, then flush.• Area must be free from vapors.• Follow all cleanup instructions.Cleanup - Latex materialsSTOPFollow these steps if you used latex materials and if you have agarden hose available. If you do not have a garden hose available,follow the Cleanup - Oil-Based Materials instructions on page 18.1 23 4SPRAYPRIME1. Perform Pressure Relief Procedure(page 7).2. Remove the spray tip andplace into container filledwith warm, soapy water.3. Place the suction tube and return tubeinto an empty waste container.4. Using a garden hose, rinse off thesuction tube, return tube and inlet filter.Empty the waste container of all fluids.English16
5 6 7 85. Remove the inlet filter fromthe suction tube and placeit into waste container.6. Thread pump cleaningadapter onto garden hose.Thread suction tube fittingover the adapter.7. Unclip the return tube from the suction tubeand place it into the waste container. Turnthe PRIME/SPRAY knob to PRIME.8. Turn the water supply to the garden hose on.Start the engine (see page 4).Water will go into the suction tube and outthrough the return tube. Let the pump runfor a few minutes, and leave pump runningfor next steps.9SPRAYSPRAYPRIME10 11 12SPRAYPRIMEPRIME9. Point the spray gun at the side ofa waste container.10. While squeezing the trigger, turn thePRIME/SPRAY knob to SPRAY.11. Continue squeezing the triggeruntil fluid is coming out clear.12. Perform Pressure ReliefProcedure, page 7.Move on the Cleaning the SprayGun Components, page 19.17English
Cleanup -Oil-BasedMaterials1 2 3SPRAYPRIMEStartYou will need:• Mineral spirits if using oil-based material• Warm, soapy water if using latex material• Waste containerFollow these steps if you sprayed oil-basedmaterials, or if you sprayed latex materialsand do not have a garden hose available.Be sure to use the appropriate cleaningsolution for the type of material sprayed.1. Perform Pressure ReliefProcedure (page 7).2. Remove the spray tipand place into an emptywaste container.3. Attach the supplied grounding wireto a grounded object.Submerge suction set into abucket with the appropriatecleaning solution.4 567SPRAYSPRAYPRIMEPRIME4. Start the engine (see instructionson page 4).Point the spray gun at the side ofa waste container.Ground the gun against theside of a metal waste containerif flushing with mineral spirits.5. While squeezing thetrigger, turn the powerON, and turn the PRIME/SPRAY knob to SPRAY.6. Continue squeezing the triggeruntil fluid is coming out clear.You may need to get newcleaning solution.7. Perform Pressure ReliefProcedure, page 7.If you flushed the sprayer with mineralspirits repeat the steps on this pageusing warm, soapy water.English18
Cleaning theSpray GunComponents1SPRAYPRIME23StartYou will need:• Soft bristled brush• Light household oil• Warm, soapy water if using latex material• Mineral spirits for oil based material• Wrenchimportant: DO NOT use any siliconebasedlubricants to clean or lubricate thespray gun.1. Peform the PressureRelief Procedure, page 7.(a)2. Pull trigger guard to separatefrom filter housing and unscrewhousing using a wrench.Note: Tighten the wrench over thewrench flats (a).3. Remove filter from spray gun.Clean spray tip and filter with softbristled brush and appropriatecleaning solution.4567(b)HOUSEHOLDOIL(c)4. Pour a few drops of lighthousehold oil inside gunhousing.5. Install gun filter taperedendfirst. Reassemblespray gun.6. Line up the tabs (b) on thespray tip with the slots in theguard assembly.Slide the tip into the guard.7. Install spray tip and guardassembly.Move on to Long TermStorage, page 20.19English
Long TermStorage1 2OILHOUSEHOLDStartYou will need:• Light household oil /Piston Lube• Rags• Wrenchimportant: Store ina well-ventilated area.If you plan to store intemperatures below 32ºF(0ºC), flush with TitanLiquid Shield (soldseparately).HOUSEHOLDOIL1. Remove the suction tube.Using a wrench, remove the spray hose.2. Fill a cup or other container withtwo ounces of Piston Lube (lighthousehold oil can be substituted).Start the engine (see directions onpage 4).34 5(a)3. Cover the outlet valve with a rag.Submerge the Sureflo valve (a) intothe oil.When oil has been sucked from thecup, press and hold the engine shutoffbutton until the engine stops running.4. Replace suction tube. 5. Wipe entire unit, hose,and spray gun to removeaccumulated spraymaterial.English20
Cleaning theSureflo Valve12StartYou will need:(a)• WrenchCleaning or servicing the Sureflo Valvemay be required if the unit has primingproblems. Priming problems may beprevented by properly cleaning the sprayerand following the long-term storage steps.If priming problems persist, you may needto replace the Sureflo Valve assembly. CallTechnical Service (1-866-848-2698) to ordernew Sureflo valve assembly.1. Remove the suction tube.2. Unscrew the Sureflo Valve assembly (a) from thesprayer. Visually inspect the inside and outsideof the Sureflo Valve assembly. Clean any paintresidue with the appropriate cleaning solution.3 4(b)3. Lubricate the O-ring on the Sureflo Valve (b) withpetroleum jelly.Replace Sureflo Valve assembly by screwing it intothe sprayer. Tighten with the wrench.4. Replace suction tube and hand-tighten.21English
TroubleshootingBefore servicing, always release systempressure by following Pressure ReliefProcedure (page 7).Problem A: The sprayer does not startCauseSolution1. Gas tank is empty Fill the gas tank2. There is a problem with sprayer engine Call Technical ServiceProblem B: The sprayer starts but does not draw material when the PRIME/SPRAY knob is set to PRIMECauseSolution1. The inlet valve is stuck Inlet may be stuck from old material. Push Sureflo Valve to release. If still stuck refer toClean the Inlet Filter see page 14 or Cleaning the Sureflo Valve see page 21 *2. The sprayer will not prime properly or has lost prime Refer to Getting Material to Flow section see page 93. The suction set is not properly installed Reinstall the suction set see page 64. The material container is empty Refer to Load Material and Getting Material to Flow sections see pages 8-95. The inlet filter is clogged Refer to Clean the Inlet Filter see page 146. The outlet valve is stuck Call Technical Service7. The inlet valve is worn or damaged Take sprayer to Titan Authorized Service Center8. The PRIME/SPRAY valve is plugged Take sprayer to Titan Authorized Service CenterProblem C: The sprayer draws up material but the pressure drops when the gun is triggered (bad spray pattern)CauseSolution1. Pressure too low Increase the pressure2. The spray tip is worn Replace spray tip with a new one**3. The inlet filter is clogged Refer to Clean the Inlet Filter see page 144. The spray tip is plugged Refer to Clear the Spray Tip see page 125. The spray gun filter is clogged Refer Clean the Spray Gun Filter see page 13. Keep extra filters on hand6. The material is too heavy or coarse Thin or strain the material7. The Sureflo Valve assembly is damaged or worn Replace the Sureflo Valve see page 21*Problem D: The PRIME/SPRAY knob is set to SPRAY and there is flow through the material return tubeCauseSolution1. The PRIME/SPRAY valve is dirty or worn Take sprayer to Titan Authorized Service CenterProblem E: The spray gun leaksCauseSolution1. Gun filter housing is loose Tighten handle2. Internal parts of spray gun are worn or dirty Take sprayer to Titan Authorized Service CenterEnglish22
Problem F: The spray tip assembly leaksCauseSolution1. The spray tip was assembled incorrectly Check tip assembly and assemble properly see page 19, steps 6-72. Gun seal is worn Replace the seal**Problem G: The spray gun will not sprayCauseSolution1. The spray tip plugged Refer to Clear the Spray Tip see page 122. The spray gun filter is clogged Refer to Clean the Spray Gun Filter see page 13. Keep extra filters on hand3. The spray tip is in wrong position Rotate spray tip to one of the spraying positions see page 12, step 54. PRIME/SPRAY knob not set on SPRAY Turn PRIME/SPRAY knob to SPRAY see page 9 Getting Material to FlowProblem H: The spray pattern is poor (tailing)CauseSolution1. Pressure too low Increase the pressure2. The spray tip is plugged Refer to Clear the Spray Tip see page 123. The inlet filter is clogged Refer to Clean the Inlet Filter see page 144. The spray gun filter is clogged Refer to Clean the Spray Gun Filter see page 13. Keep extra filters on hand5. The spray tip is worn Replace the spray tip6. The material is too thick Thin material using appropriate thinning solution7. Pressure loss Refer to Causes and Solutions for Problem CProblem I: The spray tip will not turnCauseSolution1. High pressure has locked the spray tip in place Refer to Clear the Spray Tip see page 12** Additional parts are available for this procedure. Refer to the Parts List (page 74) section of this manual for a list of the parts and their part numbersDaily MaintenanceThe only daily maintenance necessary is thorough cleaning. Follow the cleaning procedures in this manual.Extended MaintenanceSome pump parts eventually wear out from use and must be replaced. The following is a list ofavailable repair kits. Pump performance is the only reliable indicator of when to replace wear parts.Refer to the Troubleshooting section for more information on when to use these kits23Kit Part #Description0516700 Fluid Section Seal Kit0552946 Saddle seat/seal kitEnglish
Parts List • Liste de Pièces • Lista de PiezasSprayer • Pulvérisateur • Rociador123ItemArt.Art.Part No.No de piécePieza No. English - Description Français - Description Español - Descripción1 0293141A Cart assembly Ensemble du chariot Ensamblaje de carrito 12 052<strong>33</strong>20A Hose wrap Support du flexible Soporte de manguera 13 0516581A AutoOiler cap Capuchon de AutoOiler Tapa de AutoOiler 1730-165 Grounding wire Câble de mise à la terre Cable de conexión a tierra 1Qty.Qté.Cant.This unit contains no servicable parts. Do not attempt toservice yourself. Take the sprayer to a Titan authorizedservice center.Cet appareil ne contient aucune pièce nécessitant unentretien quelconque. Ne tentez pas d’effectuer vous-mêmel’entretien. Apporter l’appareil à un centre de serviceautoriséEsta unidad no contiene piezas que se puedan reparar. Nointente repararlas personalmente. Lleve el rociador a unCentro de servicio autorizado de TitanEnglish Français Español72
Parts List • Liste de Pièces • Lista de PiezasSuction set • Dispositif d’aspiration • Juego de succión12356ItemArt.Art.Part No.No de piécePieza No. English - Description Français - Description Español - Descripción1 0516127 Suction set Dispositif d’aspiration Juego de succión 12 0512389 Return tube Tube de retour Tubo de retorno 13 0512390 Clip Agrafe Abrazadera 14 0552947 Inlet filter Filtre d’entrée Filtro de entrada 15 0327226 Squeeze clip Agrafe de compression Abrazadera del apretón 16 9885553 Return tube fitting Raccord de tube de retour Conector del tubo deretorno7 0515146 Pump cleaningadapterAdaptateur de nettoyage depompeAdaptador de limpieza debombaQty.Qté.Cant.117473EspañolFrançaisEnglish
Parts List • Liste de Pièces • Lista de PiezasLX-50 Spray Gun • Pistolet de LX-50 • Pistola de LX-5034ItemArt.Art.Part No.No de piécePieza No. English - Description Français - Description Español - Descripción1 692-515 TR 2 tip, 515 Buse de TR 2 tip, 515 Boquilla de TR 2 , 515 12 0089959 Filter, 100 mesh (yellow,2 pack)Filtre, maille 100 (jaune,trousse de 2)Filtro, malla 100(amarillo, juego de 2)3 0515228 Seal Joint d’etanchéite Sello 14 ------ Filter housing Logement de filtre Alojamiento de filtro 15 0347706A Swivel Raccord Giratoria 1Qty.Qté.Cant.1125Guard Assembly • Ensemble de déflecteur • Ensamblaje del protección12345ItemArt.Art.Part No.No de piécePieza No. English - Description Français - Description Español - Descripción1 0271441 Hook guide Guide de crochet Guía de gancho 12 0552945 Guard assembly Déflecteur Ensamblaje deprotección3 0271442 Latch guide Guide de verrou Guía de sujetador 14 0552946 Tip seal / saddle seat Joint de buse / siègeforméJunta de boquilla /asiento de la montura5 0296641 Collar Collier Collar 10271065 Collar kit (includes items1, 3 and 5)Trousse de bague(comprende les articles1, 3 et 5)Juego de collar (incluyelos articulos 1, 3 y 5)Qty.Qté.Cant.11English Français Español74
Accessories • Accessoires • AccesoriosPart No.No de piécePieza No. English - Description Français - Description Español - Descripción0516700 Piston repair kit Jeu de joints pour tronçon d’acheminement Juego de reparación del pistón0516713 Hose connector kit Raccord de flexible Conector de manguera0552945 Tip guard Déflecteur Ensamblaje de protección0552946 Tip seat / seal kit Trousse de siège / rondelle Juego de asiento de montura / arandela661-311 311 SC-6 spray tip Buse de pulvérisation SC-6, 311 Boquilla rociadora SC-6, 311661-413 413 SC-6 spray tip Buse de pulvérisation SC-6, 413 Boquilla rociadora SC-6, 413661-415 415 SC-6 spray tip Buse de pulvérisation SC-6, 415 Boquilla rociadora SC-6, 415661-515 515 SC-6 spray tip Buse de pulvérisation SC-6, 515 Boquilla rociadora SC-6, 515661-517 517 SC-6 spray tip Buse de pulvérisation SC-6, 517 Boquilla rociadora SC-6, 517692-313 313 TR 2 spray tip Buse de pulvérisation TR 2 , 313 Boquilla rociadora TR 2 , 313692-515 515 TR 2 spray tip Buse de pulvérisation TR 2 , 515 Boquilla rociadora TR 2 , 515692-517 517 TR 2 spray tip Buse de pulvérisation TR 2 , 517 Boquilla rociadora TR 2 , 517314-482 Liquid Shield Liquid Shield Liquid Shield314-480 Piston Lube (8 oz.) Piston Lube (8 oz.) Piston Lube (8 oz.)0297055 Pump Shield (12 oz.) Pump Shield (12 oz.) Pump Shield (12 oz.)0508071 <strong>Paint</strong> Mate (1 qt) <strong>Paint</strong> Mate (1 L) <strong>Paint</strong> Mate (1 L)0286021 LX-50 spray gun Modèle du pistolet LX-50 Modelo de pistola rociadora LX-500286020 LX-65 spray gun Modèle du pistolet LX-65 Modelo de pistola rociadora LX-650523045 Airless hose, 50’ x 1/4” Flexible sans air, 15 m x 0,6 cm Manguera, 15 m x 0.6 cm0516714 Hose, whip end, 5’ x 1/4” Flexible sans air, 1,5 m x 0,6 cm Manguera, 1.5 m x 0.6 cm0089960 Red gun filter, extra fine (2 pack) Filtre de pistolet, rouge, trés fin (2 pièces) Filtro de pistola rojo, extra-fino (2 piezas)0089959 Yellow gun filter, fine (2 pack) Filtre de pistolet, jaune, fin (2 pièces) Filtro de pistola amarillo, fino (2 piezas)0089958 White gun filter, medium (2 pack) Filtre de pistolet, blanc, moyen (2 pièces) Filtro de pistola blanco, medio (2 piezas)0516743 Tip extension, 36” Rallonge de buse, 36 pi Extensión de la boquilla, 36”651-073 Tip extension, 24” Rallonge de buse, 24 pi Extensión de la boquilla, 24”651-072 Tip extension, 18” Rallonge de buse, 18 pi Extensión de la boquilla, 18”0516703 TR-10 telescoping roller, 3/8” nap Rouleau téléscopique de TR-10, grain de 1,0 cm Rodillo Telescópico de TR-10, pelillo de 3/8”0516715A Roller cover, 3/4” nap Manchon de rouleau, grain de 1,9 cm Funda del rodillo, pelillo de 3/4”0516716A Roller cover, 3/8” nap Manchon de rouleau, grain de 1,0 cm Funda del rodillo, pelillo de 3/8”0552947 Inlet filter Filtre d’entrée Filtro de entrada75EspañolFrançaisEnglish
Limited WarrantyAIRLESS PAINT SPRAY EQUIPMENTThis product, manufactured by Titan Tool, is warranted tothe original retail purchaser against defects in material andworkmanship for:<strong>GPX</strong><strong>33</strong> - two years from date of purchase.This warranty does not cover damage resulting from improperuse, accidents, user’s negligence or normal wear. Thiswarranty does not cover any defects or damages causedby service or repair performed by anyone other than a TitanAuthorized Service Center. This warranty does not apply toaccessories.TITAN SHALL NOT IN ANY EVENT BE LIABLE FOR ANYINCIDENTAL OR CONSEQUENTIAL DAMAGES OF ANYKIND, WHETHER FROM BREACH OF THIS WARRANTYOR ANY OTHER REASON.If any product is defective in material and/or workmanshipduring the applicable warranty period, please call TitanTechnical Service at 1-866-848-2698. do not returnthe product to the original retailer. UnderTitan’s Free Tool Replacement Program, Titan TechnicalService will either replace the defective part, or refer you toyour nearest Authorized Service Center for repair.SOME STATES DO NOT ALLOW LIMITATIONS ONHOW LONG AN IMPLIED WARRANTY LASTS OR THEEXCLUSION OF INCIDENTAL OR CONSEQUENTIALDAMAGES, SO THE ABOVE LIMITATION AND EXCLUSIONMAY NOT APPLY TO YOU.THIS WARRANTY GIVES YOU SPECIFIC LEGAL RIGHTS,AND YOU MAY ALSO HAVE OTHER RIGHTS WHICHVARY FROM STATE TO STATE.GARANTIE LIMITÉEMATÉRIEL DE PULVÉRISATION DE PEINTURE SANS AIRCe produit, fabriqué par Titan Tool, est garanti, au bénéficede l’acheteur au détail d’origine, contre tout vice de matièreset toute malfaçon pour:<strong>GPX</strong><strong>33</strong> - deux années à compter de la date d’achat.La présente garantie ne s’applique pas aux dégâts entraînéspar une utilisation incorrecte, par la négligence de l’usagerou par l’usure normale. La présente garantie ne s’appliquepas non plus aux défectuosités ou dommages résultantde l’entretien ou de la réparation que fait une personnequelconque qui ne soit pas membre d’un centre d’entretienautorisé pour les produits Titan. La présente garantie nes’applique pas aux accessoires.TITAN NE pourra en aucun cas Être tenueresponsable de DOMMAGES-INTÉRÊTS INDIRECTSOU consÉcutifs, QUE CE SOIT POUR UNE RUPTUREDE CETTE GARANTIE OU TOUTE AUTRE RAISON.En cas de défaut de matériau ou de fabrication du produitdurant la période de garantie applicable, appelez le Servicetechnique Titan au 1 866 848-2698. Ne renvoyez pasle produit au détaillant original. Dans le cadredu programme de remplacement gratuit d’outils Titan, leService technique Titan remplacera la pièce défectueuse ouvous indiquera le centre de service agréé le plus proche.CERTAINES PROVINCES INTERDISENT LESRESTRICTIONS SUR LA DURÉE D’UNE GARANTIEIMPLICITE OU L’EXCLUSION DES DOMMAGESACCESSOIRES OU INDIRECTS. IL SE PEUT DONC QUELA RESTRICTION ET L’EXCLUSION ÉNONCÉES CI-DESSUS NE S’APPLIQUENT PAS À VOUS.LE PRÉSENTE GARANTIE VOUS ACCORDE DES DROITSJURIDIQUES SPÉCIFIQUES, ET VOUS AVEZ PEUT-ÊTRE D’AUTRES DROITS, QUI PEUVENT VARIER D’UNEPROVINCE À L’AUTRE.GARANTÍA LIMITADAEQUIPO DE ATOMIZACIÓN DE PINTURA SIN AIREEste producto, fabricado por Titan Tool, está garantizadoante el comprador original contra defectos de materiales ymano de obra durante:<strong>GPX</strong><strong>33</strong> - dos años contado a partir de la fecha de compra.Esta garantía no cubre los daños que sean resultado de unuso inapropiado, accidentes, negligencia del usuario o undesgaste normal. Esta garantía no cubre ningún defecto odaño que haya sido causado por los servicios o reparacionesllevadas a cabo por alguien que no sea un técnico del Centrode Servicio Autorizado de Titan. Esta garantía no es válidapara ningún accesorio.TITAN NO SERÁ EN NINGÚN CASO RESPONSABLEDE NINGÚN DAÑO INCIDENTAL O DE CONSECUENCIADE NINGUNA CLASE, QUE RESULTE DE VIOLAR ESTAGARANTÍA O POR CUALQUIER OTRA RAZÓN.Si algún producto presenta fallas en los materiales y/o ensu fabricación durante el periodo de vigencia de la garantía,llame al Servicio Técnico de Titan al 1-866-848-2698.No devuelva el producto a la tienda dondelo adquirió. Gracias al Programa de Reemplazo deHerramientas Gratis de Titan, el Servicio Técnico de Titanreemplazará la pieza defectuosa o lo derivará al Centro deServicio Autorizado más cercano para su reparación.ALGUNOS ESTADOS NO PERMITEN LIMITACIONES ENCUANTO A LA DURACIÓN DE UNA GARANTÍA IMPLÍCITAO LA EXCLUSIÓN DE DAÑOS INCIDENTALES O DECONSECUENCIA, DE MANERA QUE LA LIMITACIÓN YEXCLUSIÓN ANTERIORES PODRÍAN NO SER VÁLIDASPARA USTED.ESTA GARANTÍA LE CONCEDE DERECHOS LEGALESESPECÍFICOS, PERO USTED PODRÍA TENER DERECHOA OTROS, LOS CUALES VARÍAN DE UN ESTADO AOTRO.U.S. Patent Nos.6,981,852 6,9<strong>33</strong>,634 7,018,1817,071,429 D550,327 D537,839D553,325 D550,329 D550,3287,886,876Other patents pendingEnglish Français Español76


