Turbo Select Manual - Grill-Repair.com
Turbo Select Manual - Grill-Repair.com
Turbo Select Manual - Grill-Repair.com

Create successful ePaper yourself
Turn your PDF publications into a flip-book with our unique Google optimized e-Paper software.
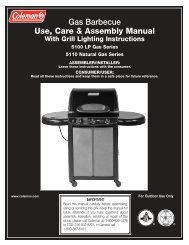
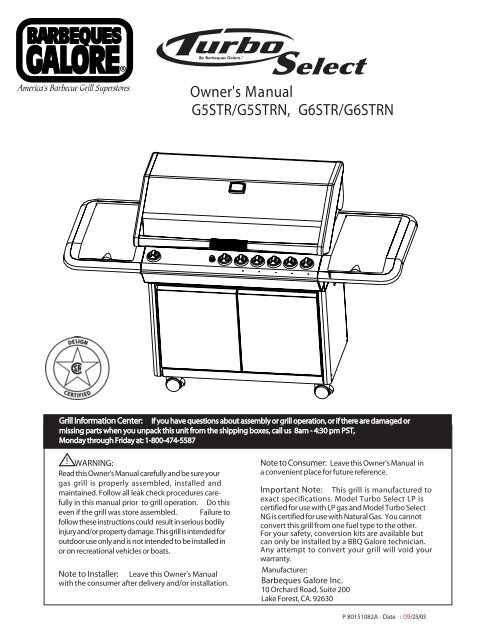
America's Barbecue <strong>Grill</strong> SuperstoresOwner's M anualG5STR/G5STRN, G6STR/G6STRN<strong>Grill</strong> Information Center: If you have questions about assembly or grill operation, or if there are damaged ormissing parts when you unpack this unit from the shipping boxes, call us 8am - 4:30 pm PST,Monday through Friday at: 1-800-474-5587! WARNING:Read this Owner's <strong>Manual</strong> carefully and be sure yourgas grill is properly assembled, installed andmaintained. Follow all leak check procedures carefullyin this manual prior to grill operation. Do thiseven if the grill was store assembled. Failure tofollow these instructions could result in serious bodilyinjury and/or property damage. This grill is intended foroutdoor use only and is not intended to be installed inor on recreational vehicles or boats.Note to Installer: Leave this Owner's <strong>Manual</strong>with the consumer after delivery and/or installation.Note to Consumer: Leave this Owner's <strong>Manual</strong> ina convenient place for future reference.Important Note: This grill is manufactured toexact specifications. Model <strong>Turbo</strong> <strong>Select</strong> LP iscertified for use with LP gas and Model <strong>Turbo</strong> <strong>Select</strong>NG is certified for use with Natural Gas. You cannotconvert this grill from one fuel type to the other.For your safety, conversion kits are available butcan only be installed by a BBQ Galore technician.Any attempt to convert your grill will void yourwarranty.Manufacturer:Barbeques Galore Inc.10 Orchard Road, Suite 200Lake Forest, CA. 92630P 80151082A - Date : 09/25/03
1. The LP gas tank has a Shut Off Valve,terminating in an LP gas supply tank valveoutlet, that is <strong>com</strong>patible with a Type 1 tankconnection device. The LP gas tank must alsohave a safety relief device that has a direct<strong>com</strong>munication with the vapor space of thetank.2. The tank supply system must be arranged forvapor withdrawal.3. The LP gas tank used must have a collarto protect the tank valve.Proper Placement and Clearance of <strong>Grill</strong>Never use your gas grill in a garage, porch, shed,breezeway or any other enclosed area. Your gas grill isto be used outdoors only, at least 16 inches from theback and 14 inches from side of any <strong>com</strong>bustiblesurface. Your gas grill should not be placed underany surface that will burn. Do not obstruct the flowof ventilation air around the gas grill housing.This outdoor gas grill is not intended to be installed inor on recreational vehicles and/or boats.!WARNINGFailure to <strong>com</strong>ply with these instructionscould result in a fire or explosion thatcould cause serious bodily injury, death, orproperty damage.• Never connect an unregulated LP gas tank toyour gas grill. The gas Regulator assemblysupplied with your gas grill is adjusted to havean outlet pressure of 11" water column (W.C.)for connection to an LP gas tank.• Only use the Regulator and Hose Assemblysupplied with your gas grill. ReplacementRegulators and Hose Assemblies must bethose specified by manufacturer.• Have your LP gas tank filled by a reputablepropane gas dealer and visually inspectedand re-qualified at each filling.• Never fill the gas tank beyond 80% full.Have your propane gas dealer check therelease valve after every filling to ensure thatit remains free of defects.• Always keep LP gas tanks in upright position.• Do not store (or use) gasoline or other flammablevapors and liquids in the vicinity of this gas grill.• An LP gas tank that is not connected for use mustNOT be stored on bottom shelf inside cabinet or inthe vicinity of this or any other gas grill.• Do not subject the LP gas tank to excessive heat.• Never store an LP gas tank indoors. If youstore your gas grill in the garage or otherindoor location, always disconnect the LPgas tank first, store it safely outside.• LP gas tanks must be stored outdoors in awell-ventilated area and out of the reach ofchildren. Disconnected LP gas tanks must notbe stored in a building, garage or any otherenclosed area.• When your gas grill is not in use the gasmust be turned off at the LP gas tank.3• The Regulator and Hose assembly must beinspected before each use of the grill. If thereis excessive abrasion or wear or if the hoseis cut, it must be replaced prior to the grillbeing used again.• Keep the gas Regulator Hose away from hotgrill surfaces and dripping grease. Avoidunnecessary twisting of hose. Visually inspecthose prior to each use for cuts, cracks,excessive wear or other damage. If the Hoseappears damaged do not use the gas grill,call our <strong>Grill</strong> Information Center for areplacement, at 1-800-474-5587.• Never light your gas grill with the Lid closedor before checking to insure the Burner Tubesare fully seated over the Gas Valve Orifices.• Never allow children to operate your grill. Donot allow children to play near your grill.! WARNINGA strong gas smell, or the hissing sound ofgas indicates a serious problem with your gasgrill or the LP gas tank. Failure to immediatelyfollow the steps listed below could resultin a fire or explosion that could cause seriousbodily injury, death, or property damage.• Shut off gas supply to the gas grill.• Turn the Control Knobs to OFF position.• Put out any flame with a Class B fireextinguisher.• Open <strong>Grill</strong> Lid.• Get away from the LP gas tank.• Do not try to fix the problem yourself.• If odor continues or you have a fire you cannotextinguish, call your fire department. Do not callnear the LP gas tank because your telephone isan electrical device and could create a sparkresulting in fire and/or explosion.NOTE: The normal flow of gas through theRegulator and Hose Assembly can create ahumming sound. A low volume of sound isperfectly normal and will not interfere with operationof the grill. If humming sound is loud andexcessive you may need to purge air from thegas line or reset the Regulator excess gas flowdevice. This purging procedure should be doneevery time a new LP gas tank is connected toyour grill. For help call the <strong>Grill</strong> InformationCenter .<strong>Grill</strong> Information Center, 8:00am-4:30pmPST, Monday through Friday at:1-800-474-5587
Natural Gas Safety Instructions• Y our Natural G as G rill is designed to operate onNatural G as only, at a pressure of 7" watercolumn (W.C .) (1/4 psig or 1.75 kpa), regulated atthe residential meter. C heck with your gas utility<strong>com</strong>pany for local gas pressure and with your localmunicipality for building code requirements. Ifyour residential gas line pressure has not beenregulated to 7" W.C ., contact your local gasutility <strong>com</strong>pany for professional assistance.• T he gas pressure R egulator supplied with thisappliance must be used. T his R egulator is setfor an outlet pressure of 4" W.C .• It is re<strong>com</strong>mended that a S hut Off V alve beinstalled at the gas supply source outdoors.Install at a point after the gas pipe exits theoutside wall and before the Quick DisconnectHose, or install it at the point before the gas linepiping enters the ground. S eeF igure 1.• P ipe sealing <strong>com</strong>pound or pipe thread tape resistantto the action of Natural G as must be used on all malepipe threads when making the connection.• Disconnect your gas grill from fuel source whenthe gas supply is being tested at high pressures.T his gas grill and its individual S hut Off Valve mustbe disconnected from the gas supply pipe systemduring any pressure testing of that system atpressure in excess of 1/2 psi (3.5kpa).• T urn off your gas grill when the gas supply istested at low pressures. T he grill must be isolatedfrom the gas supply pipe system by closing itsindividual <strong>Manual</strong> S hut Off V alve during anypressure testing of the gas supply pipe system atpressures equal to or less than 1/2 psi (3.5kpa).• T he Quick Disconnect connects to a 3/8 inch NP Tthread from gas source. T he Quick Disconnectfitting is a hand operated device that automaticallyshuts off the the flow of gas from the sourcewhen it is disconnected.• T he Quick Disconnect fitting can be installedhorizontally, or pointing downward. DO NOTinstall the fitting with the opening pointingupward because the fitting could collect waterand debris.• T he Dust C overs (plastic plugs) provided with theQuick Disconnect help keep the open endsclean while disconnected.• T he outdoor connector must be firmly attached toa ridged permanent construction.• T he Quick Disconnect MUS T B E installed aboveground.Figure 1(For Natural G as Model Only)TO NATURAL GASREGULATORMALEFITTINGG as L ine P ipingOUTSIDE WALLLOCKING GASSHUT OFF VALVEINSIDE WALLQUICKDIS C ONNE C TNATURAL GAS SUPPLYAdditionalHardware NotIncludedIf the length of line required does not exceed 50 feet,use a 5/8" O.D. tube. One size larger should be usedfor lengths greater than 50 feet.G as piping may be copper tubing, type K or L;polyethylene plastic tube, with a minimum wallthickness of .062 inch; or standard weight (schedule40) steel or wrought iron pipe.C opper tubing must be tin-lined if the gas containsmore than 0.3 grams of hydrogen sulfide per 100cubic feet of gas.P lastic tubing is suitable only for outdoor, undergrounduse.G as piping in contact with earth, or any other materialwhich may corrode the piping, must be protectedagainst corrosion in an approved manner.Underground piping must have a minimum of 18"cover.NOTE : Check with local gas <strong>com</strong>pany beforeinstalling any gas line.Test ConnectionsAll connections and joints must be thoroughly testedfor leaks in accordance with local codes and all listedprocedures in the latest edition of ANS I Z223.1! DANGERDo not us e an open flame to c hec k for gasleaks . B e s ure there are no s parks or openflames in the area while you c hec k for gasleaks . T his will res ult in a fire or explos ionwhic h c an c aus e s erious bodily injury ordeath, and damage to property.• WA R NING : Do not route the 12 foot QuickDisconnect Hose under a deck. T he hose must bevisible and inspected prior to each grill use.4
CAUTION: BEWARE OF FLASH-BACKCAUTION: Spiders and small insects occasionallyspin webs or make nests in the grill burnertubes during transit and warehousing. Thesewebs can lead to a gas flow obstruction whichcould result in a fire in and around the BurnerTubes. This type of fire is known as a "FLASH-BACK" and can cause serious damage to yourgrill and create an unsafe operating conditionfor the user.Although an obstructed Burner Tube is not theonly cause of "FLASH-BACK", it is the most<strong>com</strong>mon cause.To reduce the chance of "FLASH-BACK", youmust clean the Burner Tubes before assemblingyour grill, and at least once a month in latesummer or early fall when spiders are mostactive. Also perform this Burner Tube cleaningprocedure if your grill has not been used foran extended period of time.Pre-Assembly InstructionsTo reduce the chance of "FLASH-BACK" (seeCAUTION at left) clean the Burner Tubes andBurners before fully assembling your grill. Removethe Cotter Pin from the rear underside of eachBurner using a pair of long nose pliers. Carefullylift each Burner up and away from the Gas ValveOrifice, then refer to Figure 1 and perform oneof these three cleaning methods:1.2.Bend a stiff wire, (a lightweight coat hangerworks well) into a small hook as shown below.Run the hook through the Burner Tube andinside the Burner several times to remove anydebris.Use a Burner Cleaning Brush, or a bottle brushwith a flexible handle. Run the brush throughthe Burner Tube and inside the Burner severaltimes, removing any debris.3.Use an air hose to force air through each BurnerTube. The forced air should pass debris orobstructions through the Burner and out theports.•••Tools Required for Assembly•••Phillips Head screw driverAdjustable wrenchLong nose pliers - used to remove theCotter Pin when cleaning the BurnersOpen-end wrench (included with HardwarePack) used to tighten the Casters.Protective work glovesEye protectionThe location of the Burner Tube with respectto the Orifice is vital for safe operation. Checkto ensure the Orifice is inside of the Burner Tubebefore using your gas grill. SeeBurner Tube does not fit over the Valve Orifice,lighting the Burner may cause explosionand/or fire.Figure 2!WARNINGGAS COLLECTOR BOXSPARK ELECTRODEFigure 2. If theFigure 1ORIFICEBURNERTO CLEAN BURNER TUBE,INSERT HOOK HEREGAS COLLECTOR BOXSPARK ELECTRODEBURNERBURNER PORTORIFICEBURNER TUBE5
Contents for Hardware PackC ontents for Hardware P ack (P art #P 4182A)The following table illustrates a breakdown of the Hardware P ack. It highlights what <strong>com</strong>ponentsare used in the various stages of assembly.R ef.C omponentQty. to us eP urpos e of C omponentA.1/4" x 1" P hillips Head S crew4Fix the G rill Bowl on the C artB .1/4" x 3/4" P hillips Head S crew8Attach the S ide S helf on the Bowl S ide P anelC ."AA" Batteries1P ower the E lectronic IgnitionD."AAA" Batteries2P ower the Tank G augeE .3/16" x 3/8" P hillips Head S crew2Attach the basket on the Door P lateActual S ize and Quantity of E ach Hardware P iece:A. 1/4" x 1" P hillips Head S crew - QTY 4B . 1/4" x 3/4"P hillips Head S crew x 8C . "AA" Batteries - QTY. 1 D. "AAA" Batteries - QTY. 2E . 3/16" x 3/8" P hillips Head S crew - QTY 2Barbeques Galore Information: If you have questions about assembly or grill operation, or if there are damagedor missing parts when you unpack this unit from the shipping boxes, call us 8am - 4:30 pm PS T,Monday through Friday at: 1-800-474-55876
6B Parts DiagramRemove all <strong>com</strong>ponents from both cartons and place within easy reach. Turn the largest cartonupside down and it will provide a <strong>com</strong>fortable height work surface for grill assembly.421371767633840392321191816131291181035555067685371643032335167293452656927283126257620363524661422 374142 434449704662451554737257595675747879605877617
5B Parts DiagramRemove all <strong>com</strong>ponents from both cartons and place within easy reach. Turn the largest cartonupside down and it will provide a <strong>com</strong>fortable height work surface for grill assembly.417-12137176763643840392321201918161213911810315567506830323351672934656927283126253524662249144142 43374445557136704653 52625954767372605758567574787961779
REF#DESCRIPTIONPART#5B Parts ListQTY.REF#DESCRIPTIONPART#QTY.1.2.3.4.5.6.7.8.9.10.11.12.13.14.15.16.17.17-1.18.19.20.21.22.23.24.25.26.27.28.29.30.31.32.33.34.35.36.37.38.39.40.41.42.43.44.45.46.47.48.49.50.51.52.53.54.Lid PlateHeat IndicatorName PlateLid Side Panel, LeftLid Side Panel, RightLid HandleGrip(I)Grip(II)Frame for Back BurnerSpark ElectrodeBack BurnerBowl Rear PanelOrifice(LP Back Burner)Orifice(NG Back Burner)Gas Tube AssemblyWind ShieldUp Warming RackCooking Grid(I)Cooking Grid(II)Burner BracketCeramic Flame TamerRack for Flame TamerHinge Seat,LeftHinge Seat,RightBowl Side Panel,LeftBowl Side Panel,RightBurnerGas Collector Box W. EletrodeBowl Front PanelOrifice(LP Main Burner)Orifice(NG Main Burner)Control PanelControl Knob(Back Burner)Control Knob(Main Burner)Control Knob SeatElectric IgnitorAA BatteryGrease TrayHeat ShieldSide shelf LidStorage BoxLeft Side ShelfDecoration PlateRight Side ShelfElectrode for Side BurnerSide BurnerSide Burner BodyPot SupportDecoration Plat(SideBurner)Control Knob(Side Burner)Control Knob Seat(Side Burner)Gas Valve for Side BurnerRegulator W. HoseTank Gauge SetRear PanelDoor BracketBottom ShelfP00118056AP00607211CP00417001CP00127017JP00128017JP00206002BP00202001AP00202002AP03305002HP02610005BP02007027DP00725034AP06520001AP06520002AP03717002BP0071602ABP01515001BP01606003BP01606004BP02205011BP01804004AP01720002BP05511001OP05511002OP00720044AP00721044AP02001002EP02609002BP00738024AP06519001AP06519002AP02909033SP03426023KP03426013KP03415014AP02502134CP05301001AP02707012BP06903003BP00115016AP05512084AP01123001AP07503003DP01124001AP02614007CP02002047DP02302003DP00815001DP07513001DP03401031FP03408051JP03208007DP03601004AP04009003CP07702006EP03301003JP01003001K111111111111111121110111115315111622112111111111111111111055.56.57.58.59.60.61.62.63.64.65.66.67.68.69.70.71.72.73.74.75.76.77.78.79.Side Panel,LeftSide Panel,RightDoor Plate,LeftDoor Plate,RightCastorTowel RackBasketConnection TubeHook RackTool HookSmoke BoxLighting TubeNG Connection TubeNG RegulatorNG Air ShutterOrifice (LP Side Burner)Orifice (NG Side Burner)"AAA" BatteryMotorMotor BracketSpiltForkBushingTrim Plate (Right)Trim Plate (Left)Trim Plate (Rear)For the repair or replacement parts you need:Call our <strong>Grill</strong> Information Center, 8am - 4:30pm PST,Monday through Friday at 1-800-474-5587To make sure you obtain the correct replacement part(s) for your gas grill please refer to the parts list onthis page. The following information is required toinsure you receive the correct parts:1. Model and Serial Number (see CSA label on grill)2. Part Number3. Description4. Quantity of parts neededPlease allow sufficient time to process and ship.IMPORTANT: Keep this Owner's <strong>Manual</strong> forconvenient referral and for part replacement.IMPORTANT: Use only factory authorized parts. Theuse of any part that is not factory authorized canbe dangerous. This will also void your warranty.P01102003GP01103003GP04302002AP04303002AP05115020AP05209003AP05203003AP03705001EP05514001AP05514002AP06702001AP05530001AP03719001AY0080006P05524055AP06521001AP06521002AP05301002AP07101002BP05508018FP05508016FP05508090FP05508017FP07504005AP07505005AP07515006A1111411114111161211122111
Cart Assembly InstructionsFigure 1Remove all cart parts, hardware, and <strong>Grill</strong> Head fromshipping boxes. Raise the <strong>Grill</strong> Lid and remove allpacked <strong>com</strong>ponents. Use the parts list to check thatall necessary parts have been included.GRILL BOWLAssemble the gas grill on a protective work surfaceto avoid scratching grill surfaces. Inspect your grill fordamage as you proceed. Do not assemble or operateyour grill if it appears damaged.When assembling this grill, we re<strong>com</strong>mend asking forthe assistance of another person when maneuveringsome of the larger, heavier pieces. You will need bothan Adjustable Wrench and Phillips Screw Driver(not provided) for securing the nuts and screws.Assembling The <strong>Grill</strong>1. Remove cart assembly from shipping box and placeon a flat and level surface such as a garage floor.Peel back approximately two inches of the protectivePVC film from the Cart Door.CART2.Put the <strong>Grill</strong> Bowl on the Cart.Slide the <strong>Grill</strong> Bowlto align the hole on the Fixing bar.See Figure 1.Use 4 of the 1/4"x 1" Phillips Head screw.Figure 2AA. 1/4" x 1" Phillips Head Screw3.Attach the Left Side Shelf (with Ice Box) on theLeft Bowl Panel. Use 4 of the 1/4"x 3/4" PhillipsHead screw. See Figure 2A.Figure 2B4.B. 1/4" x 3/4" Phillips Head ScrewAttach the Right Side Shelf (with Side Burner) onthe Right Bowl Panel. Use 4 of the 1/4" x 1" PhillipsHead screw. See Figure 2B.11
5. Locate the Male Fitting of connection from S ideB urner. F eed the Male F itting through the hole onthe right S ide P anel. C onnect the Male F itting to theQuick Disconnect F itting (under the rear side of thegrill bowl) as shown in F igure 3 & 3A .Figure 3The Quick Disconnect F itting is hand operated devicethat automatically shuts off the flow of gas when itis disconnected.C aution: All connections and joints must be throughlytested for leaks. Do Not use flame to test for gasleaks.SIDE BURNERFigure 4DOOR P L A T ECONNECTIONTUBEQUICK DISCON-NECT FITTINGMALE FITTINGB AS K E T7. P lace the R ack for C eramic Flame Tamers on thelower ledge above B urners. S ee F igure 5. P laceall 12 C eramic Flame Tamers on the R ack.Figure 3AP lace C ooking G rid on the ledge above C eramicFlame Tamers. S ee Figure 5.6. Attach the Basket on the Door P late. Using 2 of3/16" x 3/8" P hillips S crews. S ee F igure 4.Figure 5CERAMIC FLAMETAMERC OOK INGG R IDUPPER WARMINGRACKE . 3/16" x 3/8" P hillips Head S crewRACK FORCERAMIC FLAMETAMERS12
Ignitor Battery Installation - See Figure 61. Unscrew the Ignitor Cap located on the <strong>Grill</strong> ControlPanel and remove the Contact and Spring from theIgnitor Slot.2. Place the manufacturer supplied AA battery into theIgnitor Slot. Be sure to place the positive pole facingtoward you.3. Place the Spring over the AA battery, then placethe Contact on top of the Spring. Screw the IgnitorCap back onto the grill Control Panel.5. If no "clicking" sound is heard check thefollowing <strong>com</strong>mon causes.If you needassistance call Barbeques Galore InfoCenter at 1-800-474-5587.• Ignitor AA battery not installed properly.• Ignitor wires may be loose. Remove the AAbattery, inspect the Ignitor Junction Boxfound behind the Control Panel, and connectany loose wires.Electrode CheckFigure 6Requires and assistant:Before placing the cooking <strong>com</strong>ponents into yourgrill, insure that the Spark Electrode Tip is properlypositioned within each Gas Collector Box (stainlesssteel mechanism found at the front between eachset of Burners.) The easiest way to insure this isto perform this Electrode Check:CONTRACTSPRINGIGNITOR CAPIGNITOR SOLT1. Be sure all Control Knobs are set to "OFF"and open the <strong>Grill</strong> Lid.2. Have an assistant stand behind to the right ofthe grill and look down at each Gas CollectorBox. NEVER put your face inside <strong>Grill</strong> Head.3. Push the ignition Cap. You should hear aclicking sound and your assistant should seea small blue spark within each Gas Collector Box.If a spark is present the Electrode Tips areproperly positioned.4. If no spark is seen the Spark Gap shown inFigure 7 needs to be adjusted as follows:• Using an adjustable wrench, loosen the insideNut just until the Gas Collector Box can bemaneuvered and turned upward.POSITIVE POLEAA BATTERYFigure 7 - Side View Gas Collector BoxSPARK GAP• The gap between the Spark Electrode Tip andSpark receiver should be approximately 3/16".• If the gap is wider than 3/16" use a pair of longnose pliers and gently squeeze the GasCollector Box until the gap is correct.• Return the Gas Collector Box to its originalhorizontal position, secure the inside Nut and trythe Electrode Check again.SPARKELECTRODE TIPINSIDENUTBarbeques Galore Information: If you have questions about assembly or grill operation, or if there are damagedor missing parts when you unpack this unit from the shipping boxes, call us 8am - 4:30 pm PST, Mondaythrough Friday at: 1-800-474-5587 (1-800-GRILL-UP)13
DepthOutdoor BBQ Built-in Installation SpecificationsNOTE: When choosing a location for your Gas grill, keep inmind that it should not be located under any overhead <strong>com</strong>bustibleconstruction. The side and bottom of the grill shouldnot be any closer than 14 inches to <strong>com</strong>bustible construction,and the back of the grill should not be any closer than 16 inchesto <strong>com</strong>bustible construction.WARNING: When using Propane, EXTREME CAUTIONshould be used to provide ample ventilation of vapor from theenclosure. LP Gas vapor is heavier than air and SERIOUSINJURY from a DANGEROUS EXPLOSION could occur if LPGas is allowed to accumulate in an enclosure and then ignited.Both the Barbecue enclosure and LP cylinder enclosurerequire venting that must be provided at the floor level of theenclosure to allow any leaking LP Gas vapor to escape. Upper& lower ground-level vents (20 sq. in. minimum each) MUSTBE PROVIDED on both sides of built-in construction. Pleaseask a Barbeques Galore associate for full details.Built-in InstructionsNOTE: When installing a barbecue equipped for liquidpropane in an island, the propane tank must be in a separateenclosure that is <strong>com</strong>pletely isolated from the barbecue.It must be cross-ventilated in accordance with the currentstandard. The propane tank MUST NEVER be installeddirectly under the barbecue.NOTE: Upper & lower ground-level vents (20 sq. in. minimumeach) MUST BE PROVIDED for <strong>com</strong>bustion air onboth sides of built-in construction. Please ask a BarbequesGalore associate for full details.Barbecues must be installed in accordance with CSAspecifications and all local building codes.1. Attach Left and Right Side Trim Kit on either side of the barbecue. Use 3 of 1/4"x 3/4" Phillips head screws for each side.2. Loosen the 2 1/4" x 3/4" Phillips Head screws on the top section of the Wind Shield. Attach the Rear Trim Kit with the WindShield. Use 3 of 1/4" x 3/4" Phillips head screrws (2 from Wind Shield).3. Carefully slide the barbecue into the island cutout.Figure 8Non-<strong>com</strong>bustibleConstructionWidthHeight10” minimum clearancefrom cutout (for Hood)BUILT-IN CUTOUT DIMENSIONSMODEL Width Depth HeightG55TR(N) 32-1/4" 20-1/4" 9-1/2"G65TR(N) 39" 20-1/4" 9-1/2"14
Figure 9LP Gas InstallationNatural GasInstallationFigure 10RearTrimLeft TrimClamp downflexlineRightTrimAir VentsAccess mustbe provided toShut-off ValveStainlessFlexlineFigure 11Natural Gas models onlyCSA ApprovedRubber Gas HoseNon-<strong>com</strong>bustibleConstructionVented Access Door3/8 FF - 1/2 MPHOSE CONNECTORCSA Approved Propane RegulatorQCC-1/OPDTankVented on BOTH SIDES of IslandWARNINGVapors from products containing Chlorine and other causticchemicals can cause Stainless Steel flexible connectors tocorrode. THESE PRODUCTS SHOULD NOT BE STORED INAN ISLAND OR NEAR THE connector.Cleaning solutions, Household Chemicals and Solder fluxescan also cause pinholes if they <strong>com</strong>e in contact with theseconnectors and MUST be washed off immediately with water.OUTINCSA ApprovedNatural GasRegulatorYellow Teflon Pipe ThreadSealant is re<strong>com</strong>mended foruse on all pipe thread connectionsEXCEPT flared threads.StainlessFlexlineClose NippleNaturalGas SupplyShut-off Valve1/2-1/2” NPTIMPORTANT:Regulator must be on the Barbecue or your warranty is void.15
Fuel Gauge Display Installation. (LP Only)IMPORTANT: Before installing batteries be sure the gastank is not mounted in the tank pull-out tray.1. Attach the Tank Gauge Bracket on the BottomShelf. Using 4 of 1/2" x 3/4" Phillips HeadScrews to fixing the Tank Gauge.2. Rotate the Battery Cover on the Bottom of the tankPull-out Tray.3. Insert two "AAA" Batteries into Battery Box.4. Return the Battery Box and wire to Tank Pull-outTray. Rotate the Battery Cover Back.BOTTOM SHELFFuel Gauge Display Operating - See Figure 5Press the "CHECK" button to operate Fuel GaugeDisplay.NOTE: Tank must be positioned in tray FuelGauge Display check.1. Fuel Display: Indicates gas tank fill level2. Fuel Warning Display: When the gas tank fill levelis on the last row a warning signal will sound forapproximately 3 seconds to warn you that the tankvolume is near empty.3. Battery Warning Display: A low battery warninglight will illuminate when the battery voltage dropsto a low level. Replace the batteries.T A NK G A UG EDIS P L A YP UL L OUT T R AYTANK GAUGEBRACKETB A T T E R Y B OXB A T T E R Y C OV E RA A B A T T E R IE SFUEL DISPLAYFUEL WARNINGDISPLAYC HE C KBATTERY WARNINGDISPLAYCHECK BUTTON16
Rotisserie Instruction1.Attach the motor bracket on the outside of the rightgrill bowl panel. Align the two holes on the grill bowlpanel. Tighten securely using two #10-24 UNC x 3/4"screws, flat washers and nuts provided.MOTOR BRACKET2. Slide a Holding Fork onto each end of Skewerand tighten the thumbscrew to keep the HoldingForks in place. Slide the bushing onto the endof the Skewer.3.Install the AC rotisserie motor onto the motorbracket as shown.4.Insert the end of bushing to the hole on the leftand right grill bowl panel. Slide the Skewer intoAC motor.5.Tighten the thumbscrew on the Bushing.IMPORTANT: Before rotisserie cooking you willneed to remove the cooking grids (and possiblythe flame tamers and warming rack) onyour grill to rotisserie cook- depending on thesize of meat you will place on the rotisserie.BUSHINGTHUMBSCREWSKEWERFORKAC MOTORMOTOR BRACKET17
Connecting A Liquid Propane Gas (LP gas)Tank To Your <strong>Grill</strong>1. Check the Tank Valve to insure it has properexternal mating threads to fit the Hose andRegulator Assembly provided. (Type 1 connectionper ANSI Z21.58a-1998)2. Inspect the Valve Connection Port andRegulator assembly. Look for damage or debris.Remove any debris. Inspect Hose for damage.Never use damaged or plugged equipment.3. Hang your filled gas tank on the Tank Seat.The ring foot of the gas tank will rest on theTank Display. See Figure 7. Make sure theLP gas tank valve is in the full OFF position(turn clockwise to close).To reset the TankGauge, depress the gas tank allthe way down using your hand, each timeyou replace the tank.Disconnecting A Liquid Propane Gas (LP gas)Tank From Your <strong>Grill</strong>1. Turn the Burner Valves and LP Gas Tank Valveto the full OFF position (turn clockwise toclose).2. Detach the Hose and Regulator Assembly fromthe LP gas Tank Valve by turning the QuickCoupling Nut counterclockwise.Figure 7.4. Make sure all Burner Valves are in the OFFposition.5. When connecting the Hose and RegulatorAssembly to the Tank Valve, hand tighten nutclockwise to a full stop. Do Not use a wrenchto tighten because it could damage the QuickCoupling Nut and result in a hazardouscondition.6. Slowly open the tank valve 1/4 to 1/2 open(counterclockwise). Use a soapy water solutionto check all connections for leaks beforeattempting to light your grill. See "Checking forGas Leaks" on page 17. If a leak is found,turn the Tank Valve off and do not use yourgrill until the leak is repaired. Do this leak testeven if the grill was store assembled.To connect A Natural Gas (NG) <strong>Grill</strong> Referto Instructions on page 4.T ANK G AUG ER E G ULATORC OUP LING NUTTY P E 1C ONNE C TIONP E R ANS I Z21.58A-1998CAUTION: When the appliance is not in use, thegas must be turned off at the supply tank.18CongratulationsYour <strong>Turbo</strong> <strong>Select</strong> gas grill is now ready foruse. Before the first use and at the beginningof each season (and whenever a LP gas tankhas been changed):1. Read all safety, lighting and operating instructions.2. Check Gas Valve Orifices, BurnerTubes and Burner Ports for any obstructions.3. Perform gas leak check according to instructionsfound on page 17 of this Owner's<strong>Manual</strong>.
!WARNINGA strong gas smell, or the hissing sound ofgas indicates a serious problem with yourgas grill or the LP gas tank. Failure toimmediately follow the steps listed belowcould result in a fire or explosion that couldcause serious bodily injury, death, or propertydamage.• Shut off gas supply to the gas grill.• Turn the control knobs to OFF position.• Put out any flame with a fire extinguisher.• Open grill lid.• Get away from the LP gas tank.• Do not try to fix the problem yourself.• If odor continues or you have a fire youcannot extinguish, call your fire department.Do not call near the LP gas tank becauseyour telephone is an electrical device andcould create a spark resulting in fire and/orexplosion.NOTE: The normal flow of gas through theregulator and hose assembly can create ahumming noise. A low volume of noise isperfectly normal and will not interfere withoperation of the grill. If humming noise is loudand excessive you may need to purge air fromthe gas line or reset the regulator excess gasflow device. This purging procedure should bedone every time a new LP gas tank isconnected to your grill. For help call theBarbeques Galore Infoline for assistance.<strong>Grill</strong> Lighting InstructionsBasic Lighting Procedures1. Familiarize yourself with the safety guidelines atthe front of this manual. Do not smoke whilelighting grill or checking gas supply connections.2.3.4.5.6.Be sure the LP gas tank is filled.Check that the end of each burner tube is properlylocated over each valve orifice.Make sure all gas connections are securelytightened.Open the <strong>Grill</strong> Lid.WARNINGFailure to open <strong>Grill</strong> Lid during thelighting procedures could result in a fireor explosion that could cause seriousbodily injury, death, or propertydamage.Set control knobs to OFF and open the LP gastank valve slowly until 1/4 to 1/2 open.OFF!Open LPgas tankCustomer Service Helpline, 8:00am - 4:30pm PSTMonday through Friday at 1-800-474-5587.7.Push and turn the LEFT control knob to HIGH.Checking For LP Gas LeaksOFFNever test for leaks with a flame. Prior to first use,at the beginning of each season, or every time yourLP gas tank is changed, you must check for gasleaks. Follow these four steps:1. Make a soap solution by mixing one part liquiddetergent and one part water.2.Turn the grill control knobs to the full OFFposition, then turn the gas ON at source.8.HIGHImmediately press the electric ignitor for 3-4seconds to light the burner.PRESS3.Apply the soap solution to all gas connections.If bubbles appear in the soap solutionthe connections are not properly sealed.Check each fitting and tighten or repair asnecessary.9.If the burner does not light, turn the control knob toOFF, wait 5 minutes for gas to clear, then retry.4.If you have a gas leak that you cannot repair,turn off the gas at the source, disconnect fuelline from your grill and call1-800-474-5587 or your gas supplier for repairassistance.1910.11.Once the left grill burner is ignited, the adjacentburner can be lit by simply turning its control knobto HIGH.Adjust control knobs to your desired cookingtemperature.
<strong>Manual</strong>ly Lighting Your <strong>Grill</strong> by MatchTo light your gas grill by match, Follow steps 1through 6 of the Basic Lighting Procedures. Then,light the match and place near the top end ofLighting Tube on the right side of the grill. SeeFigure 7. Turn the nearest Main Burner ControlKnob to the HIGH setting to release gas.The Burner should light immediately.Figure. 7MATCHLIGHTINGTUBE• Misalignment of Ignitor on BurnerCorrection: Check for proper position of theElectrode Tip as shown on page 15. The gapbetween the Spark Electrode Tip andSpark Receiver should be approximately3/16". Adjust if necessary following theElectrode Check procedure on page 15.• Disconnected Ignition WiresCorrection: Inspect the Ignitor JunctionBox found behind the Control Panel. Connectloose Ignitor wires to Junction Box and tryto light grill.• Weak AA batteryCorrection: Unscrew the Ignitor Cap and replacethe battery.! WARNINGNever lean over the grill cooking area whilelighting your gas grill. Keep your face and bodya safe distance (at least 18 inches) from theLighting Hole or Burners, when lighting yourgrill by match.If the grill fails to light properly:1. Turn gas off at source and turn the Control Knobsto OFF. Wait at least five minutes for gas to clear,then retry.2. Check gas supply and connections.3. Repeat lighting procedure. If your grill still failsto operate properly, turn the gas off at source,turn the Control Knobs to OFF, then check thefollowing:• Misalignment of Burner Tubes over OrificesCorrection: Reposition Burner Tubes over Orifices.• Obstruction in gas lineCorrection: Remove fuel line from grill. Do notsmoke! Open gas supply for one second to clearany obstruction from fuel line. Close off gas supplyat source and reconnect fuel line to grill.• Plugged OrificeCorrection: Remove Burners from grill bypulling Cotter Pin (beneath Burner) using Longnose pliers. Carefully lift each Burner up andaway from Gas Valve Orifice. Remove the Orificefrom Gas Valve and gently clear any obstructionwith a fine wire. Then reinstall all Orifices,Burners, Cotter Pins and cooking <strong>com</strong>ponents.If an obstruction is suspected in Gas Valves orGas Valve Bracket, please callBarbeques Galore at 1-800-474-5587.To purge air from your gas line and/orreset the Regulator excess gas flow device:Opening the tank valve all the way or too quickly iswhat triggers the Regulators safety device to shutdown gas flow which prevents excessive gas flow toyour grill. Lighting the Burner farthest from the fuelsource every time will help eliminate air pockets inthe Manifold. This procedure should be done everytime a new LP gas tank is connected to your grill:Turn all Control Knobs to the OFF position.Turn off the LP gas tank valve at the tankvalve.Disconnect Regulator from LP gas tank.Let unit stand for 5 minutes.Reconnect Regulator to the LP gas tank.Open <strong>Grill</strong> Lid or Side Burner Lid.Turn the LP gas tank valve on1/4 to 1/2 open.Light the Burner farthest from fuel source byturning its Control Knob to IGN then pushingin the Control Knob. To light the Side Burnerpush its Control Knob in and turn to HIGH.!WARNINGslowly untilShould a "FLASH-BACK" fire occur in/or around the Burner Tubes, follow theinstructions below. Failure to <strong>com</strong>plywith these instructions could result in afire or explosion that could causeserious bodily injury, death, or propertydamage.• Shut off gas supply to the gas grill.• Turn the Control Knobs to OFF position.• Put out any flame with a Class B fireextinguisher.• Open <strong>Grill</strong> Lid.• Once the grill has cooled down, cleanthe Burner Tubes and Burners accordingto the cleaning instructions found onpage 21 in this manual.20
Us ing your InfraredB ack B urner and R otis s erieYour new grill includes an Infrared Back Burner and aRotisserie designed to slowly cook foods that are moistand flavorful, because the turning food self bastes usinginfrared heat. The location of the Back Burner allows theplacement of a basting pan beneath the food to collectjuices and drippings for basting and gravy. To flavor thecontents of the basting pan you may add herbs, onions,or other spices of your choice. The Rotisserie Burner isInfrared, which provides intense radiant heat. This intenseheat is magnificent for searing in the natural juices andnutrients found in quality cuts of meat.Rotisserie cooking is a slow cooking process and themaximum temperature you can expect to reach withthe Lid closed is about 325° to 350° F.R ead A ll Ins tructions :1. Always attach the R otisserie to the grill first, andthen plug cord into a grounded outlet. To disconnect,turn R otisserie "OF F " then remove plug from outlet.2. Most grill surfaces and accessories are hot duringand after cooking, so use reasonable care aroundgrill, wear protective mitts and use the R otisserieHandle.3. T he use of accessory attachments on the R otisserieis not re<strong>com</strong>mended by the manufacture and maycause injuries.Do not use this appliance for otherthan intended use.4. Never line the bottom of your G rill B owl with aluminumfoil, sand or any grease absorbent substance.5. S hould a grease fire occur, turn the B urners and gasoff and leave the Lid C LOS E D until fire is out.L oading T he R otis s erieTo load the S kewer begin with the Handle in place, andslide one of the Meat Holders (P rongs facing away fromthe Handle) onto the S kewer. P ush the S kewer throughthe center of the food, and then slide the second MeatHolder, (prongs toward the food) onto the S kewer. It isvery important to center and balance the food to be cookedon the S kewer then push the Meat Holders firmly together.Tighten the Wing Nuts with pliers. It may also benecessary to wrap the food with butcher string (never useplastic or nylon string) to secure any loose portions. Oncethe food is secure insert the S kewer into the motor. Ifneeded, remove the grill C ooking G rids. P lace a bastingpan below the food to collect the juices and drippings asthe food cooks. It is normal for the S kewer to flex whenlarger cuts of meats are being cooked. S tart motor andcook food with the Lid closed.B ack B urner L ighting Ins tructionsNote: T he location of the B ack B urner makes it moresusceptible to winds that will decrease the performance ofyour R otisserie cooking. F or this reason you should notoperate the B ack B urner during windy weather conditions.F or best results, always R otisserie cook with the grill Liddown and the B ack B urner C ontrol K nob set to High. Donot use the main grill B urners when the B ack B urner is inoperation.1. Open the G rill Lid.2. S et all C ontrol K nobs to OF F and open the LP gasTank Valve slowly until 1/4 to 1/2 open. F or NaturalG as open S hutt Off Valve at source <strong>com</strong>pletly.3. P ush and turn the B ack B urner C ontrol K nob to IG Nposition. P ush the C ontrol K nob in to ignite theburner.4. If the B urner does not light, turn the C ontrol K nob toOF F, wait 5 minutes for gas to clear, then retry.5. Once lit, the B ack B urner will reach cookingtemperature quickly. T he orange/red glow will evenout in about 5 minutes.6. F or best results, always R otisserie cook with thegrill Lid down and the B ack B urner C ontrol K nob seton HIG H. Do not us e the main B urners whenthe B ac k B urner is in operation.!!WAR NINGF ailure to open G rill L id during the lightingproc edures c ould res ult in a fire orexplos ion that c ould c aus e s erious bodilyinjury, death, or property damage.WAR NINGT he R otisserie Motor must be electrically groundedin accordance with local codes or, in the absence oflocal codes, with the National E lectric C ode, ANS I/NF PA 70-1990. K eep the R otisserie Motor electriccord away from the heated surface of the grill. Donot operate the R otisserie with a damaged cord orplug, or if the R otisserie malfunctions or has beendamaged in any manner. C all the G rill InformationC enter for replacement. T he power supply cord hasa 3-prong grounded plug. F or your personal safetydo not remove the grounding prong. It must beplugged into a mating 3-prong grounding typereceptacle, grounded in accordance with the NationalE lectrical C odes and local codes and ordinances. Ifan extension cord is used it must be properlygrounded and suitable for use with OutdoorAppliances. K eep the extension cord connection dry,off of the ground and out of the reach of children.When the R otisserie Motor is not in use remove andstore in a dry indoor area.21
Cleaning and MaintenanceKeeping outdoor cooking gas appliance area clear andfree from <strong>com</strong>ustible materials, gasoline and otherflammable vapors and liquids.As with all appliances, proper care and maintenancewill keep your grill in top operating condition andprolong its life. By following these cleaning procedureson a timely basis, your grill will stay clean and workproperly with minimum effort.CAUTION:Be sure your grill is OFF and cool before cleaning.Cleaning The Cooking GridsBefore initial use and as needed, wash your Gridswith a mild detergent and rinse with hot water. Forstubborn food residue use a degreaser and fiber orbrass cleaning brush.Cleaning The Grease Tray and ReceptacleTo reduce the chance of fire, the Grease DrainingTray, Grease Receptacle and Heat Shield shouldbe inspected before each grill use. Removegrease (a plastic spatula works well) and washGrease Tray and Receptacle with a mild soapand warm water solution.Cleaning the Flame TamersTo reduce the chance of flare-ups, Flame Tamersshould be cleaned whenever food or greasedrippings accumulate. Brush off Flame Tamerswith a fiber type brush and turn over to allowthe burner heat to burn off any stuborn food residue.The Ceramic Flame Tamers work equally wellon either side.Annual Cleaning of The <strong>Grill</strong> InteriorUse a fiber or brass cleaning brush to clean the interior<strong>Grill</strong> Bowl, Cooking Grids, Flame Tamers andgrease containers. On porcelain finished parts neveruse a wire brush or metal scraper which can scratchor chip the porcelain finish and promote rusting.1. Turn all Control Knobs to the full OFF position.2. Turn the LP gas Tank Valve to the full OFF position.3. Detach the LP gas Regulator assembly from your gasgrill or disconnect the Quick Disconnect Hose from thegas source.4. Remove and clean the Flame Tamers, CookingGrids, and <strong>Grill</strong> Burners.5.6.7.8.9.10.Cover each gas Valve Orifice with aluminum foil.Brush the inside and bottom of the grill with a brasswire brush or fiber cleaning pad, and wash with amild soap and warm water solution. Rinsethoroughly and let dry.Remove aluminum foil from Orifices and checkeach Orifice for obstruction.Check eachSpark Electrode, adjusting asneeded. The space between the SparkElectrode Tip and Spark Receiver shouldbe approximately 3/16".Replace the Burners and adjust the gascollector box. The edge of the collector boxshould be overlapping the Burner Port.Replace Flame Tamers and the Cooking Grids.11. Reconnect the gas source and observe theBurner flame for correct operation.Exterior Stainless Steel Surfaces:Weathering and high heat can cause a stainless steelgrill Lid to turn tan in color. This is not to beconfused with rust and is not a product defect.Machine oils used in the manufacturing process ofstainless steel as well as cooking oils and a dirtygrill Lid can also encourage discoloration if the Lidis not cleaned prior to grill use.1. Shut off gas supply at source and disconnect fuelline from Gas Valve Manifold. Protect fuel linefitting.2. Use a Stainless Steel Cleaner and soft cloth toremove residual adhesive and oils from the insideand outside of your grill Lid. Never use abrasivecleaners or scrubbers. In addition to the initialcleaning, routine cleaning to remove dirt, greaseand oils will help discourage Lid discoloration.<strong>Grill</strong> Information Center:If you have questions about assembly or grill operation, or if there are damagedor missing parts when you unpack this unit from the shipping boxes, call us 8am - 4:30 pm PST, Mondaythrough Friday at: 1-800-474-558722
Cleaning The Burner Tubes and Burner PortsTo reduce the chance of "FLASH-BACK" you mustclean the Burner Tubes at least once a month in latesummer or early fall when spiders are most activeor when your grill has not been used for anextended period of time.1. Turn all Control Knobs to the full OFF position.2.3.4.Turn the LP gas Tank Valve to the full OFF position.Detach the LP gas Hose and Regulator Assemblyfrom your gas grill or disconnect the Quick DisconnectHose from the Natural Gas source.Remove the Cooking Grids, Flame Tamers, andGrease Trays from your grill.Regardless of which Burner cleaning procedure youuse, we re<strong>com</strong>mend you also <strong>com</strong>plete the followingsteps to help prolong Burner life.1.2.3.Use a wire brush to clean the entire outer surface ofeach Burner until free of food residue and dirt.Clean any clogged ports with a stiff wire, such asan open paper clip.Inspect each Burner for damage (cracks or holes)and if such damage is found, order and install anew Burner. After installation, check to insurethat the Gas Valve Orifices are correctly placedinside the ends of the Burner Tubes. Also checkthe position of your Spark Electrode.5.6.7.Remove the Cotter Pin from the rear underside ofeach Burner using a pair of long nose pliers.Carefully lift each Burner up and away from the gasValve Orifice.Refer to Figure 1 and perform one of these threecleaning methods:!WARNINGThe location of the Burner Tube with respectto the Orifice is vital for safe operation. Checkto ensure the Orifice is inside of the BurnerTube before using your gas grill. See2. If the Burner Tube does not fit over theValve Orifice, lighting the Burner may causeexplosion and/or fire.Figure• Bend a stiff wire, (a lightweight coat hangerworks well) into a small hook as shown below.Run the hook through the Burner Tube andinside the Burner several times to remove anydebris.Figure 2GAS COLLECTOR BOXSPARK ELECTRODE• Use a Burner Cleaning Brush or a bottle brushwith a flexible handle. Run the brush throughthe Burner Tube and inside the Burner severaltimes, removing any debris.• Use an air hose to force air through eachBurner Tube. The forced air should pass debrisor obstructions through the Burner and out theports.ORIFICEBURNERFigure 1TO CLEAN BURNER TUBE,INSERT HOOK HEREGAS COLLECTOR BOXSPARK ELECTRODEBURNERBURNER PORTORIFICEBURNER TUBE23
Frequently Asked QuestionsQuestion: Can I convert my grill from LPG to NG?Answer: No, your gas grill is manufactured to exactspecifications and is certified for Liquid Propane (LPG)or Natural Gas (NG) use only. For your safety,conversion kits are not available. Any attemptto convert your grill will void your warranty.Question: The Hose and Regulator supplied with mygrill does not fit the older LPG tank I've used for years.Answer: U.S. Government regulates gas appliancesand LP gas tanks. When regulations are changed theLP gas tank fittings are altered to insure <strong>com</strong>pliance.If your LP gas tank does not fit the Hose andRegulator supplied with your new grill, the tank isoutdated and must be replaced. Note: Effective April 1,2002 all LP gas tanks sold must include an "OPD"OverflowProtection Device. This internal deviceprevents the LP gas tank from being overfilled.Tanks without an OPD valve can not be refilled.Question: Are the serial and model numbers of my grilllisted somewhere for future reference?Answer: The model and serial numbers are listed on aSilver Label placed on the Control Panel bottom righthandside. If your grill features a Side Burner, it will haveits own silver label and a model number ending in SB.This is not the primary grill model number orserial number needed for Product WarrantyRegistration or for Customer Support purposes.Question: What causes grill parts to rust and whataffect does it have on the grill materials.Answer: Rusting is a natural oxidation process and mayappear on cast-iron and steel parts. Rust will not affect shortterm performance of your grill. Stainless steel grill partswill not rust. However, weathering and extreme heat cancause a stainless steel Lid to turn tan color. This isdiscoloration and is not considered a manufacturingdefect.Question: My grill does not light properly. Why?Answer: Always light the Burner farthest from the fuel sourcefirst. This draws gas across the Manifold helping prevent airpockets which obstruct gas flow. Also check these causes:Check LP gas supply. An empty LP gas tank weightsabout 20 pounds. A full tank weighs about 40 pounds.Check to insure all gas connections are secure.The Ignition AA battery may need replacing.Ignition wires may be loose. Remove theinspect the Ignitor Junction Box found behind theControl Panel and connect any loose wires.Spark Electrode Tips may need repositioning. Refer tothe electrode "Check" procedures found on page 15.Check that the end of each Burner Tube is properlylocated over each Gas Valve Orifice.There may be an obstruction in the gas line. To correctthis, remove LP gas Hose and Regulator or Natural Gasfuel line from your grill. Do not smoke! Open gas supplyfor one second to clear any obstruction from fuel line.Close off gas supply at source and reconnect fuel lineto your grill.If an obstruction is suspected in theOrifice or Gas Valves, call Barbeques Galoreat 1-800-474-5587.battery,24Question: My grill has a low flame and sometimeswill not light. Why?Answer: You need to purge air from the gas line orreset the Regulator excess gas flow device. Openingthe tank valve all the way or too quickly triggers theRegulators safety device to shut down gas flow whichprevents excessive gas flow to your grill. Lighting theBurner farthest from the fuel source every time will helpeliminate air pockets in the Manifold. Perform this procedureevery time a new LP tank is connected to grill:Turn all Control Knobs to the OFF position.Turn off the LP gas tank valve.Disconnect Regulator from LP gas tank.Let unit stand for 5 minutes.Reconnect Regulator to the LP gas tank.Open <strong>Grill</strong> Lid or Side Burner Lid. Turn the tankvalve on slowly until 1/4 to 1/2 open.Light the Burner farthest from fuel source byturning its Control Knob to IGN then pushingin the Control Knob. To light the Side Burner pushits Control Knob in and turn to HIGH.Question: Sometimes I hear a humming sound<strong>com</strong>ing from my Regulator. What causes this?Answer: The humming sound is gas flowing throughthe Regulator. A low volume of sound is normal and willnot interfere with the operation of your grill. If the hummingsound is loud and excessive you need to purge airfrom the gas line or reset the Regulator excess gas flowdevice as described above.Question: How and when do I clean the interiorcooking <strong>com</strong>ponents of my grill?Stainless Steel Cooking Grids: Before initial use andas needed, wash Grids with a mild detergent and rinsewith hot water. For stubborn food residue use a degreaserand fiber or brass cleaning brush.Flame Tamers: To reduce the chance of flare-ups,Flame Tamers should be cleaned whenever food orgrease drippings accumulate. Brush off Flame Tamerswith a fiber type brush and turn over to allow the burnerheat to burn off any stuborn food residue. The CeramicFlame Tamers work equally well on either side.Grease Tray, Receptacle and Heat Shield:To reduce the chance of fire, the Grease Draining Tray,Grease Receptacle and Heat Shield should be inspectedbefore each grill use. Remove grease (a plastic spatulaworks well) and wash Grease Tray and Receptaclewith a mild soap and warm water solution.Question: What causes a stainless steel to discolor?Answer: Weathering and high heat can cause astainless steel grill Lid to turn tan in color. This is notto be confused with rust and is not a product defect.Machine oils used in the manufacturing process ofstainless steel, cooking oils and a dirty grill Lid canalso encourage discoloration if the Lid is not cleanedprior to grill use. After your grill is assembled,remove the protective PVC film from the grill Lid anduse a Stainless Steel Cleaner and soft cloth toremove residual adhesive and oils from the inside andoutside of your grill Lid. Never use abrasive cleanersor scrubbers. Routine cleaning to remove dirt, greaseand oils will help discourage Lid discoloration.
Cooking Instructions!WARNINGYour grill will get very hot. Never lean overthe cooking area while using your grill. Donot touch cooking surfaces, grill housing,<strong>Grill</strong> Lid or any other grill parts while the grillis in operation, or until the grill has cooleddown after use.Failure to <strong>com</strong>ply with these instructionsmay result in serious bodily injury.Indirect CookingThe indirect cooking method can also be used withthe supplied cooking grids. To cook indirectly, thefood should be placed on the left or right side of yourgrill with the burner lit on the opposite side.Indirectcooking must be done with the lid down.Flare-UpsThe fats and juices dripping from grilled food cancause flare-ups. Since flare-ups impart a favorably,distinctive taste and color to food cooked over anopen flame, they should be accepted up to a point.Nevertheless, uncontrolled flaring can result in aruined meal.Burn-offBefore cooking on your gas grill for the first time, you willwant to "burn off" the grill to eliminate any odor or foreignmatter. Just ignite the Burners, lower the Lid, and operategrill on the HIGH setting for three to five minutes.CAUTION:Operating your grill on the HIGH setting for longer thanfive minutes may damage certain parts of your grill.not leave your grill unattended.PreheatingTo preheat, light your grill on HIGH, lower the lid andfollow this timetable:• For high temperature cooking, preheat grill3 to 5 minutes.• For low temperature cooking, preheat grill3 minutes.• To slow cook, preheating is not necessary.Do!WARNINGDo not line the bottom of the grill housingwith aluminum foil, sand or any substancethat will restrict the flow of grease into thegrease draining tray and receptacle.Failure to <strong>com</strong>ply with these instructionscould result in a fire or explosion which couldcause serious bodily injury, death, or propertydamage.Cooking TemperaturesHigh setting: Only use this setting for fast warm-up,searing steaks or chops and for burning food residueoff the grill after cooking is <strong>com</strong>plete.HIGH setting for extended cooking.Never use theMedium to Low settings: Most recipes specifymedium to low settings, including all smoking,roasting,baking and for cooking lean cuts such as fish.NOTE: Temperature settings will vary with the amountof wind and temperature outside your home.Direct CookingThe direct cooking method can be used with thesupplied Cooking Grids and food placed directly overthe lit grill Burners. Direct cooking requires the grilllid to be up. This method is ideal for searing andwhenever you want meat, poultry or fish to have anopen-flame barbecued taste. Deep frying and smokingare also best cooked in this manner because theyrequire direct heat.25
Guide to <strong>Grill</strong>ing Meat and Poultry with the Direct Cooking Method<strong>Grill</strong>ing Steak and RibsTurn the grill Burners on high, close the Lidand preheat your grill 3 to 5 minutes. Open Lidand place the meat on the Cooking Griddirectly above the lit Burners. Cook the meaton both sides until seared. Reduce the heatto medium and cook meat until done. <strong>Grill</strong>ingtimes will vary according to meat thickness.<strong>Grill</strong>ing Hamburgers and SausagesTurn the grill Burners on high, close Lid andpreheat your grill 3 to 5 minutes. Open Lidand place the meat on the Cooking Griddirectly above the lit Burners. Cook the meaton both sides until seared. Reduce the heatto medium and cook the meat until done.<strong>Grill</strong>ing times will vary according to meatthickness.<strong>Grill</strong>ing PoultryTurn the grill Burners on high, close Lid andpreheat your grill 2 to 3 minutes. Then raisethe Lid, reduce heat to medium and cookpoultry directly over lit Burners until done.Poultry skin is fatty so you should expectsome flare-ups when using this direct method.To minimize flare-ups, try grilling poultryusing the indirect method. Place the poultryon one side of the grill with the opposingBurners on medium heat, and lower the grillLid. <strong>Grill</strong>ing times will vary based on the sizeof your poultry.<strong>Grill</strong>ing PorkTurn Burners on high and preheat your grill 3 to5 minutes with the Lid down. Raise Lid, placepork on Cooking Grid and cook until seared.Reduce heat to medium and cook until done.<strong>Grill</strong>ing times will vary according to meatthickness.Cut of MeatT-bone steakSirloin steakBeef spare ribsPorter house steakNew York strip steakHamburgersSausagesChicken breast(cook with bone down)Chicken wingsDrumsticksWhole bird(cook with breast up)Pork spare ribsChopsLoinsCutletsApproximate Cooking TimesRare: 4-8 minutesMedium: 10-14 minutesWell done: 15-20 minutesRare: 4-6 minutesMedium: 8-10 minutesWell done: 10-15 minutesDirect method:approximately 15 minutesIndirect method:up to 30 minutesIndirect method:approximately 1 hourRare: 4-8 minutesMedium: 10-14 minutesWell done: 15-20 minutes26
Guide to <strong>Grill</strong>ing Fish and Seafood with the Direct Cooking MethodWhole Fish and Whole FilletsPreheat your grill on HIGH for 2-3 minuteswith the Lid down. Raise Lid and turnBurners to medium heat. Place fish (skindown) on grill and cook over direct heat untildone. Use cooking time as a guide or untilfish is opaque but still moist.Smaller Fish Fillets and CubesFollow the directions from above, usingapproximate cooking times shown at right.Place a small piece of aluminum foil on theCooking Grids if the fish pieces are smallenough to drop between the cooking grids.Cut of MeatWhole fishWhole fish filletsFish filletsBoneless cubesApproximate Cooking Times10 - 12 minutes per pound oruntil fish is opaque4 - 5 minutes each sideor until fish is opaqueGuide to <strong>Grill</strong>ing Vegetables and FruitPrepare your fruit or vegetables and brush withbutter or basting sauce if desired. To cook indirectly,the food should be placed on the left or right side ofyour grill with the Burner lit on the oppositeside and the grill Lid down.In some instances, you may want to grill vegetablesand fruit directly over the heat, using the suppliedCooking Grids. Foods that work best with directheat are relatively soft and require a short cookingtime; mushrooms, zucchini, tomatoes and skeweredfruit such as apricots, peaches, pineapple,strawberries and kiwis. Remember thegrill Lidmust remain up when cooking directly.For very firm vegetables—particularly potatoes andyams, we re<strong>com</strong>mend that you partially boil untilalmost cooked, before placing them on the grill.Cooking times using theindirect method with thehood down will be similar to those for your kitchenoven. However, there are many factors such as outsidetemperature, wind conditions and location of grillthat affect your grill performance so we suggest youwatch the Temperature Gauge and adjust the heataccordingly.Cooking times for foods prepared with thewill be much shorter mainly because of the direct heatsourse and softness of the food. Timing will be<strong>com</strong>parable to normal pan frying or grilling.direct method27
Guide to Slow Roasting and Baking TechniquesAn Important Note About Heat SettingsThe suggested heat settings shown are approximate.There are many factors such as outside temperature,wind conditions and grill location that affect your grillperformance. We offer these cooking times as aconvenience, but suggest you watch the grillTemperature Gauge and adjust the heat accordingly.Preparing to RoastRoasting uses the indirect cooking method. Therefore,the food should be placed on the left or right side of yourgrill with the Burner lit on the opposite side. You can alsouse the supplied Cooking Grid with analuminum drip pan underneath allowing you to collectjuices for making gravies. Remember, indirect cookingrequires the Lid of your grill to be down.Preheating your grill is not required for slow cookingmethods such as roasting. If you do choose to preheatyour grill before roasting, turn the Burners on highand close Lid for approximately 2-3 minutes.Food PreparationTrim meat of excess fat. Truss meat and poultry withcooking string to retain shape if desired. Bacon strips canbe used to cover the outside surface of lean meat andpoultry to help prevent it from drying out. Another methodfor keeping food moist during roasting is to put waterin a cooking pan, then cover with foil. The foil shouldbe removed for the first or the last part of the cookingtime to ensure proper browning.Tips for RoastingExcept when roasting with water in a roasting pan, thejuices that collect in the pan can be used as the base fora tasty sauce or gravy. Place a cooking pan directly overthe heat, add extra butter if needed, then add severalspoonfuls of flour to thicken sauce. Finally, add sufficientchicken or beef stock to obtain the desired consistency.Once the meat is cooked, remove it from your grill andcover with a piece of foil. Allow it to stand for 10-15minutes which allows the juices to settle. This will makecarving easier and ensure a tender, juicy roast.Type of FoodBeefLambVealPorkChickenDuckFishTurkey, under 16 poundsTurkey, over 16 poundsBAKING TECHNIQUESFrom casseroles and cornbread to delicious desertslike fondue fruit skewers or crumb cake, baking on thegrill is as easy as baking in the kitchen.Preparing to BakeTo bake in your new grill you'll need a baking dish orcast-iron cooking pan, and a pair of insulated cookingmitts. If the cooking pan is cast-iron be sure toseason the pan before use.Preheat your grill 3-5 minutes, then lower heat toachieve the baking temperature desired.Oven TemperatureSlow 300° - 340° FModerate 355° - 390° FHigh410° - 480° FHow CookedRareMediumWell doneMediumWell doneApproximate Cooking Times18 minutes per pound23 minutes per pound27 minutes per pound18 minutes per pound23 minutes per pound27 minutes per pound30-33 minutes per pound20-25 minutes per pound25 minutes per pound10 minutes per pound20-25 per pound + 30 minutes18-23 per pound + 15 minutesindirect cooking method. Therefore, your cooking panshould be placed on the left or right side of your grill withthe Burner lit on the opposite side.Tips for BakingPrepare your favorite recipe as you would in the kitchen.Foods cooked in the grill for long periods of time shouldalways be covered in aluminum foil to retain moisture.You will need to stir the food several times as it bakes,and add additional liquid if required.Watch the temperature, and adjust to cook accordingto your recipe directions.Re<strong>com</strong>mended <strong>Grill</strong> SettingBoth outside Burners on lowOne outside Burner on high and the other outsideBurner on lowBoth outside Burners on high28
Guide to Rotisserie CookingRotisserie CookingRotisserie cooking produces foods that are moist,flavorful and attractive. The Rotisserie system is most<strong>com</strong>monly used for cooking meat or poultry and isdesigned to cook food slowly. You can place a cookingpan beneath the food to collect juices for basting andgravy. To flavor the contents of the cooking pan you mayadd herbs, onions, or other spices of your choice.Rotisserie cooking is a slow cooking process andthe maximum temperature you can expect to reachwith the Lid closed is about 325 to 350 F..Balancing the FoodIn Rotisserie cooking, balancing the food is of utmostimportance. The Rotisserie must turn evenly or thestopping and starting action will cause the food to cookunevenly and possibly burn the heavier side.The easiest foods to balance are those of uniform shapeand texture. To test if the food is balanced correctly whensecured, place the ends of the Rotisserie Skewer looselyin the palms of your hands. If there is no tendency to roll,give the Skewer a quarter turn. If it is still stable, give it afinal quarter turn. It should rest without turning in each ofthese positions. It can then be attached to your grill.Loading the RotisserieTo load the Skewer begin with the Handle in place,and slide one of the Meat Holders (Prongs facing awayfrom the Handle) onto the Skewer. Push the Skewerthrough the center of the food, and then slide thesecond Meat Holder, (prongs toward the food) ontothe Skewer. It is very important to center and balancethe food to be cooked on the Skewer then push theMeat Holders firmly together. Tighten the Wing Nutswith pliers. It may also be necessary to wrap the foodwith butcher string (never use plastic or nylon string)to secure any loose portions. Once the food is secureinsert the Skewer into the motor. If needed, removethe grill Cooking Grids. Place a basting pan below thefood to collect the juices and drippings as the foodcooks. It is normal for the Skewer to flex when largercuts of meats are being cooked. Start motor and cookfood with the Lid closed.Guide to SmokingNote: it is our experience that many smoking chip andpellet products do not actually produce a smoke butinstead infuses the food with flavor. Please read productlabels carefully and if in doubt, ask your retailerfor details.Using A Smoker BoxThere are many optional smoker boxes available forpurchase. Follow these guidelines and always refer tothe label of your smoking chips or pellets for specificdirections.Raise your <strong>Grill</strong> Lid and light the grill. Lower the <strong>Grill</strong>Lid allowing your grill to reach the desired cookingtemperature for the food you are grilling. Fill your smokerbox with your prepared smoking chips or pellets. Driedherbs and spices may also be added to produce differentflavors. Wear an insulated cooking glove and place yoursmoker box on a Cooking Grid or Flame Tamer directlyabove a lit grill Burner. The heated smoking chips orpellets will flavor your foods.Tips for SmokingYou can reduce the strength of the smoke flavor byonly smoking for half or three quarters of the cookingtime. The heat required for smoking is normally low tomedium.Foods naturally high in oils lend themselves well tosmoking, while drier foods benefit from a marinade.You can also rub the food with herbs, spices orflavored oils. Many foods can be smoked to producestunning results with very little effort. Here are a fewsuggestions:•••••••••Tuna steaks, marinated in Asian flavors of sesameoil, soy sauce and sherry.Pork fillets, rubbed with ginger, orange rind andbrushed with maple syrup.Mussels, brushed with lemon rind and chili oil.Lamb cutlets, marinated in virgin olive oil, lemon,oregano and black pepper. The same marinade canbe used for a whole leg or rack of lamb.Chicken, boneless chicken pieces—especially slicedbreasts.Fish, sliced fillets of firm fish, assorted seafoodsuch as prawns, scallops and calamari.Pork, sliced fillets, diced or minced pork, slicedleg steak and sliced chops.Beef, sliced fillet, rib-eye, round, rump and sirloin.Lamb, sliced fillet, round and loin.Preparing to SmokeSmoking gives food a distinctive, delicious flavor. Youwill find a variety of wood chips or pellets availablefor use in smoking grilled foods. Pre-soaking ofwood chips may be required so read and follow themanufacturers instructions for preparation of smokingchips prior to use.29
Guide to Stir-Frying and Deep-FryingSTIR-FRYING TECHNIQUESThis method of cooking is popular around the world andcan be easily ac<strong>com</strong>plished outdoors on your grill. It'sa quick and healthful way of preparing a <strong>com</strong>plete mealusing meat, poultry or seafood in infinite <strong>com</strong>binationswith other interesting ingredients like vegetables, riceor noodles.Preparing to Stir-fryAlthough it is possible to stir fry in other dishes, a wok isyour best tool. Its high sides enable the cook to stir foodwithout spillage. Its construction allows you to cookquickly at high temperatures, with instant control of heatwhich is essential for successful stir frying.Food preparationSlice meat and poultry into long thin strips and cubefish fillets. Remove all fat from meat and poultry andcut large vegetables into even slices or cubes.Marinate foods for extra flavor and tenderness.Marinating times will vary for red meat, fish andor various cuts. Less tender cuts of meat shouldbe marinated longer. Remember to always chillmarinating food in the refrigerator prior to cooking.Stir-fry meats, poultry or fish first. Next, add hardvegetables like carrots. Then continue with softervegetables like snowpeas and peppers. To ensureeven cooking, continually stir and toss the food inthe wok using a wooden spoon or spatula.Tips for Stir-fryingPlace a wok directly over a high heat on your grill or SideBurner. Add only a small amount of food at a time toensure fast cooking and also to allow the wok to reheatbetween ingredients.DEEP-FRYING TECHNIQUESA wide variety of foods can be deep-fried outdoorson your grill, from potatoes, to seafood and chicken.Deep-frying uses a large portion of oil, preferablysaturated. The outdoor location is ideal for deep-fryingas smoke, grease and smells reach for the sky,not the ceiling of your kitchen.Preparing to Deep-fryDeep-fry on your grill using a cooking pan or wok, overdirect heat with the grill lid raised.Fill a cooking pan no more than half full of vegetable orcorn oil. Start with low heat, then raise the heatgradually. Check the temperature of the oil carefullywith a frying thermometer or test with a cube of bread.The cube of bread should brown in about 30 secondsfor most cooking needs. A temperature between350 and 400 degrees is optimal for preparingthe majority of deep-fried foods.Food PreparationFoods being deep-fried taste better when coatedwith either batter or breadcrumbs to add flavor andprevent moisture from escaping.Tips for Deep-fryingWear an insulated cooking glove and slowlylower foods into the hot oil using a wire scoopor stainless steel tongs. Add only a small quantityof food to the oil, allow it to cook, then repeatwith another small quantity. This ensures theoil doesn't drop in temperature. Once the foodis cooked, remove it carefully and drain onto a papertowel. Turn the heat off as soon as you have finisheddeep-frying and allow your pan to cool. When theoil is cool, remove all remnants of fried foodsby straining it through a fine metal sieve. Oncethe oil is quite cool, store it in a clean bottle forfuture use.Guide to Using the Optional Secondary Cooking RackVegetables are generally easy to cook on the grill. Theoptional cooking rack makes it convenient becauseyou can still use the main cooking area while thevegetables are suspended above the Cooking Grids.Pre-cook hard vegetables by briefly boiling ormicrowaving them before cooking on the grill. Wrapvegetables in a double thickness of foil to protect themwhile cooking on the grill. Then, remove the foil ifdesired, 10-15 minutes before the end of cooking,brush vegetables with butter or oil and finish cooking.The optional cooking rack can be used for purposesother than just the obvious. Consider using it forwarming French bread, garlic bread, croissants oreven bagels.A small whole fish wrapped in foil also cooks well onthe optional cooking rack. Parcels of seafood such asscallops, prawns and sliced fish fillets prepared in asauce and portioned into small foil wraps cook wellthis way, too.30
ONION BURGERSA honey and mustard sauce glazes the onion slices asthey cook alongside these delicious burgers. For optimalsweetness, select Vidalia or Walla Walla onions.Makes 4 open face burgers.IngredientsRecipes2 large sweet onions, sliced (12 to 16 ounces)2 tablespoons margarine or melted butter2 teaspoons dry mustard2 teaspoons honey1 pound lean ground beef1/4 teaspoon salt1/8 teaspoon pepper4 slices Texas toast4 lettuce leaves4 tomato slicesPreparing OnionsPlace onions in a cooking pan or on a small piece ofaluminum foil. Combine melted margarine, mustard andhoney, then drizzle over onions. Cover pan with lid orfold up edges of foil and seal with double fold to<strong>com</strong>pletely enclose onions—leaving space for steamto build. Place pan or foil packet on grill directlyover medium heat for 15 minutes with the grill lid up.Preparing BurgersWhile onions are cooking, <strong>com</strong>bine ground beef, salt andpepper in a medium bowl and mix well. Shape mixture intofour 3/4 inch burger patties and add to grill, directly overheat. <strong>Grill</strong> burgers along with onions for about 5 minutes,then turn burgers. <strong>Grill</strong> for 8 to 10 minutes more or until nopink remains in meat, and onions are tender. To serve,toast both sides of Texas toast on grill. Then top eachslice of Texas toast with a burger, lettuce, tomatoand onion. Sprinkle with pepper if desired.1/4 teaspoon salt1 1/2 pounds lean ground beef2 cups shredded lettuce1/3 cup finely shredded cheddar cheese1/4 cup dairy sour cream and /or guacamolePreparing the SalsaCombine tomato, green pepper, onion, jalapenopeppers, garlic, cilantro and salt in a bowl. Setaside 2 tablespoons of salsa.remaining salsa until serving time.Preparing BurgersIn another bowl, <strong>com</strong>bine ground beef with 2tablespoons of reserved salsa, mix well. Shapemixture into six 1/2 inch thick burgers and placeon the grill directly over medium heat with lid up.<strong>Grill</strong> for 13 to 15 minutes or until no pink remains.Turn burgers once, halfway through grilling time.Arrange the shredded lettuce on individual plates.Top lettuce with a burger, cheddar cheese andsalsa. Serve with sour cream and/or guacamole.CHICAGO STYLE HOT DOGSServe these hot dogs "Chicago-style" with pickled peppers!Makes 4 servings.Ingredients1/3 cup ketchup1/4 cup chopped pickled peppers2 tablespoons pickle relish2 tablespoons chopped onion1/4 teaspoon poppy seed4 fully cooked 4-ounce jumbo hot dogs4 hot dog bunsPreparing the RelishCombine ketchup, chopped pickled peppers, relish, onionand poppy seed in a small bowl, then set aside.Cover and chillDOUBLE SALSA BURGERSA fresh tomato salsa flavors the beef mixture for a zestytasting burger. The salsa also serves as a colorfultopping. Makes 6 burger patties.Ingredients1 large tomato, seeded and finely chopped1/2 cup finely chopped green pepper1/4 cup finely chopped red onion2 finely chopped, seeded jalapeno peppers1 garlic clove, minced1 tablespoon snipped cilantroPreparing Hot DogsPlace hot dogs on grill directly over medium heat 5to 8 minutes with the lid up. Turn hot dogs andbrush with some of the relish mixture. <strong>Grill</strong> hot dogs6 to 8 minutes more or until thoroughly cooked.To ServeToast inner sides of hot dog buns on grill. Serve hot dogsinside buns and top with remaining relish mixture.31
RIB EYE STEAKS WITH GRILLED GARLICAs they cook, the garlic cloves mellow in flavor, makinga delicious sauce for any grilled meat. And for anappetizer, spread the softened cloves over toasted slicesof french bread! Makes 4 servings.Ingredients1 whole head of garlic2 tablespoons olive oil or cooking oil1 tablespoon snipped fresh basil, or 1/2teaspoon dried basil, crushed1 tablespoon snipped fresh rosemary or 1/2teaspoon dried rosemary, crushed2 twelve-oz. boneless rib eye steaksPreparing the GarlicUse a cooking pan or tear off a 24x18-inch piece ofaluminum foil and fold long length in half, then trim tomake a 12-inch square. Remove the outer layer ofgarlic head, then cut off and discard the top 1/2-inchof garlic head to expose the garlic cloves. Placegarlic head in center of a cooking pan or in center offoil with all sides of the foil folded up around thegarlic to form a cup. Drizzle garlic with oil and sprinklewith basil and rosemary. Cover pan or twist theends of the foilto <strong>com</strong>pletely enclose the garlic.Preparing SteaksPlace steaks and the garlic pack on grill directly overmedium heat and cook about 7 minutes with the lid up.Turn steaks and grill for 5 to 8 minutes more, or untilcooked to taste. Then remove steaks and place onplatter. Remove garlic and drizzle its juices over yoursteak. Remove the softened garlic cloves and spreadover your steak. Season with salt and pepper asdesired and cut into serving-size pieces.PreparationCombine ketchup, pepper, rosemary, basil andgarlic powder. Coat both sides of steak with mixture.<strong>Grill</strong> steak with lid up, directly over medium heatfor 6 minutes. Turn steak and grill for 8 to 12minutes more or until cooked as desired. Cutinto serving size pieces.BARBECUED RIBSServe this tangy barbecue classic with corn-on-the-cob,green salad, potato salad or coleslaw!Makes 4 servings.Ingredients2 pounds American style pork spareribs1/2 cup barbecue sauce1/2 cup tomato sauce2 cloves garlic, crushedjuice of 1 lemonfew drops of tobasco saucePreparationPlace ribs into a large glass or ceramic dish.Combine remaining ingredients and pour overthe ribs. Refrigerate for several hours.Preheat your grill 3 minutes and place the ribson cooking grid. Cook indirectly, over a lowto medium heat until cooked. During the last fewminutes of cooking you can cook the ribs overa direct fire for added barbecue flavor and texture.HERB-PEPPER SIRLOIN STEAKThe hearty beef flavor is <strong>com</strong>plemented with adelicious herb coating!Makes 6 servings.Ingredients2 tablespoons ketchup1/2 teaspoon coarsely ground pepper1 1/2 teaspoons snipped fresh rosemary or 1/2teaspoon dried rosemary, crushed1 1/2 teaspoons snipped fresh basil or 1/2 teaspoondried basil, crushed1/8 teaspoon garlic powder1 1 1/2-pound boneless beef sirloin steak,cut 1-inch thick32
MARINATED TUNA STEAKExperiment with unique dishes, like this tuna steakrecipe boasting a delicious wine marinade!Makes 4 servings.Ingredients4 6-ounce fresh or frozen tuna steaks cut 1 inchthick. Thaw fish if frozen1/3 cup dry white wine1 tablespoon lemon juice1 tablespoon olive oil or cooking oil1 clove garlic, minced2 teaspoons snipped fresh rosemary, crushed,or 1/2 teaspoon dried rosemary, crushed1 teaspoon snipped fresh oregano, crushed, or1/4 teaspoon dried oregano, crushed1/4 teaspoon saltPreparationCombine wine, oil, garlic, rosemary, oregano andsalt. Place tuna steak in plastic bag and intoshallow dish, add marinade then seal bag. Rotatebag to coat fish well then chill for up to 2 hours,turning fish once.Remove fish from bag and discard marinade. Placea cooking pan with baking rack or roasting rackinto center of grill with outer burners on mediumheat. Cook tuna steak on top of rack with liddown for 8 to 12 minutes or until fish begins toflake easily. Turn fish once during cooking.When cooked, remove fish from grill and serve.MUSTARD-GLAZED HALIBUT STEAKSA simple sauce of melted margarine, lemon juice,Dijon-style mustard and basil adds a scintillating noteto these sizzling fish steaks!Makes 4 servings.IngredientsPreparationCombine thawed fish, margarine or butter, lemonjuice, mustard and basil into a cooking pan oraluminum foil rectangle, and cook directly over lowflame until melted. Brush mixture over both sides ofhalibut fish steaks. Pour balance of mixture intosmall bowl.Place clean cooking pan or foil on center of grill withboth outer burners on medium. Place fish on grilland close lid. Cook indirectly for 8 to 12 minutes orjust until fish begins to flake easily, turning onceand brushing as needed with remaining mixture.ALMOND COATED TROUTThis delicious recipe is unique and easy to prepare onyour gas grill. Makes 4 servings.Ingredients2 trout1/2 cup all purpose flour1 egg, lightly beaten1 cup sliced almonds1/3 cup parmesan cheese, gratedolive or peanut oil for fryingPreparationRemove the head and tail from trout and fillet allbones. Cut each fish in half to form 4 long fillets.Coat fish in flour, dip in egg and roll in almonds.Refrigerate for 1 hour.Fill a cooking pan with 1 to 2 inches of oil, and placeover high heat. Cook trout until golden brown.Drain oil, sprinkle trout with parmesan cheeseand serve right from the grill.4 6-ounce fresh or frozen halibut steaks, cut 1inch thick2 tablespoons margarine or butter2 tablespoons lemon juice1 tablespoon Dijon-style mustard2 teaspoons snipped fresh basil or 1/2teaspoons dried basil, crushed33
SOUTHWEST CHICKEN BREASTSThis popular recipe can also be a grilled chicken salad!Slice chicken into small strips and place them on topof shredded lettuce with avocado dressing and top withcheese! Makes 6 servings.Ingredients1/4 cup dry white wine2 tablespoons olive oil or cooking oil2 teaspoons snipped fresh tarragon or 1/4teaspoon dried tarragon, crushed1/4 teaspoon salt6 skinless, boneless chicken breast halves2 avocados, pitted, peeled and chopped1 tomato, chopped1 clove garlic, minced2 tablespoons finely chopped seededgreen chili peppers of your choice2 green onions, finely chopped1 tablespoon snipped fresh cilantro1 tablespoon honey1 tablespoon lemon juicePreparing the ChickenCombine wine, oil, tarragon and salt. Rinse chickenand dry with paper towels. Place chicken in plasticbag and into shallow dish—then add marinade andseal bag. Rotate chicken to coat well and chill upto 24 hours, turning bag occasionally.Preparing the Avocado DressingCombine avocados, tomato, garlic, chili peppers, onions,cilantro, honey and lemon juice. Toss well then coverand chill up to 2 hours.BARBECUED CHICKENAnother backyard favorite, this recipe includes an easyto make, sweet and spicy sauce.Makes 4 servings.Ingredients1/2 cup ketchup1/4 cup orange marmalade1 tablespoon vinegar1/2 teaspoon celery seed1/2 teaspoon chili powder1/4 to 1/2 teaspoon bottled hot pepper sauce1 2 1/2 to 3 pound broiler-fryer chicken, pre-cutPreparing the SauceCombine ketchup, marmalade, vinegar, celery seed,chili powder and hot pepper sauce in a cooking pan,and cook directly over a low to medium heat.Leave the cooked sauce in the pan and removefrom heat until chicken is prepared.Preparing the ChickenWash chicken and dry with paper towels. Turnoutside burners on medium and place pre-cut chickenpieces (bone side down) in center of grill. Close lidand cook indirectly for 1 hour or until chicken is nolonger pink. Brush occasionally with sauce.Remove chicken from grill once cooked, then placecooking pan with sauce into center of grill andreheat. Pour warmed sauce over chicken andserve.<strong>Grill</strong>ing the ChickenRemove the chicken from plastic bag and reservethe marinade. <strong>Grill</strong> chicken directly over mediumheat with lid up for 5 minutes. Turn chicken andbrush with marinade, then grill for 5-10 minutes moreor until chicken is no longer pink. Serve with sideof avocado dressing.34
TRADITIONAL HOLIDAY TURKEYImagine everyone's surprise when you serve your nextholiday turkey—<strong>com</strong>plete with dressing—delicious andtender straight from the grill! Serves 8 - 10Ingredients for Turkey8 - 10 pound whole turkey4 ounces butter, softened2 tablespoons chopped thyme2 tablespoons lemon juice2 teaspoons grated lemon rindIngredients for Dressing2 ounces butter2 onions, finely chopped8 ounces bacon, chopped2 tablespoons port wine1/4 cup red wine2 chicken stock cubes4 ounces chopped cashews, hazelnuts orpecans1/2 cup chopped celery1/2 cup chopped carrot1 - 1 1/2 cups fresh white breadcrumbs1 egg, lightly beaten-- salt and pepper to tastePreparing the DressingPrepare dressing in a cooking pan directly over mediumheat. Melt butter, add onions and bacon then saute3 minutes. Add port, red wine and stock cubes andbring to a boil. Cook 2 minutes. Wear protective glovesand remove pan to allow ingredients to cool.Add remaining ingredients and mix.Preparing the TurkeyAlthough not required, you may want to preheat yourgrill 3 minutes.Wash inside of turkey and dry with paper towels. Packbreadcrumb seasoning into the turkey cavity.Combine the butter, thyme, lemon juice andrind together in a bowl. Using turkey baster, insertbutter mixture under skin covering the turkey breast.Truss the turkey with string and place it on a bakingpan or roasting rack that rests into a cooking pan.Remove the cooking grids from your grill if necessary,then place the cooking pan and turkey in the center ofyour grill. Turn one outside burner to low, the other tomedium, and close lid. Cook indirectly for 3 1/2 to4 hours or until cooked. Halfway through cookingtime you may alternate burner temperatures so thatthe turkey browns evenly. Once cooked, removedressing from cooked turkey, slice and serve.PIZZA ON THE GRILLYou may never want to call out for pizza again! Followthis pizza dough recipe, or purchase ready-made pizzadough found in your grocers refrigerated section—next tothe biscuits. Slice and serve directly from the grill.Serves 6 - 8Ingredients1 1/2 teaspoons dried yeast1 cup lukewarm water1/2 teaspoon sugar3 tablespoons olive oil3 cups all purpose flour1/4 cup tomato paste or Italian tomato sauce6 ounces sliced pepperoni1 red pepper, roasted and sliced3/4 cup pitted black olives8 ounces grated mozzarella cheeseIt's easy to customize this recipe with toppings tosuit your family's taste. For spicier crust, lightly rubthe dough with olive oil then spice with pepper andgarlic salt before spreading your tomato sauce.Preparing the Pizza DoughCombine yeast, water and sugar together and letstand in a warm place until mixture starts to foam.Add this yeast mixture to flour and oil and <strong>com</strong>bineto form your pizza dough. Knead on a lightly flouredsurface until smooth and elastic. Cover and stand ina warm place until doubled in size. Knock backdough and roll out to a rectangle the size of yourcooking pan or baking dish. Place dough into alightly oiled pan.If you purchased a ready-made pizza dough, simplyopen can and roll dough into a lightly oiled cookingpan.Preparing the PizzaSpread tomato paste or Italian tomato sauce on top ofyour pizza dough. Top with pepperoni, red peppers,olives, and lastly, mozzarella cheese. Or if you prefer,you may place cheese first with toppings on last.Place a cooking pan in center of grill and cookindirectly, with one outside burner on high and theother on low, for approximately 20 minutes or untilbottom of crust is light brown. Lastly, raise the lid andfinish cooking pizza by turning burner under thecooking pan on high for about 2 minutes. This willinsure the center of pizza gets brown. Then turn offheat, slice and serve directly from pan.35
FRESH VEGETABLE STIR-FRYTake a trip to the Orient with this easy, and healthyvegetable recipe. Makes 4 - 6 servings.Ingredients2 tablespoons oil1 onion, cut into wedges1 carrot, thinly sliced2 cups broccoli, cut into small flowerets1 red pepper, sliced2 sticks celery, thinly sliced1 cup snow peas1/2 cup chicken brothPreparationHeat oil in a wok or saute pan, directly over a highheat. Add onion and cook 1 minute. Add carrotand broccoli and stir-fry 2 minutes, then addred pepper, celery and snow peas and continuecooking 1 minute more. Add chicken broth andtoss vegetables until cooked to desired doneness.ONION BLOSSOMSGreat served as a snack, or to dress up barbecuedmeats, poultry or fish. Makes 4 servings.Ingredients4 medium sweet onions (4-5 ounces each)1 tablespoons margarine or butter, melted1 teaspoon Dijon-style mustard1/8 teaspoon hot pepper sauce1 tablespoon brown sugar1 pepper (optional)GRILLED POTATO SKINSServe these crispy potatoes as a snack or side dish.We've included microwave instructions for a timesavingshort cut. Makes 12 servings.Ingredients6 baking potatoes (about 8 ounces each)3 tablespoons margarine or butter, melted1/2 cup picante sauce1 cup shredded cheddar cheese (4 ounces)3 slices bacon, crisp-cooked and crumbledor use prepackaged bacon bits1 chopped tomato (optional)1 diced green onion (optional)1/2 cup sour cream (optional)PreparationPuncture clean potatoes with a fork, wrap inaluminum foil and place directly over low to mediumheat. Close lid and cook directly for 1 hour or untilcenter is tender. OR - Microwave clean, puncturedpotatoes on high for 15 to 20 minutes, or until centertender. Allow cooked potatoes to cool thenunwrap and discard foil.Cut potatoes in half - lengthwise. Scoop out potatopulp (serve separately or discard.) Be sure to leave1/4-inch thick potato shell remaining. Brush theinside of each potato shell with melted margarine.Spoon 2 teaspoons picante sauce into each potatoshell, sprinkle with cheese and top with bacon.Place prepared potato skins on grill, directlyover medium heat. Close lid and cook for 8 to 10minutes or until potato skins are crisp. Sprinkleeach potato skin with tomato and green onionand then top with sour cream, if desired.PreparationPeel onions, then cut almost <strong>com</strong>pletely through eachonion, forming 8 wedges. Onion will be loose, but still beintact. Prepare four 12-inch squares of aluminum foil.Place one onion in the center of each foil square.Stir margarine (or butter) with hot pepper sauce anddrizzle over onions. Sprinkle with brown sugar. Thenbring up two sides of foil square and double fold.Bring remaining corners up and <strong>com</strong>pletelyenclose leaving enough space for steam to build.Place wrapped onion blossoms on grill, directlyover medium heat. Close lid and cook 15 to 25minutes or until onions are nearly tender. Make a 2-inchopening at the top of each onion wrapping, then closelid and cook 5 to 10 minutes more, or until onionsare lightly browned. Sprinkle with pepper if desiredand serve warm.36