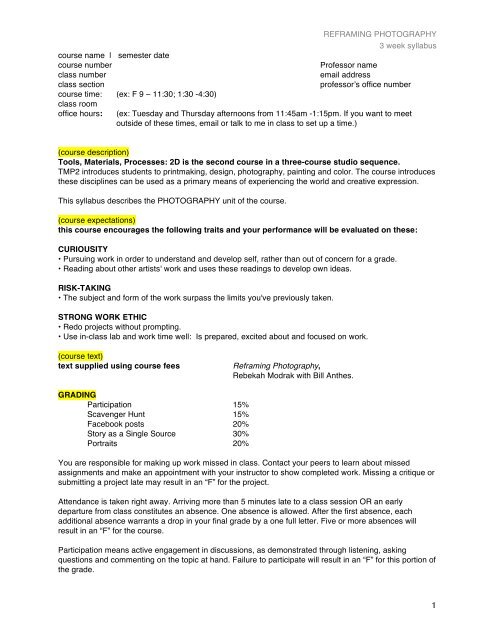
REFRAMING PHOTOGRAPHY 3 week syllabus course name ...
REFRAMING PHOTOGRAPHY 3 week syllabus course name ...
REFRAMING PHOTOGRAPHY 3 week syllabus course name ...
Create successful ePaper yourself
Turn your PDF publications into a flip-book with our unique Google optimized e-Paper software.
1 ST CLASS DAY (6 hours)<strong>REFRAMING</strong> <strong>PHOTOGRAPHY</strong>3 <strong>week</strong> <strong>syllabus</strong>9am to 12pmmaterials students should bring to class: their camera (compact, SLR, or DSLR), their cameraʼsmanual (the physical book or a downloaded version), and a computer with Adobe Photoshopand Adobe Bridge.materials instructor should provide for students: Reframing Photography books, the folder of“bad images”, and the starting images for Story from a Single Source.(“Bad images” are available on the RP website > Teaching Tools > Reframing PhotographyPresentations > Bad Images)materials instructor will need for demos: Questionnaires, syllabi, scavenger hunt handouts, acomputer with internet access, Adobe Photoshop, Adobe Bridge, and the ppt or pdf ofseries/sequence artists, the folder of “bad images”, and the Story from a Single Sourceassignment.INTRODUCTION TO THE CLASS AND THE BOOKQUESTIONNAIRE: what do you know and what do you want to know?(A pdf of this handout is available on the RP website > Teaching Tools >Reframing Photography Projects > Photo Questionnaire)ASSIGNMENT: read Reframing Photography:1) “Tools, Materials and Processes: VISION”, pages 49 – 105: 5 fb posts2) “Reenacting as a Photographic Act” pages 204 – 215; 5 fb posts3) Five discoveries from the book. Minimum 10 pages: 5 fb posts(This assignment is available on the RP website > Teaching Tools >Reframing Photography Projects > Reading Responses)PRESENTATION: look at video and artworks in Artistsʼ Gallery and Resources > Artists onwww.reframingphotography.comDEMO:SLR/DSLR/point-and-shoot cameras, image quality and resolution, fileformat, color space, aperture, depth of field, focal length, focus, theshutter, ISO, metering light, bracketing, types of light, color and light,matching light, and color casts.(A pdf of this presentation is available on RP website > Teaching Tools >Reframing Photography Presentations > Camera & Light)WORKSHOP: scavenger hunt (use your cameras and camera manuals in class)(pdf files of different versions of this assignment are available on RPwebsite > Teaching Tools > Reframing Photography Projects > CameraScavenger Hunt)ASSIGNMENT: complete scavenger hunt outside of classDEMO:using Variations to learn to identify color casts (pgs 406-407 of RP); usingcurves to correct color (pgs 407-409 of RP); using Camera Raw to correctcolor casts (pgs 243-244 of RP); using Levels and Curves to adjust tonalrange and contrast (pgs 392-399 of RP); making a gradual tonaladjustment (pgs 399-400 of RP); digital burning & dodging (pgs 401-403of RP); how to straighten images with the measuring tool (pgs 92-93 ofRP).2
<strong>REFRAMING</strong> <strong>PHOTOGRAPHY</strong>3 <strong>week</strong> <strong>syllabus</strong>1:30 to 4:30pmDEMO:PRESENTATION:ASSIGNMENT:CLASS TRIP:making digital contact sheets and digital printing(digital contact sheet - pgs 306-308 of RP; digital printing - pgs 284-306 ofRP)artists and issues involved with series/sequence(For ideas, read essay “Series and Sequence” 319 -348 of RP. A ppt. andpdf of images by artists who work with series/sequence and arerepresented in the RP book can be found at RP website > Photo Tutorials> Reframing Photography Presentations > Slideshow: Series/SequenceEssay.)story from a single source(A description of the project is available on RP website > Teaching Tools> Reframing Photography Projects > Story From A Single Source)visit to the University of Michigan Museum of Art to view photographicprints in the collection.Due Monday, 12pm: fifteen facebook postingsDue Tuesday, 12pm: scavenger hunt contact sheets on Epson photo paper (leave ininstructorʼs mailbox)2 nd CLASS DAY (6 hours)Due: story from a single source prints on Epson photo papermaterials students should bring to class: their camera (compact, SLR, or DSLR), scissors, autility knife, a stapler, a glue gun, and a ruler.materials instructor should provide for students: pins for hanging up work, foam core,translucent cloth, aluminum foil, and colored cellophane for making diffusers, reflectors andcolor gels. Bring enough for each student or each group of students to make one of each tool.When they make the diffuser, the foam they cut out of the inside of the frame can be used tomake a reflector.materials instructor will need for demos: a computer with the ppt or pdf of portraiture artists, andthe Portraiture assignment.9am to 12pmCRITIQUE:PRESENTATION:story from a single source.For critique tips, read pages 469-473 in RP. For other references checkRP website > Teaching Tools > Teaching & Learning)artists and issues involved with photography and portraiture (show videoand artwork)(A ppt. and pdf of images by artists who do portraiture and arerepresented in the RP book can be found at RP website > Photo Tutorials> Reframing Photography Presentations > Slide Shows: Portraiture.)3
<strong>REFRAMING</strong> <strong>PHOTOGRAPHY</strong>3 <strong>week</strong> <strong>syllabus</strong>Reframing Photography Projects > Portrait Prompts. Information about the book-binding part ofthis project is available on RP website > Teaching Tools > Reframing Photography Projects >Side-Stitch Zine)materials students should bring to class: a spoon or burnisher, scissors, a hammer, and a ruler.materials instructor should provide for students: pins for hanging up work, a set of binder clipsfor every student, cardboard – to serve as a buffer between your table and your bookstack, 44”of binding thread or dental floss per student, one small nail – like brads – for each student,needles suitable for your size thread, photo-copied images to cut and transfer (I often usephoto-copies of Bruno Munariʼs Machines or images from one of Diderotʼs encyclopedia), and22 sets of front and back covers for portrait books.materials instructor will need for demos: a set of binder clips, a pencil, a ruler, a hammer, asmall nail, 44” of binding thread, a needle suitable for your size thread, scissors, bindinginstructions, a computer with a folder of images for inkjet transfer and a pdf of examples ofexquisite corpses, 4 – 8 oz. wintergreen oil, q-tips, spoon for burnishing, paper or material fortransferring onto, photo-copied images to cut and transfer, Avery wax label sheets for inkjettransfer, a bowl of hot water, and at least ½ a yard of clear contact paper.9am to 12pmCRITIQUE:DEMO:WORKSHOP:portraiture in 5 parts(For critique tips, read pages 469-473 in RP. For other references checkRP website > Teaching Tools > Teaching & Learning.)side-stitch book binding(Technique described on pages 447-448 of RP. A pdf of the bindingdiagram is available on the RP website > Teaching Tools > ReframingPhotography Projects > Side-Stitch Zine)assemble book1:30 to 4:30pmDEMO:WORKSHOP:wintergreen oil transfer (pgs 224-225 of RP); inkjet transfer (page 225 ofRP); and acrylic lift with contact paper (page 229 of RP)exquisite corpses(Each student starts with a “body”, a piece of paper folded into thirds.Using one of the transfer techniques, they create a head in the top-third ofthe body. The head can resemble a human head or it can be ametaphoric head – an umbrella, a shape, a design, etc. They cover/hidetheir work and give the “body” to another person who continues bymaking the middle part of the torso. Each student makes three parts ofthree different bodies, using a different image transfer technique for eachpart. At the end of class, reveal the whole body. The materials used hereare photo-copied images; see notes above for suggestions.)5


