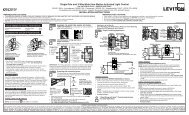
Elk ELKM1KP LCD Keypad for M1 Series Controller Installation ...
Elk ELKM1KP LCD Keypad for M1 Series Controller Installation ...
Elk ELKM1KP LCD Keypad for M1 Series Controller Installation ...

You also want an ePaper? Increase the reach of your titles
YUMPU automatically turns print PDFs into web optimized ePapers that Google loves.
<strong>LCD</strong> <strong>Keypad</strong>ELK-<strong>M1</strong>KPAPPLICATIONThe ELK-<strong>M1</strong>KP is an addressable <strong>LCD</strong> <strong>Keypad</strong> <strong>for</strong> the <strong>M1</strong> CrossPlat<strong>for</strong>m Controls. It features a 32 character back lighted display withadjustable intensity and extra large character fonts <strong>for</strong> ease of readability.The <strong>M1</strong>KP includes a plug-in connector on the back <strong>for</strong> adding aninternal proximity reader (ELK-<strong>M1</strong>PR) or <strong>for</strong> interfacing to virtually anyexternal 26 bit Wiegand compatible proximity reader. Prox cards/fobscan be used <strong>for</strong> touchless arming, disarming, door strike control, etc.FEATURES! Large, Easy to Read Characters! Back lighted with Adjustable Intensity! Removable Hinged Door! Programmable Function Keys (6)! Unique Menu Navigation/Direction Keys! Operates on 4-Wires (<strong>M1</strong> Data Bus)! Adjustable Beep Tone and Volume! Accepts Plug-in Proximity Card Reader (Optional)! Input <strong>for</strong> 1 Supervised Zone! One Programmable Voltage Output! Exit, Stay, Chime, and Bypass KeysSPECIFICATIONS! Input Connection: 6 Pin Plug-in "Flying Lead" Connector Included! Prox Connection: 5 Pin Plug-in "Flying Lead" Connector (optional ELK-WO35A required <strong>for</strong> external prox reader)! Color: Glacier White! Operating Voltage: 13.8 VDC! Current Draw: 40 - 50 mA Idle (low back light level, sounder silent)160 mA Fully Active (max. back light & sounder active)! Size: 6.875" W x 5.25" H x 1.375 DFeatures and Specifications subject to change without notice.Hookup Diagram <strong>for</strong> <strong>Keypad</strong>(see <strong>M1</strong> Instruction Manual and back of this sheet <strong>for</strong> multiple <strong>Keypad</strong> hookups.)Splice 6 Pin <strong>Keypad</strong> Wiring Assembly to the Data Bus cable using ELK-900-2 "B" Connectors.Data Bus CableCAT5 or CAT6 RecommendedTo Red (Pos) WireTo Brown WireNOTE: The first batch of <strong>M1</strong>KP <strong>Keypad</strong>s provided a switchednegative (pull to ground) output. Connect per diagram above.These units have the letter "E" at the end of the ID number onthe lower back side of the board. EG: PC096E Boards with aletter "F" or later provide the output as a switched positive.+-Load (50mA max)i.e. Relay, LEDBLACKWHITEGREENREDBLUEBROWN<strong>Keypad</strong>WiringAssembly16To BROWN WireTo BLACK (Neg) Wire+-ELK-<strong>M1</strong>KP<strong>Keypad</strong> 1Load (50mA max)I.E. LED, RelayOptional programmable Output from <strong>Keypad</strong>To BLUE Wire2200N.C. N.O. OhmTo BLACK (Neg) WireEOLOptional programmable Zone Input from <strong>Keypad</strong>See Note aboutData BusTerminationThe optional Zone Input # or Output # isdetermined by the <strong>Keypad</strong> Address.KP Zone OutputAddress # #1 193 1932 194 1943 195 1954 196 1965 197 1976 198 1987 199 1998 200 200KP Zone OutputAddress # #9 201 20110 202 20211 203 20312 204 20413 205 20514 206 20615 207 20716 208 208PO Box 100 • Hildebran, NC 28637 USA • 828-397-4200 Voice • 828-397-4415 Faxhttp://www.elkproducts.com • email: info@elkproducts.comL526 10/05
1234567890123456789012345123456789012345678901234512345678901234567890123451234567890123456789012345123456789012345678901234512345678901234567890123451234567890123456789012345123456789012345678901234512345678901234567890123451234567890123456789012345123456789012345678901234512345678901234567890123451234567890123456789012345123456789012345678901234512345678901234567890123451234567890123456789012345123456789012345678901234512345678901234567890123451234567890123456789012345123456789012345678901234512345678901234567890123451234567890123456789012345INSTALLATION AND ENROLLMENT OF ELK-<strong>M1</strong>KP KEYPADIdeal keypad mounting height is 50-58 inches above the floor. Select a location with an ambient temperature range between 32 ° and 120 °F (0° to +49 ° C). Avoid direct sunlight if possible. <strong>Keypad</strong>s operate on the <strong>M1</strong> data bus, which uses 4-wires. However, CAT5 or CAT6 eight(8) conductor is recommended <strong>for</strong> all data bus cables. The extra wires are <strong>for</strong> data return paths. NOTE: See pages 12 and 13 in the <strong>M1</strong><strong>Installation</strong> Manual <strong>for</strong> important in<strong>for</strong>mation about Data Bus termination when multiple homerun cables are installed. DO NOT SPLICEOR CONNECT WIRE WITH CONTROL POWER ON. Minimum cabling should be four conductor 22 or 24 gauge. Maximum resistance perwire is 25 Ohms. Device placement beyond 1000' is not recommended.1. Fasten mounting plate to electrical box (or directly to wall) using flat head screws to prevent shorts to the back of the circuit board.2. Splice the Black, Red, White, and Green wires of the plug-in connector to the data bus cable. Plug connector into keypad. Tuck wiresneatly into back plate and install <strong>Keypad</strong> on mounting plate.Setting the Data Bus Address and Enrolling Device(s) into the System<strong>Keypad</strong>s and expander devices communicate with the <strong>M1</strong> over the RS-485 4-wire data bus. Each device must have a unique addresssetting (from 1 to 16) within it's device type. <strong>Keypad</strong>s are device TYPE 1, input (zone) expanders TYPE 2, output expanders TYPE 3, etc.The purpose of device types is so that the address numbers can be re-used in each different device type. It is OK to have a <strong>Keypad</strong>, aZone Expander, and a Output Expander all set to address 2 and on the same data bus since each device is a different device type.It is NOT OK to have duplications of addresses within the same device type. I.E. Multiple keypads on the same control cannot beset to 'like' addresses.SETTING THE ADDRESS: From the factory all keypads are set to address 1. Valid keypad addresses are 1 to 4 <strong>for</strong> the ELK-<strong>M1</strong>, or 1 to16 <strong>for</strong> the ELK-<strong>M1</strong>G. The first keypad on the system (<strong>Keypad</strong> 1) is automatically enrolled upon power up. Each additional keypad mustbe assigned a unique address and then manually enrolled from “Menu 1 - Bus Module Enrollment”. (See <strong>M1</strong> Instruction Manual, Menu01, <strong>for</strong> complete instructions on Bus Module Enrollment)1. Press and hold the " * " key, followed by the F5 key . HOLD BOTH keys pressed <strong>for</strong> 5-10 seconds or until the <strong>LCD</strong> displays:Exit when done. F1 Set Addr. (This is <strong>Keypad</strong> setup mode)NOTE: This mode may also be accessed by removing power from the keypad (unplugging the data bus cable) and thenapplying power while holding any key pressed.Effective with firmware version 2.1.42 or higher it is2. Press the F1 key to display the current address setting.possible to access the keypad setup mode by just3. Set the desired address by entering a number from 1 to X.pressing and holding the "*" key <strong>for</strong> 10 seconds.4. Press the Exit key when done.ENROLLING:1. Press the ELK key, then press 9 (or scroll up) to display 9 - <strong>Installation</strong> Programming. Press the RIGHTarrow key to select this menu. The Installer Program Code (PIN) must be entered to access this menu.2. Enter the Installer Program Code. (See <strong>M1</strong> Manual <strong>for</strong> the default Code)3. The first Installer Programming menu displayed will be "Bus Module Enrollment"4. Press the RIGHT arrow key to select this menu. "Enrolling Bus Modules" will display5. The <strong>M1</strong> transmit an enrollment message to all data bus devices, following by a display showing the totalBus Modules that are enrolled. To view the enrolled devices and/or remove a device press the RIGHT arrowkey next to the word Edit.6. Press the * or Exit keys to exit Installer Programming.Auth. RequiredEnter Valid Pin1234567890123456789012345123456789012345678901234501-Bus ModuleEnrollment123456789012345678901234512345678901234567890123451234567890123456789012345XX Bus ModulesEnrolled, Editr12345678901234567890123451234567890123456789012345RS-485 DATA BUS+VKPDATA ADATA BNEGEGNDJ2 J1NEG -DATA BDATA A+12VDATA BUSJP3 Teminating Jumper(Located beneath cover)RE: Data Bus Termination NoteData Bus E.O.L. Termination is Very ImportantRS-485 Data Bus (Max. length is 4000 ft.Max. bus devices vary by control.)REDGREENWHITEBLACKELK-<strong>M1</strong>KP<strong>Keypad</strong> 1ELK-<strong>M1</strong>XOVDATA BUS TERMINATION IS VERY IMPORTANT!!Ideal setup is 2 home run cables (4 wire) with daisy chained devices along each. The last device on each cable MUST havea Terminating resistor installed (activated) via the gold 2 pin header/jumpers marked JP2 on keypads, JP1 on expanders.Place a black shorting cap (see hardware pack) onto the 2 gold pins to install a 120 Ohm resistor across data lines A & B.NOTE: Place a shorting cap on JP3 of Main Board it there is only 1 data bus cable. See diagrams on multiple cables.WARNING! The RS485 Data Bus must NEVER have more that two (2) terminating resistorsheader/jumpers installed. Reliability and response will be negatively affected!Temporary Connection "Plug-in" jacks <strong>for</strong> RS-485 Data Bus (J1 & J2)Local connection <strong>for</strong> Data Bus Devices ie: <strong>Keypad</strong>s, etc. <strong>for</strong> testing purposes only.ELK-<strong>M1</strong>XINDO NOT JumperTerminate these devices.ELK-<strong>M1</strong>KP<strong>Keypad</strong> 2ELK-<strong>M1</strong>KP<strong>Keypad</strong> 3JumperTerminatethese twodevices.Diagram <strong>for</strong> Daisy Chain Connection of Data Bus Devices Using Two (2) Home Run CablesThe ideal way to connect multiple home run cables is with an ELK-<strong>M1</strong>DBH Data Bus Hub. It accepts CAT5 or CAT6 cable with RJ45 plugs on the ends.It does all the work of series connecting the DATA lines A & B and provides a clean, organized management of the data bus wires.Page 2