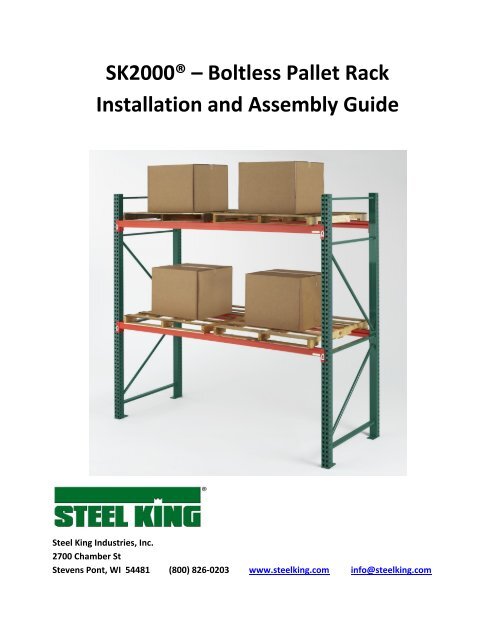
SK2000® â Boltless Pallet Rack Installation and Assembly Guide
SK2000® â Boltless Pallet Rack Installation and Assembly Guide
SK2000® â Boltless Pallet Rack Installation and Assembly Guide

You also want an ePaper? Increase the reach of your titles
YUMPU automatically turns print PDFs into web optimized ePapers that Google loves.
Steel King Industries, IncSK2000 <strong>Boltless</strong> <strong>Pallet</strong> <strong>Rack</strong> <strong>Installation</strong> <strong>Guide</strong>Step #1: Check the MaterialA. Check to make certain that all materials have been received. Materials should be checkedagainst the packing lists <strong>and</strong> Bill of Lading.B. Notify the shipper immediately of any shortages or product damage.Step #2: Check the Area:A. Clear the area where the rack system is to be located.B. Check the area for all obstructions, such as lights, heating ducts, pipes, building columns,etc., to insure a clear area for the installation of the storage rack.Step #3: Lay Out floor:Recommended tools:• Tape Measure• Chalk LineA. Establish the rack lay out by determining the aisle dimensions <strong>and</strong> the rack position.B. Snap a chalk line establishing the front edge of the upright bases. The chalk line should runthe entire length of the row of rack.3
Steel King Industries, IncSK2000 <strong>Boltless</strong> <strong>Pallet</strong> <strong>Rack</strong> <strong>Installation</strong> <strong>Guide</strong>Step #6: Install Remaining Bays:A. Follow the same procedure as Step #4 using common upright frames for each bay.Step #7: Accessories:A. When row spacers are required, each component must have (1) ½’ diameter x 3 3/4” bolt <strong>and</strong>½’ nut per connection.Use a minimum of (2) row spacers up to 120” high, (3) up to 216” high <strong>and</strong> (4) up to 312” high.Vertical placement of row spacers should be in line with upright column’s horizontal bracings..8
Steel King Industries, IncSK2000 <strong>Boltless</strong> <strong>Pallet</strong> <strong>Rack</strong> <strong>Installation</strong> <strong>Guide</strong>Step #7: Accessories Continued:B. The pallet supports are installed with one tek screw on each end.Hat Style (PSH part numbers) <strong>Pallet</strong> SupportsWaterfall (PSW part numbers) <strong>Pallet</strong> SupportsC. Tighten all accessory nuts <strong>and</strong> bolts (row spacers) <strong>and</strong> double check anchor connections tocomplete the installation process.9
Steel King Industries, IncSK2000 <strong>Boltless</strong> <strong>Pallet</strong> <strong>Rack</strong> <strong>Installation</strong> <strong>Guide</strong>Capacity Plate Note: <strong>Installation</strong> of "capacity plates" is strongly recommended. These platesshould identify the characteristics for which the rack was designed, such as load size, load weight,<strong>and</strong> rack configuration. These plates are very useful for communicating safe loading information toboth present <strong>and</strong> future users. Several signs should be prominently located for easy visibility, <strong>and</strong>be permanently affixed to the rack structure. Appropriate signs can be obtained locally, throughindustrial mail order catalogs, or from Steel King or your Steel King Distributor.Step #8: Cleanup:A. Dispose of all dunnage, strapping <strong>and</strong> debris. Sweep the floor with a broom if necessary.Determining Storage <strong>Rack</strong> CapacityTo determine the load capacity of your storage rack:A. Determine the maximum distances between shelf/beam levels.B. Determine the distance from the floor to the first shelf/beam level.C. Compare distances computed in Steps A & B; use whichever figure is greater as theMaximum Vertical Beam Spacing in the chart below.Steel King Upright FramesUpright Frame Post Type RTFAG RTFBGRTFBG‐SEISMICRTFBW‐SEISMICPost Width 3 Inches 3 Inches 3 Inches 3 InchesMaximum Vertical BeamSpacing:Capacity (pounds)48” 21,860# 31,420#Capacity ratings for seismicframes are based oninstallation location, uprightheight <strong>and</strong> vertical beamspacing.54” 19,440# 28,490#60” 17,050# 25,530#66” 14,740# 22,600#72” 12,540# 19,770#78” 10,700# 17,050#84” 9,250# 14,740#90” 8,060# 12,870#96” 7,100# 11,330#Over 96”Consult Steel KingPlease consult Steel King.10
Steel King Industries, IncSK2000 <strong>Boltless</strong> <strong>Pallet</strong> <strong>Rack</strong> <strong>Installation</strong> <strong>Guide</strong>Chart Notes:1) Capacities based upon interior usage.2) Capacities are for selective rack only.3) The above capacities do not consider seismic loading.4) Each column/post of each frame MUST be anchored to an adequate concrete floor.5) Capacities based upon installation in a plumb condition.6) Capacities are total per upright, assuming equal loading on both posts. In essence, the listedcapacity is the maximum weight that may be stored within one individual rack bay. DO NOTdouble the capacity of each upright frame when calculating a single bay’s capacity.7) Capacities are to be reduced to account for the weight of the rack system; deduct the weightof beams, frames, decking, <strong>and</strong> accessories.8) Your local Building Inspector may require adherence to a specific code, which may reduce thelisted capacity. Verify the applicable code <strong>and</strong> the capacity rating under that code with SteelKing or your Steel King Distributor.If any of these conditions do not apply to your application, or if you are unsure if they apply, DONOT USE CHART; in those cases, consult Steel King Engineering department for designinformation.Changing the configuration (such as adjusting storage levels) canadversely affect the load carrying capacity <strong>and</strong> reduce the structuralintegrity of the rack system. Before adjusting the rack configuration, contact Steel King or yourSteel King Distributor, to verify the safety <strong>and</strong> structural adequacy of the new configuration.Have questions about pallet racks? Answers to Frequently Asked Questions maybe found at the following website: www.mhia.org/industrygroups/rmi/faqIf you have any further questions, contact your local Steel King Representative forcustomer assistance or contact Steel King Industries directly at (800) 826‐0203.11
Steel King Industries, IncSK2000 <strong>Boltless</strong> <strong>Pallet</strong> <strong>Rack</strong> <strong>Installation</strong> <strong>Guide</strong>WARNING: INSTRUCTIONS FOR ASSEMBLY ARE SET FORTH ON THESE PAGES. PROPER ASSEMBLY ISTHE RESPONSIBILTY OF THE PURCHASER AND IS NOT COVERED BY ANY WARRANTY OF THE SELLER.BUYER IS CAUTIONED NOT TO SUBSTITUTE PARTS OR HARDWARE. SELLER DISCLAIMS ALL LIABILITYWITH RESPECT TO ANY SUBSTITUTION OF PARTS OR HARDWARE NOT APPROVED IN WRITING BYSELLER.THE INSTALLATION DETAIL DRAWINGS THAT FOLLOW ARE INTENDED AS BASIC GUIDES TOINSTALLATION OF THE STANDARD COMPONENTS. DEPENDING UPON THE SPECIFICS OF THESYSTEM, THERE MAY BE LIMITIATIONS REGARDING THE USE OF THESE STANDARD COMPONENTSAND/OR A REQUIREMENT FOR SPECIAL INSTALLATION TECHNIQUES. ADDITIONAL INFORMATIONIS FOUND IN STEEL KING PRICE BOOKS, PUBLISHED TECHNICAL DOCUMENTS, COMPREHENSIVEINSTALLATION DRAWINGS, AND OTHER MATERIALS.12