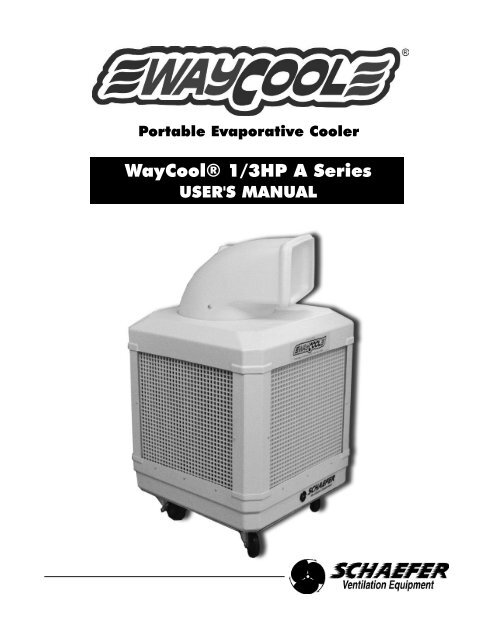
WayCool 1/3 Hp Evaporative Cooler Manual - Schaefer Ventilation ...
WayCool 1/3 Hp Evaporative Cooler Manual - Schaefer Ventilation ...
WayCool 1/3 Hp Evaporative Cooler Manual - Schaefer Ventilation ...

Create successful ePaper yourself
Turn your PDF publications into a flip-book with our unique Google optimized e-Paper software.
Water Supply SystemActual <strong>WayCool</strong>® variesslightly from unit shownhere.Water Supply SystemThe reservoir can be supplied continuously with an ordinary garden hose by attaching the supplied hose adapterto the fill connection, or it can be filled manually.With a continuous water supply connected, the float valve in the reservoir (like the one in your toilet tank) risesand falls with the water level. A linkage attaches the float to the shutoff valve in the fill connection. As the waterlevel rises to normal operating level (about 3" deep), the float valve shuts off the water supply. When the waterlevel drops, the float valve reopens to maintain a normal operating level.After unplugging the unit, the reservoir can also be manually filled with a hose or bucket, if a hose connection isimpractical. Simply remove any of the plastic retaining grates and one of the cooling pad sections and place thehose, or pour the water, directly into the reservoir. When you fill the reservoir manually it can be filled to a higherlevel, but make sure someone monitors the filling operation to avoid overfilling and flooding.Water damage due to overfilling is not covered by the warranty.When you run the unit and fill it manually, check the water level frequently so it does not run dry.The automatic shut-off feature is intended to prevent operation of the pump without water, which candamage it or reduce its service life. The cooling effect also stops if the pads dry.Pads and grates must be replaced before operating unit.7
ControlThe <strong>WayCool</strong>® control switch is mounted on the outside of one frame leg.It has the following positions:OFF power is off to the blower motor and the pump motor.LOW VENT the blower runs at low speed and the pump is OFF.HIGH VENT The blower runs at high speed and the pump is OFF.Use this setting to quickly dry the cooling pads for removal and cleaning.LOW COOL the blower runs at low speed and the pump is on.Use this setting for low cooling loads.HIGH COOL the blower runs at high speed and the pump is on.Use this setting for maximum cooling.PUMP ONLY pump is on and the blower is off. Use thissetting during startup to first saturate the cooling pads,then switch to LOW COOL or HIGH COOL to begin cooling.Control SwitchOperation and MaintenanceUNIT PLACEMENT AND OTHER CONSIDERATIONSThe <strong>WayCool</strong>® should be placed at one end of thebuilding and an appropriate exhaust fan should be atthe opposite end to pull the cool air from the <strong>WayCool</strong>®and discharge the warm air out of the building.Try to get all the air flowing in the same direction. Donot direct other fans against the <strong>WayCool</strong>® as they willcounter the airflow and hinder the cooling effect.Obstructing the airflow from the <strong>WayCool</strong>® severelyreduces the cooling effect.Avoid using ceiling fans as they disrupt the airflow fromthe <strong>WayCool</strong>®.Use as many exhaust fans as possible to create anatural draft through the building. This will enhance theperformance of the <strong>WayCool</strong>®.Typical Arrangement11
Operation and Maintenance cont'dUNPACKING AND INITIAL SETUPThe <strong>WayCool</strong>® is shipped upright in a corrugated container. The unit is fully assembled and ready for serviceexcept for thoroughly cleaning manufacturing dust from the cooling pads before running it for the first time.CAUTION Be careful when you move the unit while it is in the shipping container and whenmoving it around with the container removed. Avoid jarring or dropping the unit.1. With the unit in the upright position as marked on the container, use a sharp knife or scissors to cut thestraps that wrap the shipping container.Do not discard the container until you have thoroughly inspected the unit.2. Remove the shipping container.3. Ensure the switch is OFF and the unit is unplugged.4. Remove the plastic retaining grates from all four sides of the unit. Use your fingersto lift each upward, then outward from the bottom.5. Remove the cooling pads from all four sides of the unit. Place a putty knife or largeflat-blade screwdriver under the pad to lift it up, then outward. With one pad out,the rest can be easily removed by placing one hand on the pad's inside, your otherhand on the outside and lifting the pad up and out from the bottom.6. Inspect the entire unit for shipping damage.Pads7. Look for cracks in the bottom near the frame legs. This is also an indication of rough handling.8. Ensure the frame legs are straight and in alignment, and that the blower is sitting level and in properposition.If you notice any damage to your unit, immediately contact the dealer where it was purchased.9 Thoroughly clean all eight cooling pad sections using a garden hose.Do not use cleaning fluids or other chemicals to clean the pads as they can cause foaming duringoperation. Use only clean water. Refer to page 15 for approved cleaners.10. Remove the drain cap from the underside of the reservoir and rinse with a hose to flush any manufacturingdust etc. from the unit. Replace the drain cap.11. Replace the pads and the protective retaining grates.12. Proceed to NORMAL STARTUP.12
Operation and Maintenance cont'dREGULAR CLEANINGThe frequency with which the <strong>WayCool</strong>® should be cleaned will depend on the environment in which it is used. The more dirtythe environment the more often it will need cleaning. In most cases the <strong>WayCool</strong>® will need to be cleaned weekly.CAUTION The pads should be dry before you handle them, as they are stronger when dry than when they arewet and less susceptible to damage. If they are wet, run the unit in the HIGH VENT position until they are dry.After cleaning, let the pads air dry before you replace them.1. Turn the switch to OFF and unplug the unit.2. Remove the plastic retaining grates and check the pads for cleanliness. If they are dirty, remove and clean by spraying witha garden hose (water only). If they are not dirty you will still need to remove the cooling pads to clean the inside of the unit.Dirty cooling pads reduce the unit's effectiveness.3. Use a garden hose to rinse out the bottom and the inside of the unit. The dirt that accumulates is removed from the airduring operation, as the <strong>WayCool</strong>® also acts as an air filter.4. Remove the drain cap from the underside of the unit and let it unit drain completely. Rinse out any remaining dirt.5. Replace the drain cap (finger tighten only).6. Remove the pump discharge filter by unscrewing the top, removing the screen and rinsing it with a hose or under a tap.Replace the filter screen and screw the top back on.7. Remove the pump filter from underneath the pump. Wash thoroughly with a hose. Compress filter and place back underthe pump.8. Replace the cooling pads once they are dry and re-install the plastic retaining grates.With proper use and regular cleaning, the cooling pads will last about two seasons. If you handle them wet and areabusive, however, they will be easily damaged. Refer to page 15 for recommended conditioning and cleaningchemicals.NORMAL STARTUP1. Place the unit where it will be run. Do not attempt to lift or move the unit once it is filled. Damage to the unit or a large spillmay occur.When you decide where to place the unit, make sure there are no obstructions that could disrupt or block the airflow.Make sure the unit is level at all times. Keep the unit at least three feet away from walls or other obstructions that willinterfere with airflow into the unit.2. Check the drain cap to be sure it is in place and secure.3. Connect the garden hose to the brass hose adapter. Be sure there is a washer in the female end of the hose connection.4. Open the water supply valve and be sure water enters the reservoir through the float valve by removing one cooling pad onthe side with the water connection. Allow the unit to fill and be sure the float valve shuts off the water completely.5. If you are filling the unit manually, remove one or more cooling pads and fill the reservoir with a bucket or hose.6. Monitor the filling operation to avoid overflowing and damage.7. Plug the unit into a GFCI protected outlet.8. Adjust the spout to discharge cool air in the desired direction and tighten the knob on the end of the threaded rod.9. Turn the switch to the PUMP ONLy position and let it run for five to 10 minutes to saturate the cooling pads. Check that thepads are saturated completely and there are no dry spots.CAUTION Do not run the pump without water in the reservoir. The automatic shut-off feature is intended toprevent operation of the pump without water, which can damage it or reduce its service life. Running thepump dry will void the warranty on the pump. The red light indicates low water level (pump is off).10. Turn the switch to the HIGH COOL or the LOW COOL position to begin normal cooling operation.NORMAL SHUTDOWN1. Turn the switch to the HIGH VENT position and let the unit run until the cooling pads are dry. This will maximize the life ofthe pads.2. Turn the switch to the OFF position. Unplug the unit if you are going to clean the pads or inspect the components.3. Shut off the water supply.4. Drain the reservoir if you are going to clean or store the unit.5. If the unit will be stored for the season, ensure the cooling pads are completely dry, and then remove them. Wrap them inplastic bags or store them in a clean place where they will not be damaged or get dirty. The unit should be cleanedthoroughly before storing.13
TroubleshootingCOOLING PADS NOT WETTING1. Ensure there is water in the reservoir.2. Ensure the motor switch is in the START position and the pump switch is in the ON position.3. Ensure the pump is running.4. Pump is running but no water:a. Ensure hose is connected.b. Inspect and clean the pump discharge filter.c. Inspect and clean the pump intake filter.d. Ensure the impeller on the inside of the pump turns freely.5. Pump is not running:a. A certified electrician must check the wiring from pump to pump selector switch.b. If the wiring is correct, replace the pump.FOAMINGFoaming is generally caused by a dirty water supply or contaminated water in the reservoir.1. If foaming occurs, stop the unit, drain it and flush the bottom and inside thoroughly with clean water.2. Clean the pads and do not use any kind of chemical cleaner. Refer to the REGULAR CLEANING section for the properprocedure for cleaning the pads.3. Re-assemble, refill the reservoir and restart.LINE CLOGS OR OBSTRUCTIONS (little or no water flow)Depending on the cleanliness of the water and the amount of dirt, dust, etc. in the air, you may have to clean the PVC pipesfrom time to time. your own experience will dictate the frequency.1. Turn off and unplug the unit.2. Remove the plastic knob from the threaded rod in the spout.3. Remove the spout and set it aside.4. Remove the two screws that hold the top cover on the unit.5. Remove the top cover and set it aside.6. Locate the four PVC pipes in the top metal channel. Each PVC pipe is secured to the y connector by a single screw.Remove this screw from all four PVC pipes.7. Grip the opposite end of each PVC pipe with pliers and gently twist it out of its y connector.8. Remove the plastic mesh socks from the PVC pipes and clean them in warm, soapy water.9. Direct a jet of water at the series of outlet holes in the PVC pipes to blow them clear.10. Direct the water nozzle into the end of each pipe and blow them clear. Inspect them for cleanliness and repeat if necessary.11. Re-install the socks over the PVC pipes, taking care not to bunch them.12. Replace the PVC pipes, taking care to ensure the water outlet holes are facing inward at 90°. There is a mark on the PVCpipe that indicates the position of the holes.Be sure you push the PVC pipes fully into the Y connectors so the retaining screws go through the connector and thepipe to hold them in.ODOR CONTROLEnsure water source is of good quality and regular maintennace is being conducted. <strong>WayCool</strong>® Water Conditioner is availablefrom your dealer. See page 15.LIME OR SCALE BUILDUPEnsure water source is of good quality and regular maintennace is being conducted. <strong>WayCool</strong>® Water Conditioner is availablefrom your dealer. See page 15.SPLATTERING IN FRONTSee LINE CLOGS OR OBSTRUCTIONS.LEAKING FROM THE BOTTOMCheck for cracks In the reservoir. If a crack is found, repair it by using a <strong>WayCool</strong>® Repair Kit or replace the entire bottom.Order replacement parts from your dealer.14
Options and Accessoriesyour <strong>WayCool</strong>® can be purchased with certain option and/or accessories, and some of these can be retrofittedafter the initial purchase. Instructions are included with all equipment purchased separately.Options available at time of purchase only:• Oscillating spoutOptions and accessories available at time of purchase or after purchase:• Pneumatic wheels• Water conditioner and cleaner• Aluminum gratesPNEUMATIC WHEELSPneumatic wheels are available at the time of purchase or as a retrofit kit on apreviously purchased <strong>WayCool</strong>®.The pneumatic wheel option includes two locking and two non-locking wheels.Pneumatic wheels are designed to allow for easier rolling on rough or uneven surfaces.WATER CONDITIONER<strong>WayCool</strong>® water conditioneris recommended to controlodors found to be present insome water sources.• Place the tab under thefloat valve water outlet forfast, effective odor control.• Place the tab next to thepump for longer lastingodor control.CLEANER<strong>WayCool</strong>® cleaner is recommended toremove scale buildup from the watersupply system.• Follow the instructions on page 13 toclean the unit. Refill with water and addone pint of <strong>Cooler</strong> Cleaner Treatmentto the reservoir. Operate the <strong>WayCool</strong>®in PUMP ONLy mode for approximately20 minutes.• Drain, clean and refill the <strong>WayCool</strong>®with fresh water. Repeat steps ifnecessary. Repeat treatment whenscale buildup becomes evident.ALUMINUM GRATES<strong>WayCool</strong>® aluminum gratesare more durable than theoriginal plastic grates andprovide greater protection tothe pads.15
Options and Accessories cont'dOSCILLATING SPOUTThe oscillating spout is operatedby a four RPM gear motor thatdelivers 50 in/lbs. in torque. As thegear motor rotates, the spoutoscillates in a 110-degree arc,which cools an area of about9500 square feet.Oscillator SwitchOn/Off SwitchOscillator AssemblyThe design of the oscillator requires the blower duct to sit loosely on top of the unit.Do not place hands or any other object in the spout while unit is operational!Do not attempt to stop spout from oscillating!IF UNIT DOES NOT OSCILLATE1. Ensure the unit is plugged into a standard GFCI-protected 120-volt outlet.2. Ensure the oscillator switch is in the ON position.3. Ensure the gear motor is running. To do this, shut off the unit by turning the main switch to the OFF positionand leave the rocker switch for the gear motor in the ON position. you should then be able to hear the gearmotor.4. If the motor is running:• The spout may be fastened too tight against the top of the <strong>WayCool</strong>®. The nut above the brace shouldbe loosened to allow 1/16" clearance between the bottom of the spout and the top of the <strong>WayCool</strong>®.• If the spout is not too tight, the linkage may be damaged. Look for visible damage to the linkage rod orthe lever. If any of the linkage parts are damaged, they will need to be replaced.5. If the motor is not running, the motor may have failed or there could be a wiring problem. Contact a licensedelectrician. If the motor is determined to have failed, it must be replaced.IF SPOUT APPEARS TO JUMP WHILE OSCILLATING1. The spout may be fastened too tight against the top of the <strong>WayCool</strong>®. The nut above the brace should beloosened to allow 1/16" clearance between the bottom of the spout and the top of the <strong>WayCool</strong>®.2. If the spout is not too tight, the linkage may be damaged. Look for visible damage to the linkage rod or thelever. If any of the linkage parts are damaged, they will need to be replaced.IF UNIT MAKES EXCESSIVE NOISE1. The spout may be fastened too tight against the top of the <strong>WayCool</strong>®. The nut above the brace should beloosened to allow 1/16" clearance between the bottom of the spout and the top of the <strong>WayCool</strong>®.2. If the spout is not too tight, the linkage may be damaged. Look for visible damage to the linkage rod or thelever. If any of the linkage parts are damaged, they will need to be replaced.3. A motor bearing may have failed. If the noise is determined to be coming from the motor, the bearing mayhave failed and the motor may need to be replaced.IF SPOUT LIFTS UP OUT OF RECESS IN TOP OF UNIT1. The spout may be too loose. There should be approximately 1/16" clearance between the blower duct andthe top of the <strong>WayCool</strong>®.2. The linkage may be damaged. Look for visible damage to the linkage rod or the lever. If any of the linkageparts are damaged, they will need to be replaced.WARNING If the top of the unit is removed for troubleshooting or for any other reason, thewires from the gear motor to the oscillator switch must first be disconnected. This is done byremoving the two female disconnects that are attached to the back of the oscillator switch.16
Warranty<strong>Schaefer</strong> <strong>Ventilation</strong> Equipment, LLC<strong>Schaefer</strong> Limited Warranty Policy<strong>Schaefer</strong> <strong>Ventilation</strong> Equipment, LLC (SVE) provides the following limited warranty from the date of invoice tothe initial purchaser of our products or to its customer with a dated proof of purchase:I. Two-year coverage (unless otherwise indicated below) applies to all products, components andassemblies provided by SVE that prove to be defective in material or workmanship. Any such defectiveproduct will be repaired or replaced at SVE’s option, with the defective product or component returned,upon approval, to SVE, F.O.B Sauk Rapids, Minnesota.II.This warranty does not cover:a. Failure, damage or malfunction as a result of:i. Improper installation or installation not in accordance with installation instructions.ii. Operating conditions that vary from SVE’s operating instructions.iii. Misuse, abuse, negligence, alteration, or accident.iv. Transporting the product.v. Improper operation or lack of appropriate or regular maintenance of the product.b. Loss of time, inconvenience, loss of use of the product or other consequential or incidental damages.c. Parts that need replacement due to normal wear and tear.d. Superficial or cosmetic rust or corrosion.e. Any product whose name plate has been removed.Products with warranty periods that differ from the standard 2-year warranty are as follows:• Poly Housings 25 years• Fiberglass Housings 15 years• Low-intensity Tube Heater Exchange Tubes 5 years• Heavy-Duty Industrial Wash-Down Fans (with VWD motors) 3 years• K-Series, 2-Stage, Compact and Stainless Steel Tube Heaters 1 year• Quartz and Zubri Heaters 1 year• Big Dog Fans 1 year• Shutter Motors and Aluminum Riveted Fan Blades 1 year• Epoxy Line Wash down fans (with EWD motors) 1 year• <strong>Evaporative</strong> Cooling Pads 180 days• HotZone® Electric Elements 120 days• Quartz Bulbs 90 days• Tuff & Gusty Fans 90 days• Any product or part as noted as an exception to the standard2-year warranty in the product’s operating manual.SVE reserves the right to add or delete products from this exception list at any time.THERE ARE NO WARRANTIES OF MERCHANTABILITy OR FITNESS OF USE.SVE reserves the right to change product design and specification without prior notice or liability.The above constitutes the sole warranty offered by <strong>Schaefer</strong> <strong>Ventilation</strong> Equipment, LLC.Effective March 1, 2010.All information, illustrations and specifications provided here are based on the latest product informationavailable at the time of printing. Product specifications subject to change.17
www.schaeferfan.com©2011 <strong>Schaefer</strong> <strong>Ventilation</strong> Equipment / M-WC1/3HPA 3-31-11