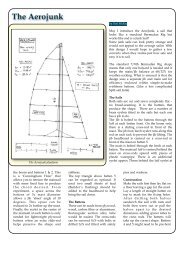
Chapter 6 The (Wooden) Mast. - The Junk Rig Association
Chapter 6 The (Wooden) Mast. - The Junk Rig Association
Chapter 6 The (Wooden) Mast. - The Junk Rig Association
- No tags were found...

Create successful ePaper yourself
Turn your PDF publications into a flip-book with our unique Google optimized e-Paper software.
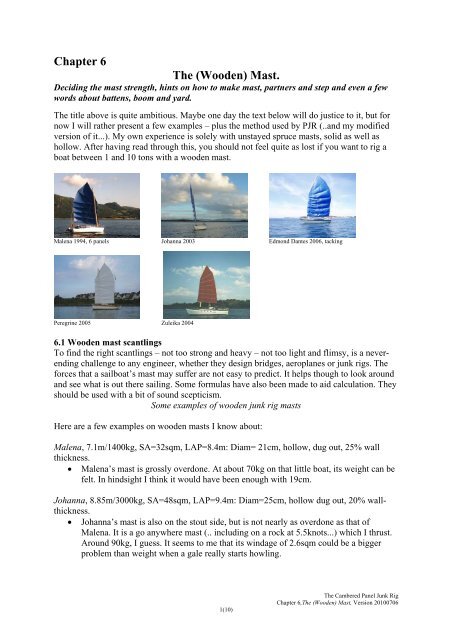
hollow mast from 1995 was covered with one layer of thin glass roving in epoxy and then 7coats of a 2 pot Polyurethane varnish. This still holds up well. On Johanna I use the samerecipe, but with white colour in the varnish for extra sun protection. I have also seen a coupleof masts that just have been varnished with Coelane 1-pot varnish, and this seems very goodtoo. I suggest you do a good job; repainting masts every year is a pain...By the way: On my masts I beef up the area at the partners with 2 extra layers of glass rovingin epoxy. This is to ensure that the fibres in the mast shall not be crunched by the wedgesholding it in place.Well, that’s all I know about making wooden masts.If you are not lucky enough to live where trees are cheap and plentiful, I suggest you starthunting for aluminium, or GRP lamp posts or something. However, I know too little aboutthem to suggest scantlings or how they should be made.6.3 <strong>Mast</strong> step, partners and mastheadA quick sketch of the mast step (..mastefot...) , meant for a Swede,so I forgot to write in English. It should explain itself though.<strong>Mast</strong> stepFor some reason I like to make things from plywood and epoxy; shelves, boxes, outboardbrackets etc, and now; mast steps. I have only fitted mast steps for 2 boats, both having solidGRP hulls. I don’t know if this is the best method, but it worked for me. <strong>The</strong> fine thing with itis that the progress was step by step. In addition, I could see the end result and assess it beforeit was carved in stone (read: before mixing epoxy commenced). Look at fig. 6..... <strong>The</strong> main5(10)<strong>The</strong> Cambered Panel <strong>Junk</strong> <strong>Rig</strong><strong>Chapter</strong> 6,<strong>The</strong> (<strong>Wooden</strong>) <strong>Mast</strong>, Version 20100706
idea was to lay up a number of layers of plywood with a hole for the mast foot to rest in. <strong>The</strong>design ensures a huge contact area against the hull, preventing it from EVER breaking loose.Dry-fitting the plywood:• True up the boat to be level. If your boat is afloat, keep a spirit level ready to makesure that the boat is not listing when critical measurements are to be taken.• Drill a little pilot hole in the deck where you want the centre of the mast to go. <strong>The</strong>mast step should spread out evenly for and aft of the mast position.• Mark up on the hull where the mast step will be and rub this hull area up with an anglegrinder. No Topcoat or paint must be left, just a glean GRP with a slightly dented,uneven surface.• Have a vacuum cleaner ready and clean up at once afterwards or the dust will soonmake a mess of the whole boat.• Dry-fit the first plywood plank to the hull with tape. This plank the mast will stand on.By making it narrower than the mast, it is easy to make drain channels for eventualwater to escape through. Tape it securely to the hull.• Fit the next layers one by one until the total height is 8-10cm or until the contact areaagainst the hull is sufficient (60 by 60cm?). Each layer is just fastened to the onebelow with 2 screws, less than twice the plywood thickness long. I actuallyrecommend drilling holes for the screws and using machine screws. <strong>The</strong>y are notmeant to hold well, but to act as guides when dismounting and remounting the step(several times). Flush screw heads of course.• For each layer of plywood you dry-fit, mark them with a thin felt-tip pen against thehull.• Note: When planing the edges of each layer of plywood to fit the hull, the fit can befairly loose. Still, there should not be more than 2-4mm gap between the hull andplywood. Reason: When the gluing job begins, we don’t want a high volume of epoxyin any cavities, or it may “go off” (.. Yes, I know what I’m talking about...). so, if you by accidentmake one with too much clearance to the hull, chuck it away and start over again.Making the mast hole in the step:• Hang a plumb (.. a big nut will do...) from the pilot hole in the deck and mark the mastcentre on the mast step. Double-check that you hit the centreline of the boat.• Mark up the close-fitting mast hole, loosen the plywood and saw out the mast hole.• Screw it back on to the remaining mast step and use it as a template for marking themast hole on the layer underneath.• Repeat this unscrewing, sawing the hole, refitting, marking etc, until you are back tothe lowest plank, the one that carries the mast. Double-check that the position of thelowest plank is well marked on the hull.• If you have the mast nearby, you could even reconnect all the layers (including thebottom one) correctly outside the boat, thanks to guiding screws, and trial fit it on themast. <strong>The</strong> mast should fit like a hand in a glove.On my first mast step, in Malena, the mast was a ratherloose fit. As the boat pitched, we could hear the dunk-noiseat it moved in the step (it took a while to trace that noise).We got away by fitting a couple of wide but thin wedgesthat was tapped in place. That worked fine.Installing the mast step:• I use to install the mast step layer by layer. I feel I have better control then.6(10)<strong>The</strong> Cambered Panel <strong>Junk</strong> <strong>Rig</strong><strong>Chapter</strong> 6,<strong>The</strong> (<strong>Wooden</strong>) <strong>Mast</strong>, Version 20100706
Johanna:For Johanna’s 5.8m battens I was lucky to find 6m lengths of 50-1.5mm tubes. <strong>The</strong>y werewonderfully stiff and light. I had concerns about buckling, but there seem to be no reason formy fear: In a wild make-it-or-break-it sail (dead run), the long (6.3m) no.2 batten was bent. Iknew it was under much harder stress than the others and had seen it panting in the blows.Luckily, as said, it just bent without collapsing. That batten is now replaced with a 50-3.2mmtube. I am very happy with these battens. <strong>The</strong> 50-1.5mm tubes should weigh 0.61kg/m and the50-3.2mm tube 1.26kg/m. Note that the 50-1.5mm tubes are only 10% heavier than the 25-3mm tubes and yet they are so much stiffer and stronger.<strong>The</strong> batten ends on Johanna are not hammered flat. Instead a 6mm runs through, about30mm(?) from the end. <strong>The</strong> nut holding the bolt is an eye-nut. In addition a 3-link stub ofchain is hung on that bolt. <strong>The</strong> eye-nut and chain stubs are good fixing points for sails, parrelsetc. No problem with shafe.Batten end on JohannaBoomI guess most of us instinctively would seek for a heavier section for the boom than for thebattens. Still, on both Malena and Johanna they are of the same sections as the (lower)battens, and I have never had any trouble with them. Period9(10)<strong>The</strong> Cambered Panel <strong>Junk</strong> <strong>Rig</strong><strong>Chapter</strong> 6,<strong>The</strong> (<strong>Wooden</strong>) <strong>Mast</strong>, Version 20100706
YardMalena: (Slieve, I’ll have to draw up the real yard for Malena here so they at least have apractical example...)<strong>The</strong> 4.6m yard for Malena was made from spruce, exactly according to the PJR method (Seech. 10, Fig 10.1). For that little boat it was no problem to hoist with a 4:1 halyard. It is still inuse.Johanna:For Johanna’s 5.9m yard I tried the same recipe, but the cube scale factor had done its work;that yard became a monster. I never weighed it, but it felt to be well over 20kg. I thendesigned one in aluminium. This is much lighter; I haven’t checked but it should be below10kg, I think. Together with a well placed winch it suddenly made hoisting the sail quite easy,even for lazy old me. I generally hoist the five first panels by hand in one go. <strong>The</strong>n I rest a bitwhile stuffing the (5-part) halyard in a canvas bag. <strong>The</strong>n I winch up the two last panels.Johanna’s second yard, made of aluminiumThis yard has proven to hold up well. I can see that it bends a bit sideway against the mast,particularly under full sail (..Johanna’s mast is a bit short, so it is a squeeze...). For a biggerboat, I guess I would beef the yard up sideways by welding on “cheek plates” on each side,covering the middle half of the length...end of <strong>Chapter</strong> 6...10(10)<strong>The</strong> Cambered Panel <strong>Junk</strong> <strong>Rig</strong><strong>Chapter</strong> 6,<strong>The</strong> (<strong>Wooden</strong>) <strong>Mast</strong>, Version 20100706