Buckeye DVR User Manual - Buckeye CableSystem
Buckeye DVR User Manual - Buckeye CableSystem
Buckeye DVR User Manual - Buckeye CableSystem

You also want an ePaper? Increase the reach of your titles
YUMPU automatically turns print PDFs into web optimized ePapers that Google loves.
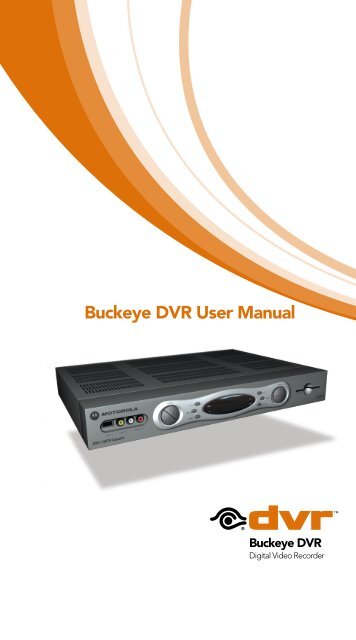
<strong>Buckeye</strong> <strong>DVR</strong> <strong>User</strong> <strong>Manual</strong><strong>Buckeye</strong> <strong>DVR</strong>Digital Video Recorder
Contents<strong>Buckeye</strong> <strong>DVR</strong> - Don’t miss a thing. 1Control Live TV 1Playback ControlsUsing the Video Control Buttons 2Playback ControlsUsing the Remote Control Arrow Buttons 2Pause, Rewind, Fast-Forward, Slow Motion,Instant Replay, Get Back to LIVE TV 3Swap Between Programs 4Your Personal Video Library 4Building Your Library - Recording Programs 4Record Program Information 4<strong>Manual</strong>ly Schedule Recording 5Record a Series 5Managing Scheduling Conflicts 6View Your List of Scheduled Recordings 7Modifying Recording Options 7View Programs Stored InYour Personal Video Library 7Managing Your Personal Video Library 8Copy Recordings to a VHS Tape 9<strong>Buckeye</strong> <strong>DVR</strong>Digital Video Recorder
Don’t miss a thing.<strong>Buckeye</strong> <strong>DVR</strong>Digital Video Recorder<strong>Buckeye</strong> <strong>DVR</strong>Imagine…coming home to your ownpersonal library of television programs,movies, and sports that you can watchwhenever it’s convenient for you. It’s TVfor your schedule.Pause live television! Rewind and replayprograms so you don’t miss a beat.Record up to 90 hours* of your favoriteprograms and view them as many timesas you want, whenever you want. Youcan even record high-definition TV**.All without rentals, tapes or returns.Your <strong>Buckeye</strong> <strong>DVR</strong> converter has made recording and watching your favoriteprograms easier than ever. Powered by i-Guide, now you can watch a programwhile recording another or record two programs at once! You have your ownpersonal video library, stored on your digital set-top box, so you can watchthem at your convenience. You can even pause, fast-forward and rewind LIVETV to playback the scenes you’ve missed. In fact, your <strong>DVR</strong> is one of the firstavailable that can actually record and play high-definition programming!**Control Live TVUsing <strong>Buckeye</strong> <strong>DVR</strong> with i-Guide, you can control LIVE TV. Anytime you tuneto a channel, the <strong>DVR</strong> begins making a temporary recording of whateveryou’re watching. So you can PAUSE if the phone rings, REWIND the sceneyou missed and FAST-FORWARD to skip what you don’t want to watch. Your<strong>DVR</strong> will record up to one hour of live TV+.The live TV recording is not a permanent recording, unless you actually recordit to the <strong>DVR</strong>’s hard drive. For live TV recordings, the temporary recordingbuffer will be erased if any of the following occur:• Turn off your <strong>DVR</strong>.• Watch the same channel for longer than the temporary recording (buffer)period. Only the most recent hour of the program (15 minutes of HD) iskept in the temporary recording.• Switch to another program on the same tuner. When you change channelswithout using the SWAP function, your <strong>DVR</strong> begins to store the newprogram. It removes the previous program you were watching from thestorage. (See SWAP section for additional information.)*Recording capacity varies.**Recording and playback of high-definition programs requires <strong>DVR</strong> connection to high-definition television.+Recording buffer (temporary hard drive) for each tuner will record as long as you stay tuned to the same channel.1
• You watch more than one hour. After one hour, the <strong>DVR</strong> removes theearlier minutes of the recording, so that only the most recent hour is keptin the temporary recording.Playback ControlsYou can play back your video recordings using the buttons on your remoteusing the Video Control Buttons.These buttons function like VCR controls.Plus, you have new <strong>Buckeye</strong> <strong>DVR</strong> controlfeatures, like Instant Replay and SWAP.Note: Some remotes will have an Instant Replay button.Using the Remote Control Arrow ButtonsThe 5634buttons on your remote control will control playback when youare watching a recording in progress or while watching a recorded program.• Play• Pause• Rewind• Slow Rewind from Pause• Fast-Forward• Slow Forward from Pause• Go to Live TVStatus BarThe Status Bar appears whenever you pause, rewind or fast-forward a liveprogram. It also gives you information such as the title of the program youare watching, the source of the program and duration of time. The yellowposition bar indicates where you are in the program. Green indicates thelength of the program you are watching. Red indicates that you are watchinga recording in process. White indicates the length of other programs availablein the buffer.2
PauseAs you watch live TV and recorded programs press PAUSE and the video onyour TV screen instantly freezes. No more missing the climactic scene of amovie or the winning play of the game! For programs you are watching live,your <strong>DVR</strong> will remain in pause for up to 90 minutes*. Press PLAY to resumenormal play of the program.RewindWant to review a portion of your live show? It’s a snap with <strong>Buckeye</strong> <strong>DVR</strong>.Press REWIND. Press it again up to 4 times to increase the rewind speed.rE1, rE2, rE3 and rE4 will appear on converter screen. rE1 is the slowestsetting and rE4 is the fastest. Press REW a fifth time or press play to resumenormal play.Fast-ForwardFor programs you are watching live, FAST-FORWARD can be activated if youhave paused or rewound the program (live TV can not be fast-forwarded).Press FAST-FORWARD to move forward in the program.** Press it up to 4times to increase the fast-forward speed. FF1, FF2, FF3 and FF4 will appearon the converter screen. FF1 is the slowest setting and FF4 is the fastest.Slow MotionYour <strong>DVR</strong> is equipped with slow-forward and slow-rewind functions to giveyou crisp and clear Slow Motion images. Ever wonder what the referees arelooking at when they review a controversial play? Use Slow Motion to getan inside look. To activate slow-forward, press PAUSE and then FAST-FORWARD. To use slow-rewind, press PAUSE and then REWIND. To returnto regular speed, press PLAY.Instant ReplayWith Instant Replay*, you can go back to see the last play of the game orreplay the last scene of your movie. Just press on your remote to replaythe last 15 seconds. Press repeatedly to continue skipping back in 15-second increments.Get Back to Live TVAnytime you pause or rewind a live program, the show continues to bebroadcast in real time. To return to live programming, press the 6button*.GUIDE TIP: Using Parental Locks With <strong>DVR</strong> - You can restrict viewing of recordedprograms, just like any other program. If you schedule a recording for a programyou have LOCKED, the program will be recorded, however, audio is muted and novideo will appear while the program is recording. A restricted notice appearsallowing you to enter your PIN to view the program during recording. Once theprogram has been recorded, you can access it from your list of recorded programs.Just enter your PIN to view it.* Pause capacity depends on video format; less than 15 minutes for High-Definition programming.** You can only fast-forward up to the point of live TV.3
Record One Show While Viewing AnotherBecause <strong>Buckeye</strong> <strong>DVR</strong> has two tuners, it can buffer two programs at thesame time – one on each tuner. The SWAP feature lets you toggle back andforth between the two live shows while giving you full control of both. Whileyou are tuned to a program, press the SWAP button on your remote.• You will change tuners. Now you can select an alternate program bychanging channels or using the i-Guide.• Press SWAP again to toggle between the two programs.Note: The SWAP button is the key to keeping the buffer for both programs. If you change channelswithout using the SWAP key, you will lose the buffer. The SWAP button may not be availableon all remotes.Your Personal Video LibraryUsing your <strong>Buckeye</strong> <strong>DVR</strong> with i-Guide, you can build your own personallibrary of programs, movies, sports, TV shows …whatever you want. Followthe steps below to build and manage your personal video library.DI2Building Your Library - Recording ProgramsYou can set and schedule recordings three ways with i-Guide: one touchrecord, interactively by program and by manually scheduling your recording.One Touch RecordPress RECORD on your remote any timewhile watching TV or while navigatingthrough the guide. Recording beginsimmediately at the point you pressedRECORD for programs airing now. You canautomatically schedule recordings forprograms starting at a later time or dateby pressing RECORD while in the listings.Recording will start at the program’sscheduled start time.Record From Program InformationFrom the listings, highlight and select aprogram scheduled for a later time. Pressthe INFO button and you will see aninformation screen. Highlight the RecordIcon and press OK to start a recordingfor the time the program is scheduled tostart.Record Two Programs at OnceThe <strong>Buckeye</strong> <strong>DVR</strong> converter allows you to set recordings for two differentprograms that air at the same time. While recording two programs, you canwatch and control either program up to the point of live TV by using the4
SWAP button on your remote. There are several ways to record two programsat once. Here are two basic examples:While Watching a Show:• Press RECORD to record the program you are watching.• Press SWAP to switch to the other tuner and find the second programyou want to record.• Press RECORD when you locate the second program you want torecord.From the Guide:• Highlight a program you want to record from any listings screen.• Press RECORD to set up the first recording• Highlight the second program.• Press RECORD to set up the second recording.<strong>Manual</strong>ly Schedule a RecordingYou can set a <strong>Manual</strong> Recording to automatically record a specific time andchannel.Step 1: Select <strong>DVR</strong> from the Main Menu, then select Set a Recording.Step 2: Select the start and end times and the day you wish to record andconfirm your settings.Step 3: A channel list will then appear, allowing you to select the channelto record. Select the channel you want.Step 4: A “Create a New Recording” Screen will appear, select Create aRecording to confirm your settings or select the Recordings OptionsIcon for additional Recording Options.Record a Series<strong>Buckeye</strong> <strong>DVR</strong> lets you record multiple episodes of a program according toyour preferences. You can set the <strong>DVR</strong> to record only new (first run) episodes,first run episodes and repeats or all episodes.When you set a recording from a Series Program Information screen, you’llhave an additional icon on the preceding Recordings Overlay. Choose Createa Series Recording Icon to specify your series recording options.• Select the episode type to record, such as first run only, first run andrepeats or all episodes.• Specify how many recordings to save.• Specify how long to save the recording – until you erase it or until spaceis needed.• To access advanced series setup features like add minutes to the startand end times and specify which channels to record, select the SetupIcon to review all options.Your series recordings will appear in your My Recordings list with the showtitle as its label. Multiple recordings of the same show will have the samelabel and will be listed beginning with the most recent recordings first asdefault. To change your view, use the (arrow left/right) buttons on your remoteto View by Date, View by Channel or View by Title.5
Managing Scheduling ConflictsIf you schedule more than two recordings for the same time, you will see aScheduling Conflict screen that allows you to choose between a previouslyset recording and the new recording that is conflicting. Individual recordingsalways take priority over series recordings when there are scheduling conflicts.In case of a scheduling conflict between two series programs, additional iconswill appear at the bottom of the Scheduling Conflict screen to help youdetermine which program to record.-Return to the previous screen.-Record highlighted series as shown above.-Don’t record this series.• To give your new recording the highest scheduling priority and to capturethe most number of episodes for your new recording, select High. Thescreen will show you how many episodes of the new series will be recordedand which episodes of the old series will not be recorded because of theconflict.• To move the new series back to the bottom of the scheduling priority list,select Low and the screen will refresh and give you revised results.• Select the Record Icon to confirm your new settings. You may alsomodify the priority assigned to a series using the Series Priority List. (Seenext section)DIGITAL VIDEO RECORDINGModify the Series Priority ListTo help you manage which series get recorded when there are schedulingconflicts, your <strong>DVR</strong> automatically creates a Series Priority List. The first seriesyou set to record has the highest priority and is the program recorded in caseof a conflict. If there are no conflicts, eachadditional series you set to record is addedto the bottom of the list. You can easily changethe recording priority of the programs so thatthe programs of your choice are recorded incase of a conflict.• Select <strong>DVR</strong> from the Main Menu orQuick Menu.• Choose Series Priority.• Highlight a program and use the Page+/- buttons on your remote to modifyits priorities.Note: If you want to record two series recordings instead of an individual recording that airsat the same time, you must delete the individual recording from the Scheduled Recordings List(See Cancel a Scheduled Recording section).6
View Your List of Scheduled RecordingsStep 1: From the Main Menu or Quick Menu, select <strong>DVR</strong>**Menu label may varyStep 2: Select Future Recordings.Step 3: See a list of all the programs you have scheduled to record, selecta title to cancel the scheduled recording or modify recordingoptions.Modifying Recording Optionsi-Guide gives you flexibility to manage your personal video library. Youcan change your Recording Options at any time, as often as you like.Change Options for Scheduled RecordingsStep 1: From the Main Menu select <strong>DVR</strong>.Step 2: Select Future Recordings.Step 3: Highlight a program title and press OK or INFO.Step 4: Select from the program information screen.Step 5: Select to change the Recording Options, or select todelete this program from your list of Future Recordings.Use the 5634buttons on your remote to change Recording Options:• Change the frequency of the recording, such as every day or once aweek.• Specify how many recordings to save.• Set a Save Until parameter, either until you delete or automatically whenspace is needed.• Change the start and end times in order to catch every minute of aprogram, even if it runs over.From ListingsSelect your Scheduled Recording in the listings indicated by the reddot in the instant info.Press OK or INFO and select the Icon.From here, select Icon to cancel the recording, or select Icon tomodify the Recording Options.GUIDE TIP: <strong>DVR</strong> is not a long-term storage device. To maximize your storagespace, review the contents of your library regularly and discard the recordingsyou no longer wish to save. See “Managing Your Personal Video Library” in thismanual.View Programs Stored In Your Personal Video LibraryStep 1: Press LIST on the remote or from the <strong>DVR</strong> Menu, select MyRecordings. Use the 56buttons on your remote to search throughand highlight titles from your list of recorded programs. Press OKto select the program.Step 2: From the Information Screen, select Icon to resume play fromwhere you left off or select Icon to restart from the beginning.7
Guide Symbols to Know: Recorded ProgramInformation Screens- Go back to the previous screen- Delete the program from My Recordings- Play the recording- Change the Delete Priority Rule- Start the recording from the beginning- Place a Lock on the program to restrict viewingStep 3: To control playback while watching a recorded program, use eitherthe video control buttons or the arrow buttons on your remote.See the “Playback Control” section for more information.Recording Starting NoticeBefore a scheduled recording begins, anotice will appear on-screen giving youthe opportunity to confirm or cancel thescheduled recording. If you don’t doanything when the recording is scheduledto start, the <strong>DVR</strong> will automatically tuneto the channel and begin recording. LiveTV programming that has been temporarilyrecorded will be erased once the scheduledrecording starts. GuideGUIDE TIP: Changing the channel during a recording will stop the recording. Youwill see a notice confirming whether you want to stop the recording and changechannels or continue recording.Managing Your Personal Video LibraryA recorded program remains in your personal video library until you decideto delete it, unless you have it set to delete when space is needed. Your <strong>DVR</strong>will record and store up to 90 hours of programming and up to 20 hours ofhigh-definition programming*. To make the most efficient use of <strong>Buckeye</strong><strong>DVR</strong> storage space, follow these guidelines:To Delete RecordingsFrom the program information screen, select the delete Icon to deletethe recording, or select the Icon to modify the Delete Priority. For example,you can tell the guide to delete the recording when space is needed.* Recording HD programming requires a <strong>DVR</strong> connection to a HD television.8
Copy Recordings to a VHS TapeAfter you watch a recording, decide toeither erase it or keep it permanently bytransferring it to a VHS tape using yourVCR.When you copy recordings to a VHS tape,make sure that the recording is displayedon the TV screen for the entire time therecording is being copied. If you changechannels or display guide screens duringthe copying process, your tape copy will contain these images and you willnot have a complete copy of the recording.1. Connect the S Video or RCA OUT 1 connection on the back of the <strong>DVR</strong>to the Cable IN of your VCR.2. Put a tape in your VCR and tune your VCR to the proper input.3. Access your list of Recorded Programs.4. Use the 5634buttons on your remote to highlight a program fromyour list of Recorded Programs. Press OK to select a program.5. From the Information Screen, select to resume play from where youleft off or select to restart from the beginning.6. Start recording on the VCR when playback begins.7. As the recording plays, it is taped to your VCR.Note: Refer to your VCR <strong>User</strong> <strong>Manual</strong> for specific instructions on using your VCR.To help you manage your personal video library, i-Guide will advise you withan on-screen notice when the available memory gets low or full. If recordingspace becomes full during a recording, the recording will stop. To avoidmissing part of the program, make sure you have enough recording space torecord the entire program before you begin.GUIDE TIP: If you have any questions regarding the use of <strong>Buckeye</strong> <strong>DVR</strong> call andspeak with a customer representative at 419-724-9800. We are available to take yourcalls 24 hours a day, 7 days a week OR visit our website at buckeyecablesystem.com.<strong>Buckeye</strong> <strong>DVR</strong>Digital Video Recorder9
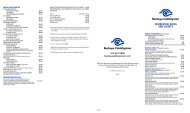
NW Ohio: 419-724-9800SE Michigan: 1-800-866-3260Erie County: 419-627-0800