
You also want an ePaper? Increase the reach of your titles
YUMPU automatically turns print PDFs into web optimized ePapers that Google loves.
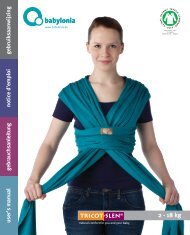
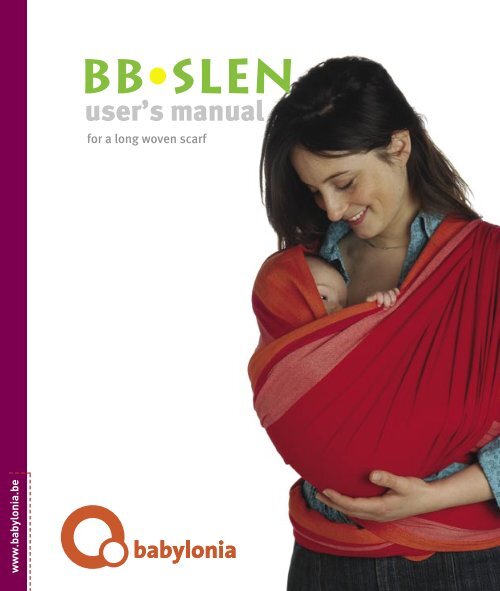
BB•SLENuser’s manualfor a long woven scarfwww.babylonia.be
CONGRATULATIONS!You have chosen to carry your baby in a cloth baby carrier. Babiesacross the globe are carried by their parents, siblings, and caregiversas they continue through their daily activities. A practice which benefitsboth the baby and the wearer as you will see. Before providingyou with step-by-step instructions on how to tie your baby carrier, wefirst want to explain why you should carry your baby. Take your timeand read through the manual calmly. You do not have to become anexpert in all the positions presented. Besides, not every baby will likeevery position. We present you with a large variety so that you andyour baby can try them out and choose your favorites.Worn up next to you, your baby can participate in your activities.This interaction with the outside world will enhance hislanguage and social development.Learning to carry your baby comfortably is like learning to dance. Ittakes a little practice before the movements become second natureand you glide through them with your eyes closed. It is often helpfulto practice tying the scarf several times before placing your babyinside. It can also help to talk to your baby and explain what you aredoing while placing him in the carrier. Your baby will sense if you areuncomfortable. Tell him you are a bit insecure yourself but that youwill learn how to do this together.You will see, once you have learned to carry your baby, you will wonderhow you ever lived without it. Not only does it make life easier, itprovides sensory and motor development and much more.Table of ContentsIntroductionFrequently Asked QuestionsHow to Choose a Position(and pages references to each individual method)Getting StartedTying MethodsTwinsOther Babylonia Products& Thank You3468104447© copyright Babylonia 2005This book, or parts thereof, may not be reproduced in any form without permission.
Want to read more about the benefits of carrying your baby?Here are a few of our favorites.Granju, Katie Allison. Attachment Parenting: Instinctive care foryour baby and young child. New York, New York: Pocket Books,1999.Heller, Sharon. The Vital Touch: How Intimate Contact with YourBaby Leads to Happier, Healthier Development. New York, NewYork: Henry Holt and Company, 1997.Liedloff, Jane. The Continuum Concept: In search of happinesslost. Cambridge, Massachussetts: Perseus Books, 1985.Sears, W. and Sears, M. The Attachment Parenting Book. Boston,Massachusetts: Little Brown, 2001.Small, Meredith F. Our Babies, Ourselves: How Biology andCulture Shape the Way We Parent. New York, New York: Doubleday,2001.BB•SLEN > User’s <strong>Manual</strong>Please read through carefully before starting!Babies Yearn for SkinAfter nine months of warmth, movement and constant contact withmother, birth is a huge transition and babies are in need of intimatecontact with their parents. Babies who are carried close to the body,visibly enjoy this direct physical contact. The cherishing body-to-bodycontact fulfils one of baby’s primal and deep needs and offers anideal position from which to discover the big wide world.Safe and SecureIn a simple cloth carrier, your baby feels safe and secure. He feelsyour physical warmth and hears your voice and heartbeat. He recognizesyour scent and can have permanent eye contact with you.Babies Cry LessResearch indicates that babies who are carried on a daily basis crysignificantly less. In a cloth carrier your baby is not forced to passivelyspend the day. He participates naturally in your daily activities.Hence, your baby can observe and hear quite a bit, which is beneficialfor his psychosocial development. When he has had enough, yourbaby simply closes his eyes and falls asleep on your chest.Stimulates balanced developmentIn the security of a cloth sling, your baby experiences the world froma safe position. The huge amount of stimuli he has to deal with in abrief period of time does not frighten him because he is so close toyou. This feeling of security results in the development of a positiveself-image and later on, it forms the basis of a confident and assuredpersonality. Contrary to old popular belief, it has become quite clearthat carrying your baby in a cloth carrier does not lead to spoiled anddependent children, but that the opposite is accomplished.When using a baby carrier that is adapted to the wearer as wellas the baby, it is possible to carry a child as long as he wishes.Children who are 2, 3, 4 or even 5 years old often get tiredof walking and will ask to be carried. Holding a child of thisage in your arms can put a lot of strain on one’s shoulders andback. A baby carrier, however, will distribute the weight of thechild evenly. As a child progressively gains his independence,he will go back and forth between wanting to do it all by himself,and wanting help from others. Contrary to popular belief,meeting his needs and reassuring him will boost his confidenceand make him more independent.And the fatherDuring the first few months it is not always easy for a young father todevelop an equally close bond with baby as the mother. However,with a cloth carrier, he can undertake a lot of things at a very earlystage with the baby safely tucked on his chest.
FREQUENTLY ASKED QUESTIONSIs this type of carrier safe for the development of my baby’s spine?The basis of good posture begins with the pelvis. If this is well supported,the baby’s spine and neck will fall into a natural curve and theweight will be supported by the pelvis. To ensure a correct position,the baby’s knees should be higher than his pelvis, in a fetal position,with his hips and legs properly supported. The baby’s bottom shouldbe lower than the knees and his back should be rounded with hishead resting on your body. This is the ideal position for the developmentof healthy hip joints. The baby does not hang, but comfortablyrests against the wearer.Will the carrier put too much pressure on my breasts?If you follow the instructions of our tying methods, the scarf shouldnot put pressure on your breasts. You should cross the bands overor under them, and if across them, spread out the fabric so that itdoesn’t put pressure on one specific spot.At what age can I start carrying my baby and when should I stop?The benefits of carrying premature babies – or kangaroo care – is welldocumented. A baby (full term or premature) can be placed in a babycarrier just after birth, creating a ‘womb with a view’. There are, ofcourse, no problems starting later as well. Your back will strengthenIf the baby is in an upright position, it is essential that the legs do notdangle or hang in mid-air. This puts strain on the baby’s spine andthe baby will tend to arch backwards creating a bad position for hisneck too.The fetal tuck is the most natural position for a baby. Not only is thisposition good for correct spinal and hip development, it allows him torest and use his energy to develop other strengths.Does my baby’s head need to be supported?If your baby’s pelvis is supported correctly as explained above, thenher neck will follow a natural curve and her head will rest on yourchest. She is free to lift her head when curious to look around andher neck muscles will strengthen quickly. There is no need to supporther head, unless you are bending over. At that moment, spread oneband over her head. This can also be done to stabilize her when sheis sleeping.How long can I safely carry my baby per day?There are no limits. A baby well positioned in a baby carrier can becarried as long as he and the wearer desire. Remember that babiesaround the world are carried throughout the entire day as the wearercontinues about his or her daily tasks and activities.Is this good for my own back?If you have back problems, you should always consult with your doctorbefore using a baby carrier. This said, using a carrier is probablyone of the best ways to prevent back strain because the cloth carriesthe weight and not your arms and back as when you are simply holdingyour baby in your arms. Carry your baby each day and progressivelyextend the carrying time to allow your back muscles a chance tostrengthen along with the baby’s weight gain.as you carry your baby and his weight gains will go mostly unnoticed.A baby can be carried as long as he wants. Even an older child willfind a safe refuge in a baby carrier when tired with the stimulations ofthe outside world.Will my baby like being in a baby carrier?Babies crave close human contact. Once they are used to being carried,you will instinctively reach for your carrier whenever your babyis fussy, can’t fall asleep, or just needs a reassuring presence. Somebabies need a little adaptation time to a new position in the carrier,especially on your back.Sometimes babies are unhappy in a carrier because they feel insecure.This is often the result of not tying the carrier tight enough. Follow theinstructions carefully to make sure you wear your baby high and tight.We recommend trying a new position when your baby is relaxed, justafter eating or ready to fall asleep. Walk around after placing your babyin the carrier for the first time or when trying a new position. This will
distract him while he gets used to a new way of being carried.Most importantly, TRUST YOUR BABY. If your baby is uncomfortable,too tight, too hot, or whatever, he will let you know. If he is asleep orhappily observing the world, then he is just fine. Carrying your babyclose means you can often read his body language well before hestarts to cry or tell you something is wrong.Will my baby be able to breathe wrapped in a carrier?Wrapped snuggly into the baby carrier, your baby is still able to move.If he is uncomfortable in any way, he can turn his head or wiggle hisbody in protest. Either he will shift and rectify the situation, or you canhelp adjust him to a more comfortable position. Held close to you,your baby will synchronize his breathing to your heartbeat and therise and fall of your chest. This stabilizes his respiration.Will I spoil my baby and make him dependent on me?Imagine you are thirsty. Sometimes you are given a glass of water andsometimes you are not. Your thirst is not quenched. You are forced toFREQUENTLY ASKED QUESTIONS5wait until the next time someone else decides you can have a glassof water. You become increasingly nervous and frustrated. You beginto constantly ask for water, even when you are not thirsty, becauseyou are not sure that when you will be thirsty, you will be given somewater. You become insecure when you do not have water available.You are so preoccupied with having enough water that you are unableto think about anything else.Now imagine the opposite scenario. You are thirsty. You are immediatelygiven water, however much you need to quench your thirst.You are satisfied and can go on about whatever you were doing withoutworry. You are reassured because the water is in abundant supplyand you can have some whenever you need it. You feel secure inthis knowledge and the physical presence of the water is not alwaysnecessary. You are worry free and can put your energy into other activities.Now imagine these two scenarios with your baby and his need forclose physical contact and reassurance. You decide.Will my baby be too hot or too cold in a baby carrier?Newborn babies are not capable of regulating their body temperature.The adult’s body will stabilize the baby’s body temperature when holdingthem close. Dress yourself and your baby accordingly. Rememberthat your body heat will be considered one layer and the baby carrieritself is a second. In cold weather, your coat over both of you is a thirdlayer. Just make sure that whatever extremities are exposed are wellprotected from the sun and/or the cold.Meeting your baby’s needs by carrying him close to you creates asecure and self-confident child.
HOW TO CHOOSE A POSITIONPOSITIONS:There is a large variety of tying methods for the long scarf. We haveprovided you with instructions for our favorites as well as a selectionguide as per the physical ability of your baby and/or your physical activity.Do not hesitate to be creative and experiment with other methodsthat you may find elsewhere or create on your own. Just alwaysremember to maintain the basic elements:1. Keep the baby’s knees higher than his hips when he’s in a vertical position.2. The fabric should always be spread out so that no one spot is strained.3. The baby should always be carried high and tight.Physical ability of babyAlmost all of the positions in this manual can be used with any agebaby. Even the back carry positions can be used for a very young babyif the adult feels comfortable doing so. Some positions, however, aremore easily adapted to the physical abilities of the baby. The chartshould provide you with a guideline to choose which position is bestadapted to the abilities of your child.ActivityYour own activity while carrying your baby may also influence whichposition you choose. On the opposite page you will find a chart indicatingwhich positions are best suited for a range of common activities.Front page 10 >1. Wrap Cross I 102. Wrap Cross II 163. Cross 18- Cradle 20- Upright 21- Buddha 22- Facing out 234. Kangaroo 24Hip page 265. Hip Wrap 276. Hip with Knot 307. Hip Cross 32Back page 34Putting your baby on your back:Method I 34Method II 36Method III 37Method IV 37Tying methods:8. Back Pouch 389. Back Wrap 40NOTE: Taking baby off your back 42Twins page 441. Wrap Cross I 442. Cross with babies on hips 453. Cross with babies in front & back 46
BreastfeedingIn/Out oftenExtended CarryingTime / Long WalksSocial SettingsFrom day one Cross > Cradle Cross > CradleHolds head up AloneSits upHip with KnotHip CrossCross-all positionsWrap Cross IICross-all positionsHip CrossWrap Cross II(Twins - Cross)(babies on hips)Wrap Cross IKangarooBackpack PouchBackpack CrossWrap Cross I & IIKangarooBackpack PouchBackpack CrossWrap Cross I & IIKangarooHip WrapHip with KnotCross > Buddha(Twins - Wrap Cross I)Hip Cross(Twins - Cross)(babies on hips)HOW TO CHOOSE A POSITION7
GETTING STARTED> TYING TIPSTIPTIPWhen you use the carrier for the first time you may feel a bitawkward or unsure. The best time to try the carrier is whenyour baby is calm, having just eaten and is ready to fall asleep.Once you have placed your baby in the carrier, walk around todistract your baby while she adapts to a new way of being carried.If she is fussy and does not calm down after a few minutes,take her out and try again later. Once you have practiceda few times, you will see that the carrier is really the perfectway to comfort a restless baby.> WARNINGSCommon sense is the best prevention of accidents whenwearing your baby in a carrier. Some practical points are:• When leaning over, always support your baby’s head withyour hand or a band of fabric.• Cooking with your baby in a carrier can be tempting, but becareful! Your curious baby can reach over and grab something(knife, hot pan, bowl of liquid, etc.)• Remember that wearing your baby changes your spatial dimensions.Be careful when walking through narrow spaces,low doors, etc.• Do not ride a bike while carrying your baby in a carrier.The BB•SLEN label serves as amark to help you find the middleof the fabric quickly and easily.TIPWear your baby high and tight.Keep her within kissing distance.If your baby is carried toolow or too loosely, your lowerback will hurt from the strain.Pulling on the seams is the keyto getting the scarf tight. The instructionsexplain which seamscorrespond to specific placesaround the baby.TIPA knot tied in the middle ofyour back can be uncomfortablewhen sitting. When usinga knot, make it rather on yourside by starting with the endsslightly uneven.TIPTIPTIPDo not twist the fabric when putting it on. This will make a significant differencein the comfort and weight distribution. Always begin by gathering the fabricevenly.Tie the scarf lower around yourhips instead of your waist. Thiswill distribute the weight betterand provide extra support toyour back.Take your baby out by separatingthe bands and lifting himout of fabric. Sometimes it helpsto take his legs out of the bandsbefore lifting him out completely.You do not, however, need totake the whole scarf off.
TYING A KNOTThe square knot has the advantage that when pulled on, it just gets tighter and will not come untied. It lays very flatand is not bulky like a double knot.1. Start with two ends inboth hands.2. Tie the right end overthe left end.3. Now tie left end (originallythe right) over theright end.4. Pull tightly on bothends.5. Knot should be tightand lay flat.The slip knot has the advantage that you can adjust your sling while keeping it tied.NOTE: It is the shorter band at the beginning which will be adjustable when you finish.GETTING STARTED91. Starting with oneband longer than theother, cross the longerband over once2. and tie.3. Letting the shortband hang down, makea U shape with the longerband.4. Thread the end behindthe short bandand through the loop.5. Pull on both ends6. until the knot istight.7. You can adjust theshort band by pullingon it while holding theknot.
FRONT POSITIONSWRAP CROSS IWRAP CROSS IWRAP CROSS IICROSS > CRADLECROSS > UPRIGHTARMS OUTCROSS > UPRIGHTARMS INCROSS > BUDDHACROSS > KANGAROO
FRONT > WRAP CROSS Ioption 1: small babywith feet inoption 2: largerbaby with feet outThis is an ideal positionfor carrying your baby foran extended period of timedue to the three bandswhich provide a lot of support.It is appropriate fromday one through the toddleryears.1. Holding the top seams, placemiddle of fabric across yourchest.FRONT > WRAP CROSS I112. Wrap the bands around youand grab both top seams in onehand.3. Slip free hand under the bandand take opposite top seam.4. Cross the bands and pull outto your sides.5. Take top seam of one bandand pull up and out to full arm’slength.6. Gather fabric in both handsand place flat on your shoulder.7. Take top seam of other sideand pull up and out to full arm’slength.8. Gather fabric in both handsand place flat on your shoulder.9. Take bands in both handsand pull up.
YESNO10. Adjust so that they lay comfortablyon your shoulders.11. Readjust your shirt by pullingit down.Bands should lay flat and tightacross your back.NOT twisted.NONOOPTION 112. To place a small babywith feet inNOT too loose.NOT too close to shoulders butrather spread out evenly acrossthem.12.a Resting the baby high overone shoulder, pull open theband across your chest.12.b Slide the baby feet firstinto the band.12.c The baby will naturallybring its knees up into a ‘frog–like’ position.12.d Holding the baby firmly inone hand, pull the outer fabricup to the baby’s neck.12.e If you like, tuck some of thefabric up under the baby.Continue at number 14.
OPTION 213. To place a larger babywith legs out13.a Create a slight pocket inthe fabric to place the baby.13.b Starting with the baby onone shoulder, slide the babyfeet first between you and theband of fabric.13.c Reaching up from underneaththe bandFRONT > WRAP CROSS I1313.d Pull the baby’s feet throughthe band.13.e Spread the baby’s legs tostraddle your waist.13.f Pull the upper border up tothe baby’s neck.13.g Verify that the bandcovers the baby’s bottom and ispulled out to his knees.14. While supporting the babywith one hand, pull tight the insideseam of the band to adjusttension at shoulders of baby.15. Repeat on the other sidewhile continuing to support thebaby with your free hand.16. Now pull snugly the outerseam to adjust tension underbaby’s bottom.17. Repeat on other side.
18. Holding outer seams of oneband pull tightly and spreadacross back of baby.19. Pull band under baby’sleg, while supporting babywith your hand.20. Continue supporting babywith hand and pull tight innerseam of free band.21. Holding outer seams of otherband, pull tightly and spreadacross back of baby. Continue tosupport baby with your arm.TIPTIP22. Pass band under baby’s legand take both bands in yourhands. Keep fabric tight at alltimes.23. Pulling tight, wrap bandsaround your hips and tie asquare knot. Make sure to stayUNDER baby’s legs.Make sure your baby is high andtight against you. You should beable to kiss your baby’s headeasily.If baby is sleeping, you cansupport his head by pullingthe band over him.TIPOUTYour baby can keep hisarms out of the bands tointeract with the world.To remove your baby,simply spread open the bandsand after taking his legs out ofthe crossed bandslift him out of the scarf.
FRONT > WRAP CROSS IIThis position is great when you want to tie the scarfcompletely before putting your baby inside. For example,put on the scarf before going out in the car.Upon arrival, you don’t have to do any adjustments onthe sidewalk, just put your baby in directly from hercar seat and you’re off!With the three bands around the baby, this positionprovides a lot of support and is very comfortable forcarrying your baby for a long period of time.FRONT > WRAP CROSS II151. Place the middle of the scarfacross your waist.2. Cross the bands acrossyour back and place them onyour shoulders. Make sure notto twist them.3. Cross the bands in frontand place them through thewaist band.4. Wrap the ends around yourhips and tie a square knot.5. Resting the baby high on yourshoulder, place his leg throughthe inner band.6. Put his leg through the waistband.
7. Shift the baby to your oppositeshoulder and place his legthrough the outer band.8. Put this leg through the waistband.9. Spread out the inner bandof fabric and sit the baby downinto it.10. Spread out the outer band.Make sure the fabric is pulledout to the baby’s knees on bothsides.11. Pull open the waist bandover the back of the baby.12. The baby can choose tokeep his arms in or out.
FRONT > CROSSCRADLEUPRIGHTARMS OUTUPRIGHTARMS INBHUDDAThe cross position isgreat for taking a babyor toddler in and outof the scarf often. Thescarf can be left on anddoes not need to be retiedeach time.All these positions startwith the same method.FRONT > CROSSTYING FOR ALL4 POSITIONS17NOTE: We recommend alwayscrossing the bands in the sameorder. The inner band will bethe one the baby is placed intofirst.1. Place the middle of the fabricacross your back.2. Cross it in front of you andplace on your shoulders.3. Reach behind you and takethe two bands in your hands.4. Cross the bands acrossyour back – careful not to twistthem!5. Bring them around to thefront and tie a knot (slip orsquare).6. A slip knot will allow you toadjust the tension of the bandsafter putting them on.
YES NO TIP7. Pull down on the two bandsin front to create room for thebaby to be placed.TIPThe bands should be left looseenough to leave room for thebaby,TYING > variationBut NOT be too loose that theydo not provide enough support.Once your baby is placed in thebands, pull down on the bandsto make the cross low on yourback. This will distribute theweight more evenly.The various positions of theCross can also be done withthis knot. We don’t find it ascomfortable, however, becauseof the loop on your back whichdoes not lay flat.Tying the bands low aroundyour hips will help distributethe weight more comfortably.1. Start with one end slightlylonger than the other.2. Create a loop in the center ofyour back.3. Pass the longer end throughthe loop.4. Wrap the ends around yourhips and tie a knot.5. You now have the two bandsacross your chest as with theCross.
CROSS > CradleSee page 17 to begin.1. Slip the outside band off yourshoulder.2. Spread open the inner bandof fabric to create room to placethe baby.FRONT > CROSS193. Rest your baby high on freeshoulder.4. Slide your baby’s feet intothe band5. guiding them down andaround your waist.6. Place your baby’s hips andhead into the band of fabric.7. Tuck the fabric up under yourbaby as you place her inside.8. Once your baby is in theright position, remove yourarm from the band.9. Return the outside band toyour free shoulder.10. Spread the band evenlyacross your shoulder.
OUT11. Spread out the band so thatit supports the length of yourbaby.12. To raise the head of yourbaby or adjust tension, take thetop fold of fabric and fold outwards.13. Seated in an L position withher head resting up on yourchest, your baby can choose tointeract with the outside worldor sleep.To take baby out, simply pullback the outside bandCROSS > Uprightopen the inner bandand pull baby out with bothhands.See page 17 to begin.1. Place your baby over the oppositeshoulder of inside band,and reaching up under theband,2. pull baby’s leg through theinside band.3. Shift your baby to the oppositeshoulder and4. pull the other leg through theoutside band.
5. Keeping your baby high onyour chest, spread open evenlythe inside band.6. Sit your baby down into theband. NOTE: The middle of thefabric should be in the middleof your baby’s back.FRONT > CROSS > CRADDLETIP217. Spread out the outside bandand make sure the fabric ispulled all the way out to yourbaby’s knees.Your baby should be worn highenough that you can kiss hishead easily.TIPTIPYour baby can sleep with thefabric supporting his head.When awake, your baby canpull his arms out of the bandsto look around.
Positions Facing OutThere are two positions where your baby can face out andbe in direct contact with the outside world. This can be verystimulating for a curious child. Be careful, however, that yourbaby doesn’t become overstimulated. Facing out, your childhas no where to turn in when everything becomes toomuch. When he falls asleep, we recommend taking himout of the carrier and turning him to face you. This willgive him a place to rest his head and fully support his back.CROSS > BuddhaIf you have a very curious child who protests to beingcarried facing you, then we recommend using the hip positions.This gives your baby a greater exposure to the outsideworld while offering the possibility to turn inward towardsyou to rest when he wants.NOTE: Always keep one hand free to support your baby when necessary.If he leans forward he could risk falling out of the bands.1. Rest your baby with legscrossed, high on shoulderopposite inside band.2. Sit your baby down into theinside band.3. Tuck fabric up under yourbaby’s bottom.4. Make sure it is pulled up behindyour baby.CROSS > Facing outIt is possible to put your baby’slegs through the bands and faceout. But this position shouldnot be used for a long periodof time as it does not fully supportthe pelvis. Your baby’slegs hang freely and too muchstrain is put on his spinal cord.5. Spread the outer band tosupport the entire base ofyour baby.6. This position allows yourbaby to face out while fullysupporting his base.
FRONT > KANGAROOThis ‘Kangaroo care’position is ideal forcarrying prematurebabies skin-to-skin.Of course a baby ofany age will benefitfrom this position.1. Place your baby in the middleof the fabric, making sure the fabricgoes up to her shoulders andunder her bottom.2. Gather the fabric and takeboth bands in one hand.FRONT > CROSS > BUDDHA233. Lift baby to your chestwhile supporting her withother hand.4. Holding baby on your chest,put one band over your shoulder.5. Switching hands, take thefree band in one hand6. and place it over your freeshoulder.7. Reaching from underneath,take fabric from inner seamand8. pull under the band and out,twisting the band across yourshoulder.9. Take the fabric from the otherside10. and twist over your shoulder,just like on the first side.
11. Reach behind you and takethe inside seam of the bandover opposite shoulder.12. Pull tightly and pass underthe free band.13. Bring it around in frontof you and gather the bandcompletely into your hand.14. Keeping band in your handuse that arm to support thebaby.!!Make sure both bands remaintight to support your baby whenyou remove your hands.15. With free hand, reach behindyou16. Pull second band aroundfront and gather in your hand.17. Pull tight on both bands.Shifting from side to side canhelp pull everything snug.TIP18. Going over the top of thebaby’s legs, cross the bandsunderneath the baby’s bottom.19. Pass under the baby’s legs.20. Wrap the bands around yourhips and tie a flat knot.You can place the fabric upon your shoulder to have fullmovement of your arms, if youprefer.
HIP POSITIONSHIP CROSSHIP WITH KNOTHIP WRAPHIP WRAP
HIP POSITIONSWe highly recommend the hip positions for curiousbabies who are unhappy facing your chest. Thesepositions are especially convenient in a socialgathering. They allow the baby to choose betweenfacing outwards and interacting with others, orfacing inwards and sleeping.TIP TIP TIP NOtoo looseBabies can be worn on your hipor off center of your chest from avery young age.To bend forwards or removeyour child from a dangerous situation,you can simply put yourarm in front of the baby.Some people will recommendthat you switch the sides thatyou carry your baby on a regularbasis. While this is possible,many parents prefer carryingtheir children on one side only.This is not harmful to you or yourbaby. The choice is yours.When tied correctly, the babyshould sit high and snugagainst you. His weight shouldbe evenly distributed and youshould not have to counter balance.NOtoo low
HIP > HIP WRAPThis can be usedwith a baby of anysize, but this tyingmethod is especiallyappropriate for anewborn or onethat can not yet situp alone.option 1: small babywith arms & feet inoption 2: large babywith arms & feet out1. Choose which hip your babywill sit on. Place scarf flat overthe opposite shoulder.HIP > HIP WRAP272. The band in front should beabout 40cm longer than the onebehind.3. Pull the front band acrossyour body.4. Holding the upper seam, 5. Reach under the free bandand take it in your oppositehand.6. Pull it across your back,going underneath the backband. Make sure not to twist it.7. Gather the entire width inyour hand and bring it aroundto the front.8. Place it over your shoulder. 9. Open the band at your hip.
OPTION 1: To place baby’s legs inside the band:Continue with instructionsat 4. Photos shown with baby’sfeet out, but tying method is thesame for a baby with feet in.1. Resting your baby over yourfree shoulder, place her feetfirst into the band.2. Her feet will fold up into afrog-like position and sit comfortably.3. The baby should be placedjust off center of your chest, notstraddling on your hip.OPTION 2: To place baby’s legs outside the band:1. Resting your child on yourshoulder, reach up underneaththe band and pull his feetthrough it.2. A larger child will sitcomfortably on your hip,3. but it is also possible to havehim sit slightly off center of yourchest.4. Holding the baby with onehand, pull the fabric band up tohis neck.5. Return to the band resting onyour shoulder.6. Take it off your shoulder,while holding the baby withyour free hand.7. Take the band in your oppositehand, and continue supportingthe baby with your arm.
8. Reach under the top bandand9. pull the inner seam out.10. Pull out far to turn the fabricand shake it completely open.11. Switch hands that supportyour baby and continue to holdthe first band tight.HIP > HIP WRAP2912. With free hand reach behindyou to grab inner seam of bandand pull across your back.13. Gather entire band into yourhand.14. Holding both bands in yourhands, pull tightly until the fabricfeels snug.15. Cross under the baby’s bottomand place the bands underhis legs.TIP TIP TIP TIP16. Wrap bands around yourhips and tie a square knot underthe baby’s bottom.The fabric should lay flatand snug across your backwith only one twist in it.Make sure the babysits high and closeto you.Baby’s arms canbe out to interactwith the world.You will want to keep the armsinside for a younger baby whocan not yet hold up her head,or any child who is sleeping.
HIP > HIP WITH KNOTThis position givesgood support to a babywho can not yet sit upalone.1. Choose which hip the babywill sit on. Place middle of fabricon the opposite shoulder.2. Tie a slip or square knot atwaist level.3. Shift the knot to your upperchest.4. Placing baby on your freeshoulder, reach up under theband and pull his feet through.5. Straddle baby’s legs aroundyour hip and sit baby into theband.6. Pull the top seam up to hisneck.7. If you have chosen to tie aslip knot, adjust it now by pullingon the corresponding seamsto tighten the upper and lowerseams around baby.8. Grab the inside seam next toyour neck
9. and fold it out over yourshoulder to adjust the tension.10. Make sure the baby is straddlingyour hip and the fabric extendsout to his knees.11. Take the two ends in bothhands.HIP > HIP WITH KNOT3112. Cross under baby’s bottomand wrap under his legs.13. Wrap around your hips andtie a square knot.14. Your baby’s arms can stayinsideTIP15. or out of the band. To lean forward or remove yourbaby from danger, place yourarm in front of baby.
HIP > HIP CROSSThis is a great positionfor an energetic& curious toddler whofrequently wants in andout of the baby carrier.This position is mostcomfortable once a childcan sit up on his own.1. Choose which hip the babywill sit on. Place middle of fabricon the opposite shoulder.2. The front band should beslightly longer than the backband.3. Cross the back band over thefront band on your hip.4. Wrap the bands around yourhips.5. Tie a square or slip knot. 6. Pull on the two bands tocreate a space to place the child.(A slip knot will allow you to adjustthe bands)
7. Resting baby on your freeshoulder, reach up under thefront band and pull his legthrough the band.8. Now place the back bandover his other leg.9. Sit your baby down into thefront band and spread it open.TIP10. Spread open the backband.TIPHIP > HIP CROSS3311. Check that fabric is spreadout to the knees of your baby tofully support his base.NO12. Fold back the band acrossshoulder to adjust tension.NOThe fabric should be tight acrossyour back and will be twistedonce due to folding the fabricacross your shoulder.Baby can choose to keep hisarms in or out. Keep your babyhigh on your hip and tight upclose to you for efficient weightdistribution and maximum comfort.!too lowtoo looseMake sure the two bands remain crossed over the baby’s back. If thebaby should arch backwards, be sure to support him with your handas he risks forcing the bands open.
BACK POSITIONSBACK POUCHBACK WRAP
Putting baby on back: 4 methodsWe will explain four ways to place your babyon your back before continuing with the BackPouch or Back Wrap. Methods I & II are appropriatefor children of all ages and abilitieswhere as Methods III & IV are easier forslightly older or more experienced babies.Wearing your baby or child on your back is avery comfortable method, especially for longperiods of time, or for activities that require fullmovemenent of your arms and space in frontof you. The tying methods are not difficult, butwill require a bit of practice in the beginning.You will find that a child used to being carriedwill instinctively hold onto your back while youlean forward to tie the scarf. Ask your baby to liedown and pretend to sleep on your back whileyou’re tying the scarf. They will usually be happyto join in the game!When beginning, we suggest to:• Practice in front of a mirror.• Practice the chosen method a few times with justthe fabric before placing your baby in it.• Ask a second person to keep a hand on your babywhile tying the scarf.Some parents prefer waiting until their babycan hold her head up before wearing her ontheir back. However, experienced parents maychoose to wear their baby on their back earlier,ensuring that the fabric supports the baby’shead at all times.BACK > METHOD IMethod IFor children of all ages andabilities.Begin by placing the middle ofthe fabric across a flat surface(bed, table top, sofa, etc.)351. Lay or sit your baby in themiddle, with the fabric spreadout up to his shoulders anddown to his knees.2. Pull the lower seams up tothe top seams and
3. twist a couple times to makeit snug around baby.4. Repeat on the other side. 5. Pull the two bands togetheraround the baby.6. Take the two bands in onehand.7. Pull the fabric tightly throughthe one hand.8. Pick up the baby, supportingit with your opposite hand.9. Swing the baby over oneshoulder, continuing to supportit with your free hand.10. With your free hand underthe baby’s bottom, slide it gentlydown to the middle of yourback.11. Continuing to support thebaby’s bottom, slide your handdown the two bands.12. Pull the bands upward overyour head.13. Take the bands in bothhands14. to proceed with the BackPouch or Back Wrap.
Method IIFor children of all ages andabilities. Choose the startingposition depending on yourbaby’s ability.orStart with a child lying down,sitting, or standing.Begin by placing the middle ofthe fabric across a chair.1a. For a child who can not sitalone.1b. For a child who can sitalone.1c. For a child who can standalone.2. Sit the baby in the middleof the fabric, with it spread outfrom shoulders to knees.3. Sit down in front of the babyand pull one band up underyour arm.4. Take both bands in onehand,5. and place the other hand underthe baby’s bottom.BACK > METHOD II, III, IV376 . Supporting your baby withyour hand, stand up and leanforward.7. Continue to support babywhile you bounce him up higheron your back.8. Take bands in both handsto proceed with Back Pouch orBack Wrap.
Method IIIFor a baby who can sit up onhis own1. Start with your baby on yourhip with the middle of the fabricup around his shoulders andunder his knees.2. Continuing to support yourbaby, move your arm in front ofhim.3. Slide him onto the middle ofyour back.4. Continue to support babywhile you bounce him up higheron your back.5. Take bands in both handsto proceed with Back Pouch orBack Wrap.Method IVFor a child who will hold onby himself1. A child who is used to beingcarried can simply be placed onyour back.2. He will hold onto to you asyou wrap the scarf around him.3. Make sure the fabric is tuckedup under his bottom beforecontinuing with Back Pouch orBack Wrap.
BACK > BACK POUCHThis is a quick and easy way to tie your baby onyour back. It is important to pull the seams tightto prevent the pouch from sliding out from underthe baby’s bottom.1. Choose from methods I-IV toplace baby on your back.2. Take the two bands and placethem over your shoulders.3. Block one band between yourknees and pull on seams of oppositeband to make it snug.BACK > BACK POUCH394. Repeat with the oppositeband.5. Be sure to pull the seam underyour baby’s bottom verytight so it does not slip up.6. While blocking one bandbetween your knees, twist theother band tightly.7. Switch bands and twist thesecond one in the same manner.
or8. Holding both bands in yourhands,9a. Pass the bands under yourarms OR9b. tie them once high on yourchest (above your breasts for awoman).10. Standing up, wrap thebands around your back goingOVER the baby’s legs.or11. Cross the bands under thebaby’s bottom12. and wrap them UNDER thebaby’s legs.13.a Bring the bands aroundfront and tie in a square knot.13.b OR wrap around your hipsand tie a square knot behindyou.TIPTIP!The pouch the baby is sitting inmust be pulled tight to preventit from slipping up under thebaby’s arms. As long as yourbaby’s arms are over the band,he will not fall out. This is calledthe Tibetan method of carrying.Make sure the fabric is spreadacross the baby’s bottom out toits knees.Spread open the bands acrossyour shoulders if you choose.
BACK > BACK WRAPThe wrap takes more time to tie than the pouch,but it provides a lot of support. There are 3 waysto tie the bands across your chest. We will demonstratethe simple cross method since it is the mostdifficult to adjust correctly.3 ways of tying the bands across your chest1. Choose from methods I-IV toplace baby on your back.2.a Tie the fabric once tightlyhigh on your chest. (above thebreasts for women)2.b Wrap the bands up and overyour shoulders like a backpack.2.c Cross the bands across yourchest without tying a knot. Wewill demonstrate this method.BACK > BACK WRAP413. Block one band between yourknees to hold it tight.4. Take one band and place itacross your shoulder. Use yourarm to spread open the fabric.5. Reach behind you and grabthe inner seam of the band.6. Grab the outer seam with yourother hand, pull on both seamsto make the band tight and crossit over your baby’s back.
7. Cross under the baby’s legand bring around front.8. Block this band between yourknees and take the other bandin your hand.9. Place it on your free shoulderand spread open with yourarm.10. Pull on the inner seam atyour neck and below baby’s bottom.Adjust so that it is tight andlies flat across baby’s back.11. Take outer seam in otherhand and pull entire bandtight.12. Cross under baby’s leg andbring around front.13. Take bands in both hands,pull tightly, and stand upstraight.14. Wrap around your hips andtie a flat knot in frontYESNO15. or in back. Spread the bands evenly across Not too close to your neck.your shoulders.
TIP TIP TIPBe sure the fabric is spread outto the baby’s knees to fully supportits base.Baby can leave arms inor pull arms out.TO REMOVE BABYFROM YOUR BACK1. Leaning forward, untie theknot, yet pull tightly on fabric tosupport baby.2. Take both bands in onehand.3. Support baby’s bottom withother hand.BACK > BACK WRAP434. While continuing to supportthe baby, loosen the fabricenough to slide him to yourhip.5. Move your arm behind thebaby.6. You can also use your hip orleg to help support the baby.7. Let go of the fabric and holdyour baby!
TWINSTaking care of twins can be more than twice the challenge of justone baby. All the more reason to use a baby carrier to make lifeeasier. Most parents of twins will buy two carriers so that eachparent can carry one baby. When alone, however, you may wantto try some of the positions below. Do not feel bad, however, ifyou do not carry your babies together like this for long periodsof time. We recognize that carrying two children is very heavy!Especially for a mother who has already carried her twins for ninemonths in her womb and her pelvis and abdominal muscles mayneed more time to regain strength.WRAP CROSS I CROSS ON HIPS CROSS ON FRONT& BACKFor more details and tips, refer back to the individual tying methodsections for each position.WRAP CROSS I1. Begin as you would for theWrapped Cross I (page 10), butleave extra space to place twobabies.2. Place the first baby into bandslightly off center. Support thebaby’s bottom while simultaneouslyholding the band of fabricwith one hand.3. Place the second baby intothe band.4. Make sure the fabric is pulledup over the babies’ shoulders.5. Supporting both babies andone band of fabric with onearm, pull on the inner seam offree band to adjust the fabric atthe babies’ shoulders.6. Pull on the outer seam of freeband to adjust fabric under babies’feet.
7. Supporting both babies andtightened band with oppositearm, now adjust the inner seamof other band.8. Pull on outer seam to adjustfabric under babies’ feet.9. While pulling the bands tightly,cross bands under babies’bottoms and10. wrap around your hips beforetying a square knot.CROSSwith babies on hips11. Spread open the bands toprovide extra support for thebabies.TWINS > CROSS451. Begin with the same tyingmethod as for the Cross (page18), but leave more slack in thebands for the two babies.2. Sit the first baby in the innerband on your hip.3. To adjust the tension, takethe inner seam next to yourneck4. and pull it out across yourshoulder, thus twisting theband once.
5. Now take the second babyand sit her into the oppositeband on your free hip.6. Pull the fabric up to the baby’sshoulders.7. Adjust tension in secondband just as the first, by foldingthe inner seam outwards.8. Babies should sit comfortablyon your hips.CROSSwith babiesin front & back9. The bands should be evenlyspread across your shouldersand will be twisted once on yourback.1. Using the position of theCross, have someone placeyour baby on your back. Makesure to leave the cross in frontloose enough to place a babyinside.2. Place the second baby into thecross in front of you following thesame method on page 20.3. The baby should be seatedand supported by the two bandsspread across her back.4. The babies’ weight should bebalanced out across your frontand back making this a fun andeasy way to carry twins.
OTHER BABYLONIA PRODUCTSTRI•COTTITRICOT•SLENBB•SLINGBB•BACKPACKTHANK YOU!!If your baby could talk, he would thank you for buying a sling. But since he probably cannot talk yet,we’re happy to thank you on his behalf as well as ours! We sincerely hope you will enjoy your BB•SLENand get many years of use out of it.We have done our best to provide you with a detailed manual full of helpfultips on carrying your baby. If you still have questions after readingthrough it carefully, we suggest you try to find someone who can helpyou in person. Look for midwife and breastfeeding organizations inyour neighborhood. You may even find one of the growing number ofbaby carrying organizations who conduct regular workshopsto help you learn how. A search for ‘baby carriers’ onthe internet will bring up a wealth of information.We are always interested to know how peoplelike our carriers. We would love to hear yourstories and see your photos. Send them tobabycarriers@babylonia.be
BB•SLEN > USER MANUALIT’S A PIECE OF CAKE!Carrying your baby undeniably has its advantages for both youand your baby. But who can teach you how? Babylonia hascreated a very special manual for the BB•SLEN – a long wovenscarf. The Introduction and Frequently Asked Questionssections will provide you with information on the benefits ofcarrying your baby and answer all those questions you havewondered about. The How to Choose a Position section providesyou with a unique chart helping you choose a positionthat meets both the physical ability of your baby and your ownactivity. The Getting Started section provides you with someessential tips and how to tie knots. Then each position is describedwith detailed, step-by-step photographs demonstratingthe tying method from beginning to end and with lots ofhelpful tips included along the way. You will be hard pressed tofind a more complete guide on how to use your long woven scarf!What makes the BB•SLEN special?BB•SLEN by Babylonia is a high quality sling made with nontoxicdyes. It is specially woven to wrap around the curves ofthe baby and the wearer while remaining strong and supportiveto distribute the weight evenly.Babylonia strives to offer you the highest quality carrier at anaffordable price. We only work with organizations that ensurethe workers are paid appropriate wages and have suitableworking conditions as well as much more. Read more aboutthis on our website: www.babylonia.beHow should I care for my BB•SLEN?To keep your BB•SLEN in optimal condition, we recommendwashing it in 40 degree water and hang to dry.Which size scarf should I buy?The BB•SLEN is available in three lengths: 2m60, 4m90, and5m60.The 2m60 is a short scarf for wearing the baby in a front, hip,or back carry positions. It is quick to put on and off and comeswith a separate manual.The 4m90 and 5m60 are also intended for front, hip and backpositions yet provide a larger choice of tying methods. Theyprovide more support across the shoulders, back and aroundthe hips. Some people like to tie the fabric an extra time aroundtheir hips to distribute the weight better, providing more supportfor an extended carrying time. We recommend the4m90 small framed people or no extra support around hips5m60 larger framed people or extra support around hipsIf two people of different stature plan to use the same scarf, werecommend choosing the larger size.We have done our best to provide you with detailed instructions on how to useyour BB•SLEN. You are responsible for following the instructions and usingyour carrier properly. Use common sense when carrying your baby. An uncooperativechild can climb out of a scarf. Always keep hands available to protectthe baby from any possible danger. Babylonia is not responsible for injuries orloss of life incurred while using this product.www.babylonia.beBB•SLENuser’s manualfor a long woven scarfWritten by Erin Meyer for Babylonia