SB 15/230 - Harman Kardon
SB 15/230 - Harman Kardon
SB 15/230 - Harman Kardon
- No tags were found...

Create successful ePaper yourself
Turn your PDF publications into a flip-book with our unique Google optimized e-Paper software.
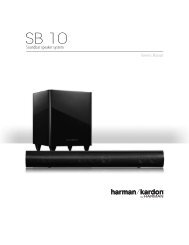
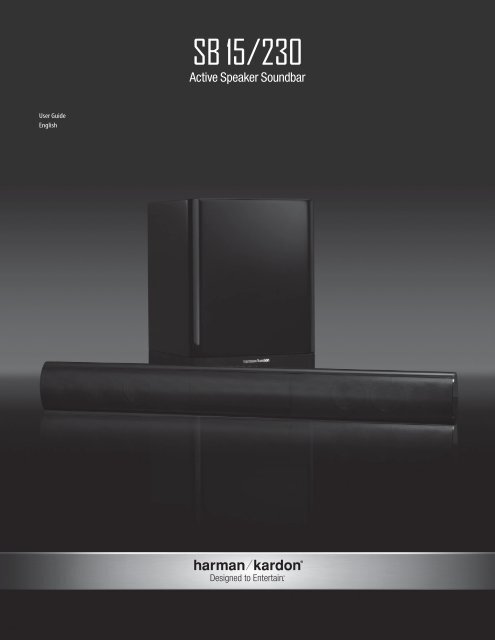
<strong>SB</strong> <strong>15</strong>/<strong>230</strong>Active Speaker SoundbarUser GuideEnglishDesigned to Entertain.
<strong>SB</strong> <strong>15</strong>/<strong>230</strong> Soundbar Home Theater Speaker System Owner’s ManualTable of ContentsIntroduction .................................................................................................. 3Description and Features ................................................................................. 3Included ....................................................................................................... 4Soundbar Top-Panel Controls. . . . . . . . . . . . . . . . . . . . . . . . . . . . . . . . . . . . . . . . . . . . . . . . . . . . . . . . . . . . . . . . . . . . . . . . . . . 4Soundbar Rear-Panel Controls and Connections .................................................. 4Subwoofer Rear-Panel Controls ........................................................................ 5Speaker Placement......................................................................................... 6Placing the Soundbar on a Table. ................................................................. 6Wall-Mounting the Soundbar. ..................................................................... 6Placing the Subwoofer. . . . . . . . . . . . . . . . . . . . . . . . . . . . . . . . . . . . . . . . . . . . . . . . . . . . . . . . . . . . . . . . . . . . . . . . . . . . . . . . . 6Connections. . . . . . . . . . . . . . . . . . . . . . . . . . . . . . . . . . . . . . . . . . . . . . . . . . . . . . . . . . . . . . . . . . . . . . . . . . . . . . . . . . . . . . . . . . . . . . . . . . 7Source Connections..................................................................................... 7Power Connections...................................................................................... 7Operation...................................................................................................... 8Turning the Soundbar On and Off ................................................................. 8Turning the Subwoofer On and Off. .............................................................. 8Adjusting the System’s Volume..................................................................... 8Muting the System...................................................................................... 8Soundbar Surround Mode Button................................................................. 8Subwoofer Volume Knob. . . . . . . . . . . . . . . . . . . . . . . . . . . . . . . . . . . . . . . . . . . . . . . . . . . . . . . . . . . . . . . . . . . . . . . . . . . . . . 9Soundbar Trim Switch. ................................................................................ 9Wireless Code Switches. .............................................................................. 9Subwoofer Crossover Knob. ......................................................................... 9Subwoofer Phase Switch. ............................................................................ 9Programming the Soundbar to Respond to Your TV Remote .................................. 10Troubleshooting............................................................................................. 11Specifications ................................................................................................ 12Important Safety Instructions1. Read these instructions.2. Keep these instructions.3. Heed all warnings.4. Follow all instructions.5. Do not use this apparatus near water.6. Clean only with a dry cloth.7. Do not block any ventilation openings. Install in accordance with the manufacturer’s instructions.8. Do not install near any heat sources such as radiators, heat registers, stoves or other apparatus(including amplifiers) that produce heat.9. Do not defeat the safety purpose of the polarized or grounding-type plug. A polarized plug has twoblades with one wider than the other. A grounding-type plug has two blades and a third groundingprong. The wide blade or the third prong is provided for your safety. If the provided plug does not fitinto your outlet, consult an electrician for replacement of the obsolete outlet.10. Protect the power cord from being walked on or pinched, particularly at plugs, conveniencereceptacles and the point where they exit from the apparatus.11. Only use attachments/accessories specified by the manufacturer.12. Use only with the cart, stand, tripod, bracket or table specified by the manufacturer orsold with the apparatus. When a cart is used, use caution when moving the cart/apparatuscombination to avoid injury from tip-over.13. Unplug this apparatus during lightning storms or when unused for long periods of time.14. Refer all servicing to qualified service personnel. Servicing is required when the apparatus has beendamaged in any way, such as power supply cord or plug is damaged, liquid has been spilled or objectshave fallen into the apparatus, the apparatus has been exposed to rain or moisture, does not operatenormally, or has been dropped.<strong>15</strong>. Do not expose this apparatus to dripping or splashing and ensure that no objects filled with liquids,such as vases, are placed on the apparatus.16. To completely disconnect this apparatus from the AC Mains, disconnect the power supply cord plugfrom the AC receptacle.17. The mains plug of the power supply cord shall remain readily operable.18. Do not expose batteries to excessive heat such as sunshine, fire or the like.THE LIGHTNING FLASH WITH AN ARROWHEAD SYMBOL,WITHIN AN EQUILATERAL TRIANGLE, IS INTENDED TO ALERTTHE USER TO THE PRESENCE OF UNINSULATED “DANGEROUSVOLTAGE” WITHIN THE PRODUCT’S ENCLOSURE THAT MAYBEOF SUFFICIENT MAGNITUDE TO CONSTITUTEA RISK OF ELECTRICSHOCK TO PERSONS.CAUTIONRISK OF ELECTRIC SHOCKDO NOT OPENWARNING: TO REDUCE THE RISK OFFIRE OR ELECTRIC SHOCK, DO NOTEXPOSE THIS APPARATUS TO RAINOR MOISTURE.THE EXCLAMATION POINT WITHIN AN EQUILA-TERALTRIANGLE IS INTENDED TO ALERT THE USERTO THE PRESENCEOF IMPORTANT OPERATING AND MAINTENANCE (SERVICING)INSTRUCTIONS IN THE LITERATURE ACCOMPANYING THEPRODUCT.SEE MARKING ON BACK OF PRODUCT.2
<strong>Harman</strong> <strong>Kardon</strong>® <strong>SB</strong> <strong>15</strong>/<strong>230</strong>IntroductionThank you for purchasing the <strong>Harman</strong> <strong>Kardon</strong>® <strong>SB</strong> <strong>15</strong>/<strong>230</strong> speaker system, with whichyou’re about to begin many years of listening enjoyment. The <strong>SB</strong> <strong>15</strong>/<strong>230</strong> has beencustom-designed to provide the excitement and power of the cinema experience inyour own living room.While sophisticated electronics and state-of-the-art speaker components are hard atwork within the <strong>SB</strong> <strong>15</strong>/<strong>230</strong>, hookup and operation are simple.To obtain maximum enjoyment from your new soundbar speaker system, we urgeyou to take a few minutes to read through this manual. This will help ensure thatthe connections you make are correct. In addition, a few minutes spent learning thefunctions of the various controls will enable you to take advantage of all the powerand refinement the <strong>SB</strong> <strong>15</strong>/<strong>230</strong> is able to deliver.If you have any questions about this product, its installation or its operation, pleasecontact your dealer, the best local source of information.IncludedOne <strong>SB</strong> <strong>15</strong>CNTR soundbar speakerOne <strong>SB</strong> <strong>15</strong>SUB 10-inch (250mm) 100-watt wireless subwooferENGLISHDescription and FeaturesThe <strong>SB</strong> <strong>15</strong>/<strong>230</strong> is a complete home theater speaker system that includes:•• A video-shielded stereo soundbar speaker (the <strong>SB</strong> <strong>15</strong>CNTR) with two-way dualdriverleft and right speakers and built-in 25-watt x 2 stereo amplifier•• A 10-inch (250mm), 100-watt wireless powered subwoofer (the <strong>SB</strong><strong>15</strong>SUB)•• Wall-mount brackets for the soundbar•• A 6.5-foot (2m) stereo audio cable for connecting the system directly to your TV’saudio output.The <strong>SB</strong> <strong>15</strong>CNTR soundbar contains the system’s left and right speakers and stereoamplifiers, and features digital signal processing with virtual 3D surround circuitrythat creates a complete surround-sound experience without any extra speakers orwires. You can set the soundbar on a table in front of your TV, and the system includeshardware that makes it easy to mount the soundbar on the wall along with yourflat-panel TV. You can program the soundbar to respond to your TV remote’s volume,power and source commands.The <strong>SB</strong><strong>15</strong>SUB subwoofer receives its signal from the <strong>SB</strong> <strong>15</strong>CTR soundbar via wirelesstechnology, so you can place it anywhere in your room without having to run anywires. Its 10-inch (250mm) woofer and built-in 100-watt amplifier deliver a movie’simpact and excitement. Other conveniences include a volume control, a phase switchfor fine-tuning bass response to suit your listening environment, and an efficientswitching system that senses the presence of an audio signal and automaticallyswitches the subwoofer on.<strong>Harman</strong> <strong>Kardon</strong> invented the high-fidelity receiver more than 50 years ago. Withstate-of-the-art features and time-honored circuit designs, the <strong>SB</strong> <strong>15</strong>/<strong>230</strong> will turnyour flat-screen TV into a fun and exciting home theater.Two wall-mount brackets for the <strong>SB</strong> <strong>15</strong>CNTR soundbarOne 24V DC power supply and AC power cord for the <strong>SB</strong> <strong>15</strong>CNTR speakerOne 6.5-foot (2m) stereo audio cableImportantIf anything is missing, or if any part of your <strong>SB</strong> <strong>15</strong>/<strong>230</strong> system fails to operateproperly, contact your dealer immediately.3
Soundbar Top-Panel ControlsPowerButtonPowerIndicatorSurroundModeButtonSurroundModeIndicatorVolumeUp/DownButtonsSourceSelectorButtonSourceIndicatorPower Button: When the soundbar is in the Standby mode (the Power Indicator isamber), press this button to turn the <strong>SB</strong> <strong>15</strong>/<strong>230</strong> system On. (The Power Indicatorturns blue.) NOTE: When the soundbar is in the Standby mode, it will automaticallyturn On whenever it detects an audio signal at the Source 1 (analog) inputs.When the <strong>SB</strong> <strong>15</strong>/<strong>230</strong> system is On:•• Momentarily press the Power button to mute the <strong>SB</strong> <strong>15</strong>/<strong>230</strong> system. (The PowerIndicator flashes blue.)•• Hold down the Power button for three seconds to put the soundbar in the Standbymode. (The Power Indicator turns amber.) NOTE: The subwoofer will remain on forapproximately <strong>15</strong> minutes after the audio signal ceases, then will automaticallygo into the Standby mode.Surround Mode Button: This button turns the <strong>SB</strong> <strong>15</strong>/<strong>230</strong> system’s 3D Surroundprocessing On and Off. The Surround Mode Indicator turns blue when 3D Surroundis active, and turns white when 3D Surround is not active (normal stereo sound). SeeSoundbar Surround Mode Button, on page 8, for more information.Volume Up/Down Buttons: Press the ( – ) button to reduce the volume; press the( + ) button to increase the volume.Source Selector Button: This button switches between the sources connectedto the Source 1 (analog) and Source 2 (digital) inputs. When Source 1 is active, theSource Indicator turns white; when Source 2 is active, the Source Indicator turnsblue.Soundbar Rear-Panel Controlsand ConnectionsWireless Code Switch: Selects between four different channels for the wirelesssubwoofer signal.IMPORTANT: Be sure to set the subwoofer’s Wireless Code switch to the same channelthat you set the soundbar’s Wireless Code switch. See Wireless Code Switches, onpage 9, for more information.EQ Switch: This switch adjusts the soundbar’s bass for either wall or table mounting.If you’re mounting the soundbar on a wall with the included wall-mount brackets, setthis switch to the Wall position for the most natural-sounding bass performance. Ifyou are placing the soundbar on a table, set the EQ switch to the Table position for themost natural-sounding bass performance.Trim Switch: This switch adjusts the soundbar’s input sensitivity so it will workwith TVs that have different audio signal output levels. See Soundbar Trim Switch, onpage 9, for more information.Source 1 Connection (analog): Use the included stereo audio cable to connect thestereo analog outputs of your TV, DVD player or cable/satellite tuner here.Source 2 Connection (digital): If your TV, DVD player or cable/satellite tuner has acoaxial digital output, you can connect it here.NOTE: If you connect your TV or another component to the soundbar’s Source 1connection, you can connect a different component to the Source 2 connection.Power Connection: Connect the included DC power supply here. See PowerConnections, on page 7, for more information.IMPORTANT: Do not connect the power supply’s AC cord to an AC outlet until you havemade and verified all connections.Power Switch: Set this switch to the On position (press the switch’s white dot) toactivate the soundbar. In normal operation, this switch will be left in the On position.See Turning the Soundbar On and Off, on page 8, for more information.EQSwitchTrimSwitchSource 2ConnectionPowerSwitchWireless CodeSwitchSource 1ConnectionPowerConnection4
Subwoofer Rear-Panel ControlsENGLISHCrossoverKnobCROSSOVERVOLUMEVolumeKnobMINMAXPhaseSwitchPHASE0180WirelessCodeSwitchONPOWERACFuseOFFPowerCordPowerSwitchCrossover Knob: This knob adjusts the subwoofer’s crossover between 50Hz and<strong>15</strong>0Hz.The higher you set the Crossover knob, the higher in frequency the subwooferwill operate and the more its bass will “overlap” that of the soundbar. This adjustmenthelps achieve a smooth transition of bass frequencies between the subwoofer andthe soundbar for a variety of different rooms and subwoofer locations. See SubwooferCrossover Knob, on page 9, for more information.Volume Control: Use this control to balance the subwoofer’s volume with that ofthe soundbar. Turn the knob clockwise to increase the subwoofer’s volume; turn itcounterclockwise to decrease the subwoofer’s volume.Phase Switch: This switch determines whether the subwoofer driver’s pistonlikeaction moves in and out in phase with the speakers in the soundbar. If thesubwoofer were to play out of phase with the soundbar speakers, some of the soundwaves produced by the subwoofer or soundbar could be canceled, reducing bassperformance and sonic impact. This phenomenon depends in part on the relativeplacement of the speakers in the room. See Subwoofer Phase Switch, on page 9, formore information.Wireless Code Switch: Selects between four different channels for the wirelesssubwoofer signal. IMPORTANT: Be sure to set the soundbar’s Wireless Code switch tothe same channel as you set the subwoofer’s Wireless Code switch. See Wireless CodeSwitches, on page 9, for more information.AC Fuse: The <strong>SB</strong> <strong>15</strong>SUB is factory-equipped with a T1AL/250V 1A – 250V AC fuse. Ifthe fuse ever blows:1.2.Unplug the power cord from the wall.Use a screwdriver to remove the blown fuse.3. Replace the fuse with an identical T1AL/250V 1A – 250V AC fuse.CAUTION: FOR CONTINUED PROTECTION AGAINST FIRE, REPLACE THE FUSE ONLY WITHTHE SAME TYPE AND RATING.Power Cord: Plug this cord into an active, unswitched AC outlet. See PowerConnections, on page 7, for more information.Power Switch: Set this switch to the On position to activate the subwoofer.In normal operation, this switch will be left in the On position. See Turning theSubwoofer On and Off, on page 8, for more information.Status Indicator (on top of unit, not shown): Lights blue when the subwoofer'spower switch is in the On position; lights amber when the subwoofer is in Standby;turns off when the subwoofer’s Power switch is in the Off position.5
Subwoofer Volume KnobUse the subwoofer’s Volume knob to balance the bass with the rest of the sound. Playmusic or movies that you are familiar with and adjust the subwoofer’s Volume knobso the bass sounds balanced on both music and films. Listen to several different musicrecordings and film soundtracks that contain strong bass passages and find a settingfor the Volume knob that doesn’t over-emphasize the bass or make it sound weak.Subwoofer Crossover KnobThe subwoofer’s Crossover knob adjusts the subwoofer’s crossover between 50Hz and<strong>15</strong>0Hz. The higher you set the Crossover knob, the higher in frequency the subwooferwill operate and the more its bass will “overlap” that of the soundbar. This adjustmenthelps achieve a smooth transition of bass frequencies between the subwoofer and thesoundbar for a variety of different rooms and subwoofer locations.ENGLISHCROSSOVERCrossoverKnobCROSSOVERVolumeKnobMINVOLUMEMAXMINVOLUMEMAXPHASE0PHASE0180180Once you find a setting for the subwoofer’s Volume knob that balances the bass withthe rest of the sound, you shouldn’t have to change it.Soundbar Trim SwitchThis switch adjusts the soundbar’s audio input sensitivity so it will work with TVsthat have different audio signal output levels. If your TV’s audio signal output is low,the soundbar may not play loud enough. In this case, set the Trim switch to position3 so the soundbar will play louder. If your TV’s audio signal output is high, you mayhear distortion in the soundbar at normal listening volumes, In this case, set the TrimSwitch to position 1 to reduce the distortion and improve the sound.To set the Crossover knob, listen for the smoothness of the bass.If the bass seems too strong at certain frequencies, try a lower Crossover knob setting.If the bass seems too weak at certain frequencies, try a higher Crossover knob setting.Subwoofer Phase SwitchThis switch determines whether the subwoofer’s piston-like action moves in andout in phase with the speakers in the soundbar. If the subwoofer were to play outof phase with the soundbar speakers, some of the sound waves produced by thesoundbar and subwoofer could be canceled out at some frequencies, reducing bassperformance and sonic impact. This phenomenon depends in part on the relativeplacement of all the speakers in the room.CROSSOVERVOLUMEPhaseSwitchPHASEMIN0MAX180Wireless Code SwitchesTrim SwitchIn the unlikely event that there is interference when operating the system, or if youhave more than one <strong>SB</strong> <strong>15</strong>/<strong>230</strong> system in operation, you may change the wirelesschannel at which the system operates. There are four-position Wireless Code switcheson both the soundbar and subwoofer. To change the wireless channel, simply set eachof the switches to one of the other three positions. IMPORTANT: The switches on thesoundbar and the subwoofer must be set to the same position for the wireless systemto work properly.Although there is no absolute correct setting for the Phase switch, in most cases itshould be left in the 0° position. When the subwoofer is properly in phase with thesoundbar speakers, the sound will be clearer and have more impact. This will makepercussive sounds like drums, piano and plucked strings sound more lifelike. The bestway to set the Phase switch is to listen to music that you are familiar with and adjustthe switch so that drums and other percussive sounds have maximum impact.Wireless CodeSwitchSoundbarWireless CodeSwitchSubwooferNOTE: The maximum wireless operating distance between the soundbar andsubwoofer is approximately 50 feet (<strong>15</strong>.3m).9
Programming the Soundbar to Respond to Your TV RemoteYou can program the soundbar so it will respond to your TV remote’s Power, Mute,Volume Up, Volume Down and Source commands. This lets you control your wholehome theater system with a single remote. Before beginning to program thesoundbar, have your TV remote handy. We recommend sitting down in front of thesoundbar. The steps will time-out, so read through the entire procedure before youbegin.To program the power command:1. With the soundbar turned on, hold down the soundbar’s Power and SourceSelector (SRC) buttons together until all the soundbar button indicators flash. Thisenters the learning mode.Hold downboth buttons untilall indicators flash3. Aim the TV remote at the front of the soundbar from about 300mm-900mm(about 12-36 inches) away.TVRemote300mm-900mm12"-36"4. Hold down the TV remote's Power button for one second, then release it. Do thisa total of four (4) times. When the soundbar has learned the power command,its Power Indicator will turn blue, and the Surround Mode and Source SelectorIndicators will flash blue.••If the Power Indicator flashes amber, the procedure failed. Repeat Steps 1 – 4.2.Momentarily press the soundbar’s Power button. It will turn amber.MomentarilypressTo program the source, volume + and volume – commands:Follow Steps 1–4 as above, but in Steps 2 and 4, substitute the soundbar and TVremote’s Source Selector and Volume Up/Down buttons for the Power buttons.To program the mute command:Follow Steps 1-4 as above, but in Step 2, hold down the soundbar's Power button for2-3 seconds. In step 4, substitute the TV remote's Mute button for its Power button.To erase all remote programming:Hold down the soundbar's Surround Mode and Volume Up buttons at the same timefor 2-3 seconds.10
TroubleshootingIf the soundbar does not turn on:•• Check that the soundbar power supply’s AC cord is plugged into a working ACoutlet, and that the power supply is plugged into the soundbar.••Check that the soundbar’s Power switch is in the On position.If the subwoofer does not turn on:••••Check that the subwoofer’s power cord is plugged into a working AC outlet.Check that the subwoofer’s Power switch is in the On position.••Check if the subwoofer’s AC fuse has blown. See Subwoofer Rear-Panel Controls:AC fuse, on page 5, for instructions on checking and changing the fuse.If there is no sound coming from both the soundbar and the subwoofer:••Check that the soundbar is on (the Power Indicator is illuminated blue).•• Check that the cable connecting the TV or other source component to thesoundbar is properly connected at both ends.•• Check that the soundbar’s Source Selector is set to the correct source (theSource Indicator illuminates white for Source 1 – analog, and illuminates bluefor Source 2 – digital), and that the source is playing an audio signal.•• Check that the system is not muted (when the system is muted, the soundbar’sPower Indicator flashes blue). Momentarily press the Power button to un-mutethe system.•• Check that the soundbar’s volume is not turned all the way down (the lowestsetting of the Volume Down button will mute the system).If there is no sound coming from just the subwoofer:•• Check that the Subwoofer Volume Control is not turned all the way down (fullycounterclockwise).•• Check that the Wireless Code switches on the subwoofer and soundbar are bothset to the same setting number.•• Move the subwoofer closer to the soundbar. (The maximum wireless operationdistance is 50 feet (<strong>15</strong>.3m).If the soundbar’s sound is distorted:•• Set the soundbar’s Trim switch to a lower setting.•• Check the source component to see if the distortion is coming from it, and notthe soundbar.If the system’s sound is too quiet, even when the soundbar’s volume isturned all the way up:•• Set the soundbar’s Trim switch to a higher setting.•• If the TV or source component is connected via a variable output, check itsinstructions to be sure that the output is not turned down too low.The bass output is not loud enough:•• Turn up the subwoofer’s Volume knob.•• Move the subwoofer into a corner of the room.•• Move the subwoofer closer to the seating location.The soundbar won’t learn your TV remote’s commands:••Carefully follow steps 1 – 4 of Programming the Soundbar to Respond to Your TVRemote, on page 9.•• Hold the TV remote 12 inches (300mm) in front of the soundbar during thelearning procedure.•• Although the soundbar will learn commands from most TV remotes, there maybe some IR codes that it cannot learn.If you press your TV remote’s Power button and the soundbar turns off whenthe TV turns on (or vice versa):•• Press the Power button on either the soundbar or the TV (but not both) onetime. This will put them back in sync so they will turn on and off together whenyou press the TV remote’s Power button.ENGLISH11
Specifications<strong>SB</strong> <strong>15</strong>/<strong>230</strong> SystemFrequency Response50Hz–20kHz<strong>SB</strong> <strong>15</strong>CNTR SoundbarInput RatingDC 24V, 2.5–2.7AAmplifier Power25 watts x 2TweeterTwo 3/4" domes (one per channel),video-shieldedMidrangeFour 3" drivers (two per channel), videoshieldedDimensions (H x W x D)110mm x 920mm x 89mm(4-5/16" x 36-1/4" x 3-1/2")Weight8 lb (3.6kg)<strong>SB</strong> <strong>15</strong>SUB SubwooferInput rating:AC <strong>230</strong>V, 50Hz, 100WAmplifier Power100 watts RMSWoofer10" cone, vented enclosureDimensions (H x W x D)480mm x 380mm x 380mm(18-7/8" x 13-3/8" x 13-3/8")Weight34 lb (<strong>15</strong>.4kg)<strong>Harman</strong> Consumer Group, Inc.8500 Balboa Boulevard, Northridge, CA 91329 USA516.255.4545 (USA only)www.harmankardon.comMade in China©2009 <strong>Harman</strong> International Industries, Incorporated. All rights reserved.Features, specifications and appearance are subject to change without notice.<strong>Harman</strong> <strong>Kardon</strong> is a trademark of <strong>Harman</strong> International Industries, Incorporated, registered in the United States and/or other countries. Designed to Entertain is atrademark of <strong>Harman</strong> International Industries, Incorporated.Part No. 406-000-06124-E12