LCD TV Models - LG Electronics India
LCD TV Models - LG Electronics India
LCD TV Models - LG Electronics India

You also want an ePaper? Increase the reach of your titles
YUMPU automatically turns print PDFs into web optimized ePapers that Google loves.
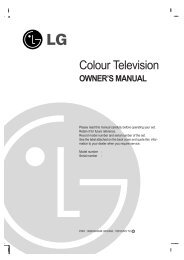
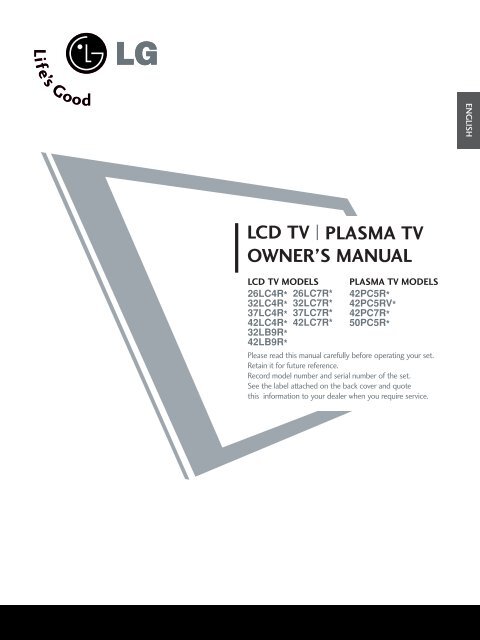
<strong>LCD</strong> <strong>TV</strong> PLASMA <strong>TV</strong><br />
OWNER’S MANUAL<br />
<strong>LCD</strong> <strong>TV</strong> MODELS PLASMA <strong>TV</strong> MODELS<br />
26LC4R* 26LC7R* 42PC5R*<br />
32LC4R* 32LC7R* 42PC5RV*<br />
37LC4R* 37LC7R* 42PC7R*<br />
42LC4R* 42LC7R* 50PC5R*<br />
32LB9R*<br />
42LB9R*<br />
Please read this manual carefully before operating your set.<br />
Retain it for future reference.<br />
Record model number and serial number of the set.<br />
See the label attached on the back cover and quote<br />
this information to your dealer when you require service.<br />
ENGLISH
ACCESSORIES<br />
Ensure that the following accessories are included with your <strong>TV</strong>. If an accessory is missing, please contact the<br />
dealer where you purchased the product.<br />
Owner's<br />
Manual<br />
Owner’s manual<br />
Owner’s Manual Batteries<br />
Polishing Cloth<br />
Polish the screen with the cloth<br />
This feature is not available<br />
for all models.<br />
Plasma <strong>TV</strong> models<br />
2-Wall brackets 2-eye-bolts<br />
<strong>LCD</strong> <strong>TV</strong> models<br />
2- <strong>TV</strong> Brackets<br />
2- Wall Brackets<br />
2-bolts Twister Holder<br />
Arrange the wires<br />
with the twister<br />
holder.<br />
1 2 3<br />
4 5 6<br />
7 8 9<br />
0<br />
TIME HOLD<br />
SIZE<br />
REVEAL<br />
?<br />
POSITION INDEX<br />
VOL<br />
MUTE<br />
FAV<br />
PR<br />
EXIT<br />
OK<br />
LIST Q.VIEW<br />
MENU<br />
TIME HOLD<br />
SIZE<br />
REVEAL<br />
?<br />
1 2 3<br />
4 5 6<br />
7 8 9<br />
0<br />
POSITION INDEX<br />
SIMPLINK<br />
SLEEP<br />
INPUT MODE<br />
<strong>TV</strong> POWER <strong>TV</strong><br />
DVD<br />
RATIO<br />
PIP PR- PIP PR+ PIP INPUT<br />
VOL<br />
MUTE<br />
PIP<br />
INPUT<br />
TEXT I/II<br />
FAV<br />
PR<br />
VCR<br />
EXIT<br />
OK<br />
LIST Q.VIEW<br />
MENU<br />
SIMPLINK<br />
SLEEP<br />
INPUT M<br />
<strong>TV</strong> POWER T<br />
DVD<br />
RATIO<br />
PIP PR- PIP PR+ PIP INPUT<br />
PIP<br />
INPUT<br />
TEXT I/II<br />
Remote Control Power Cord<br />
*Slightly wipe stained spot on the exterior only with the cleansing<br />
cloths for the product exterior if there is stain or fingerprint on<br />
surface of the exterior.<br />
Do not wipe roughly when removing stain. Please be cautious of<br />
that excessive power may cause scratch or discoloration.<br />
or<br />
Cable Management<br />
VCR<br />
26”, 32”, 37” only<br />
4-bolts for stand assembly<br />
Refer to p. 8<br />
32LB9R* only<br />
1-screw for stand fixing<br />
Refer to p. 8<br />
ACCESSORIES<br />
1
CONTENTS<br />
2<br />
CONTENTS<br />
ACCESSORIES.....................................................1<br />
PREPARATION PICTURE CONTROL<br />
Front Panel Controls................................................. 4<br />
Back Panel Information ............................................ 6<br />
Stand Installation....................................................... 8<br />
ATTACHING THE <strong>TV</strong> TO A DESK (Only 32LB9R* model) ........ 8<br />
Attaching the <strong>TV</strong> to a Wall........................................9<br />
Back Cover for Wire Arrangement....................... 10<br />
Desktop Pedestal Installation ............................... 12<br />
Wall Mount: Horizontal installation..................... 13<br />
Antenna Connection............................................... 14<br />
EXTERNAL EQUIPMENT SETUP<br />
HD Receiver Setup .......................................................15<br />
DVD Setup..................................................................... 18<br />
VCR Setup..................................................................... 21<br />
Other A/V Source Setup........................................... 24<br />
External Stereo............................................................. 25<br />
PC Setup.........................................................................26<br />
- Screen Setup for PC Mode ...............................28<br />
WATCHING <strong>TV</strong> / /PROGRAMME PROGRAMME CONTROL<br />
Remote Control Key Functions..................................32<br />
Turning on the <strong>TV</strong>....................................................... 34<br />
Programme Selection ................................................. 34<br />
Volume Adjustment......................................................34<br />
On Screen Menus Selection and Adjustment ......35<br />
Auto Programme Tuning............................................ 36<br />
Manual Programme Tuning ....................................... 37<br />
Fine Tuning .....................................................................38<br />
Assigning a Station Name..........................................39<br />
Programme Edit ........................................................... 40<br />
Favourite Programme .................................................. 41<br />
Calling the Programme Table ................................... 42<br />
Key lock.......................................................................... 43<br />
.................................................................. 44<br />
Watching PIP(Picture-in-Picture) .............................46<br />
Picture Size (Aspect Ratio)Control.........................48<br />
Preset Picture Settings<br />
- Picture Mode-Preset............................................50<br />
- Auto Colour Tone Control(Warm/Medium/Cool) 51<br />
Manual Picture Adjustment<br />
- Picture Mode-User Option................................52<br />
- Colour Tone - User Option...............................53<br />
- Picture Improvement Technology...................54<br />
Demo..................................................................55<br />
Advanced - Cinema......................................................56<br />
Advanced - Black(Darkness) Level...........................57<br />
Picture Reset..................................................................58<br />
Image Sticking Minimization(ISM) Method...........59<br />
Low-Power Picture Mode............................................60<br />
SOUND & LANGUAGE CONTROL<br />
Auto Volume Leveler ....................................................61<br />
Preset Sound Settings - Sound Mode....................62<br />
Sound Setting Adjustment - User Mode ...............63<br />
Balance............................................................................64<br />
<strong>TV</strong> Speakers On/Off Setup .......................................65<br />
I/II<br />
- Stereo/Dual Reception.......................................66<br />
- NICAM Reception ................................................67<br />
- Speaker Sound Output Selection....................67<br />
On-Screen Menu Language Selection ...................... 68
TIME SETTING<br />
Clock Setup....................................................................69<br />
Auto On/Off Timer Setting .......................................70<br />
Sleep Timer Setting......................................................71<br />
Auto Shut-off Setting...................................................72<br />
TELETEXT<br />
Switch On/Off .............................................................73<br />
SIMPLE Text....................................................................73<br />
TOP Text .........................................................................74<br />
FASTEXT .........................................................................74<br />
Special Teletext Functions..........................................75<br />
APPENDIX<br />
Troubleshooting ............................................................76<br />
Maintenance .................................................................78<br />
Product Specifications ................................................79<br />
Programming the Remote Control ........................ 81<br />
CONTENTS<br />
3
PREPARATION<br />
4<br />
PREPARATION<br />
FRONT PANEL CONTROLS<br />
■ This is a simplified representation of the front panel. Here shown may be somewhat different from your <strong>TV</strong>.<br />
■ If your product has a protection film attached, remove the film and then wipe the product with a polishing<br />
cloth.<br />
Plasma <strong>TV</strong> <strong>Models</strong><br />
42/50PC5R*<br />
INPUT<br />
INPUT<br />
MENU<br />
42PC7R*<br />
MENU<br />
OK<br />
OK<br />
POWER Button<br />
INPUT<br />
MENU<br />
INPUT<br />
INPUT<br />
VOL<br />
INPUT Button<br />
OK<br />
MENU<br />
VOL<br />
MENU<br />
PR<br />
MENU Button<br />
INPUT MENU OK<br />
OK<br />
INPUT<br />
OK<br />
OK Button<br />
INPUT Button<br />
POWER Button<br />
VOL<br />
INPUT<br />
PR<br />
VOL<br />
MENU<br />
PR<br />
MENU<br />
VOLUME Buttons<br />
OK<br />
OK<br />
MENU Button<br />
VOL<br />
INPUT MENU OK<br />
Remote Control Sensor<br />
Power/Standby Indicator<br />
VOL • illuminates red in standby PR mode.<br />
VOL<br />
PR<br />
OK PR Button<br />
• illuminates green when the set is switched on.<br />
PROGRAMME Buttons<br />
INPUT MENU OK<br />
VOL<br />
VOL<br />
PR<br />
VOL<br />
PR<br />
PR<br />
VOLUME Buttons<br />
Remote Control Sensor<br />
PR<br />
PROGRAMME Buttons<br />
Power/Standby Indicator<br />
• illuminates red in standby mode.<br />
• illuminates green when the set is<br />
switched on.
<strong>LCD</strong> <strong>TV</strong> <strong>Models</strong><br />
26/32/37/42LC4R*<br />
26/32/37/42LC7R*<br />
32/42LB9R*<br />
Intelligent Eye<br />
Adjusts picture<br />
according to the<br />
surrounding conditions.<br />
Remote Control Sensor<br />
Remote Control<br />
Sensor<br />
R<br />
PR<br />
VOL<br />
OK<br />
MENU<br />
INPUT<br />
/I<br />
Power/Standby Indicator<br />
• illuminates red in standby mode.<br />
• illuminates green when the set is switched on.<br />
PR VOL OK MENU INPUT /I<br />
PROGRAMME Buttons<br />
VOLUME Buttons<br />
OK Button<br />
MENU Button<br />
INPUT Button<br />
POWER Button<br />
PROGRAMME Buttons<br />
VOLUME Buttons<br />
OK Button<br />
MENU Button<br />
INPUT Button<br />
POWER Button<br />
Power/Standby Indicator<br />
• illuminates red in standby mode.<br />
• illuminates green when the set is switched on.<br />
PREPARATION<br />
5
1<br />
2<br />
PREPARATION<br />
HDMI/DVI IN<br />
1<br />
6<br />
PREPARATION<br />
COMPONENT IN<br />
BACK PANEL INFORMATION<br />
■ This is a simplified representation of the back panel. Here shown may be somewhat different from your <strong>TV</strong>.<br />
Plasma <strong>TV</strong> <strong>Models</strong><br />
42/50PC5R*<br />
HDMI IN<br />
2<br />
42PC7R*<br />
1<br />
2<br />
1<br />
2<br />
1<br />
HDMI/DVI IN<br />
1<br />
HDMI/DVI IN<br />
1<br />
RGB IN<br />
HDMI/DVI IN HDMI IN<br />
1 COMPONENT 2 IN<br />
2<br />
COMPONENT VIDEOIN<br />
VIDEO AUDIO<br />
VARIABLE<br />
AUDIO OUT<br />
HDMI/DVI IN<br />
HDMI/DVI IN<br />
1<br />
1<br />
1<br />
2<br />
COMPONENT IN<br />
1<br />
HDMI IN<br />
2<br />
AUDIO<br />
8<br />
RGB IN<br />
AV IN 1 AV OUT<br />
R AUDIO L/MONO VIDEO<br />
VARIABLE AUDIO OUT<br />
2<br />
RGB IN<br />
RGB<br />
AV 1 AUDIO AV 2<br />
(PC)<br />
(RGB/DVI)<br />
VARIABLE ARIABLE AUDIO OUT<br />
AV V IN 1 AV V OUT<br />
R AUDIO L/ L/MONO MONO VIDEO<br />
S-VIDEO<br />
L/MONO AUDIO R<br />
VIDEO<br />
AV IN 3<br />
ANTENNA<br />
IN<br />
AV V IN 2<br />
3 4<br />
5 6<br />
7<br />
COMPONENT IN<br />
HDMI IN<br />
HDMI IN<br />
2<br />
2<br />
COMPONENT IN<br />
HDMI VIDEOIN<br />
2<br />
1<br />
8<br />
RGB IN<br />
VARIABLE AUDIO OUT<br />
RGB<br />
(PC)<br />
AUDIO<br />
(RGB/DVI)<br />
AUDIO RGB IN AV IN 1 AV OUT<br />
VARIABLE ARIABLE AUDIO OUT<br />
2<br />
S-VIDEO<br />
VIDEO L/MONO MONO AUDIO R<br />
AV IN 1 AV OUT<br />
RGB IN AV V IN 1 AV V OUT<br />
R AUDIO L/MONO VIDEO<br />
R AUDIO L/MONO VIDEO<br />
R AUDIO L/ L/MONO MONO VIDEO<br />
AV IN 2<br />
S-VIDEO<br />
S-VIDEO<br />
VIDEO L/MONO AUDIO R<br />
VIDEO L/ L/MONO MONO AUDIO AUDIO R<br />
S-VIDEO<br />
AV V IN 2<br />
3 VARIABLE AUDIO OUT 4<br />
5 6<br />
7<br />
S-VIDEO<br />
VIDEO L/MONO AUDIO R<br />
ANTENNA<br />
IN<br />
AV IN 2<br />
ANTENNA<br />
IN<br />
S-Video Input<br />
Connect S-Video out from an<br />
S-VIDEO device.<br />
Audio/Video Input<br />
Connect audio/video output<br />
from an external device to<br />
these jacks.<br />
S-Video Input<br />
Connect S-Video out from an<br />
S-VIDEO device.<br />
Audio/Video Input<br />
Connect audio/video output<br />
from an external device to<br />
these jacks.
I IN<br />
<strong>LCD</strong> <strong>TV</strong> <strong>Models</strong><br />
1<br />
2<br />
3<br />
4<br />
HDMI/DVI IN<br />
1<br />
RGB 1 IN AV IN 1 AV OUT<br />
VARIABLE<br />
AUDIO OUT<br />
2<br />
HDMI/DVI IN<br />
1<br />
COMPONENT IN<br />
HDMI IN<br />
2<br />
8<br />
R AUDIO L/MONO VIDEO<br />
RGB IN<br />
VARIABLE<br />
AUDIO OUT 1<br />
HDMI Input<br />
Connect a HDMI signal to HDMI IN.<br />
Or DVI(VIDEO)signal to HDMI/DVI port with DVI<br />
to HDMI cable.<br />
RGB/Audio Input<br />
Connect the monitor output from a PC/D<strong>TV</strong>(only<br />
Audio) to the appropriate input port.<br />
Component Input<br />
Connect a component video/audio device to<br />
these jacks.<br />
HDMI IN<br />
Variable Audio Output<br />
Connect an external amplifier or add a subwoofer<br />
to your surround sound system.<br />
2<br />
1<br />
AV IN 1 AV OUT<br />
R AUDIO L/MONO VIDEO<br />
VIDEO<br />
AUDIO<br />
COMPONENT IN<br />
2<br />
S-VIDEO<br />
VIDEO L/MONO AUDIO R<br />
VARIABLE ARIABLE<br />
AUDIO OUT<br />
5<br />
6<br />
7<br />
8<br />
S-VIDEO<br />
VIDEO L/ L/MONO MONO AUDIO R<br />
AV IN 2<br />
S-VIDEO<br />
AV V IN 2<br />
RGB IN<br />
RGB(PC)<br />
2<br />
AUDIO<br />
(RGB/DVI)<br />
S-Video Input<br />
Connect S-Video out from an<br />
S-VIDEO device.<br />
Audio/Video Input<br />
Connect audio/video output<br />
from an external device to<br />
these jacks.<br />
AV V IN 1 AV V OUT<br />
R AUDIO L/ L/MONO MONO VIDEO<br />
ANTENNA<br />
IN<br />
3 4<br />
5 6<br />
7<br />
Audio/Video Input (AV IN 1)<br />
Connect audio/video output from an external<br />
device to these jacks.<br />
AV Output<br />
Connect second <strong>TV</strong> or monitor to the AV OUT<br />
socket on the set.<br />
Antenna Input<br />
Connect over-the-air signals to this jack.<br />
Power Cord Socket<br />
This <strong>TV</strong> operates on an AC power. The voltage is<br />
indicated on the Specifications page. Never<br />
attempt to operate the <strong>TV</strong> on DC power.<br />
S-VIDEO<br />
VIDEO L/MONO AUDIO R<br />
AV IN 2<br />
PREPARATION<br />
7
PREPARATION<br />
8<br />
PREPARATION<br />
STAND INSTALLATION (Only 26, 32,37 inch <strong>LCD</strong> <strong>TV</strong> models)<br />
1<br />
2<br />
3<br />
Carefully place the product screen side down on<br />
a cushioned surface that will protect product and<br />
screen from damage.<br />
Assemble the product stand with the product as<br />
shown.<br />
Install the 4 bolts securely, in the back of the<br />
product in the holes provided.<br />
ATTACHING THE <strong>TV</strong> TO A DESK (Only 32LB9R* model)<br />
If you wish to attach the <strong>TV</strong> to a desk, it must be securely fastened to the desk using a metal screw (as shown<br />
below). Failure to securely attach the <strong>TV</strong> may result in the <strong>TV</strong> falling; which may cause damage to the <strong>TV</strong> and<br />
serious personal injury.<br />
1-Screw<br />
Stand<br />
Desk
ATTACHING THE <strong>TV</strong> TO A WALL<br />
■ Set it up close to the wall so the product doesn’t fall over when it is pushed backwards.<br />
■ The instructions shown below is a safer way to set up the product, which is to fix it on the wall so the<br />
product doesn’t fall over when it is pulled in the forward direction. It will prevent the product from<br />
falling for-ward and hurting people. It will also prevent the product from damage caused by fall. Please<br />
make sure that children don’t climb on or hang from the product.<br />
Plasma <strong>TV</strong> models <strong>LCD</strong> <strong>TV</strong> models<br />
1<br />
2<br />
!<br />
NOTE<br />
1<br />
2<br />
Use the eye-bolts or <strong>TV</strong> brackets/bolts to fix the product to the wall as shown in the picture.<br />
(If your product has the bolts in the eye-bolts position before inserting the eye-bolts, loosen the bolts.)<br />
* Insert the eye-bolts or <strong>TV</strong> brackets/bolts and tighten them securely in the upper holes.<br />
Secure the wall brackets with the bolts (not provided as parts of the product, must purchase separately) on<br />
the wall. Match the height of the bracket that is mounted on the wall.<br />
3<br />
3 Use a sturdy rope (not provided as parts of the product, must purchase separately) to tie the<br />
product. It is safer to tie the rope so it becomes horizontal between the wall and the product.<br />
G When moving the product to another place undo the ropes first.<br />
G Use a product holder or a cabinet that is big and strong enough for the size and weight of the product.<br />
G To use the product safely make sure that the height of the bracket that is mounted on the wall is same<br />
as that of the product.<br />
1<br />
2<br />
PREPARATION<br />
9
PREPARATION<br />
10<br />
PREPARATION<br />
BACK COVER FOR WIRE ARRANGEMENT<br />
Plasma <strong>TV</strong> models<br />
■ These models have two cable arrangement methods according to the stand type.<br />
Stand type 1<br />
Arrange the cables as shown picture.<br />
Stand type 2<br />
1<br />
2<br />
Hold the CABLE MANAGEMENT with hands and push it as shown.<br />
Connect the cables as necessary.<br />
CABLE MANAGEMENT<br />
To connect an additional equipment, see the<br />
External equipment Connections section.<br />
3<br />
Reinstall the CABLE MANAGEMENT as shown.
<strong>LCD</strong> <strong>TV</strong> models<br />
1<br />
2<br />
3<br />
Connect the cables as necessary.<br />
To connect an additional equipment,<br />
see the External<br />
equipment Connections<br />
section.<br />
Install the CABLE MAN-<br />
AGEMENT as shown.<br />
Bundle the cables using the<br />
supplied twister holder.<br />
How to remove the cable management<br />
Hold the CABLE MANAGEMENT with both hands and pull it upward.<br />
!<br />
NOTE<br />
G Do not hold the CABLE MANAGEMENT when moving the product.<br />
- If the product is dropped, you may be injured or the product may be broken.<br />
or<br />
or<br />
or<br />
CABLE MANAGEMENT<br />
(Insert it as pushing the loops on the<br />
both sides of the cable management.)<br />
or<br />
TWIST HOLDER<br />
(Pull it out as holding the loops on the both<br />
sides of the cable management.)<br />
PREPARATION<br />
11
PREPARATION<br />
12<br />
PREPARATION<br />
■ The <strong>TV</strong> can be installed in various ways such as on a wall, or on a desktop etc.<br />
■ The <strong>TV</strong> is designed to be mounted horizontally.<br />
DESKTOP PEDESTAL INSTALLATION<br />
For proper ventilation, allow a clearance of 4inches on each side from the wall.<br />
4 inches<br />
4 inches<br />
Short-circuit Breaker<br />
4 inches<br />
Power Supply<br />
GROUNDING<br />
Ensure that you connect the earth ground wire to prevent possible electric shock. If grounding methods<br />
are not possible, have a qualified electrician install a separate circuit breaker.<br />
Do not try to ground the unit by connecting it to telephone wires, lightening rods, or gas pipes.<br />
4 inches
WALL MOUNT: HORIZONTAL INSTALLATION<br />
For proper ventilation, allow a clearance of 4" on each side and from the wall. Detailed installation instructions<br />
are available from your dealer, see the optional Tilt Wall Mounting Bracket Installation and Setup Guide.<br />
4 inches<br />
4 inches<br />
4 inches<br />
4 inches<br />
4 inches<br />
PREPARATION<br />
13
PREPARATION<br />
14<br />
PREPARATION<br />
■ It is recommended that 42PC5RH / 50PC5RH / 42PC7RVH model only be used at an altitude of less than<br />
6561 feet (2000m) to get the best quality picture and sound.<br />
■ To prevent the equipment damage, never plug in any power cords until you have finished connecting all equipment.<br />
ANTENNA CONNECTION<br />
■ For optimum picture quality, adjust antenna direction.<br />
■ An antenna cable and converter are not supplied.<br />
Wall<br />
Antenna<br />
Socket<br />
Outdoor<br />
Antenna<br />
Antenna<br />
Multi-family Dwellings/Apartments<br />
(Connect to wall antenna socket)<br />
1<br />
2<br />
HDMI/DVI IN<br />
1<br />
HDMI IN<br />
2<br />
RGB IN<br />
Single-family Dwellings /Houses<br />
(Connect to wall jack for outdoor antenna)<br />
1<br />
2<br />
UHF<br />
HDMI/DVI IN<br />
VHF<br />
1<br />
COMPONENT IN<br />
HDMI IN<br />
2<br />
Signal<br />
Amplifier<br />
RF Coaxial Wire (75 ohm)<br />
VARIABLE<br />
AUDIO OUT<br />
RGB IN<br />
HDMI/DVI IN HDMI IN<br />
1 2<br />
COMPONENT IN<br />
RGB IN<br />
VIDEO AUDIO<br />
VARIABLE AUDIO OUT<br />
AV IN 1 AV OUT<br />
R AUDIO L/MONO VIDEO<br />
AV IN 1 AV OUT<br />
R AUDIO L/MONO VIDEO<br />
S-VIDEO<br />
L/MONO AUDIO R<br />
VIDEO<br />
AV IN 3<br />
HDMI/DVI IN HDMI IN<br />
AV 1 AV 2 1 2<br />
ANTENNA<br />
IN<br />
VIDEO<br />
AUDIO<br />
COMPONENT IN<br />
■ In poor signal areas,to get better picture quality, install a VARIABLE signal amplifier to the antenna as shown above.<br />
COMPONENT IN<br />
AUDIO OUT<br />
■ If signal needs to be split for two <strong>TV</strong>s,use an antenna signal splitter for connection.<br />
ANTENNA<br />
IN<br />
ANTENNA<br />
IN<br />
RGB IN<br />
VARIABLE<br />
AUDIO OUT<br />
S-VIDEO<br />
VIDEO L/MONO AUDIO R<br />
AV 1 AV 2<br />
S-VIDEO<br />
VIDEO L/MONO AUDIO R<br />
AV IN 2<br />
ANTENNA<br />
IN<br />
AV IN 2<br />
S-VIDEO<br />
VIDEO L/MONO AUDIO R<br />
AV IN 3
EXTERNAL EQUIPMENT SETUP<br />
■ To prevent the equipment damage, never plug in any power cords until you have finished connecting all equipment.<br />
■ This part of EXTERNAL EQUIPMENT SETUP mainly use pictures for the <strong>LCD</strong> <strong>TV</strong> models.<br />
HD RECEIVER SETUP<br />
When connecting with a component cable<br />
1<br />
2<br />
3<br />
4<br />
Connect the video outputs (Y, PB, PR) of the digital set<br />
top box to the COMPONENT IN VIDEO jacks on the<br />
set.<br />
Connect the audio output of the digital set-top box to<br />
the COMPONENT IN AUDIO jacks on the set.<br />
Turn on the digital set-top box.<br />
(Refer to the owner’s manual for the digital set-top box.)<br />
Select Component1 input source with using the<br />
INPUT button on the remote control.<br />
If connected to COMPONENT IN2, select<br />
Component2 input source.<br />
Signal<br />
480i/576i<br />
480p/576p<br />
720p/1080i<br />
1080p<br />
Component<br />
Yes<br />
Yes<br />
Yes<br />
No<br />
HDMI1/2<br />
No<br />
Yes<br />
1<br />
2<br />
HDMI DVI IN<br />
1 2<br />
HDMI IN<br />
VIDEO<br />
AUDIO<br />
COMPONENT IN<br />
Yes<br />
HDMI HDMI/DVI DVI IN IN HDMI IN<br />
Yes<br />
1<br />
(except VGA <strong>Models</strong>)<br />
2<br />
EXTERNAL EQUIPMENT SETUP<br />
15
EXTERNAL EQUIPMENT SETUP<br />
16<br />
EXTERNAL EQUIPMENT SETUP<br />
When connecting with a HDMI cable<br />
!<br />
1<br />
2<br />
3<br />
NOTE<br />
Connect the HDMI output of the digital set-top box to<br />
the HDMI/DVI IN 1 or HDMI IN 2 jack on the set.<br />
Select HDMI1 or HDMI2 input source with using the<br />
INPUT button on the remote control.<br />
Turn on the digital set-top box.<br />
(Refer to the owner’s manual for the digital set-top box.)<br />
1<br />
2<br />
COMPONENT IN<br />
HDMI HDMI/DVI DVI IN IN<br />
HDMI IN<br />
1 2<br />
G <strong>TV</strong> can receive the video and audio signal simultaneously with using a HDMI cable.<br />
G If the digital set-top box supports Auto HDMI function, the output resolution of the source device will<br />
be automatically set to 1280x720p.<br />
G If the digital set-top box player does not support Auto HDMI, you need to set the output resolution<br />
appropriately.<br />
To get the best picture quality, adjust the output resolution of the source device to 1280x720p.<br />
1
When connecting with a HDMI to DVI cable<br />
1<br />
2<br />
3<br />
4<br />
HDMI HDMI/DVI DVI IN IN<br />
1<br />
HDMI IN<br />
RGB IN<br />
AUDIO<br />
RGB(PC)<br />
(RGB/DVI)<br />
RGB(PC)<br />
AUDIO<br />
(RGB/DVI)<br />
1 2<br />
AV IN 1 AV OUT<br />
Connect the DVI output of the digital set-top box to the HDMI/DVI IN 1 jack on the set.<br />
Connect the audio output of the digital set-top box to the AUDIO(RGB/DVI) jack on the set.<br />
Turn on the digital set-top box. (Refer to the owner’s manual for the digital set-top box.)<br />
Select HDMI1 input source with using the INPUT button on the remote control.<br />
L/MONO<br />
EXTERNAL EQUIPMENT SETUP<br />
17
EXTERNAL EQUIPMENT SETUP<br />
18<br />
EXTERNAL EQUIPMENT SETUP<br />
DVD SETUP<br />
When connecting with a component cable<br />
1<br />
2<br />
3<br />
4<br />
5<br />
Connect the video outputs (Y, PB, PR) of the DVD to the<br />
COMPONENT IN VIDEO jacks on the set.<br />
Connect the audio outputs of the DVD to the COMPO-<br />
NENT IN AUDIO jacks on the set.<br />
Turn on the DVD player, insert a DVD.<br />
Select Component1 input source with using the INPUT<br />
button on the remote control.<br />
If connected to COMPONENT IN2, select Component2<br />
input source.<br />
Refer to the DVD player's manual for operating instructions.<br />
1<br />
2<br />
HDMI DVI IN<br />
HDMI HDMI/DVI DVI IN IN<br />
1 2<br />
HDMI IN<br />
VIDEO<br />
AUDIO<br />
COMPONENT IN<br />
Component Input ports<br />
To get better picture quality, connect a DVD player to the component input ports as shown below.<br />
Component ports on the <strong>TV</strong> Y PB PR<br />
Video output ports<br />
on DVD player<br />
Y<br />
Y<br />
Y<br />
Y<br />
PB<br />
B-Y<br />
Cb<br />
Pb<br />
PR<br />
R-Y<br />
Cr<br />
Pr<br />
HDMI IN<br />
1 2<br />
RG
NT IN<br />
HDMI IN<br />
HDMI IN<br />
When connecting with a RCA cable<br />
1<br />
2<br />
3<br />
Connect the AUDIO/VIDEO jacks between <strong>TV</strong> and DVD<br />
player. Match the jack colours (Video = yellow, Audio Left =<br />
white, and Audio Right = red)<br />
Insert a DVD into the DVD player and press PLAY on the<br />
DVD player. (Refer to the DVD player owner’s manual.)<br />
Select AV1 input source using the INPUT button on the<br />
remote control.<br />
If connected to HDMI AV DVI IN2, IN select HDMI AV2 IN input source.<br />
When connecting with an S-Video cable<br />
1<br />
2<br />
3<br />
4<br />
5<br />
L/MONO AUDIO R<br />
VIDEO<br />
AV IN 2<br />
Connect the S-VIDEO output of the DVD to the S -<br />
VIDEO input on the set.<br />
Connect the audio outputs of the DVD to the AUDIO<br />
input jacks on the set.<br />
Turn on the DVD player, insert a DVD.<br />
Select AV2 input source with using the INPUT button<br />
on the remote control.<br />
Refer to the DVD player's manual for operating<br />
instructions.<br />
AV AV IN IN 1<br />
1 AV OUT<br />
S-VIDEO<br />
VIDEO L/MONO MONO AUDIO R<br />
R AUDIO L/ L/MONO MONO VIDEO<br />
L/MONO<br />
AV IN 2<br />
S-VIDEO VIDEO<br />
VIDEO<br />
OUTPUT<br />
SWITCH<br />
1<br />
S-VIDEO<br />
OUTPUT<br />
SWITCH<br />
L R<br />
L R<br />
1 2<br />
ANT IN<br />
ANT OUT<br />
ANT IN<br />
ANT OUT<br />
EXTERNAL EQUIPMENT SETUP<br />
19
EXTERNAL EQUIPMENT SETUP<br />
20<br />
EXTERNAL EQUIPMENT SETUP<br />
When connecting HDMI cable<br />
!<br />
1<br />
2<br />
3<br />
Connect the HDMI output of the DVD to the<br />
HDMI/DVI IN 1 or HDMI IN 2 jack on the set.<br />
Select HDMI1 or HDMI2 input source with using<br />
the INPUT button on the remote control.<br />
Refer to the DVD player's manual for operating<br />
instructions.<br />
NOTE<br />
G <strong>TV</strong> can receive the video and audio signal simultaneously with<br />
using a HDMI cable.<br />
G If the DVD supports Auto HDMI function, the output resolution<br />
of the source device will be automatically set to 1280x720p.<br />
G If the DVD player does not support Auto HDMI, you need to set<br />
the DVD output resolution appropriately.<br />
To get the best picture quality, adjust the output resolution of the<br />
source device to 1280x720p.<br />
(except VGA <strong>Models</strong>)<br />
Resolution<br />
720x480<br />
720x576<br />
1280x720<br />
1920x1080i<br />
1920x1080p<br />
1<br />
2<br />
HDMI HDMI/DVI DVI IN IN<br />
COMPONENT IN<br />
1 2<br />
1<br />
HDMI IN<br />
Supported Display Resolution (HDMI-D<strong>TV</strong> mode)<br />
Horizontal Vertical<br />
Frequency(kHz) Frequency(Hz)<br />
31.47 59.94<br />
31.50 60.00<br />
31.25 50.00<br />
44.96 59.94<br />
45.00 60.00<br />
37.50 50.00<br />
33.72 59.94<br />
33.75 60.00<br />
28.125 50.00<br />
67.432 59.94<br />
67.5 60<br />
56.25 50
VCR SETUP<br />
■ To avoid picture noise (interference), leave an adequate distance between the VCR and <strong>TV</strong>.<br />
■ Typically a frozen still picture from a VCR. If the 4:3 picture format is used; the fixed images on the sides of<br />
the screen may remain visible on the screen.<br />
When connecting with an antenna<br />
AUDIO<br />
(RGB/DVI)<br />
1<br />
2<br />
3<br />
AV IN 1 AV OUT<br />
L/MONO<br />
ANTENNA<br />
IN<br />
1<br />
ANT OUT<br />
ANT IN<br />
2<br />
S-VIDEO VIDEO<br />
OUTPUT<br />
SWITCH<br />
Wall Jack<br />
Antenna<br />
Connect the ANT OUT socket of the VCR to the ANTENNA IN socket on the set.<br />
Connect the antenna cable to the ANT IN socket of the VCR.<br />
Press the PLAY button on the VCR and match the appropriate programme between the <strong>TV</strong> and VCR for<br />
viewing.<br />
L<br />
R<br />
HDMI DVI IN<br />
EXTERNAL EQUIPMENT SETUP<br />
HDMI IN<br />
21<br />
L/MONO AUDIO R<br />
VIDEO
EXTERNAL EQUIPMENT SETUP<br />
22<br />
EXTERNAL EQUIPMENT SETUP<br />
When connecting with a RCA cable<br />
HDMI DVI IN<br />
1<br />
2<br />
3<br />
!<br />
HDMI IN<br />
L/MONO AU<br />
VIDEO<br />
AV IN 2<br />
RGB(PC)<br />
AUDIO<br />
(RGB/DVI)<br />
AV AV IN IN 1<br />
1 AV OUT<br />
R AUDIO L/ L/MONO MONO VIDEO<br />
L/MONO<br />
S-VIDEO VIDEO<br />
OUTPUT<br />
SWITCH<br />
L R<br />
ANT IN<br />
ANT OUT<br />
Connect the AUDIO/VIDEO jacks between <strong>TV</strong> and VCR. Match the jack colours (Video = yellow,<br />
Audio Left = white, and Audio Right = red)<br />
Insert a video tape into the VCR and press PLAY on the VCR. (Refer to the VCR owner’s manual.)<br />
Select AV1 input source using the INPUT button on the remote control.<br />
If connected to AV IN2, select AV2 input source.<br />
NOTE<br />
G If you have a mono VCR, connect the audio cable from the VCR to the AUDIO L/MONO jack<br />
of the set.<br />
1
When connecting with an S-Video cable<br />
1<br />
2<br />
3<br />
4<br />
!<br />
Connect the S-VIDEO output of the VCR to the S -<br />
VIDEO input on the set. The picture quality is<br />
improved; compared to normal composite (RCA cable)<br />
input.<br />
Connect the audio outputs of the VCR to the AUDIO<br />
input jacks on the set.<br />
Insert a video tape into the VCR and press PLAY on<br />
the VCR. (Refer to the VCR owner’s manual.)<br />
Select AV2 input source with using the INPUT button<br />
on the remote control.<br />
NOTE<br />
G If both S-VIDEO and VIDEO sockets have been conneced to<br />
the S-VHS VCR simultaneously, only the S-VIDEO can be<br />
received.<br />
HDMI DVI IN<br />
HDMI IN<br />
S-VIDEO<br />
VIDEO L/MONO MONO AUDIO R<br />
AV IN 2<br />
VIDEO<br />
S-VIDEO<br />
OUTPUT<br />
SWITCH<br />
AV IN 1<br />
R AUDIO L/MONO VIDEO<br />
L R<br />
1 2<br />
ANT IN<br />
ANT OUT<br />
EXTERNAL EQUIPMENT SETUP<br />
23
EXTERNAL EQUIPMENT SETUP<br />
24<br />
EXTERNAL EQUIPMENT SETUP<br />
OTHER A/V SOURCE SETUP<br />
1<br />
2<br />
3<br />
S-VIDEO<br />
VIDEO L/ L/MONO MONO AUDIO R<br />
S-VIDEO<br />
AV V IN 2<br />
1<br />
Camcorder<br />
VIDEO<br />
L R<br />
Video Game Set<br />
Connect the AUDIO/VIDEO jacks between <strong>TV</strong> and external equipment. Match the jack colours.<br />
(Video = yellow, Audio Left = white, and Audio Right = red)<br />
Select AV2 input source with using the INPUT button on the remote control.<br />
If connected to AV IN1, select AV1 input source.<br />
Operate the corresponding external equipment.<br />
Refer to external equipment operating guide.
EXTERNAL STEREO<br />
HDMI DVI IN<br />
Use to connected either an external amplifier, or add a subwoofer<br />
to your surround sound system.<br />
!<br />
1<br />
2<br />
NOTE<br />
Connect the input jack of the stereo amplifier to the<br />
VARIABLE AUDIO OUT jacks on the set.<br />
Set up your speakers through your analog stereo<br />
amplifier, according to the instructions provided with<br />
the amplifier.<br />
G When connecting with external audio equipments, such as<br />
amplifiers or speakers, please turn the <strong>TV</strong> speakers off.<br />
(G p.65)<br />
HDMI IN<br />
VARIABLE ARIABLE<br />
AUDIO OUT<br />
1<br />
EXTERNAL EQUIPMENT SETUP<br />
25
EXTERNAL EQUIPMENT SETUP<br />
26<br />
EXTERNAL EQUIPMENT SETUP<br />
PC SETUP<br />
This <strong>TV</strong> provides Plug and Play capability, meaning that the PC adjusts automatically to the <strong>TV</strong>'s settings.<br />
When connecting with a D-sub 15 pin cable<br />
1<br />
2<br />
3<br />
4<br />
HDMI DVI IN<br />
HDMI IN<br />
RGB IN<br />
AUDIO<br />
RGB(PC) (RGB/DVI)<br />
RGB(PC)<br />
RGB OUTPUT<br />
AUDIO<br />
(RGB/DVI)<br />
1 2<br />
AUDIO<br />
AV IN 1 AV OUT<br />
Connect the RGB output of the PC to the RGB (P C) jack on the set.<br />
Connect the PC audio output to the AUDIO jack on the set.<br />
Turn on the PC and the set.<br />
Select RGB PC input source with using the INPUT button on the remote control.<br />
L/MONO
!<br />
NOTE<br />
G To enjoy vivid picture and sound,connect a PC to<br />
the set.<br />
G Avoid keeping a fixed image on the set ’s screen<br />
for a long period of time.The fixed image may<br />
become permanently imprinted on the<br />
screen;use a screen saver when possible.<br />
G Connect PC to the RGB (PC) port of the<br />
set;change the resolution output of PC accordingly.<br />
G There might be noise according to some resolution,vertical<br />
pattern,contrast or brightness in PC<br />
mode.Change the PC mode into another resolution<br />
or change the refresh rate into another<br />
rateor adjust the brightness and contrast on the<br />
menu until the picture is clean.If the refresh rate<br />
of the PC graphic card can not be changed,<br />
change the PC graphic card or consult it to the<br />
manufacturer of the PC graphic card.<br />
Supported Display Resolution (RGB-PC mode)<br />
Resolution<br />
640x350<br />
720x400<br />
640x480<br />
848x480<br />
852x480<br />
800x600<br />
1024x768<br />
1280x768<br />
1360x768<br />
1366x768<br />
Horizontal Vertical<br />
Frequency(kHz) Frequency(Hz)<br />
31.5 70.1<br />
31.5 70.1<br />
31.5 59.9<br />
31.5 60.0<br />
31.5 60.0<br />
37.9 60.3<br />
48.4 60.0<br />
47.8 59.9<br />
47.7 59.8<br />
47.7 59.8<br />
G The synchronization input waveform for<br />
Horizontal and Vertical frequencies are separate.<br />
G We recommend using 1366x768, 60Hz (<strong>LCD</strong> <strong>TV</strong><br />
models) / 852x480, 60Hz (42 inch WVGA<br />
PLASMA <strong>TV</strong> models) / 1024x768, 60Hz (42<br />
inch XGA PLASMA <strong>TV</strong> models) / 1366x768,<br />
60Hz (50 inch PLASMA <strong>TV</strong> models) for the PC<br />
mode, they provide the best picture quality.<br />
G If the resolution of PC is over SXGA, there will<br />
be no picture on the set.<br />
G Connect the audio cable from the PC to the<br />
Audio input on the set.(Audio cables are not<br />
included with the set).<br />
G When you use too long RGB-PC cable,there<br />
might be a noise on the screen.We recommend<br />
using under 5m of the cable.It provides the best<br />
picture quality.<br />
!<br />
NOTE<br />
G It’s supported to 848x480, 852x480 in VGA<br />
modes. (VGA <strong>Models</strong>)<br />
G It’s supported to 1280x768, 1360x768,<br />
1366x768 in XGA modes. (XGA <strong>Models</strong>)<br />
EXTERNAL EQUIPMENT SETUP<br />
27
EXTERNAL EQUIPMENT SETUP<br />
28<br />
EXTERNAL EQUIPMENT SETUP<br />
Screen Setup for PC mode<br />
Auto Configure (RGB [PC] mode only)<br />
Automatically adjusts picture position and minimizes image<br />
shaking.After adjustment, if the image is still not correct, your<br />
set is functioning properly but needs further adjustment.<br />
Auto configure<br />
This function is for the automatic adjustment of the screen<br />
position, clock, and phase. The displayed image will unstable for<br />
a few seconds while the auto configuration is in progress.<br />
1<br />
2<br />
3<br />
4<br />
5<br />
Press the MENU button and then use D / E button to<br />
select the Picture menu.<br />
Press the G button and then use D / E button to select<br />
Screen.<br />
Press the G button and then use D / E button to select<br />
Auto Config..<br />
Press the G button to start Auto Config..<br />
• When Auto config. has finished, OK will be shown on<br />
screen.<br />
• If the position of the image is still not correct, try Auto<br />
adjustment again.<br />
• If picture needs to be adjusted more after Auto adjustment<br />
in RGB (PC), you can adjust the Manual Config..<br />
Press the EXIT button to return to <strong>TV</strong> viewing.<br />
Picture<br />
Picture<br />
Picture Mode<br />
Colour Temperature<br />
XD<br />
Advanced<br />
Aspect Ratio<br />
Picture Reset<br />
Screen G<br />
XD Demo<br />
DE F G OK MENU<br />
Screen<br />
Auto config. Config. G<br />
Manual Config.<br />
VGA Mode<br />
Reset<br />
DE F G OK MENU<br />
EXIT<br />
LIST Q.VIEW<br />
MENU<br />
Picture Mode<br />
Colour Temperature<br />
XD<br />
Advanced<br />
Aspect Ratio<br />
Picture Reset<br />
Screen<br />
XD Demo<br />
DE F G OK MENU<br />
To Set<br />
To Set<br />
OK<br />
FAV<br />
VOL PR<br />
MUTE<br />
1 2 3<br />
4 5 6<br />
7 8 9<br />
SLEEP<br />
1<br />
2<br />
3 4
Adjustment for screen Phase, Clock, Position<br />
If the picture isn’t clear after auto adjustment and especially<br />
if characters are still trembling, adjust the picture phase<br />
manually.<br />
To correct the screen size, adjust Clock.<br />
This function works in the following mode : RGB[PC], COM-<br />
PONENT (480i/480p/576i/576p/720p/1080i), HDMI<br />
(480p/576p/720p/1080i/1080p(except VGA <strong>Models</strong>)).<br />
It’s not available to use Phase, Clock function in COMPO-<br />
NENT (480i/480p/576i/576p/720p/1080i), HDMI<br />
(480p/576p/720p/1080i/1080p(except VGA <strong>Models</strong>)).<br />
Clock This function is to minimize any vertical bars or<br />
stripes visible on the screen background. And the<br />
horizontal screen size will also change.<br />
Phase This function allows you to remove any horizontal<br />
noise and clear or sharpen the image of characters.<br />
1<br />
2<br />
3<br />
4<br />
5<br />
6<br />
Press the MENU button and then use D / E button to<br />
select the Picture menu.<br />
Press the G button and then use D / E button to select<br />
Screen.<br />
Press the G button and then use D / E button to select<br />
Manual Config..<br />
Press the G button and then use D / E button to select<br />
Phase, Clock, H-Position or V-Position.<br />
Press the F / G button to make appropriate adjustments.<br />
Press the EXIT button to return to <strong>TV</strong> viewing.<br />
Picture<br />
Picture<br />
Picture Mode<br />
Colour Temperature<br />
XD<br />
Advanced<br />
Aspect Ratio<br />
Picture Reset<br />
Screen G<br />
XD Demo<br />
DE F G OK MENU<br />
Screen<br />
Auto Config.<br />
Manual Config. G<br />
VGA Mode<br />
Reset<br />
DE F G OK MENU<br />
EXIT<br />
LIST Q.VIEW<br />
MENU<br />
OK<br />
FAV<br />
VOL PR<br />
MUTE<br />
1 2 3<br />
4 5 6<br />
7 8 9<br />
Picture Mode<br />
Colour Temperature<br />
XD<br />
Advanced<br />
Aspect Ratio<br />
Picture Reset<br />
Screen<br />
XD Demo<br />
DE F G OK MENU<br />
To Set<br />
SLEEP<br />
Phase 50<br />
Clock 0<br />
H-Position 0<br />
V-Position 0<br />
1<br />
2<br />
3 4 5<br />
EXTERNAL EQUIPMENT SETUP<br />
29
EXTERNAL EQUIPMENT SETUP<br />
30<br />
EXTERNAL EQUIPMENT SETUP<br />
Selecting Wide VGA/XGA mode<br />
To see a normal picture, match the resolution of RGB mode and<br />
selection of VGA/XGA mode.<br />
This function works in the following mode: RGB[PC] mode.<br />
1<br />
2<br />
3<br />
4<br />
5<br />
Press the MENU button and then use D / E button to<br />
select the Picture menu.<br />
Press the G button and then use D / E button to select<br />
Screen.<br />
Press the G button and then use D / E button to select<br />
VGA Mode (or XGA Mode).<br />
Press the G button and then use D / E button to select<br />
the desired VGA/XGA resolution.<br />
Press the EXIT button to return to <strong>TV</strong> viewing.<br />
Picture<br />
Picture<br />
Picture Mode<br />
Colour Temperature<br />
XD<br />
Advanced<br />
Aspect Ratio<br />
Picture Reset<br />
Screen G<br />
XD Demo<br />
DE F G OK MENU<br />
Screen<br />
Auto Config.<br />
Manual Config.<br />
VGA Mode G<br />
Reset<br />
DE F G OK MENU<br />
EXIT<br />
LIST Q.VIEW<br />
MENU<br />
OK<br />
FAV<br />
VOL PR<br />
MUTE<br />
Picture Mode<br />
Colour Temperature<br />
XD<br />
Advanced<br />
Aspect Ratio<br />
Picture Reset<br />
Screen<br />
XD Demo<br />
DE F G OK MENU<br />
To Set<br />
640x480<br />
848x480<br />
852x480<br />
SLEEP<br />
1<br />
2<br />
3 4
Initializing<br />
(Reset to original factory settings)<br />
This function operates in current mode.<br />
To initialize the adjusted value<br />
1<br />
2<br />
3<br />
4<br />
5<br />
Press the MENU button and then use D / E button to<br />
select the Picture menu.<br />
Press the G button and then use D / E button to select<br />
Screen.<br />
Press the G button and then use D / E button to select<br />
Reset.<br />
Press the G button.<br />
• You can initialize Position, PIP size, PIP position.<br />
Press the EXIT button to return to normal <strong>TV</strong> viewing.<br />
Picture<br />
Picture<br />
Picture Mode<br />
Colour Temperature<br />
XD<br />
Advanced<br />
Aspect Ratio<br />
Picture Reset<br />
Screen G<br />
XD Demo<br />
DE F G OK MENU<br />
EXIT<br />
LIST Q.VIEW<br />
MENU<br />
OK<br />
FAV<br />
VOL PR<br />
MUTE<br />
1 2 3<br />
4 5 6<br />
7 8 9<br />
Picture Mode<br />
Colour Temperature<br />
XD<br />
Advanced<br />
Aspect Ratio<br />
Picture Reset<br />
Screen<br />
XD Demo<br />
Screen<br />
Auto Config.<br />
Manual Config.<br />
VGA Mode<br />
Reset G To Set<br />
DE F G OK MENU<br />
To Set<br />
SLEEP<br />
1<br />
2<br />
3 4<br />
EXTERNAL EQUIPMENT SETUP<br />
31
WATCHING <strong>TV</strong> / PROGRAMME CONTROL<br />
32<br />
WATCHING <strong>TV</strong> / PROGRAMME CONTROL<br />
REMOTE CONTROL KEY FUNCTIONS<br />
When using the remote control, aim it at the remote control sensor on the <strong>TV</strong>.<br />
INPUT MODE<br />
<strong>TV</strong><br />
INPUT<br />
POWER <strong>TV</strong><br />
DVD<br />
RATIO<br />
SIMPLINK<br />
LIST<br />
MENU<br />
Q.VIEW<br />
EXIT<br />
SLEEP<br />
VOL<br />
SIZE<br />
PIP<br />
OK<br />
PR<br />
VCR<br />
I/II<br />
PIP PR- PIP PR+ PIP INPUT<br />
FAV<br />
1 2 3<br />
4 5 6<br />
7 8 9<br />
0<br />
TIME HOLD<br />
?<br />
REVEAL<br />
MUTE<br />
TEXT<br />
POSITION INDEX<br />
1<br />
1<br />
1<br />
POWER<br />
<strong>TV</strong> INPUT<br />
INPUT<br />
RATIO<br />
Brightness<br />
adjustment<br />
PIP<br />
PIP PR - /+<br />
PIP INPUT<br />
SIZE<br />
POSITION<br />
VCR/DVD<br />
control buttons<br />
EXIT<br />
LIST<br />
MENU<br />
Q.VIEW<br />
SLEEP<br />
Switches the set on from standby or off to standby.<br />
Returns to the <strong>TV</strong> viewing from any mode.<br />
Switches the set on from standby.<br />
If you press the button once, the input source OSD<br />
will appear on screen as shown. Press the D / E button<br />
and then OK button to select the desired input<br />
source (<strong>TV</strong>, AV1, AV2, Component1, Component2, RGB<br />
PC, HDMI1 or HDMI2).<br />
Selects your desired picture format.<br />
Adjusts screen brightness.<br />
It returns to the default settings brightness by changing<br />
mode source.<br />
Switches the sub picture PIP mode.<br />
Selects a programme for the sub picture.<br />
Selects the input source for the sub picture in PIP picture<br />
mode.<br />
Adjusts the sub picture size.<br />
Moves the sub picture.<br />
Controls some video cassette recorders or DVD players<br />
when you have already selected DVD or VCR mode button.<br />
Control connected AV devices by pressing the D / E /<br />
F / G, O K buttons and buttons for play, stop, pause,<br />
fast reverse, fast forward, chapter skip.<br />
(The button does not provide such functions.)<br />
Clears all on-screen displays and returns to <strong>TV</strong> viewing<br />
from any menu.<br />
Displays the programme table.<br />
Selects a menu.<br />
Returns to the previously viewed programme.<br />
Sets the sleep timer.
INPUT MODE<br />
<strong>TV</strong><br />
INPUT<br />
POWER <strong>TV</strong><br />
DVD<br />
RATIO<br />
SIMPLINK<br />
LIST<br />
MENU<br />
Q.VIEW<br />
EXIT<br />
SLEEP<br />
VOL<br />
SIZE<br />
PIP<br />
OK<br />
PR<br />
VCR<br />
I/II<br />
PIP PR- PIP PR+ PIP INPUT<br />
1 2 3<br />
4 5 6<br />
7 8 9<br />
0<br />
TIME HOLD<br />
?<br />
REVEAL<br />
FAV<br />
MUTE<br />
TEXT<br />
POSITION INDEX<br />
2<br />
2<br />
2<br />
MODE Selects the remote operating modes.<br />
TELETEXT<br />
BUTTONS<br />
SIMPLINK<br />
I/II<br />
Coloured<br />
buttons<br />
THUMBSTICK<br />
(Up/Down/Left<br />
Right)<br />
OK<br />
VOLUME<br />
UP/DOWN<br />
FAV<br />
MUTE<br />
Programme<br />
UP/DOWN<br />
0~9 number<br />
buttons<br />
These buttons are used for teletext.<br />
For further details, see the ‘Teletext’ section.<br />
See a list of AV devices connected to <strong>TV</strong>.<br />
When you toggle this button, the Simplink menu appears<br />
at the screen.(G p.44)<br />
Selects the sound output.<br />
These buttons are used for teletext (only TELETEXT<br />
models) or Programme edit.<br />
Allows you to navigate the on-screen menus and adjust<br />
the system settings to your preference.<br />
Accepts your selection or displays the current mode.<br />
Adjusts the volume.<br />
Displays the selected favourite programme.<br />
Switches the sound on or off.<br />
Selects a programme.<br />
Selects a programme.<br />
Selects numbered items in a menu.<br />
Installing Batteries ■ Open the battery compartment cover on<br />
the back side and install the batteries<br />
matching correct polarity (+with +,-with -).<br />
■ Install two 1.5V AA batteries. Don’t mix old<br />
or used batteries with new ones.<br />
■ Close cover.<br />
WATCHING <strong>TV</strong> / PROGRAMME CONTROL<br />
33
WATCHING <strong>TV</strong> / PROGRAMME CONTROL<br />
34<br />
WATCHING <strong>TV</strong> / PROGRAMME CONTROL<br />
TURNING ON THE <strong>TV</strong><br />
If your <strong>TV</strong> will be turned on, you will be able to use its features.<br />
1<br />
PROGRAMME SELECTION<br />
1<br />
First, connect power cord correctly.<br />
At this moment, the <strong>TV</strong> switches to standby mode.<br />
■ In standby mode to turn <strong>TV</strong> on, press the , INPUT, PR D / E<br />
button on the <strong>TV</strong> or press the POWER, T V, INPUT, PR +/-,<br />
NUMBER( 0~9 ) buttons on the remote control and then the <strong>TV</strong> will<br />
switch on.<br />
VOLUME ADJUSTMENT<br />
1<br />
2<br />
3<br />
Press the PR +/- or NUMBER buttons to select a programme number.<br />
Press the VOL +/- button to adjust the volume.<br />
If you want to switch the sound off, press the MUTE button.<br />
You can cancel the Mute function by pressing the MUTE, VOL +/- or<br />
I/II button.<br />
INPUT MODE<br />
<strong>TV</strong><br />
INPUT<br />
POWER <strong>TV</strong><br />
DVD<br />
RATIO<br />
SIMPLINK<br />
LIST<br />
MENU<br />
Q.VIEW<br />
EXIT<br />
SLEEP<br />
VOL<br />
SIZE<br />
PIP<br />
OK<br />
PR<br />
VCR<br />
I/II<br />
PIP PR- PIP PR+ PIP INPUT<br />
FAV<br />
1 2 3<br />
4 5 6<br />
7 8 9<br />
0<br />
TIME HOLD<br />
?<br />
REVEAL<br />
MUTE<br />
TEXT<br />
POSITION INDEX
ON SCREEN MENUS SELECTION AND ADJUSTMENT<br />
Your <strong>TV</strong>'s OSD (On Screen Display) may differ slightly from what is shown in this manual.<br />
The OSD mainly use pictures for the Plasma <strong>TV</strong> models.<br />
1<br />
2<br />
3<br />
Setup<br />
Option<br />
!<br />
Press the MENU button and then D / E button to display each menu.<br />
Press the G button and then D / E button to select a menu item.<br />
Change the setting of an item in the sub or pull-down menu with F / G button.<br />
You can move to the higher level menu by pressing the O K or MENU button.<br />
Auto Tuning<br />
Manual Tuning<br />
Programme Edit<br />
Favourite Programme<br />
Setup MENU Picture MENU Audio MENU<br />
Language<br />
SIMPLINK<br />
Key Lock<br />
ISM Method<br />
Low Power<br />
Option MENU<br />
NOTE<br />
Picture<br />
Picture Mode<br />
Colour Temperature<br />
XD<br />
Advanced<br />
Aspect Ratio<br />
Picture Reset<br />
Screen<br />
XD Demo<br />
Sound Mode<br />
Auto Volume<br />
Balance 0<br />
<strong>TV</strong> Speaker<br />
DE F G OK MENU DE F G OK MENU DE F G OK MENU<br />
DE F G OK MENU<br />
* PLASMA <strong>TV</strong> models only<br />
Clock<br />
Off Time<br />
On Time<br />
Sleep Time<br />
Auto Sleep<br />
Time MENU<br />
a. The OSD (On Screen Display) function enables you to adjust the screen status conveniently since it provides<br />
graphical presentation.<br />
b. In this manual, the OSD (On Screen Display) may be different from your <strong>TV</strong>’s because it is just example<br />
to help the <strong>TV</strong> operation.<br />
c. In the teletext mode, menus are not displayed.<br />
Audio<br />
Time<br />
DE F G OK MENU<br />
WATCHING <strong>TV</strong> / PROGRAMME CONTROL<br />
35
WATCHING <strong>TV</strong> / PROGRAMME CONTROL<br />
36<br />
WATCHING <strong>TV</strong> / PROGRAMME CONTROL<br />
AUTO PROGRAMME TUNING<br />
Up to 100 <strong>TV</strong> stations can be stored by programme numbers (0 to 99).<br />
Once you have preset the stations, you will be able to use the PR +/- or<br />
NUMBER buttons to scan the stations you have programmed.<br />
Stations can be tuned using automatic or manual modes.<br />
All stations that can be received are stored by this method. It is recommended<br />
that you use auto programme during installation of this set.<br />
1<br />
2<br />
3<br />
4<br />
5<br />
6<br />
7<br />
8<br />
9<br />
Press the MENU button and then D / E button to select the<br />
Setup menu.<br />
Press the G button and then D / E button to select Auto<br />
Tuning.<br />
Press the G button and then D / E button to select System.<br />
Press the D / E button to select a <strong>TV</strong> system menu;<br />
BG: PAL B/G, SECAM B/G (Europe / East Europe / Asia /<br />
NewZealand / M.East / Africa / Australia)<br />
I : PAL I/II (U.K. / Ireland / Hong Kong / South Africa)<br />
DK: PAL D/K, SECAM D/K (East Europe / China / Africa / CIS)<br />
M : (USA / Korea / Philippines)<br />
Press the D / E button to select Storage From.<br />
Press the F / G button or NUMBER buttons to select the<br />
beginning programme number. If you use NUMBER buttons, any<br />
number under 10 is entered with a numeric ‘0’ in front of it,<br />
i.e.‘05’ for 5.<br />
Press the D / E button to select Search.<br />
Press the G button to begin auto tuning.<br />
All receivable stations are stored.<br />
To stop auto tuning, press the MENU button.<br />
When auto tuning is completed, the Programme edit menu<br />
appears on the screen. See the Programme edit section to edit<br />
the stored programme.<br />
Press the EXIT button to return to normal <strong>TV</strong> viewing.<br />
Setup<br />
Setup<br />
Auto Tuning G<br />
Manual Tuning<br />
Programme Edit<br />
Favourite Programme<br />
DE F G OK MENU<br />
Auto Tuning<br />
System G<br />
Storage From<br />
Search<br />
DE F G OK MENU<br />
EXIT<br />
LIST Q.VIEW<br />
MENU<br />
OK<br />
FAV<br />
VOL PR<br />
MUTE<br />
Auto Tuning<br />
Manual Tuning<br />
Programme Edit<br />
Favourite Programme<br />
DE F G OK MENU<br />
To Set<br />
BG<br />
I<br />
DK<br />
M<br />
Auto Tuning<br />
SLEEP<br />
1<br />
2<br />
3 4 5 6 7<br />
C 05 BG<br />
5 35%<br />
MENU Stop<br />
8
MANUAL PROGRAMME TUNING<br />
Manual programme lets you manually tune and arrange the stations<br />
in whatever order you desire.<br />
1<br />
2<br />
3<br />
4<br />
5<br />
6<br />
7<br />
8<br />
9<br />
10<br />
11<br />
12<br />
13<br />
14<br />
15<br />
Press the MENU button and then D / E button to select the<br />
Setup menu.<br />
Press the G button and then D / E button to select Manual<br />
Tuning.<br />
Press the G button and then D / E button to select Storage.<br />
Press the F / G button or NUMBER buttons to select the<br />
desired programme number (0 to 99). If you use NUMBER<br />
buttons, any number under 10 is entered with a numeric ‘0’ in<br />
front of it, i.e. ‘0 5’ for 5.<br />
Press the D / E button to select System.<br />
Press the D / E button to select a <strong>TV</strong> system menu;<br />
BG : PAL B/G, SECAM B/G (Europe / East Europe / Asia /<br />
NewZealand / M.East / Africa / Australia)<br />
I : PAL I/II (U.K. / Ireland / Hong Kong / South Africa)<br />
DK : PAL D/K, SECAM D/K (East Europe / China / Africa / CIS)<br />
M : (USA / Korea / Philippines)<br />
Press the D / E button to select Band.<br />
Press the G button and then D / E button to select V/UHF<br />
or Cable.<br />
Press the D / E button to select Channel.<br />
You can select the desired programme number with the F / G<br />
button or NUMBER buttons. If possible, select the programme<br />
number directly with the number buttons. Any number under<br />
10 is entered with a numeric ‘0’ in front of it, i.e. ‘0 5’ for 5.<br />
Press the D / E button to select Search.<br />
Press the F / G button to commence searching. If a station is<br />
found the search will stop.<br />
Press the O K button to store it.<br />
To store another station, repeat steps 3 to 1 3.<br />
Press the EXIT button to return to normal <strong>TV</strong> viewing.<br />
EXIT<br />
Setup<br />
Setup<br />
Auto Tuning<br />
Manual Tuning G<br />
Programme Edit<br />
Favourite Programme<br />
DE F G OK MENU<br />
Manual Tuning<br />
Storage G<br />
System<br />
Band<br />
Channel<br />
Fine<br />
Search<br />
Name<br />
DE F G OK MENU<br />
LIST Q.VIEW<br />
MENU<br />
OK<br />
FAV<br />
VOL PR<br />
MUTE<br />
1 2 3<br />
4 5 6<br />
7 8 9<br />
SLEEP<br />
0<br />
TIME HOLD<br />
Auto Tuning<br />
Manual Tuning<br />
Programme Edit<br />
Favourite Programme<br />
DE F G OK MENU<br />
To Set<br />
99<br />
3 4 5 6<br />
1<br />
2<br />
7<br />
8 9 10 11 12<br />
WATCHING <strong>TV</strong> / PROGRAMME CONTROL<br />
37
WATCHING <strong>TV</strong> / PROGRAMME CONTROL<br />
38<br />
WATCHING <strong>TV</strong> / PROGRAMME CONTROL<br />
FINE TUNING<br />
Normally fine tuning is only necessary if reception is poor.<br />
1<br />
2<br />
3<br />
4<br />
5<br />
6<br />
Press the MENU button and then D / E button to select<br />
the Setup menu.<br />
Press the G button and then D / E button to select<br />
Manual Tuning.<br />
Press the G button and then D / E button to select Fine.<br />
Press the G button and then F / G button to fine tune for<br />
the best picture and sound.<br />
Press the O K button to store it.<br />
Press the EXIT button to return to normal <strong>TV</strong> viewing.<br />
Manual Tuning<br />
Setup<br />
Setup<br />
Auto Tuning<br />
Manual Tuning G<br />
Programme Edit<br />
Favourite Programme<br />
DE F G OK MENU<br />
Storage<br />
System<br />
Band<br />
Channel<br />
Fine G<br />
Search<br />
Name<br />
DE F G OK MENU<br />
EXIT<br />
LIST Q.VIEW<br />
MENU<br />
OK<br />
FAV<br />
VOL PR<br />
MUTE<br />
1 2 3<br />
4 5 6<br />
7 8 9<br />
Auto Tuning<br />
Manual Tuning<br />
Programme Edit<br />
Favourite Programme<br />
DE F G OK MENU<br />
To Set<br />
F/G<br />
SLEEP<br />
3 4 5<br />
1<br />
2
ASSIGNING A STATION NAME<br />
You can assign a station name with five characters to each programme number.<br />
1<br />
2<br />
3<br />
4<br />
5<br />
6<br />
7<br />
Press the MENU button and then D / E button to select<br />
the Setup menu.<br />
Press the G button and then D / E button to select<br />
Manual Tuning.<br />
Press the G button and then D / E button to select<br />
Name.<br />
Press the G button and then D / E button. You can use a<br />
blank, +, -, the number 0 to 9 and the alphabet A to Z.<br />
Press the F / G button to select the position and make<br />
your choice of the second character, and so on.<br />
Press the O K button to store it.<br />
Press the EXIT button to return to normal <strong>TV</strong> viewing.<br />
Setup<br />
Setup<br />
Auto Tuning<br />
Manual Tuning G<br />
Programme Edit<br />
Favourite Programme<br />
DE F G OK MENU<br />
Manual Tuning<br />
Storage<br />
System<br />
Band<br />
Channel<br />
Fine<br />
Search<br />
Name G<br />
DE F G OK MENU<br />
EXIT<br />
LIST Q.VIEW<br />
MENU<br />
OK<br />
FAV<br />
VOL PR<br />
MUTE<br />
1 2 3<br />
4 5 6<br />
7 8 9<br />
Auto Tuning<br />
Manual Tuning<br />
Programme Edit<br />
Favourite Programme<br />
DE F G OK MENU<br />
To Set<br />
C 05<br />
SLEEP<br />
1<br />
2<br />
3 4 5 6<br />
WATCHING <strong>TV</strong> / PROGRAMME CONTROL<br />
39
WATCHING <strong>TV</strong> / PROGRAMME CONTROL<br />
40<br />
WATCHING <strong>TV</strong> / PROGRAMME CONTROL<br />
PROGRAMME EDIT<br />
This function enables you to delete or skip the stored programmes.<br />
Also you can move some stations to other programme<br />
numbers or copy a blank station data into the selected programme<br />
number.<br />
1<br />
2<br />
3<br />
4<br />
Press the MENU button and then D / E button to select<br />
the Setup menu.<br />
Press the G button and then D / E button to select<br />
Programme Edit.<br />
Press the G button to display the Programme edit menu.<br />
A Deleting a programme<br />
1.Select a programme to be deleted with the D / E / F / G<br />
button.<br />
2.Press the RED button twice.<br />
The selected programme is deleted, all the following<br />
programmes are shifted up one position.<br />
A Copying a programme<br />
1.Select a programme to be copied with the D / E / F / G<br />
button.<br />
2.Press the GREEN button.<br />
All the following programmes are shifted down one position.<br />
A Moving a programme<br />
1.Select a programme to be moved with the D / E / F / G<br />
button.<br />
2.Press the YELLOW button.<br />
3.Move the programme to the desired programme number with<br />
the D / E / F / G button.<br />
4.Press the YELLOW button again to release this function.<br />
A Skipping a programme number<br />
1.Select a programme number to be skipped with the D / E /<br />
F / G button.<br />
2.Press the BLUE button. The skipped programme turns to blue.<br />
3.Press the BLUE button again to release the skipped programme.<br />
When a programme number is skipped it means that you will<br />
be unable to select it using the D / E button during normal<br />
<strong>TV</strong> viewing. If you want to select the skipped programme,<br />
directly enter the programme number with the NUMBER buttons<br />
or select it in the programme edit or table menu.<br />
Press the EXIT button to return to normal <strong>TV</strong> viewing.<br />
Setup<br />
Setup<br />
Auto Tuning<br />
Manual Tuning<br />
Programme Programme Edit G<br />
Favourite Programme<br />
DE F G OK MENU<br />
EXIT<br />
LIST Q.VIEW<br />
MENU<br />
OK<br />
FAV<br />
VOL PR<br />
MUTE<br />
1 2 3<br />
4 5 6<br />
7 8 9<br />
Auto Tuning<br />
Manual Tuning<br />
Programme Edit<br />
Favourite Programme<br />
DE F G OK MENU<br />
Programme Edit<br />
Delete<br />
Move<br />
To Set<br />
SLEEP<br />
0 C 03 5 S 69<br />
1 BLN 03 6 S 17<br />
2 C 12 7 S 22<br />
3 S 66 8 C 09<br />
4 S 67 9 C 11<br />
Copy<br />
Skip<br />
DE F G OK MENU<br />
1<br />
2<br />
3
FAVOURITE PROGRAMME<br />
This function lets you select your favourite programmes directly.<br />
Repeatedly press the FAV button to select stored favourite programmes.<br />
1<br />
2<br />
3<br />
4<br />
5<br />
6<br />
7<br />
Press the MENU button and then D / E button to select the<br />
Setup menu.<br />
Press the G button and then D / E button to select<br />
Favourite Programme.<br />
Press the G button.<br />
Press the D / E button to select - - - - - - -.<br />
Select a desired programme with the F / G button or NUM-<br />
BER buttons. Any number under 10 is entered with a numeric<br />
‘0’in front of it, i.e.‘05’ for 5.<br />
To store another programme, repeat steps 4 to 5.<br />
You can store up to 8 programmes.<br />
Press the EXIT button to return to normal <strong>TV</strong> viewing.<br />
Setup<br />
Setup<br />
Auto Tuning<br />
Manual Tuning<br />
Programme Edit<br />
Favourite Programme G<br />
DE F G OK MENU<br />
EXIT<br />
LIST Q.VIEW<br />
MENU<br />
OK<br />
FAV<br />
VOL PR<br />
MUTE<br />
1 2 3<br />
4 5 6<br />
7 8 9<br />
SLEEP<br />
0<br />
TIME HOLD<br />
Auto Tuning<br />
Manual Tuning<br />
Programme Edit<br />
Favourite Programme<br />
DE F G OK MENU<br />
-- -----<br />
-- -----<br />
-- -----<br />
-- -----<br />
-- -----<br />
-- -----<br />
-- -----<br />
-- -----<br />
1<br />
2 3 4 5<br />
WATCHING <strong>TV</strong> / PROGRAMME CONTROL<br />
41
WATCHING <strong>TV</strong> / PROGRAMME CONTROL<br />
42<br />
WATCHING <strong>TV</strong> / PROGRAMME CONTROL<br />
CALLING THE PROGRAMME TABLE<br />
You can check the programmes stored in the memory by displaying<br />
the programme table.<br />
A Displaying programme table<br />
Press the LIST button to display the Programme table menu.<br />
The programme table appears on the screen.<br />
One programme table contains ten programmes as shown.<br />
!<br />
NOTE<br />
a. You may find some blue programmes. They have been set up<br />
to be skipped by auto programming or in the programme edit<br />
mode.<br />
b. Some programmes with the channel number shown in the<br />
programme table indicate there is no station name assigned.<br />
A Selecting a programme in the programme table<br />
Select a programme with the D / E / F / G button.<br />
Then press the O K button. The set switches to the chosen<br />
programme number.<br />
A Paging through a programme table<br />
There are 10 programme table pages in which contain 100 pro<br />
grammes. Pressing the D / E / F / G button repeatedly turns the<br />
pages.<br />
Press the LIST button to return to normal <strong>TV</strong> viewing.<br />
EXIT<br />
LIST Q.VIEW<br />
MENU<br />
OK<br />
FAV<br />
VOL PR<br />
MUTE<br />
1 2 3<br />
4 5 6<br />
7 8 9<br />
Programme List<br />
FG DE OK<br />
SLEEP<br />
0 C 03 5 S 69<br />
1 BLN 03 6 S 17<br />
2 C 12 7 S 22<br />
3 S 66 8 C 09<br />
4 S 67 9 C 11
KEY LOCK<br />
The <strong>TV</strong> can be set so that the remote control is needed to control<br />
it.<br />
This feature can be used to prevent unauthorized viewing.<br />
This set is programmed to remember which option it was last<br />
set to even if you turn the set off.<br />
1<br />
2<br />
3<br />
4<br />
!<br />
Press the MENU button and then D / E button to select<br />
the Option menu.<br />
Press the G button and then D / E button to select Key<br />
Lock.<br />
Press the G button and then D / E button to select On or<br />
Off.<br />
Press the EXIT button to return to normal <strong>TV</strong> viewing.<br />
NOTE<br />
EXIT<br />
Language<br />
SIMPLINK<br />
Key Lock<br />
ISM Method<br />
Low Power<br />
LIST Q.VIEW<br />
MENU<br />
OK<br />
FAV<br />
VOL PR<br />
MUTE<br />
1 2 3<br />
4 5 6<br />
7 8 9<br />
G In Key Lock ‘O n’, if the set is turned off, press the r / I, INPUT, PR D / E button on the set or<br />
POWER, INPUT, T V, PR +/- or NUMBER buttons on the remote control.<br />
G With the Key Lock O n, the display ‘Key Lock On’ appears on the screen if any button on the front<br />
panel is pressed while viewing the set.<br />
Option<br />
Option<br />
Language<br />
SIMPLINK<br />
Key Lock G<br />
ISM Method<br />
Low Power<br />
DE F G OK MENU<br />
DE F G OK MENU<br />
Off<br />
On<br />
SLEEP<br />
2<br />
1<br />
3<br />
WATCHING <strong>TV</strong> / PROGRAMME CONTROL<br />
43
WATCHING <strong>TV</strong> / PROGRAMME CONTROL<br />
44<br />
WATCHING <strong>TV</strong> / PROGRAMME CONTROL<br />
This operates only for the devices with the SIMPLINK logo.<br />
Please check the SIMPLINK logo.<br />
This allows you to control and play other AV devices connected<br />
to the display through HDMI cable without additional cables<br />
and settings.<br />
If you do not want SIMPLINK menu, select “Off”.<br />
1<br />
2<br />
3<br />
4<br />
Press the MENU button and then D / E button to select the<br />
Option menu.<br />
Press the G button and then D / E button to select SIM-<br />
PLINK.<br />
Press the G button and then D / E button to select On or<br />
Off.<br />
Press the EXIT button to return to normal <strong>TV</strong> viewing.<br />
Option<br />
Language<br />
SIMPLINK G<br />
Key Lock<br />
ISM Method<br />
Low Power<br />
DE F G OK MENU<br />
Option<br />
INPUT MODE<br />
<strong>TV</strong><br />
INPUT<br />
POWER <strong>TV</strong><br />
DVD<br />
RATIO<br />
VCR<br />
SIMPLINK<br />
PIP<br />
LIST Q.VIEW<br />
MENU<br />
EXIT<br />
SLEEP<br />
OK<br />
TEXT<br />
I/II<br />
PIP PR- PIP PR+ PIP INPUT<br />
Language<br />
SIMPLINK<br />
Key Lock<br />
ISM Method<br />
Low Power<br />
DE F G OK MENU<br />
Off<br />
On<br />
2<br />
1<br />
3
SIMPLINK Functions<br />
Disc playback<br />
Control connected AV devices by pressing the D / E / F / G, OK buttons and buttons for play, stop, pause, fast<br />
reverse, fast forward, chapter skip.(The button does not provide such functions)<br />
Direct Play<br />
After connecting AV devices to <strong>TV</strong>, you can directly control the devices and play media without additional settings.<br />
Select AV device<br />
Enables you to select one of AV devices connected to <strong>TV</strong> and play it.<br />
Power off all devices<br />
When you power off <strong>TV</strong>, all connected devices are turned off.<br />
Switch audio-out<br />
Offers an easy way to switch audio-out.<br />
* A device, which is connected to <strong>TV</strong> through HDMI cable but does not support SIMPLINK, does not provide this function.<br />
SIMPLINK Menu<br />
Press the D / E / F / G button and then OK button to select the desired SIMPLINK source.<br />
1<br />
2<br />
3<br />
4<br />
5<br />
<strong>TV</strong> viewing : Switch to the previous <strong>TV</strong> programme<br />
regardless of the current mode.<br />
DISC playback : Select and play discs. When multiple<br />
discs are available, the titles of the discs are conveniently<br />
displayed at the bottom of the screen.<br />
VCR playback : Play and control the connected VCR.<br />
HDD Recordings playback : Play and control<br />
recordings stored in HDD.<br />
Audio Out to Home theater/Audio Out to <strong>TV</strong> :<br />
Select Home theater or <strong>TV</strong> speaker for Audio Out.<br />
!<br />
NOTE<br />
<strong>TV</strong><br />
DISC<br />
F DVD HTS G<br />
VCR<br />
DE OK<br />
HDD Recorder<br />
SPEAKER<br />
F <strong>TV</strong> Speaker G<br />
Selected Device<br />
When no device is connected<br />
(displayed in gray)<br />
When a device is<br />
connected (displayed in<br />
bright colour)<br />
G Connect the HDMI/DVI IN or HDMI IN terminal of the <strong>TV</strong> to the rear terminal (HDMI terminal) of the<br />
SIMPLINK device with the HDMI cable.<br />
G After connecting the HDMI terminal for the home theater with SIMPLINK function in the above method,<br />
connect the VARIABLE AUDIO OUT terminal on the back of the <strong>TV</strong> to the VARIABLE AUDIO IN terminal<br />
on the back of the SIMPLINK device with the VARIABLE AUDIO OUT cable.<br />
G When operating the external device with SIMPLINK, press the <strong>TV</strong> button among the MODE button on the<br />
remote controller.<br />
G When you switch the Input source with the INPUT button on the remote controller, you can stop the<br />
operation of device controlled by SIMPLINK.<br />
G When you select or operate the media device with home theater function, the speaker automatically<br />
switches to home theater speaker (HT speaker).<br />
1<br />
2<br />
3<br />
4<br />
5<br />
WATCHING <strong>TV</strong> / PROGRAMME CONTROL<br />
45
PICTURE CONTROL<br />
46<br />
PICTURE CONTROL<br />
WATCHING PIP(PICTURE-IN-PICTURE)<br />
PIP lets you view 2 different inputs (sources) on your <strong>TV</strong> screen at the same time.<br />
One source will be large, and the other source will show a smaller inset image.<br />
PIP function is available in the Component, RGB, HDMI mode. (But, it can’t adjust<br />
480i/576i resolution of Component mode.)<br />
Watching PIP/Double Window<br />
Press the PIP button to access the sub picture.<br />
Each press of PIP changes the PIP options.<br />
PIP Mode DW Mode<br />
PIP Off<br />
Programme Selection for Sub Picture<br />
Press the PIP PR +/- button to select a programme for the sub picture.<br />
The selected programme number is displayed just below the programme number of main picture.<br />
INPUT MODE<br />
<strong>TV</strong><br />
INPUT<br />
POWER <strong>TV</strong><br />
DVD<br />
RATIO<br />
SIMPLINK<br />
LIST<br />
MENU<br />
Q.VIEW<br />
EXIT<br />
SLEEP<br />
VOL<br />
SIZE<br />
PIP<br />
OK<br />
PR<br />
VCR<br />
I/II<br />
PIP PR- PIP PR+ PIP INPUT<br />
FAV<br />
1 2 3<br />
4 5 6<br />
7 8 9<br />
0<br />
TIME HOLD<br />
?<br />
REVEAL<br />
MUTE<br />
TEXT<br />
POSITION INDEX
Input Source Selection for Sub Picture<br />
Press the PIP INPUT button to select the input source for the sub picture.<br />
Each press of PIP INPUT button is pressed, each input source for the sub picture is displayed.<br />
(Sub picture can be selected only <strong>TV</strong>, AV1, AV2)<br />
Sub Picture Size Adjustment (PIP mode only)<br />
Press the SIZE button to adjust the sub picture size.<br />
With SIZE button in PIP mode, sub picture is adjusted.<br />
Moving the Sub Picture (PIP mode only)<br />
Press the POSITION button.<br />
Repeatedly press the POSITION button then sub picture moves.<br />
PICTURE CONTROL 47
PICTURE CONTROL<br />
48<br />
PICTURE CONTROL<br />
PICTURE SIZE (ASPECT RATIO)CONTROL<br />
You can watch the screen in various picture formats; Spectacle, Original, 4:3,<br />
16:9, 14:9 and Zoom1/2.<br />
If a fixed image is displayed on the screen for a long time, that fixed image may<br />
become imprinted on the screen and remain visible.<br />
You can adjust the enlarge proportion using D / E button.<br />
This function works in the following signal.<br />
1<br />
Press the RATIO button repeatedly to select the desired picture format.<br />
You can also adjust Aspect Ratio in the Picture menu.<br />
• Spectacle<br />
When your <strong>TV</strong> receives the wide screen signal, when<br />
selected it will adjust the picture horizontally, in non-linear<br />
proportion, to fill the entire screen.<br />
Spectacle DE<br />
• Original<br />
When your <strong>TV</strong> receives the wide screen signal, it will be<br />
automatically changed to the picture format to be sent.<br />
Original<br />
INPUT MODE<br />
<strong>TV</strong><br />
INPUT<br />
POWER <strong>TV</strong><br />
DVD<br />
RATIO<br />
VCR<br />
SIMPLINK<br />
PIP<br />
LIST Q.VIEW<br />
MENU<br />
EXIT<br />
SLEEP<br />
OK<br />
TEXT<br />
I/II<br />
PIP PR- PIP PR+ PIP INPUT<br />
FAV<br />
VOL PR<br />
• 4:3<br />
Following selection will lead you to view a picture with<br />
an original 4:3 aspect ratio, with gray bars appearing at<br />
both the left and right sides.<br />
• 16:9<br />
Following selection will lead you to adjust the picture<br />
horizontally, in a linear proportion, to fill the entire<br />
screen (useful for viewing 4:3 formatted DVDs).<br />
4:3<br />
16:9<br />
MUTE
• 14:9<br />
You can enjoy the picture format of 14:9 or general <strong>TV</strong><br />
programme through the 14:9 mode. The screen 14:9 is<br />
viewed just like that the screen 4:3 is magnified to the<br />
left / right.<br />
• Zoom1<br />
Following selection will lead you to view the<br />
picture without any alternation, while filling<br />
the entire screen. However, the top and bottom<br />
portions of the picture will be cropped.<br />
!<br />
NOTE<br />
14:9 DE<br />
Zooml DE<br />
• Zoom2<br />
Choose Zoom2 when you want the picture to<br />
be altered, both horizontally extended and<br />
vertically cropped. The picture taking a<br />
halfway trade off between alteration and<br />
screen coverage.<br />
Zoom2 DE<br />
G You can only select 4:3, 16:9 (Wide) in Component, RGB, HDMI mode only.<br />
PICTURE CONTROL 49
PICTURE CONTROL<br />
50<br />
PICTURE CONTROL<br />
PRESET PICTURE SETTINGS<br />
Picture Mode-Preset<br />
Intelligent Eye Adjusts picture according to the surrounding conditions.(32/42LB9R*<br />
only)<br />
Dynamic Select this option to display with a sharp image.<br />
Standard The most general and natural screen display status.<br />
Mild Select this option to display with a mild image.<br />
User1/2 Select this option to use the user-defined setting.<br />
1<br />
2<br />
3<br />
4<br />
Press the MENU button and then D / E button to select<br />
the Picture menu.<br />
Press the G button and then D / E button to select<br />
Picture Mode.<br />
Press the G button and then D / E button to select<br />
Intelligent Eye (32/42LB9R* only), Dynamic,<br />
Standard, Mild, User1 or User2.<br />
Press the EXIT button to return to normal <strong>TV</strong> viewing.<br />
• Picture Mode adjusts the <strong>TV</strong> for the best picture appearance.<br />
Select the preset value in the Picture Mode menu<br />
based on the programme category.<br />
• Intelligent Eye (32/42LB9R* only), Dynamic, Standard and<br />
Mild are programmed for optimum picture reproduction at<br />
the factory and cannot be changed.<br />
• When the Intelligent eye function is on, the most suitable<br />
picture is automatically adjusted according to the surrounding<br />
conditions. (32/42LB9R* only)<br />
Picture<br />
Picture<br />
Picture Mode G<br />
Colour Temperature<br />
XD<br />
Advanced<br />
Aspect Ratio<br />
Picture Reset<br />
Screen<br />
XD Demo<br />
DE F G OK MENU<br />
EXIT<br />
LIST Q.VIEW<br />
MENU<br />
OK<br />
FAV<br />
VOL PR<br />
MUTE<br />
1 2 3<br />
4 5 6<br />
7 8 9<br />
Picture Mode<br />
Colour Temperature<br />
XD<br />
Advanced<br />
Aspect Ratio<br />
Picture Reset<br />
Screen<br />
XD Demo<br />
DE F G OK MENU<br />
SLEEP<br />
Intelligent Eye<br />
Dynamic<br />
Standard<br />
Mild<br />
User1<br />
User2<br />
2<br />
1<br />
3
Auto Colour Tone Control(Warm/Medium/Cool)<br />
To initialize values (reset to default settings), select the Cool<br />
option.<br />
Choose one of three automatic colour adjustments. Set to<br />
warm to enhance hotter colours such as red, or set to cool to<br />
see less intense colours with more blue.<br />
It’s available to use this function in “User1/2” of Picture mode<br />
only.<br />
1<br />
2<br />
3<br />
4<br />
Press the MENU button and then D / E button to select<br />
the Picture menu.<br />
Press the G button and then D / E button to select<br />
Colour Temperature.<br />
Press the G button and then D / E button to select<br />
either Cool, Medium, Warm or User.<br />
Press the EXIT button to return to normal <strong>TV</strong> viewing.<br />
EXIT<br />
Picture<br />
Picture<br />
Picture Mode<br />
Colour Temperature G<br />
XD<br />
Advanced<br />
Aspect Ratio<br />
Picture Reset<br />
Screen<br />
XD Demo<br />
DE F G OK MENU<br />
LIST Q.VIEW<br />
MENU<br />
OK<br />
FAV<br />
VOL PR<br />
MUTE<br />
1 2 3<br />
4 5 6<br />
7 8 9<br />
Picture Mode<br />
Colour Temperature<br />
XD<br />
Advanced<br />
Aspect Ratio<br />
Picture Reset<br />
Screen<br />
XD Demo<br />
DE F G OK MENU<br />
Cool<br />
Medium<br />
Warm<br />
User<br />
SLEEP<br />
2<br />
1<br />
3<br />
PICTURE CONTROL 51
PICTURE CONTROL<br />
52<br />
PICTURE CONTROL<br />
MANUAL PICTURE ADJUSTMENT<br />
Picture Mode-User Option<br />
Contrast Adjusts the difference between the light and<br />
dark levels in the picture.<br />
Brightness Increases or decreases amount of white in the<br />
picture.<br />
Colour Adjusts intensity of all colours.<br />
Sharpness Adjusts the level of crispness in the edges<br />
between the light and dark areas of the picture.<br />
The lower the level, the softer the image.<br />
Tint Adjusts the balance between red and green levels.<br />
1<br />
2<br />
3<br />
4<br />
5<br />
6<br />
!<br />
Press the MENU button and then D / E button to select<br />
the Picture menu.<br />
Press the G button and then D / E button to select<br />
Picture Mode.<br />
Press the G button and then D / E button to select User1<br />
or User2.<br />
Press the G button and then D / E button to select the<br />
desired picture option (Contrast, Brightness, Colour,<br />
Sharpness and Tint).<br />
Press the F / G button to make appropriate adjustments.<br />
Press the EXIT button to return to normal <strong>TV</strong> viewing.<br />
NOTE<br />
G You can’t adjust colour, sharpness and tint in the RGB-<br />
PC mode to the levels you prefer.<br />
Picture<br />
Picture<br />
Picture Mode G<br />
Colour Temperature<br />
XD<br />
Advanced<br />
Aspect Ratio<br />
Picture Reset<br />
Screen<br />
XD Demo<br />
DE F G OK MENU<br />
User1<br />
Contrast 100 G<br />
Brightness 50<br />
Colour 50<br />
Sharpness 50<br />
Tint 0<br />
DE F G OK MENU<br />
EXIT<br />
LIST Q.VIEW<br />
MENU<br />
OK<br />
FAV<br />
VOL PR<br />
MUTE<br />
1 2 3<br />
Picture Mode<br />
Colour Temperature<br />
XD<br />
Advanced<br />
Aspect Ratio<br />
Picture Reset<br />
Screen<br />
XD Demo<br />
Intelligent Eye<br />
Dynamic<br />
Standard<br />
Mild<br />
User1<br />
User2<br />
SLEEP<br />
Contrast 100 F G<br />
E<br />
DE F G OK MENU<br />
2<br />
4<br />
1<br />
3<br />
5
Colour Tone - User Option<br />
To adjust red, green, blue to any colour temperature you prefer.<br />
It’s available to use this function in “User1/2” of Picture mode<br />
only.<br />
1<br />
2<br />
3<br />
4<br />
5<br />
6<br />
Press the MENU button and then D / E button to select<br />
the Picture menu.<br />
Press the G button and then D / E button to select<br />
Colour Temperature.<br />
Press the G button and then D / E button to select User.<br />
Press the G button and then D / E button to select Red,<br />
Green or Blue.<br />
Press the F / G button to make appropriate adjustments.<br />
Press the EXIT button to return to normal <strong>TV</strong> viewing.<br />
Picture<br />
Picture<br />
Picture Mode<br />
Colour Temperature G<br />
XD<br />
Advanced<br />
Aspect Ratio<br />
Picture Reset<br />
Screen<br />
XD Demo<br />
DE F G OK MENU<br />
User<br />
Red +30 G<br />
Green 0<br />
Blue 0<br />
DE F G OK MENU<br />
EXIT<br />
LIST Q.VIEW<br />
MENU<br />
OK<br />
FAV<br />
VOL PR<br />
MUTE<br />
1 2 3<br />
Picture Mode<br />
Colour Temperature<br />
XD<br />
Advanced<br />
Aspect Ratio<br />
Picture Reset<br />
Screen<br />
XD Demo<br />
Cool<br />
Medium<br />
Warm<br />
User<br />
SLEEP<br />
Red +30 F G<br />
E<br />
DE F G OK MENU<br />
2<br />
4<br />
1<br />
3<br />
5<br />
PICTURE CONTROL 53
PICTURE CONTROL<br />
54<br />
PICTURE CONTROL<br />
- PICTURE IMPROVEMENT TECHNOLOGY<br />
XD is <strong>LG</strong> electronic's unique picture improving technology to<br />
display a real HD source through an advanced digital signal processing<br />
algorithm.<br />
It’s not available to use this function in RGB-PC mode.<br />
1<br />
2<br />
3<br />
4<br />
Press the MENU button and then D / E button to select<br />
the Picture menu.<br />
Press the G button and then D / E button to select XD.<br />
Press the G button and then D / E button to select<br />
Auto or Manual.<br />
Press the EXIT button to return to <strong>TV</strong> viewing.<br />
* Selecting the Manual<br />
This menu is activated after selecting the User1 or User2 of Picture<br />
Mode.<br />
1<br />
2<br />
3<br />
Press the G button and then D / E button to select X D<br />
Contrast, XD Colour or XD NR.<br />
Press the G button and then D / E button to select On or<br />
Off.<br />
Press the EXIT button to return to normal <strong>TV</strong> viewing.<br />
A XD Contrast : Optimizing the contrast automatically<br />
according to the brightness of the reflection.<br />
A XD Colour : Adjusting the colours of the reflection<br />
automatically to reproduce as closely as possible to the<br />
natural colours.<br />
A XD NR : Removing the noise up to the point where it<br />
does not damage the original picture. (It’s not available<br />
to use this function in HDMI, Component (except<br />
480i/576i), RGB-PC mode.)<br />
Picture<br />
Picture<br />
Picture Mode<br />
Colour Temperature<br />
XD G<br />
Advanced<br />
Aspect Ratio<br />
Picture Reset<br />
Screen<br />
XD Demo<br />
DE F G OK MENU<br />
Manual<br />
XD Contrast G G<br />
XD Colour<br />
XD NR<br />
DE F G OK MENU<br />
EXIT<br />
LIST Q.VIEW<br />
MENU<br />
OK<br />
FAV<br />
VOL PR<br />
MUTE<br />
1 2 3<br />
4 5 6<br />
7 8 9<br />
Picture Mode<br />
Colour Temperature<br />
XD<br />
Advanced<br />
Aspect Ratio<br />
Picture Reset<br />
Screen<br />
XD Demo<br />
DE F G OK MENU<br />
Auto<br />
Manual<br />
Off<br />
On<br />
SLEEP<br />
2<br />
1<br />
1<br />
3<br />
2
DEMO<br />
Use it to see the difference between XD Demo on and XD<br />
Demo off.<br />
It’s not available to use this function in RGB[PC] mode.<br />
1<br />
2<br />
3<br />
4<br />
Press the MENU button and then D / E button to select<br />
the Picture menu.<br />
Press the G button and then D / E button to select XD Demo.<br />
Press the G button to begin XD Demo.<br />
To stop XD Demo, press the MENU button.<br />
• XD Demo<br />
Picture<br />
Picture<br />
Picture Mode<br />
Colour Temperature<br />
XD<br />
Advanced<br />
Aspect Ratio<br />
Picture Reset<br />
Screen<br />
XD Demo G<br />
DE F G OK MENU<br />
EXIT<br />
LIST Q.VIEW<br />
MENU<br />
OK<br />
FAV<br />
VOL PR<br />
MUTE<br />
1 2 3<br />
Picture Mode<br />
Colour Temperature<br />
XD<br />
Advanced<br />
Aspect Ratio<br />
Picture Reset<br />
Screen<br />
XD Demo<br />
DE F G OK MENU<br />
XD Off XD On<br />
MENU Exit<br />
To Start<br />
SLEEP<br />
2<br />
1<br />
3<br />
PICTURE CONTROL 55
PICTURE CONTROL<br />
56<br />
PICTURE CONTROL<br />
ADVANCED - CINEMA<br />
Set up the <strong>TV</strong> for the best picture appearance for viewing<br />
movies.<br />
This feature operates only in Analog <strong>TV</strong>, AV, S-video and<br />
Component 480i/576i mode.<br />
1<br />
2<br />
3<br />
4<br />
5<br />
Press the MENU button and then D / E button to select<br />
the Picture menu.<br />
Press the G button and then D / E button to select Advanced.<br />
Press the G button and then D / E button to select Cinema.<br />
Press the G button and then D / E button to select On or Off.<br />
Press the EXIT button to return to normal <strong>TV</strong> viewing.<br />
Picture<br />
Picture<br />
Picture Mode<br />
Colour Temperature<br />
XD<br />
Advanced G<br />
Aspect Ratio<br />
Picture Reset<br />
Screen<br />
XD Demo<br />
DE F G OK MENU<br />
Advanced<br />
Cinema G<br />
Black Level<br />
DE F G OK MENU<br />
EXIT<br />
LIST Q.VIEW<br />
MENU<br />
OK<br />
FAV<br />
VOL PR<br />
MUTE<br />
1 2 3<br />
4 5 6<br />
7 8 9<br />
Picture Mode<br />
Colour Temperature<br />
XD<br />
Advanced<br />
Aspect Ratio<br />
Picture Reset<br />
Screen<br />
XD Demo<br />
DE F G OK MENU<br />
To Set<br />
Off<br />
On<br />
SLEEP<br />
2<br />
1<br />
3<br />
4
ADVANCED - BLACK(DARKNESS) LEVEL<br />
When you watch the movie, this function adjusts the set to the<br />
best picture appearance. Adjusting the contrast and the brightness<br />
of the screen using the black level of the screen.<br />
This function works in the following mode: AV (NTSC-M), S-<br />
Video (NTSC-M) or HDMI.<br />
1<br />
2<br />
3<br />
4<br />
5<br />
Press the MENU button and then D / E button to select<br />
the Picture menu.<br />
Press the G button and then D / E button to select<br />
Advanced.<br />
Press the G button and then D / E button to select Black<br />
Level.<br />
Press the G button and then D / E button to select Low<br />
or High.<br />
A Low :: The reflection of the screen gets darker.<br />
A High :: The reflection of the screen gets brighter.<br />
Press the EXIT button to return to normal <strong>TV</strong> viewing.<br />
Picture<br />
Picture<br />
Picture Mode<br />
Colour Temperature<br />
XD<br />
Advanced G<br />
Aspect Ratio<br />
Picture Reset<br />
Screen<br />
XD Demo<br />
DE F G OK MENU<br />
Advanced<br />
Cinema<br />
Black Level G<br />
DE F G OK MENU<br />
EXIT<br />
LIST Q.VIEW<br />
MENU<br />
OK<br />
FAV<br />
VOL PR<br />
MUTE<br />
1 2 3<br />
4 5 6<br />
7 8 9<br />
Picture Mode<br />
Colour Temperature<br />
XD<br />
Advanced<br />
Aspect Ratio<br />
Picture Reset<br />
Screen<br />
XD Demo<br />
DE F G OK MENU<br />
To Set<br />
Low<br />
High<br />
SLEEP<br />
2<br />
1<br />
3<br />
4<br />
PICTURE CONTROL 57
PICTURE CONTROL<br />
58<br />
PICTURE CONTROL<br />
PICTURE RESET<br />
Returns to the default settings Picture Mode, Colour<br />
Temperature, XD, Advanced, Aspect Ratio at the factory.<br />
1<br />
2<br />
3<br />
4<br />
Press the MENU button and then D / E button to select<br />
the Picture menu.<br />
Press the G button and then D / E button to select<br />
Picture Reset.<br />
Press the G button to initialize the adjusted value.<br />
Press the EXIT button to return to normal <strong>TV</strong> viewing.<br />
Picture<br />
Picture<br />
Picture Mode<br />
Colour Temperature<br />
XD<br />
Advanced<br />
Aspect Ratio<br />
Picture Reset G<br />
Screen<br />
XD Demo<br />
DE F G OK MENU<br />
EXIT<br />
LIST Q.VIEW<br />
MENU<br />
OK<br />
FAV<br />
VOL PR<br />
MUTE<br />
1 2 3<br />
4 5 6<br />
7 8 9<br />
Picture Mode<br />
Colour Temperature<br />
XD<br />
Advanced<br />
Aspect Ratio<br />
Picture Reset<br />
Screen<br />
XD Demo<br />
DE F G OK MENU<br />
To Set<br />
SLEEP<br />
2<br />
1<br />
3
IMAGE STICKING MINIMIZATION(ISM)METHOD<br />
A frozen of still picture from a PC/video game displayed on the<br />
screen for prolonged periods will result in a ghost image<br />
remaining even when you change the image. Avoid allowing a<br />
fixed image to remain on the set's screen for a long period of<br />
time.<br />
It’s not available to use this function in <strong>LCD</strong> models.<br />
White Wash<br />
White wash removes permanent images from the screen.<br />
Note: An excessive permanent image may be impossible to<br />
clear entirely with White Wash.<br />
Orbiter<br />
Orbiter may help prevent ghost images. However, it is best<br />
not to allow any fixed image to remain on the screen. To<br />
avoid a permanent image on the screen, the screen will move<br />
every 2 minutes.<br />
Inversion<br />
This is the function to invert the panel colour of the screen.<br />
The panel colour is automatically inverted every 30 minutes.<br />
1<br />
2<br />
3<br />
4<br />
Press the MENU button and then D / E button to<br />
select the Option menu.<br />
Press the G button and then D / E button to select<br />
ISM Method.<br />
Press the G button and then D / E button to select<br />
either Normal, White Wash, Orbiter or Inversion.<br />
If you unnecessary to set this function, set Normal.<br />
Press the EXIT button to return to normal <strong>TV</strong> viewing.<br />
Option<br />
Option<br />
Language<br />
SIMPLINK<br />
Key Lock<br />
ISM Method G<br />
Low Power<br />
DE F G OK MENU<br />
EXIT<br />
Language<br />
SIMPLINK<br />
Key Lock<br />
ISM Method<br />
Low Power<br />
LIST Q.VIEW<br />
MENU<br />
OK<br />
FAV<br />
VOL PR<br />
MUTE<br />
1 2 3<br />
4 5 6<br />
7 8 9<br />
DE F G OK MENU<br />
Normal<br />
White Wash<br />
Orbiter<br />
Inversion<br />
SLEEP<br />
2<br />
1<br />
3<br />
PICTURE CONTROL 59
PICTURE CONTROL<br />
60<br />
PICTURE CONTROL<br />
LOW-POWER PICTURE MODE<br />
This is the function to reduce the power consumption of the set.<br />
It’s not available to use this function in <strong>LCD</strong> models.<br />
1<br />
2<br />
3<br />
4<br />
Press the MENU button and then D / E button to<br />
select the Option menu.<br />
Press the G button and then D / E button to select<br />
Low Power.<br />
Press the G button and then D / E button to select<br />
On or Off.<br />
Press the EXIT button to return to normal <strong>TV</strong> viewing.<br />
Option<br />
Option<br />
Language<br />
SIMPLINK<br />
Key Lock<br />
ISM Method<br />
Low Power G<br />
DE F G OK MENU<br />
EXIT<br />
Language<br />
SIMPLINK<br />
Key Lock<br />
ISM Method<br />
Low Power<br />
LIST Q.VIEW<br />
MENU<br />
OK<br />
FAV<br />
VOL PR<br />
MUTE<br />
1 2 3<br />
4 5 6<br />
7 8 9<br />
DE F G OK MENU<br />
Off<br />
On<br />
SLEEP<br />
2<br />
1<br />
3
SOUND & LANGUAGE CONTROL<br />
AUTO VOLUME LEVELER<br />
Auto Volume automatically keeps on an equal volume level even<br />
if you change programmes.<br />
1<br />
2<br />
3<br />
4<br />
Press the MENU button and then D / E button to select<br />
the Audio menu.<br />
Press the G button and then D / E button to select Auto<br />
Volume.<br />
Press the G button and then D / E button to select On or<br />
Off.<br />
Press the EXIT button to return to normal <strong>TV</strong> viewing.<br />
1<br />
Audio<br />
Audio<br />
Sound Mode<br />
Auto Volume G<br />
Balance 0<br />
<strong>TV</strong> Speaker<br />
DE F G OK MENU<br />
EXIT<br />
LIST Q.VIEW<br />
MENU<br />
OK<br />
FAV<br />
VOL PR<br />
MUTE<br />
1 2 3<br />
4 5 6<br />
7 8 9<br />
SLEEP<br />
Sound Mode<br />
Auto Volume<br />
Balance 0<br />
<strong>TV</strong> Speaker<br />
DE F G OK MENU<br />
Off<br />
On<br />
2<br />
1<br />
3<br />
SOUND & LANGUAGE CONTROL 61
SOUND & LANGUAGE CONTROL<br />
62<br />
SOUND & LANGUAGE CONTROL<br />
PRESET SOUND SETTINGS-SOUND MODE<br />
You can select your preferred sound setting; Surround MAX,<br />
Standard, Music, Movie or Sports and you can also adjust the<br />
sound frequency of the equalizer.<br />
Sound Mode lets you enjoy the best sound without any Special<br />
adjustment because the <strong>TV</strong> sets the appropriate sound options<br />
based on the programme content.<br />
Surround MAX, Standard, Music, Movie, and Sports are<br />
preset for good sound quality at the factory and are not<br />
adjustable.<br />
Surround MAX Select this option to sound realistic.<br />
Standard The most commanding and natural audio.<br />
Music Select this option to enjoy the original sound<br />
when listening to the music.<br />
Movie Select this option to enjoy sublime sound.<br />
Sports Select this option to watch sports broadcasting.<br />
User Select this option to use the user-defined audio<br />
settings.<br />
1<br />
2<br />
3<br />
4<br />
Press the MENU button and then D / E button to select<br />
the Audio menu.<br />
Press the G button and then D / E button to select<br />
Sound Mode.<br />
Press the G button and then D / E button to select<br />
Surround MAX, Standard, Music, Movie, Sports or<br />
User.<br />
Press the EXIT button to return to normal <strong>TV</strong> viewing.<br />
Audio<br />
Audio<br />
Sound Mode G<br />
Auto Volume<br />
Balance 0<br />
<strong>TV</strong> Speaker<br />
DE F G OK MENU<br />
EXIT<br />
LIST Q.VIEW<br />
MENU<br />
OK<br />
FAV<br />
VOL PR<br />
MUTE<br />
1 2 3<br />
4 5 6<br />
7 8 9<br />
SLEEP<br />
Sound Mode<br />
Auto Volume<br />
Balance 0<br />
<strong>TV</strong> Speaker<br />
DE F G OK MENU<br />
Surround MAX<br />
Standard<br />
Music<br />
Movie<br />
Sports<br />
User<br />
2<br />
1<br />
3
SOUND SETTING ADJUSTMENT -USER MODE<br />
Adjust the sound equalizer.<br />
1<br />
2<br />
3<br />
4<br />
5<br />
6<br />
Press the MENU button and then D / E button to select<br />
the Audio menu.<br />
Press the G button and then D / E button to select<br />
Sound Mode.<br />
Press the G button and then D / E button to select User.<br />
Press the G button.<br />
Select a sound band by pressing the F / G button.<br />
Make appropriate sound level with the D / E button.<br />
Press the EXIT button to return to normal <strong>TV</strong> viewing.<br />
Audio<br />
Audio<br />
Sound Mode G<br />
Auto Volume<br />
Balance 0<br />
<strong>TV</strong> Speaker<br />
DE F G OK MENU<br />
EXIT<br />
LIST Q.VIEW<br />
MENU<br />
OK<br />
FAV<br />
VOL PR<br />
MUTE<br />
1 2 3<br />
4 5 6<br />
7 8 9<br />
SLEEP<br />
Sound Mode<br />
Auto Volume<br />
Balance 0<br />
<strong>TV</strong> Speaker<br />
DE F G OK MENU<br />
User<br />
Surround MAX<br />
Standard<br />
Music<br />
Movie<br />
Sports<br />
User<br />
DE F G OK MENU<br />
2<br />
0.1 0.5 1.5 5.0 10 kHz<br />
1<br />
3 4<br />
5<br />
SOUND & LANGUAGE CONTROL 63
SOUND & LANGUAGE CONTROL<br />
64<br />
SOUND & LANGUAGE CONTROL<br />
BALANCE<br />
You can adjust the sound balance of speaker to the levels you<br />
prefer.<br />
1<br />
2<br />
3<br />
4<br />
Press the MENU button and then D / E button to select<br />
the Audio menu.<br />
Press the G button and then D / E button to select<br />
Balance.<br />
Press the G button and then F / G button to make<br />
desired adjustment.<br />
Press the EXIT button to return to normal <strong>TV</strong> viewing.<br />
Audio<br />
Audio<br />
Sound Mode<br />
Auto Volume<br />
Balance R15 0G<br />
<strong>TV</strong> Speaker<br />
1<br />
DE F G OK MENU<br />
EXIT<br />
LIST Q.VIEW<br />
MENU<br />
OK<br />
FAV<br />
VOL PR<br />
MUTE<br />
1 2 3<br />
4 5 6<br />
7 8 9<br />
SLEEP<br />
Sound Mode<br />
Auto Volume<br />
Balance 0<br />
<strong>TV</strong> Speaker<br />
DE F G OK MENU<br />
2<br />
1<br />
3
<strong>TV</strong> SPEAKERS ON/OFF SETUP<br />
You can adjust the internal speaker status.<br />
In AV, COMPONENT, RGB[PC] and HDMI mode, internal speaker<br />
audio can be outputted even though there is no video signal.<br />
If you want to use your external hi-fi stereo system, turn off the<br />
internal speakers of the set.<br />
1<br />
2<br />
3<br />
4<br />
Press the MENU button and then D / E button to select<br />
the Audio menu.<br />
Press the G button and then D / E button to select <strong>TV</strong><br />
Speaker.<br />
Press the G button and then D / E button to select<br />
On or Off.<br />
Press the EXIT button to return to normal <strong>TV</strong> viewing.<br />
1<br />
Audio<br />
Audio<br />
Sound Mode<br />
Auto Volume<br />
Balance 0<br />
<strong>TV</strong> Speaker G<br />
DE F G OK MENU<br />
EXIT<br />
LIST Q.VIEW<br />
MENU<br />
OK<br />
FAV<br />
VOL PR<br />
MUTE<br />
1 2 3<br />
4 5 6<br />
7 8 9<br />
SLEEP<br />
Sound Mode<br />
Auto Volume<br />
Balance 0<br />
<strong>TV</strong> Speaker<br />
DE F G OK MENU<br />
Off<br />
On<br />
1<br />
2 3<br />
SOUND & LANGUAGE CONTROL 65
SOUND & LANGUAGE CONTROL<br />
66<br />
SOUND & LANGUAGE CONTROL<br />
I/II<br />
Stereo/Dual Reception<br />
When a programme is selected, the sound information for the station appears after<br />
the programme number and station name disappear.<br />
Broadcast<br />
Mono<br />
Stereo<br />
Dual<br />
On Screen Display<br />
MONO<br />
STEREO<br />
DUAL I<br />
A Mono sound selection<br />
If the stereo signal is weak in stereo reception, you can switch to mono by pressing<br />
the I/II button twice. In mono reception, the depth of sound is improved. To switch<br />
back to stereo, press the I/II button twice again.<br />
A Language selection for dual language broadcast<br />
If a programme received two languages (dual language), you can switch to DUAL I,<br />
DUAL II or DUAL I+II by pressing the I/II button repeatedly.<br />
DUAL I Sends the primary broadcast language to the loudspeakers.<br />
DUAL II Sends the secondary broadcast language to the loudspeakers.<br />
DUAL I+II Sends a separate language to each loudspeaker.<br />
INPUT MODE<br />
<strong>TV</strong><br />
INPUT<br />
POWER <strong>TV</strong><br />
DVD<br />
RATIO<br />
VCR<br />
SIMPLINK<br />
PIP<br />
LIST Q.VIEW<br />
MENU<br />
EXIT<br />
SLEEP<br />
OK<br />
I/II<br />
PIP PR- PIP PR+ PIP INPUT<br />
FAV<br />
TEXT
NICAM Reception<br />
If the set is equipped with the receiver for NICAM reception, the high quality NICAM (Near<br />
Instantaneous Companding Audio Multiplex) digital sound can be received.<br />
Sound output can be selected according to the type of received broadcast as follows by pressing<br />
the I/II button repeatedly.<br />
1<br />
2<br />
3<br />
When NICAM mono is received, you can select NICAM MONO or FM MONO.<br />
When NICAM stereo is received, you can select NICAM STEREO or FM MONO.<br />
If the stereo signal is weak, switch to FM MONO.<br />
When NICAM dual is received, you can select NICAM DUAL I, NICAM DUAL II or<br />
NICAM DUAL I+II or MONO.<br />
Speaker Sound Output Selection<br />
In AV, S-Video, Component, RGB and HDMI mode, you can select output sound for the left and<br />
right loudspeakers.<br />
Repeatedly press the I/II button to select the sound output.<br />
L+R: Audio signal from audio L input is sent to the left loudspeakers and audio signal from<br />
audio R input is sent to the right loudspeakers.<br />
L+L: Audio signal from audio L input is sent to left and right loudspeakers.<br />
R+R: Audio signal from audio R input is sent to left and right loudspeakers.<br />
SOUND & LANGUAGE CONTROL 67
SOUND & LANGUAGE CONTROL<br />
68<br />
SOUND & LANGUAGE CONTROL<br />
ON-SCREEN MENU LANGUAGE SELECTION<br />
The menus can be shown on the screen in the selected language. First select your language.<br />
1<br />
2<br />
3<br />
4<br />
5<br />
!<br />
Press the MENU button and then use D / E button to select the<br />
Option menu.<br />
Press the G button and then use D / E button to select Language.<br />
Press the G button and then use D / E button to select your desired<br />
language.<br />
Press the O K button<br />
Press the EXIT button to return to normal <strong>TV</strong> viewing.<br />
NOTE<br />
G If you intend to be away on vacation, disconnect the power plug from<br />
wall power outlet.<br />
INPUT MODE<br />
<strong>TV</strong><br />
INPUT<br />
POWER <strong>TV</strong><br />
DVD<br />
RATIO<br />
SIMPLINK<br />
LIST<br />
MENU<br />
Q.VIEW<br />
EXIT<br />
SLEEP<br />
VOL<br />
SIZE<br />
PIP<br />
OK<br />
PR<br />
VCR<br />
I/II<br />
PIP PR- PIP PR+ PIP INPUT<br />
FAV<br />
1 2 3<br />
4 5 6<br />
7 8 9<br />
0<br />
TIME HOLD<br />
?<br />
REVEAL<br />
MUTE<br />
TEXT<br />
POSITION INDEX
TIME SETTING<br />
CLOCK SETUP<br />
You must set the time correctly before using on/off time function.<br />
If current time setting is erased by a power failure or the set is<br />
unplugged, reset the clock.<br />
1<br />
2<br />
3<br />
4<br />
5<br />
Press the MENU button and then D / E button to select<br />
the Time menu.<br />
Press the G button and then D / E button to select<br />
Clock.<br />
Press the G button and then D / E button to set the hour.<br />
Press the G button and then D / E button to set the<br />
minute.<br />
Press the EXIT button to return to normal <strong>TV</strong> viewing.<br />
Time<br />
Clock Clock G<br />
Off Time<br />
On Time<br />
Sleep Time<br />
Auto Sleep<br />
DE F G OK MENU<br />
Time<br />
EXIT<br />
Clock<br />
Off Time<br />
On Time<br />
Sleep Time<br />
Auto Sleep<br />
LIST Q.VIEW<br />
MENU<br />
OK<br />
FAV<br />
VOL PR<br />
MUTE<br />
1 2 3<br />
4 5 6<br />
7 8 9<br />
DE F G OK MENU<br />
- - : - -<br />
SLEEP<br />
2<br />
1<br />
3 4<br />
TIME SETTING 69
TIME SETTING<br />
70<br />
TIME SETTING<br />
AUTO ON/OFF TIMER SETTING<br />
The Off time automatically switches the set to standby at the<br />
preset time.<br />
Two hours after the set is switched on by the on time function it<br />
will automatically switch back to standby mode unless a button<br />
has been pressed.<br />
Once the on time/off time is set, these functions operate daily at<br />
the preset time.<br />
Off time function overrides On time function if they are set both<br />
to the same time.<br />
The set must be in standby mode for the On timer to work.<br />
1<br />
2<br />
3<br />
4<br />
5<br />
6<br />
7<br />
Press the MENU button and then D / E button to select<br />
the Time menu.<br />
Press the G button and then D / E button to select Off<br />
Time/On Time.<br />
Press the G button and then D / E button to select On.<br />
• To cancel On/Off Time function, select Off.<br />
Press the G button and then D / E button to set the hour.<br />
Press the G button and then D / E button to set the<br />
minutes.<br />
For only On Time function<br />
• Programme: Press the G button and then D / E button<br />
to select the programme.<br />
• Volume: Press the G button and then D / E button to<br />
adjust volume level at turn-on.<br />
Press the EXIT button to return to normal <strong>TV</strong> viewing.<br />
Time<br />
Clock<br />
Off Time G<br />
On Time<br />
Sleep Time<br />
Auto Sleep<br />
DE F G OK MENU<br />
Time<br />
Clock<br />
Off Time<br />
On Time G<br />
Sleep Time<br />
Auto Sleep<br />
DE F G OK MENU<br />
Time<br />
EXIT<br />
Clock<br />
Off Time<br />
On Time<br />
Sleep Time<br />
Auto Sleep<br />
LIST Q.VIEW<br />
MENU<br />
OK<br />
FAV<br />
VOL PR<br />
MUTE<br />
1 2 3<br />
4 5 6<br />
7 8 9<br />
DE F G OK MENU<br />
- - : - -<br />
Off<br />
SLEEP<br />
07:00<br />
PR 1<br />
Vol. 8<br />
On<br />
2<br />
2<br />
3<br />
3<br />
4<br />
4<br />
1<br />
5<br />
5 6
SLEEP TIMER SETTING<br />
You don’t have to remember to switch the set off before you go<br />
to sleep. The sleep timer automatically switches the set to<br />
standby after the preset time has elapsed.<br />
1<br />
2<br />
!<br />
Press the SLEEP button repeatedly to select the number of<br />
minutes. The display ‘ - - - ’ will appear on the<br />
screen, followed by 10, 20, 30, 60, 90, 120, 180 and 240.<br />
When the number of minutes you want is displayed on the<br />
screen, the timer begins to count down from the number of<br />
minutes selected.<br />
■ You can also set up the Sleep Time in the Time menu.<br />
NOTE<br />
Time Time<br />
Clock<br />
Clock<br />
Off Time<br />
Off Time<br />
On Time<br />
On Time<br />
Sleep Time<br />
Sleep Time G<br />
Auto Sleep<br />
Auto Sleep<br />
DE F G OK MENU<br />
DE F G OK MENU<br />
G To view the remaining sleep time, press the SLEEP button once.<br />
RATIO<br />
SIMPLINK<br />
EXIT<br />
PIP<br />
LIST Q.VIEW<br />
MENU<br />
OK<br />
TEXT<br />
VCR<br />
I/II<br />
PIP PR- PIP PR+ PIP INPUT<br />
FAV<br />
VOL PR<br />
G To cancel the sleep time, repeatedly press the SLEEP button until the display ‘ - - - ’ appears.<br />
G When you switch the set off, the set releases the preset sleep time.<br />
Off<br />
MUTE<br />
SLEEP<br />
TIME SETTING 71
TIME SETTING<br />
72<br />
TIME SETTING<br />
AUTO SHUT-OFF SETTING<br />
If set to on and there is no input signal, the <strong>TV</strong> turns off automatically<br />
after 10 minutes.<br />
1<br />
2<br />
3<br />
4<br />
Press the MENU button and then D / E button to select<br />
the Time menu.<br />
Press the G button and then D / E button to select Auto<br />
Sleep.<br />
Press the G button and then D / E button to select On or<br />
Off.<br />
Press the EXIT button to return to normal <strong>TV</strong> viewing.<br />
Time<br />
Time<br />
Clock<br />
Off Time<br />
On Time<br />
Sleep Time<br />
Auto Sleep G<br />
DE F G OK MENU<br />
EXIT<br />
Clock<br />
Off Time<br />
On Time<br />
Sleep Time<br />
Auto Sleep<br />
LIST Q.VIEW<br />
MENU<br />
OK<br />
FAV<br />
VOL PR<br />
MUTE<br />
1 2 3<br />
4 5 6<br />
7 8 9<br />
DE F G OK MENU<br />
Off<br />
On<br />
SLEEP<br />
1<br />
2 3
TELETEXT<br />
This feature is not available in all countries.<br />
Teletext is a free service broadcast by most <strong>TV</strong> stations which gives up-to-the-minute information on news,<br />
weather, television programmes, share prices and many other topics.<br />
The teletext decoder of this <strong>TV</strong> can support the SIMPLE, TOP and FASTEXT systems. SIMPLE (standard teletext)<br />
consists of a number of pages which are selected by directly entering the corresponding page number.<br />
TOP and FASTEXT are more modern methods allowing quick and easy selection of teletext information.<br />
SWITCH ON/OFF<br />
Press the TEXT button to switch to teletext. The initial page or last page appears on the screen.<br />
Two page numbers, <strong>TV</strong> station name, date and time are displayed on the screen headline. The first page number<br />
indicates your selection, while the second shows the current page displayed.<br />
Press the TEXT or EXIT button to switch off teletext. The previous mode reappears.<br />
SIMPLE TEXT<br />
A Page selection<br />
1<br />
2<br />
Enter the desired page number as a three digit number with the NUMBER buttons. If during selection you<br />
press a wrong number, you must complete the three digit number and then re-enter the correct page number.<br />
The PR+/- button can be used to select the preceding or following page.<br />
TELETEXT<br />
73
TELETEXT<br />
74<br />
TELETEXT<br />
TOP TEXT<br />
The user guide displays four fields-red, green, yellow and blue at the bottom of the screen. The yellow field<br />
denotes the next group and the blue field indicates the next block.<br />
A Block / group / page selection<br />
1<br />
2<br />
3<br />
4<br />
With the blue button you can progress from block to block.<br />
Use the yellow button to proceed to the next group with automatic overflow to the next block.<br />
With the green button you can proceed to the next existing page with automatic overflow to the next group.<br />
Alternatively the PR+ button can be used.<br />
The red button permits to return to previous selection. Alternatively the PR- button can be used.<br />
A Direct page selection<br />
Corresponding to the SIMPLE teletext mode, you can select a page by entering it as a three digit number using<br />
the NUMBER buttons in TOP mode.<br />
FASTEXT<br />
The teletext pages are colour coded along the bottom of the screen and are selected by pressing the corresponding<br />
coloured button.<br />
A Page selection<br />
1<br />
2<br />
3<br />
4<br />
Press the i button to select the index page.<br />
You can select the pages which are colour coded along the bottom line with the same coloured buttons.<br />
Corresponding to the SIMPLE teletext mode, you can select a page by entering its three digit page number<br />
with the NUMBER buttons in FASTEXT mode.<br />
The PR+/- button can be used to select the preceding or following page.
SPECIAL TELETEXT FUNCTIONS<br />
?<br />
A REVEAL<br />
Press this button to display concealed information, such as solutions of riddles or puzzles.<br />
Press this button again to remove the information from the display.<br />
A SIZE<br />
Selects double height text.<br />
Press this button to enlarge the top half of the page.<br />
Press this button again to enlarge the bottom half of the page.<br />
Press this button again to return to the normal display.<br />
A UPDATE<br />
Displays the <strong>TV</strong> picture on the screen while waiting for the new teletext page. The display will appear at the top<br />
left hand corner of the screen. When the updated page is available then display will change to the page number.<br />
Press this button to view the updated teletext page.<br />
A TIME<br />
When viewing a <strong>TV</strong> programme, press this button to display the time at the top right hand corner of the screen.<br />
Press this button again to remove the display. In the teletext mode, press this button to select a sub page number.<br />
The sub page number is displayed at the bottom of the screen. To hold or change the sub page, press the<br />
RED/GREEN, PR+/- or NUMBER buttons.<br />
Press again to exit this function.<br />
A HOLD<br />
Stops the automatic page change which will occur if a teletext page consists of 2 or more sub pages. The number<br />
of sub pages and the sub page displayed is, usually, shown on the screen below the time. When this button<br />
is pressed the stop symbol is displayed at the top left-hand corner of the screen and the automatic page change<br />
is inhibited. To continue press this button again.<br />
TELETEXT<br />
75
APPENDIX<br />
76<br />
APPENDIX<br />
TROUBLESHOOTING<br />
The operation does not work normally.<br />
The remote control<br />
doesn’t work<br />
Power is suddenly<br />
turned off<br />
The video function does not work.<br />
No picture &<br />
No sound<br />
Picture appears slowly<br />
after switching on<br />
No or poor colour<br />
or poor picture<br />
Horizontal/vertical<br />
bars or picture shaking<br />
Poor reception on<br />
some channels<br />
Lines or streaks in<br />
pictures<br />
■ Check to see if there is any object between the product and the remote control<br />
causing obstruction.<br />
■ Are batteries installed with correct polarity (+ to +, - to -)?<br />
■ Correct remote operating mode set: <strong>TV</strong>, VCR etc.?<br />
■ Install new batteries.<br />
■ Is the sleep time set?<br />
■ Check the power control settings. Power interrupted<br />
■ No broadcast on station tuned with Auto off activated.<br />
■ Check whether the product is turned on.<br />
■ Try another channel. The problem may be with the broadcast.<br />
■ Is the power cord inserted into wall power outlet?<br />
■ Check your antenna direction and/or location.<br />
■ Test the wall power outlet, plug another product’s power cord into the outlet where the<br />
product’s power cord was plugged in.<br />
■ This is normal, the image is muted during the product startup process. Please contact<br />
your service center, if the picture has not appeared after five minutes.<br />
■ Adjust Colour in menu option.<br />
■ Keep a sufficient distance between the product and the VCR.<br />
■ Try another channel. The problem may be with the broadcast.<br />
■ Are the video cables installed properly?<br />
■ Activate any function to restore the brightness of the picture.<br />
■ Check for local interference such as an electrical appliance or power tool.<br />
■ Station or cable product experiencing problems, tune to another station.<br />
■ Station signal is weak, reorient antenna to receive weaker station.<br />
■ Check for sources of possible interference.<br />
■ Check antenna (Change the direction of the antenna).
The audio function does not work.<br />
Picture OK &<br />
No sound<br />
No output from one<br />
of the speakers<br />
Unusual sound from<br />
inside the product<br />
There is a problem in PC mode. (Only PC mode applied)<br />
The signal is out of<br />
range.<br />
Vertical bar or stripe<br />
on background &<br />
Horizontal Noise &<br />
Incorrect position<br />
Screen colour is<br />
unstable or single<br />
colour<br />
■ Press the VOL+/- (or Volume) button.<br />
■ Sound muted? Press MUTE button.<br />
■ Try another channel. The problem may be with the broadcast.<br />
■ Are the audio cables installed properly?<br />
■ Adjust Balance in menu option.<br />
■ A change in ambient humidity or temperature may result in an unusual noise when<br />
the product is turned on or off and does not indicate a fault with the product.<br />
■ Adjust resolution, horizontal frequency, or vertical frequency.<br />
■ Check the input source.<br />
■ Work the Auto configure or adjust clock, phase, or H/V position.<br />
■ Check the signal cable.<br />
■ Reinstall the PC video card.<br />
APPENDIX<br />
77
APPENDIX<br />
78<br />
APPENDIX<br />
MAINTENANCE<br />
Early malfunctions can be prevented. Careful and regular cleaning can extend the amount of time you will<br />
have your new <strong>TV</strong>. Be sure to turn the power off and unplug the power cord before you begin any cleaning.<br />
Cleaning the Screen<br />
1<br />
2<br />
Here’s a great way to keep the dust off your screen for a while. Wet a soft cloth in a mixture of lukewarm<br />
water and a little fabric softener or dish washing detergent. Wring the cloth until it’s almost dry, and then<br />
use it to wipe the screen.<br />
Make sure the excess water is off the screen, and then let it air-dry before you turn on your <strong>TV</strong>.<br />
Cleaning the Cabinet<br />
■ To remove dirt or dust, wipe the cabinet with a soft, dry, lint-free cloth.<br />
■ Please be sure not to use a wet cloth.<br />
Extended Absence<br />
CAUTION<br />
If you expect to leave your <strong>TV</strong> dormant for a long time (such as a vacation), it’s a good idea to unplug<br />
the power cord to protect against possible damage from lightning or power surges.
PRODUCT SPECIFICATIONS<br />
Dimensions<br />
(Width x Height x Depth)<br />
Weight<br />
Power requirement<br />
Dimensions<br />
(Width x Height x Depth)<br />
Weight<br />
Power requirement<br />
Environment condition<br />
MODELS<br />
Television System<br />
Program Coverage<br />
External Antenna Impedance<br />
with stand<br />
without stand<br />
with stand<br />
without stand<br />
MODELS<br />
with stand<br />
without stand<br />
with stand<br />
without stand<br />
Operating Temperature<br />
Operating Humidity<br />
Storage Temperature<br />
Storage Humidity<br />
26LC4R*<br />
26LC4R-TA<br />
676.4 x 529.2x 221.0 mm<br />
26.6 x 20.8 x 8.7 inches<br />
676.4 x 474.3 x 85.0 mm<br />
26.6 x 18.7 x 3.3 inches<br />
10.1kg / 22.3 lbs<br />
9.1kg / 20.1 lbs<br />
AC100-240V~ 50/60Hz 1.3A<br />
26LC7R*<br />
26LC7R-TA<br />
26LC7R-TB<br />
676.6 x 531.0x 221.0 mm<br />
26.6 x 20.9 x 8.7 inches<br />
676.6 x 478.7 x 84.0 mm<br />
26.6 x 18.9 x 3.3 inches<br />
10.4kg / 22.9 lbs<br />
9.0kg / 19.9 lbs<br />
AC100-240V~ 50/60Hz 1.3A<br />
32LC4R*<br />
32LC4R-TA<br />
806.4 x 606.1x 249.0 mm<br />
31.8 x 23.9 x 9.8 inches<br />
806.4 x 548.4 x 80.5 mm<br />
31.8 x 21.6x 3.2 inches<br />
13.9 kg / 30.7 lbs<br />
11.3 kg / 24.9 lbs<br />
AC100-240V~ 50/60Hz 1.5A<br />
32LC7R*<br />
32LC7R-TA<br />
32LC7R-TB<br />
806.6 x 606.5 x 249 mm<br />
31.8 x 23.9 x 9.8 inches<br />
806.6 x 552.3 x 79 mm<br />
31.8 x 21.8x 3.1 inches<br />
13.7kg / 30.2 lbs<br />
11.2kg / 24.7 lbs<br />
AC100-240V~ 50/60Hz 1.5A<br />
❊ ■ The specifications shown above may be changed without prior notice for quality improvement.<br />
37LC4R*<br />
37LC4R-TA<br />
926.6 x 697.6x 280.4mm<br />
36.5x 27.5 x 11.0 inches<br />
926.6 x 635.6 x 88.0mm<br />
36.5x 25.0 x 3.5 inches<br />
20.0 kg / 44.1 lbs<br />
16.3 kg / 35.9 lbs<br />
AC100-240V~ 50/60Hz 1.8A<br />
37LC7R*<br />
37LC7R-TA<br />
37LC7R-TB<br />
37LC7R-TJ<br />
927 x 692.8x 280.5mm<br />
36.5x 27.3 x 11.1 inches<br />
927 x 630 x 88.0mm<br />
36.5x 24.8 x 3.5 inches<br />
20.0 kg / 44.1 lbs<br />
16.0 kg / 35.3 lbs<br />
AC100-240V~ 50/60Hz 1.8A<br />
1033.4 x 750.0 x 287.6 mm<br />
40.7x 29.5 x 11.3 inches<br />
1033.4 x 686.8 x 88.5mm<br />
40.7 x 27.0x 3.5inches<br />
24.9 kg / 54.9 lbs<br />
20.4 kg / 45.0 lbs<br />
AC100-240V~ 50/60Hz 2.2A<br />
PAL/SECAM B/G/D/K, PAL I/II, NTSC-M<br />
VHF: NZ1~E21, UHF: E21 ~ E69, CA<strong>TV</strong>: S1 ~ S20, HYPER: S21 ~ S47<br />
75 Ω<br />
0 ~ 40°C / 32 ~ 104°F<br />
Less than 80%<br />
-20 ~ 60°C / -4 ~ 140°F<br />
Less than 85%<br />
42LC4R*<br />
42LC4R-TA<br />
1032.7 x 750.0 x 287.6 mm<br />
40.7x 29.5 x 11.3 inches<br />
1032.7 x 685.5 x 88.5 mm<br />
40.7 x 27.0 x 3.5 inches<br />
24.5 kg / 54.0 lbs<br />
20 kg / 44.1 lbs<br />
AC100-240V~ 50/60Hz 2.2A<br />
42LC7R*<br />
42LC7R-TA<br />
42LC7R-TB<br />
APPENDIX<br />
79
APPENDIX<br />
80<br />
APPENDIX<br />
PRODUCT SPECIFICATIONS<br />
Dimensions<br />
(Width x Height x Depth)<br />
Weight<br />
Power requirement<br />
Dimensions<br />
(Width x Height x Depth)<br />
Weight<br />
Power requirement<br />
Television System<br />
MODELS<br />
Program Coverage<br />
External Antenna Impedance<br />
Environment condition<br />
with stand<br />
without stand<br />
with stand<br />
without stand<br />
MODELS<br />
with stand<br />
without stand<br />
with stand<br />
without stand<br />
Operating Temperature<br />
Operating Humidity<br />
Storage Temperature<br />
Storage Humidity<br />
42PC5R* 42PC5RV*<br />
42PC5R-TB 42PC5RV-TB<br />
42PC5R1-TD<br />
42PC5RH-TB<br />
1048.0 x 766.0 x 310.0 mm<br />
41.3 x 30.2 x 12.2 inches<br />
1048.0 x 713.0 x 83.5 mm<br />
41.3 x 28.1 x 3.3 inches<br />
28.0 kg / 61.7 lbs<br />
24.6kg / 54.2 lbs<br />
AC100-240V~50/60Hz 3.5A<br />
805.8x619.7x283.9 mm<br />
31.7x24.4x11.2 inches<br />
805.8x554.1x79.0 mm<br />
31.7x21.8x3.1 inches<br />
14.8 kg / 32.6 lbs<br />
12.6 kg / 27.8 lbs<br />
1048.0 x 766.0 x 310.0 mm<br />
41.3 x 30.2 x 12.2 inches<br />
1048.0 x 713.0 x 83.5 mm<br />
41.3 x 28.1 x 3.3 inches<br />
28.0 kg / 61.7 lbs<br />
24.6kg / 54.2 lbs<br />
AC100-240V~50/60Hz 3A<br />
32LB9R*<br />
32LB9R-TA / 32LB9R1-TA<br />
32LB9R-TB / 32LB9R1-TB<br />
32LB9R-TD / 32LB9R1-TD<br />
AC100-240V~ 50/60Hz 1.5A<br />
1216.0 x 701.0 x 286.5 mm<br />
47.9 x 27.6 x 11.3 inches<br />
1216.0 x 649.0 x 85.0 mm<br />
47.9 x 25.6 x 3.3 inches<br />
28.2 kg / 62.2 lbs<br />
25.5 kg / 56.2 lbs<br />
❊ ■ The specifications shown above may be changed without prior notice for quality improvement.<br />
42PC7R*<br />
42PC7RV-TA<br />
42PC7RVH-TA<br />
AC100-240V~50/60Hz 3A<br />
1030.8x779.8x333.2 mm<br />
40.6x30.7x13.1 inches<br />
1030.8x693x88.5 mm<br />
40.6x27.3x3.5 inches<br />
24.2kg / 53.4 lbs<br />
20.3kg / 44.8 lbs<br />
1242.0 x 887.6 x 370.0mm<br />
48.9 x 34.9 x 14.6 inches<br />
1242.0 x 827.2 x 88.0 mm<br />
48.9 x 32.6 x 3.5 inches<br />
39.3 kg / 86.6 lbs<br />
34.6kg / 76.2 lbs<br />
AC100-240V~ 50/60Hz 2.1A<br />
AC100-240V~50/60Hz 5.0A<br />
PAL/SECAM B/G/D/K, PAL I/II, NTSC-M<br />
VHF: NZ1~E21, UHF: E21 ~ E69, CA<strong>TV</strong>: S1 ~ S20, HYPER: S21 ~ S47<br />
75 Ω<br />
0 ~ 40°C / 32 ~ 104°F<br />
Less than 80%<br />
-20 ~ 60°C / -4 ~ 140°F<br />
Less than 85%<br />
50PC5R*<br />
50PC5R-TB<br />
50PC5R1-TD<br />
50PC5RH-TB<br />
42LB9R*<br />
42LB9R-TA / 42LB9R1-TA<br />
42LB9R-TB / 42LB9R1-TB<br />
42LB9R-TD / 42LB9R1-TD
PROGRAMMING THE REMOTE CONTROL<br />
The remote is a multi-brand or a universal remote. It can be programmed to operate most remote-controllable<br />
devices of other manufacturers.<br />
Note that the remote may not control all models of other brands.<br />
Programming a code into a remote mode<br />
1<br />
2<br />
3<br />
4<br />
5<br />
6<br />
Test your remote control.<br />
To find out whether your remote control can operate the component without programming, turn on the<br />
component such as a VCR and press the corresponding mode button (such as a DVD or VCR) on the<br />
remote control, while pointing at the component. Test the POWER and PR + / - buttons to see if the<br />
component responds properly. If not, the remote requires programming to operate the device.<br />
Turn on the component to be programmed, then press the corresponding mode button (such as a DVD or<br />
VCR) on the remote control. The remote control button of desired device is lighted.<br />
Press the MENU and MUTE buttons simultaneously, the remote control is ready to be programmed for<br />
the code.<br />
Enter a code number using the number buttons on the remote control. Programming code numbers for the<br />
corresponding component can be found on the following pages. Again, if the code is correct, the device<br />
will turn off.<br />
Press the MENU button to store the code.<br />
Test the remote control functions to see if the component responds properly. If not, repeat from step 2.<br />
APPENDIX<br />
81
APPENDIX<br />
82<br />
APPENDIX<br />
Programming code<br />
VCR<br />
Brand Codes Brand Codes Brand Codes<br />
AIWA 034<br />
AKAI 016 043 046 124<br />
125 146<br />
AMPRO 072<br />
ANAM 031 033 103<br />
AUDIO DYNAMICS 012 023 039 043<br />
BROKSONIC 035 037 129<br />
CANON 028 031 033<br />
CAPEHART 108<br />
CRAIG 003 040 135<br />
CURTIS MATHES 031 033 041<br />
DAEWOO 005 007 010 064<br />
065 108 110 111<br />
112 116 117 119<br />
DAYTRON 108<br />
DBX 012 023 039 043<br />
DYNATECH 034 053<br />
ELECTROHOME 059<br />
EMERSON 006 017 025 027<br />
029 031 034 035<br />
036 037 046 101<br />
129 131 138 153<br />
FISHER 003 008 009 010<br />
FUNAI 034<br />
GE 031 033 063 072<br />
107 109 144 147<br />
GO VIDEO 132 136<br />
HARMAN KARDON 012 045<br />
HITACHI 004 018 026 034<br />
043 063 137 150<br />
INSTANTREPLAY 031 033<br />
JCL 031 033<br />
JCPENNY 012 013 015 033<br />
040 066 101<br />
JENSEN 043<br />
JVC 012 031 033 043<br />
048 050 055 060<br />
130 150 152<br />
KENWOOD 014 034 039 043<br />
047 048<br />
<strong>LG</strong> (GOLDSTAR) 001 012 013 020<br />
101 106 114 123<br />
LLOYD 034<br />
LXI 003 009 013 014<br />
017 034 101 106<br />
MAGIN 040<br />
MAGNAVOX 031 033 034 041<br />
067 068<br />
MARANTZ 012 031 033 067<br />
069<br />
MARTA 101<br />
MATSUI 027 030<br />
MEI 031 033<br />
MEMOREX 003 010 014 031<br />
033 034 053 072<br />
101 102 134 139<br />
MGA 045 046 059<br />
MINOLTA 013 020<br />
MITSUBISHI 013 020 045 046<br />
049 051 059 061<br />
151<br />
MTC 034 040<br />
MULTITECH 024 034<br />
NEC 012 023 039 043<br />
048<br />
NORDMENDE 043<br />
OPTONICA 053 054<br />
PANASONIC 066 070 074 083<br />
133 140 145<br />
PENTAX 013 020 031 033<br />
063<br />
PHILCO 031 034 067<br />
PHILIPS 031 033 034 054<br />
067 071 101<br />
PILOT 101<br />
PIONEER 013 021 048<br />
PORTLAND 108<br />
PULSAR 072<br />
QUARTZ 011 014<br />
QUASAR 033 066 075 145<br />
RCA 013 020 033 034<br />
040 041 062 063<br />
107 109 140 144<br />
145 147<br />
REALISTIC 003 008 010 014<br />
031 033 034 040<br />
053 054 101<br />
RICO 058<br />
RUNCO 148<br />
SALORA 014<br />
SAMSUNG 032 040 102 104<br />
105 107 109 112<br />
113 115 120 122<br />
125<br />
SANSUI 022 043 048 135<br />
SANYO 003 007 010 014<br />
102 134<br />
SCOTT 017 037 112 129<br />
131<br />
SEARS 003 008 009 010<br />
013 014 017 020<br />
031 042 073 081<br />
101<br />
SHARP 031 054 149<br />
SHINTOM 024<br />
SONY 003 009 031 052<br />
056 057 058 076<br />
077 078 149<br />
SOUNDESIGN 034<br />
STS 013<br />
SYLVANIA 031 033 034 059<br />
067<br />
SYMPHONIC 034<br />
TANDY 010 034<br />
TATUNG 039 043<br />
TEAC 034 039 043<br />
TECHNICS 031 033 070<br />
TEKNIKA 019 031 033 034<br />
101<br />
THOMAS 034<br />
TMK 006<br />
TOSHIBA 008 013 042 047<br />
059 082 112 131<br />
TOTEVISION 040 101<br />
UNITECH 040<br />
VECTOR RESEARCH 012<br />
VICTOR 048<br />
VIDEO CONCEPTS 012 034 046<br />
VIDEOSONIC 040<br />
WARDS 003 013 017 024<br />
031 033 034 040<br />
053 054 131<br />
YAMAHA 012 034 039 043<br />
ZENITH 034 048 056<br />
058 072 080 101
DVD<br />
Brand Codes Brand Codes Brand Codes<br />
APEX DIGITAL 022<br />
DENON 020 014<br />
GE 005 006<br />
HARMAN KARDON 027<br />
JVC 012<br />
<strong>LG</strong> 001 010 016 025<br />
MAGNAVOX 013<br />
MARANTZ 024<br />
MITSUBISHI 002<br />
NAD 023<br />
ONKYO 008 017<br />
PANASONIC 003 009<br />
PHILIPS 013<br />
PIONEER 004 026<br />
PROCEED 021<br />
PROSCAN 005 006<br />
RCA 005 006<br />
SAMSUNG 011 015<br />
SONY 007<br />
THOMPSON 005 006<br />
TOSHIBA 019 008<br />
YAMAHA 009 018<br />
ZENITH 010 016 025<br />
APPENDIX<br />
83