463241113 - English - Char-Broil Grills
463241113 - English - Char-Broil Grills
463241113 - English - Char-Broil Grills
Create successful ePaper yourself
Turn your PDF publications into a flip-book with our unique Google optimized e-Paper software.
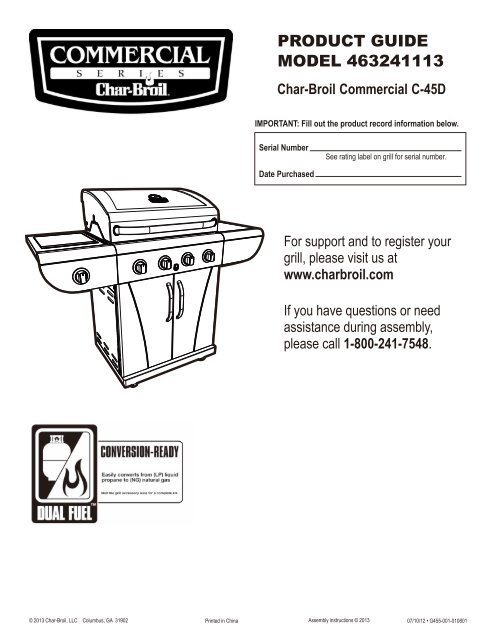
PRODUCT GUIDEMODEL <strong>463241113</strong><strong>Char</strong>-<strong>Broil</strong> Commercial C-45DIMPORTANT: Fill out the product record information below.Serial NumberSee rating label on grill for serial number.Date PurchasedFor support and to register yourgrill, please visit us atwww.charbroil.comIf you have questions or needassistance during assembly,please call 1-800-241-7548.© 2013 <strong>Char</strong>-<strong>Broil</strong>, LLC Columbus, GA 31902 Printed in ChinaAssembly instructions © 201307/10/12 • G455-001-010801
TABLE OF CONTENTSFor Your Safety . . . . . . . . . . . . . . . . . . . . . . . . . . . . . . . . . . . . 2-3Grilling Guide. . . . . . . . . . . . . . . . . . . . . . . . . . . . . . . . . . . . . . 4-7Use and Care . . . . . . . . . . . . . . . . . . . . . . . . . . . . . . . . . . . . 8-13Limited Warranty. . . . . . . . . . . . . . . . . . . . . . . . . . . . . . . . . . . . 14Parts List. . . . . . . . . . . . . . . . . . . . . . . . . . . . . . . . . . . . . . . . . . 15Parts Diagram. . . . . . . . . . . . . . . . . . . . . . . . . . . . . . . . . . . . . . 16Assembly . . . . . . . . . . . . . . . . . . . . . . . . . . . . . . . . . . . . . . . 17-28Troubleshooting. . . . . . . . . . . . . . . . . . . . . . . . . . . . . . . . . . 29-31Registration Card . . . . . . . . . . . . . . . . . . . . . . . . . . . . . . . . . . . 35Safety SymbolsThe symbols and boxes shown below explain what each headingmeans. Read and follow all of the messages found throughoutthe manual.WARNINGWARNING: Indicates a potentially hazardous situationwhich, if not avoided, could result in death or serious injury.CAUTIONCAUTION: Indicates a potentially hazardous situation orunsafe practice which, if not avoided, may result in minoror moderate injury.DANGERDANGER: Indicates an imminently hazardous situationwhich, if not avoided, will result in death or serious injury.INSTALLER/ASSEMBLER:Leave this manual with consumer.CONSUMER:Keep this manual for future reference.If you smell gas:DANGER1. Shut off gas to the appliance.2. Extinguish any open flame.3. Open lid.4. If odor continues, keep away from theappliance and immediately call your gassupplier or your fire department.WARNING1. Do not store or use gasoline or otherflammable liquids or vapors in the vicinity ofthis or any other appliance.2. An LP cylinder not connected for use shall notbe stored in the vicinity of this or any otherappliance.WARNINGFailure to follow all manufacturer’s instructions couldresult in serious personal injury and/or property damage.CAUTIONFor residential use only. Do not use for commercialcooking.CAUTIONRead and follow all safety statements, assemblyinstructions, and use and care directions beforeattempting to assemble and cook.CAUTIONSome parts may contain sharp edges.Wear protective gloves if necessary.THIS GRILL IS FOR OUTDOOR USE ONLY.2
WARNINGCALIFORNIA PROPOSITION 651. Combustible by-products produced when usingthis product contains chemicals known to the Stateof California to cause cancer, birth defects, orother reproductive harm.2. This product contains chemicals, including leadand lead compounds, known to the State ofCalifornia to cause cancer, birth defects orother reproductive harm.CAUTIONUsing pots larger than 6 quarts in capacity couldexceed weight limit of theside burner shelfor side shelf,resulting in failureof grill cartcomponents.Wash your hands after handling this product.Installation Safety Precautions• Use grill, as purchased, only with LP (propane) gas and theregulator/valve assembly supplied. If your grill is Dual Fuel ready,a conversion kit must be purchased for use with natural gas.• Grill installation must conform with local codes, or in theirabsence of local codes, with either the National Fuel GasCode, ANSI Z223.1/ NFPA 54, Natural Gas and PropaneInstallation Code, CSA B149.1, or Propane Storage andHandling Code, B149.2.• All electrical accessories (such as rotisserie) must beelectrically grounded in accordance with local codes, orNational Electrical Code, ANSI / NFPA 70 or CanadianElectrical Code, CSA C22.1. Keep any electrical cords and/orfuel supply hoses away from any hot surfaces.• This grill is safety certified for use in the United States and/orCanada only. Do not modify for use in any other location.Modification will result in a safety hazard.WARNINGDo not attempt to repair or alter thehose/valve/regulator for any “assumed” defect. Anymodification to this assembly will void your warrantyand create the risk of a gas leak and fire. Use onlyauthorized replacement parts supplied bymanufacturer.CAUTIONGrease Fires• Putting out grease fires by closing the lid is notpossible. <strong>Grills</strong> are well ventilated for safety reasons.• Do not use water on a grease fire. Personal injury mayresult. If a grease fire develops, turn knobs and LP tankoff.• If grill has not been regularly cleaned, a grease fire canoccur that may damage the product. Pay close attentionwhile preheating or burning off food residue to insurethat a grease fire does not develop. Follow instructionson General Grill Cleaning and Cleaning The BurnerAssembly to prevent grease fires.• The best way to prevent grease fires is regular cleaningof the grill.NOTE: DO NOT over tighten screws and washers thatcome into contact with porcelain coated surfaces. Overtightening may cause the porcelain coating to crack andbreak, resulting in exposed metal that will be prone to rust.3
GRILLING GUIDE – Getting StartedFirst Time UseRead your Assembly Manual and ensure the grill is put togetherproperly. Remove all Point-of-Purchase advertising material fromall grill surfaces before first use. We recommend operating yourgrill on its highest setting for 15-20 minutes prior to your first use.This aids in removing the oils used during manufacturing.Lava Rock / BriquettesThis gas grill has been designed, engineered, and tested to beused with flame tamers or heat distribution plates to providemore even heating, improve the cleaning process, and reduceflare-ups. The addition of after market lava rocks, charcoal, orbriquettes of any type will cause poor combustion and increasethe likelihood of a grease fire, and is not recommended. Usingbriquettes, lava rock, or charcoal in this grill will void yourwarranty. For extra smoke flavor, we recommend using asmoker box with wood chips.Temperature - Convective <strong>Grills</strong> ONLY.The temperature gauge in the hood of your new grill measuresair temperature. The air temperature inside your grill will neverbe as hot as the temperature at the cooking surface.Note: Since 1995, all regulators (the part that attaches to the gastank to regulate the flow of gas) have included a safety featurethat restricts gas flow in the event of a gas leak. You caninadvertently activate this safety feature without having a gasleak. This typically occurs when you turn on the gas using thegrill control knob before you turn on the LP tank valve. If the gasregulator safety feature activates, the grill will only reachtemperatures between 250°F and 300°F even with all burners onthe high setting.RegulatorCoupling NutIf your grill is not getting hotter than 250°F to 300°F thesesteps should be taken first to reset the gas regulator safetydevice:1. Open the grill lid.2. Turn off all knobs on the control panel in front.3. Turn off the tank knob.4. Disconnect the regulator from the LP tank.5. Wait 30 seconds.6. Reconnect the regulator to the LP tank.7. Slowly open the LP tank knob all the way. Do not putexcessive force on the valve at the full open position to avoiddamaging the valve.8. Turn on the appropriate control knob and light the grill per theinstructionsl.An illustration of this process is included in this Product Guide.See Troubleshooting section for additional information.Pre-Heating Your GrillJust like your home oven, your grill should be pre-heated toprovide optimum performance. Pre-heat the grill on high for 10-15 minutes – longer if weather conditions require. Please refer tothe lighting instructions inside the Product Guide if you havequestions about how to light your grill. A match-light chain andhole is provided for your convenience.4
GRILLING GUIDE – Grilling 101Outdoor grilling is really quite simple. You'll succeed withburgers, dogs, or steaks usually on your very first try. Withexperience, you will learn how to work with your grill, creatingmore imaginative meals all the time. This knowledge makes upthe art of grilling. Before you start grilling, organize your foodaccording to cooking technique and required cooking time, andoptimize the use of your grilling area.Rotisserie CookingRotisserie cooking is best for 'round' meat, such as large roasts,whole poultry, and pork. It generally requires an accessory motorand spit rod that allows the meat to be turned at a constantspeed. Rotisserie cooking is best done in front of a specialrotisserie burner, or utilizing an indirect cooking burnerarrangement. A pan can be placed underneath the meat to catchgrease and food drippings, and helps minimize clean-up.Direct CookingDirect cooking involves grilling your meat directly over high heat.It is perfect for searing steaks, chops, and other smaller pieces ofmeat and vegetables that quickly make their way to the table.Indirect CookingIndirect cooking utilizes select burners to circulate heatthroughout the grill, without direct contact between the meat andthe flame. The meat is placed over the burner that is 'off'. Thismethod is generally used to slow cook large cuts of meat andpoultry. A pan can be placed underneath the meat to catchgrease and food drippings, and helps minimize clean-up.Food SafetyFood safety is a very important part of enjoying the outdoorcooking experience. To keep food safe from harmful bacteria,follow these four basic steps:Clean: Wash hands, utensils, and surfaces with hot soapy waterbefore and after handling raw meat.Separate: Separate raw meats from ready-to-eat foods to avoidcross contamination. Use a clean platter and utensils whenremoving cooked foods.Cook: Cook meat and poultry thoroughly to kill bacteria. Use athermometer to ensure proper internal food temperatures.Chill: Refrigerate prepared foods and leftovers promptly.5
GRILLING GUIDE – Tips & TricksCooking on your new grill is a hands-on experience, and it isrecommended to remain outside with your grill while cooking.Grilling can be affected by many external conditions. In coldweather, you will need more heat to reach an ideal cookingtemperature, and grilling may take longer. The meat's internaltemperature and thickness can also affect cooking times. Coldand thicker meats will take longer to cook.Internal Meat TemperaturesMeat cooked on a grill often browns very fast on the outside.Therefore, use a meat thermometer to ensure it has reachedsafe internal temperatures.USDA Recommended Safe MinimumInternal TemperaturesBeef, Veal, Lamb, Steak, Roasts, & Whole Pork(with a 3 minute rest time)145° FFish145° FBeef, Veal, Lamb, and Pork - Ground160° FEgg Dishes160° FTurkey, Chicken & Duck Whole, Pieces & Ground 165° FPlease refer to the USDA for complete, up-to-date information.Our internal temperature chart is based on USDA standards formeat doneness. Check it out at www.isitdoneyet.govWood ChipsFor extra smoke flavor when grilling, try adding wood chips.Soak the chips in water for approximately 30 minutes beforeadding to a smoke box or pan. Place smoke box or pan on top ofthe cooking grate above the flame. Turn grill on high until thewood starts to smoke. Reduce heat to desired temperature forcooking, and place food on cooking grate as desired. Close lid toretain more smoke. Hardwood varieties that work particularlywell with grilled foods include Alder, Apple, Cherry, Grapevines,Hickory, Mesquite, Oak, Rosemary and Sassafras.SkewersMetal skewers should be flat, with long handles. Round skewersallow food to roll when turned, so it may not cook as evenly. Usemetal skewers when cooking meat kabobs. Wooden skewersshould be soaked in water for an hour before use, and are bestused for quick cooking foods such as vegetables and fruits.SaucesSauces containing sugars and fats can cause flare-ups, and yourfood may burn. In general, apply these sauces during the final10 minutes of cooking. Keep in mind, use of excessive saucesor glazes will also require extra cleaning afterwards.Marinades and RubsTo enhance the flavor of grilled foods, a liquid marinade or dryrub can be used prior to cooking. Meat can be either soaked orinjected with liquid marinade up to 24 hours prior to grilling. Dryrubs can be applied directly to the meat immediately beforegrilling.UtensilsUse tongs or a spatula to handle the food instead of a fork, anddon't turn the food toooften. Piercing the foodwith a fork will releasejuices that you want inthe meat, and maycause flare-ups.6
GRILLING GUIDE – Cleaning Your GrillWhy Clean?We've all heard the saying 'An ounce of prevention is worth apound of cure'. This is great advice when it comes to keepingyour grill clean.Routine CarePeriodic cleaning of this grill is necessary,as grill fires can occur when grease andfood debris collect in the bottom of the grill.After each use, remove any remainingfood particles from the cooking grate andinside of the grill using a grill brush. Dothis after the grill has cooled down, yet isstill warm. It is much easier to clean foodparticles while warmth is still present, thanafter the food particles have completelycooled and hardened. This grill is notdesigned to be 'burned off' by closing thelid and turning the burners on High for anextended time. The excessive heatgenerated can cause leftover grease tocatch fire, and can cause permanentdamage to your grill.General CleaningPlastic parts: Wash with warm soapy water and wipe dry. Do notuse abrasive cleaners, degreasers or a concentrated grill cleaneron plastic parts. Damage to and failure of parts can result.Porcelain surfaces: Because of glass-like composition, mostresidue can be wiped away with baking soda/water solution orglass cleaner. Use non-abrasive scouring powder for stubbornstains.Painted surfaces: Wash with mild detergent or non-abrasivecleaner and warm water. Wipe dry with a soft non-abrasive cloth.Stainless steel surfaces: Stainless steel can rust under certainconditions. This can be caused by environmental conditionssuch as chlorine or salt water, or impropercleaning tools such as wire or steelwool. It can also discolor due to heat,chemicals, or grease build-up. Tomaintain your grill's high qualityappearance, wash with mild detergentand warm water, or use a stainlesssteel grill cleaner. Baked-on greasedeposits may require the use of anabrasive plastic cleaning pad. Use onlyin direction of brushed finish to avoiddamage. Do not use abrasive pad onareas with graphics.Cooking surfaces: If a bristle brush is used to clean any of thegrill cooking surfaces, ensure no loose bristles remain on cookingsurfaces prior to grilling. It is not recommended to clean cookingsurfaces while grill is hot.Storing Your Grill• Clean cooking grates.• Store grill in dry location.• When LP cylinder is connected to grill, store outdoors in a wellventilated space and out of reach of children.• Cover grill if stored outdoors. Choose from a variety of grillcovers offered by manufacturer.• Store grill indoors ONLY if LP cylinder is turned off,disconnected, and removed from grill. Never store LP cylinderindoors.• When removing grill from storage, follow the 'Cleaning theBurner Assembly' instructions in the Use and Care section ofthe Product Guide.CrittersSpiders like to make their homes in the venturi tubes of grills.These must be inspected and cleaned regularly to ensure thereare no blockages. Refer to the Use and Care portion of thisProduct Guide for complete information.The <strong>Char</strong>-<strong>Broil</strong>® grill is equipped with Gear Trax, whichallow for the easy mounting of our unique line of Gear Traxaccessories. Please visit charbroil.com for a complete listof Gear Trax accessories. *Available on most models.VISIT CHARBROIL.COM FORALL YOUR GRILLING NEEDS!7
USE AND CAREDANGER• NEVER store a spare LP cylinder under or nearthe appliance or in an enclosed area.• Never fill a cylinder beyond 80% full.• An over filled or improperly stored cylinder is ahazard due to possible gas release from thesafety relief valve. This could cause an intensefire with risk of property damage, serious injury ordeath.• If you see, smell or hear gas escaping,immediately get away from the LPcylinder/appliance and call your fire department.LP Cylinder Removal, Transport and Storage•Turn OFF all control knobs and LP cylinder valve. Turn couplingnut counterclockwise by hand only - do not use tools todisconnect. Loosen cylinder screw beneath bottom shelf ordisconnect other retention means, then lift PL cylinder up andand out of cart. Install safety cap onto LP cylinder valve.Always use cap and strap supplied with valve.Failure to use safety cap as directed may result in seriouspersonal injury and/or property damage.•A disconnected LP cylinder in LP Cylinder Valvestorage or being transportedmust have a safety cap installed (as shown).Do not store an LP cylinder in enclosed spacessuch as a carport, garage, porch, coveredpatio or other building. Never leave an LP cylinderinside a vehicle which may become overheatedby the sun.•Do not store an LP cylinder in an area where children play.SafetyCapRetainer StrapLP Cylinder•The LP cylinder used with your grill must meet thefollowing requirements:•Use LP cylinders only with these required measurements: 12"(30.5cm) (diameter) x 18" (45.7 cm) (tall) with 20 lb. (9 kg.)capacity maximum.•LP cylinders must be constructed and marked in accordancewith specifications for LP cylinders of the U.S. Department ofTransportation (DOT) or for Canada, CAN/CSA-B339,cylinders, spheres and tubes for transportation of dangerousgoods. Transport Canada (TC). See LP cylinder collar formarking.•LP cylinder valve must have:•Type 1 outlet compatible withregulator or grill.•Safety relief valve.•UL listed Overfill ProtectionOPD Hand WheelDevice (OPD). This OPD safetyfeature is identified by a unique triangular hand wheel. Useonly LP cylinders equipped with this type of valve.•LP cylinder must be arranged for vapor withdrawal and includecollar to protect LP cylinder valve. Always keep LP cylinders inupright position during use, transit or storage.LP cylinder in upright position for vapor withdrawalLP (Liquefied Petroleum Gas)•LP gas is nontoxic, odorless and colorless when produced. ForYour Safety, LP gas has been given an odor (similar to rottencabbage) so that it can be smelled.•LP gas is highly flammable and may ignite unexpectedly whenmixed with air.LP Cylinder Filling•Use only licensed and experienced dealers.•LP dealer must purge new cylinder before filling.•Dealer should NEVER fill LP cylinder more than 80% of LPcylinder volume. Volume of propane in cylinder will vary bytemperature.•A frosty regulator indicates gas overfill. Immediately close LPcylinder valve and call local LP gas dealer for assistance.•Do not release liquid propane (LP) gas into the atmosphere.This is a hazardous practice.•To remove gas from LP cylinder, contact an LP dealer or call alocal fire department for assistance. Check the telephonedirectory under “Gas Companies” for nearest certified LPdealers.8
LP Cylinder Exchange•Many retailers that sell grills offer you the option of replacingyour empty LP cylinder through an exchange service. Use onlythose reputable exchange companies that inspect, precision fill,test and certify their cylinders. Exchange your cylinder onlyfor an OPD safety feature-equipped cylinder as describedin the "LP Cylinder" section of this manual.•Always keep new and exchanged LP cylinders in uprightposition during use, transit or storage.•Leak test new and exchanged LP cylinders BEFOREconnecting to grill.•Place dust cap on cylinder valve outlet whenever the cylinder isnot in use. Only install the type of dust cap on the cylinder valveoutlet that is provided with the cylinder valve. Other types of capsor plugs may result in leakage of propane.Connecting Regulator to the LP Cylinder1.LP cylinder must be properly secured onto grill. (Refer toassembly section.)2.Turn all control knobs to the OFF position.3.Turn LP cylinder OFF by turning hand-wheel clockwise to afull stop.4.Remove the protective cap from LP cylinder valve. Always usecap and strap supplied with valve.OffClockwiseOPD Hand WheelLP Cylinder Leak TestFor your safety•Leak test must be repeated each time LP cylinder is exchangedor refilled.•Do not smoke during leak test.•Do not use an open flame to check for gas leaks.•Grill must be leak tested outdoors in a well-ventilated area,away from ignition sources such as gas fired or electricalappliances. During leak test, keep grill away from open flamesor sparks.•Use a clean paintbrush and a 50/50 mild soap and watersolution. Brush soapy solution onto areas indicated by arrowsin figure below.▲ Do not use household cleaning agents. Damage to gastrain components can result.Safety Relief ValveStrap and CapType 1 outlet withthread on outsideDo not use a POL transport plug(plastic part with external threads)!It will defeat the safety feature ofthe valve.5.Hold regulator and insert nipple into LPcylinder valve. Hand-tighten thecoupling nut, holding regulator in astraight line with LP cylinder valve soas not to cross-thread the connection.WARNINGIf “growing” bubbles appear do not use or move the LPcylinder. Contact an LP gas supplier or your firedepartment!Nipple has to be centeredinto the LP cylinder valve.9
StraightHold coupling nut and regulatoras shown for proper connectionto LP cylinder valve.Leak Testing Valves, Hose and Regulator1.Turn all grill control knobs to OFF.2.Be sure regulator is tightly connected to LP cylinder.3.Completely open LP cylinder valve by turning hand wheelcounterclockwise. If you hear a rushing sound, turn gas offimmediately. There is a major leak at the connection. Correctbefore proceeding.4.Brush soapy solution onto areas circled below, or other similarfittings on your grill.6.Turn the coupling nut clockwise and tighten to a full stop. Theregulator will seal on the back-check feature in the LP cylindervalve, resulting in some resistance. An additional one-half tothree-quarters turn is required to complete theconnection. Tighten by hand only – do not use tools.NOTE:If you cannot complete the connection, disconnect regulator andrepeat steps 5 and 6. If you are still unable to complete theconnection, do not use this regulator!DANGER• Do not insert any tool or foreign object into the valveoutlet or safety relief valve. You may damage the valveand cause a leak. Leaking propane may result inexplosion, fire, severe personal injury, or death.WARNINGNOTE: Sideburnershelf fascia notshown for clarity.NOTE: Your grillmay NOT beequipped with asideburner.• Outdoor gas appliance is not intended to be installedin or on a boat.• Outdoor gas appliance is not intended to be installedin or on an RV.• Never attempt to attach this grill to the self-containedLP gas system of a camper trailer or motor home.• Do not use grill until leak-tested.• If a leak is detected at any time, STOP and call the firedepartment.• If you cannot stop a gas leak, immediately closeLP cylinder valve and call LP gas supplier or your firedepartment!5.If “growing” bubbles appear, there is a leak. Close LPcylinder valve immediately and retighten connections. If leakscannot be stopped do not try to repair. Call for replacementparts.6.Always close LP cylinder valve after performing leak test byturning hand wheel clockwise.10
CAUTIONSPIDER ALERT!SPIDER AND WEBSINSIDE BURNER3. Remove carryover tubes and burners.4. Detach electrode from burner.NOTE: Removal/Detachment method will depend on theburner configuration. See different configurations inillustrations below.5. Carefully lift each burner up and away from valve openings.We suggest three ways to clean the burner tubes. Use the oneeasiest for you.(A) Bend a stiff wire (a light weight coat hanger works well)into a small hook. Run the hook through each burnertube several times.If your barbeque is getting hard to light orthe flame is weak, check and clean theventuris and burners.(B) Use a narrow bottle brush with a flexible handle (do notuse a brass wire brush), run the brush through eachburner tube several times.(C) Wear eye protection: Use an air hose to force air intothe burner tube and out the burner ports. Check eachport to make sure air comes out each hole.6. Wire brush entire outer surface of burner to remove foodresidue and dirt.7. Clean any blocked ports with a stiff wire such as an openpaper clip.8. Check burner for damage, due to normal wear and corrosionsome holes may become enlarged. If any large cracks orholes are found replace burner.VERY IMPORTANT: Burner tubes must reengage valveopenings. See illustrations at right.9. Attach electrode to burner.10. Carefully replace burners.11. Attach burners to brackets on firebox.12. Reposition carryover tubes and attachto burners. Replace flame tamers andcooking grates.Correctburner-to-valveengagementFireboxRemove screwsStoring Your Grill• Clean cooking grates.• Store in dry location.• When LP cylinder is connected to grill, store outdoors in a wellventilatedspace and out of reach of children.• Cover grill if stored outdoors. Choose from a variety of grillcovers offered by manufacturers.• Store grill indoors ONLY if LP cylinder is turned off anddisconnected, removed from grill and stored outdoors.• When removing grill from storage, follow “Cleaning the BurnerAssembly” instructions before starting grill.Cleaning the Burner AssemblyFollow these instructions to clean and/or replace parts of burnerassembly or if you have trouble igniting grill.1. Turn gas OFF at control knobs and LP cylinder.2. Remove cooking grates and flame tamers.FireboxCarryover tubeCarryover tubeFirebox burnerbracketFireboxburnerbracketElectrodeElectrodePry offelectrode witha flat bladescrewdriver13
LIMITED WARRANTYThis warranty only applies to units purchased from an authorized retailer. Manufacturer warrants to the original consumer-purchaser only that thisproduct shall be free from defects in workmanship and materials after correct assembly and under normal and reasonable home use for the periodsindicated below beginning on the date of purchase*. The manufacturer reserves the right to require that defective parts be returned, postage and orfreight pre-paid by the consumer for review and examination.SCOPE OF COVERAGE PERIOD OF COVERAGE TYPE OF FAILURE COVERAGEStainless BurnerFirebox and LidAll Other PartsLimited Lifetime2 years from date of purchase*1 year from date of purchase**Note: A dated sales receipt WILL be required for warranty service.PERFORATION, MANUFACTURING,AND MATERIAL DEFECTS ONLYThe original consumer-purchaser will be responsible for all shipping charges for parts replaced under the terms of this limited warranty.This limited warranty is applicable in the United States and Canada only, is only available to the original owner of the product and is not transferable.Manufacturer requires proof of your date of purchase. Therefore, you should retain your sales slip or invoice. Registering your product is not asubstitute for proof of purchase and the manufacturer is not responsible for or required to retain proof of purchase records.This limited warranty applies to the functionality of the product ONLY and does not cover cosmetic issues such as scratches, dents, corrosions ordiscoloring by heat, abrasive and chemical cleaners or any tools used in the assembly or installation of the appliance, surface rust, or thediscoloration of stainless steel surfaces. RUST is not considered a manufacturing or materials defect.This limited warranty will not reimburse you for the cost of any inconvenience, food, personal injury or property damage.ITEMS MANUFACTURER WILL NOT PAY FOR:1. Shipping cost, standard or expedited, for warranty and replacement parts2. Service calls to your home.3. Repairs when your product is used for other than normal, single-family household or residential use.4. Damage, failures, or operating difficulties resulting from accident, alteration, careless handling, misuse, abuse, fire, flood,acts of God, improper installation or maintenance, installation not in accordance with electrical or plumbing codes, or useof products not approved by the manufacturer.5. Any food loss due to product failures or operating difficulties.6. Replacement parts or repair labor costs for units operated outside the United States or Canada.7. Pickup and delivery of your product.8. Repairs to parts or systems resulting from unauthorized modifications made to the product.9. The removal and/or reinstallation of your product.DISCLAIMER OF IMPLIED WARRANTIES and LIMITATION OF REMEDIESRepair or replacement of defective parts is your exclusive remedy under the terms of this limited warranty. In the event of parts availability issues,the manufacturer reserves the right to substitute like or similar parts that are equally functional.Manufacturer will not be responsible for any consequential or incidental damages arising from the breach of either this limited warranty or anyapplicable implied warranty, or for failure or damage resulting from acts of God, improper care and maintenance, grease fire, accident, alteration,replacement of parts by anyone other than Manufacturer, misuse, transportation, commercial use, abuse, hostile environments (inclement weather,acts of nature, animal tampering), improper installation or installation not in accordance with local codes or printed manufacturer instructions.THIS LIMITED WARRANTY IS THE SOLE EXPRESS WARRANTY GIVEN BY THE MANUFACTURER. NO PRODUCT PERFORMANCESPECIFICATION OR DESCRIPTION WHEREVER APPEARING IS WARRANTED BY MANUFACTURER EXCEPT TO THE EXTENT SETFORTH IN THIS LIMITED WARRANTY. ANY IMPLIED WARRANTY PROTECTION ARISING UNDER THE LAWS OF ANY STATE,INCLUDING IMPLIED WARRANTY OF MERCHANTABILITY OR FITNESS FOR A PARTICULAR PURPOSE OR USE, IS HEREBYLIMITED IN DURATION TO THE DURATION OF THIS LIMITED WARRANTY.Neither dealers nor the retail establishment selling this product has any authority to make any additional warranties or to promise remediesin addition to or inconsistent with those stated above. Manufacturer's maximum liability, in any event, shall not exceed the purchase price of theproduct paid by the original consumer.NOTE: Some states do not allow an exclusion or limitation of incidental or consequential damages, so some of the above limitations or exclusionsmay not apply to you. This limited warranty gives you specific legal rights as set foth herein. You may also have other rights which vary from stateto state. In the state of California only, if refinishing or replacement of the product is not commercially practicable, the retailer selling this product orthe Manufacturer will refund the purchase price paid for the product, less the amount directly attributable to use by the original consumer-purchaserprior to discovery of the nonconformity. In addition, in the state of California only, you may take the product to the retail establishment selling thisproduct in order to obtain performance under this limited warranty.If you wish to obtain performance of any obligation under this limited warranty, you shouldwrite to:Consumer RelationsP. O. Box 1240Columbus, GA 31902-1240Consumer returns will not be accepted unless a valid Return Authorization is first acquired. Authorized returns are clearly marked on the outside ofthe package with an RA number and the package is shipped freight/postage pre-paid. Consumer returns that do not meet these standards will berefused.14
PARTS LISTKey Qty DescriptionA 1 BOTTOM SHELFB 1 TANK SCREW, F/ BOTTOM SHELFC 2 CASTER, LOCKINGD 2 CASTER, FIXEDE 1 CART LEFT SIDE PANELF 1 GROMMET, F/ REGULATOR HOLEG 1 CART RIGHT SIDE PANELH 1 CART LOWER BACK PANELI 1 FRONT BRACEJ 1 LEFT RAIL, F/ GREASE TRAYK 1 RIGHT RAIL, F/ GREASE TRAYL 1 FIREBOXM 1 MATCH HOLDERN 4 MAIN BURNER, F/ FIREBOXO 4 ELECTRODE, F/ MAIN BURNERP 1 HOSE VALVE REGULATOR ASSYQ 1 MAIN CONTROL PANELR 1 ELECTRONIC IGNITION MODULES 1 CAP, F/ ELECTRONIC IGNITIONMODULET 1 HEAT SHIELD, F/ IGNITION MODULEU 1 IGNITER SWITCH MODULEV 1 ELECTRODE WIRE, F/ SIDEBURNERW 1 ELECTRODE, F/ SIDEBURNERX 3 CARRYOVER TUBEY 5 BEZEL, F/ CONTROL KNOBZ 5 CONTROL KNOBAA 1 CART UPPER BACK PANELBB 1 LEFT SIDE SHELF, F/ S/BCC 1 FASCIA, F/ LEFT SIDE SHELFDD 1 DRIP PAN, F/ SBEE 4 RUBBER BUMPER, LIDFF 1 LID, F/ SBGG 1 RIGHT SIDE SHELFHH 1 FASCIA, F/ RIGHT SIDE SHELFII 1 TOP LIDJJ 2 BEZEL, F/ LID HANDLEKK 1 HANDLE F/ TOP LIDLL 2 RUBBER BUMPER, ROUND,W/ HARDWARE, F/ TOP LIDMM 1 LOGO PLATE, COMMERCIALNN 1 TEMPERATURE GAUGE, PREMIUMOO 1 HARDWARE F/ TOP LID ASSEMBLYKey Qty DescriptionPP 1 LEFT DOOR, NO HANDLEQQ 2 DOOR HANDLERR 1 RIGHT DOOR, NO HANDLESS 4 FLAME TAMERTT 2 COOKING GRATEUU 1 WARMING RACKVV 1 GREASE TRAYWW 1 SIDEBURNER BURNERXX 1 GRATE, F/ SBYY 2 RUBBER BUMPER, SIDEBURNER(REAR)NOT Pictured… 1 CASTER PIN… 2 DOOR MAGNET… 1 ASSEMBLY MANUAL, ENGLISH… 1 ASSEMBLY MANUAL, SPANISH… 1 HARDWARE PACKNOTE: Some grill parts shown in the assembly steps may differ slightly in appearance fromthose on your particular grill model. However, the method of assembly remains the same.15
OOPARTS DIAGRAMABCCDDEFGHIJKLMNOPQRSTUVWXYYZZAABBCCDDEEFFGGHHIIJJJJKKLLMMNNPPQQQQRRSSTTUUVVWWXXYY16
ASSEMBLY1Place bottom shelf upside down. Insert Caster Pin into the caster mounting plate to lock it in place, shown A. Spin the casterclockwise into the threads on the bottom shelf until secure. Remove the Caster Pin and repeat for remaining casters. Makesure the two locking casters are secured at the rear and the non-locking casters are secured at the front. After all 4 castersare secured remove the Caster Pin and save for future maintenance.Non-lock casterABottom shelfCaster PinFrontRearLocking caster2Attachside panels to bottom shelf using three 1/4-20x1/2” screws per panel.IMPORTANT: Panel with large hole must be on Left side of bottom shelf.1/4-20x1/2” screwLeft side panelMagnetFrontRight side panel17
3Place lower back panel between side panels at rear of bottom shelf. Secure lower back panel to side panelsusing two 1/4-20x1/2” screws on each side.1/4-20x1/2” screwLower back panel4This step requires two people to lift andposition grill head onto cart. Carefully lowerthe grill head onto the cart, aligning slots atbottom of grill head with posts on cart sidepanels. Make sure the regulator hose ishanging outside the cart. Grill head mustface open side of cart.Grill headRegulator hose18
5On back of grill, place upper back panel between side panels. Secure upper back panel in upper holes, usingone 1/4-20x1½” screw and Fiber washer on each side. Secure upper back panel in lower holes, using one 1/4-20x1½” screw on each side.1/4-20x1½”screwFiberwasher1/4-20x1½”screwUpper back panel6Install control knob by pressing it onto valve stem on control panel.Valve stemControl knob19
7Attach one 1/4-20x1/2"screw to control panel with half of the threads left. Place the key hole slot on fascia ontothe screw. Insert flange on right side shelf into side shelf brackets on side of firebox, shown A.Attach rear of shelf using one 1/4-20x1 ½"screw and 1/4" nut, shown B/C.Attach right side shelf using two 1/4-20x1/2"screws and 1/4" nuts, shown D.Attach front of shelf using one #8x3/8"self-tapping screw and large flat washer. Attach front of fascia using two1/4-20x1/2"screws, shown E. Tighten all screws.ARight side shelfBRear of Shelf1/4-20x1½” screwC1/4-20x1½” screw1/4" nutKey holeBracket1/4-20x1/2" screwDE1/4-20x1/2"screw#8x3/8"self-tappingscrew1/4" nut1/4-20x1/2" screwlarge flatwasher20
8Attach one 1/4-20x1/2"screw to control panel with half of the threads left. Place the key hole slot on fascia ontothe screw. Insert flange on left side shelf into side shelf brackets on side of firebox, shown A.Attach rear of shelf using one 1/4-20x1 ½"screw and 1/4" nut, shown B/C.Attach left side shelf using two 1/4-20x1/2"screws and 1/4" nuts, shown D.Attach front of shelf using one #8x3/8"self-tapping screw and large flat washer. Attach front of fascia using two1/4-20x1/2"screws, shown E. Tighten all screws.ABLeft side shelf1/4-20x1½” screwKey holeCBracket1/4-20x1/2" screw#8x3/8"self-tappingscrew1/4" nutED1/4" nutlarge flatwasher1/4-20x1/2"screw1/4-20x1/2"screw21
12Release cap and nut from electronic ignition module. Attach Electronic ignition module and EI heat shield to front brace withthe nut. Insert AA battery into module, negative(-) end first. Replace the cap, shown A.Connect each of the wires from main burner and side burner electrodes into the back of Electronic ignition module, positions1-5. Connect the two wires [(a) and (b)] from switch wiring harness into the back of Electronic ignition module, shown B.NOTE: Switch terminals are larger than electrode terminals and should only be installed in location shown as (a),(b).Insert front brace under control panel and between cart panels. Make sure door hinge pin is on the top side and facing thefront. Secure front brace in upper holes using one 1/4-20x1½” screw and Fiber washer on each side. Secure front brace inlower holes using one 1/4-20x1½” screw on each side, shown C.AEI heat shieldElectronic ignition moduleNutCapAA battery(-)(+)Front braceBElectronic ignition module(a)(b)51234Tie wrapCControl panelFiberwasher1/4-20x1 ½"screwFront braceHinge pin1/4-20x1 ½"screw24
13.Inside of cart, insert left and right grease tray rails into slots beneath grease tray opening in upper back panel,shown A.Attach left and right rails under front brace with two #8x3/8" self-tapping screws, shown B.ANote: Some parts omittedfor clarity of illustrationBFront braceLower back panelRight rail14LeftrailRight rail#8x3/8" self-tappingscrewLeft railInsert hinge pin on bottom of doors into hole in bottom shelf. Press upper hinge pin in front brace, align hinge holeon top of door, and release hinge pin into door.PRESSTop ofdoorRight doorHinge pinon bottomof door25
15Install flame tamers in the firebox. Make sure indentations at ends of flame tamer match the flanges at front andrear of firebox.Flame tamer16Place cooking grates onto the firebox as shown.Insert the three wire ends at rear of warming rack into holes in back of firebox. Front wires of warming rack reston sides of firebox.Warming rackcooking grate26
17On back of grill, slide grease tray into opening in upper back panel.CAUTIONFailure to install grease tray will causehot grease to drip from bottom of grillwith risk of fire or property damageGrease tray18LP CYLINDER IS SOLD SEPARATELY. Fill and leak check the cylinder before attaching to grill and regulator(see Use & Care section). Once cylinder has been filled and leak checked, place cylinder into hole in bottomshelf. Make sure cylinder valve is facing front of grill. Secure cylinder with cylinder screw under bottom shelf.Insert regulator through large hole in left side panel. See Use & Care section of this manual to performthe “Burner Flame Check” and for important safety instructions before using.Cylinder screw at rear of cartCylinder screwAlways keep LP cylinders in upright position duringuse, transport, and storage.CAUTIONCylinder valve must face front of cart oncetank is attached. Failure to install cylindercorrectly may allow gas hose to be damagedin operation, resulting in the risk of fire.LP Cylinder(not included)Regulator27
DANGER: If a gas leak cannot be stopped, or a fire occurs due to gas leakage, call the fire department.EmergenciesGas leaking fromcracked/cut/burnedhose.Gas leaking from LPcylinder.Gas leaking from LPcylinder valve.Gas leaking betweenLP cylinder andregulator connection.Fire coming throughcontrol panel.Grease fire orcontinuous excessiveflames above cookingsurface.Possible Cause• Damaged hose.• Mechanical failure due to rusting ormishandling.• Failure of cylinder valve frommishandling or mechanical failure.• Improper installation, connection nottight, failure of rubber seal.• Fire in burner tube section of burner dueto blockage.• Too much grease buildup in burner area.Prevention/Solution• Turn off gas at LP cylinder or at source on natural gas systems. Ifanything but burned, replace valve/hose/regulator. If burned,discontinue use of product until a plumber has investigated causeand corrections are made.• Replace LP cylinder.• Turn off LP cylinder valve. Return LP cylinder to gas supplier.• Turn off LP cylinder valve. Remove regulator from cylinder andvisually inspect rubber seal for damage. See LP Cylinder Leak Testand Connecting Regulator to the LP Cylinder.• Turn off control knobs and LP cylinder valve. Leave lid open toallow flames to die down. After fire is out and grill is cold, removeburner and inspect for spider nests or rust. See Natural Hazardand Cleaning the Burner Assembly pages.• Turn off control knobs and LP cylinder valve. Leave lid open toallow flames to die down. After cooling, clean food particles andexcess grease from inside firebox area, grease tray, and othersurfaces.TroubleshootingProblemBurner(s) will not lightusing ignitor.(See Electronic IgnitionTroubleshooting also)Continued on nextpage.Possible CauseGAS ISSUES:• Trying to light wrong burner.• Burner not engaged with control valve.• Obstruction in burner.• No gas flow.• Vapor lock at coupling nut to LP cylinder.• Coupling nut and LP cylinder valve notfully connected.ELECTRICAL ISSUES:• Electrode cracked or broken; “sparks atcrack.”• Electrode tip not in proper position.• Wire and/or electrode covered withcooking residue.• Wires are loose or disconnected.• Wires are shorting (sparking) betweenignitor and electrode.• Dead battery.Prevention/Solution• See instructions on control panel and in Use and Care section.• Make sure valves are positioned inside of burner tubes.• Ensure burner tubes are not obstructed with spider webs or othermatter. See cleaning section of Use and Care.• Make sure LP cylinder is not empty. If LP cylinder is not empty,refer to “Sudden drop in gas flow.”• For a grill equipped with the AUTO-CLEAN feature, make surethe AUTO-CLEAN valve is set to “Grill”• Turn off knobs and disconnect coupling nut from LP cylinder.Reconnect and retry.• Turn the coupling nut approximately one-half to three-quartersadditional turn until solid stop. Tighten by hand only - do not usetools.• Replace electrode(s).Main Burners:• Tip of electrode should be pointing toward gas port opening onburner. The distance should be 1/8” to 1/4”. Adjust if necessary.Sideburner:• Tip of electrode should be pointing toward gas port opening onburner. the distance should be 1/8” to 3/16”. Adjust if necessary.• Clean wire and/or electrode with rubbing alcohol and clean swab.• Reconnect wires or replace electrode/wire assembly.• Replace ignitor wire/electrode assembly.• Replace with a new alkaline battery.28
Troubleshooting (continued)ProblemBurner(s) will not lightusing ignitor.(See Electronic IgnitionTroubleshooting also)Burner(s) will notmatch light.Sudden drop in gasflow or low flame.Flames blow out.Flare-up.Persistent grease fire.Possible CauseELECTRONIC IGNITION:• No spark, no ignition noise.• No spark, some ignition noise.• Sparks, but not at electrode or at fullstrength.• See “GAS ISSUES:” on previous page.• Match will not reach.• Improper method of match-lighting.• Out of gas.• Excess flow valve tripped.• Vapor lock at coupling nut/LP cylinderconnection.• High or gusting winds.• Low on LP gas.• Excess flow valve tripped.• Grease buildup.• Excessive fat in meat.• Excessive cooking temperature.• Grease trapped by food buildup aroundburner system.Prevention/Solution• See Section I of Electronic Ignition System.• See Section II of Electronic Ignition System.• See Section III of Electronic Ignition System.• Use long-stem match (fireplace match).• See “Match-Lighting” section of Use and Care.• Check for gas in LP cylinder.• Turn off knobs, wait 30 seconds and light grill. If flames are still low,turn off knobs and LP cylinder valve. Disconnect regulator.Reconnect regulator and leak-test. Turn on LP cylinder valve, wait30 seconds and then light grill.• Turn off knobs and LP cylinder valve. Disconnect coupling nut fromcylinder. Reconnect and retry.• Turn front of grill to face wind or increase flame height.• Refill LP cylinder.• Refer to “Sudden drop in gas flow” above.• Clean burners and inside of grill/firebox.• Trim fat from meat before grilling.• Adjust (lower) temperature accordingly.• Turn knobs to OFF. Turn gas off at LP cylinder. Leave lid in positionand let fire burn out. After grill cools, remove and clean all parts.Flashback...(fire in burner tube(s)).Unable to fill LPcylinder.One burner does notlight from otherburner(s).AUTO-CLEAN(If Equipped)Timer does not work(Green light does notflash)• Burner and/or burner tubes are blocked.• Some dealers have older fill nozzleswith worn threads.• Grease buildup or food particles inend(s) of carryover tube(s).Possible CauseDead BatteryBatteries installed incorrectly.Knob Position did not start the CleanCycle• Turn knobs to OFF. Clean burner and/or burner tubes. See burnercleaning section of Use and Care.• The worn nozzles don’t have enough “bite” to engage the valve. Trya second LP dealer.• Clean carry-over tube(s) with wire brush.Prevention/SolutionReplace batteriesInstall batteries correctly.Push Knob in to start the clean cycle. (Green LED should begin toflash)No LED’s will illuminate Dead BatteryReplace batteriesRed LED next to batterysymbol is illuminatedLow Battery StrengthPrepare to replace batteries (NOTE: Clean cycle will operate witha weak battery.29
Troubleshooting - Electronic IgnitionProblem (Ignition)Possible CauseCheck ProcedurePrevention/SolutionSECTION INo sparks appear atany electrodes whenElectronic Ignition Buttonis pressed; no noise canbe heard from sparkmodule.• Battery not installedproperly.• Dead battery.• Button assembly notinstalled properly.• Faulty spark module.• Check battery orientation.• Has battery been usedpreviously?• Check to insure threads areproperly engaged. Buttonshould travel up and downwithout binding.• If no sparks are generatedwith new battery and goodwire connections, module isfaulty.• Install battery (make sure that “+” and “–”connectors are oriented correctly, with “+” end upand “–” end down.)• Replace battery with new alkaline battery.• Unscrew button cap assembly and reinstall, makingsure threads are aligned and engaged fully.• Replace spark module assembly.SECTION IINo sparks appear atany electrodes whenElectronic Ignition Buttonis pressed; noise canbe heard from sparkmodule.• Output leadconnections notconnected.• Are output connections onand tight?• Remove and reconnect all output connections atmodule and electrodes.SECTION IIISparks are presentbut not at allelectrodes and/or notat full strength• Output leadconnections notconnected.• Arcing to grill awayfrom burner(s).• Are output connections onand tight?• If possible, observe grill indark location. Operateignition system and look forarcing between output wiresand grill frame.• Remove and reconnect all output connections atmodule and electrodes.• If sparks are observed other than from burner(s),wire insulation may be damaged. Replace wires.• Weak battery.• All sparks present but weakor at slow rate.• Replace battery with a new alkaline battery.• Electrodes are wet.• Has moisture accumulatedon electrode and/or in burnerports?• Use paper towel to remove moisture.• Electrodes cracked orbroken “sparks atcrack”.• Inspect electrodes forcracks.• Replace cracked or broken electrodes.30
PLEASE FILL OUT THIS CARD AND ATTACH A COPY OF YOUR SALES RECEIPT. RETURN IT WITHIN 10 DAYS OF PURCHASE.FOR WARRANTYSERVICEPROOF OF PURCHASEWILL BE REQUIRED.THIS WARRANTYIS NON‐TRANSFERABLE.LLENE ESTA TARJETA Y DEVUELVALADENTRO DE LOS 10 DIAS DE LA COMPRA. PARA EL SERVICIODE GARANTIAES NECESARIOQUE PRESENTESU COMPROBANTEDECOMPRA.CONSERVE LA FACTURA. ESTA GARANTIAES INTRANSFERIBLE.VEUILLEZCOMPLETERCETTE CARTE ET LA RETOURNERDANS LES 10 JOURS SUIVANTL’ACHAT. POUR OBTENIRLE SERVICESOUS GARANTIE,UNE PREUVE D’ACHAT DOITETRE PRESENTEE.VEUILLEZCONSERVERVOTRE FACTURE. LA PRESENTEGARANTIEN’EST PAS TRANSFERABLE.*Required | Necesario | ExigéPlease register your product online at:Registre su producto en línea en:Veuillez enregistrer votre produit à l'adresse:www.charbroil.com/register(If you register online, you do not need to send in this registration card.)(Si registra en línea, no es necesario enviar esta tarjeta de registro.)(Si vous enregistrez votre produit en ligne, il n'est pas nécessaire d'envoyer la carted'enregistrement.)~ PLEASE PRINT ~ IMPRIMAPOR FAVOR ~ S'IL VOUS PLAÎT IMPRIMER~*❶ First Name | Nombre | Prénom Initial | Inicial | Initiale Last Name | Apellido | Nom de FamillieAddress (number & street) | Dirección (número y calle) | Adresse (numéro et rue)Apt Number | Nº de apart | Nº d’appt.City | Cludad | Ville State | Estado | Province Zip Code | Código Zip | Code Postal*❷ E‐mail Address | Dirección de correo electrónico | Adresse électronique * ❸ Phone Number | Número telefónico | Numéro de téléphone*❹ Model Number | Número de modelo | Numéro de modèleSerial Number | Número de serie| Numéro de sérieSTICKERON PRODUCT* ❺Attach copy of yoursales receipt here.❻ Date of Purchase | Fecha de compra | Date de l’achat$❽ Purchase Price | Precio de compra | Prix d’achat❿ Which product are you registering?¿Qué producto está registrando?Quel produit enregistrez‐vous?1. Gas Grill | Parrilla a gas | Gril au gaz2. Electric Grill | Parrilla eléctrica | Gril électrique3. Smoker | Ahumador | Fumoir4. <strong>Char</strong>coal Grill | Parrilla a carbón | Barbecue au charbon5. Cooker/Fryer | Cocina/freidora | Cuiseur/Friteuse6. Other | Otro | Autre❼ Store Name | Nombre de la tienda | Nom du magasin❾ Your Gender | Sexo | Sexe: Male | Masculino | Masculin Female | Femenino | FémininMail to: / Enviar a: / Envoyer à :<strong>Char</strong>‐<strong>Broil</strong> Warranty RegistrationP.O. Box 1240Columbus, GA 31902‐1240Adjunte aqui la copiade su recibo decompraVeuillez attacher unecopie de votre reçuici.We respect your privacy. | Respetamos su privacidad. | Nous respectons votre vie privée.If you prefer not to receive special offers and promotions from <strong>Char</strong>‐<strong>Broil</strong>, please check here:Marque aquí si no desea recibir ofertas y promociones especiales de <strong>Char</strong>‐<strong>Broil</strong>:Si vous préférez ne pas recevoir d’informations concernant des offres spéciales et despromotions de <strong>Char</strong>broil, veuillez cocher ici:Thank you for completing this questionnaire. | Gracias por completer este cuestionario. | Merci d’avoir bien voulu remplir ce questionnaire.31
THANK YOUFOR YOUR RECENTPURCHASE FROMCHECK OUT THESEGREAT FEATURESON OUR WEBSITE• Valuable product information• Inspiring grilling accessories• Reliable customer support• Delicious recipes and tips from chefs• Exciting events and promotions• And much more!REGISTER YOUR PRODUCT TO RECEIVE ASPECIAL OFFERCHARBROIL.COM/REGISTER


