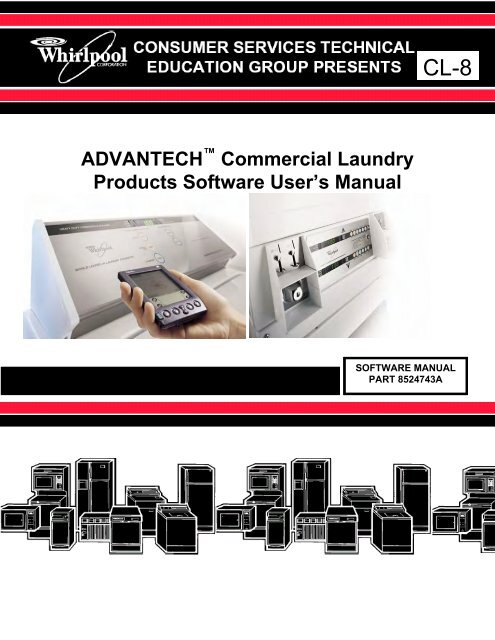
ADVANTECH Commercial Laundry Products Software User's Manual
ADVANTECH Commercial Laundry Products Software User's Manual
ADVANTECH Commercial Laundry Products Software User's Manual
You also want an ePaper? Increase the reach of your titles
YUMPU automatically turns print PDFs into web optimized ePapers that Google loves.
THE <strong>ADVANTECH</strong> PRODUCT LINECSP2770/2771KQCEE2760KQCGE2761KQCEE2790KQCGE2791KQCAE2762KQ
Archway(Form)NumberLiterature Cross ReferenceWhirlpoolPartNumberDescription Contains Ordering And ViewingInformationAll information necessary tooperate and manage Available at www.coinop.com, or callCWXL043B 8524744BCD for<strong>ADVANTECH</strong>1-800-643-3444PC <strong>User's</strong> <strong>Commercial</strong> <strong>Laundry</strong>Included on this<strong>Software</strong> Install CDAlso through Whirlpool CorporationLiterature department and forN/A 8178077CL7 Service Complete diagnostic and selected Trade Partners at:<strong>Manual</strong>/Job Aid technical reference manual www.whirlpoolwebworld.com,CWLL086A 8524743ACL8 <strong>Software</strong> Complete <strong>Software</strong> and products and more, commercialUser’s <strong>Manual</strong> Palm® application <strong>Manual</strong>laundry link, or call:Product specifications,1-800-851-4605CWLL082B N/A Sales literature Money AcceptorCross-referenceWhirlpool Corporation publications are available to support <strong>ADVANTECH</strong> <strong>Commercial</strong> <strong>Laundry</strong>For on-line access to all pertinent Whirlpool commercial laundry service information, go to:http://cltpsc.whirlpoolcorp.com/techinfo/techinfonew/literature.htmEnter as complete a model number as possible and then click searchNote: Canadian model numbers begin with a “Y”Government models begin with a “G”
Table of Contents
Table of Contents<strong>ADVANTECH</strong> OVERVIEW 1<strong>ADVANTECH</strong> <strong>Commercial</strong> <strong>Laundry</strong> Product....................................................... 2<strong>ADVANTECH</strong> PC System and Handheld Requirements ..................................... 5Minimum PC System Requirements ...................................................................... 6Minimum Handheld Requirements......................................................................... 6<strong>ADVANTECH</strong> MANAGEMENT SOFTWARE INSTALLATION 5Installing <strong>ADVANTECH</strong> Management <strong>Software</strong> .................................................. 8Installing DCOM95 for Windows "95" Users ........................................................ 10<strong>ADVANTECH</strong> HANDHELD SOFTWARE INSTALLATION 13Installing <strong>ADVANTECH</strong> Handheld <strong>Software</strong>...................................................... 14<strong>ADVANTECH</strong> MANAGEMENT SOFTWARE SETUP 19Management <strong>Software</strong> Overview......................................................................... 20Locations ............................................................................................................. 22Creating a New Location .............................................................................. 22Editing Location Information ......................................................................... 23Deleting a Location ....................................................................................... 23Passwords ........................................................................................................... 24Setting the Management Password .............................................................. 24Setting the Access Control Password........................................................... 25Setting Service Person IDs and Passwords ................................................. 26Setting the <strong>Software</strong> Update Password ........................................................ 27Machine Templates.............................................................................................. 28Creating a New Machine Template............................................................... 28Editing an Existing Template ........................................................................ 31Deleting a Machine Template ....................................................................... 31Special Prices Overview ............................................................................... 32Setting Special Prices................................................................................... 32HOTSYNC ® PROCESS BETWEEN THE MANAGEMENT SOFTWARE AND THEPALM HANDHELD 35Download Machine Setup Data to Palm Handheld via a HotSync ® Process…....36I
DATA EXCHANGE BETWEEN THE PALM HANDHELD AND <strong>ADVANTECH</strong> COMMERCIAL LAUNDRY PRODUCTS 37Overview.............................................................................................................. 38Starting the Handheld <strong>Software</strong> and Logging In .................................................. 38Initializing Machines............................................................................................. 40Using the Send Setup Command......................................................................... 43Using the Get Audit Command ............................................................................ 44Using the Utilities Command................................................................................ 45Using the One Touch Command.......................................................................... 46AUDITS 47Overview.............................................................................................................. 48Uploading Audits.................................................................................................. 48Viewing Audits ..................................................................................................... 48Viewing Histograms .................................................................. ……………..51Creating a <strong>Manual</strong> Audit ............................................................................... 52Audit Problems ............................................................................................. 53Deleting an Audit .......................................................................................... 53Existing Machines......................................................................................... 53Viewing an Existing Machine ........................................................................ 54Deleting an Existing Machine........................................................................ 54EXCEPTIONS 55Overview.............................................................................................................. 56Viewing Exceptions.............................................................................................. 56Creating a <strong>Manual</strong> Exception............................................................................... 57Deleting an Exception .......................................................................................... 58SERVICE DATA 59Overview.............................................................................................................. 60Viewing Service Data........................................................................................... 60Entering Service Data <strong>Manual</strong>ly........................................................................... 61Deleting Service Data .......................................................................................... 62REPORTS 63Overview.............................................................................................................. 64Viewing Reports................................................................................................... 64Exporting Reports ................................................................................................ 66Printing Reports ................................................................................................... 67UPDATING CONTROL BOARD FIRMWARE 69Downloading Firmware to PDA............................................................................ 70Installing Downloaded Firmware to A Machine .................................................... 71II
APPENDIX 75Passwords and IDs.............................................................................................. 76Backing Up the Management <strong>Software</strong>................................................................ 77Reinstall Procedures............................................................................................ 78Audit Discrepencies ............................................................................................. 79Possible Exceptions............................................................................................. 80Report Types ....................................................................................................... 81Exporting Reports ................................................................................................ 84TROUBLESHOOTING INFORMATION 87GLOSSARY 89INDEX 93<strong>ADVANTECH</strong> SOFTWARE QUICK REFERENCE SHEET 95SUPPORT AND CONTACT INFORMATION 98III
Overview<strong>ADVANTECH</strong> <strong>Commercial</strong> <strong>Laundry</strong> <strong>Products</strong>Whirlpool ® <strong>ADVANTECH</strong> commercial laundryproducts allows the use of a Palm handheld device,also referred to as a Personal Digital Assistant (PDA),for washer and dryer installation, setup, settingspecial vend prices, washer and dryer softwareupgrades, and transferring data to and from apersonal computer (PC). This information is setup onthe PC using <strong>ADVANTECH</strong> Management <strong>Software</strong>,which is then used to download <strong>ADVANTECH</strong> Handheld <strong>Software</strong> to the Palm handheld. ThePalm handheld uses an infrared light beam tocommunicate information contained in theManagement <strong>Software</strong> to the washer and dryer. SeeInformation Flowchart on page 3.Before downloading the Handheld <strong>Software</strong> to a PDAdevice running the Palm operating system,<strong>ADVANTECH</strong> Management <strong>Software</strong> must beinstalled and running on your PC. Passwords,machine setup, and Handheld <strong>Software</strong> are availablewithin the Management <strong>Software</strong> package. Thissoftware instruction manual details the initial setup ofthe <strong>ADVANTECH</strong> Management and Handheld<strong>Software</strong> and its use with the PC, the Palm handheld (or other PDA), and the <strong>ADVANTECH</strong> commercial laundry products.It is assumed that you are familiar with the basicoperation and use of the Palm handheld and the PC,and that you have followed all installation instructionsthat came with the Palm handheld for the setup ofthe Palm software, including the HotSync ® Manager,and its cradle. See the Palm owner’s manual for moreinformation. Setup of the Palm software and asuccessful HotSync ® between the PDA & the PCshould be accomplished prior to the installation of the<strong>ADVANTECH</strong> Management <strong>Software</strong> onto the PC.2
OverviewSMARTSet UpInstructions(Templates)2Audit andServicedataCARDS101HotSync®5439DataExportBrand x<strong>Software</strong>88Brand x<strong>Software</strong>User builtinterface required6Reports<strong>ADVANTECH</strong><strong>Software</strong>71. Smart Cards see page 292. Set Up Instructions (templates) see page 283. Audit Data see page 47, Service Data see page 594. Handheld <strong>Software</strong> Installation see page 145. HotSync ® procedures see page 356. Data Analysis in third party software see page 757. Management <strong>Software</strong> Overview see page 218. Reports see page 639. Exporting Reports see page 6610. Printing Reports see page 674
5<strong>ADVANTECH</strong> PC System andHandheld Requirements
System RequirementsMinimum PC SystemRequirements• Pentium ® 233 MHz MMX ®processor• CD-ROM drive• 32 MB of RAM• Dedicated minimum of 2.5 GBof hard drive space to storereport information• One of the following operatingsystems:♦ Windows ® 98 Version4.10.2222A (Second Edition)♦preferredWindows ® 98 Version4.10.1998 (First Edition)♦ Windows ® 95 SR2, SR2.5 1♦ Windows NT ® SP3, SP4, SP6♦ Windows ME ®♦Windows ® 2000 Professional,SP1• Monitor resolution: 1024x768pixels or higherMinimum HandheldRequirements• PDA handheld computer(running on a Palm ® operatingsystem required)• Palm OS ® 3.5.0 to 4.0.0• 4MB of RAM1 In order for the Management <strong>Software</strong> torun on the Windows ® 95 operating system,Windows ® 95 users must install DCOM95before installing the Management <strong>Software</strong>.See page 11 for DCOM95 installinstructions.6
7<strong>ADVANTECH</strong> Management<strong>Software</strong> Installation
<strong>ADVANTECH</strong> Management <strong>Software</strong> InstallationInstalling <strong>ADVANTECH</strong> Management <strong>Software</strong>The Management <strong>Software</strong> is used to interpret auditdata collected from your <strong>ADVANTECH</strong> commerciallaundry products. It must be installed before theHandheld <strong>Software</strong> can be downloaded to the Palm handheld. The Management <strong>Software</strong> and theHotSync ® Manager must be loaded and operatingprior to attempting a PDA data transfer.1. Power on the PC, if not done so already.2. Place the <strong>ADVANTECH</strong> Management <strong>Software</strong>CD into the CD drive.3. The InstallShield Self-extracting EXE windowappears.Important:Windows ® 95 users MUST click on NO, and theninstall DCOM95 before proceeding with installation ofthe <strong>ADVANTECH</strong> Management <strong>Software</strong>.See page 11 for the DCOM95 install instructions.If you are using an operating system other thanWindows ® 95, such as Windows ® 98, WindowsNT ® , Windows ME, Windows ® 2000, Windows ®2000 Professional, or if you are using Windows ®95 and have already installed DCOM95, click onYes to continue with the installation.4. The InstallShield Self-extracting EXE andSetup windows will appear briefly. When theWelcome window appears, click on Next toproceed.5. Click on Next again.6. Read the <strong>Software</strong> License Agreement then inorder to precede you must accept the terms byclicking on Yes.7. Click on Next again.8. The Select Program Folder window appears. Toaccept the default folder location (Advantech)click on Next.8
<strong>ADVANTECH</strong> Management <strong>Software</strong> Installation9. Click on Next again to begin the software installation.Several windows will flash on the screen. No user inputis necessary until you see the End User LicenseAgreement screen, pictured below.10. Select the Yes checkbox, then click on Next.11. Click on Next again.12. Several windows will flash. Click on Finish.13. You should have already installed your Palm softwareand the HotSync ® Manager, so you may see the ExitHotSync Manager window. Click on No to proceed.ORIf you have not yet installed your Palm software andthe HotSync ® Manager, you may be warned that theHotSync ® Manager cannot be found. Click on OK toproceed (it is recommended that the Palm softwareand the HotSync ® Manager be installed prior to the<strong>ADVANTECH</strong> Management <strong>Software</strong>).14. The Setup Complete window appears. Verify that Yesis selected, then click on Finish. This will restart yourPC.15. Eject the Management <strong>Software</strong> CD from the CD drive.Note:If the installation does not start automatically, select theStart button and choose Run. Type D:\setup and clickon OK. (If your CD drive is not D, select the appropriatedrive.)9
<strong>ADVANTECH</strong> Management <strong>Software</strong> InstallationInstalling <strong>ADVANTECH</strong> Management <strong>Software</strong> (continued)Important:Before proceeding to install the Handheld <strong>Software</strong>,the Palm software, the HotSync ® Manager, and theHotSync ® cradle must already be setup. See the Palmowner’s manual for more information.Installing DCOM95DCOM95 is a file that allows <strong>ADVANTECH</strong> Management <strong>Software</strong> to run on the Windows ® 95operating system. Windows ® 95 users must installDCOM95 before installing the Management<strong>Software</strong>. Users of all other operating systems(Windows ® 98, Windows NT ® , Windows ME, andWindows ® 2000 & Windows ® 2000 Professional) maydisregard DCOM95 installation.1. Power on the PC.2. After the PC has booted up, place the<strong>ADVANTECH</strong> Management <strong>Software</strong> CD intothe CD drive.3. The InstallShield Self-extracting EXE windowappears. Click on No to exit the install process.4. Select Start, Programs, Windows Explorer.5. Single-click on the drive letter representing theCD drive (usually the D:\ drive), located on theleft side of the Explorer window.InstallingDCOM95 (continued)6. Double-click on the file DCOM95.exe, located onthe right side of the Explorer window.10
<strong>ADVANTECH</strong> Management <strong>Software</strong> InstallationHints:CD DriveDCOM95.exeFileDepending on your PC setup:• The Explorer window may look slightly different.• The DCOM95.exe filename may appear asDCOM95.• The letter that represents the CD drive may bedifferent.7. Click on Yes.8. Read the End User Agreement then click onYes again, to accept.9. Several windows will flash. When the DCOM95for Windows ® 95 window appears, click on Yesto restart the PC.10. After the PC has restarted, eject the CD.11
<strong>ADVANTECH</strong> Management <strong>Software</strong> InstallationNOTES:12
13<strong>ADVANTECH</strong> Handheld <strong>Software</strong>Installation
<strong>ADVANTECH</strong> Handheld <strong>Software</strong> InstallationInstalling <strong>ADVANTECH</strong> Handheld <strong>Software</strong><strong>ADVANTECH</strong> Handheld <strong>Software</strong> is downloadedfrom the PC to the Palm handheld via the HotSync ®process.Important:<strong>ADVANTECH</strong> Management <strong>Software</strong> and thePalm software must already be installed on your PC.The HotSync ® Manager must also be running. Seethe Palm owner’s manual for more information1. Launch the Management <strong>Software</strong> by clicking onStart, Programs, <strong>ADVANTECH</strong>,<strong>ADVANTECH</strong> Management <strong>Software</strong> or byclicking on the shortcut icon from the Windows ®Desktop.2. First, you will be prompted to fill in the NewLocation Information dialog box with a name,address, and phone number for one of yourlaundry locations. Fill in the appropriateinformation, and click on Submit. See Note onpage 16.3. Next, you will be prompted to enter a NewOwner Password. Enter a password and clickon Enter.Important:The New Owner Password prevents unauthorizedaccess to your machines by any PDA that has notbeen synced with your copy of the Management<strong>Software</strong>. A lost Owner ID cannot be restored;therefore you should write it down and store it in asafe place. If you forget your Owner ID then all of yourmachines will have to be factory reset and reinitializedand the Owner ID file will have to be deleted beforethe Management <strong>Software</strong> can be reinstalled. SeeAppendix for reinstall procedures or contact theWhirlpool Technical Assistance Team at: 1-800-NOBelts (1-800-662-3587) > Option 514
<strong>ADVANTECH</strong> Handheld <strong>Software</strong> InstallationNote: If you’re not ready to enter the locationinformation at this time, click on the Close button.Additional locations can be created later.4. If you are using the preferred monitor resolution(1024x768 pixels or higher,) you should be ableto view all 6-command buttons in the upper rightcorner of your screen.If you cannot view all six command buttons,• Click on the Restore button, located in theextreme upper right of the screen.5. Place the Palm handheld in its cradle.6. In the Management <strong>Software</strong> on the PC, click onthe PDA Sync button.7. Select the Advanced Sync Features menu fromthe upper left corner of the screen and chooseTransfer Palm Application.8. A Warning window will appear, click on Yes.15
<strong>ADVANTECH</strong> Handheld <strong>Software</strong> Installation9. The <strong>ADVANTECH</strong> Palm Application Installerdialog box appears. Verify the User Name iscorrect then click on Install….Note:The User Name, shown here as Service Person #1,was defined during the Palm handheld setup. Tochange the User Name, see the Palm owner’smanual.10. The Waiting for HotSync window appears.Press the HotSync ® button on the Palm handheld’s cradle to begin the HotSync ®process.16
<strong>ADVANTECH</strong> Handheld <strong>Software</strong> Installation11. If the Users dialog box appears, prompting youto select a user, then select the appropriate username. This will be the name of the person usingthe PDA. Click on OK.12. Once the HotSync ® process is complete, the PCscreen may display the HotSync ® Problemwindow. Click on OK.13. Tap the Reset button, located on the Palm handheld screen.14. The HotSync ® process is complete. Close anyremaining open windows on the PC, includingthe PDA Synchronization window. Do this byclicking on the Exit button.15. On the Palm handheld, tap on the Home icon toreturn to the main screen.17
<strong>ADVANTECH</strong> Handheld <strong>Software</strong> InstallationNOTES:18
<strong>ADVANTECH</strong> Management <strong>Software</strong>Setup19
<strong>ADVANTECH</strong> Management <strong>Software</strong> SetupManagement <strong>Software</strong> OverviewOnce you have completed the installation of theManagement and Handheld <strong>Software</strong>, you are readyto begin setup of the Management <strong>Software</strong>. TheManagement <strong>Software</strong> stores databases on your PCto help you manage your laundry locations, machinesetups, audits, exceptions, and service data. With theManagement <strong>Software</strong> you can also generate reportsto track machine usage for a specified time period.The preferred monitor resolution for the Management<strong>Software</strong> is 1024x768 pixels or higher. If that is notpossible on your monitor, the Management <strong>Software</strong>window will need to be Restored every time theprogram is launched. See page 16, step 4 for moreinformation.To restore the Management <strong>Software</strong> window:1. Click on the Restore button, located in theextreme upper right of the screen.Note: All instructions included in this manualassume that the Management <strong>Software</strong> is launchedand the screen display is set so that all six commandbuttons can be viewed. See illustration on next page.20
<strong>ADVANTECH</strong> Management <strong>Software</strong> SetupThe Management <strong>Software</strong> screen allows you toexecute commands by using either the menus,located in the upper left, or the command buttons,located in the upper right. Also located on the left sideof the screen is the Location: drop-down list. This listis used to specify which laundry location you wish towork with in the Management <strong>Software</strong>.MenusCommandButtonsRestoreButtonLocation:Drop-downListThis section describes how to setup the Management<strong>Software</strong> and prepare it for downloading to the Palm handheld. The following items must be setup beforethe first HotSync ® operation.• Machine Locations• Passwords and IDs1. Management Password2. Access Control Password3. Service Person IDs and Passwords• Machine Templates (Special Pricing optional)21
<strong>ADVANTECH</strong> Management <strong>Software</strong> SetupLocationsLocations store address information for yourmachines. Setup, audit, exception, and service dataare all stored and reported by location.Creating a New LocationIn addition to creating the Owner ID the first time youlaunch the Management <strong>Software</strong>, you are alsoprompted to enter New Location Info. If you chosenot to enter New Location Info at that time, or wouldlike to create additional locations, follow the stepsbelow. At least one location must be created before aHotSync ® operation can be done.1. Select Locations, Create New Location fromthe menu.2. Enter the appropriate information into the NewLocation Info dialog box.3. Click on Submit.4. Repeat steps 1-3 to create additional locations.22
<strong>ADVANTECH</strong> Management <strong>Software</strong> SetupEditing Location Information1. Verify that the correct location appears in theLocation: drop-down list located in the upper leftof the screen.2. Select Locations, Update Current Locationfrom the menu.3. Make the appropriate changes in the UpdateLocation Info dialog box.4. Click on Submit.Deleting a Location1. Verify that the correct location appears in theLocation: drop-down list located in the upper leftof the screen.2. Select Locations, Delete Current Locationfrom the menu.3. Click on Yes to accept the Location DeletionWarning.Important:Deleting a location also deletes template setup andaudit data associated with the location.23
<strong>ADVANTECH</strong> Management <strong>Software</strong> SetupPasswordsPasswords protect your data from unauthorized useraccess. The first time you launch the Management<strong>Software</strong> you are prompted to enter an Owner ID.There are several other types of passwords that, inconjunction with the Owner ID, produce multiplelayers of security for the Management and Handheld<strong>Software</strong>. See Appendix for more information onpasswords.Setting the Management PasswordThe Management Password is used to access theManagement <strong>Software</strong>. You will be prompted to enterthis password each time you launch the Management<strong>Software</strong>.Important:Write down your management password and store itin a safe place. If you forget this password you will notbe able to use your Management <strong>Software</strong>, even ifyou reinstall it!1. Select Passwords, Set Management Passwordfrom the menu.2. Enter the New Management Password in thedialog box and press [Tab].3. Enter the Management Password again toconfirm, then click on Enter.4. Click on OK.Note: The Management Password is casesensitive, i.e., distinguishes between upper and lowercaseletters.24
<strong>ADVANTECH</strong> Management <strong>Software</strong> SetupSetting the Access Control PasswordThe Access Control Password is used inconjunction with the Owner ID to protect yourmachines from unauthorized user access. Unlike theOwner ID, the Access Control Password can bechanged.Important:If a service person loses a PDA, it is recommendedthat you change your Access Control Passwordimmediately, re-sync all of your PDAs, and re-initializeall of your machines to install the new password.1. Select Passwords, Set Access ControlPassword from the menu.2. Enter the New Access Control Password in thedialog box and press [Tab].3. Enter the Access Control Password again toconfirm, then click on Enter.4. Click on OK.Note: The Access Control Password is casesensitive.25
<strong>ADVANTECH</strong> Management <strong>Software</strong> SetupSetting Service Person IDs and PasswordsService Person IDs control access to the Handheld<strong>Software</strong>, located on the PDA. These IDs give theowner/operator the ability to track service personactivity. An ID should be created for each serviceperson using a PDA.1. Select Passwords, Add/View Service PersonIDs from the menu.2. Enter your Management Password, then clickon Submit. The Add New Service Personwindow appears.3. Enter the User Name and press [Tab].Important:• The User Name and Password cannot belonger than 12 characters (alpha and/or numeric)including spaces.• The Password is case sensitive.4. Enter the Password and press [Tab].5. Enter the Password again to confirm, then clickon Add.26
<strong>ADVANTECH</strong> Management <strong>Software</strong> SetupSetting Service Person IDs (continued)6. Repeat steps 1-5 to create additional ServicePerson IDs.7. Click on Exit when you are finished addingService Person IDs.Hints:• Longer passwords are more secure; howeverchoosing a password that is too long can becumbersome to enter into the PDA.• Click on the View Existing IDs button to see IDsyou have already setup.Note: If you delete a Service Person ID, thatinformation is deleted from the active list only. Thisinformation still resides in the database so you canstill view who is responsible for past audits.Setting the <strong>Software</strong> Update PasswordThe <strong>Software</strong> Update Password is used to securethe upgrade process when needing to change theWhirlpool imbedded software of the machine’s controlboard. The process will copy new software from thePDA to the control board of the machine by n infraredbeam. This will only be required if Whirlpool issuesnew machine control board software also calledfirmware. The <strong>Software</strong> Update Password is notmandatory and should only be used for additionalsecurity.1. Select Passwords, then Set <strong>Software</strong> UpdatePassword from the menu.2. Enter the New <strong>Software</strong> Update Password andpress [Tab].3. Enter the <strong>Software</strong> Update Password again toconfirm, then click on Enter.4. Click on OK.27
<strong>ADVANTECH</strong> Management <strong>Software</strong> SetupMachine TemplatesMachine Templates are created and managed withinthe Management <strong>Software</strong>. Template informationincludes machine settings such as base cycle priceand base cycle time for machines at a certainlocation. A single location can have multiple templatescreated to assist in resource balancing and usagemanagement. This information is then downloaded tothe PDA, via the HotSync ® process, to distributemachine setup information to the washers and dryers.Machine templates are location specific. A newtemplate must be created for each location even iftemplate data is the same at all locations.Creating a New Machine Template1. Select the correct location from the Location:drop-down list.2. Click on Setups.3. The Machine Setups dialog box appears.4. Click on the tab to display either a New WasherTemplate or a New Dryer Template. Makeselections for the new template. See tables onthe following pages for more information ontemplate options.28
<strong>ADVANTECH</strong> Management <strong>Software</strong> SetupThe following options can be set for either a New Washer or New DryerTemplate (defaults are listed below the option):OptionDescriptionBase Cycle Price*Sets the Base Cycle Price for a wash or a dry cycle.($1.00)Base Cycle Time (cannotSets the Base Cycle Time for a wash or a dry cycle.be changed on washer)Sets the value of coins inserted into the first coin drop or slide.Value of Coin 1 ($0.25)This field must be filled in.Sets the value of coins inserted into the second coin drop orValue of Coin 2 ($1.00)slide (if necessary).Indicates the number of coins that must be inserted into theCoinslide Coin1first slide to equal the value of the Base Cycle Price. This(4)field must be filled in.Indicates the number of coins that must be inserted into theCoinslide Coin2second slide to equal the value of the Base Cycle Price (if(0)necessary).Coin Drop Installed** Indicates whether or not a Coin Drop device is installed.Coin Slide Installed** Indicates whether or not a Coin Slide device is installed.Aux Device Installed** Indicates whether or not a Smart Card reader is installed.Indicates whether service persons can access the machinesPDA Enabledwith PDAs. If this options is not enabled (no checkmark), thenPDAs cannot be used.Start on Start Button**** When enabled allows for Push-to-Start or OPL cycles. ($0.00)Minimum Coin1 Pulse Sets the minimum number of milliseconds for coins to pass(24 milliseconds)*** through the Coin1 drop.Maximum Coin1 Pulse Sets the maximum number of milliseconds for coins to pass(50 milliseconds)*** through the Coin1 drop.Minimum Coin2 Pulse Sets the minimum number of milliseconds for coins to pass(24 milliseconds)*** through the Coin2 drop.Maximum Coin2 Pulse Sets the maximum number of milliseconds for coins to pass(50 milliseconds)*** through the Coin2 drop.Between Coin Delay For machines with coin drops installed, the minimum number(default 0.2 seconds)*** of seconds between the drop of Coin1 and the drop of Coin2.Enable Daylight Indicates whether the machine is set to observe DaylightSavings (Disabled) Savings Time.Indicates the location of the decimal point when the price isDecimal Point Locationdisplayed on the machine.* For coin drops and slides, Base Cycle Price must match the mechanical settings of the selected coin acceptor.** A minimum of one-money accepting mechanism must be selected: Coin Drop, Coin Slide, Aux Device, or OPL*** For coin-operated machines, use manufacturer’s recommended time settings for individual installation, if an OFF errorcode appears on the display during use, the time pulse or delay should be dropped to 0.0**** For Start On Start Option a minimum of .01 must be input for the cycle price in order for the 0.00 vend price toappear in the display of the machine.29
<strong>ADVANTECH</strong> Management <strong>Software</strong> SetupNew Washer Template options, defaults are listed below the option:OptionEstimated Fill Time(0 seconds)Extra Money forWarm Water($0.00)Extra Money for HotWater($0.00)Hot TemperatureReduction(0)Enable Warm Rinse(No)Is Pressure SwitchSet to Low Level (No)Freeze Time DuringFill (No)DescriptionEstimates the time it takes to fill a machine during wash orrinse cycles. This time is added to the Base Cycle Time. Anestimated fill time can be obtained from the audit results bylocation. Display time will be increased by double the amountselected as it adds the time to both fill cycles.Indicates how much money to be added to the Base CyclePrice when warm water is selected.Indicates how much money to be added to the Base CyclePrice when hot water is selected.Indicates how many seconds of cold water should be addedto the hot water for each minute of fill time. Max of 30seconds.Selects warm water only for the Rinse Cycle. The default isNo (no check mark).Indicates whether washer’s pressure switch is set to low.The default is No (no check mark). See Service Tech<strong>Manual</strong> for more information.Indicates whether machine’s Base Cycle Time should begincounting down during machine fill. The default is No (nocheck mark).New Dryer Template options:OptionTopoff Price($0.00)Topoff Time(0)Disable TopoffsExtended Cooldown(5 minutes)DescriptionIndicates that Base Cycle Time can be extended after theinitial Base Cycle Price has been met.Sets the amount of time, in minutes, that is added for eachadditional coin.Does not allow Topoffs.Indicates the number of minutes of Cooldown before end ofthe Base Cycle Time. This is part of the Base Cycle Time,not an addition to.5. Click on Save to save machinetemplate options.6. A number will automatically be assigned to thetemplate. Click on OK to confirm the action.30
<strong>ADVANTECH</strong> Management <strong>Software</strong> SetupEditing an Existing Template1. Click the appropriate Existing Washer Templateor Existing Dryer Template tab.2. Select the washer or dryer template to be editedfrom the Select a Template: drop-down list.3. Make the appropriate changes to the template.4. Click on Save.5. Click on OK to confirm update.Deleting a Machine Template1. Click the appropriate Existing Washer Templateor Existing Dryer Template tab.2. Select the washer or dryer template to be deletedfrom the Select a Template: drop-down list.3. Click on Delete, located in the lowerright of the dialog box.4. Click on Yes to confirm the action.5. Click on OK.31
<strong>ADVANTECH</strong> Management <strong>Software</strong> SetupSpecial Prices OverviewThe New Washer and New Dryer Templates enableyou to create up to three special vend prices foryour machines. For example, you could adjust pricesfor specific time periods when the machines are underor over-utilized, or set the machine to turn itself off fora specified time period. See page 35 for Special Priceexamples.Setting Special Prices1. Click on Edit Special Prices,located in the center of the New Washer or NewDryer Template tab.2. The Special Prices dialog box appears. Selectthe appropriate days for the Days for Special:and set the Special Parameters:. You cannotset a Special Price of $0.00.3. Click on the Add Special button.Note: To set the machine to turn itself off for aspecified time period, select the days and times forthe machine to turn off under Days for Special: andSpecial Parameters:, then set the Price of Specialto “$100.01”. This will cause the machine to display“OFF” on its control panel during the specified timeperiod.32
<strong>ADVANTECH</strong> Management <strong>Software</strong> Setup4. The following window appears. The special pricewill remain in the software’s memory until thetemplate is saved. Click on OK.5. Click on the Exit button to exit the SpecialPrices dialog box.6. The Special Prices Info window appears. Clickon Yes.Note: The Special Prices will not be saved untilyou save the template.7. Click on Save to save the NewWasher or New Dryer Template.8. Click on OK to confirm.9. Click on Exit to exit the MachineSetups dialog box.Important:You will not be prompted to save the template beforeexiting the Machine Setups window. It is importantthat you remember to click on Save before exiting, orall of your template information will be lost!33
<strong>ADVANTECH</strong> Management <strong>Software</strong> SetupSpecial Price ExamplesSpecial Price setto reflect anunder-utilizedmachine (defaultprice is $1.00)Special Price setto reflect anover-utilizedmachine (defaultprice is $1.00)Special Price setto turn amachine off for aspecified timeperiod34
HotSync ® Process Between theManagement <strong>Software</strong> and the Palm Handheld35
<strong>ADVANTECH</strong> Management <strong>Software</strong> HotSyncDownloading Machine Setup Data to the Palm Handheld via a HotSync ®Once you have setup your passwords, locations, andtemplates you can download the information from thePC to the PDA via the HotSync ® process. The PDA willbe in Open-Access Mode until the first HotSync ®operation is performed. In Open-Access mode yourmachines are vulnerable to any PDA with the Handheld<strong>Software</strong> loaded on them, however, only a limitednumber of utilities are available in this mode: Get/SetTime, Get Setup, Start/End Cycles, Audit Count,Service Mode, and Run Diagnostics. It is recommendedthat you sync your PDAs with the Management<strong>Software</strong> and initialize your machines as soon aspossible after installation. After the first HotSync ®operation has been performed the PDAs will then be inSynced Mode, where all features will becomeavailable.Before performing a HotSync ® operation, make sure theManagement <strong>Software</strong> has been launched on the PCand that the Palm handheld is in its cradle. Refer topage 15 of this manual for instructions on installing theHandheld <strong>Software</strong>.1. Click on PDA Sync.2. Click on ExecutePDA Data Transfer.3. Press the HotSync ® button on the HotSync ® cradleor cable.4. When the HotSync ® operation is complete, click OK onthe PC, then click on Exit. The Palm handheld screenwill look like this:5. On the Palm handheld, use the stylus to tap the Homeicon, located to the left of the Graffiti ® writing area. Thiswill display the main menu screen on the PDA.36
37Data Exchange Between the Palm Handheld and <strong>ADVANTECH</strong> <strong>Commercial</strong> <strong>Laundry</strong> <strong>Products</strong>
Data exchange between PDA & MachineOverviewOnce you have completed the initial setup of theManagement and Handheld <strong>Software</strong>, and havedownloaded the data to the Palm handheld, you areready to upload the information to the <strong>ADVANTECH</strong> commercial laundry products. Part of this processrequires the initialization of each machine so data canbe exchanged between the Palm handheld and the<strong>ADVANTECH</strong> equipment. When initialization iscomplete, templates may then be uploaded to themachines.Starting the Handheld <strong>Software</strong> and Logging In1. Remove the Palm handheld from its cradle andturn it on, if necessary.2. Using the stylus, tap the Palm handheld screento scroll to the <strong>ADVANTECH</strong> icon.3. Tap on the <strong>ADVANTECH</strong> icon.4. The Welcome screen appears.5. Tap on Continue.6. The Login screen appears. Select the correctService ID and enter the correspondingpassword using the Graffiti ® writing method.38
Data exchange between PDA & Machine7. Tap on Continue.8. The Select a location: window appears. Selectthe appropriate location, then tap on Continue.9. After logging in and selecting the appropriatelocation, the following screen appears.The Select a command screen is where you canchoose to Initialize a machine, Send Setup templateinformation, Get Audit data, use Utilities features, oruse the One Touch command. Each of thesefeatures is explained in more detail throughout thissection.39
Data exchange between PDA & MachineInitializing MachinesInitialization prepares a machine for use with theManagement <strong>Software</strong>. Before a machine isinitialized, it is in Open-Access Mode. This meansany PDA with the Handheld <strong>Software</strong> installed canaccess your machines. So it is very important toinitialize your machines as soon as possible. When amachine is initialized, information such as the OwnerID, Access Password, and Location ID are uploadedto the machine. These passwords and IDs protectyour machines from unauthorized user access. Amachine name (number) will be assigned and auditinformation can be obtained.Important:Communication between the Palm handheld and the<strong>ADVANTECH</strong> equipment is done through aninfrared light beam. Therefore, the position of the PDAin relation to the machine is critical for successfulcompletion of the data transfer.The infrared communication port on the PDA isusually located at the top of the device. The receiveron the machine is located to the right of the last digiton the display panel. See picture below.40
Data exchange between PDA & MachineAim the handheld much like you would aim a TVremote control. Be sure to locate the infrared port onthe device that you are using and understand thedirection of its beam to ensure a successful datatransmission. Ensure that the distance between thePDA and the infrared receiver on the machine is lessthan 5-inches. Strong light sources not excludingsunlight, or close proximity of other infrared devicessuch as alarm systems may inhibit the transmission ofdata. To remedy this situation, simply use your handto shield the receiver & or the PDA port.Proper positioningof this type PDAdevice for an upperstack dryer datatransfer.Proper positioningof the same typePDA device for awasher or singledryer data transfer.41
Data exchange between PDA & MachineTo initialize a machine:1. Aim the PDA at the machine’s infrared receiver.2. Tap on Initialize, located on the Select acommand screen on the PDA.3. The Initialization screen appears. To create adifferent ID, use the Graffiti ® writing area on thePDA to delete and re-enter a new ID number.Verify that you are aiming at the machine’sinfrared receiver then tap on OK when the ID iscorrect.Important:Machine IDs must begin with a “W” for washers or a“D” for dryers, followed by an additional five digits.The Handheld <strong>Software</strong> suggests a logical numberingorder. Or, if you prefer, you could use the productserial number as well as another system of yourchoice. Machine IDs must also be unique within alocation.42
Data exchange between PDA & MachineHint:An easy way to keep track of machine names is tobegin with the first machine to your left as you enter alocation and work clockwise around the room, orphysically mark the machine with a property tag ormagic marker.4. When initialization is complete the screen willdisplay Operation completed. Tap on Back toreturn to the Select a command screen.Using the Send Setup CommandThe Send Setup command transfers a washer ordryer template, created in the Management <strong>Software</strong>,to a machine.1. Aim the infrared port on the PDA at a 90 degreeangle to the machine’s receiver.2. Tap on Send Setup, from the Select acommand screen on the PDA.3. Select the appropriate Setup Template, then tapon Send.43
Data exchange between PDA & MachineUsing the Send Setup Command (continued)4. When the operation is complete, tap on Back toreturn to the Select a command menu.Using the Get Audit CommandNote: The Management <strong>Software</strong> will not recognizethe setup data you assigned to the machine until youhave taken an audit and performed a HotSync ®operation, to download it back to your PC.The Get Audit command allows you to track vendcycles for each machine. Audit data is then uploadedfrom the PDA to the PC, containing the Management<strong>Software</strong>, for analysis.1. Aim the handheld at the machine’s receiver.2. Tap on Get Audit, located on the Select acommand screen on the PDA.3. When the Audit is complete, the following screenappears. Tap on Back to return to the Select acommand screen.Important:If all items on the Get Audit screen are checked, thenthe operation was a success. If some items are notchecked, then the communication has failed. In theevent of a failed audit, tap the Back button, checkyour aim of the PDA in relation to the control panel,and perform steps 1-3 again.44
Data exchange between PDA & MachineUsing the Utilities Command45The Utilities command, located on the Select acommand screen, displays options for managingyour machines. Many of these options can also beaccessed directly from the control board on themachine.• Service mode - Places the machine into ServiceMode. This option can be used in place ofpressing the service switch on the machine. Seethe Service Tech Sheet or Service <strong>Manual</strong> formore information on placing the machine inService Mode.• Start cycle - Allows the service person to start acycle without depositing any coins.• End cycle - Ends the current cycle that isrunning.• Run diagnostic - Checks machine’s internaldata to ensure integrity.• Machine info - Displays the processor’s serialnumber, machine ID, location ID, and softwareversion number.• Set time - Sets the machine’s internal clockbased on the time and date that is on the Palm handheld. The time is set automatically duringinitial setup of the machine, however use Settime if manual set up is required.• Get time – Displays the machine’s current timeand date settings.
Data exchange between PDA & Machine• Get setup - Allows the service person to “clone”a machine. For example, if a control boardneeded to be replaced on a machine, the serviceperson could clone the setup data from anexisting machine in order to copy the currenttemplate to the new control board.Important:All machine usage history will be lost at time of controlboard replacement. See Service Tech <strong>Manual</strong>/Job Aidfor details.Using the One Touch Command• Re-program - Used only when a machinesoftware (firmware) upgrade is required.Instructions for re-programming will be providedwhen new machine software (firmware) isavailable.The final option on the Select a command screen isOne Touch. This command performs two commoncommands with a single tap of the stylus:• Audit data is uploaded to the Palm handheldfrom the machine.• The correct time and date are set on themachine, according to the time and date on thePDA.46
47Audits
AuditsOverviewUploading AuditsAfter audit data has been uploaded from themachines to the Palm handheld, it can bedownloaded back to the PC and analyzed using theManagement <strong>Software</strong>. Up to 500 machine audits canbe stored on the Palm handheld before a HotSync ®operation is required.Before performing a HotSync ® operation to upload theAudits from the Palm handheld to the PC, makesure the Management <strong>Software</strong> has been launchedand that the Palm handheld is in its cradle.Viewing Audits1. Click on PDA Sync.2. Click on Execute PDAData Transfer.3. Press the HotSync ® button on the HotSync ®cradle.4. When the HotSync ® operation is complete, clickon OK on the PC, then click on Exit.Audits track information such as number of cyclesvended, number of coins inserted, and the totalamount of revenue received. Audit data can later beused to generate reports.Two types of audits are recorded for each machine:Interval – Interval audits track cycle and vendhistory from the time of the last audit. This informationis cleared from the machine every time audit data iscollected.Cumulative – Cumulative audits track cycle andvend history over the life of the machine. This data isnever cleared from the machine unless a reinitializationis done or a control board is replaced.48
Audits AuditsImportant:For coin-operated machines it is imperative that coinsare collected every time an audit is taken. Auditsrecord how many coins should be collected anddocuments that information with a CollectionTimestamp in the Service Data.Before viewing an Audit, verify the correct location isselected from the Location: drop-down list.1. Click on Audits. The MachineAudits dialog box appears with the ViewGroup Audit Data tab displayed.492. Verify that the correct location is selected, orselect a specific machine from the SpecificMachine drop-down list.
Audits3. Double-clicn the audit grid to view details about aparticular audit. The View Audit Details tabappears.The View Audit Details tab displays the following information:OptionDescriptionGeneral InformationDisplays information about Machine ID number, CollectionDate, and Service Person.Revenue 2Displays both Interval and Cumulative revenue information.Coin CountsDisplays the Interval and Cumulative number of coinscollected.Other CountsDisplays Interval and Cumulative Cycle, Free Vend, andAux Device information.Average Fill Times(seconds)Displays Average Fill Time for each water temperature.Washer Audits onlyInterval Cycle CountsWater TemperatureCountsWasher Audits onlyTopoff CountsDryer Audits onlyDisplays Special Cycles information.Displays a Count of Water Temperature usage as selectedby customers.Displays Interval and Cumulative Cycle Revenue fortopoffs.2 This is the actual and accurate revenue collected by the machine. Other revenue values arebased on the number of coins or the number of cycles and the machine’s current setup. Thesenumbers can be inaccurate if machine setup has been changed, or if extra coins have beeninserted into the coin operated machines.50
Audits AuditsViewing HistogramsHistograms show hourly cycle counts for a selectedmachine, which may be helpful in determining peakusage. This option is only available for synced auditdata, not manual audit data. On the View AuditDetails tab:1. Click on Histogram. The Audit CycleHistogram window appears.2. Click on the Hide button to close the window.51Note: Histogram data is reset after every audit.
AuditsCreating a <strong>Manual</strong> AuditOccasionally you may need to add audit informationmanually in the Management <strong>Software</strong>. For example,if your PDA stops working and you need to record thata coin collection was taken.From the View Audit Details tab:1. Click on Create Audit. The AuditCreation dialog box appears.2. Enter in the appropriate Interval Revenue: andInterval Cycles information, then click on AddAudit.3. Click on OK to confirm the new audit data entryinto the database.52
Audits AuditsAudit ProblemsIf audit problems are present on the View AuditDetails tab, they will appear highlighted in red and aView Problems button will be displayed. SeeAppendix section for a complete list of auditdiscrepancies.1. Click on View Problems to view details.The Problems… window appears.2. Click on Exit to close the window.Deleting an AuditOnly audits that are created manually can be deleted.Existing Machines1. Click on Delete Audit, located on theView Audit Details tab.2. Click Yes to confirm the delete command.Important:Deleting audit data can have a serious impact on theoverall reconciliation of machine data.53
AuditsOnce a machine template has been created, theinformation has been downloaded to the PDA via theHotSync ® process, and audits have been taken,information about specific machine templates can beviewed in the Management <strong>Software</strong>. This informationresides on the Existing Machines tab of theMachine Setups dialog box.This view is helpful to see which template eachmachine is using or service information for diagnosingservice issues. The machine ID number and whetheror not any manual setups have been set on themachine can also be viewed.Viewing an Existing Machine1. Select the correct location from the Location:drop-down list.2. Click on Setups.3. The Machine Setups dialog box appears.4. Click in the Existing Machine tab.5. Choose the machine you would like to view fromthe Select a machine: drop-down list.Deleting an Existing MachineIf a certain machine is taken out of service or movedto a new location, you could delete it.1. Within the Machine Setups dialog box, click onthe Existing Machine tab.2. From the Select a Machine: drop-down list,choose the machine to be deleted.3. Click on Delete, located in the lowerright corner.4. Click on Yes.Important:Deleting an existing machine will delete all audit,machine, exception, and service data associated withthe machine.5. Click on OK.54
55Exceptions
ExceptionsOverviewViewing ExceptionsExceptions keep track of audit information such aswhen a free vend was given, or when the A/C powerwas lost. This data can be viewed for an entirelocation or for individual machines. Each machinekeeps track of the 100 most recent exceptions. Thisdata is automatically collected during a machine audit.See Appendix for table of possible exceptions.Before viewing Exceptions, verify the correct locationis selected from the Location: drop-down list.1. Click on Exceptions. TheExceptions window appears.56
ExceptionsCreating a <strong>Manual</strong> Exception1. Select the Specific Machine option, and choosea machine name from the drop-down list.2. Check the Create New Exception checkbox.The bottom half of the window displays theCreate a new exception: options.3. Select an exception: from the drop-down list,and select a Date on the calendar.4. Click on Save.5. A confirmation window appears. Click on OK.6. Click on Exit to close the Exceptions window.57
ExceptionsDeleting an Exception1. Select an exception by single-clicking on theappropriate exception on the grid.2. Click on Delete Exceptionfrom within the Exceptions dialog box.Important:You will not be given a warning to complete thisaction.58
59Service Data
Service DataOverviewViewing Service DataService Data is a record of when services, such ascoin collections, were performed. Like Exceptions,Service Data is collected during a machine audit andcan be viewed for an entire location or for a specificmachine. Each machine can record up to tentimestamps for the service switch, and fivetimestamps for other types of service.Before viewing Service Data, verify the correctlocation is selected from the Location: drop-down list.1. Click on Service Data. TheService Data window appears.60
Service DataEntering Service Data <strong>Manual</strong>lyOccasionally you may need to add service datainformation manually in the Management <strong>Software</strong>.For example, if your PDA stops working and you needto record that a coin collection was taken.1. Select the Specific Machine option, and choosea machine name from the drop-down list.2. Check the Create New Service Data checkbox.The bottom half of the window displays theCreate new service data: options.613. Select Service Data: from the drop-down list,and select a Date on the calendar.4. Click on Save.5. A confirmation window appears. Click on OK.6. Click on Exit to close the Service Data window.
Service DataDeleting Service Data1. Select service data to be deleted by singleclickingon the appropriate service data on thegrid.2. Click on Delete ServiceData.3. Click on OK to close the confirmation window.Important:You will not be given a warning to complete thisaction, however you will receive a confirmation thatthe action has been successfully completed.62
63Reports
ReportsOverviewThe Management <strong>Software</strong> provides an extensiveselection of reporting options to help you track yourmachine setup and service data, audits, andexceptions. Reports can be previewed on the screen,printed, or exported to a separate file for use within athird-party program. It is assumed that if you are usinga third-party software to analyze the Management<strong>Software</strong> reports that you will build/supply theinterfaces necessary for the information to bedisplayed in a meaningful way.Viewing ReportsBefore viewing a Report, verify the correct location isselected from the Location: drop-down list.1. Click on Reports. The Whirlpool<strong>ADVANTECH</strong> Reports dialog box appears.2. Click on the check boxes to select which type ofreport, or reports, you wish to create. If no reportdata is available for a selected report, a warningwindow will be displayed at the time ofpreviewing or printing.64
ReportsThe following table describes the types of reports that can be created. SeeAppendix for a complete listing of report types.OptionSetup ReportsException ReportsAudit ReportsService Data ReportsDescriptionCreates a report based on an Existing Washer or DryerTemplate, Comprehensive Machine Listing, or MachinesDeviating from Templates.Creates a report detailing all Machine Exceptions orExceptions per Machine.Creates reports based on Audit data such as: Last Audit perMachine, Audit Data per Machine, or Location, Audit CycleHistograms, or Audit Data per Service Person.Creates reports based on Service Data per Machine orLocation.3. To view the report, under Select an option toview: select Screen, then click on Preview.Note: A specific range of dates can be selectedbefore viewing the reports.65
ReportsExporting ReportsPreviewed reports can be exported to a separate filefor use within a third-party software program. It isassumed that if you are using third-party software toanalyze the Management <strong>Software</strong> reports that youwill build/supply the interfaces necessary for theinformation to be displayed in a meaningful way.1. Select the type of report to be created andchoose to Preview it on the Screen. The reportwill open inside a separate window.2. Click on the Export button.3. In the Export dialog box, select which type ofFormat: in which to export the report, and whichDestination: for the report. See ExportingReports in the Appendix for a complete list ofdifferent format types.4. Click on OK.Note: Depending on the format you have selected,you may be allowed to make other choices as to thesetup of the exported report. Once you have savedthe report to the destination of your choice, you canre-open the report inside of the program you havespecified.66
ReportsPrinting ReportsBefore printing a Report, verify the correct location isselected from the Location: drop-down list.1. Click on Reports. The Whirlpool<strong>ADVANTECH</strong> Reports dialog box appears.2. Click on the check boxes to select which type ofreport, or reports, you wish to create. If no reportdata is available for a selected report, a warningwindow will be displayed at the time ofpreviewing or printing.3. To print the report, under Select an option toview: select Printer, then click on Print.Note: A specific range of dates can be selectedbefore printing the reports.67
ReportsNOTES:68
69Updating Control Board Firmware
Firmware UpdateFirmware UpdateDownloading Firmware to PDA1. Whirlpool Corp makes critical updates toembedded control programming available to usersof the product.2. Updates can be performed on previously installedunits using properly programmed PDAs & the<strong>ADVANTECH</strong> Back Office <strong>Software</strong> installed ona PC: (Whirlpool Pt# 8524744B)3. PDA devices need to operate on a Palm ® OS of3.5.0 to 4.0.04. Firmware must be downloaded from the Internet at:www.cltpsc.whirlpoolcorp.com/techinfo/tech_support/firmware/firmwaredefault.htm5. Place the downloaded file onto the computerDesktop where it can be unzipped easily.6. Unzip the file and place it in the computer<strong>ADVANTECH</strong>/Add-on folder.7. Boot-up the <strong>ADVANTECH</strong> software application8. Select the PDA Sync button9. Select Advanced Sync Features10. Select Import Reprogramming File11. Locate the Firmware file on your computer where itwas placed: C://Programs/<strong>ADVANTECH</strong>/Add-onThen select the appropriate firmware file.70
Firmware Update12. Select Process ISP.13. Then select Yes.14. Check the box: Include ISP File15. Press the Hot Sync button on the cradle or thecable to sync the computer with the PDA.16. Click on OK after the ISP File is downloadedInstalling Firmware On a Machine1. Unlock, open and remove the metercase accessdoor. Push and hold the service switch until theprocess is complete.2. On a full console machine or on a stack dryer theservice switch is located on the control board nearthe P11 Aux connection.3. Either service switch circuit must remain closedthroughout the update process. Reprogrammingcan take up to 4-min. per machine and is onlycomplete when the word “done” appears in themachine’s display.71
Firmware Update4. On the PDA, open the <strong>ADVANTECH</strong> applicationby tapping on the icon shown.5. Choose Select Location, and then pick theappropriate location from the list.6. Choose UTILITIES, and then select Re-program.7. Aim the PDA’s IR beam into the IR receiver on themachine, located just to the right of the centsposition in the display (circled in the display below).8. Handheld should be held no more than 4-inchesfrom the display and the beam should be shieldedfrom intense light sources that can distort the beam.9. To verify that the new firmware was uploaded:a. Exit the previous operation by releasing theservice switch and then pressing the S6pad twice. The Vend Price should bedisplayed.b. Press and release the service switch andthen press and release S4 twice. First theVend Price will display, and then theFirmware Version.72
Firmware UpdateNOTES:73
Firmware UpdateNOTES:74
75Appendix
AppendixPasswords and IDsThe following table outlines the Passwords and IDs required when using theManagement and Handheld <strong>Software</strong>.Password/IDOwner IDManagementPasswordAccessControlPasswordServicePerson IDServicePersonPassword<strong>Software</strong>UpdatePasswordDescription Entered When? ProtectsUsed to prevent unauthorizedaccess to your <strong>ADVANTECH</strong> commercial laundry products byany PDA that has not beensynced with your copy of theManagement <strong>Software</strong>.Used to prevent unauthorizedaccess to the Management<strong>Software</strong> on the PC.Used in conjunction with theOwner ID to protect your<strong>ADVANTECH</strong> commerciallaundry products.Used to control access to theHandheld <strong>Software</strong>.Used to control access to theHandheld <strong>Software</strong>.Used to update the<strong>ADVANTECH</strong> commerciallaundry product’s control board.Created upon initialentry to theManagement<strong>Software</strong>. Enteredonly after areinstall.Entered every timethe Management<strong>Software</strong> isaccessed.Entered whenevera PDA is re-syncedwith theManagement<strong>Software</strong>.Selected from theLogin Menu on thePDA.Entered every timethe Handheld<strong>Software</strong> isaccessed.Entered whenevera new softwareversion isdistributed.(Optional)<strong>ADVANTECH</strong> commerciallaundryproductsManagement<strong>Software</strong><strong>ADVANTECH</strong> commerciallaundryproductsPDAPDAControl Board<strong>Software</strong>CaseSensitive?NoYesYesNoNoNo76
AppendixBacking Up the Management <strong>Software</strong>Periodically you should backup your Management<strong>Software</strong> to protect your data from accidental loss inthe event of a PC failure.Before beginning a backup, ensure that you haveenough diskettes, or other media, to accommodateyour backup data. Due to the large size of thedatabase files that are backed up, it is recommendedthat backups be to a CD or tape drive.All files that should be backed up have a .mbdextension, and are located in the installation directory.The default installation directory is listed below:C:\Program Files\Advantech\WhirlpoolAdvantech\DB-Report.1. Select Start, Programs, Windows Explorer.2. Navigate to the default installation directory forthe Management <strong>Software</strong>, unless you specifieda different location at the time of install.3. On the right side of the screen select all files withan .mbd extension.Hint:To select multiple files, press the [Ctrl] key whileselecting the .mbd files.4. Select Edit, Copy from the menu.5. Single-click on the drive letter to which you wishto backup your data. For example, if you arebacking up to a floppy disk, single-click on the3 ½ Floppy (A:) drive.6. Select Edit, Paste from the menu.77
AppendixReinstall ProceduresIf the Management <strong>Software</strong> ever becomes corrupted,or if the Owner or Management Password is lost, theManagement <strong>Software</strong> must be reinstalled.Important:Reinstalling the Management <strong>Software</strong> will cause youto lose all of your audit data – unless you haverecently backed up that information.Before you reinstall the Management <strong>Software</strong>, youneed to uninstall the current version and delete anadditional file from your hard drive.To uninstall:1. Select Start, Settings, Control Panel.2. Double-click on Add/RemovePrograms.3. Scroll through the list of programs, located at thebottom of the window, until you find Whirlpool<strong>ADVANTECH</strong>, located in the Add/RemoveProgram Properties dialog box.4. Single-click to select Whirlpool <strong>ADVANTECH</strong>.5. Click on Add/Remove.6. When the uninstall process is complete, close allopen windows.Now that you have uninstalled the Management<strong>Software</strong>, you are ready to delete the rest of theassociated Management <strong>Software</strong> files from your harddrive.1. Select Start, Programs, Windows Explorer.2. Navigate to C:\Windows.3. Select the Advantech.ini file.4. Press [Delete] on the keyboard.5. Click on Yes to confirm the deletion.78
AppendixNow you can reinstall the Management software. Dothis by following the installation instructions on page 9of this manual.Note: This will not delete DCOM95. Windows ® 95users DO NOT need to reinstall the DCOM95 filebefore reinstallation!Audit DiscrepenciesMessage Appearing in Audit Reconciliation Problems WindowCoin 1 Counts: current vs. previous auditCoin 2 Counts: current vs. previous auditTopoff Counts: current vs. previous auditCycle Counts: current vs. previous auditSpecial Counts & Normal Cycle Counts vs. Cycle Interval CountsRevenue Counts: current vs. previous auditFree Vend Counts: current vs. previous auditAux Device Counts: current vs. previous auditCycles Killed Counts: current vs. previous auditFor each category, the cumulative counters are compared with the intervalcounters as follows:Previous Cumulative Count + Current Interval Count = Current CumulativeIf this is not true, then a discrepancy appears in the Audit ReconciliationProblems window.79
AppendixPossible ExceptionsExceptionAC power offAC power onAudit table lostCoin drop 1 pulse tooshortCoin drop1 pulse toolongCoin drop2 pulse toolongCoin drop2 pulse tooshortDrain time too longFactory resetFill time too longFill time too shortFree vend givenduring serviceroutineInternal backup tablebadInternal main tablebadInternal table lostInvalid owner ID<strong>Manual</strong> back inservice<strong>Manual</strong> out of serviceReserved internalexceptionService table lostSetup table lostTime: Fall backTime: SpringForwardWasher lid did notopenCauseUnplugged or AC failedPlugged in or AC turned onN/ABad coin, fishing of drop, or incorrect coin acceptor set up.Bad coin, fishing of drop or incorrect coin acceptor set up.Bad coin, fishing of drop or incorrect coin acceptor set up.Bad coin, fishing of drop or incorrect coin acceptor set up.Drain time is greater than 15 minutes. This is only logged,no action is taken.N/AFill time is greater than 30 minutes. This is only logged, noaction is taken.Fill time is less than 2 minutes. This is only logged, noaction is taken.N/AN/AN/AController lost one of its setup tablesBad ID from Palm handheldN/AService person entered a manual command on controlboard to indicate “OFF” on display.N/AN/AN/AReturn to Standard TimeDaylight SavingsWasher lid switch must be detected as open before it isallowed to run another wash cycle. The washer displays=OFF= on the display until the service routine is run. Seeproduct Tech Sheet or Service <strong>Manual</strong>/Job Aid for ServiceRoutine Procedure. Possible defective lid switch.80
AppendixReport TypesBelow are examples of reports that can be generatedfrom each of the four categories of reports in theManagement <strong>Software</strong>.Category: Setup Reports• Existing Washer Templates• Existing Dryer Templates• Comprehensive Machine Listing• Machines Deviating from Templates81
AppendixCategory: Exception Reports• Comprehensive Exception List• Exceptions per MachineCategory: Audit Reports• Last Audit per Machine• Audit Data per Machine• Audit Data per Location• Audit Cycle Histograms• Audit Data per Service Person82
AppendixCategory: Service Data Reports• Service Data per Machine• Service Data per Location83
AppendixExporting ReportsReports can be exported to the following file formats:• Character-separated values• Comma-separated values (CSV)• Crystal Reports (RPT)• Data Interchange Format (DIF)• Excel 2.1 (XLS)• Excel 3.0 (XLS)• Excel 4.0 (XLS)• Excel 5.0 (XLS)• Excel 5.0 (XLS) (Extended)• Excel 7.0 (XLS)• Excel 7.0 (XLS) (Extended)• Excel 8.0 (XLS)• Excel 8.0 (XLS) (Extended)• HTML 3.0 (Draft Standard)• HTML 3.2 (Extended)• HTML 3.2 (Standard)• Lotus 1-2-3 (WK1)• Lotus 1-2-3 (WK3)• Lotus 1-2-3 (WKS)• Paginated Text• Record Style (columns of values)• Rich Text Format• Tab-separated text• Tab-separated values• Text• Word for Windows document84
AppendixNOTES85
AppendixNOTES86
87Troubleshooting Information
TroubleshootingIf you experience problems with the software, consult this list for troubleshootingtips.Problem• Connection between PDA and laundrymachine fails.Solution• Check position (angle should be 90degrees)and distance of PDA in relation toinfrared sensor on laundry machine.• Make sure there isn’t any bright lightinterfering with the infrared connection. Useyour hand to shade the sensor.• PDA appears to be locked up.• Try returning to the “Home” menu and relaunchthe Handheld <strong>Software</strong>.• Press the Reset button on the back of thePDA. Caution: Audit data may be lost whena reset is done on the PDA.• Check battery level, charge, or replacebattery if necessary.• PDA Sync with Management <strong>Software</strong> fails. • Check connection between PDA and cradle.• Audit Problems button displays in Audit View. • The Audit Problem button displays whenthere are inconsistencies in audit data. Theyare generally caused by:i An audit that was collected from themachine but never performed a HotSync ®operation to the Management <strong>Software</strong>.i A deleted audit.i A damaged audit table due to a washer ordryer malfunction.• When trying to initialize a machine, WrongAccess Password error displays.• Receive Fatal Alert error while trying toconnect to machine.• Machine needs to be factory reset. SeeService <strong>Manual</strong>/Job Aid.• May not have been close enough to themachine. Reset the PDA and try again.•• Errors occur during Management <strong>Software</strong> • Uninstall the software and then reinstall.installation.• Palm handheld battery wears down quickly. • Palm handheld models III or IIIx should notbe left in cradle unless a HotSync ® operationis being performed.• Program Error messages occur duringsoftware installation.• Follow reinstall procedures in the Appendixon pages 81 and 82.• Error displayed on machine. • Do not use $0.00 vend price for coin slidesor coin drops.• Off displayed on machine. • See Tech Sheet or Service <strong>Manual</strong>/Job Aidfor Off code details.• Handheld <strong>Software</strong> does not install on Palm handheld.• De-install the Management <strong>Software</strong> andinstall software on PC in the following order:1. Palm <strong>Software</strong>2. Management <strong>Software</strong>88
89Glossary
GlossaryAccess Control Password – Password used in conjunction with the Owner IDto protect laundry machines from unauthorized PDA access.Aux Device – SMART Card, network device, or other.Coindrop – Coindrops have slots into which coins are deposited one at a time.Coinslide – Coinslides hold coins on a sliding device that is pushed in to depositmoney into the machine.Cradle – Device used to connect PC with PDA.Cumulative Audit – Cycle and vend history tracked over the life of a machine.DCOM95 – File that enables the Management <strong>Software</strong> to run on the Windows ®95 operating system. DCOM95 must be installed on Windows ® 95 machinesbefore the Management <strong>Software</strong> is installed.Download – Transfer of data from PC to PDA, or from PDA to laundry machine.Exception – Any vend or cycle information that deviates from the norm, i.e., theA/C power was turned off.Graffiti ® – Style of writing used to enter data into a PDA.Handheld – Palm device, or similar machine. Also referred to as a PDA, or aPersonal Digital Assistant.Histogram – Chart that depicts number of cycles vended for a given time period.HotSync ® – Method of downloading or uploading data from the PC to thePDA, or vice versa.HotSync ® Button – Button, located on the PDA’s cradle, that is pressed toinitiate a HotSync ® procedure.HotSync ® Manager – Enables communication between PC and PDA. TheHotSync ® Manager icon displays in the Windows ® System Tray to verify that it isrunning.Infrared – Type of light beam used to transfer data between the PDA andlaundry machine.Initialize – Method of setting up laundry machine so that it can be recognized bythe PDA.90
GlossaryInstallation Directory – Location on PC where Management <strong>Software</strong> resides.The default installation directory is C:\Program Files\Advantech\WhirlpoolAdvantech.Interval Audit – Cycle and vend history that is tracked from the time of the lastmachine audit.Management Password – Password used to access the Management <strong>Software</strong>.Open-Access Mode – Initial mode of the Handheld <strong>Software</strong> on the PDA. Offersa limited number of utilities to be performed.Owner ID – ID that is setup upon first entry into the Management <strong>Software</strong>. ThisID prevents unauthorized access to laundry machines by PDAs that are notgiven access.Palm <strong>Software</strong> – <strong>Software</strong> needed to be installed on the PC in order forcommunication to take place between the PC and the PDA.PC – Personal computer.PDA – Personal Digital Assistant or handheld. Used in reference to a Palm device or similar machine.Reinitialization – Returns the machine to its original factory specifications.Service Person ID – ID used to control access to Handheld <strong>Software</strong>.Service Switch – See Service Tech Sheet or Service <strong>Manual</strong>/Job Aid for moredetails.<strong>Software</strong> Update Password – Password provided by Whirlpool Corporation tobe used when installing new control software on a laundry machine.Stylus – Pen-like device, provided with Palm handheld, to be used to enterinformation into the Palm handheld.Synced Mode – Mode of the Handheld <strong>Software</strong> after it is initially downloadedvia the HotSync ® process to the Management <strong>Software</strong>. All utilities are availablein this mode.Upload – Transfer of data from laundry machine to Palm handheld or Palm handheld to PC.91
GlossaryNOTES:92
93Index
IndexAAuditsUploading ....................................... 55Viewing........................................... 55BBackups ............................................. 82CContact Information............ See SupportCumulativeAudits ............................................. 55DDryer Templates............. See TemplatesEEnd cycle............................................ 50ExceptionsCreating.......................................... 66Deleting .......................................... 66Viewing........................................... 65Existing Machines .............................. 61GGet Audit Command........................... 49Get setup............................................ 51Get time.............................................. 50Graffiti................................................... 2IInfrared............................................... 45Initializing ........................................... 45InstallingHandheld <strong>Software</strong>......................... 15Management <strong>Software</strong> ..................... 9Installing DCOM95............................. 11IntervalAudits ............................................. 55LLocationsCreating.......................................... 23Deleting .......................................... 24Editing ............................................ 24MMachine Info .......................................50Machine Setups..................................29Monitor Resolution..............................16OOne Touch Command ........................51Open-Access Mode ............................45Owner ID ............................................15PPasswords ..........................................25Access Control................................26Management Password..................25Service Person ...............................27<strong>Software</strong> Update.............................28PDA Sync ...........................................39RReportsExporting.........................................77Printing............................................78Viewing ...........................................75Re-program ........................................51Run diagnostic....................................50SSend Setup Command .......................48Service DataDeleting...........................................71Entering ..........................................70Viewing ...........................................69Service mode......................................50Set time ..............................................50Special Prices.....................................33Start cycle...........................................50Support ...............................................91System Requirements ..........................5TTemplatesCreating ..........................................29Editing.............................................32Troubleshooting..................................95UUtilities Command ..............................5094
95Quick Reference
Quick Reference<strong>ADVANTECH</strong> System Quick Reference SheetCut out this quick reference sheet and give to your service persons to takewith them when they go to retrieve machine audits.<strong>ADVANTECH</strong> System Quick Reference SheetWhenever coin collections are taken from laundry machines an auditshould be taken using a PDA equipped with <strong>ADVANTECH</strong> Handheld<strong>Software</strong>.Starting the Handheld <strong>Software</strong> and Logging In1. Make sure the Palm handheld is turned on.2. Using the stylus, tap the Palm screen to scroll to the<strong>ADVANTECH</strong> icon.3. Tap on the <strong>ADVANTECH</strong> icon.4. The Welcome screen appears.5. Tap on Continue, located in the lower left corner.6. The Login screen appears. Select your Service ID and enteryour password using the Graffiti ® writing method.7. Tap on Continue.8. The Select a location: window appears. Select the appropriatelocation by tapping on the correct location name, then tap onContinue.9. After logging in and selecting the appropriate location, the Selecta command screen appears. The Select a command screen iswhere you can choose to Get Audit data.Aiming the PDAAudits are taken by “beaming” information from the laundry machinesto the PDA through an infrared light beam. Therefore, the position ofthe PDA in relation to the machine is critical for successful completionof the data transfer.The infrared communication port on the PDA is located at the top of thedevice. The receiver on the machine is located to the right of the lastdigit on the display panel.196
Quick Reference<strong>ADVANTECH</strong> System Quick Reference SheetCut out this quick reference sheet and give to your servicepersons to take with them when they go to retrieve machineaudits.<strong>ADVANTECH</strong> System Quick Reference SheetAiming the PDA (continued)Aim the handheld much like you would aim a TV remote control. Besure to hold the PDA at a ninety-degree angle to the machine’s controlpanel. To ensure successful data transmission, make sure the distancebetween the PDA and the machine is six inches or less. Strong sunlightor the use of other infrared devices such as alarm systems may inhibitthe transmission of data. To remedy this situation, simply use yourhand to shade the receiver or the PDA.Taking a Machine Audit1. Aim the handheld at the laundry machine’s receiver.2. Tap on Get Audit, located on the Select a command screen onthe PDA.3. When the Audit is complete a checkmark should appear next toall items listed on the screen. Tap on Back to return to the Selecta command screen.4. Repeat steps 1-3 to take audits from additional machines.Important:If all items on the Get Audit screen are checked, then the operationwas a success. If some items are not checked, then the communicationhas failed. In the event of a failed audit, tap the Back button, checkyour aim of the PDA in relation to the control panel on the laundrymachine, and perform steps 1-3 again.297
Quick Reference— U.S.A. —One-stop number for commercial laundry support:1-800-no-belts(1-800-662-3587)INTERNET SUPPORTFIND AUTHORIZED COMMERCIAL LAUNDRYROUTE OPERATORS OR DISTRIBUTORS<strong>Commercial</strong> <strong>Laundry</strong> Link:www.coinop.com/routewww.coinopcom/distributor1-800-no-belts (1-800-662-3587) > OPTION 3FIND AUTHORIZED SERVICER1-800-no-belts (1-800-662-3587) > OPTION 2ALL USERSFor access to Wiring Diagrams, Installation Instructions, Parts ListsGo to the TRADE PARTNER SUPPORT CENTER:www.cltpsc.whirlpoolcorp.com/techinfo/techinfonew/literature.htmFOR US CL PRODUCT ORDERS:1-800-no-belts (1-800-662-3587) > OPTION 1ORDER LITERATURE OR PRODUCT & WARRANTY INFOwww.coinop.com/productsWARRANTY CLAIMS STATUS or MISSING PARTS1-800-no-belts (1-800-662-3587) > OPTION 4 or:www.cltpsc.whirlpoolcorp.com > Warranty ClaimsTECHNICAL ASSISTANCE CENTER FOR WHIRLPOOL CL PRODUCTS1-800-no-belts (1-800-662-3587) > OPTION 5CONTACT THE WHIRLPOOL CL TECHNICAL COMMUNICATION MANAGER1-800-446-2574 EXT. 4268 OR:www.cltpsc.whirlpoolcorp.com > Technical info > Tech Support98
Support and Contact InformationArchway Part No. CWLL086AWhirlpool Part No. 8524743A99


