
You also want an ePaper? Increase the reach of your titles
YUMPU automatically turns print PDFs into web optimized ePapers that Google loves.
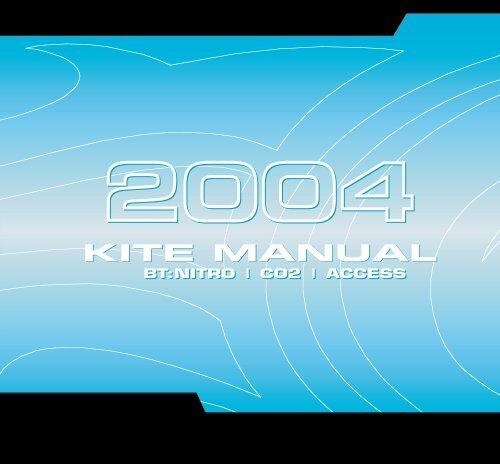
<strong>2004</strong>KITE MANUALBT:NITRO | CO2 | ACCESS
RELEASE OF LIABILITYAND ASSUMPTION OF RISKDO NOT USE THIS PRODUCT UNLESS YOU AGREEWITH THE FOLLOWING TERMS AND CONDITIONSIMPORTANTWARNING!THIS WARNINGIS FOR YOUR OWN SAFETY AND PRO-TECTION. IF YOU DO NOT AGREE WITHTHESE TERMS AND CONDITIONS, DONOT USE THIS PRODUCT. KINDLY RE-TURN THIS PRODUCT BEFORE USINGIT, AND YOUR PURCHASE PRICE WILLBE REFUNDED IN FULL.YOU MUST READ THISINCLUDEDUSER MANUAL BEFOREUSINGTHIS PRODUCTTHE INFORMATION CONTAINEDIN THIS MANUALIS FOR YOUR REFERENCEAND MAY BE SUBJECT TO CHANGE ATANYTIME.PLEASE VISIT OUR WEBSITE AT:www.<strong>Cabrinha</strong>Kites.comFOR CURRENT UPDATESTO THIS MANUALThe user of this productis an adult who understands thatthe use of this product may exposethe user to certain unavoidablerisks, dangers, and hazards. Theuser of this product voluntarily assumesthese risks. Before usingthis product, the user has carefullyreviewed, understood, and agreesto comply with the terms of theUser's Manual. The user of thisproduct understands and agrees tocomply with the terms of the sale.The user of this product understandsthat the seller is not responsiblefor any damage to propertyor injury caused by negligentoperation of this product by theuser, and the user releases theseller from all such liability. Kiteboardingis an adult sport. Power<strong>kite</strong>s and their lines and controlequipment can be dangerous to flyersand to anyone in the vicinity oftheir use. Kiteboarding must betaken seriously and we recommendthat, at least in the early stages ofyour use, you seek the guidance ofexperienced <strong>kite</strong>boarders. Improperand/or negligent use of this <strong>kite</strong>may result in serious injury ordeath to yourself and others. Donot use your <strong>kite</strong> near power lines,airports or streets, and keep your<strong>kite</strong> fly lines away from people andobstacles. Always fly in an openarea, observe wind and weatherconditions, particularly in circumstanceswhere you may encounteroffshore winds or strong winds. Donot attempt to use your <strong>kite</strong> on wateruntil you are confident and comfortablewith its use on land. Spendtime to become familiar with theoperation of your <strong>kite</strong> and rememberthat you are responsible for itssafe operation and for the safety ofthose around you. As you learn thesport, work within your own limitationsand do not exceed them. Ifyou intend to use the <strong>kite</strong> on water,always use appropriate safety andfloatation devices and do not attachyourself or tie yourself permanentlyto the <strong>kite</strong> lines. The <strong>kite</strong> is not intendedfor use as a flying devicenor indeed is it intended as ameans of flotation.
<strong>2004</strong> KITE MANUALINTRODUCTIONTHANK YOU for purchasing a <strong>Cabrinha</strong><strong>kite</strong> and welcome to the sport of <strong>kite</strong>boarding.As you may know, the excitement of <strong>kite</strong>boardingis attracting people of all ages fromall corners of the globe. It’s one of the most dynamicand fastest growing sports of the newdecade.It can also be overwhelming if notapproached in an educated and safe manner.That’s why we have supplied this extensiveuser’s <strong>manual</strong>. It will help to educate you aboutyour new <strong>kite</strong> and about the safe ways in whichto use it. It also contains information regardingthe set-up, care and maintenance of your new<strong>kite</strong> so that you can spend as much time onthe water as possible.Please read this user’s <strong>manual</strong> carefullyand entirely before using this <strong>kite</strong>. Do notattempt to <strong>kite</strong>board without appropriate instruction.It will make this sport safer, not onlyfor yourself, but for those around you.
<strong>2004</strong> KITE MANUALSAFETYSAFETY GEARWe strongly recommendthe use of thefollowing protectivegear:• GLOVES• EYE PROTECTION• SUNSCREEN• SAFETY KNIFE• HELMET• NEOPRENE WETSUIT• FOOT PROTECTION• LIFE JACKET,IMPACT VEST ORFLOTATION VESTKITEBOARDING is an extremely diverse sport, with manydisciplines and ability levels. As with all sports, there canbe certain inherent risks. The following contains key safetypoints to remember when operating your <strong>Cabrinha</strong> <strong>kite</strong>.• Be familiar with the set up and use of the supplied securitysystems: the Quick Release and the Recon Security Leash &Relaunch System (Recon).• Make sure your Recon System is rigged according to the suppliedinstructions, and that your Recon compatible <strong>kite</strong> isused with a Recon compatible control bar system.• Always use your <strong>Cabrinha</strong> <strong>kite</strong> with a security system.• Never permanently attach yourself to this <strong>kite</strong>, the controlbar, or lines.• Never use this <strong>kite</strong> as a flying device.• Never touch the <strong>kite</strong> lines while under tension; do not catchthe <strong>kite</strong> using these lines.• When inflated, but not in use, secure your <strong>kite</strong> with sand orwith something heavy and non-abrasive); the more weight thebetter (see “Kite Care” for more information). An inflatablepower <strong>kite</strong> will still fly, even without a rider, so be mindful ofthose around you and secure your <strong>kite</strong>. Your <strong>kite</strong> may causeserious injury or death if it launches unexpectedly.• Do not lend your gear to someone who has not been fully instructedon the use of inflatable <strong>kite</strong>s. Other users should alsoread this user’s <strong>manual</strong> and be proficient in all its points.• Check your gear before going on the water. Insure that yourflying lines, safety systems, <strong>kite</strong>, board, etc. are all riggedproperly and are in working order.
SAFETYWIND, WATER and WEATHER CONDITIONS• Do not underestimate the powerof the wind.• Be aware of unpredictable andchanging weather conditions.• Avoid "offshore" wind conditionsand use extreme caution in"onshore" wind conditions.• Avoid strong, gusty wind.• Be careful of wave conditions,especially when learning.• Be educated about tides andrip currents.• Be mindful of your ability level.Do not <strong>kite</strong>board if conditionsare beyond your ability level.• Be educated about air and water temperatures and wear appropriate protection against theelements.• Do not use this product in thunderstorms.• Consult an anemometer to determine wind speeds if necessary.• Do not use an oversized <strong>kite</strong>. Consult your Wind Range Chart for the correct recommendedsize. Use your common sense. If in doubt about what <strong>kite</strong> size to use, choose smaller ratherthan bigger.
SAFETYWIND RANGECHARTBT:NITRO5.56.57.58.510.012.014.017.010 MPH 15 MPH 20 MPH 25 MPH25 ++25 ++25 ++20 - 25 ++20 - 2512 - 2410 - 208 - 1820.08 - 15CO26.57.525 ++25 ++8.510.020 - 25 ++20 - 2512.012 - 2414.010 - 2017.08 - 1820.08 - 15ACCESS5.07.015 - 2525 ++9.012 - 2412.010 - 2215.58 - 18These general guidelines are purely for reference only. Your body weight, ability level, waterconditions, and board size will also affect <strong>kite</strong> selection.When choosing a <strong>kite</strong> size, please use your personal experience and always refer to the riders onthe water for a size reference.
SAFETYKNOW YOUR ABILITY LEVEL• Do not attempt <strong>kite</strong>boarding without appropriateinstruction.• Do not <strong>kite</strong> alone.• Launch, land, and ride together with apartner or have someone on shore whocan keep an eye on you.• Make sure you are in good physical conditionbefore using this product.• Practice flying a small, traction <strong>kite</strong> or a"trainer <strong>kite</strong>" before flying this <strong>kite</strong>.• The more time spent on the "trainer <strong>kite</strong>",the safer and the faster you will learn.• Make sure you are a proficient swimmerbefore using this product in or near thewater.• Make sure the wind and water conditionsare within your ability level and that youhave made the correct equipment choices.• Never <strong>kite</strong>board further from shore thanyou are able to swim back.• Always save a reserve of energy; end your<strong>kite</strong>boarding session before you are exhausted.• Make sure you’ve done your homework andthat you know the safety precautions of allaspects of the sport: launching, landing,flying, riding, kiting among other waterusers, self rescuing, etc.• Understand the technique of self-rescuebefore using this product in or near thewater.• Never let someone who is not familiar withinflatable <strong>kite</strong>s launch, catch, or use your<strong>kite</strong>. You will endanger them, as well asyourself and those around you.• You are responsible for the safe operationof your <strong>kite</strong>.
SAFETYKITEBOARDING LOCATION• Observe local laws and regulations regardingthis product and the usage area.• Talk to the local riders about the weatherconditions and beach rules.• Check your area thoroughly before launchingyour <strong>kite</strong>.• Make sure you have considerable space inwhich to launch, land, and use this product.• You should have at least 100 meters ofspace on both sides and downwind of you.Be especially aware of your downwindarea.• Be mindful and aware of the wind directionin relation to your launch area.• Avoid areas with rocks and/or shallow orexposed reefs.• Avoid launching, landing or using this productnear power lines, telephone poles,trees, people, pets, buildings, automobiles,streets, sharp objects downwind and airports.• Avoid crowded beaches and waterways.• Make sure your lines do not cross a walkwayor passage.• Do not let others walk between you andyour <strong>kite</strong>.• Be careful and mindful of other waterusers, including windsurfers, boaters, jetskiers,swimmers, floating objects,etc.• Before launching, make sure you havescouted a safe landing area, in case youdo not make it back to your launch spot.
KITEOVERVIEW11BT:NITRO / CO2 / ACCESSWITH RECON CONTROL SYSTEM110127923 3481318 1822162119212523141517 172420*diagram not to scale132261. 4-Line Kite2. Recon Bridle Assembly3. Recon Rear Pigtail4. Recon Tension Fitting (front/rear)5. Recon Load Transfer Tip6. Recon Tension Bullet7. Recon Activation Line (on trailing edge)8. Rescue Handles9. True Match 3-D Battens10. Multi-Segmented Dacron Leading Edge11. Airlock High Volume Valve12. Standard Inflation Valves13. Steering Lines (Rear Control Lines)14. De-power Lines (Front Control Lines)15. Recon Center Leader Line16. Centerline Adjustment Strap w/ Recon QR System17. Leader Lines18. Re-launch Assistance Ball Grips19. Line Stopper20. Recon Release Handle21. Bar Floats22. Multi-Functional Bar Ends23. Powerlock Fitting24. Powerlock De-power Line with Quick Release25. Recon Harness Loop w/ Security Pin54
RECONSECURITY LEASH & RE-LAUNCH SYSTEMIMPORTANT INFORMATIONIMPORTANT INFORMATIONThe Recon Security Leash & Re-Launch System [RECON] is standard equipment on allof the <strong>2004</strong> <strong>Cabrinha</strong> inflatable <strong>kite</strong>s. This patent pending system is both a unique securityleash and a re-launch system, which allows the rider to immediately turn off thepower of the <strong>kite</strong> by activating the Recon’squick release handle. The same featuresthat de-power the <strong>kite</strong> also assist in quickerre-launching.The Recon Allows The Rider To:• Shut down the <strong>kite</strong> instantly byactivating the Recon release handle.• Water re-launch with ease.• Spin the bar.IMPORTANTRECON RELEASE SYSTEM TIPS• All <strong>2004</strong> <strong>Cabrinha</strong> <strong>kite</strong>s must be used with <strong>2004</strong> Recon compatible control systems in orderfor the Recon's IMMEDIATE DEPOWER feature to work properly.• Furthermore, if a <strong>2004</strong> Recon compatible control bar is used with a <strong>kite</strong> that does not havethe integrated Recon System (eg. a 2003 <strong>kite</strong>), it is dangerous to pull the Recon release handleto de-power the <strong>kite</strong>. You may still use a <strong>2004</strong> control system on an older <strong>kite</strong>, but pullingthe Recon release handle will actually power up the <strong>kite</strong> (not de-power it) on a <strong>kite</strong> not equippedwith the integrated Recon System.
RECONSECURITY LEASH & RE-LAUNCH SYSTEMIMPORTANT INFORMATION / OPERATIONENGAGING THE SECURITY PIN1. Double check that your QR and Recon systems are set upproperly.2. Hook into your harness loop. (fig.1)3. Once hooked into the harness loop, only engage the SecurityPin once you are safely on the water.14. Insert the Security Pin into the center of the harness hook,making sure it is below the harness loop. Your harnessloop must be between the harness hook and the SecurityPin in order for this feature to work properly. (fig.2)5. Make sure that the Security Pin is secure. This will keepyour harness loop from accidentally dropping out of yourharness hook. Your Security Pin is now ready for use.2RELEASING THE SECURITY PIN3You may disengage from the Security Pin in two ways:A. With your hands, slide the Security Pin out of the harnesshook. (fig.3)B. Release the Quick Release Handle on your harness loop.(fig.4)4
RECONSECURITY LEASH & RE-LAUNCH SYSTEMOPERATIONOPERATION OF THE RECON1. To activate the IMMEDIATE DEPOWER Function pull the Recon ReleaseHandle, located at the base of the Centerline Adjustment Strap(CAS), toward your body. (fig.1)2. This will release the Velcro closure on the CAS. (fig.2)3. Once the Recon Release Handle is pulled and the Velcro is released,the center leader line will double in length. This will cause increasedtension in the steering (back) fly lines and create slack in the de-power(front) fly lines.4. The Recon Bullet will then disengage from the Recon Tension Fitting(RTF) on the wing tip of the <strong>kite</strong>. (fig.3)5. When the Bullet is disengaged from the RTF, the Recon ActivationLine will tighten around the trailing edge of the <strong>kite</strong> and collapse thefoil, effectively turning off the power of the <strong>kite</strong>.126. The <strong>kite</strong> will fully de-power and will drop out of the sky toward the water.(fig.4) NOTE: The <strong>kite</strong> will not fly again until you <strong>manual</strong>ly resetthe Recon on the CAS (see “Resetting the Recon Release System”).7. If you activated the Recon while on the water, follow the steps of selfrescue and swim to shore. You may also reset the Recon (see“Resetting the Recon”) and resume your session, if you choose, butnote that this is an intermediate-advanced technique.8. If you activated the Recon system when landing your <strong>kite</strong>, have yourpartner safely secure your <strong>kite</strong> on shore, reset the Recon, and thenwind your lines on the control bar.9. NOTE: The Recon System is intended to be used for landing your <strong>kite</strong>and for emergency situations only.34
RECONSECURITY LEASH & RE-LAUNCH SYSTEMOPERATIONIMPORTANT RECON SYSTEM CARE TIPS• When your <strong>kite</strong> is not in use, makesure to reset the Bullet into the RTFon the wing tip of the <strong>kite</strong>. This helpsprevent the bridle lines from becomingtangled with the Bullet. (fig.1)• Before winding your lines onto yourbar, make sure to reset your ReconSystem.• When stowing your <strong>kite</strong> between sessions,make sure to weigh your <strong>kite</strong>down with sand in order to keep your<strong>kite</strong> from flapping in the wind. This notonly prevents unnecessary wear on the<strong>kite</strong> fabric, but also helps prevent yourbridle lines and Recon system from becomingtangled.1• Contain your <strong>kite</strong> leaders on the attachedVelcro holders on the wing tip.(fig.2)2
RECONSECURITY LEASH & RE-LAUNCH SYSTEMOPERATIONRESETTING YOUR RECON SYSTEMYour Recon System can and should be reset before winding your lines on your control bar at theend of your session.The Recon can also be reset on the water, if you choose. (NOTE: we strongly suggest that this isan intermediate-advanced technique). To reset your Recon on the water, follow the instructionsbelow:1. While remaining hooked into your QR Harness Loop, swim or pull yourself along the centerleader line (which was extended when you released your Recon) toward the Centerline AdjustmentStrap (CAS). NOTE: Make sure to stay freeof your flying lines.2. Reach forward and grab the CAS. NOTE: Do NOTwrap the leader line, flying line, etc. around yourhand. Simply grab the CAS and pull it back towardyou.3. Pull the CAS back toward the RECON release atthe top of the depower line.4. Insert the Velcro tab into the D-ring at the base ofthe Centerline Adjustment Strap (CAS).15. Fold the Velcro piece over onto the opposing Velcro.(fig.1)6. Replace the final Velcro cover on top.7. Make sure to slide the ball back up the de-power line and to put the neoprene bootie back on.NOTE: This step is very important, because if you do not replace the ball, the Recon will re-activatewhen you re-launch.8. Your Recon Release System is now reset.9. You are now ready to either re-launch your <strong>kite</strong> from the water or to wind your lines onto yourcontrol bar.
RECONSECURITY LEASH & RE-LAUNCH SYSTEMOPERATIONRE-LAUNCHING WITH YOUR RECON SYSTEMThe same features that de-power the <strong>kite</strong> also assist in quicker re-launching. The Recon’s two keycomponents are tightly integrated into the construction of the <strong>kite</strong> as well as the control system toreduce the added lines and tethers normally associated with conventional leashes or reverselaunch systems. There is no 5th line, external wrist or harness leash, or a complex bridling system.When the <strong>kite</strong> is leading edge down on the water, it can be rolled into aside launch position by following these steps:1. Attached to each of your back (steering) leader lines you will find RelaunchAssistance Ball Grips that will assist you in re-launching your<strong>kite</strong>.2. Reach up on one of the back leader lines and pullthe ball and leader line toward your body. Pullsharply to disengage the Recon Bullet from theRecon Tension Fitting (RTF). Maintain constant2 3 4tension on this leader line. NOTE: Make sure notto wrap the leader line around your hand or to allow your body to get entangledin it. (fig.1)3. Once the bullet is disengaged, the trailing edge of the <strong>kite</strong> will then contract,and the <strong>kite</strong> will soon roll onto its side. (fig.2,3,4)4. Once on its side, the <strong>kite</strong> will begin to move toward the edge of the wind window. You mayhave to finesse the <strong>kite</strong> to the edge of the window; to do this continue to hold onto the sameleader line until the <strong>kite</strong> wants to re-launch. (fig.5)5. When the <strong>kite</strong> is ready to re-launch, release the leader line and steer the <strong>kite</strong> up into the sky.Slowly steer your <strong>kite</strong> into neutral position and level out your bar.6. Once you begin riding again, tension on your flying lines will reset the Recon Bullet into place inthe RTF on the wingtip of the <strong>kite</strong>.15
RECONSECURITY LEASH & RE-LAUNCH SYSTEMIMPORTANT INFORMATION / SET UPBYPASS LEASH - (Optional)All <strong>2004</strong> <strong>Cabrinha</strong> <strong>kite</strong>s can be used with the optional ByPass Leash. This security leash is anoptional feature and is recommended for first time users and <strong>kite</strong>boarding schools, and for riderswho <strong>kite</strong>board without being hooked into the harness loop.The ByPass Leash System leaves your hands free for board handling and comfort.If you choose not to ride with the ByPass Leash, follow the instructions on using the security pinto make sure you have a positive connection to your <strong>kite</strong>.IMPORTANT BYPASS LEASH TIPS• Make sure you set up your ByPass Leash properly before going on the water.• When using your <strong>Cabrinha</strong> <strong>kite</strong> with the optional ByPass Leash, you may activate the shutdown feature of the <strong>kite</strong> by simply letting go of the control bar, as long as you are NOT hookedinto the harness loop.• If hooked into the harness loop when using the ByPass Leash, you must first either unhookor activate the quick release on your harness loop in order to utilize the ByPass Leash Systemas a means of shutting the <strong>kite</strong> down. NOTE: It is intended that when riding with the By-Pass Leash, the rider should not be hooked into the harness loop.
SET UPIMPORTANT INFORMATION• QUICK RELEASE SYSTEM (QRS)QUICK RELEASE SYSTEM (QRS)We supply a variety of Quick Release Systems (QRS) to aid you in your ability to releasecompletely from your <strong>kite</strong>.Important QRS Tips• Make sure your QRS PULL TAB is facing you.• To avoid confusion, always ride with the Pull Tab facing the same direction. In thecase of an emergency, you will know where it is.• You should be familiar with the operation of the QRS in the event of a situation whereyou wish to activate the QRS feature.
SET UPIMPORTANT INFORMATION• QUICK RELEASE SYSTEM (QRS)QUICK RELEASE OPERATIONGrab the release tab and pull until the curvedpin is free. Under tension, the Velcro will releasethe harness loop.RESETTING THE QUICK RELEASE (QR)1 Slide the Velcro4through the stainlesssteel D-ring.Slide the QR pinthrough the retainer.2 Fold the flap back5over itself.Flatten the Velcroover the top of theQR pin.3 Guide the gromment6over the QRpin retainer.Close the thin Velcroaround the system.Your QR system isnow ready for useagain.
SET UPSTEP 1 - CONTROL SYSTEMSTHE POWERLOCK CONTROL SYSTEMSTEP 1SET UP THE POWERLOCK CONTROL SYSTEMThe Powerlock Control System is a controlsystem for 4-LINE <strong>kite</strong>s.The Powerlock Control System allows the riderto interactively lock and unlock the power ofthe <strong>kite</strong> when hooked into the QRS PowerlockHarness Loop.The Powerlock fitting eliminates the need tohave two harness loops on the control bar.The rider has the benefits of both de-powerand fixed 4-line control with a single harnessloop.Important Powerlock Tips• Your <strong>kite</strong> should be tuned so that when therider is unhooked from the harness linethe <strong>kite</strong> is fully sheeted in (powered), butnot over sheeted.• You may fine tune the power of the <strong>kite</strong>with the Centerline Adjustment Strap.• See the section on 4-Line Tuning for moreexplanation of 4-line <strong>kite</strong> tuning capabilities.
SET UPSTEP 1 - CONTORL SYSTEMSTHE POWERLOCK CONTROL SYSTEMPowerlock Control System(Included Components)• Control Barwith end fittings and Powerlock Fitting• Depower Line with QRS• 30cm Recon Harness Loop w/ Security Pin(27cm, 33cm, and 36cm also available)• Leader Lines (2) with INSTANT RELAUNCHBall Grips (red = left; black = right.)• Centerline Adjustment Strap with Recon ReleaseHandles• Bar Floats• Powerlock "Fangs"There are 3 different Powerlock "Fangs" used totune the Powerlock Fitting included in this package.Operating thePowerlock Control SystemTo Lock: Pull the bar towardyou and engage the Lock Ball intoPowerlock Fitting.To Unlock: Pull the bar slightlytoward the body and using yourwrists, twist the top of the bartoward your body, disengagingthe Lock Ball from the PowerlockFitting.Lock Ballengaged -Kite ispoweredand lockedLock Balldisengaged -Kite isde-powered
SET UPSTEP 1 - CONTROL SYSTEMSTHE POWERLOCK CONTROL SYSTEMRemovescrewto change"Fangs"Powerlock Tuning OptionsThe Powerlock Control System’s locking ability can be tuned to suit riderpreference by changing the "fangs".1. Disengage the Lock Ball from the fitting2. Using a #2 Phillips head screwdriver remove the set screw fromthe fitting.3. Gently slide the ‘fangs’ vertically from the fitting.4. Insert the desired ‘fangs’.5. Replace the set screw and tighten.Important: Be sure that the fitting has not rotated on the control bar.There is a fixed position for the fitting that is set by a protrusion insidethe fitting. This protrusion fits into a hole in the bar. Do not tighten thefitting until you are sure that these line up.Powerlock “Fangs”Different Powerlock "fangs" are used to tune the Powerlock Fitting.AggressiveLock: Thesefangs are aggressivelyangledto lockinto the PowerlockFittingmost securely.Recommended for ridingpredominately in the fixedpower position with the optionto unlock and de-power.Non-AggressiveLock:These fangsallow you todisengagefrom thePowerlockmore easily.Recommended for riding predominatelydepowered withthe option of locking in. Recommendedfor learning to usethe Powerlock.No-Lock:These fangsslide throughthe Powerlockwithoutthe Lock Ballengaging.Works like aregular de-power system withoutlocking ability.
SET UPSTEP 1 - CONTROL SYSTEMSTHE POWERLOCK CONTROL SYSTEMSTEP 1.1CONNECT YOUR FLYING LINESTO THE LEADER LINES1. Lay your Powerlock Control System face up on theground approximately 30 meters away from a post ortree to which you will be attaching your lines in order tocheck that the lengths are even (see Step 1.2).2. Unwind and lay out the color-coded FLYING LINES betweenthe post and the control bar. You will have twosets of lines—the front (or inside) STEERING LINES andthe back (or outside) DE-POWER LINES.3. Make sure your flying lines are not twisted or crossed.Do this by walking down your lines, separating themfrom each other. Once you have them separated, laythem down in this order from left to right while lookingfrom your control bar toward the end of the lines: redsteering line, red-sheathed white de-power line, blacksheathedwhite de-power line, black steering line.4. You will connect the steering lines to the leader with a"larks head to larks head" connection. (fig.1) Slide theleader through the loop on the end of the control line.Then thread the end of the control line trough the loopon the leader. By pulling the control line all the waythough in this manner you will end up with the properconnection. (fig.1a)5. Pull the connection tight for a secure connection (fig.2,2a).6. Your flying lines are now connected to your leader lines,and you are ready to make sure that all of your lines areeven.1a2a12Proceed to STEP 1.2 – CHECK YOUR LINE LENGTHS BEFORE GOING ON THE WATER.
SET UPSTEP 1 - CONTROL SYSTEMSTHE POWERLOCK CONTROL SYSTEMSTEP 1.2CHECK YOUR LINE LENGTHSBEFORE GOING ON THE WATER1. Loop a piece of line (any rope or cord) around a tree or fence post.2. Tie the line in a knot around the tree, leaving a piece long enough toattach all four lines.3. Assuming you have already attached your flying lines to the leaderlines, roll out the lines from the post and set the control bar on theground, facing up, with the red control lines on the left and the blackcontrol lines on the right (looking from your bar to the post). Makesure there are no obstructions in between your bar and the post.4. Make sure your flying lines are not twisted or crossed.5. At the ends of the flying lines nearest the post you will notice thatthere are eyelets on the rear steering lines and front de-power lines.The overhand knots on the front (depower) lines are there to eliminateincorrect connection to the <strong>kite</strong>.6. Take the rope attached to the post and feed it through the eyelets onall four lines, with the red on the left and the black on the right.7. Tie a bowline knot, with all four lines inside the loop.8. Walk back to the control bar.9. Make sure that the centerline adjustment strap is fully extended, sothat the <strong>kite</strong> is set up at full power.10. Standing directly in line with the post, pull back hard and steady onthe control bar by pulling straight back toward yourself.11. Your control bar should be in line with your shoulders and should bestraight and not at an angle.12. You will find that all of the lines should have even tension under pressure(ie. no slack in the de-power lines or steering lines).13. If your control bar is even, your Powerlock Control System is ready toattach to your inflated <strong>kite</strong>.14. You should now tie an overhand knot in the ends of the front linesProceed to SET UP: STEP 2 - INFLATING YOUR KITE.15. If your control bar is not even, follow the instructions in Step 1.3 -LINE LENGTH CORRECTIONS.
SET UPSTEP 1 - CONTROL SYSTEMSTHE POWERLOCK CONTROL SYSTEMSTEP 1.3LINE LENGTH CORRECTIONSCORRECTControl bar is evenand parallel with yourshoulder.INCORRECTIf your bar is at anangle, your leader lineneeds adjustment.1 2Adjustments are made by moving one or both of the knots on the ends of the leaderlines. Your goal is to have all four of your flying lines the same length.• If one of the steering lines are too long, loosen the knot (located inside of the relaunchball on the long side) and move it toward the <strong>kite</strong>.• If one of the steering lines are too short, loosen the knot (located inside of the relaunchball on the short side) and move it toward the control system.• Re-tighten the knot and check your line length again. (fig.1) Adjust again if necessaryuntil the control bar is balanced.• DO NOT put knots in your FLYING LINES. Knots in the flying lines compromise the lifeof the line. Put knots only in your LEADER LINES.• It is highly unlikely that your center (de-power) lines are uneven. If they are, you maymake the correction by adjusting the knots on the Recon Center Leader Assembly. Ifthe red-sheathed de-power line is too long, move the knot on the left center leaderline toward the control bar. If this same de-power line is too short, move the knotaway from the control bar. If the black-sheathed de-power line is too long, move theknot on the right center leader line toward the control bar. If this same de-power lineis too short, move the knot away from the control bar.• Once you’ve made the proper adjustment, check the bar again. All four lines shouldbe the same length and the bar should be balanced. (fig.1)
SET UPSTEP 2 - INFLATING YOUR KITE• INFLATING THE STRUTSSTEP 2.1INFLATING THE STRUTSHold the pump at a perpendicularangle to thevalve. Use one hand tohold the valve steady andthe other hand to operatethe pump.Secure Velcro coveringover each strut valve.12See the section on Kite Care before inflating the struts of your<strong>kite</strong>.1. Unroll your <strong>kite</strong> with the struts facing up.2. Make sure your back is to the wind and that the leading edge ofthe <strong>kite</strong> is closest to your body. Secure the wingtips with sandto keep the <strong>kite</strong> from flapping in the wind.3. Partially inflate the center strut, then the two middle struts, followedby the end struts.4. When inflating, hold the pump at a perpendicular angle to the<strong>kite</strong> valve. Use one hand to hold the valve steady and the otherhand to operate the pump. (fig.1) This will help maintain the lifeof the internal bladder.5. When all struts are partially inflated, go back to each strut,making sure the internal bladders are lined up correctly.6. Confirm that the corners of each strut under the leading edgeare able to fully inflate. Lightly push air around in the bladdersuntil the corners are free and correctly lined up.7. Now fully inflate each strut.8. The stopper ball in the valve should engage when the strut isfully inflated. If it doesn’t, turn the strut upside-down and allowgravity to set the ball in place.9. Quickly secure the valve plug and attach the Velcro coveringacross each valve.. (fig.2)10. Do not over-inflate the struts. You may damage the internalbladder by over-inflating it. If the strut is fairly solid to thetouch, it is fully inflated.11. Do not under-inflate the struts. This will cause poor performanceand re-launching problems.
SET UPSTEP 2 - INFLATING YOUR KITE• INFLATING THE LEADING EDGESTEP 2.2INFLATING THE LEADING EDGEAll <strong>Cabrinha</strong> <strong>kite</strong>s feature the 2-part, high-volume AirlockValve as well as a standard valve on the leadingedge bladder. The Airlock Valve is for inflating and deflatingyour <strong>kite</strong>. The standard valve’s primary purposeis to keep the Airlock Valve from twisting.THE UPPER SECTION IS THE INFLATION CAP.THE LOWER SECTION IS THE RELEASE VALVE.1. Make sure that the release valve is seated firmly byturning clockwise. Do not over tighten the release valvewhen the <strong>kite</strong> is not inflated. Doing so may twist anddamage the bladder.2. Check that the standard valve plug and Velcro coveringare secure before inflating the bladder.3. Open the inflation cap by turning it counter clockwise.Insert pump (use the adapter tubing if using a handpump) and inflate the leading edge.4. When the leading edge is fully inflated, remove pumpvalve and screw the inflation cap back on. Lightlyturn/tighten until inflation cap is firmly secure. Checkthat the release valve is also still secure.
SET UPSTEP 2 - INFLATING YOUR KITE• INFLATING THE LEADING EDGESTEP 2.2INFLATING THE LEADING EDGE (continued)Under - Inflated KiteProperly - Inflated Kite5. Do not under-inflate or over-inflate the leading edge. Proper inflation will make it difficult butnot impossible to bend the ends of the <strong>kite</strong> in. If it is very easy to bend the wing tips in, the leadingedge is under-inflated. Kite should be firm enough that while on its back, the wing tips shouldextend into the air and <strong>kite</strong> should retain its bowed shape. If the leading edge is under-inflated, itmay cause poor performance and re-launching problems.6. Once the leading edge is properly inflated, turn <strong>kite</strong> overand secure the <strong>kite</strong> with sand.Proceed to SET UP|STEP 2.3TIPS ON SECURING YOUR KITE
SET UPSTEP 2 - INFLATING YOUR KITE• SECURING YOUR KITESTEP 2.3TIPS FOR SECURING YOUR KITE• Never leave an inflated <strong>kite</strong> unattended on the beach for a long period of time. Winds mayshift or change and the <strong>kite</strong> may become unsecured and fly off.• Always secure your <strong>kite</strong> with sand, using more weight than you think you need. An unmanned<strong>kite</strong> is dangerous.• Never secure your <strong>kite</strong> with rocks or sharp objects (including your board); they will compromisethe life of the <strong>kite</strong>. If you do not have a sandy beach launch, consider sand bags.• Do not leave an inflated <strong>kite</strong> (secured or not), directly exposed to the wind for any length oftime. This allows the trailing edge to flutter excessively, which can damage the <strong>kite</strong> or tanglethe Recon System. If you must leave the <strong>kite</strong> exposed to the wind on the beach, place sufficientamounts of sand between each strut and near the trailing edge to minimize or stop thefluttering. Also, if possible, leave the <strong>kite</strong> in a shaded area.• Make sure your Recon “Bullet” is reset in the Recon Tension Fitting (RTF) when the <strong>kite</strong> is notin use.• Keep in mind other beach users and make sure your <strong>kite</strong> and lines will not be a danger to others.• Wind your lines onto the bar when you are not kiting. This will keep the beach free of lines andwill prevent other beach users from becoming tangled in your equipment.Proceed to SET UP|STEP 2.4 - TIPS ON DEFLATING THE LEADING EDGE
SET UPSTEP 2 - INFLATING YOUR KITE• DEFLATING THE LEADING EDGESTEP 2.4DEFLATING THE LEADING EDGETo deflate the Leading Edge, you must unscrew the releasevalve and not the inflation cap. The release valveis the lower portion of the AIRLOCK.After deflating, clear valve of any sand or debris, thenseal the valve before stowing <strong>kite</strong> to prevent debrisfrom getting inside internal bladderImportant Note: When closing valve on deflated<strong>kite</strong>, hold bladder in place to prevent twisting bladder.Do not over tighten valve when <strong>kite</strong> is deflated.You may tighten it further when <strong>kite</strong> is partiallyinflated again.Proceed to SET UP|STEP 3ATTACHING YOUR KITE
SET UPSTEP 3 - ATTACHING THE KITE• ATTACHING CONTROL LINESSTEP 3ATTACHING CONTROL LINESOnce you have completed SET UP: STEPS 1 and2, you are ready to connect your control systemto your inflated <strong>kite</strong>.1. With your lines laid out, carry the <strong>kite</strong> to theend of the flying lines farthest from your controlbar. Make sure the leading edge is facinginto the wind.2. Secure the <strong>kite</strong> with sand or sand bags. Donot secure <strong>kite</strong> with anything sharp or abrasive.3. You will notice four connection bridles on your<strong>kite</strong> (two on each wingtip). There are threeknots on the rear bridle and one larks headknot on the front bridle. Utilize the middle knot on the rear bridle;the other knots are there for tuning purposes.4. Attach your red de-power (center) line to the red bridle on the leftwing tip of the <strong>kite</strong>.5. Using a larks head knot, attach your red steering (outside) line tothe red bridle on the left wing tip of the <strong>kite</strong>.6. Attach your black de-power (center) line to the black bridle on theright wing tip of the <strong>kite</strong>.7. Using a larks head knot, attach your black steering (outside) lineto the black bridle on the right wing tip of the <strong>kite</strong>.NOTE: See "KITE OVERVIEW" as reference.*diagram not to scaleProceed to SET UP|STEP 3DOWNWND or UPWIND LAUNCH SET UP
SET UPSTEP 3 - ATTACHING THE KITE• DOWNWIND LAUNCH SET UPSTEP 3DOWNWIND LAUNCH SETUP1. Lay the bar 30 meters downwind of the <strong>kite</strong> so that the wing tipsare facing the control bar (the leading edge of the <strong>kite</strong> should befacing into the wind). When setting the bar up downwind of the <strong>kite</strong>,you must turn the bar upside down before walking the lines out.This means that the red-sheathed lines will be on the right, whilethe black-sheathed lines will be on the left.2. Walk out the outside steering lines and attach them to the (trailingedge) back bridles (remember, red-to-red; black-to-black).3. Walk out the white, center, de-power lines and attach them to the(leading edge) front bridles (remember, red-to-red; black-to-black).Make sure that the de-power lines do not cross the steering lines.4. The lines should not cross each other or be twisted.Your <strong>kite</strong> is now ready to fly. Please see the sections of this <strong>manual</strong>that relates to safety and make sure you are familiar with the conditionsbefore getting on the water. Kite tuning tips are located in this <strong>manual</strong>under Tuning.*diagram not to scale
SET UPSTEP 3 - ATTACHING THE KITE• UPWIND LAUNCH SET UPSTEP 3UPWIND LAUNCH SETUPThis is the necessary set up when performing a self-launch.1. Lay the bar 30 meters upwind of the <strong>kite</strong>. The leading edge will be pointedtoward the bar and into the wind. The wing tips of the <strong>kite</strong> will be facingaway from the bar. The control bar should be right side up.2. Walk out the steering (outside) lines and place them parallel to each otheron the ground about 4 feet apart, near the <strong>kite</strong> (remember, red sheathedlines on the left and black sheathed lines on the right).3. Place the steering lines far apart, so the <strong>kite</strong> will lie between them.4. Walk out the de-power (center) lines and place them in between the steeringlines, parallel to each other so that all four lines are lined up as follows(left to right): red sheathed red line, red sheathed white line, black sheathedwhite line, black sheathed black line. The lines should not cross eachother or be twisted.5. Place <strong>kite</strong> on top of the de-power lines so the wing tips of the <strong>kite</strong> are pointingdownwind and are near the ends of your steering lines.6. Make sure the <strong>kite</strong> is still secured with sand or sand bags.7. From outside of the <strong>kite</strong>, attach the steering lines to the correspondingback bridles on the wing tips (remember, red-to-red, black-to-black). Attachthe steering lines to the middle knots on the bridles.8. From inside the <strong>kite</strong>, attach the de-power lines to the corresponding frontbridles on the wing tips (remember, red-to-red, black-to-black).Your <strong>kite</strong> is now ready to fly. Please see the sections of this <strong>manual</strong> that relatesto safety and make sure you are familiar with the conditions before gettingon the water. Kite tuning tips are located in this <strong>manual</strong> under Tuning.*diagram not to scale
SET UPTUNING THE KITEKITE TUNING TIPSProper tuning of your NITRO, CO2 and ACCESS <strong>kite</strong>is essential for best performance. A properly tuned<strong>kite</strong> increases its efficiency, speed, and allows the<strong>kite</strong> to de-power correctly. The following guidelineswill help you to properly tune the <strong>kite</strong> to suit yourstyle of riding.1. All models have a desired sweet spot that is achievedby the correct tension of the steering(back) and de-power (front) lines. Fine-tuning ofthe <strong>kite</strong> may be done by making small adjustmentsto the Centerline Adjustment Strap(CAS.).View of <strong>kite</strong> from riders perspective.Kite in the neutral positiondirectly above the rider.Oversheeted wingtip(too much back line tension)Correct trim2. Do not ‘over sheet’ the <strong>kite</strong>. The first objective isto set the <strong>kite</strong>’s maximum power while allowing itto fly efficiently across the sky. More power andfig.2quicker turning is achieved by tensioning thesteering (back) lines. This is called ‘sheeting in the <strong>kite</strong>’. There is however, a point of diminishingreturns. Too much back line tension will cause the <strong>kite</strong> to fly slowly across the sky and notallow it to fly to the edge of the power window.3. With the <strong>kite</strong> directly overhead, hook into the harness loop and fully sheet in (power up) the<strong>kite</strong>. Observe the angle of the wingtips in relation to the other inflated battens. A commontun-ing position is achieved when the wing tips are parallel to the inflated battens and thesteering (back) lines are taught. (fig.1) If the wing tips are flared outward at the leading edgethe <strong>kite</strong> will be over sheeted. (fig.2)4. De-power the <strong>kite</strong> by pulling on the CAS until the desired effect is achieved. The more you pullon the CAS the less power the <strong>kite</strong> will have. Keep in mind that you will still be able to de-powerthe <strong>kite</strong> through the Powerlock Loop, so do not de-power too much with the CAS. To increasepower, pull down on the plastic loop on the CAS.fig.1
KITEBOARDING BASICSAREA OF OPERATIONThis is the 100 meters of area to each side and downwind of the rider. Do notlaunch your <strong>kite</strong> if you do not have this safe distance between yourself and otherpeople, or ob-structions.WIND DIRECTION100 METERS100 METERS100 METERS 100 METERS
KITEBOARDING BASICSKITE POSITIONS, ZONES, and POWERNEUTRAL POSITIONThis is the position just above the rider’s head in the sky. If the rider keeps the control bar steadyand parallel to his/her shoulders, the <strong>kite</strong> will naturally "park" itself in this position. It is a positionin which the <strong>kite</strong> will have the least amount of pull and is most steady. When in the neutral position,if the <strong>kite</strong> luffs, it will move slightly away from the rider, in a downwind direction. If keptsteady, when the <strong>kite</strong> receives a gust, it will pull and again fly back into the neutral position. Theneutral position is also where you may "park" the <strong>kite</strong> in order to rest, reel in your board, etc. Inthis position, the <strong>kite</strong> still has power, so keep in mind that although it is relatively stable in this position,it may still pull you. This is the safest position in which to keep the <strong>kite</strong> when learning.NEUTRAL ZONEThis is the area that includes the neutral position and the area to the left and right of the rider. Itencompasses the most upwind or windward positions in which to fly the <strong>kite</strong>. When flown here,the <strong>kite</strong> has the least amount of power or pull. This is one of the safer zones in which to fly the<strong>kite</strong>.POWER ZONEThis is the area in front and to the sides of the pilot, but excluding the neutral position and zones.It is the area in which the <strong>kite</strong> has the most power and pull. When flown in this area, the <strong>kite</strong> canbe powerful and dangerous, so avoid flying your <strong>kite</strong> in this zone when learning.GENERATING POWEROne way to generate power from your <strong>kite</strong> is by steering your <strong>kite</strong> from low to high or from high tolow in the sky. The movement of your <strong>kite</strong> in the sky creates lift, which creates power. Keep this inmind, especially when learning. When bringing the <strong>kite</strong> from a low position up to the neutral position,the movement of the <strong>kite</strong> actually creates power and generates speed, so be prepared.When underpowered, you may use this ability of the <strong>kite</strong> to your advantage by creating power andspeed to get planing.
KITEBOARDING BASICSKITE POSITIONS, ZONES, and POWER
STEERING, LAUNCHINGAND LANDINGSTEERINGKey Points To Remember• When practicing steering a <strong>kite</strong> on land, always remember that your <strong>kite</strong> has extreme power.Be prepared and be safe.• When first learning to fly your <strong>kite</strong>, always keep your eyes on the <strong>kite</strong>.• Steer slowly. Do not make any abrupt motions with the control bar.• Keep in mind the power of the <strong>kite</strong>.• Never turn the control bar like a car steering wheel. It is ineffective for steering the <strong>kite</strong> andmay actually cause the <strong>kite</strong> to become out of control.Steering the Kiteto the Left1) Hold the bar with bothhands, shoulder distanceapart.2) With your eyes on the <strong>kite</strong>,slightly pull on the control bar with your lefthand, pulling it toward your body.3) This will allow your left arm to bend andyour right arm to extend.4) Pull slowly. The quicker your movements,the faster the <strong>kite</strong> will turn and the morepower it will create.5) Once the <strong>kite</strong> starts to turn, it will continueto turn left unless you tell it otherwise.6) Be ready to steer the <strong>kite</strong> back into theneutral position.Steering the Kiteto the Left1) Hold the bar with bothhands, shoulder distanceapart.2) With your eyes on the <strong>kite</strong>,slightly pull on the control bar with yourright hand, pulling it toward your body.3) This will allow your right arm to bend andyour left arm to extend.4) Pull slowly. The quicker your movements,the faster the <strong>kite</strong> will turn and the morepower it will create.5) Once the <strong>kite</strong> starts to turn, it will continueto turn right unless you tell it otherwise.6) Be ready to steer.
STEERING, LAUNCHINGAND LANDINGPLANNING YOUR LAUNCH• Choose an area where you have atleast 100 meters of space to yourleft and right and especially downwindof you.• Set up your equipment so that your<strong>kite</strong> is downwind of where you will belaunching, but most importantly, sothat it is at an angle off of the wind.• DO NOT SET UP YOUR KITE FOR ASTRAIGHT DOWNWIND LAUNCH!The <strong>kite</strong> will launch with too muchpower and you will endanger the livesof yourself and those around you if you launch in this manner.• Basically, if the wind is at your back, and straight downwind is at a 180°, then you willwant to set your <strong>kite</strong> at about a 100° off the wind, either to the left or to the right ofyou .• The more the <strong>kite</strong> is positioned into the wind when you launch, the less power it willhave when it goes up, and the safer your launch will be.• Your partner will stand with the <strong>kite</strong> while you will stand 30 meters away at your controlbar.• Make sure you launch slowly and safely, and launch the <strong>kite</strong> at an angle, NOTSTRAIGHT DOWNWIND!
STEERING, LAUNCHINGAND LANDINGLAUNCHING WITH A PARTNER1. Before launching, re-familiarize yourself with yourRecon and QR Systems in the event that youmust engage them. Make sure you have themproperly set up.2. Next, thoroughly check your lines, your gear, andyour launching and landing sites; if all is okay,you are ready to launch your <strong>kite</strong>.3. Before you launch, organize a clearly defined releasesignal that you and your partner both understand.4. Next, if you are using the Direct Connect LeashSystem, attach it. (See D.C. Leash attachment)If not, proceed directly to Step 5.5. Have your partner stand with the <strong>kite</strong> at 100° offof the wind.6. Your partner should hold the <strong>kite</strong> in the middle ofthe leading edge, with the leading edge verticaland pointing into the wind.7. Your partner should stand behind the <strong>kite</strong> andnot to the side or in front of the <strong>kite</strong>.8. Also, your partner SHOULD NOT touch the bridleor flying lines.9. With the control bar in your hands and at chestheight, take a few steps back to take the slackout of the flying lines.10. If you are using the Direct Connect Leash, DONOT hook into the harness loop when launching.If you are NOT using the Direct Connect Leash,then hook into your harness loop, but be readyto pull the Recon System or engage the QRS onyour harness loop if necessary.11. Signal your partner to let go of your <strong>kite</strong>. It isimportant that your partner lets you steer the<strong>kite</strong> out of his or her hands.12. Your partner SHOULD NOT throw the <strong>kite</strong> intothe air. Instruct him/her against doing this BE-FORE you launch. When the <strong>kite</strong> is thrown intothe air, it hinders the ability of the <strong>kite</strong> to launchproperly. When thrown, the <strong>kite</strong> may eitherlaunch too abruptly and powerfully or it may notlaunch at all. It is a very dangerous way tolaunch.13. Once your partner lets go of the <strong>kite</strong>, havehim/her move upwind of you and out of yourway.14. SLOWLY steer the <strong>kite</strong> up into the neutral position.Do this by slowly pulling toward you on theside of the bar attached to high side of <strong>kite</strong>. DONOT make any abrupt motions. The slower yousteer the <strong>kite</strong> into the neutral position, the saferand the more in control you will be.15. With the <strong>kite</strong> in neutral position and the wind atyour back, walk slowly to the water’s edge, keepingin constant check with the <strong>kite</strong>. You shouldknow what it is doing at all times.16. If anything goes wrong with the launch, youshould be ready to first utilize the Recon System,and second to utilize the QRS. WARNING: themore wind there is during your launch, the fastereverything will happen. That is why it is importantthat you launch the <strong>kite</strong> slowly and safely.
STEERING, LAUNCHINGAND LANDINGSELF LAUNCHING1. First set your <strong>kite</strong> face down, with the leading edge into the wind, at100° to 110° off of the wind.2. Secure the <strong>kite</strong> with sand or sand bags. Do not secure <strong>kite</strong> with anythingsharp or abrasive.3. Next, wind your lines out from the <strong>kite</strong> to the place from where you willlaunch the <strong>kite</strong>.4. Before launching, re-familiarize yourself with your Recon and QR Systemsin the event that you must engage them. Make sure you have themproperly set up.5. Next, thoroughly check your lines, your gear, and your launching andlanding sites; if all is okay, you are ready to launch your <strong>kite</strong>.6. Check to make sure your lines are connected properly and are not twistedor crossed.7. Once you have thoroughly checked your lines, your gear, and your launchingand landing sites, you are ready to set your <strong>kite</strong> up for self-launch.Turn the <strong>kite</strong> on its side, with the leading edge facing into the wind.(fig.1)8. Fold the bottom wing tip (the one closest to the ground) over onto the<strong>kite</strong>. Make the fold at the first strut. (fig.2)9. Weigh this wing tip down heavily with sand or sand bags. (fig.3)10. Make sure that the flying lines and bridles are free and will not catch onthe struts when you self-launch.11. Quickly walk back to your bar, walking upwind and staying free of the <strong>kite</strong>lines.12. If you are using the ByPass Leash, attach it at this time. If you are notusing the ByPass Leash, proceed directly to Step 13.13. If you are using the ByPass Leash DO NOT hook into your harness loop.If you are not using the ByPass Leash, hook into your de-power loop,but be ready to pull the Recon Release System or engage the QRS onyour harness loop if necessary,123
STEERING, LAUNCHINGAND LANDINGSELF LAUNCHING (continued)14. With the control bar in both hands and at chest height, take a few stepsback to take the slack out of the flying lines.15. This will release the sand or sand bags from the wing tip of the <strong>kite</strong>.(fig.1)16. As you take a few steps backward and steer the <strong>kite</strong> up into the sky, the<strong>kite</strong> will fill with wind and begin to rise. (fig.2)17. SLOWLY steer the <strong>kite</strong> into the sky by pulling toward you on the side ofthe bar attached to high side of <strong>kite</strong>. DO NOT make any abrupt motions.The slower you steer the <strong>kite</strong> into the neutral position, the safer and themore in control you will be. (fig.3)18. Continue to steer the <strong>kite</strong> into the neutral position–SLOWLY.19. With the <strong>kite</strong> in neutral position and the wind at your back, walk slowly tothe water’s edge, keeping in constant check with the <strong>kite</strong>. You shouldknow what it is doing at all times.20. If anything goes wrong with the launch, you should be ready to first utilizethe Recon Release System, and second to utilize the QRS.123WARNING: the more wind there is during your launch, the faster everythingwill happen. That is why it is important that you launch the<strong>kite</strong> slowly and safely.DO NOT set your <strong>kite</strong> up for self launch and then wind out your lines. Make sure your lines arelaid out and are correct before you set your <strong>kite</strong> in self-launch position. The <strong>kite</strong> may launch accidentallywhile you are winding out your lines.TIP: Take special care to avoid packing the Recon Tension Fitting with sand or debris that may affectits normal operation.
STEERING, LAUNCHINGAND LANDINGLANDING A KITE TO YOUR PARTNER1. Prior to launching, make sure your partnerhas been instructed on how to land your<strong>kite</strong> properly.2. Also, you should always determine adequatelanding spots before you launch your<strong>kite</strong>.3. Having done that, make sure that whenyou are heading toward shore, that yourlanding location is still safe, un-crowdedand un-obstructed.4. Never land your <strong>kite</strong> over, on top of, ornear others, especially if they are downwindof you. You should have an area clearof people, pets, power lines, trees, andother obstructions.5. As you approach shore, keep your <strong>kite</strong> lownear the water, at the edge of the powerwindow.6. Drop down (or step) off your board andbody drag the final distance to shore. Donot approach the shoreline with speed.7. Slowly steer your <strong>kite</strong> into the wind and toyour partner.8. Your partner should be on the windwardside of your <strong>kite</strong> as he/she approaches it.9. Once the <strong>kite</strong> is nearly touching theground, your partner should grab the <strong>kite</strong>at the middle of the leading edge strut.He/she should grab the <strong>kite</strong> in the samelocation on the <strong>kite</strong> as when it waslaunched.10. Your partner SHOULD NOT grab the <strong>kite</strong>bridles or flying lines.11. Your partner should AVOID grabbing the<strong>kite</strong> by either wing tip or the trailing edgeof the <strong>kite</strong>. Grabbing the <strong>kite</strong> by the wingtip or the trailing edge will often cause it toflip or spin; the <strong>kite</strong> will also be hard tomanage.12. Once your partner has the <strong>kite</strong>’s leadingedge, he/she should walk the <strong>kite</strong> awayfrom the water’s edge.13. Your partner may either continue to holdthe <strong>kite</strong> or he/she may secure the <strong>kite</strong> byturning it over, with the struts down andthe leading edge pointed into the wind, andsecuring it with sand or sand bags.14. Once on land, with your <strong>kite</strong> secured, youmay wind up your lines.
STEERING, LAUNCHINGAND LANDINGRE-LAUNCHINGImportant NoteProper inflation of the struts, especially the leading edge, is imperative for water re-launchability ofyour <strong>kite</strong>. Make sure your <strong>kite</strong> struts are properly inflated before entering the water.1. When your <strong>kite</strong> goes down on the water,know that the <strong>kite</strong> may re-launch on itsown, often when you do not expect it to, sobe prepared.2. If your <strong>kite</strong> goes down on its face, with theleading edge and struts facing the water,you must steer the <strong>kite</strong> onto its side.3. Attached to each of your back (steering)leader lines you will find Re-launch AssistanceBall Grips that will assist you in relaunchingyour <strong>kite</strong>.4. Reach up on one of the back leader linesand pull the ball and leader line towardyour body. Pull sharply to disengage theRecon Bullet from the Recon Tension Fitting(RTF). Maintain constant tension onthis leader line. NOTE: Make sure not towrap the leader line around your hand orto allow your body to get entangled in it.5. Once the bullet is disengaged, the trailingedge of the <strong>kite</strong> will then contract, and the<strong>kite</strong> will soon roll onto its side.6. Once on its side, the <strong>kite</strong> will begin to movetoward the edge of the wind window. Youmay have to finesse the <strong>kite</strong> to the edge ofthe window; to do this continue to hold ontothe same leader line until the <strong>kite</strong> wantsto re-launch.7. Sometimes, especially in light wind, youmust be patient as the <strong>kite</strong> works its wayto the edge of the wind window. Do notget impatient and start pulling on bothsides of the bar. This only confuses the<strong>kite</strong>. Continue to work the <strong>kite</strong> to the originalside you chose.8. When the <strong>kite</strong> is ready to re-launch, releasethe leader line and steer the <strong>kite</strong> upinto the sky. Slowly steer your <strong>kite</strong> intoneutral position and level out your bar.9. Once you begin riding again, tension onyour flying lines will reset the Recon Bulletinto place in the RTF on the wingtip of the<strong>kite</strong>.
REPAIRSKITE FABRIC REPAIRSKITE FABRIC REPAIRSMajor TearsFor a major tear in the <strong>kite</strong> fabric, consult your dealer for a reputable <strong>kite</strong> repair loft.Minor TearsFor a minor tear in the <strong>kite</strong> fabric, you may repair the tear with <strong>kite</strong> repair tape.Your <strong>kite</strong> has been supplied with an adhesive <strong>kite</strong> repair material.1. Clean and dry your <strong>kite</strong>.2. Lay the <strong>kite</strong> flat and on a clean, dry, smooth surface.3. Cut two pieces of repair tape the same size, making sure they are each big enough to coverthe entire tear.4. Carefully cover one side of the tear with a piece of the repair tape. Gently rub the tapesmoothly onto the surface of the <strong>kite</strong>.5. Next, cover the opposite side of the tear with the second piece of repair tape, in the samemanner as before.6. Make sure the tape is secure.
REPAIRSSTRUT and LEADING EDGE BLADDER REPAIRSKEY POINTS TO REMEMBER• Before attempting to repair one of your <strong>kite</strong> bladders, make sure your <strong>kite</strong> is clean and dry. Alwayskeep your <strong>kite</strong> pump, valves, and bladders free of sand, water and other things that willdirty them.• Make sure the bladders are deflated.• Avoid repairing your <strong>kite</strong> on the beach or in dirty, dusty, windy areas. It is best to find a clean,dry spot out of the wind. A grassy spot is ideal.• You will need a set of flying lines and a bladder repair kit (supplied with <strong>kite</strong>) before you beginto repair the bladder.
REPAIRSSTRUT and LEADING EDGE BLADDER REPAIRSREPARING STRUT BLADDERS1. First, lay the <strong>kite</strong> out with the struts facing up.2. Detach the Velcro closure at the base of the damaged strut. This will open upthe sleeve of the strut and will allow you access to the internal bladder. (fig.1)3. Next, separate the valve plug from the Velcro closure so that the valve is freefrom the strut’s sleeve. This will essentially disconnect the bladder from thesleeve. Keep track of the valve plug for later use.14. Tie one flying line around the valve. Cinch it down well on the valve. Do not tiethe knot through the hole on the valve or you may damage it.5. Gently insert the valve down into the strut sleeve.6. Go to the base of the sleeve and gently pull the bladder out of the sleeve, leavingthe flying line through the sleeve. Having the flying line through the sleevewill allow you to easily replace the bladder once it is repaired. (fig.2)27. Inflate the bladder and plug the valve so that it maintains air. Do not over inflatethe bladder.8. Submerge the bladder in water to locate the hole. A bathtub or large sink fullof water is best.9. Look for bubbles to locate the hole.10. Once you have located the leak, dry the area and mark the hole with a circle.A permanent marker works best for this. (fig.3)11. Dry and clean the rest of the bladder with a soft towel.12. Again, deflate the bladder.3
REPAIRSSTRUT and LEADING EDGE BLADDER REPAIRSREPARING STRUT BLADDERS (continued)13. Decide whether to use the glue or a patch supplied in your bladder repair kit.14. If the hole is on a seam, you will need to glue the area.15. If the hole is on a flat area of the bladder, remove the backing on one of thepatches and press it onto the bladder, covering the hole.16. Set the bladder aside for approximately 20 minutes to dry.417. Again, inflate the bladder and check to make sure it is now holding air.18. If you have repaired the holes in the bladder, coat the entire bladder in talcumpowder to assist insertion back into the sleeve.19. Deflate once again.20. Tie the flying line from the end of the strut opening onto the valve.21. Lay the bladder flat at the end of the strut, so that you may now feed it backinto the sleeve.22. Gently feed the valve, followed by the rest of the bladder, into the sleeve.23. From the valve opening of the sleeve, you will pull the flying line out of thesleeve, while pulling the bladder back into place.24. Once the bladder is replaced, pull the valve back into the hole of the sleeveand remove the flying line from its base.25. Re-attach the Velcro at the base end of the sleeve. (fig.4)26. Re-attach the valve plug.27. Inflate the strut partially to make sure the bladder fits into all four corners ofthe sleeve.28. Inflate the strut entirely or deflate it if you are going to store the <strong>kite</strong>.
REPAIRSSTRUT and LEADING EDGE BLADDER REPAIRSREPARING LEADING EDGE BLADDERS1. First, lay the <strong>kite</strong> out with the struts facing up.1 22. You will find zipper closures at both ends of the Leading Edge(LE) and also in the center of the LE. Unzip all three. This willopen up the sleeve of the strut and will allow you access to thebladder. (fig.1,2)3. Separate the Airlock Valve Assembly fromthe leading edge. Carefully lift the retainerring from the bladder. Keep track of theassembly for later use. (fig.3,4,5)3 4 54. Next, on the standard valve, separate thevalve plug from the Velcro closure so thatthe valve is free from the strut’s sleeve.This will essentially disconnect the bladder6from the sleeve. Keep track of the valve plug for later use.5. For the next step, you will need two flying lines. Starting with one end of the leadingedge, tie one line around the wing tip end of the bladder. Cinch the line downwell. Follow the same procedure with the other end of the leading edge bladder. (fig.6)6. Next, gently push the valve down into the strut sleeve.77. Now, access the leading edge bladder through the zippered access pocket near theleading edge valve. (fig.7)8. Gently pull one side of the bladder out of the sleeve at a time, leaving the flying linethrough both sides of the sleeve. Having the flying line through the sleeve will allowyou to easily replace the bladder once it is repaired.9. Inflate the bladder and plug both valves so that it maintains air. Do not over inflate8the bladder.10. Submerge the bladder in water to locate the hole. A bathtub or large sink full of wateris best. You will need to submerge one section of the bladder at a time in orderto locate the hole. Look for air bubbles to locate the hole.11. Once you have located the leak, dry the area and mark the hole with a circle. Apermanent marker works best for this. (fig.8)
REPAIRSSTRUT and LEADING EDGE BLADDER REPAIRSREPARING LEADING EDGE BLADDERS (continued)12. Dry and clean the rest of the bladder with a soft towel.13. Again, deflate the bladder.14. Decide whether to use the glue or a patch supplied in your bladder repair kit.15. If the hole is on a seam, you will need to glue the area.16. If the hole is on a flat area of the bladder, remove the backing on one of thepatches and press it onto the bladder, covering the hole.17. Set the bladder aside for approximately 20 minutes to dry.18. Again, inflate the bladder and check to make sure it is now holding air.19. Deflate once again.20. Tie each flying line to the corresponding ends of the bladder.21. Lay the bladder flat near the center access pocket and fold it, accordion style,so that you may feed each end back into the sleeve.322. Starting with one end, feed the bladder into the access pocket.23. Walk to one end of the leading edge and gently pull on the flying line, whileholding the end of the sleeve. Slowly feed the bladder back into this side of thesleeve.24. Next, follow the same instructions with the other side of the bladder, until thevalve is near the hole and the bladder is fully inserted.25. Since the zipper access pockets are not at the very ends of the LE strut, you will have to tuck the ends ofthe bladder into the corresponding tips. (fig.1)26. Once the bladder is replaced, pull the valve back into the hole of the sleeve. (fig.2)27. Next, place the standard valve back into position and replace the valve plug in the Velcro. (fig.3)28. Making sure not to catch the internal bladder in the zippers, close all three zipper pockets.29. Re-attach the Airlock Valve Assembly.30. Inflate the Leading Edge partially to make sure the bladder fits into all four corners of the sleeve.31. Inflate the Leading Edge entirely or deflate it if you are going to store the <strong>kite</strong>.12
IMPORTANT INFORMATIONBEACH ETIQUETTEHere are some basic things to consider when sharing beaches and water accesseswith other users:SAFETY• Follow the safety instructions outlined inthis <strong>manual</strong>.• Follow the safety instructions and rulesand regulations posted at the beaches youuse.• Check with local <strong>kite</strong>boarding associationsor shops prior to launching in a new area.There may be local rules and regulationsto follow which are not posted.• Utilize common sense safety.• Do not touch other people’s gear, unlessinstructed to do so by the owner. Pickingup their bars, <strong>kite</strong>s, etc. may disrupt a setupritual they have.• Always secure your <strong>kite</strong> with sand or sandbags. An unmanned <strong>kite</strong> is dangerous.• Never leave an inflated <strong>kite</strong> unattended.Winds may shift and cause the <strong>kite</strong> to becomeunsecured and fly off.SETTING UP• Set up only the gear that you plan on usingimmediately. Deflate and put away your<strong>kite</strong>s when not in use.• Set up in an area where you have plenty ofspace.• Set up in a manner conducive to havingmultiple users in the area.• Roll up your lines when not in use.• Always keep other beach and water accessusers in mind when launching, landing,and <strong>kite</strong>boarding.• Yield to other beach users. Be courteousand cooperative.• Always be ready to lend assistance to other<strong>kite</strong>boarders. The favor may be returnedsooner than you think.
IMPORTANT INFORMATIONKITE CAREDue to the often extreme nature of <strong>kite</strong>boarding, a thorough approach should be takenwhen caring for your <strong>kite</strong> and all its associated rigging.PREPARING FOR YOUR SESSION• A frequent inspection of the <strong>kite</strong> should bemade in order to identify punctures, tears,or abrasions in the canopy, struts, or ReconSystem. It is also necessary to checkthe fly lines for wear and for unwantedknots which may reduce the strength ofthe fly lines.• Do not rig on asphalt, cement, gravel, orother abrasive surfaces; doing so maydamage your equipment. It is best to rigon sand or grass. Damage done to yourequipment by rigging on abrasive surfaceswill not be covered under warranty.• Do not rig among sharp objects that couldtear the canopy or puncture the struts andleading edge bladder.• Take care not to expose your Recon Systemor flying lines to sharp objects thatmay wear through them.• While setting up, secure your <strong>kite</strong> withsand or sand bags. Do not secure your<strong>kite</strong> with rocks or other sharp or abrasiveobjects that may damage your <strong>kite</strong>.BETWEEN SESSIONS• Never leave an inflated <strong>kite</strong> unattended onthe beach for a long period of time. Windsmay shift or change and the <strong>kite</strong> may becomeunsecured and fly off.• Do not leave an inflated <strong>kite</strong> (secured ornot), directly exposed to the wind for anylength of time. This allows the trailing edgeto flutter excessively, which can damagethe <strong>kite</strong> or tangle the Recon System. If youmust leave the <strong>kite</strong> exposed to the wind onthe beach, place sufficient amounts ofsand between each strut and near thetrailing edge to minimize or stop the fluttering.• Make sure the Recon “Bullet” is reset inthe Recon Tension Fitting when the <strong>kite</strong> isnot in use.• Do not leave your <strong>kite</strong> exposed to sunlightfor long periods of time. Between sessions,choose a shaded area to secureyour <strong>kite</strong>. When not in use, stow away.
IMPORTANT INFORMATIONKITE CARE (continued)PROPER STORAGE• It is recommended to wash your <strong>kite</strong> with fresh water and dry thoroughly before rolling andstoring.• Do not roll up <strong>kite</strong> when wet.• Clear the <strong>kite</strong> of sand or other foreign objects before stowing.• Once it is clean and dry, stow your <strong>kite</strong> in the supplied bag in a clean, dry, cool place.• Do not place heavy objects on the bag containing the <strong>kite</strong> because the carbon rods may bedamaged.• Do not leave your <strong>kite</strong> inflated in your car or car rack box; exposing the <strong>kite</strong> to extreme temperatureswhile inflated may damage the internal bladders.• Wash your control system with fresh water from time to time by placing the entire controlsystem (with lines wound onto the bar) into a bucket of fresh water and let it sit for 5 minutes.Allow to dry thoroughly before storing in a dry location.• Once it is clean and dry, stow your control bar in the supplied bag in a clean, dry, cool place.
GLOSSARYKITEBOARDING TERMINOLOGYKITEBOARDING TERMINOLOGYTRAINER KITE – a <strong>kite</strong> that may be used onland to simulate the motions used in <strong>kite</strong>boarding.It is an excellent instructional and learningtool. Despite its small size, this <strong>kite</strong> stillhas power, so be alert.INFLATABLE KITE – a <strong>kite</strong> with inflatable tubesdesigned to float the <strong>kite</strong> and to facilitatewater re-launchability.FOUR-LINE INFLATABLE KITE – a water-relaunchable<strong>kite</strong> with four flying lines and inflatabletubes. This <strong>kite</strong> does not usuallyhave a bridle system.STRUTS – the outer fabric tubes found on your<strong>kite</strong>. They house the inner inflatable bladders,which are filled with air to give structureto the <strong>kite</strong>.BLADDER – the inner inflatable tube found withinthe leading edge and the struts of the<strong>kite</strong>. (Imagine a bike–it has both a tire onthe outside and an inner tube which holdsair).RECON SECURITY LEASH & RE-LAUNCH SYS-TEM – <strong>Cabrinha</strong>’s patented system that isfully integrated into the <strong>2004</strong> <strong>kite</strong>s. Botha unique security leash and a re-launchsystem, the Recon allows the rider to immediatelyturn off the power of the <strong>kite</strong> byactivating the Recon quick release. It alsoassists in quicker re-launchingQRS-QUICK RELEASE SAFETY – connectionpoints on the control systems that the pilotmay release in emergencies. QRS HarnessLeash (Patent) that is attached to the riderand <strong>kite</strong>, designed to disconnect you inemergencies.CONTROL BAR – the steering device the pilotuses to steer the <strong>kite</strong>.FANGS – Metal teeth that engage and disengagethe de-power loop on the PowerlockControl System.BRIDLES – the lines that hang from the wingtips of the <strong>kite</strong>. The flying lines will be attachedfrom the control bar to these bridlelines in order to connect control bar to<strong>kite</strong>.LEADER LINES – The lines that attach directlyto the control bar. You will attach theselines to the flying lines in order to connectthem to your bar.
GLOSSARYKITEBOARDING TERMINOLOGYKITEBOARDING TERMINOLOGY (continued)RE-LAUNCH ASSISTANCE BALL GRIPS – Theplastic ball found on each of the two steeringleader lines. The ball assists you ingetting a better grip on your leader linewhen re-launching your <strong>kite</strong>.FLYING LINES – a term used to describe allfour of the lines included with your <strong>kite</strong>package. These lines connect the bridlelines on the <strong>kite</strong> to the leader lines on thecontrol bar and are typically 20-30 metersin length.STEERING LINES – the two outside flying linesthat attach to the trailing edge bridles onthe <strong>kite</strong>—one to the left wing tip and theother to the right wing tip.DE-POWER LINES – the two center flying linesthat attach to the leading edge bridles onthe <strong>kite</strong>—one to the left wing tip, the otherto the right wing tip. These lines assist inde-powering the <strong>kite</strong>.HARNESS – a piece of equipment used to temporarilyattach the rider to the control barharness line. This enables the rider to saveenergy by utilizing their body weight and allof their muscles to hang on to the <strong>kite</strong>.Most common are the waist harness (attachesaround the torso) and the seat harness(attaches to the waist and around thelegs)KITEBOARDING – the term used to describethe sport of power kiting on water.NEUTRAL POSITION – This is the position justabove the rider’s head in the sky. If the riderkeeps the control bar steady and parallelto his/her shoulders, the <strong>kite</strong> will naturally"park" itself in this position. It is aposition in which the <strong>kite</strong> will have the leastamount of pull and is most steady. Whenin the neutral position, if the <strong>kite</strong> luffs, itwill move slightly away from the rider, in adownwind direction. If kept steady, whenthe <strong>kite</strong> receives a gust, it will pull andagain fly back into the neutral position. Theneutral position is also where you may"park" the <strong>kite</strong> in order to rest, reel in yourboard, etc. In this position, the <strong>kite</strong> stillhas power, so keep in mind that although itis relatively stable in this position, it maystill pull you. This is the safest position inwhich to keep the <strong>kite</strong> when learning.
GLOSSARYKITEBOARDING TERMINOLOGYKITEBOARDING TERMINOLOGY (continued)NEUTRAL ZONE – This is the area that includesthe neutral position and the area tothe left and right of the rider. It encompassesthe most upwind or windward positionsin which to fly the <strong>kite</strong>. When flownhere, the <strong>kite</strong> has the least amount of poweror pull. This is one of the safer zones inwhich to fly the <strong>kite</strong>.POWER ZONE – This is the area in front and tothe sides of the pilot, but excluding theneutral position and zones. It is the area inwhich the <strong>kite</strong> has the most power andpull. When flown in this area, the <strong>kite</strong> canbe powerful and dangerous, so avoid flyingyour <strong>kite</strong> in this zone when learning.LAUNCHING – the motion in which the pilotsteers the <strong>kite</strong> from their partner’s handsinto the sky.SELF LAUNCHING – a technique in which thepilot launches the <strong>kite</strong> without assistance,usually by weighting down a wing tip withsand until he/she is ready to launch.RE-LAUNCHING – the motion in which the pilotsteers the <strong>kite</strong> off of the water and back intothe sky.BODY DRAGGING – this is an instructional tactic/ step in which the pilot flies the <strong>kite</strong>while in the water, but without the board.The pilot will launch, then walk to the water,and basically drag in the water whilepracticing flying, re-launching and self-rescuetechniques.WATER STARTING – the motion of the pilot inwhich he/she goes from sitting or lying inthe water to standing on the board.GYBING – the motion in which the pilotchanges the direction of the board he/sheis riding. The pilot switches from a starboardtack to a port tack or vice versa.PLANING – the point in time in which the pilotgets the board skimming on the water.LANDING – the motion in which the pilot steersthe <strong>kite</strong> into their partner’s hands onshore.OVER-POWERED – a situation in which the pilothas a <strong>kite</strong> too powerful for his/her abilitylevel, weight, strength, and/or wind conditions.UNDER-POWERED – a situation in which the pilothas a <strong>kite</strong> not powerful enough forhis/her weight, strength, and/or windconditions.
GLOSSARYKITEBOARDING TERMINOLOGYKITEBOARDING TERMINOLOGY (continued)REACH – a direction of travel relative to thewind direction. Generally 90-160 degreesoff the wind.LULL – a term used to describe wind when itlessens in strength, for any amount oftime. A term also used to describe thecomplete de-powering of a <strong>kite</strong>.LUFF – a term used to describe what happensto the <strong>kite</strong> in a lull.
GLOSSARYWIND TERMINOLOGYWIND TERMINOLOGYSIDESHORE – wind is blowing from the left orfrom the right, parallel to the shore. Idealwind direction for <strong>kite</strong>boarding.ONSHORE – wind is blowing directly or to agreat extent directly from the water towardthe land. Utilize caution when operatingyour <strong>kite</strong> in or near water in this winddirection.SIDE ONSHORE – wind is blowing from eitherthe left or the right and from the water towardthe land. This is a combination of onshoreand sideshore wind. Utilize cautionwhen operating your <strong>kite</strong> in or near waterin this wind direction.OFFSHORE – wind is blowing from the shore directlyor to a great extent out to the water.Do not operate your <strong>kite</strong> in or near waterin this wind direction.SIDE OFFSHORE – wind is blowing from eitherthe left or the right and from the shore outto the water. This is a combination of offshoreand sideshore wind. Do not operateyour <strong>kite</strong> in or near water in this wind direction.GUSTY WIND – wind is inconsistent and variesconsiderably from one wind strength to another.DOWNWIND – the direction in which the windis traveling.UPWIND – the direction from which the wind isblowing.LEEWARD – the downwind side of the <strong>kite</strong>boarder.WINDWARD – the upwind side of the <strong>kite</strong>boarder.KNOTS – a measure of speed based on nauticalmiles.1 knot = 1 nautical mile per hour.1 knot = 1.15 miles per hour.1 knot = 1.85 kilometers per hour.MPH – Miles Per Hour. A measure of speed.1 mph = 1.6 kilometers per hour.BEAUFORT SCALE – a system for estimatingwind strength based on the effects windhas on the physical environment (eg. thebehavior of waves, smoke, etc.). Instrumentsare not used to determine windstrengths in this point scale (O = calm to12 = hurricane).
WARRANTYCABRINHA LIMITED WARRANTY(<strong>Cabrinha</strong> is a division of Neil Pryde Ltd.)Every <strong>Cabrinha</strong> product is subjected to rigidpre-sales quality control tests and is backed byour comprehensive warranty policy below.WHAT THIS WARRANTY COVERS:GeneralNeil Pryde Ltd. ("<strong>Cabrinha</strong>") warrants this Productto be free of major defects in materials and workmanshipwhen this Product is used for ordinaryrecreational activities by the original purchaser fora period of 90 Days from the original date of purchase(as evidenced by the relevant purchase receipt)subject to the following terms and conditions.Specific product warrantiesThis Warranty is valid only when the warranty cardaccompanying this Product is properly filled outand returned to <strong>Cabrinha</strong> within seven (7) daysfrom the original date of purchase.Important Notice: This Product is designed for,and is intended to be used by ordinary purchaserfor recreational purpose or use only. This Productis not designed for commercial use where it is subjectto continuous or high volume repetitive usageover an extended period of time.What This Warranty Does Not CoverThis Warranty does not cover the following:• Costs of return shipments to <strong>Cabrinha</strong>.• Damage caused by alterations, modifications orchanges not authorized or approved by <strong>Cabrinha</strong>in writing, or due to service and/or repairs doneby anyone other than <strong>Cabrinha</strong> or an <strong>Cabrinha</strong> authorizedrepair facility, or due to accident, abuse,misuse or improper use, neglect, or failure to performnormal maintenance in accordance with theinstructions set out below or in the user’s guideaccompanying this Product.• Damage caused by extended or excessive exposureto sunlight (or ultra-violet radiation), improperhandling or storage, or failure to follow instructionsprovided with this Product;• Damage caused by anything other than defects inmaterials or workmanship.• This Product when being used in commercial,rental, teaching or instructional programs or activities,or in competition of any kind.• This Product when being classified as secondhand.• Consequential and incidental damages or expenses,including damages to property or for personalinjury; and• Damage caused by any use of this Product as atoy.• Normal wear and tear, including scratches andfading.• Damage caused by the use of this Product inwaves or shore break.• Damage caused by the over-inflation of the bladders.• Normal wear and tear, including scratches, punctures,rigging with components other than <strong>Cabrinha</strong>components.
WARRANTYHOW TO MAKE WARRANTY CLAIM<strong>Cabrinha</strong> will make the final and conclusive determinationin relation to each claim under this Warrantyon a case-by-case basis, which may require inspectionand/or photos of this Product, whichclearly show the defect(s), if any. This informationmust be sent to the <strong>Cabrinha</strong> Distributor of thisProduct in your country, postage prepaid [or viayour local authorized <strong>Cabrinha</strong> dealer]. This Productcan be returned only if the <strong>Cabrinha</strong> distributor inadvance of returning this Product gives a return authorizationnumber (RA). The RA number must beclearly labeled on the outside of the package, failingwhich such package will be refused. Any productmust be shipped CLEAN and DRY.If this Product is considered to be defective by<strong>Cabrinha</strong>, this Warranty covers the repair or replacement(by the same or similar model) or refundof all or part of the purchase price of this Productonly (which alternative and/or the appropriateamount, if any, shall be decided by <strong>Cabrinha</strong> at itssole and absolute discretion). <strong>Cabrinha</strong> will not beresponsible for any costs, losses, or damages incurredas a result of loss of use of this Product.THE ORIGINAL PURCHASE RECEIPT MUST AC-COMPANY ALL WARRANTY CLAIMS. THENAME OF THE RETAILER AND DATE OF PUR-CHASE MUST BE CLEAR AND ELIGIBLE ONSUCH RECEIPT.WHAT TO DO TO KEEPTHIS WARRANTY IN EFFECTThis Warranty is voided if any unauthorized repair,change, alteration or modification has beenmade to any part of this Product. The warranty forany repaired or replacement product (as the casemay be) is good from the date of the original purchaseonly.There are no warranties, which extend beyondthe warranty specified herein.ADDITIONAL RIGHTSThis Warranty does not affect, and is in additionto, any statutory rights that you may have underor by virtue of any applicable law.HOW TO OBTAIN WARRANTY SERVICESTo obtain warranty service of this Product, orif you have any questions about any products of <strong>Cabrinha</strong>or their respective user’s instructions, pleasecontact:For Information e-mail: support@cabrinha<strong>kite</strong>s.comor your local <strong>Cabrinha</strong> Distributor. (for a completelist of distributors, visit www.<strong>Cabrinha</strong>Kites.com)WARNINGIT IS THE USER’S RESPONSIBILITY TO CARE-FULLY READ THE ATTACHED USER’S GUIDEAND INSTRUCT ALL USERS ON THE PROPERUSAGE AND MAINTENANCE OF THIS PROD-UCT.For USA purchasers only:All warranties implied by State law, includingthe implied warranties of merchantability and fitnessfor a particular purpose, are hereby limited to the durationof this Warranty. Some States do not allowlimitations on how long an implied warranty lasts, sothe foregoing limitation may not apply to you. Withthe exception of any warranties implied by State law(as hereby limited), this Warranty is exclusive and inlieu of all other warranties, guarantees, agreementsand similar obligations of manufacturer or reseller.This Warranty gives you specific legal rights, whichvary from State to State.