2006 - Dirt Jam Pro SL
2006 - Dirt Jam Pro SL
2006 - Dirt Jam Pro SL
- No tags were found...
Create successful ePaper yourself
Turn your PDF publications into a flip-book with our unique Google optimized e-Paper software.
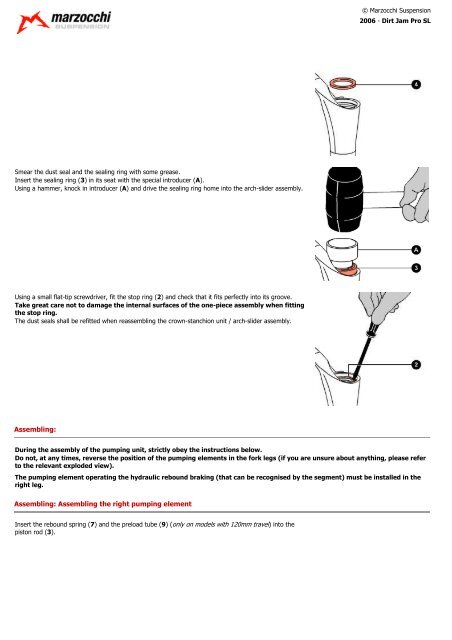
© Marzocchi Suspension<strong>2006</strong> - <strong>Dirt</strong> <strong>Jam</strong> <strong>Pro</strong> <strong>SL</strong>Smear the dust seal and the sealing ring with some grease.Insert the sealing ring (3) in its seat with the special introducer (A).Using a hammer, knock in introducer (A) and drive the sealing ring home into the arch-slider assembly.Using a small flat-tip screwdriver, fit the stop ring (2) and check that it fits perfectly into its groove.Take great care not to damage the internal surfaces of the one-piece assembly when fittingthe stop ring.The dust seals shall be refitted when reassembling the crown-stanchion unit / arch-slider assembly.Assembling:During the assembly of the pumping unit, strictly obey the instructions below.Do not, at any times, reverse the position of the pumping elements in the fork legs (if you are unsure about anything, please referto the relevant exploded view).The pumping element operating the hydraulic rebound braking (that can be recognised by the segment) must be installed in theright leg.Assembling: Assembling the right pumping elementInsert the rebound spring (7) and the preload tube (9) (only on models with 120mm travel) into thepiston rod (3).


