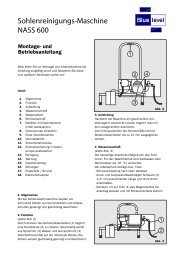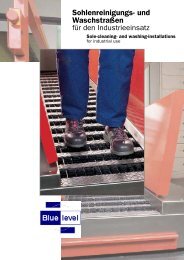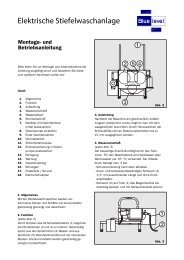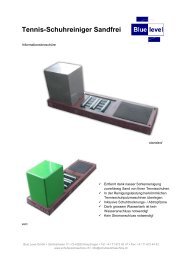
Technical data sheet / brochure - Schuhputzmaschine.ch
Technical data sheet / brochure - Schuhputzmaschine.ch
Technical data sheet / brochure - Schuhputzmaschine.ch

You also want an ePaper? Increase the reach of your titles
YUMPU automatically turns print PDFs into web optimized ePapers that Google loves.
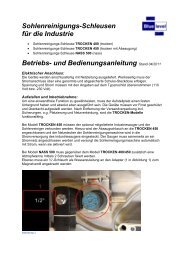
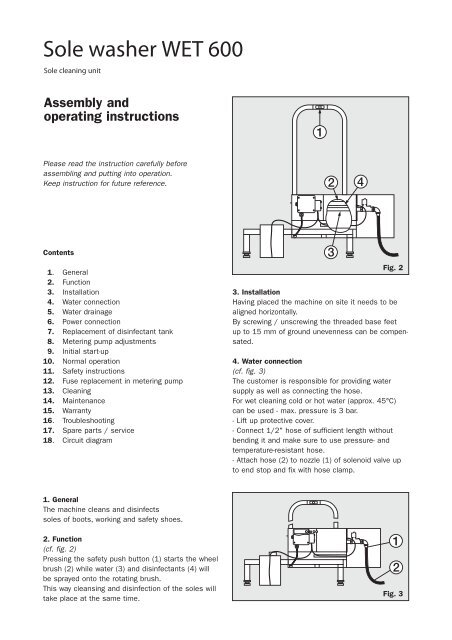
Sole washer WET 600Sole cleaning unitFig. 45. Water drainage(cf. fig. 4)Dirty water is drained off through the pipe socket (1)to the floor.Pipe socket diameter outside 70 mm, inside 66mm, length 58 mm.6. Power connectionThe ma<strong>ch</strong>ine comes with a cord of approx. 4mlength, fitted with a 5-pole CEE connector (16 A).The customer must provide an appropriate CEEsocket installed (400 VAC/16 A).Motor / wheel brush rotates clockwise.Fig. 57. Replacement of disinfectant tank(cf. fig. 5)- Place tank (1) with disinfectant next to the ma<strong>ch</strong>ine.- Insert hose (2) into the tank down to base level;avoid kinks and bends.- Press and continue to hold down the safety pushbutton (3) and high-speed push button (4) onmetering pump (5) until disinfectant flows outof the spray tube (6) without forming bubbles;afterwards release (3) and (4).8. Metering pump adjustments- Opening of the metering pump may only be carriedout by qualified electrician.- Caution! Components carry live voltage- Volumetric displacement 0,01 - 0,5 l/min- Follow disinfectant manufacturer's instructionsfor dosage and take samples8.1 Increase dosage(cf. fig. 6)- Loosen cover screws and take off cover (1) ofmetering pump- Turn “Hub” adjuster (2) clockwise with a screwdriver- Remove pressure hose (3)- Press safety push button (4) and place measuringcup (5) underneath the pressure nozzle (6)- Adjust “Hub” (2) according to measurement results- Re-assemble in reverse order8.2 Decrease dosage(cf. fig. 7)- Loosen cover screws and take off cover (1) ofmetering pump- Turn the “Hub” adjuster (2) counter-clockwise witha screwdriver- Remove pressure hose (3)- Press safety push button (4) and place measuringcup (5) underneath the pressure nozzle (6)- Adjust “Hub” (2) according to measurement results- In case the dosage is still too high when usingsetting "Hub=1" adjust "Frequenz" (7) counterclockwise- Re-assemble in reverse order
Sole washer WET 600Sole cleaning unitFig. 6 Fig. 79. Initial start-upAfter power and liquid connections have been madefollow these steps:- Hook the protective cover into carriers- Insert gratings into carriers- Turn on water tap- Plug in main power supply- Carry out test run- Place ma<strong>ch</strong>ine on platform- Firmly grasp retaining bracket- Step on grating in the cleaning area with one footat a time- Press safety push button and release button aftera short runtime10. Normal Operation- Enter platform- Firmly grasp retaining bracket- Step on grating in the cleaning area with one footat a time- Press safety push button and release the buttonafter cleaning process11. Safety Instructions- Operation not permitted without protective coverin proper position- Do not start a cleaning process without grating inits proper place- Do NOT tou<strong>ch</strong> rotating brushes either with barehands or wearing gloves- The ma<strong>ch</strong>ine must only be used for cleaning thesoles of boots, working and safety shoes- Disconnect mains plug prior to carrying out anymaintenance or repair work
Sole washer WET 600Sole cleaning unit16. TroubleshootingError- Brush doesnot rotate- No Water- NodisinfectantCause- Mains plug not plugged in- Safety push button defective- Transformer fuse has triggered- Motor too hot, thermostat hastriggered- Gate valve closed- Hose removed from nozzle- Hose defective- Solenoid valve fails to open- Storage tank empty- Suction hose not inserted downto base- Metering pump fails to run- Metering pump runs but nodeliverySolution- Plug in main power supply- Have button <strong>ch</strong>ecked by qualified electrician;replace if necessary- Have it <strong>ch</strong>ecked by qualified electrician- Have it <strong>ch</strong>ecked by qualified electrician- Open gate valve (max. pressure 3 bar)- Make sure hose is fixed tightly to nozzle- Replace hose- Replace solenoid valve /notify Service- Fill up storage tank or replace (refer to7. Replacement of tank with disinfectant)- Insert suction hose down to base (refer to7. Replacement of tank with disinfectant)- Refer to 12. Fuse replacement in metering pump- Pump hose defective, replace / notify Service17. Spare parts (cf. fig. 9)Pos.Art. Nr.QuantityDescription1MG.03.2011Three-phasea.c. motor2SB.10.0221Metering pump3EM.01.0051Solenoid valve,G1/2“-24VAC4ES.09.4241Safety pushbutton5KG.01.0213 mHose,Di 6 x 1,5 mmFig. 9680.05.001.0531Disk brush,D 180 mmProduct specifications and designsubject to <strong>ch</strong>ange without notice.
Sole washer WET 600Sole cleaning unit18. Circuit diagram
Sole washer WET 600Sole cleaning unit18. Circuit diagram
Sole washer WET 600Sole cleaning unit18. Elektro-S<strong>ch</strong>altplan
Contact us for service, spare partsand additional information:Blue Level GmbHSwitzerlandPostal address:Säntisstrasse 17CH-8280 KreuzlingenPhone:+41 (0) 71 762 45 07Fax:+41(0)71 672 44 53E-mail:info@bluelevel.<strong>ch</strong>Internet:www.s<strong>ch</strong>uhputzmas<strong>ch</strong>ine.<strong>ch</strong>