
You also want an ePaper? Increase the reach of your titles
YUMPU automatically turns print PDFs into web optimized ePapers that Google loves.
1<br />
2<br />
3<br />
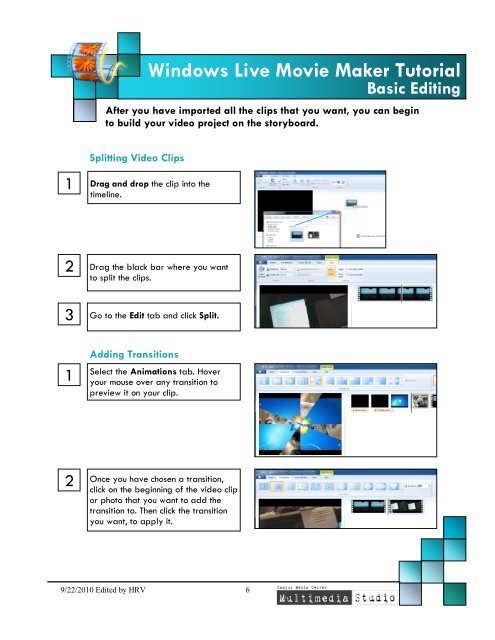
<strong>Windows</strong> <strong>Live</strong> <strong>Movie</strong> <strong>Maker</strong> <strong>Tutorial</strong><br />
After you have imported all the clips that you want, you can begin<br />
to build your video project on the storyboard.<br />
Splitting Video Clips<br />
Drag and drop the clip into the<br />
timeline.<br />
Drag the black bar where you want<br />
to split the clips.<br />
Go to the Edit tab and click Split.<br />
Adding Transitions<br />
Select the Animations tab. Hover<br />
1 your mouse over any transition to<br />
preview it on your clip.<br />
2<br />
Once you have chosen a transition,<br />
click on the beginning of the video clip<br />
or photo that you want to add the<br />
transition to. Then click the transition<br />
you want, to apply it.<br />
9/22/2010 Edited by HRV 6<br />
Basic Editing