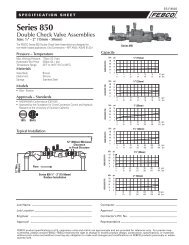
DOUBLE CHECK ASSEMBLIES MODELS 850 ... - Backflow Supply
DOUBLE CHECK ASSEMBLIES MODELS 850 ... - Backflow Supply
DOUBLE CHECK ASSEMBLIES MODELS 850 ... - Backflow Supply

You also want an ePaper? Increase the reach of your titles
YUMPU automatically turns print PDFs into web optimized ePapers that Google loves.
TABLE OF CONTENTSFeatures and Operating Procedures ................................................................................................................ 2Vandalism ......................................................................................................................................................... 2General Service Procedures ............................................................................................................................ 3Cut-A-Way Drawing .......................................................................................................................................... 3Trouble Shooting Procedures ........................................................................................................................... 4Check Module Disassembly ............................................................................................................................. 4Check Module Seal Replacement .................................................................................................................... 5Check Module Re-Assembly ............................................................................................................................ 5Exploded View .................................................................................................................................................. 6Parts List .......................................................................................................................................................... 7Repair Kits ........................................................................................................................................................ 8Testing .............................................................................................................................................................. 9Freeze Protection ............................................................................................................................................. 9Other FEBCO MasterSeries ® Products .......................................................................................................... 10Notes Page ..................................................................................................................................................... 11Warranty .......................................................................................................................................... Back CoverFEATURES AND OPERATING PROCEDURESThe FEBCO Double Check Assembly <strong>Backflow</strong> Preventer consists of two independently operating, springloaded check valves. The pressure drop across the first check valve is approximately 1.0 PSIG with no flow.The pressure drop across the second check valve is also 1.0 PSIG with no flow. A complete assemblyincludes two shut-off valves and four test cocks.VANDALISMIf the unit is installed where vandalism may be a problem, the assembly should be protected and secured.On 1 /2" through 2" units the handles of shut-off valves can be removed to discourage tampering.A protective enclosure can be installed over the unit to discourage vandals. If an enclosure is used, it shouldbe installed so that adequate clearance is available for maintenance and testing. Consult local codes beforeinstalling any type of protective enclosure.Page 2 FEBCO Model <strong>850</strong> / <strong>850</strong>U ( 1 /2" - 2")
GENERAL SERVICE PROCEDURES1. FEBCO backflow prevention assemblies can be serviced with standard tools and are designed for ease ofmaintenance. The assemblies are designed to be serviced in line, so the unit should not need to beremoved from the line during servicing. NO special tools are required.Suggested Tool Kit Model <strong>850</strong> ( 1 /2" - 2")• 1 crescent wrench • 1 medium Phillips screw driver• 1 medium standard screw driver • Box/open end wrench• Differential pressure test kit2. The most common cause of check fouling is dirt and debris in the seating areas. The line should be flushedclean of debris before installation of the assembly. To flush the line after installation of the assembly, slowlyclose the inlet shut-off valve, remove the cover and spring assemblies of both check valves and open theinlet shut-off valve to allow sufficient flow of water through the assembly to clear all sand, debris, etc. fromthe line. If debris in the water continues to cause fouling, a strainer may be installed upstream of theassembly (check local codes).3. Rinse all parts with clean water before reassembly.4. Carefully inspect seals, and seating surfaces for damage or debris. If the check valve seat disc has beenseverely cut at the seat ring diameter, the assembly has been subjected to extremely high and repeatedback pressure. Either thermal water expansion or water hammer are the most likely causes. If back pressurepersists, consider installation of a pressure relief valve downstream of the assembly.5. Use caution to avoid damaging any guiding surfaces while handling parts. Do not force parts together. Theo-ring seals used in FEBCO assemblies require only a small tightening force to insure a positive seal.6. Test unit after servicing in accordance with locally approved test methods to insure proper operation (seepage 9 for more details).7. Refer to applicable exploded drawings and parts lists (pages 6-8) for visual aid information.8. Use food grade petroleum jelly as a lubricant as instructed in this manual.CUT-A-WAY DRAWINGTest Cock # 3Test Cock # 1Test Cock # 2Test Cock # 4FLOW á1 st Check Module2 nd Check ModuleNote: Union End Ball Valves Not ShownFEBCO Model <strong>850</strong> / <strong>850</strong>U ( 1 /2" - 2") Page 3
TROUBLE SHOOTING GUIDESymptom # 1Check fails to hold 1.0 PSID min.Cause:A. Debris on sealing surfacesB. Leaking shut-off valveC. Damaged seat or seat discD. Spring stem not moving freelySolution:Inspect and cleanInspect and clean, or repairDisassemble and replaceInspect for debris or damageSymptom # 2Chatter during flow conditions.Cause:A. Worn or damaged partsSolution:Inspect and replaceSymptom # 3Low flows passing through themainline valve.Cause:A. Mainline check fouledSolution:Inspect and clean, or repair<strong>CHECK</strong> MODULE DISASSEMBLY1. Slowly close inlet and outlet ball valves. Bleedresidual pressure by opening # 2, # 3, and # 4 testcocks. Allow the test cocks to remain open untilthe reassembling is completed. Test cock # 1should remain closed.2. Remove the cover bolts (item 21) using theappropriate size wrench.5. Remove the outlet check assembly by placing thetip of a medium size flat nose screw driver in theslot of the seat (item 3) and prying the checkassembly back until the red o-ring (item 3.1) isexposed. Then, using your fingers, pull it out fromthe body bore until it is completely exposed thenlift out of the body.3. Remove spacer (item 8) by grasping the flangedend of the spacer and pulling straight up.4. Remove the inlet check assembly by pulling it inthe direction of flow out from the body bore until itis completely exposed then lift out of the body.Page 4 FEBCO Model <strong>850</strong> / <strong>850</strong>U ( 1 /2" - 2")
SEAL REPLACEMENTBoth check assemblies are disassembled andreassembled in the same manner. To service thechecks you may replace the check modules with newones by using check module assembly kits availablefrom FEBCO. Or, you may also replace the rubbercomponents in the check modules by using thereplacement rubber parts kits available from FEBCO.For details on parts and kits please see pages 6 - 8.1. To disassemble, grasp the seat section (item 3) inone hand and the guide section (item 7) in theother hand and then rotate in a counter clock wisedirection (approx. 1 /8 turn) until the two partsdisengage.<strong>CHECK</strong> MODULE RE-ASSEMBLYUse reverse procedure for assembly with the followingspecial instructions.1. Inspect the check module o-ring (item 3.1) fordamage and replace if necessary. To ease assembly,apply a thin coating of FEBCO factory suppliedpetroleum jelly (food grade) to the o-ring(item 3.1) prior to installing in body. CAUTION:Excess lubricant may cause foreign debris tocollect on internal components which could foulthe check assembly and result in a test failure.2. The word INLET is inscribed on the end of eachmodule. That end should face the inlet of thevalve.2. Remove retaining screw (item 5.2) and discretainer (item 5.1) so the rubber disc is fullyexposed. Carefully pry out the rubber disc frompoppet. Be careful not to damage the poppetwhen removing the disc. Rinse poppet in cleanwater and replace the old rubber disc with newrubber disc. If the rubber disc is not damaged itcan be reversed and reinstalled when a new discis not available. Rinse all other internal componentswith clean water. Replace disc retainer andsecure with retaining screw (item 5.2).3. When replacing spacer (item 8) between the twocheck assemblies be sure that the flanged end ofthe spacer is touching the back side of the inletcheck assembly so that the cover will fit properly.Next, replace cover making sure # 3 test cock is onthe upstream side. Do not over tighten cover bolts(Approximately 35 inch-pounds is sufficient).4. After reassembling, close test cock # 2, # 3 and # 4(test cock # 1 should already be closed), slowlyopen inlet ball valve. Bleed air from the unit byopening and closing test cock # 2, then # 3 andfinally # 4.5. Check for external leaks and repair if necessary.Slowly open outlet ball valve.6. Test assembly in accordance with the locallyapproved test methods.3. Reassemble check module in the reverse manneras indicated in above. When reassembling thecheck module be sure to insert the poppet steminto the guide hole and keep fingers clear of theslots in the module.FEBCO Model <strong>850</strong> / <strong>850</strong>U ( 1 /2" - 2") Page 5
EXPLODED VIEW<strong>CHECK</strong>MODULEPage 6 FEBCO Model <strong>850</strong> / <strong>850</strong>U ( 1 /2" - 2")
PARTS LISTItem Description Qty. 1/23/4 1 1 1 /4 1 1 /2 21 Body 1 110134 110031 110032 110136 110027 1100251.2 Tailpiece 1 110127 110040 110039 110138 110138 1100371.4 O-Ring 1 39603070 39603070 39603370 39604370 39604370 396043702 Cover 1 110041 110041 110035 110026 110026 1100262.2 O-Ring 1 39622470 39622470 39622970 39624070 39624070 396240703 Seat 2 500393 500393 500373 500358 500358 5003583.1 O-Ring 2 39612670 39612670 39622470 39633770 39633770 396337704 Poppet 2 500394 500394 500374 500357 500357 5003575 Seat Disc 2 410127 410127 410134 410128 410128 4101285.1 Disc Retainer 2 500396 500396 500391 500384 500384 5003845.2 Round HD Screw 2 51653203 51653203 51653203 51951304 51951304 519513046 Spring 1 630177 630177 630173 630169 630169 6301697 Guide 2 500395 500395 500375 500356 500356 5003568 Retainer Spacer 1 500392 500392 500376 500366 500366 5003669* Ball Valve Tapped 1 781244 781053 781054 781055 781056 781057Union End BV Tapped 1 781287 781288 781289 781290 781291 7812929.1* Ball Valve 1 781047 781048 781049 781050 781051 781052Union End Ball Valve 1 781293 781294 781295 781296 781297 78129811 Test Cock 4 781074 781074 781074 781075 781075 78107512 Seat Ring - RV 1 500378 500378 500378 500368 500368 50036821 Hex HD Capscrew 10 51151306 51151306 51151306 51151406 51151406 51151406*Union End Ball Valve Not Shown.FEBCO Model <strong>850</strong> / <strong>850</strong>U ( 1 /2" - 2") Page 7
REPAIR KITSHow to order parts and Repair Kits1. Locate item number and kit number in this maintenance manual.2. Verify the size of the valve the parts are to be used on.3. Provide full model number located on I.D. plate.4. Give kit number.5. A serial number (located on the I.D. plate) will assist in ordering the proper kits.6. Contact your local FEBCO Parts Distributor.<strong>850</strong> Rubber Parts Kit 1/23/4 1 1 1 /4 1 1 /2 2Part No. 905-342 905-342 905-343 905-344 905-344 905-344All Sizes Include:Item Describtion Qty. Item Describtion Qty.2.2 O-Ring 1 5 Seat Disc 23.1 O-Ring 2<strong>850</strong> Check Module Assembly 1/23/4 1 1 1 /4 1 1 /2 2Part No. 905-347 905-347 905-349 905-351 905-351 905-351All Sizes Include:Item Describtion Qty. Item Describtion Qty.3 Seat 1 5.1 Disc Retainer 13.1 O-Ring 1 5.2 Round HD Screw 14 Poppet 1 6 Spring 15 Seat Disc 1 7 Guide 1<strong>850</strong> Single Poppet Kit 1/23/4 1 1 1 /4 1 1 /2 2Part No. 905-339 905-339 905-340 905-341 905-341 905-341All Sizes Include:Item Describtion Qty. Item Describtion Qty.4 Poppet 1 5.1 Disc Retainer 15 Seat Disc 1 5.2 Round HD Screw 1Page 8 FEBCO Model <strong>850</strong> / <strong>850</strong>U ( 1 /2" - 2")
TESTINGAll mechanical devices should be inspected on a regular basis to ensure they are working correctly. Theassembly should be tested at time of initial installation, after servicing or maintenance, and at least annuallythereafter. Acceptable test procedures are published by Foundation for Cross Connection Control and HydraulicResearch at the University of Southern California (USC), The American Water Works Association (AWWA),The American Society of Sanitary Engineering (ASSE Series 5000) and the Canadian Standards Association(CAN/CSA B64•10). Please consult the regulatory authority in your area for more specific information.FREEZE PROTECTIONThe backflow prevention assembly may be subject to damage if theinternal water is allowed to freeze. The unit must be protected fromfreezing using a heated enclosure, insulation heat tape, or othersuitable means. The unit must always be accessible for testing andmaintenance. If the system will be shut down during freezing weather,use the following procedures to drain internal passages.Ball Valve Shut-Off Draining ProcedureIf the assembly has been installed with ball valve shut-off valves, theymust also be properly drained to prevent freeze damage. After drainingprocedure has been completed on the backflow prevention assembly,position all ball valve shut-offs and test cocks in a half open/half closed(45 degree) position.Open the ball valve approximately 45 degrees while draining thepipeline and assembly to allow water between the ball valve and valvebody to drain. Leave the ball valve in this position for the winter toprevent freeze damage.The ball valve must be fully closed before the system is repressurized. OPEN AND CLOSE BALL VALVESSLOWLY TO PREVENT DAMAGE TO THE SYSTEM CAUSED BY WATER HAMMER.Main Valve Draining Procedure ( 1 /2" - 2")1. Close the main shut-off valve.2. Open the inlet drain.3. Open the inlet and outlet ball valves 45 degree (half open, half closed).4. Open all testcocks.5. Open the outlet drain.6. Remove the cover and inlet check module until all water inside valve drains back out through inlet drain.7. If you blowout the piping downstream of the backflow assembly using compressed air: Connect the airsupply to the outlet drain and close the outlet ball valve. After clearing the system with air, partially openthe outlet ball valve. Leave all drain valves, testcocks, and ball valves in half open/half closed position forthe winter.FEBCO Model <strong>850</strong> / <strong>850</strong>U ( 1 /2" - 2") Page 9
FEBCO PERFORMANCE, VALUE, AND QUALITYFEBCO MasterSeries ® (2 1 /2" - 10")Double CheckAssemblyDouble CheckDetector AssemblyReduced PressureAssemblyModel 870V Model 876V Model 880VVertical"N" - ShapeModel 870V Model 876V Model 880VConventional In-LineModel <strong>850</strong> Model 856 Model 860For nearly half a century customers have looked to FEBCO for quality products, reliable lowheadloss performance, and great value. Today, with the new FEBCO MasterSeries ® designs,FEBCO has once again taken the initiative with patented product innovations.All 2 1 /2 through 10" MasterSeries products include:• Patented VectorCheck performance for low head loss• Cast ductile iron bodies for lighter weight• Lowest installed cost — Saves on labor and material• Choice of cost-saving "N"-Shape designs, revolutionary vertical designs, or conventional inlinedesigns.Contact a FEBCO representative today for product literature and technical specifications onFEBCO MasterSeries ® backflow prevention products.Page 10 FEBCO Model <strong>850</strong> / <strong>850</strong>U ( 1 /2" - 2")
NOTESFEBCO Model <strong>850</strong> / <strong>850</strong>U ( 1 /2" - 2") Page 11
WARRANTYAll products manufactured and sold by CMB Industries, Inc. carry with them the following warranty: CMBIndustries, Inc. warrants to the original purchaser (who is the end user) all products manufactured by it will befree from defects in workmanship and material for a period of one (1) year from the date of original shipment.CMB Industries, Inc. also warrants that all internal components of 1 /2" through 2" Model <strong>850</strong>/860 and 1 /2" through1" Model 766 products, will be free from defects in workmanship and material for a period of five (5) years fromthe date of original shipment and also that the body only of the 1 /2" through 1 1 /4" Model 765 will be subject to alifetime warranty against damage by freezing.This warranty is applicable provided such products are used under normal conditions within the recognizedpressure, flow and temperature limits and are given normal service and care. CMB INDUSTRIES, INC.MAKES NO OTHER REPRESENTATION OR WARRANTY OF ANY KIND, EXPRESSED OR IMPLIED, INFACT OR IN LAW, AND EXPRESSLY DISCLAIMS ALL OTHER WARRANTIES, INCLUDING WITHOUTLIMITATION, THE WARRANTIES OF MERCHANTABILITY OR FITNESS FOR PARTICULAR PURPOSE. Inthe event of a defect in material or workmanship of a product covered by this warranty, CMB Industries, Inc.shall, at its sole option, repair or replace such defective product. CMB Industries, Inc. shall not be liable forany labor required to repair or replace any product covered by this warranty. This warranty is void with respectto any such product which is altered or tampered with by anyone without prior consent of CMB Industries, Inc.CMB Industries, Inc. shall not be liable under any circumstances for damages caused by accident, misuse orabuse of the product or for failure to follow the installation, maintenance or operating instructions. IN NOEVENT SHALL CMB INDUSTRIES BE LIABLE FOR CONSEQUENTIAL, INCIDENTAL, INDIRECT, PER-SONAL INJURY, PROPERTY OR PUNITIVE DAMAGES.To make a claim under this warranty, the buyer must notify the factory in writing within ten (10) days of discoveryof any claimed defects or workmanship, and if authorized by the factory, shall return the product in thesame condition as when received by the buyer, transportation prepaid, to the factory or to such other locationas directed by the factory. If said returned product is found by the factory to be defective in workmanship ormaterials, it shall be repaired or replaced without charge, pursuant to the terms of this warranty. This warrantyexcludes component parts or appurtenances not manufactured by CMB Industries, Inc. Any claims withrespect to such equipment must be made to the manufacturer thereof in accordance with the terms of thewarranty, if any, given by such manufacturer, or pursuant to such warranties as may exist by law. The physicalor chemical properties of CMB Industries, Inc. products represent typical, average values obtained in accordancewith test methods and are subject to normal manufacturing variations. This information is supplied as atechnical service and is subject to change without notice.FEBCO BACKFLOW PREVENTION...A product of CMB Industries, Inc.CMB Industries Inc. is a leader in the water control market with more than 75years of experience in the design and manufacturing of the world’s mostinnovative water control products. CMB products include FEBCO <strong>Backflow</strong>Preventers, K-FLO Butterfly Valves and POLYJET Control Valves. As an ISO9001 Certified manufacturer, CMB is committed to quality and performance.For more information about FEBCO <strong>Backflow</strong> Preventers, visit our web siteat www.FEBCOonline.com or request our interactive CD, CMB+, with itselectronic catalog, valve selection guide, and technical drawings and data.ISO 9001 CertifiedPost Office Box 8070 • Fresno, California • U.S.A.Tel# (559) 252-0791 • Fax# (559) 453-9030 • www.cmb-ind.com • www.FEBCOonline.comCopyright 2001 CMB Industries, Inc. MM<strong>850</strong>SM 6/01