Connection to the SysKonnect SK-54P1 802.11g Wireless Print Server
Connection to the SysKonnect SK-54P1 802.11g Wireless Print Server
Connection to the SysKonnect SK-54P1 802.11g Wireless Print Server

You also want an ePaper? Increase the reach of your titles
YUMPU automatically turns print PDFs into web optimized ePapers that Google loves.
<strong>SysKonnect</strong> <strong>SK</strong>-<strong>54P1</strong><br />
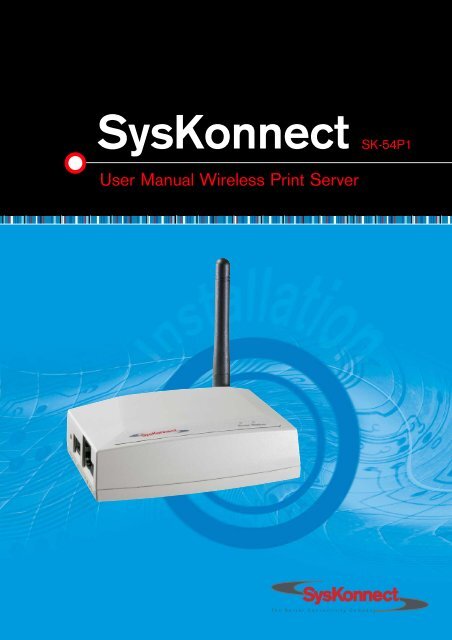
User Manual <strong>Wireless</strong> <strong>Print</strong> <strong>Server</strong>
<strong>SysKonnect</strong> <strong>SK</strong>-<strong>54P1</strong> <strong>802.11g</strong> <strong>Wireless</strong> <strong>Print</strong> <strong>Server</strong><br />
<strong>SysKonnect</strong> <strong>SK</strong>-<strong>54P1</strong><br />
<strong>802.11g</strong> <strong>Wireless</strong> <strong>Print</strong> <strong>Server</strong><br />
(v1.00 / 02 September, 2004)<br />
Visit our web site: http://www.syskonnect.com<br />
User Manual
4<br />
Copyright © <strong>SysKonnect</strong> GmbH, 2004. All rights reserved.<br />
This manual refers <strong>to</strong> <strong>the</strong> <strong>SysKonnect</strong> <strong>SK</strong>-<strong>54P1</strong> <strong>802.11g</strong> <strong>Wireless</strong> <strong>Print</strong> <strong>Server</strong>. Contents are<br />
subject <strong>to</strong> change. Product and brand names are (registered) trademarks of <strong>the</strong>ir appropriate<br />
owners.<br />
Please send your comments on this documentation <strong>to</strong>:<br />
<strong>SysKonnect</strong> GmbH<br />
A Marvell ® Company<br />
Information Development<br />
Siemensstraße 23<br />
76275 Ettlingen / Germany<br />
Fax: +49 7243 502 989<br />
E-Mail: manual@syskonnect.de<br />
The German version of this manual is available on <strong>the</strong> enclosed CD-ROM and on our web<br />
site.
Conventions<br />
<strong>SysKonnect</strong> <strong>SK</strong>-<strong>54P1</strong> <strong>802.11g</strong> <strong>Wireless</strong> <strong>Print</strong> <strong>Server</strong><br />
The following conventions apply <strong>to</strong> this manual.<br />
Warnings and Notes<br />
Used <strong>to</strong> indicate a potentially hazardous situation which, if not avoided, could result in death<br />
or serious injury. Example: dangerous voltage.<br />
Used <strong>to</strong> indicate a potentially hazardous situation which, if not avoided, may result in minor or<br />
moderate injury. Example: electrostatic discharge.<br />
i Used for additional information and advice.<br />
Font Styles applied<br />
Courier: Courier is used for <strong>the</strong> following elements:<br />
• Terminal input <strong>to</strong> be entered by <strong>the</strong> user<br />
• Terminal output issued by <strong>the</strong> system<br />
Examples: Enter sk98diag.<br />
If <strong>the</strong> test was successful, <strong>the</strong> message passed is issued.<br />
Italics: Italics is used for <strong>the</strong> following elements:<br />
• In bodytext as an introduction of new technical terms<br />
• In instructions for radio but<strong>to</strong>ns and check boxes<br />
Examples: The station is operated in Repeater Mode.<br />
Select <strong>the</strong> Sharing radio but<strong>to</strong>n.<br />
Check <strong>the</strong> Enable Bidirectional Support check box.<br />
SMALL CAPS: SMALL CAPS is used for <strong>the</strong> following elements:<br />
• Menu options<br />
• But<strong>to</strong>ns<br />
• Tabs<br />
• Entries in a list box<br />
Quotation<br />
Marks (“ “)<br />
Examples: In <strong>the</strong> main menu, select EXIT.<br />
Click <strong>the</strong> CONNECT but<strong>to</strong>n.<br />
Select <strong>the</strong> tab PORTS.<br />
The <strong>to</strong>p line in <strong>the</strong> printer list (HP LASERJET 4M) indicates<br />
that <strong>the</strong> HP laserjet printer 4M is installed on this PC.<br />
Quotation Marks are used for <strong>the</strong> following elements:<br />
• Window/screen names<br />
• Field names<br />
• List box names
6 Conventions<br />
Examples: The “Create NDPS Manager Object” window is displayed.<br />
Type a name in <strong>the</strong> field “NDPS Manager Name”.<br />
The list “Network” is displayed, containing all installed network<br />
components.<br />
Underline Underline is used <strong>to</strong> identify hyperlinks.<br />
Example: Visit our web site: http://ww.syskonnect.com.
<strong>SysKonnect</strong> <strong>SK</strong>-<strong>54P1</strong> <strong>802.11g</strong> <strong>Wireless</strong> <strong>Print</strong> <strong>Server</strong><br />
Table of Contents<br />
Conventions 5<br />
Warnings and Notes 5<br />
Font Styles applied 5<br />
Safety Precautions 11<br />
Avoiding injuries 11<br />
Avoiding damage 11<br />
1 Introduction 13<br />
Features 13<br />
Package Contents 14<br />
Physical Details 14<br />
LED Indica<strong>to</strong>rs 15<br />
Diagnostic Push But<strong>to</strong>n 15<br />
2 Installation 17<br />
3 Windows Configuration 19<br />
Overview 19<br />
Using <strong>the</strong> Windows Wizard 19<br />
<strong>Wireless</strong> Configuration 21<br />
<strong>Wireless</strong> Modes 21<br />
Required Configuration 21<br />
Client PC configuration 21<br />
Overview 21<br />
<strong>Print</strong>ing Methods 22<br />
Checking your Network Pro<strong>to</strong>cols (Windows 9x) 22<br />
Windows Peer-<strong>to</strong>-Peer <strong>Print</strong>ing 23<br />
Windows 2000/XP Setup 24<br />
Windows 9x/Me Setup 26<br />
PTP <strong>Print</strong>er Port Setup 27<br />
Windows SMB <strong>Print</strong>ing 31<br />
Windows with <strong>Server</strong>-based <strong>Print</strong> Queues 32<br />
Windows <strong>Server</strong> Configuration 34<br />
Windows NT4.0 <strong>Server</strong> 34<br />
Windows 2000/2003 <strong>Server</strong> 34<br />
4 Unix System Configuration 37<br />
Overview 37<br />
IP Address Configuration 37<br />
O<strong>the</strong>r <strong>Print</strong> <strong>Server</strong> Configurations 38<br />
LPD Configuration 38<br />
LPD on IBM AIX 4.15 38<br />
LPD on System V 39<br />
LPD on Linux 40<br />
LPD on BSD 41<br />
<strong>Print</strong>ing using LPD 42<br />
5 Novell NetWare Configuration 43<br />
Overview 43<br />
Creating an NDPS Manager Object 43<br />
Creating an NDPS <strong>Print</strong>er Agent 44<br />
6 Macin<strong>to</strong>sh Configuration 47<br />
Macin<strong>to</strong>sh (AppleTalk) 47<br />
Software Requirements 47
8 Table of Contents<br />
AppleTalk Setup 47<br />
<strong>Print</strong>ing 47<br />
Advanced Setup and Management 47<br />
Macin<strong>to</strong>sh OS X 48<br />
7 BiAdmin Management Utility 49<br />
Requirements 49<br />
Installation 49<br />
Operation 49<br />
Main Screen 49<br />
Menus 53<br />
Configuration 54<br />
8 Web-Based Management 65<br />
Overview 65<br />
Preparation 65<br />
<strong>Connection</strong> <strong>to</strong> <strong>the</strong> <strong>SysKonnect</strong> <strong>SK</strong>-<strong>54P1</strong> <strong>802.11g</strong> <strong>Wireless</strong> <strong>Print</strong> <strong>Server</strong> 66<br />
Configuration Screens 66<br />
AppleTalk 66<br />
NetBEUI 67<br />
TCP/IP 67<br />
<strong>Wireless</strong> Configuration 68<br />
O<strong>the</strong>r Screens 72<br />
9 Special Features 73<br />
Overview 73<br />
Internet <strong>Print</strong>ing Pro<strong>to</strong>col (IPP) 73<br />
IPP <strong>Server</strong> Configuration 73<br />
IPP Client Setup – Windows 98/Me 73<br />
IPP Client Setup – Windows 2000/XP 76<br />
Using IPP <strong>Print</strong>ers 77<br />
Internet Mail <strong>Print</strong>ing 78<br />
System Requirements 78<br />
Internet Mail <strong>Print</strong>ing Configuration 79<br />
User Software 79<br />
Using <strong>the</strong> new Port 81<br />
Checking <strong>the</strong> <strong>Print</strong>er Driver 81<br />
<strong>Print</strong>ing through <strong>the</strong> Internet 82<br />
10 Troubleshooting 83<br />
Overview 83<br />
Hardware & <strong>Connection</strong> Problems 83<br />
AppleTalk (Macin<strong>to</strong>sh) 84<br />
Windows <strong>Print</strong>ing Problems 86<br />
Unix Troubleshooting 92<br />
11 Important Information 93<br />
Technical Support 93<br />
Returning a <strong>SysKonnect</strong> <strong>Print</strong> <strong>Server</strong> for Repair 93<br />
Additional Documentation and Updates 94<br />
Technical Specifications 95<br />
Pro<strong>to</strong>col Support 95<br />
Feature Support 95<br />
Appendix A. License and Warranty Information 97<br />
The Americas, Asia, Australia, New Zealand, Pacific 97<br />
Europe 98<br />
Deutschland, Schweiz, Österreich, Liechtenstein 99
<strong>SysKonnect</strong> <strong>SK</strong>-<strong>54P1</strong> <strong>802.11g</strong> <strong>Wireless</strong> <strong>Print</strong> <strong>Server</strong><br />
Table of Figures<br />
Figure 1: The <strong>SysKonnect</strong> <strong>SK</strong>-<strong>54P1</strong> <strong>802.11g</strong> <strong>Wireless</strong> <strong>Print</strong> <strong>Server</strong> 14<br />
Figure 2: <strong>SysKonnect</strong> <strong>SK</strong>-<strong>54P1</strong> <strong>802.11g</strong> <strong>Wireless</strong> <strong>Print</strong> <strong>Server</strong> Screen 20<br />
Figure 3: Network Configuration 23<br />
Figure 4: Peer-<strong>to</strong>-Peer <strong>Print</strong>ing 23<br />
Figure 5: “<strong>Print</strong>er Ports” Screen 24<br />
Figure 6: “Add Port” Screen 25<br />
Figure 7: “Additional Port Information” Screen 25<br />
Figure 8: “Port Settings” Screen 26<br />
Figure 9: <strong>Print</strong> <strong>Server</strong> Installation Screen 27<br />
Figure 10: <strong>Print</strong>er Port Setup (peer-<strong>to</strong>-peer printing) 27<br />
Figure 11: Error Message: “Required File not found” 28<br />
Figure 12: “Configure <strong>Print</strong>er Port” Screen 28<br />
Figure 13: Port Settings (Peer-<strong>to</strong>-Peer Driver) 30<br />
Figure 14: Network Neighborhood 31<br />
Figure 15: Install SMB <strong>Print</strong>er 32<br />
Figure 16: Network Path – Windows 98/Me 33<br />
Figure 17: Network Path – Windows XP 33<br />
Figure 18: Windows 2000 Message 35<br />
Figure 19: Windows 2003 Message 35<br />
Figure 20: Create NDPS Manager Object 43<br />
Figure 21: Create <strong>Print</strong>er Agent 44<br />
Figure 22: Configure Port Handler 45<br />
Figure 23: <strong>Print</strong>er List 48<br />
Figure 24: LPR Screen 48<br />
Figure 25: BIADMIN Main Screen 49<br />
Figure 26: Device Information 50<br />
Figure 27: <strong>Print</strong>er Status 51<br />
Figure 28: System Tab 54<br />
Figure 29: TCP/IP Tab 55<br />
Figure 30: AppleTalk Tab 56<br />
Figure 31: NetBEUI Tab 57<br />
Figure 32: Internet <strong>Print</strong>ing Tab 58<br />
Figure 33: Port Tab 59<br />
Figure 34: <strong>Wireless</strong> Tab – WEP Encryption 60<br />
Figure 35: <strong>Wireless</strong> Tab – WPA Encryption 62<br />
Figure 36: “<strong>Wireless</strong> Link Info” Screen 63<br />
Figure 37: “AppleTalk” Screen 66<br />
Figure 38: “NetBEUI” Screen 67<br />
Figure 39: “TCP/IP” Screen 67<br />
Figure 40: “<strong>Wireless</strong>” Screen 68<br />
Figure 41: “<strong>Wireless</strong> Security “ Screen – WEP 70<br />
Figure 42: “<strong>Wireless</strong> Security” Screen – WPA-P<strong>SK</strong> 71<br />
Figure 43: IPP Port 74
10 Table of Figures<br />
Figure 44: Select <strong>Print</strong>er for IPP Port 75<br />
Figure 45: Windows 2000 – Locate your <strong>Print</strong>er 76<br />
Figure 46: Windows 2000: No printer driver 77<br />
Figure 47: InterNet <strong>Print</strong>er Port 80<br />
Figure 48: InterNet <strong>Print</strong>er Properties 81<br />
Figure 49: InterNet <strong>Print</strong>ing Progress 82<br />
Figure 50: Add <strong>Print</strong>er Wizard – Network Path 86<br />
Figure 51: “Details” Tab 87<br />
Figure 52: “Add Port” Screen 88<br />
Figure 53: “Configure <strong>Print</strong><strong>Server</strong>” Screen 88<br />
Figure 54: <strong>Print</strong>ers Folder 89<br />
Figure 55: <strong>Print</strong>er Ports Tab 90<br />
Figure 56: Capture <strong>Print</strong>er Port Dialog 91
i<br />
<strong>SysKonnect</strong> <strong>SK</strong>-<strong>54P1</strong> <strong>802.11g</strong> <strong>Wireless</strong> <strong>Print</strong> <strong>Server</strong><br />
Safety Precautions<br />
To protect yourself from injuries and avoid damage of <strong>the</strong> <strong>SysKonnect</strong> <strong>SK</strong>-<strong>54P1</strong><br />
<strong>802.11g</strong> <strong>Wireless</strong> <strong>Print</strong> <strong>Server</strong>, always observe <strong>the</strong> following safety instructions.<br />
Avoiding injuries<br />
Electrical current!<br />
Electrical current from power, phone, and communications cables can be hazardous.<br />
Never <strong>to</strong>uch any electrical elements with bare hands.<br />
To avoid potential shock hazards:<br />
• Do not carry out any installation, maintenance, or (re)configuration work during a thunders<strong>to</strong>rm.<br />
• Do not connect or disconnect any power cables during a thunders<strong>to</strong>rm.<br />
• Unplug this device from its power source before cleaning. Use only a slightly dampened<br />
cloth for cleaning. Do not use liquid or aerosol cleaners.<br />
• Do not use this product near water.<br />
• This device should only be used with <strong>the</strong> power supply type specified on <strong>the</strong> marking<br />
label. If you are not sure of <strong>the</strong> type of your local power supply, consult your dealer or <strong>the</strong><br />
local power company.<br />
• Do not pinch, crimp or o<strong>the</strong>rwise damage <strong>the</strong> power cord. For transportation, ensure that<br />
<strong>the</strong> cable is properly shielded and does not pose a tripping hazard.<br />
• If using an extension cord, make sure <strong>the</strong> <strong>to</strong>tal ampere rating of <strong>the</strong> products using <strong>the</strong><br />
cord does not exceed <strong>the</strong> extension cord's ampere rating.<br />
• Do not attempt <strong>to</strong> service this device, as opening or removing <strong>the</strong> casing may expose you<br />
<strong>to</strong> dangerous voltage points or o<strong>the</strong>r risks. Refer all servicing <strong>to</strong> qualified service personnel.<br />
• The <strong>SysKonnect</strong> <strong>SK</strong>-<strong>54P1</strong> <strong>802.11g</strong> <strong>Wireless</strong> <strong>Print</strong> <strong>Server</strong> should be serviced by qualified<br />
service personnel under <strong>the</strong> following conditions:<br />
• The power cord is damaged or frayed.<br />
• Liquid has been spilled on<strong>to</strong> <strong>the</strong> product.<br />
• The product has been exposed <strong>to</strong> rain or water.<br />
• The product does not operate normally in accordance with <strong>the</strong> operating instructions.<br />
• The device has been dropped or <strong>the</strong> casing has been damaged.<br />
Electrical installations must comply with <strong>the</strong> safety regulations of <strong>the</strong> country in which <strong>the</strong>y are<br />
operated.<br />
Avoiding damage<br />
Electrostatic discharge!<br />
Electrostatic discharge may damage or destroy <strong>the</strong> <strong>SysKonnect</strong> <strong>SK</strong>-<strong>54P1</strong> <strong>802.11g</strong> <strong>Wireless</strong><br />
<strong>Print</strong> <strong>Server</strong>.<br />
To avoid damaging <strong>the</strong> <strong>SysKonnect</strong> <strong>SK</strong>-<strong>54P1</strong> <strong>802.11g</strong> <strong>Wireless</strong> <strong>Print</strong> <strong>Server</strong> observe <strong>the</strong> following:<br />
• Never use force when working with <strong>the</strong> <strong>SysKonnect</strong> <strong>Print</strong> <strong>Server</strong>.<br />
• Do not place <strong>the</strong> <strong>SysKonnect</strong> <strong>Print</strong> <strong>Server</strong> on an unstable surface. The device may fall<br />
causing serious damage <strong>to</strong> <strong>the</strong> device.<br />
• Avoid unnecessary movement since this can increase electrostatic charge.
12 Safety Precautions
1 Introduction<br />
<strong>SysKonnect</strong> <strong>SK</strong>-<strong>54P1</strong> <strong>802.11g</strong> <strong>Wireless</strong> <strong>Print</strong> <strong>Server</strong><br />
This chapter provides an overview of your <strong>SysKonnect</strong> <strong>SK</strong>-<strong>54P1</strong> <strong>802.11g</strong> <strong>Wireless</strong> <strong>Print</strong> <strong>Server</strong>'s<br />
features.<br />
Features<br />
Congratulations on <strong>the</strong> purchase of your new <strong>SysKonnect</strong> <strong>SK</strong>-<strong>54P1</strong> <strong>802.11g</strong> <strong>Wireless</strong> <strong>Print</strong><br />
<strong>Server</strong>. Your <strong>SysKonnect</strong> <strong>SK</strong>-<strong>54P1</strong> <strong>802.11g</strong> <strong>Wireless</strong> <strong>Print</strong> <strong>Server</strong> was designed <strong>to</strong> provide a<br />
simple and efficient network printing solution. It is packed with features, including:<br />
• <strong>Wireless</strong> LAN Support<br />
<strong>Wireless</strong> stations supporting <strong>the</strong> IEEE 802.11b or IEEE <strong>802.11g</strong> standard can interoperate<br />
with <strong>the</strong> <strong>SysKonnect</strong> <strong>SK</strong>-<strong>54P1</strong> <strong>802.11g</strong> <strong>Wireless</strong> <strong>Print</strong> <strong>Server</strong>. Both LAN and WLAN<br />
users can print <strong>to</strong> <strong>the</strong> attached printer or printers.<br />
• Versatility<br />
The <strong>SysKonnect</strong> <strong>SK</strong>-<strong>54P1</strong> <strong>802.11g</strong> <strong>Wireless</strong> <strong>Print</strong> <strong>Server</strong> supports up <strong>to</strong> four pro<strong>to</strong>cols:<br />
TCP/IP, SMB (Service Message Block), AppleTalk (E<strong>the</strong>rTalk), and NetBEUI. It features<br />
an E<strong>the</strong>rnet interface port and operating system support includes Unix, NetWare (NDPS<br />
LPR printing), and Microsoft Windows.<br />
• Easy Installation<br />
The <strong>SysKonnect</strong> <strong>SK</strong>-<strong>54P1</strong> <strong>802.11g</strong> <strong>Wireless</strong> <strong>Print</strong> <strong>Server</strong> makes adding printers or plotters<br />
<strong>to</strong> your network simple.<br />
• Easy Setup<br />
A number of utility programs are supplied <strong>to</strong> simplify <strong>the</strong> setup. For Windows 95/98/Me/<br />
NT/2000/XP users, <strong>the</strong> BiAdmin program facilitates <strong>the</strong> configuration of <strong>the</strong> <strong>SysKonnect</strong><br />
<strong>SK</strong>-<strong>54P1</strong> <strong>802.11g</strong> <strong>Wireless</strong> <strong>Print</strong> <strong>Server</strong> for a variety of network and server configurations.<br />
• Web-based Interface<br />
The Web-based interface provides an easy method of configuration in TCP/IP networks,<br />
regardless of your client platform.<br />
• Compact Size<br />
This allows <strong>the</strong> <strong>SysKonnect</strong> <strong>SK</strong>-<strong>54P1</strong> <strong>802.11g</strong> <strong>Wireless</strong> <strong>Print</strong> <strong>Server</strong> <strong>to</strong> be used even<br />
where space is limited.<br />
• Remote Management Tools<br />
A variety of software <strong>to</strong>ols are provided. In most environments, both <strong>the</strong> <strong>SysKonnect</strong> <strong>SK</strong>-<br />
<strong>54P1</strong> <strong>802.11g</strong> <strong>Wireless</strong> <strong>Print</strong> <strong>Server</strong> and attached bi-directional printers can be<br />
configured remotely.<br />
• Internet <strong>Print</strong>ing Pro<strong>to</strong>col (IPP) Support<br />
The <strong>SysKonnect</strong> <strong>SK</strong>-<strong>54P1</strong> <strong>802.11g</strong> <strong>Wireless</strong> <strong>Print</strong> <strong>Server</strong> can act as an IPP (Internet<br />
<strong>Print</strong>ing Pro<strong>to</strong>col) server, allowing clients, suppliers, colleagues and o<strong>the</strong>rs <strong>to</strong> print <strong>to</strong><br />
your printer from anywhere on <strong>the</strong> Internet. Windows IPP client software is also supplied.
14 1 Introduction<br />
Package Contents<br />
You should find <strong>the</strong> following items packaged with your <strong>SysKonnect</strong> <strong>SK</strong>-<strong>54P1</strong><br />
<strong>802.11g</strong> <strong>Wireless</strong> <strong>Print</strong> <strong>Server</strong>. If any items are missing, contact your dealer immediately.<br />
The <strong>SysKonnect</strong> <strong>SK</strong>-<strong>54P1</strong> <strong>802.11g</strong> <strong>Wireless</strong> <strong>Print</strong> <strong>Server</strong> contains:<br />
• Power adapter<br />
• One CD-ROM containing all support programs and this manual<br />
• Quick Install Guide<br />
Physical Details<br />
This section has details of <strong>the</strong> LEDs and connec<strong>to</strong>rs. Fur<strong>the</strong>r details are contained in section<br />
"Technical Specifications" on page 95.<br />
The <strong>SysKonnect</strong> <strong>Print</strong> <strong>Server</strong> provides <strong>the</strong> following connections:<br />
• 1 x USB 2.0 printer port<br />
• IEEE <strong>802.11g</strong>/802.11b wireless station<br />
• 10/100Base-T LAN connection<br />
• 5V power connection<br />
Figure 1. The <strong>SysKonnect</strong> <strong>SK</strong>-<strong>54P1</strong> <strong>802.11g</strong> <strong>Wireless</strong> <strong>Print</strong> <strong>Server</strong>
LED Indica<strong>to</strong>rs 15<br />
Res<strong>to</strong>ring <strong>the</strong> fac<strong>to</strong>ry<br />
default settings<br />
Generating a diagnostic<br />
print out<br />
i<br />
LED Indica<strong>to</strong>rs<br />
<strong>SysKonnect</strong> <strong>SK</strong>-<strong>54P1</strong> <strong>802.11g</strong> <strong>Wireless</strong> <strong>Print</strong> <strong>Server</strong><br />
There are two (2) LED indica<strong>to</strong>rs on <strong>the</strong> <strong>to</strong>p panel – Status (green, right) and Error (red, left).<br />
The LED indica<strong>to</strong>r modes are described in <strong>the</strong> following table.<br />
Status LED Error LED Status Description<br />
Off Off No power<br />
On On Hardware error<br />
On Off Normal operation (idle)<br />
Blinking Off Normal operation – data is being transmitted or<br />
received on <strong>the</strong> USB printer port.<br />
Blinking Blinking During a firmware upgrade, both LEDs will blink.<br />
Diagnostic Push But<strong>to</strong>n<br />
The <strong>SysKonnect</strong> <strong>SK</strong>-<strong>54P1</strong> <strong>802.11g</strong> <strong>Wireless</strong> <strong>Print</strong> <strong>Server</strong> is fitted with a diagnostic push but<strong>to</strong>n.<br />
The but<strong>to</strong>n is recessed. A pin or paper clip can be used <strong>to</strong> press it. This but<strong>to</strong>n has two<br />
functions:<br />
• Res<strong>to</strong>re <strong>the</strong> fac<strong>to</strong>ry default settings<br />
• <strong>Print</strong> a test page containing all current settings.<br />
To res<strong>to</strong>re <strong>the</strong> fac<strong>to</strong>ry default settings, proceed as follows:<br />
1. Turn <strong>the</strong> <strong>SysKonnect</strong> <strong>SK</strong>-<strong>54P1</strong> <strong>802.11g</strong> <strong>Wireless</strong> <strong>Print</strong> <strong>Server</strong> off.<br />
2. Press and hold <strong>the</strong> diagnostic but<strong>to</strong>n. While pressing <strong>the</strong> but<strong>to</strong>n, switch <strong>the</strong> <strong>SysKonnect</strong><br />
<strong>SK</strong>-<strong>54P1</strong> <strong>802.11g</strong> <strong>Wireless</strong> <strong>Print</strong> <strong>Server</strong> on.<br />
If you continue pressing <strong>the</strong> but<strong>to</strong>n for 10 seconds, a diagnostic page will be printed,<br />
showing <strong>the</strong> new (default) settings.<br />
In order <strong>to</strong> print a test page, <strong>the</strong> printer must support ASCII printing.<br />
To generate a diagnostic print out, proceed as follows:<br />
1. Ensure that both <strong>the</strong> <strong>SysKonnect</strong> <strong>SK</strong>-<strong>54P1</strong> <strong>802.11g</strong> <strong>Wireless</strong> <strong>Print</strong> <strong>Server</strong> and <strong>the</strong> printer<br />
attached <strong>to</strong> port 1 are on.<br />
2. Press <strong>the</strong> diagnostic but<strong>to</strong>n, and hold it in for 2 seconds.<br />
The test page containing <strong>the</strong> current settings will be printed.<br />
PostScript printers are unable <strong>to</strong> print this page. If you have a PostScript printer on port 1, <strong>the</strong><br />
test page will not be printed.
16 1 Introduction
2 Installation<br />
<strong>SysKonnect</strong> <strong>SK</strong>-<strong>54P1</strong> <strong>802.11g</strong> <strong>Wireless</strong> <strong>Print</strong> <strong>Server</strong><br />
This chapter describes how <strong>to</strong> install <strong>the</strong> <strong>SysKonnect</strong> <strong>SK</strong>-<strong>54P1</strong> <strong>802.11g</strong> <strong>Wireless</strong> <strong>Print</strong> <strong>Server</strong><br />
in your Local Area Network.<br />
To install <strong>the</strong> <strong>SysKonnect</strong> <strong>Print</strong> <strong>Server</strong>, proceed as follows:<br />
Preparation 1. Ensure <strong>the</strong> power is off. Do not connect <strong>the</strong> <strong>SysKonnect</strong> <strong>Print</strong> <strong>Server</strong> while power is on.<br />
2. Find <strong>the</strong> default server name for your <strong>SysKonnect</strong> <strong>Print</strong> <strong>Server</strong>.<br />
The default server name is shown on a sticker on <strong>the</strong> base of <strong>the</strong> device. It consists of<br />
eight letters and/or digits. Record this name; it may be needed during configuration.<br />
Connect <strong>the</strong> printer(s) 3. Connect <strong>the</strong> printer or plotter cable(s) <strong>to</strong> <strong>the</strong> appropriate port(s) on <strong>the</strong> <strong>SysKonnect</strong> <strong>Print</strong><br />
<strong>Server</strong> unit.<br />
Connect <strong>to</strong> your network<br />
i<br />
4. Connect a standard network cable from your switch or hub <strong>to</strong> <strong>the</strong> 10/100Base-T LAN<br />
connec<strong>to</strong>r on <strong>the</strong> <strong>SysKonnect</strong> <strong>Print</strong> <strong>Server</strong>.<br />
To use <strong>the</strong> LAN interface, <strong>the</strong> LAN cable needs <strong>to</strong> be inserted before powering on.<br />
The wired (LAN) interface should be used for initial configuration.<br />
In <strong>the</strong> default wireless Infrastructure mode, connecting a LAN cable will disable <strong>the</strong> wireless<br />
interface. To use both <strong>the</strong> LAN and wireless interfaces, <strong>the</strong> wireless mode must be changed<br />
<strong>to</strong> Ad-hoc.<br />
Power up 5. Plug in <strong>the</strong> power adapter cable and power up.<br />
Start-up will take only a few seconds.<br />
Use only <strong>the</strong> power supply unit provided with <strong>the</strong> device. Power supply units for different<br />
models are not interchangeable.<br />
Check <strong>the</strong> LEDs Once start-up is complete:<br />
• The Status LED should be on.<br />
• The Error LED should be off.
18 2 Installation
Configuration<br />
methods<br />
Advanced configuration<br />
and management<br />
3 Windows Configuration<br />
<strong>SysKonnect</strong> <strong>SK</strong>-<strong>54P1</strong> <strong>802.11g</strong> <strong>Wireless</strong> <strong>Print</strong> <strong>Server</strong><br />
This chapter provides an overview of <strong>the</strong> configuration process in <strong>the</strong> various Windows environments.<br />
The first part details <strong>the</strong> configuration on a standalone system, whereas <strong>the</strong> second<br />
part describes <strong>the</strong> configuration on a Web <strong>Server</strong>.<br />
Overview<br />
The <strong>SysKonnect</strong> <strong>SK</strong>-<strong>54P1</strong> <strong>802.11g</strong> <strong>Wireless</strong> <strong>Print</strong> <strong>Server</strong> is designed <strong>to</strong> support many different<br />
platforms, and <strong>the</strong> configuration required depends upon <strong>the</strong> environment in which it is<br />
installed.<br />
The <strong>SysKonnect</strong> <strong>SK</strong>-<strong>54P1</strong> <strong>802.11g</strong> <strong>Wireless</strong> <strong>Print</strong> <strong>Server</strong> usually requires configuration, but if<br />
<strong>the</strong>re's a DHCP server on your network, <strong>the</strong>n <strong>the</strong> device is just plug-and-play. A Windowsbased<br />
setup wizard is also provided on <strong>the</strong> CD-ROM <strong>to</strong> simplify this task.<br />
PCs wishing <strong>to</strong> use <strong>the</strong> printer attached <strong>to</strong> <strong>the</strong> <strong>SysKonnect</strong> <strong>SK</strong>-<strong>54P1</strong> <strong>802.11g</strong> <strong>Wireless</strong> <strong>Print</strong><br />
<strong>Server</strong> always require configuration. For details see section "<strong>Print</strong>ing Methods" on page 22.<br />
If you wish <strong>to</strong> use a queue-based printing system using Windows NT <strong>Server</strong>/Windows 2000/<br />
Windows XP, <strong>the</strong> network server must be configured as detailed in section "Windows 2000/<br />
2003 <strong>Server</strong>" on page 34. However, it is not necessary <strong>to</strong> use a network server-based queue;<br />
client PCs can print directly <strong>to</strong> <strong>the</strong> <strong>SysKonnect</strong> <strong>SK</strong>-<strong>54P1</strong> <strong>802.11g</strong> <strong>Wireless</strong> <strong>Print</strong> <strong>Server</strong> using<br />
<strong>the</strong> peer-<strong>to</strong>-peer printing installed by <strong>the</strong> USER SETUP option on <strong>the</strong> CD-ROM.<br />
The following methods are available <strong>to</strong> perform <strong>the</strong> required <strong>SysKonnect</strong> <strong>Print</strong> <strong>Server</strong> configuration:<br />
• Windows-based wizard – see below for details.<br />
• BiAdmin management utility program – for details see chapter 7 "BiAdmin Management<br />
Utility" on page 49.<br />
• Web-based setup – for details see chapter 8 "Web-Based Management" on page 65.<br />
The BiAdmin management utility is provided for advanced configuration and management.<br />
This program is installed by default when <strong>the</strong> ADMINISTRATOR install option is chosen. For details,<br />
see chapter 7 "BiAdmin Management Utility" on page 49.<br />
Using <strong>the</strong> Windows Wizard<br />
The Windows-based wizard is supplied on <strong>the</strong> CD-ROM, and runs on Windows 95, 98,<br />
NT4.0, Me, Windows 2000 and Windows XP.<br />
Using this wizard is <strong>the</strong> recommended method <strong>to</strong> configure <strong>the</strong> <strong>SysKonnect</strong> <strong>SK</strong>-<strong>54P1</strong><br />
<strong>802.11g</strong> <strong>Wireless</strong> <strong>Print</strong> <strong>Server</strong>.<br />
It can be used <strong>to</strong> configure <strong>the</strong> <strong>SysKonnect</strong> <strong>Print</strong> <strong>Server</strong> for your network environment, even if<br />
it does not have a valid IP address.<br />
To configure <strong>the</strong> <strong>SysKonnect</strong> <strong>Print</strong> <strong>Server</strong> using <strong>the</strong> Windows wizard, proceed as follows:<br />
1. Insert <strong>the</strong> supplied CD-ROM in<strong>to</strong> your drive.<br />
2. If <strong>the</strong> setup program does not start au<strong>to</strong>matically, run Setup.exe in <strong>the</strong> root folder.<br />
3. On <strong>the</strong> screen, shown below, click SETUP WIZARD.
20 3 Windows Configuration<br />
Figure 2. <strong>SysKonnect</strong> <strong>SK</strong>-<strong>54P1</strong> <strong>802.11g</strong> <strong>Wireless</strong> <strong>Print</strong> <strong>Server</strong> Screen<br />
4. Click NEXT on <strong>the</strong> screen of <strong>the</strong> wizard, <strong>to</strong> view a list of wireless print servers on your<br />
LAN.<br />
5. Select your new <strong>SysKonnect</strong> <strong>SK</strong>-<strong>54P1</strong> <strong>802.11g</strong> <strong>Wireless</strong> <strong>Print</strong> <strong>Server</strong>.<br />
6. Click NEXT <strong>to</strong> continue.<br />
7. Enter <strong>the</strong> required data on <strong>the</strong> following screen:<br />
• Name of <strong>the</strong> <strong>SysKonnect</strong> <strong>Print</strong> <strong>Server</strong> can be changed if you wish.<br />
• Comment is optional.<br />
• Select or enter <strong>the</strong> workgroup name for this <strong>SysKonnect</strong> <strong>SK</strong>-<strong>54P1</strong> <strong>802.11g</strong> <strong>Wireless</strong><br />
<strong>Print</strong> <strong>Server</strong>.<br />
8. Click NEXT <strong>to</strong> configure <strong>the</strong> TCP/IP screen:<br />
• If your LAN has a DHCP server, select OBTAIN IP ADDRESS AUTOMATICALLY.<br />
• O<strong>the</strong>rwise select FIXED IP ADDRESS.<br />
For FIXED IP ADDRESS:<br />
- Enter an unused address from <strong>the</strong> range used on your LAN,<br />
or<br />
- Click <strong>the</strong> SUGGEST NEW VALUES but<strong>to</strong>n.<br />
• Use <strong>the</strong> same network mask and gateway as <strong>the</strong> PCs on your LAN.<br />
On <strong>the</strong> wireless screens, <strong>the</strong> settings should be set <strong>to</strong> match o<strong>the</strong>r wireless stations. For<br />
details about each setting, refer <strong>to</strong> <strong>the</strong> following section "<strong>Wireless</strong> Configuration" on<br />
page 21.<br />
9. Click FINISH <strong>to</strong> save <strong>the</strong> data <strong>to</strong> <strong>the</strong> <strong>SysKonnect</strong> <strong>SK</strong>-<strong>54P1</strong> <strong>802.11g</strong> <strong>Wireless</strong> <strong>Print</strong> <strong>Server</strong>.<br />
i To install <strong>the</strong> wizard on your PC, use <strong>the</strong> INSTALLATION option.<br />
If <strong>the</strong> desired <strong>SysKonnect</strong> <strong>SK</strong>-<strong>54P1</strong> <strong>802.11g</strong> <strong>Wireless</strong> <strong>Print</strong> <strong>Server</strong> is not listed:<br />
• Check all cables connected <strong>to</strong> <strong>the</strong> <strong>SysKonnect</strong> <strong>SK</strong>-<strong>54P1</strong> <strong>802.11g</strong> <strong>Wireless</strong> <strong>Print</strong> <strong>Server</strong>.<br />
• Check that <strong>the</strong> <strong>SysKonnect</strong> <strong>SK</strong>-<strong>54P1</strong> <strong>802.11g</strong> <strong>Wireless</strong> <strong>Print</strong> <strong>Server</strong>'s error LED is off. If it<br />
is on, restart <strong>the</strong> <strong>SysKonnect</strong> <strong>Print</strong> <strong>Server</strong>.<br />
• Check that your PC and <strong>the</strong> <strong>SysKonnect</strong> <strong>SK</strong>-<strong>54P1</strong> <strong>802.11g</strong> <strong>Wireless</strong> <strong>Print</strong> <strong>Server</strong> are on<br />
<strong>the</strong> same LAN segment. (If you don't have a router or gateway on your LAN, you only<br />
have 1 segment.)<br />
• Check that your PC has ei<strong>the</strong>r <strong>the</strong> TCP/IP or NetBEUI network pro<strong>to</strong>cols installed. For<br />
details see section "Checking your Network Pro<strong>to</strong>cols (Windows 9x)" on page 22.
<strong>Wireless</strong> Configuration 21<br />
i<br />
<strong>SysKonnect</strong> <strong>SK</strong>-<strong>54P1</strong> <strong>802.11g</strong> <strong>Wireless</strong> <strong>Print</strong> <strong>Server</strong><br />
<strong>Wireless</strong> Configuration<br />
<strong>Wireless</strong> Modes<br />
The <strong>SysKonnect</strong> <strong>SK</strong>-<strong>54P1</strong> <strong>802.11g</strong> <strong>Wireless</strong> <strong>Print</strong> <strong>Server</strong> is a wireless station, not an access<br />
point. Like o<strong>the</strong>r wireless stations, it has two modes:<br />
• Ad-hoc mode<br />
No access point is used, wireless stations communicate directly with each o<strong>the</strong>r. Each<br />
wireless station should be set <strong>to</strong> use <strong>the</strong> same channel, although some wireless stations<br />
will scan all channels <strong>to</strong> find compatible ad-hoc groups <strong>the</strong>y can join.<br />
• Infrastructure (default)<br />
All wireless stations connect <strong>to</strong> <strong>the</strong> access point. This allows connection <strong>to</strong> both o<strong>the</strong>r<br />
wireless stations and <strong>the</strong> wired LAN.<br />
To use both <strong>the</strong> LAN and wireless interfaces, <strong>the</strong> wireless mode must be set <strong>to</strong> Ad-hoc.<br />
In Infrastructure mode, connecting a LAN cable will disable <strong>the</strong> wireless interface.<br />
Required Configuration<br />
Client PC configuration<br />
The chapter details <strong>the</strong> client configuration required on LAN clients <strong>to</strong> use <strong>the</strong> printer(s) attached<br />
<strong>to</strong> <strong>the</strong> <strong>SysKonnect</strong> <strong>SK</strong>-<strong>54P1</strong> <strong>802.11g</strong> <strong>Wireless</strong> <strong>Print</strong> <strong>Server</strong>.<br />
Overview<br />
Ad-hoc mode Infrastructure mode<br />
SSID The <strong>SysKonnect</strong> <strong>Print</strong> <strong>Server</strong> will<br />
join any group with <strong>the</strong> same SSID.<br />
If <strong>the</strong>re is no ad-hoc group available,<br />
<strong>the</strong> <strong>SysKonnect</strong> <strong>Print</strong> <strong>Server</strong><br />
will create <strong>the</strong> group using <strong>the</strong> SSID<br />
assigned <strong>to</strong> it.<br />
Channel The <strong>SysKonnect</strong> <strong>Print</strong> <strong>Server</strong> will<br />
join any group with <strong>the</strong> same channel<br />
number.<br />
If <strong>the</strong>re is no existing ad-hoc group<br />
available, <strong>the</strong> <strong>SysKonnect</strong> <strong>Print</strong><br />
<strong>Server</strong> will create <strong>the</strong> group using<br />
its own channel number.<br />
WEP<br />
settings<br />
Must match <strong>the</strong> o<strong>the</strong>r wireless stations.<br />
Must match <strong>the</strong> access point.<br />
Access point sets <strong>the</strong> channel used.<br />
<strong>Wireless</strong> stations au<strong>to</strong>matically locate<br />
<strong>the</strong> correct channel.<br />
Must match <strong>the</strong> access point.<br />
Before performing client configuration, <strong>the</strong> <strong>SysKonnect</strong> <strong>SK</strong>-<strong>54P1</strong> <strong>802.11g</strong> <strong>Wireless</strong> <strong>Print</strong><br />
<strong>Server</strong> must be installed on your LAN, and configured as described in chapter 2 "Installation"<br />
on page 17. Both <strong>the</strong> <strong>SysKonnect</strong> <strong>Print</strong> <strong>Server</strong> and <strong>the</strong> attached printer(s) must be powered<br />
on.
22 3 Windows Configuration<br />
<strong>Print</strong>ing Methods<br />
The <strong>SysKonnect</strong> <strong>SK</strong>-<strong>54P1</strong> <strong>802.11g</strong> <strong>Wireless</strong> <strong>Print</strong> <strong>Server</strong> supports a number of printing methods:<br />
• Peer-<strong>to</strong>-peer printing means that <strong>the</strong> print jobs are s<strong>to</strong>red (queued) on your PC, and sent<br />
directly <strong>to</strong> <strong>the</strong> <strong>SysKonnect</strong> <strong>SK</strong>-<strong>54P1</strong> <strong>802.11g</strong> <strong>Wireless</strong> <strong>Print</strong> <strong>Server</strong> when it is available.<br />
Fur<strong>the</strong>r information is given in section "Windows Peer-<strong>to</strong>-Peer <strong>Print</strong>ing" on page 23.<br />
• <strong>Server</strong>-based <strong>Print</strong> Queue means that all print jobs are s<strong>to</strong>red (queued) on <strong>the</strong> network<br />
server (e.g. Windows NT/2000) and <strong>the</strong>n sent <strong>to</strong> <strong>the</strong> <strong>SysKonnect</strong> <strong>Print</strong> <strong>Server</strong>. This<br />
allows <strong>the</strong> Network Administra<strong>to</strong>r <strong>to</strong> modify <strong>the</strong> print queue. For example, an important<br />
job can be moved <strong>to</strong> <strong>the</strong> head of <strong>the</strong> queue. For details refer <strong>to</strong> section "Windows with<br />
<strong>Server</strong>-based <strong>Print</strong> Queues" on page 32.<br />
• Windows SMB printing is a Microsoft standard for using a network printer. No additional<br />
software needs <strong>to</strong> be installed on your Windows PC, and printing from MS-DOS<br />
programs is supported. However, due <strong>to</strong> <strong>the</strong> fact that <strong>the</strong> <strong>SysKonnect</strong> <strong>Print</strong> <strong>Server</strong> can<br />
not s<strong>to</strong>re files, large print jobs may cause problems. For details see section "Windows<br />
SMB <strong>Print</strong>ing" on page 31.<br />
• AppleTalk is also supported, and normally no configuration of <strong>the</strong> <strong>SysKonnect</strong> <strong>Print</strong><br />
<strong>Server</strong> is required. For details see section "Macin<strong>to</strong>sh (AppleTalk)" on page 47 .<br />
Which printing method should I use?<br />
• If using Windows 95, 98, NT, Me, 2000, or XP, <strong>the</strong> easiest method <strong>to</strong> use is peer-<strong>to</strong>-peer<br />
printing.<br />
• If using Windows, and you need <strong>to</strong> print from MS-DOS programs, or you don't wish <strong>to</strong><br />
install additional software, use SMB.<br />
However, SMB is not suitable for large, complex documents, so if you need this as well<br />
as MS-DOS printing, you should install both peer-<strong>to</strong>-peer printing and SMB printing. MS-<br />
DOS programs can use <strong>the</strong> SMB printer, Windows programs should use peer-<strong>to</strong>-peer<br />
printing.<br />
• If your LAN has network servers (e.g. Windows NT, Windows 2000 <strong>Server</strong>) use <strong>the</strong><br />
method advised by your Network Administra<strong>to</strong>r. The <strong>SysKonnect</strong> <strong>Print</strong> <strong>Server</strong> can print<br />
via a queue located on a network server, if desired.<br />
• Unix users – refer <strong>to</strong> chapter 4 "Unix System Configuration" on page 37.<br />
• Macin<strong>to</strong>sh users – refer <strong>to</strong> chapter 6 "Macin<strong>to</strong>sh Configuration" on page 47.<br />
Checking your Network Pro<strong>to</strong>cols (Windows 9x)<br />
Your PC must have ei<strong>the</strong>r <strong>the</strong> TCP/IP or NetBEUI pro<strong>to</strong>cols installed. (All versions of Windows<br />
after Windows 95 have TCP/IP installed by default.)<br />
If using peer-<strong>to</strong>-peer printing, <strong>the</strong> installation program will check this for you.<br />
If using o<strong>the</strong>r methods, you must check manually, as follows:<br />
1. Select SETTINGS > CONTROL PANEL > NETWORK OPTION on <strong>the</strong> start menu.<br />
You should see a screen like <strong>the</strong> following:
Windows Peer-<strong>to</strong>-Peer <strong>Print</strong>ing 23<br />
<strong>SysKonnect</strong> <strong>SK</strong>-<strong>54P1</strong> <strong>802.11g</strong> <strong>Wireless</strong> <strong>Print</strong> <strong>Server</strong><br />
Figure 3. Network Configuration<br />
• The <strong>to</strong>p line in <strong>the</strong> list (NetBEUI -> PCI Fast E<strong>the</strong>rnet Adapter) indicates that <strong>the</strong><br />
NetBEUI pro<strong>to</strong>col is installed on this PC. Your PC will show <strong>the</strong> name of your<br />
Network card ra<strong>the</strong>r than PCI Fast E<strong>the</strong>rnet Adapter.<br />
• The highlighted line (TCP/IP -> PCI Fast E<strong>the</strong>rnet Adapter) indicates that TCP/IP is<br />
installed. Your PC will show <strong>the</strong> name of your network card ra<strong>the</strong>r than PCI Fast<br />
E<strong>the</strong>rnet Adapter.<br />
2. If nei<strong>the</strong>r line is present:<br />
• Install <strong>the</strong> NetBEUI pro<strong>to</strong>col by selecting ADD > PROTOCOL > MICROSOFT > NETBEUI<br />
> OK. You may be asked for your Windows CD-ROM.<br />
This pro<strong>to</strong>col requires no configuration.<br />
• If required, you can also install TCP/IP. However, depending on your LAN environment,<br />
TCP/IP may require fur<strong>the</strong>r configuration.<br />
3. If ei<strong>the</strong>r of <strong>the</strong> pro<strong>to</strong>col is already installed, proceed with installation.<br />
Windows Peer-<strong>to</strong>-Peer <strong>Print</strong>ing<br />
With this printing method, print jobs are s<strong>to</strong>red (queued) on your PC, and <strong>the</strong>n sent <strong>to</strong> <strong>the</strong><br />
<strong>SysKonnect</strong> <strong>SK</strong>-<strong>54P1</strong> <strong>802.11g</strong> <strong>Wireless</strong> <strong>Print</strong> <strong>Server</strong> when it is available.<br />
Figure 4. Peer-<strong>to</strong>-Peer <strong>Print</strong>ing
24 3 Windows Configuration<br />
Windows 2000 & XP require no additional software.<br />
For o<strong>the</strong>r versions of Windows, <strong>the</strong> supplied PTP (peer-<strong>to</strong>-peer) printer port software must be<br />
installed on each PC.<br />
Windows 2000/XP Setup<br />
The recommended printing method is <strong>to</strong> use LPR (line printer remote), as follows:<br />
1. Open your “<strong>Print</strong>ers” folder.<br />
2. Right-click <strong>the</strong> desired printer if you have a printer installed.<br />
3. Select PROPERTIES.<br />
4. Select <strong>the</strong> PORTS tab.<br />
5. Click <strong>the</strong> ADD PORT but<strong>to</strong>n.<br />
6. Select STANDARD TCP/IP PORT.<br />
7. Click NEW PORT.<br />
Figure 5. “<strong>Print</strong>er Ports” Screen
Windows Peer-<strong>to</strong>-Peer <strong>Print</strong>ing 25<br />
<strong>SysKonnect</strong> <strong>SK</strong>-<strong>54P1</strong> <strong>802.11g</strong> <strong>Wireless</strong> <strong>Print</strong> <strong>Server</strong><br />
Figure 6. “Add Port” Screen<br />
8. Enter <strong>the</strong> IP address of <strong>the</strong> print server in <strong>the</strong> “<strong>Print</strong>er Name or IP Address” field on <strong>the</strong><br />
“Add Standard TCP/IP <strong>Print</strong>er Port” screen above.<br />
9. Click NEXT.<br />
The screen “Additional Port Information Required” is displayed.<br />
10. On this screen, select CUSTOM.<br />
11. Click <strong>the</strong> SETTINGS but<strong>to</strong>n.<br />
Figure 7. “Additional Port Information” Screen
26 3 Windows Configuration<br />
Figure 8. “Port Settings” Screen<br />
12. On <strong>the</strong> “Port Settings” screen shown above:<br />
• Select LPR in <strong>the</strong> “Pro<strong>to</strong>col” section.<br />
• Enter a queue name (L1 for <strong>the</strong> USB port).<br />
• Ensure <strong>the</strong> LPR Byte Counting Enabled setting is enabled.<br />
• Click OK <strong>to</strong> confirm your changes and <strong>to</strong> close this screen.<br />
13. Follow <strong>the</strong> instructions <strong>to</strong> complete <strong>the</strong> wizard.<br />
Windows 9x/Me Setup<br />
Before performing <strong>the</strong> following procedure, <strong>the</strong> <strong>SysKonnect</strong> <strong>SK</strong>-<strong>54P1</strong> <strong>802.11g</strong> <strong>Wireless</strong> <strong>Print</strong><br />
<strong>Server</strong> must be installed on your LAN, and configured as described in chapter 2 "Installation"<br />
on page 17. Both <strong>the</strong> <strong>SysKonnect</strong> <strong>SK</strong>-<strong>54P1</strong> <strong>802.11g</strong> <strong>Wireless</strong> <strong>Print</strong> <strong>Server</strong> and <strong>the</strong> attached<br />
printer should be powered on.<br />
1. Insert <strong>the</strong> supplied CD-ROM in<strong>to</strong> your drive.<br />
The “<strong>Print</strong> <strong>Server</strong> Installation” screen is displayed.<br />
)
Windows Peer-<strong>to</strong>-Peer <strong>Print</strong>ing 27<br />
i<br />
<strong>SysKonnect</strong> <strong>SK</strong>-<strong>54P1</strong> <strong>802.11g</strong> <strong>Wireless</strong> <strong>Print</strong> <strong>Server</strong><br />
Figure 9. <strong>Print</strong> <strong>Server</strong> Installation Screen<br />
2. If <strong>the</strong> setup program does not start, run Setup.exe in <strong>the</strong> root folder.<br />
3. Click <strong>the</strong> INSTALLATION but<strong>to</strong>n.<br />
4. On <strong>the</strong> following screen select USER INSTALL.<br />
5. Follow <strong>the</strong> instructions <strong>to</strong> complete <strong>the</strong> installation of <strong>the</strong> peer-<strong>to</strong>-peer printer port driver.<br />
(If <strong>the</strong>re is a problem with <strong>the</strong> installation refer <strong>to</strong> chapter 10 "Troubleshooting" on page<br />
83.)<br />
The printer driver setup will be executed.<br />
In future, you can use START > PROGRAMS > PRINT SERVER DRIVER > PRINTER PORT SETUP <strong>to</strong><br />
run <strong>the</strong> program again.<br />
PTP <strong>Print</strong>er Port Setup<br />
The program will search for print servers on <strong>the</strong> network, and a screen like <strong>the</strong> following will<br />
be displayed.<br />
Figure 10. <strong>Print</strong>er Port Setup (peer-<strong>to</strong>-peer printing)
28 3 Windows Configuration<br />
The name of <strong>the</strong> attached printer will be displayed if possible. If "No printer" is displayed,<br />
check that <strong>the</strong> printer is properly connected and powered on.<br />
If your <strong>SysKonnect</strong> <strong>SK</strong>-<strong>54P1</strong> <strong>802.11g</strong> <strong>Wireless</strong> <strong>Print</strong> <strong>Server</strong> is not listed:<br />
1. Click <strong>the</strong> REFRESH but<strong>to</strong>n.<br />
2. Check that both <strong>the</strong> <strong>SysKonnect</strong> <strong>Print</strong> <strong>Server</strong> and <strong>the</strong> printer are properly connected and<br />
powered on.<br />
3. Check that <strong>the</strong> <strong>SysKonnect</strong> <strong>Print</strong> <strong>Server</strong> has been configured. (Use <strong>the</strong> setup wizard on<br />
<strong>the</strong> CD-ROM.)<br />
4. If using TCP/IP, try installing <strong>the</strong> NetBEUI pro<strong>to</strong>col.<br />
(For details, see section "Checking your Network Pro<strong>to</strong>cols (Windows 9x)" on page 22.).<br />
Then try again.<br />
5. Select <strong>the</strong> port <strong>to</strong> which <strong>the</strong> <strong>SysKonnect</strong> <strong>SK</strong>-<strong>54P1</strong> <strong>802.11g</strong> <strong>Wireless</strong> <strong>Print</strong> <strong>Server</strong> is connected.<br />
6. Click NEXT.<br />
If you see <strong>the</strong> following error message, ei<strong>the</strong>r install Internet Explorer 4 or later, or follow<br />
<strong>the</strong> procedure in section "Windows <strong>Print</strong>ing Problems" on page 86.<br />
Figure 11. Error Message: “Required File not found”<br />
A pop-up message will inform you if <strong>the</strong> port has been created successfully.<br />
Then a screen like <strong>the</strong> following will be displayed.<br />
Figure 12. “Configure <strong>Print</strong>er Port” Screen<br />
7. Select <strong>the</strong> correct Windows printer in <strong>the</strong> printers list.<br />
8. Click <strong>the</strong> CONNECT but<strong>to</strong>n.<br />
9. If <strong>the</strong> correct printer type is not listed, click ADD NEW PRINTER <strong>to</strong> run <strong>the</strong> Windows “Add<br />
<strong>Print</strong>er” wizard.<br />
Step through <strong>the</strong> wizard and install <strong>the</strong> required printer:<br />
• Select <strong>the</strong> correct printer manufacturer and model, or use <strong>the</strong> HAVE DI<strong>SK</strong> option if<br />
appropriate.
Windows Peer-<strong>to</strong>-Peer <strong>Print</strong>ing 29<br />
i<br />
Epson Spooler Manager<br />
<strong>SysKonnect</strong> <strong>SK</strong>-<strong>54P1</strong> <strong>802.11g</strong> <strong>Wireless</strong> <strong>Print</strong> <strong>Server</strong><br />
We recommend changing <strong>the</strong> printer name <strong>to</strong> indicate which device is on<br />
(e.g. HP2100 on SCA43600_P1).<br />
• If you were asked about sharing <strong>the</strong> printer, do not enable SHARING.<br />
When <strong>the</strong> printer installation is finished, it will be listed in <strong>the</strong> “Configure <strong>Print</strong>er Port”<br />
screen above.<br />
• Select <strong>the</strong> printer.<br />
• Click CONNECT.<br />
The installation is now complete. You can print now by using this printer. To install additional<br />
printers, repeat <strong>the</strong> instructions given in step 9.<br />
If using <strong>the</strong> Epson Spooler Manager, this program must be disabled, as follows:<br />
1. Run <strong>the</strong> Epson Spooler Manager.<br />
2. Select QUEUE SETUP from <strong>the</strong> menu.<br />
3. Click USE PRINT MANAGER FOR THIS PORT.<br />
4. Click OK <strong>to</strong> exit.<br />
Management <strong>Print</strong> jobs can be managed like any Windows printer:<br />
1. Open <strong>the</strong> printers folder (START > SETTINGS > PRINTERS).<br />
2. Double-click any printer <strong>to</strong> see <strong>the</strong> current print jobs.<br />
If <strong>the</strong> printer attached <strong>to</strong> <strong>the</strong> <strong>SysKonnect</strong> <strong>SK</strong>-<strong>54P1</strong> <strong>802.11g</strong> <strong>Wireless</strong> <strong>Print</strong> <strong>Server</strong> has<br />
changed, just run <strong>the</strong> setup program again, and select <strong>the</strong> correct printer.<br />
To delete a port created by this setup program, use <strong>the</strong> Windows facility DELETE PORT:<br />
1. Assuming that you have printers installed, right-click any printer in <strong>the</strong> printers folder.<br />
2. Select PROPERTIES.<br />
3. Click <strong>the</strong> DELETE PORT but<strong>to</strong>n.<br />
This but<strong>to</strong>n is on <strong>the</strong> DETAILS or PORTS tab, depending on your Windows version.<br />
If <strong>the</strong> <strong>SysKonnect</strong> <strong>SK</strong>-<strong>54P1</strong> <strong>802.11g</strong> <strong>Wireless</strong> <strong>Print</strong> <strong>Server</strong>'s IP address has changed, and<br />
you cannot print, delete <strong>the</strong> port (see procedure above) and re-install it.<br />
Advanced Port<br />
Options<br />
Use <strong>the</strong> Start menu <strong>to</strong> run this program in future. The default installation is START > PRO-<br />
GRAMS > PRINT SERVER DRIVER > PRINT DRIVER SETUP.<br />
The options for peer-<strong>to</strong>-peer printing are accessed via <strong>the</strong> PORT SETTINGS but<strong>to</strong>n:<br />
1. Use START > SETTINGS > PRINTERS <strong>to</strong> open <strong>the</strong> printers folder.<br />
2. Right-click <strong>the</strong> printer.<br />
3. Select PROPERTIES.<br />
4. Click <strong>the</strong> PORT SETTINGS but<strong>to</strong>n.<br />
This but<strong>to</strong>n is on <strong>the</strong> DETAILS or PORTS tab, depending on your Windows version.<br />
A screen like <strong>the</strong> following is displayed:
30 3 Windows Configuration<br />
Figure 13. Port Settings (Peer-<strong>to</strong>-Peer Driver)
Windows SMB <strong>Print</strong>ing 31<br />
<strong>SysKonnect</strong> <strong>SK</strong>-<strong>54P1</strong> <strong>802.11g</strong> <strong>Wireless</strong> <strong>Print</strong> <strong>Server</strong><br />
Items shown on this screen are as follows:<br />
Port If desired, click BROWSE <strong>to</strong> select a different print server. If <strong>the</strong> selected<br />
device has multiple ports, <strong>the</strong> SELECT DEVICE PORT but<strong>to</strong>n can be<br />
used <strong>to</strong> select <strong>the</strong> port.<br />
The port name cannot be changed after installation. This name is<br />
shown in <strong>the</strong> printer's properties.<br />
Banner Check this option <strong>to</strong> print a banner page before each print job.<br />
If using a PostScript printer, check <strong>the</strong> PostScript box.<br />
The user name will be printed on <strong>the</strong> banner page.<br />
Retry Interval Sets how often Windows will poll <strong>the</strong> <strong>SysKonnect</strong> <strong>SK</strong>-<strong>54P1</strong><br />
<strong>802.11g</strong> <strong>Wireless</strong> <strong>Print</strong> <strong>Server</strong> <strong>to</strong> establish a connection when <strong>the</strong><br />
printer is busy. Increase this value if you get <strong>to</strong>o many warning messages.<br />
Windows SMB <strong>Print</strong>ing<br />
This method requires no additional software <strong>to</strong> be installed, but <strong>the</strong> NetBEUI or TCP/IP<br />
pro<strong>to</strong>col must be installed on your PC. Use <strong>the</strong> following procedure <strong>to</strong> install <strong>the</strong> <strong>SysKonnect</strong><br />
<strong>SK</strong>-<strong>54P1</strong> <strong>802.11g</strong> <strong>Wireless</strong> <strong>Print</strong> <strong>Server</strong>'s printer as a Windows SMB network printer:<br />
1. Double-click <strong>the</strong> NETWORK NEIGHBORHOOD icon on <strong>the</strong> desk<strong>to</strong>p.<br />
2. Select DETAILS on <strong>the</strong> “View” menu.<br />
3. Locate <strong>the</strong> desired <strong>SysKonnect</strong> <strong>SK</strong>-<strong>54P1</strong> <strong>802.11g</strong> <strong>Wireless</strong> <strong>Print</strong> <strong>Server</strong>, as shown<br />
below:<br />
• If it is <strong>the</strong> same workgroup as your PC, it will be listed on screen.<br />
• If it is in a different workgroup, double-click ENTIRE NETWORK, <strong>the</strong>n double-click <strong>the</strong><br />
appropriate workgroup <strong>to</strong> open it.<br />
Figure 14. Network Neighborhood<br />
4. Double-click <strong>the</strong> SY<strong>SK</strong>ONNECT PRINT SERVER icon <strong>to</strong> view a printer icon for each printer<br />
port.<br />
The comment field may indicate what type of printer is connected <strong>to</strong> <strong>the</strong> port.<br />
5. To install a printer, right-click <strong>the</strong> desired printer icon.<br />
6. Select INSTALL, as shown below.<br />
This will start <strong>the</strong> “Add <strong>Print</strong>er” wizard.
32 3 Windows Configuration<br />
Figure 15. Install SMB <strong>Print</strong>er<br />
7. Follow <strong>the</strong> instructions <strong>to</strong> complete <strong>the</strong> installation.<br />
• For information about <strong>the</strong> question "Do you print from MS-DOS programs?", see<br />
section "<strong>Print</strong>ing from MS-DOS programs" on page 91.<br />
• Select <strong>the</strong> printer manufacturer and model <strong>to</strong> match <strong>the</strong> printer connected <strong>to</strong> this port<br />
on <strong>the</strong> <strong>SysKonnect</strong> <strong>SK</strong>-<strong>54P1</strong> <strong>802.11g</strong> <strong>Wireless</strong> <strong>Print</strong> <strong>Server</strong> and complete <strong>the</strong> wizard.<br />
This printer will now appear in your printers folder (START > SETTINGS > PRINTERS) and can be<br />
used like any o<strong>the</strong>r printer. However, SMB printing is not suitable for large complex print jobs.<br />
You should use <strong>the</strong> peer-<strong>to</strong>-peer printing instead.<br />
Windows with <strong>Server</strong>-based <strong>Print</strong> Queues<br />
With a server-based print queue, <strong>the</strong> <strong>SysKonnect</strong> <strong>SK</strong>-<strong>54P1</strong> <strong>802.11g</strong> <strong>Wireless</strong> <strong>Print</strong> <strong>Server</strong> is<br />
installed on an existing network server (Windows, Unix, or NetWare), ra<strong>the</strong>r than on your PC.<br />
If your network administra<strong>to</strong>r uses this system, each Windows client must be set up as follows:<br />
1. Open your printers folder.<br />
2. Double-click <strong>the</strong> ADD PRINTER but<strong>to</strong>n <strong>to</strong> start <strong>the</strong> “Add <strong>Print</strong>er” wizard.<br />
3. When prompted, select NETWORK PRINTER.<br />
4. If you are asked for <strong>the</strong> network path or <strong>the</strong> queue name, do <strong>the</strong> following:<br />
• On Windows 98/Me, click <strong>the</strong> BROWSE but<strong>to</strong>n, as seen in figure 16.<br />
• On Windows 2000/XP, leave <strong>the</strong> field blank and click NEXT, as seen in figure 17.
Windows with <strong>Server</strong>-based <strong>Print</strong> Queues 33<br />
<strong>SysKonnect</strong> <strong>SK</strong>-<strong>54P1</strong> <strong>802.11g</strong> <strong>Wireless</strong> <strong>Print</strong> <strong>Server</strong><br />
Figure 16. Network Path – Windows 98/Me<br />
Figure 17. Network Path – Windows XP<br />
5. Browse <strong>the</strong> network, and locate <strong>the</strong> server and printer (or print queue) which your network<br />
administra<strong>to</strong>r advised you <strong>to</strong> use.<br />
6. Click OK.<br />
7. Click NEXT.<br />
8. Select <strong>the</strong> correct printer manufacturer and model, as advised by your network<br />
administra<strong>to</strong>r.<br />
9. Click NEXT.<br />
10. Follow <strong>the</strong> instructions <strong>to</strong> complete <strong>the</strong> wizard.<br />
The new printer will be listed with any o<strong>the</strong>r installed printers, and may be selected when<br />
printing from any Windows application.
34 3 Windows Configuration<br />
Adding TCP/IP printing<br />
support<br />
Adding a TCP/IP<br />
remote printer<br />
Windows <strong>Server</strong> Configuration<br />
Windows NT4.0 <strong>Server</strong><br />
If using Windows NT 4.0, Microsoft TCP/IP printing support must be installed.<br />
• If it is already installed, add a TCP/IP remote printer, as described below.<br />
• O<strong>the</strong>rwise, install TCP/IP printing support, <strong>the</strong>n add a TCP/IP remote printer.<br />
To add TCP/IP support, proceed as follows:<br />
1. Go <strong>to</strong> START > SETTINGS > CONTROL PANEL > NETWORK.<br />
2. Select <strong>the</strong> SERVICE option.<br />
3. Ensure that Microsoft TCP/IP <strong>Print</strong>ing is enabled.<br />
If it is not enabled, select <strong>the</strong> ADD option and enable it as usual.<br />
4. If you added services in step 3, reboot <strong>the</strong> computer for <strong>the</strong> changes <strong>to</strong> take affect.<br />
To add a TCP/IP remote printer, proceed as follows:<br />
1. Go <strong>to</strong> START > SETTINGS > PRINTER.<br />
2. Invoke <strong>the</strong> “Add <strong>Print</strong>er” wizard.<br />
3. When prompted with “This printer will be managed by”, select MY COMPUTER.<br />
4. Click Next.<br />
5. Select ADD PORT.<br />
6. Select LPR PORT.<br />
7. Click NEW PORT.<br />
8. In <strong>the</strong> “Name of Address of server providing lpd:” dialog box, enter <strong>the</strong> <strong>SysKonnect</strong> <strong>Print</strong><br />
<strong>Server</strong>'s IP address.<br />
9. In <strong>the</strong> “Name of printer or print queue on that server” dialog box, enter <strong>the</strong> appropriate<br />
logical printer number (e.g. L1) as previously configured on <strong>the</strong> <strong>SysKonnect</strong> <strong>Print</strong> <strong>Server</strong>.<br />
10. Click OK.<br />
11. When returned <strong>to</strong> <strong>the</strong> “<strong>Print</strong>er Ports” window, click CLOSE.<br />
12. Install your printer driver as usual.<br />
13. When prompted whe<strong>the</strong>r or not <strong>the</strong> printer will be shared, select <strong>the</strong> Sharing radio but<strong>to</strong>n.<br />
14. In <strong>the</strong> “Shared” dialog box, enter <strong>the</strong> shared printer name.<br />
(The shared name is how o<strong>the</strong>r users will see this printer.)<br />
15. Click OK <strong>to</strong> save and exit.<br />
Client PCs can now be configured as described in section "Client PC configuration" on page<br />
21.<br />
Windows 2000/2003 <strong>Server</strong><br />
1. Start <strong>the</strong> “Add <strong>Print</strong>er” wizard.<br />
2. Select NETWORK PRINTER.<br />
3. Click NEXT <strong>to</strong> browse for <strong>the</strong> <strong>SysKonnect</strong> <strong>Print</strong> <strong>Server</strong>.<br />
4. Locate and double-click <strong>the</strong> <strong>SysKonnect</strong> <strong>Print</strong> <strong>Server</strong>.<br />
5. Select <strong>the</strong> desired port.<br />
6. Click NEXT.<br />
A message like one of <strong>the</strong> following will be displayed:
Windows <strong>Server</strong> Configuration 35<br />
<strong>SysKonnect</strong> <strong>SK</strong>-<strong>54P1</strong> <strong>802.11g</strong> <strong>Wireless</strong> <strong>Print</strong> <strong>Server</strong><br />
Figure 18. Windows 2000 Message<br />
Figure 19. Windows 2003 Message<br />
7. Click OK.<br />
8. Select <strong>the</strong> correct manufacturer and model for this printer.<br />
9. Follow <strong>the</strong> instructions <strong>to</strong> complete <strong>the</strong> installation.<br />
10. In <strong>the</strong> printers folder, right-click <strong>the</strong> new printer.<br />
11. Select SHARING.<br />
12. Select SHARED AS:.<br />
13. Enter an appropriate name for this printer.<br />
Users will see this name when browsing for <strong>the</strong> printer during installation.<br />
If desired, click ADDITIONAL DRIVERS and install printer drivers for o<strong>the</strong>r versions of Windows,<br />
such as Windows 98. This will assist users during <strong>the</strong> installation process.<br />
14. Click OK <strong>to</strong> close this window.<br />
The configuration is now complete.<br />
Client PCs can now be configured as described in section "Client PC configuration" on page<br />
21.
36 3 Windows Configuration
4 Unix System Configuration<br />
Overview<br />
<strong>SysKonnect</strong> <strong>SK</strong>-<strong>54P1</strong> <strong>802.11g</strong> <strong>Wireless</strong> <strong>Print</strong> <strong>Server</strong><br />
Your <strong>SysKonnect</strong> <strong>SK</strong>-<strong>54P1</strong> <strong>802.11g</strong> <strong>Wireless</strong> <strong>Print</strong> <strong>Server</strong> supports <strong>the</strong> LPD (Line <strong>Print</strong>er<br />
Deamon) Unix printing method, which is supported by all common Unix systems.<br />
You must configure both <strong>the</strong> <strong>SysKonnect</strong> <strong>SK</strong>-<strong>54P1</strong> <strong>802.11g</strong> <strong>Wireless</strong> <strong>Print</strong> <strong>Server</strong> itself and<br />
your Unix system, as described in <strong>the</strong> following sections.<br />
IP Address Configuration<br />
Because it supports dynamic IP address allocation using DHCP (Dynamic Host Configuration<br />
Pro<strong>to</strong>col) or BOOTP (BOOTstrap Pro<strong>to</strong>col), <strong>the</strong> <strong>SysKonnect</strong> <strong>SK</strong>-<strong>54P1</strong> <strong>802.11g</strong> <strong>Wireless</strong> <strong>Print</strong><br />
<strong>Server</strong> ships with an IP address of 0.0.0.0. This is not a valid IP address.<br />
1. Therefore, you must do one of <strong>the</strong> following:<br />
• Check your DHCP server (if you have one), and determine <strong>the</strong> IP address allocated <strong>to</strong><br />
<strong>the</strong> <strong>SysKonnect</strong> <strong>SK</strong>-<strong>54P1</strong> <strong>802.11g</strong> <strong>Wireless</strong> <strong>Print</strong> <strong>Server</strong>.<br />
• Configure your BOOTP server (if you have one), <strong>to</strong> provide an IP address <strong>to</strong> <strong>the</strong> <strong>SysKonnect</strong><br />
<strong>SK</strong>-<strong>54P1</strong> <strong>802.11g</strong> <strong>Wireless</strong> <strong>Print</strong> <strong>Server</strong>, <strong>the</strong>n restart <strong>the</strong> <strong>SysKonnect</strong> <strong>SK</strong>-<strong>54P1</strong><br />
<strong>802.11g</strong> <strong>Wireless</strong> <strong>Print</strong> <strong>Server</strong>.<br />
• Use a Windows platform and run <strong>the</strong> Setup Wizard or BiAdmin utility <strong>to</strong> allocate a valid IP<br />
address <strong>to</strong> <strong>the</strong> <strong>SysKonnect</strong> <strong>SK</strong>-<strong>54P1</strong> <strong>802.11g</strong> <strong>Wireless</strong> <strong>Print</strong> <strong>Server</strong>.<br />
• Add an entry <strong>to</strong> <strong>the</strong> arp table <strong>to</strong> associate <strong>the</strong> hardware address of <strong>the</strong> <strong>SysKonnect</strong> <strong>SK</strong>-<br />
<strong>54P1</strong> <strong>802.11g</strong> <strong>Wireless</strong> <strong>Print</strong> <strong>Server</strong> with <strong>the</strong> desired IP address, as follows:<br />
arp -s IP_Address 00:c0:02:xx:xx:xx<br />
where:<br />
IP_Address is <strong>the</strong> IP address you wish <strong>to</strong> assign <strong>to</strong> <strong>the</strong> <strong>SysKonnect</strong> <strong>SK</strong>-<strong>54P1</strong><br />
<strong>802.11g</strong> <strong>Wireless</strong> <strong>Print</strong> <strong>Server</strong>.<br />
00:c0:02:xx:xx:xx is <strong>the</strong> hardware address of <strong>the</strong> <strong>SysKonnect</strong> <strong>SK</strong>-<strong>54P1</strong><br />
<strong>802.11g</strong> <strong>Wireless</strong> <strong>Print</strong> <strong>Server</strong>.<br />
(The hardware address of <strong>the</strong> <strong>SysKonnect</strong> <strong>SK</strong>-<strong>54P1</strong> <strong>802.11g</strong> <strong>Wireless</strong> <strong>Print</strong> <strong>Server</strong> is<br />
shown on a sticker on <strong>the</strong> base of <strong>the</strong> device.)<br />
Example arp -s 192.168.0.21 00:c0:02:12:34:56<br />
2. You should <strong>the</strong>n assign this IP address <strong>to</strong> <strong>the</strong> <strong>SysKonnect</strong> <strong>SK</strong>-<strong>54P1</strong> <strong>802.11g</strong> <strong>Wireless</strong><br />
<strong>Print</strong> <strong>Server</strong> using your Web browser, as described in chapter 8 "Web-Based Management"<br />
on page 65 .
38 4 Unix System Configuration<br />
O<strong>the</strong>r <strong>Print</strong> <strong>Server</strong> Configurations<br />
The recommended method <strong>to</strong> configure <strong>the</strong> <strong>SysKonnect</strong> <strong>SK</strong>-<strong>54P1</strong> <strong>802.11g</strong> <strong>Wireless</strong> <strong>Print</strong><br />
<strong>Server</strong> is <strong>to</strong> use <strong>the</strong> web-based interface, as described in chapter 8 "Web-Based Management"<br />
on page 65.<br />
• Ensure that <strong>the</strong> TCP/IP settings are correct for your network.<br />
• The logical printers (e.g. L1) must be configured correctly <strong>to</strong> match your system.<br />
LPD Configuration<br />
Configuration for <strong>the</strong> most common platforms is described below.<br />
LPD on IBM AIX 4.15<br />
Before proceeding, ensure that <strong>the</strong> <strong>SysKonnect</strong> <strong>SK</strong>-<strong>54P1</strong> <strong>802.11g</strong> <strong>Wireless</strong> <strong>Print</strong> <strong>Server</strong> has<br />
been assigned an IP address.<br />
To setup your AIX system for LPD printing, proceed as follows:<br />
1. Add <strong>the</strong> <strong>SysKonnect</strong> <strong>SK</strong>-<strong>54P1</strong> <strong>802.11g</strong> <strong>Wireless</strong> <strong>Print</strong> <strong>Server</strong> <strong>to</strong> /etc/hosts.lpd,<br />
using <strong>the</strong> name you assigned <strong>to</strong> <strong>the</strong> <strong>SysKonnect</strong> <strong>SK</strong>-<strong>54P1</strong> <strong>802.11g</strong> <strong>Wireless</strong> <strong>Print</strong> <strong>Server</strong>.<br />
2. Start <strong>the</strong> LPD daemon if it is not running, using <strong>the</strong> following command:<br />
start src -s qdaemon<br />
3. Start <strong>the</strong> system administration <strong>to</strong>ol “smit”.<br />
4. Select PRINT SPOOLING.<br />
5. Create <strong>the</strong> required number of queues (one for each logical printer) by selecting:<br />
• ADD A PRINT QUEUE<br />
• REMOTE (printer attached <strong>to</strong> remote host)<br />
• STANDARD PROCESSING<br />
6. Use <strong>the</strong> following information:<br />
Name of queue <strong>to</strong><br />
add<br />
Hostname for remote<br />
server<br />
Name of queue on<br />
remote server<br />
Type of print spooler<br />
on remote server<br />
Use a single-word queue name, which indicates which printer is<br />
attached.<br />
<strong>SysKonnect</strong> <strong>SK</strong>-<strong>54P1</strong> <strong>802.11g</strong> <strong>Wireless</strong> <strong>Print</strong> <strong>Server</strong> name as<br />
used in /etc/hosts.lpd.<br />
Logical printer number (e.g. L1) <strong>to</strong> service this queue.<br />
Use default value (AIX version xxx).<br />
7. Ensure that <strong>the</strong> logical printers are configured in <strong>the</strong> <strong>SysKonnect</strong> <strong>Print</strong> <strong>Server</strong>.<br />
8. <strong>Print</strong> using <strong>the</strong> following command:<br />
lp -d printer_queue file_name<br />
where<br />
printer_queue is one of <strong>the</strong> entries used in name of queue <strong>to</strong> add.<br />
file_name is <strong>the</strong> file you wish <strong>to</strong> print.
LPD Configuration 39<br />
Procedure<br />
Adding remote printers<br />
i<br />
LPD on System V<br />
<strong>SysKonnect</strong> <strong>SK</strong>-<strong>54P1</strong> <strong>802.11g</strong> <strong>Wireless</strong> <strong>Print</strong> <strong>Server</strong><br />
Before beginning <strong>the</strong> LPD setup, ensure that an IP address has been assigned <strong>to</strong> <strong>the</strong><br />
<strong>SysKonnect</strong> <strong>SK</strong>-<strong>54P1</strong> <strong>802.11g</strong> <strong>Wireless</strong> <strong>Print</strong> <strong>Server</strong>. Keep <strong>the</strong> following points in mind:<br />
• The remote host name is <strong>the</strong> name of <strong>the</strong> <strong>SysKonnect</strong> <strong>SK</strong>-<strong>54P1</strong> <strong>802.11g</strong> <strong>Wireless</strong> <strong>Print</strong><br />
<strong>Server</strong>.<br />
• The remote printer name is <strong>the</strong> print queue name for <strong>the</strong> logical printer. Logical printers<br />
also need <strong>to</strong> be configured on <strong>the</strong> <strong>SysKonnect</strong> <strong>SK</strong>-<strong>54P1</strong> <strong>802.11g</strong> <strong>Wireless</strong> <strong>Print</strong> <strong>Server</strong><br />
itself.<br />
• If your UNIX asks for <strong>the</strong> LPD type, be sure <strong>to</strong> identify <strong>the</strong> service type as BSD. The<br />
<strong>SysKonnect</strong> <strong>SK</strong>-<strong>54P1</strong> <strong>802.11g</strong> <strong>Wireless</strong> <strong>Print</strong> <strong>Server</strong>’s LPD pro<strong>to</strong>col meets BSD system<br />
standards.<br />
• In <strong>the</strong> sample commands shown below, printer_name is <strong>the</strong> name of <strong>the</strong> print queue<br />
serviced by <strong>the</strong> <strong>SysKonnect</strong> <strong>SK</strong>-<strong>54P1</strong> <strong>802.11g</strong> <strong>Wireless</strong> <strong>Print</strong> <strong>Server</strong>, and<br />
Spooler_direc<strong>to</strong>ry is <strong>the</strong> name of <strong>the</strong> direc<strong>to</strong>ry, which is used <strong>to</strong> spool <strong>the</strong> print jobs.<br />
Action Sample command<br />
S<strong>to</strong>p print services /usr/lib/lpshut<br />
Add a system printer /usr/lib/lpadmin -p printer_name -v /<br />
dev/null<br />
Restart <strong>the</strong> print services /usr/lib/lpsched<br />
Enable printing <strong>to</strong> <strong>the</strong> new printer<br />
device<br />
Start accepting jobs for <strong>the</strong> new<br />
printer device<br />
A remote printer is added by inserting <strong>the</strong> following line in <strong>the</strong> /etc/printcap file.<br />
<strong>Print</strong>er_name|Remote_<strong>Print</strong>er_Alias:\<br />
[tab] :lp=:\<br />
[tab] :rm=PS_NAME:\<br />
[tab] :rp=Logical_<strong>Print</strong>er_name:\<br />
[tab] :sd=Spooler_direc<strong>to</strong>ry:\<br />
[tab] :mx#0:<br />
enable printer_name<br />
accept printer_name<br />
Create a spooling direc<strong>to</strong>ry mkdir /usr/spool/Spooler_direc<strong>to</strong>ry<br />
Make spooling daemon <strong>the</strong> owner<br />
of this direc<strong>to</strong>ry<br />
chown daemon /usr/spool/<br />
Spooler_direc<strong>to</strong>ry<br />
Create read/write permissions chmod 775 /usr/spool/Spooler_direc<strong>to</strong>ry<br />
Give permissions <strong>to</strong> LPD processes.<br />
chgrp daemon /usr/spool/<br />
Spooler_direc<strong>to</strong>ry<br />
The entry is really one line, but can be entered as shown.<br />
Use a tab character where shown.<br />
where:<br />
• <strong>Print</strong>er_name is <strong>the</strong> print queue name used <strong>to</strong> s<strong>to</strong>re jobs for <strong>the</strong> corresponding logical<br />
printer.<br />
• PS_NAME is <strong>the</strong> <strong>SysKonnect</strong> <strong>Print</strong> <strong>Server</strong> name defined in /etc/hosts.
40 4 Unix System Configuration<br />
• Logical_<strong>Print</strong>er_name is <strong>the</strong> logical printer name on <strong>the</strong> <strong>SysKonnect</strong> <strong>Print</strong> <strong>Server</strong><br />
(e.g. L1).<br />
• Spooler_direc<strong>to</strong>ry is <strong>the</strong> direc<strong>to</strong>ry you created, see row 6 of <strong>the</strong> procedure table.<br />
Example Marketing|RP1_PS123456:\<br />
[tab] :lp=:\<br />
[tab] :rm=PS_Rm203:\<br />
[tab] :rp=L1:\<br />
[tab] :sd=/usr/spool/Marketing:\<br />
[tab] :mx#0:<br />
Repeat this process for each logical printer/print queue combination that you wish <strong>to</strong> create.<br />
LPD on Linux<br />
If using <strong>the</strong> command line, <strong>the</strong> procedure is <strong>the</strong> same as for System V (above).<br />
On recent Linux distributions, you can use <strong>the</strong> graphical X-windows interface instead of <strong>the</strong><br />
command line. The procedure is described below, but may vary according <strong>to</strong> your version of<br />
Linux.<br />
1. Start your X-windows shell.<br />
2. Select CONTROL PANEL > PRINTER CONFIGURATION.<br />
3. Select ADD.<br />
4. For <strong>the</strong> printer type, select REMOTE UNIX (LPD) QUEUE.<br />
5. Use <strong>the</strong> following data <strong>to</strong> complete <strong>the</strong> resulting dialog.<br />
Name Enter a name for this printer.<br />
Spool Direc<strong>to</strong>ry /var/spool/lpd/name_of_printer<br />
File Limit 0 (no limit)<br />
Remote Host Name or IP address of <strong>SysKonnect</strong> <strong>SK</strong>-<strong>54P1</strong> <strong>802.11g</strong> <strong>Wireless</strong><br />
<strong>Print</strong> <strong>Server</strong><br />
e.g. SC3000014<br />
Note:<br />
Host file entry is required <strong>to</strong> use <strong>the</strong> name instead of IP address.<br />
Remote Queue L1<br />
where 1 is <strong>the</strong> logical printer number.<br />
6. Save this data.<br />
7. Exit <strong>the</strong> printer configuration.<br />
Configuration is now completed, and <strong>the</strong> printer is now available for use.
LPD Configuration 41<br />
Procedure<br />
Adding remote printers<br />
i<br />
LPD on BSD<br />
<strong>SysKonnect</strong> <strong>SK</strong>-<strong>54P1</strong> <strong>802.11g</strong> <strong>Wireless</strong> <strong>Print</strong> <strong>Server</strong><br />
Before continuing, ensure that an IP address has been assigned <strong>to</strong> <strong>the</strong> <strong>SysKonnect</strong> <strong>SK</strong>-<strong>54P1</strong><br />
<strong>802.11g</strong> <strong>Wireless</strong> <strong>Print</strong> <strong>Server</strong>.<br />
Remember <strong>the</strong> following:<br />
• The remote host name is <strong>the</strong> name of <strong>the</strong> <strong>SysKonnect</strong> <strong>Print</strong> <strong>Server</strong>.<br />
• The remote printer name is <strong>the</strong> logical printer (e.g. L1) on <strong>the</strong> <strong>SysKonnect</strong> <strong>Print</strong> <strong>Server</strong>.<br />
• If asked for <strong>the</strong> LPD type, enter <strong>the</strong> service type as BSD.<br />
• In <strong>the</strong> sample commands shown below, printer_name is <strong>the</strong> print queue serviced by <strong>the</strong><br />
logical printer on <strong>the</strong> <strong>SysKonnect</strong> <strong>Print</strong> <strong>Server</strong>, and Spooler_dir is <strong>the</strong> name of <strong>the</strong><br />
direc<strong>to</strong>ry, which is used <strong>to</strong> spool <strong>the</strong> print jobs.<br />
Action Sample Command<br />
Create a spooling direc<strong>to</strong>ry mkdir /usr/spool/Spooler_dir<br />
Set spooling daemon as owner<br />
of this direc<strong>to</strong>ry<br />
A remote printer is added by inserting <strong>the</strong> following line in <strong>the</strong> /etc/printcap file.<br />
<strong>Print</strong>er_name|Remote_<strong>Print</strong>er_Alias:\<br />
[tab] :lp=:\<br />
[tab] :rm=PS_NAME:\<br />
[tab] :rp=Logical_<strong>Print</strong>er_name:\<br />
[tab] :sd=Spooler_direc<strong>to</strong>ry:\<br />
[-tab] :mx#0:<br />
chown daemon /usr/spool/Spooler_dir<br />
Create read/write permissions chmod 775 /usr/spool/Spooler_dir<br />
Give permissions <strong>to</strong> LPD processes<br />
chgrp daemon /usr/spool/Spooler_dir<br />
Start lpc print mechanism lpc start printer_name<br />
The entry is really one line, but can be entered as shown.<br />
Use a tab character where shown.<br />
where:<br />
• <strong>Print</strong>er_name is <strong>the</strong> print queue name used <strong>to</strong> s<strong>to</strong>re jobs for <strong>the</strong> corresponding logical<br />
printer.<br />
• PS_NAME is <strong>the</strong> <strong>SysKonnect</strong> <strong>SK</strong>-<strong>54P1</strong> <strong>802.11g</strong> <strong>Wireless</strong> <strong>Print</strong> <strong>Server</strong> name defined in /<br />
etc/hosts.<br />
• Logical_<strong>Print</strong>er_name is <strong>the</strong> logical printer name on <strong>the</strong> <strong>SysKonnect</strong> <strong>Print</strong> <strong>Server</strong>.<br />
(e.g. L1)<br />
• Spooler_direc<strong>to</strong>ry is <strong>the</strong> direc<strong>to</strong>ry you created in row 1 of <strong>the</strong> procedure table.
42 4 Unix System Configuration<br />
Example Marketing|RP1_PS123456:\<br />
[tab] :lp=:\<br />
[tab] :rm=PS_Rm203:\<br />
[tab] :rp=L1:\<br />
[tab] :sd=/usr/spool/Marketing:\<br />
[tab] :mx#0:<br />
Repeat this process for each logical printer/print queue combination that you wish <strong>to</strong> create.<br />
<strong>Print</strong>ing using LPD<br />
For LPD printing instructions, refer <strong>to</strong> your UNIX manual. The following example is for a BSD<br />
system:<br />
lpr -P printer_name filename<br />
where:<br />
• printer_name is <strong>the</strong> name of <strong>the</strong> print queue defined on <strong>the</strong> Unix host.<br />
• filename is <strong>the</strong> name of <strong>the</strong> file you wish <strong>to</strong> print.<br />
Example lpr -P Marketing /etc/hosts<br />
In <strong>the</strong> example above, <strong>the</strong> /etc/hosts file is sent <strong>to</strong> <strong>the</strong> printer queue “Marketing”. It will <strong>the</strong>n be<br />
sent <strong>to</strong> <strong>the</strong> logical printer associated with this queue.
5 Novell NetWare Configuration<br />
Overview<br />
<strong>SysKonnect</strong> <strong>SK</strong>-<strong>54P1</strong> <strong>802.11g</strong> <strong>Wireless</strong> <strong>Print</strong> <strong>Server</strong><br />
The <strong>SysKonnect</strong> <strong>Print</strong> <strong>Server</strong> must be configured as a valid device on your TCP/IP network.<br />
This printing method uses LPR (Line <strong>Print</strong>er Remote) over TCP/IP, not <strong>the</strong> Netware pro<strong>to</strong>col.<br />
To use NDPS (Novell Distributed <strong>Print</strong>ing Services), <strong>the</strong> Novell server must be running Novell<br />
NetWare 5, and <strong>the</strong> PCs (clients) must be running IntranetWare Client V2.2. or later.<br />
The following procedure is designed <strong>to</strong> enable public access printing under NDPS. Public access<br />
printing allows anybody on <strong>the</strong> network <strong>to</strong> access <strong>the</strong> printer.<br />
Creating an NDPS Manager Object<br />
If an NDPS Manager Object already exists, skip this procedure and proceed <strong>to</strong> section "Creating<br />
an NDPS <strong>Print</strong>er Agent" on page 44.<br />
1. Login <strong>to</strong> NetWare 5.0 <strong>Server</strong> as Admin and start <strong>the</strong> NetWare Administra<strong>to</strong>r program<br />
nwadmn32.exe.<br />
2. Select <strong>the</strong> container on NetWare Administra<strong>to</strong>r where you want <strong>the</strong> NDPS Manager<br />
object <strong>to</strong> reside (e.g. TESUPP).<br />
3. Select CREATE > OBJECT from <strong>the</strong> menu bar <strong>to</strong> view <strong>the</strong> “New Object” dialog.<br />
4. Select NDPS MANAGER as <strong>the</strong> object <strong>to</strong> create.<br />
The “Create NDPS Manager Object” window is displayed, as shown below.<br />
<strong>SysKonnect</strong> MGR<br />
Figure 20. Create NDPS Manager Object<br />
5. Type a name in <strong>the</strong> field “NDPS Manager Name” (e.g. <strong>SysKonnect</strong>MGR as shown in figure<br />
20).<br />
6. Browse <strong>the</strong> field “Resident <strong>Server</strong>” and select where you want <strong>the</strong> NDPS Manager object<br />
<strong>to</strong> be assigned (e.g. TECH_50.TESUPP as seen in figure 20).<br />
7. Browse <strong>the</strong> field “Database Volume” and select where you want <strong>the</strong> NDPS Manager<br />
database <strong>to</strong> be assigned (e.g. TECH_50_SYS.TESUPP as seen in figure 20).<br />
8. Click CREATE.<br />
The new NDPS Manager will be displayed in <strong>the</strong> main browser window.<br />
9. After creating an NDPS Manager, you can create NDPS printers by using NetWare<br />
Administra<strong>to</strong>r, as explained below.
44 5 Novell NetWare Configuration<br />
To start <strong>the</strong> NDPS Manager in future, proceed as follows:<br />
1. enter <strong>the</strong> following command at <strong>the</strong> console: LOAD NDPSM.<br />
2. Select <strong>the</strong> NDPS Manager object.<br />
To start <strong>the</strong> NDPS Manager whenever you bring up <strong>the</strong> server, add a command like <strong>the</strong> following<br />
<strong>to</strong> your server's Au<strong>to</strong>exec.ncf file:<br />
LOAD NDPSM <strong>SysKonnect</strong>MGR.TeSupp<br />
The last item is <strong>the</strong> name of <strong>the</strong> NDPS Manager object you wish <strong>to</strong> load.<br />
Creating an NDPS <strong>Print</strong>er Agent<br />
To create Public Access <strong>Print</strong>ers using <strong>the</strong> NDPS Manager Object in NetWare Administra<strong>to</strong>r,<br />
proceed as follows:<br />
1. Start <strong>the</strong> NDPS Manager object you will be using <strong>to</strong> control <strong>the</strong> printer agent.<br />
2. At <strong>the</strong> identification page, click <strong>the</strong> PRINTER AGENT LIST.<br />
3. Click NEW.<br />
The “Create <strong>Print</strong>er Agent” window will be displayed:<br />
<strong>SK</strong>-<strong>54P1</strong><br />
<strong>SysKonnect</strong>MGR.TeSupp<br />
Figure 21. Create <strong>Print</strong>er Agent<br />
4. In <strong>the</strong> field “<strong>Print</strong>er Agent (PA) Name” enter <strong>the</strong> desired name for <strong>the</strong> printer agent (e.g.<br />
<strong>SK</strong>-<strong>54P1</strong>).<br />
5. In <strong>the</strong> field “NPDS Manager Name” select <strong>the</strong> NPDS Manager <strong>to</strong> be used.<br />
Normally, <strong>the</strong> NDPS Manager will be <strong>the</strong> NDPS Manager object you are using.<br />
6. In <strong>the</strong> field “Gateway Types” select NOVELL PRINTER GATEWAY (see figure 21).<br />
7. Click OK.<br />
8. Select <strong>the</strong> available printer.<br />
9. In <strong>the</strong> field “<strong>Connection</strong> Type” select REMOTE (LPR ON IP).<br />
10. Click NEXT.<br />
The “Configure Port Handler” screen is displayed.
Creating an NDPS <strong>Print</strong>er Agent 45<br />
<strong>SysKonnect</strong> <strong>SK</strong>-<strong>54P1</strong> <strong>802.11g</strong> <strong>Wireless</strong> <strong>Print</strong> <strong>Server</strong><br />
Figure 22. Configure Port Handler<br />
11. In <strong>the</strong> field “Host Address”, enter <strong>the</strong> IP address previously assigned <strong>to</strong> <strong>the</strong> <strong>SysKonnect</strong><br />
<strong>Print</strong> <strong>Server</strong> device.<br />
12. In <strong>the</strong> field “<strong>Print</strong>er Name”, enter <strong>the</strong> logical port name on <strong>the</strong> <strong>SysKonnect</strong> <strong>Print</strong> <strong>Server</strong><br />
(L1).<br />
13. Click FINISH.<br />
14. Select appropriate drivers for Windows 98 etc. as required.<br />
The new printer agent will now appear in <strong>the</strong> “<strong>Print</strong>er Agent List” window.<br />
Repeat this procedure for any o<strong>the</strong>r ports on <strong>the</strong> <strong>Print</strong> <strong>Server</strong>, or for any o<strong>the</strong>r logical printers<br />
you wish <strong>to</strong> use.<br />
Client PCs can now be configured as described in section "Client PC configuration" on page<br />
21.
46 5 Novell NetWare Configuration
6 Macin<strong>to</strong>sh Configuration<br />
<strong>SysKonnect</strong> <strong>SK</strong>-<strong>54P1</strong> <strong>802.11g</strong> <strong>Wireless</strong> <strong>Print</strong> <strong>Server</strong><br />
Macin<strong>to</strong>sh (AppleTalk)<br />
The <strong>SysKonnect</strong> <strong>SK</strong>-<strong>54P1</strong> <strong>802.11g</strong> <strong>Wireless</strong> <strong>Print</strong> <strong>Server</strong> supports AppleTalk (E<strong>the</strong>rTalk),<br />
PAP, ATP, NBP, ZIP and DDP pro<strong>to</strong>cols, enabling Macin<strong>to</strong>sh computers on <strong>the</strong> network <strong>to</strong><br />
view and use <strong>the</strong> <strong>SysKonnect</strong> <strong>SK</strong>-<strong>54P1</strong> <strong>802.11g</strong> <strong>Wireless</strong> <strong>Print</strong> <strong>Server</strong> as a regular AppleTalk<br />
printer.<br />
Normally, no configuration is required.<br />
Software Requirements<br />
System 9.x OS or newer.<br />
AppleTalk Setup<br />
1. Click <strong>the</strong> apple icon.<br />
2. Choose CONTROL PANEL > APPLETALK.<br />
3. Ensure that ETHERNET is selected under “AppleTalk <strong>Connection</strong>”.<br />
4. Click CHOOSER.<br />
The chooser panel will open.<br />
5. Click on ei<strong>the</strong>r <strong>the</strong> LaserWriter 8 icon (recommended) or <strong>the</strong> LaserWriter 7 icon.<br />
LaserWriter 8 makes use of <strong>the</strong> fonts installed in <strong>the</strong> printer itself, so <strong>the</strong> printing<br />
response time is quicker.<br />
LaserWriter 7 uses <strong>the</strong> fonts installed in <strong>the</strong> computer, which increases network traffic<br />
and takes more printing time.<br />
6. Select a PostScript printer from <strong>the</strong> list.<br />
7. Click CREATE.<br />
The PPD (PostScript <strong>Print</strong>er Description) will be searched au<strong>to</strong>matically.<br />
8. Select a printer description from <strong>the</strong> list.<br />
9. Click SELECT.<br />
The configuration is now complete.<br />
<strong>Print</strong>ing<br />
<strong>Print</strong>ing with <strong>the</strong> <strong>SysKonnect</strong> <strong>SK</strong>-<strong>54P1</strong> <strong>802.11g</strong> <strong>Wireless</strong> <strong>Print</strong> <strong>Server</strong> installed in an Apple-<br />
Talk network is identical <strong>to</strong> normal printing.<br />
1. Select FILE > PRINT.<br />
2. Select <strong>the</strong> desired printer.<br />
Advanced Setup and Management<br />
In a mixed Windows PC/Macin<strong>to</strong>sh environment, you can use BiAdmin <strong>to</strong> configure <strong>the</strong><br />
<strong>SysKonnect</strong> <strong>SK</strong>-<strong>54P1</strong> <strong>802.11g</strong> <strong>Wireless</strong> <strong>Print</strong> <strong>Server</strong>. For details, see section<br />
"Configuration" on page 54.
48 6 Macin<strong>to</strong>sh Configuration<br />
Macin<strong>to</strong>sh OS X<br />
If using LPR printing, you need <strong>to</strong> ensure <strong>the</strong> <strong>SysKonnect</strong> <strong>SK</strong>-<strong>54P1</strong> <strong>802.11g</strong> <strong>Wireless</strong> <strong>Print</strong><br />
<strong>Server</strong> has a valid IP address before configuring your Mac.<br />
To configure your Mac for LPR printing, proceed as follows:<br />
1. Select <strong>the</strong> PRINTER LIST icon.<br />
Figure 23. <strong>Print</strong>er List<br />
2. Click <strong>the</strong> ADD PRINTER but<strong>to</strong>n.<br />
3. Choose LPR PRINTERS USING IP, as shown in figure 24.<br />
Figure 24. LPR Screen<br />
4. Enter <strong>the</strong> IP address of <strong>the</strong> <strong>SysKonnect</strong> <strong>Print</strong> <strong>Server</strong> in <strong>the</strong> LPR printer's address field.<br />
5. Enter <strong>the</strong> queue name (L1).<br />
6. Select <strong>the</strong> printer model from <strong>the</strong> drop-down list.<br />
7. Click ADD.<br />
The configuration is now complete.
7 BiAdmin Management Utility<br />
<strong>SysKonnect</strong> <strong>SK</strong>-<strong>54P1</strong> <strong>802.11g</strong> <strong>Wireless</strong> <strong>Print</strong> <strong>Server</strong><br />
This chapter describes <strong>the</strong> installation and operation of <strong>the</strong> BiAdmin Configuration & Management<br />
program.<br />
Requirements<br />
This program requires:<br />
• Windows 95, Windows 98 or Me<br />
• Windows NT 4.0, Windows 2000 or XP<br />
Additional recommendations:<br />
• Screen resolution of 800 * 600 or greater<br />
Installation<br />
Use <strong>the</strong> supplied CD-ROM. This CD-ROM will usually au<strong>to</strong>-run. If au<strong>to</strong>-run is disabled on your<br />
PC, run <strong>the</strong> setup.exe program in <strong>the</strong> root folder.<br />
After selecting Installation you have two choices for <strong>the</strong> BiAdmin installation:<br />
• If using ADMINISTRATOR option, BiAdmin is always installed.<br />
• If using <strong>the</strong> CUSTOM option, BiAdmin has <strong>to</strong> be explicitly selected.<br />
Operation<br />
Start <strong>the</strong> program by using <strong>the</strong> icon created by <strong>the</strong> setup program.<br />
When run, <strong>the</strong> program searches <strong>the</strong> network for all active print servers, <strong>the</strong>n lists <strong>the</strong>m on<br />
screen, as shown by <strong>the</strong> example screen below.<br />
Main Screen<br />
Figure 25. BIADMIN Main Screen
50 7 BiAdmin Management Utility<br />
Device List<br />
The left panel displays a list of all <strong>SysKonnect</strong> <strong>SK</strong>-<strong>54P1</strong> <strong>802.11g</strong> <strong>Wireless</strong> <strong>Print</strong> <strong>Server</strong>s found<br />
on <strong>the</strong> network. When a <strong>SysKonnect</strong> <strong>SK</strong>-<strong>54P1</strong> <strong>802.11g</strong> <strong>Wireless</strong> <strong>Print</strong> <strong>Server</strong> is selected from<br />
<strong>the</strong> list, its details are displayed in <strong>the</strong> right panel.<br />
i If <strong>the</strong> IP address is "Null", please click <strong>the</strong> REFRESH icon <strong>to</strong> get <strong>the</strong> value again.<br />
If <strong>the</strong> desired <strong>SysKonnect</strong> <strong>Print</strong> <strong>Server</strong> is not listed, try <strong>the</strong> following:<br />
• Check that <strong>the</strong> device is installed and on.<br />
• Refresh <strong>the</strong> list.<br />
• If <strong>the</strong> <strong>SysKonnect</strong> <strong>Print</strong> <strong>Server</strong> is on ano<strong>the</strong>r LAN segment, use <strong>the</strong> INITDEVICE ><br />
ATTACHED REMOTE menu option <strong>to</strong> locate and display <strong>the</strong> demanded <strong>SysKonnect</strong> <strong>Print</strong><br />
<strong>Server</strong>.<br />
Icons<br />
Device Status<br />
Menu equivalent: MAIN > DEVICE STATUS<br />
All of <strong>the</strong> settings for <strong>the</strong> current device are displayed in a read-only scrollable<br />
list in <strong>the</strong> left panel.<br />
You can use <strong>the</strong> SAVE TO FILE and RESTORE TO DEVICE but<strong>to</strong>ns on this<br />
screen <strong>to</strong> save a copy of <strong>the</strong> selected device's config file <strong>to</strong> your PC, or res<strong>to</strong>re<br />
a previously saved file <strong>to</strong> <strong>the</strong> selected <strong>SysKonnect</strong> <strong>SK</strong>-<strong>54P1</strong><br />
<strong>802.11g</strong> <strong>Wireless</strong> <strong>Print</strong> <strong>Server</strong>.<br />
Figure 26. Device Information
Operation 51<br />
<strong>SysKonnect</strong> <strong>SK</strong>-<strong>54P1</strong> <strong>802.11g</strong> <strong>Wireless</strong> <strong>Print</strong> <strong>Server</strong><br />
<strong>Print</strong>er Status<br />
Menu equivalent: MAIN > PRINTER STATUS<br />
After selecting this icon, a DETAIL but<strong>to</strong>n will be available <strong>to</strong> show more information<br />
about <strong>the</strong> printer.<br />
Figure 27. <strong>Print</strong>er Status<br />
You can select <strong>the</strong> desired port from <strong>the</strong> drop-down list <strong>to</strong> display <strong>the</strong> current<br />
status of <strong>the</strong> printer attached <strong>to</strong> <strong>the</strong> port. Possible states are:<br />
• “Status”: ON-LINE, OFF-LINE, or OUT OF PAPER<br />
• “<strong>Print</strong>ing Information”: IDLE, PRINTING<br />
If <strong>the</strong> printer is bi-directional, and is not busy, <strong>the</strong> PRINTER CONFIGURATION<br />
but<strong>to</strong>n will be available, allowing you <strong>to</strong> change <strong>the</strong> configuration of <strong>the</strong><br />
attached printer. This but<strong>to</strong>n will be grayed out if <strong>the</strong> printer does not<br />
support this option, or if <strong>the</strong> printer is busy printing.<br />
Configuration<br />
Menu Equivalent: MAIN > CONFIGURE<br />
This option allows you <strong>to</strong> configure <strong>the</strong> selected <strong>SysKonnect</strong> <strong>Print</strong> <strong>Server</strong>.<br />
For details see <strong>the</strong> following section "Configuration" on page 54.<br />
Wizard<br />
This <strong>SysKonnect</strong> <strong>Print</strong> <strong>Server</strong> Wizard allows you <strong>to</strong> do <strong>the</strong> basic configuration<br />
for <strong>the</strong> selected device. The screens are similar <strong>to</strong> <strong>the</strong> Wizard run from<br />
<strong>the</strong> CD-ROM, as described in section "Using <strong>the</strong> Windows Wizard" on<br />
page 19.
52 7 BiAdmin Management Utility<br />
Upgrade<br />
Menu Equivalent: MAIN > UPGRADE<br />
This option allows you <strong>to</strong> upgrade <strong>the</strong> firmware for <strong>the</strong> selected<br />
<strong>SysKonnect</strong> <strong>Print</strong> <strong>Server</strong>. Before using this option, you need <strong>to</strong> obtain <strong>the</strong><br />
.bin file for <strong>the</strong> firmware upgrade, and copy it <strong>to</strong> <strong>the</strong> same direc<strong>to</strong>ry as<br />
BiAdmin.<br />
Refresh<br />
Menu Equivalent: MAIN > REFRESH<br />
Select this icon <strong>to</strong> update <strong>the</strong> <strong>SysKonnect</strong> <strong>SK</strong>-<strong>54P1</strong> <strong>802.11g</strong> <strong>Wireless</strong> <strong>Print</strong><br />
<strong>Server</strong> device listing after changing <strong>the</strong> name or IP address.<br />
Exit<br />
Menu Equivalent: MAIN > EXIT<br />
Exit <strong>the</strong> BiAdmin program. This does not save any changes you have<br />
made; <strong>to</strong> save changes you must use <strong>the</strong> saving option on each screen.
Operation 53<br />
Menus<br />
Main Menu<br />
InitDevice Menu<br />
Diagnostics menu<br />
<strong>SysKonnect</strong> <strong>SK</strong>-<strong>54P1</strong> <strong>802.11g</strong> <strong>Wireless</strong> <strong>Print</strong> <strong>Server</strong><br />
DEVICE STATUS Same as DEVICE icon.<br />
PRINTER STATUS Same as PRINTER STATUS icon.<br />
CONFIGURE Same as CONFIGURE icon.<br />
UPGRADE Same as UPGRADE icon.<br />
REFRESH Same as REFRESH icon.<br />
EXIT Same as EXIT icon.<br />
RESET DEVICE This will cause <strong>the</strong> device <strong>to</strong> reboot. This should be done after<br />
making any configuration changes, or if <strong>the</strong> device s<strong>to</strong>ps responding<br />
after some problems.<br />
RESTORE TO FACTORY<br />
DEFAULT<br />
This will res<strong>to</strong>re all device values <strong>to</strong> <strong>the</strong>ir fac<strong>to</strong>ry defaults. To res<strong>to</strong>re<br />
only <strong>the</strong> current screen, use <strong>the</strong> SET TO DEFAULT but<strong>to</strong>n on<br />
<strong>the</strong> screen.<br />
ATTACHED REMOTE This is used <strong>to</strong> connect <strong>to</strong> a <strong>SysKonnect</strong> <strong>Print</strong> <strong>Server</strong> device on<br />
ano<strong>the</strong>r LAN segment. You need <strong>to</strong> know <strong>the</strong> IP address of <strong>the</strong><br />
remote <strong>SysKonnect</strong> <strong>Print</strong> <strong>Server</strong>.<br />
If your LAN does not have a router, you can ignore this option.<br />
CONNECTED PROTOCOL This option allows you <strong>to</strong> designate which LAN pro<strong>to</strong>col will be<br />
used for communication between <strong>the</strong> selected device and this<br />
application. You should select one pro<strong>to</strong>col only.<br />
PRINT TEST PAGE Use this option <strong>to</strong> print a test sheet from <strong>the</strong> selected<br />
<strong>SysKonnect</strong> <strong>Print</strong> <strong>Server</strong> port. The test print out will include<br />
status information.
54 7 BiAdmin Management Utility<br />
Configuration<br />
When <strong>the</strong> configuration icon is clicked, or <strong>the</strong> configure option on <strong>the</strong> Main Menu is selected,<br />
a tabbed window will open. The tabs available will vary depending on <strong>the</strong> model selected. For<br />
<strong>the</strong> <strong>SysKonnect</strong> <strong>SK</strong>-<strong>54P1</strong> <strong>802.11g</strong> <strong>Wireless</strong> <strong>Print</strong> <strong>Server</strong>, <strong>the</strong> following tabs are available:<br />
• System<br />
• TCP/IP<br />
• AppleTalk<br />
• NetBEUI<br />
• Internet <strong>Print</strong>ing<br />
• Port<br />
• <strong>Wireless</strong><br />
System Tab<br />
This screen allows you <strong>to</strong>:<br />
• change <strong>the</strong> name of <strong>the</strong> <strong>SysKonnect</strong> <strong>Print</strong> <strong>Server</strong>.<br />
• change <strong>the</strong> password for <strong>the</strong> <strong>SysKonnect</strong> <strong>Print</strong> <strong>Server</strong>.<br />
• set <strong>the</strong> network pro<strong>to</strong>cols used by <strong>the</strong> selected <strong>SysKonnect</strong> <strong>Print</strong> <strong>Server</strong>. (Any pro<strong>to</strong>cols<br />
not used on your LAN may be disabled. This may improve performance.)<br />
Figure 28. System Tab
Operation 55<br />
TCP/IP Tab<br />
<strong>SysKonnect</strong> <strong>SK</strong>-<strong>54P1</strong> <strong>802.11g</strong> <strong>Wireless</strong> <strong>Print</strong> <strong>Server</strong><br />
This tab will allow configuration for <strong>the</strong> TCP/IP network pro<strong>to</strong>col. The basic options are:<br />
• Dynamic IP Address (DHCP) – The IP address is obtained au<strong>to</strong>matically, from a DHCP<br />
server on your network.<br />
• Fixed IP Address – You must enter <strong>the</strong> IP address, subnet mask, and gateway address.<br />
• “IP Address” – Select an unused IP address from <strong>the</strong> address range used on your<br />
LAN.<br />
• “Subnet Mask” – Use <strong>the</strong> same values as PCs on your LAN (or on <strong>the</strong> same LAN<br />
segment, if you have a router).<br />
• “Gateway Address” – Use <strong>the</strong> same values as PCs on your LAN (or on <strong>the</strong> same<br />
LAN segment, if you have a router).<br />
The <strong>SysKonnect</strong> <strong>SK</strong>-<strong>54P1</strong> <strong>802.11g</strong> <strong>Wireless</strong> <strong>Print</strong> <strong>Server</strong> also supports <strong>the</strong> Au<strong>to</strong>-IP function.<br />
If <strong>the</strong> <strong>SysKonnect</strong> <strong>Print</strong> <strong>Server</strong> is set <strong>to</strong> DYNAMIC IP ADDRESS, but <strong>the</strong>re's no DHCP server<br />
found on <strong>the</strong> network, <strong>the</strong> <strong>SysKonnect</strong> <strong>Print</strong> <strong>Server</strong> will get an IP from <strong>the</strong> range of<br />
169.254.1.1 ~ 169.254.254.254 au<strong>to</strong>matically. In this case, even though <strong>the</strong> <strong>SysKonnect</strong> <strong>Print</strong><br />
<strong>Server</strong> was initialized with an Au<strong>to</strong>-IP, it will change <strong>to</strong> DHCP whenever a DHCP server is detected.<br />
Figure 29. TCP/IP Tab<br />
The TCP session parameters should only be changed if advised <strong>to</strong> do so by your network administra<strong>to</strong>r<br />
or print server technical support.
56 7 BiAdmin Management Utility<br />
AppleTalk Tab<br />
Generally, no <strong>SysKonnect</strong> <strong>SK</strong>-<strong>54P1</strong> <strong>802.11g</strong> <strong>Wireless</strong> <strong>Print</strong> <strong>Server</strong> configuration is required in<br />
order <strong>to</strong> use AppleTalk.<br />
This screen allows you <strong>to</strong>:<br />
• set <strong>the</strong> “Zone Name” field <strong>to</strong> determine which Apple systems can gain access <strong>to</strong> this<br />
printer<br />
• select <strong>the</strong> port <strong>to</strong> be used<br />
• enter in <strong>the</strong> “<strong>Print</strong>er Type” field <strong>the</strong> printer driver used for each port.<br />
• set “Communication Pro<strong>to</strong>col” <strong>to</strong> ASCII or BINARY. This must match <strong>the</strong> setting on <strong>the</strong><br />
Apple computer systems using <strong>the</strong> <strong>SysKonnect</strong> <strong>SK</strong>-<strong>54P1</strong> <strong>802.11g</strong> <strong>Wireless</strong> <strong>Print</strong> <strong>Server</strong>.<br />
Figure 30. AppleTalk Tab
Operation 57<br />
NetBEUI Tab<br />
<strong>SysKonnect</strong> <strong>SK</strong>-<strong>54P1</strong> <strong>802.11g</strong> <strong>Wireless</strong> <strong>Print</strong> <strong>Server</strong><br />
This screen allows you <strong>to</strong>:<br />
• choose <strong>the</strong> domain name for <strong>the</strong> selected <strong>SysKonnect</strong> <strong>Print</strong> <strong>Server</strong>.<br />
• set how fast jobs are sent <strong>to</strong> <strong>the</strong> printer by using <strong>the</strong> “Response Time” field.<br />
• set <strong>the</strong> desired option for <strong>the</strong> “Abort Job if Error Occured” setting.<br />
• Yes causes a print job <strong>to</strong> be terminated if a printing error occurs.<br />
• No (default) will try <strong>to</strong> continue but may cause print errors.<br />
Figure 31. NetBEUI Tab
58 7 BiAdmin Management Utility<br />
Internet <strong>Print</strong>ing Tab<br />
The Internet printing feature allows you <strong>to</strong> send print jobs <strong>to</strong> <strong>the</strong> <strong>SysKonnect</strong> <strong>Print</strong> <strong>Server</strong><br />
using Internet e-mail. Please see section "Internet Mail <strong>Print</strong>ing Configuration" on page 79 for<br />
details of using this feature.<br />
Figure 32. Internet <strong>Print</strong>ing Tab
Operation 59<br />
Port Tab<br />
Logical port Logical ports (printers) can be used in <strong>the</strong> Unix environment. The following settings are available:<br />
• “Selected Logical Port” – Select <strong>the</strong> logical printer port you wish <strong>to</strong> configure.<br />
• “Map <strong>to</strong> Physical Port” – Select <strong>the</strong> physical printer port that <strong>the</strong> logical printer will use.<br />
• “Convert LF <strong>to</strong> LF+CR” – If checked, LF (line feed) characters are changed <strong>to</strong> CR+LF<br />
(carriage return + line feed).<br />
• “Prefix of Job” – The printer control string (in hex) that will be sent <strong>to</strong> <strong>the</strong> printer before<br />
each print job. This string cannot exceed 15 characters.<br />
• “Suffix of Job” – The printer control string (in hex) which is <strong>to</strong> be sent <strong>to</strong> <strong>the</strong> printer after<br />
each print job. This string cannot exceed 15 characters.<br />
<strong>SysKonnect</strong> <strong>SK</strong>-<strong>54P1</strong> <strong>802.11g</strong> <strong>Wireless</strong> <strong>Print</strong> <strong>Server</strong><br />
Figure 33. Port Tab<br />
The GET DEFAULTS but<strong>to</strong>n will reset all settings <strong>to</strong> <strong>the</strong>ir fac<strong>to</strong>ry-default values.
60 7 BiAdmin Management Utility<br />
<strong>Wireless</strong> Tab<br />
This tab will be available if <strong>the</strong> selected device has wireless capability.<br />
The screen will change according <strong>to</strong> <strong>the</strong> “Security” mode selection, which has three options:<br />
• DISABLED – no data encryption is used.<br />
• WEP – see below for details.<br />
• WPA – for details see section "<strong>Wireless</strong> Tab – WPA Encryption" on page 62.<br />
WEP encryption If <strong>the</strong> security mode is set <strong>to</strong> WEP, <strong>the</strong> screen will look like as follows:<br />
Figure 34. <strong>Wireless</strong> Tab – WEP Encryption<br />
Change <strong>the</strong> settings <strong>to</strong> suit your environment. Generally, you must match <strong>the</strong> settings of o<strong>the</strong>r<br />
wireless stations. The available settings are described below.<br />
Selected Device Displays <strong>the</strong> name of <strong>the</strong> selected print server.<br />
SSID If using an ESS (Extended Service Set, with multiple access<br />
points) this ID is called an ESSID (Extended Service Set Identifier).<br />
To communicate, all wireless stations must use <strong>the</strong> same SSID/<br />
ESSID. Change this value, or change <strong>the</strong> o<strong>the</strong>r wireless stations<br />
<strong>to</strong> ensure each wireless station has <strong>the</strong> same value.<br />
The default value is blank (null), so <strong>the</strong> wireless station can join<br />
any Ad-hoc group.<br />
Note: The SSID is case-sensitive.
Operation 61<br />
<strong>SysKonnect</strong> <strong>SK</strong>-<strong>54P1</strong> <strong>802.11g</strong> <strong>Wireless</strong> <strong>Print</strong> <strong>Server</strong><br />
Channel No The effect of this setting depends on <strong>the</strong> network type setting:<br />
In Ad-hoc mode, all wireless stations must use <strong>the</strong> same channel<br />
number, although some wireless stations will scan all channels<br />
looking for an ad-hoc group <strong>the</strong>y can join.<br />
In Infrastructure mode, this setting has no effect. The channel is<br />
selected au<strong>to</strong>matically <strong>to</strong> match <strong>the</strong> channel used by <strong>the</strong> access<br />
point.<br />
If you experience interference (shown by lost connections and/or<br />
slow data transfers) you may need <strong>to</strong> experiment with different<br />
channels.<br />
Network Type Select <strong>the</strong> correct value for your wireless LAN.<br />
Ad-hoc mode is used when <strong>the</strong>re is no wireless access point,<br />
and each wireless station communicates directly with o<strong>the</strong>r wireless<br />
stations.<br />
Infrastructure mode is used when each wireless station connects<br />
<strong>to</strong> <strong>the</strong> wireless access point. This also provides access <strong>to</strong> <strong>the</strong><br />
wired LAN.<br />
Security Mode DISABLED – no data encryption is used.<br />
WEP – data is encrypted using <strong>the</strong> WEP standard.<br />
WPA – data is encrypted using <strong>the</strong> WPA-P<strong>SK</strong> standard. This is a<br />
later standard than WEP, and provides much better security than<br />
WEP.<br />
Note: WPA-P<strong>SK</strong> in not available in Ad-hoc mode.<br />
WEP Disable/<br />
Enable<br />
If DISABLED (default), data is not encrypted before being transmitted.<br />
If ENABLED, you must provide ei<strong>the</strong>r <strong>the</strong> 64 bit key table or <strong>the</strong><br />
128 bit keys. The key is used <strong>to</strong> encrypt <strong>the</strong> data before transmission.<br />
WEP Au<strong>the</strong>ntication Options are OPEN SYSTEM or SHARED KEY.<br />
Select <strong>the</strong> method (OPEN SYSTEM or SHARED KEY) used by o<strong>the</strong>r<br />
wireless stations.<br />
SHARED KEY is more secure than OPEN SYSTEM.<br />
WEP Keys 64 BITS/128 BITS<br />
Select 64 BITS or 128 BITS as required <strong>to</strong> match o<strong>the</strong>r wireless<br />
stations on your WLAN. Stations which do not have matching<br />
settings will be unable <strong>to</strong> communicate.<br />
128 bit keys are more secure than 64 bit keys.<br />
DEFAULT KEY<br />
Select <strong>the</strong> key you wish <strong>to</strong> be <strong>the</strong> default. Transmitted data is always<br />
encrypted using <strong>the</strong> DEFAULT KEY; <strong>the</strong> o<strong>the</strong>r keys are for<br />
decryption only.<br />
KEY TABLE (key 1~4)<br />
Enter <strong>the</strong> key values <strong>to</strong> match o<strong>the</strong>r wireless stations on your<br />
WLAN. Note that keys must be entered in Hex. Hex characters<br />
are <strong>the</strong> digits 0 <strong>to</strong> 9, and <strong>the</strong> letters A <strong>to</strong> F.
62 7 BiAdmin Management Utility<br />
<strong>Wireless</strong> Tab – WPA Encryption<br />
If <strong>the</strong> “Security” mode is set <strong>to</strong> WPA, <strong>the</strong> screen will look as follows:<br />
Figure 35. <strong>Wireless</strong> Tab – WPA Encryption<br />
WPA Algorithm Select <strong>the</strong> method used on your LAN.<br />
WPA Keys Enter <strong>the</strong> WPA-P<strong>SK</strong> used by your wireless LAN. The key must<br />
be between 8 and 63 characters in length.
Operation 63<br />
<strong>Wireless</strong> Link Info Screen<br />
<strong>SysKonnect</strong> <strong>SK</strong>-<strong>54P1</strong> <strong>802.11g</strong> <strong>Wireless</strong> <strong>Print</strong> <strong>Server</strong><br />
After clicking <strong>the</strong> LINK INFO but<strong>to</strong>n on <strong>the</strong> wireless screen, a screen like <strong>the</strong> following will be<br />
displayed:<br />
Figure 36. “<strong>Wireless</strong> Link Info” Screen<br />
State Indicates which access point is currently in use.<br />
Current Channel Current channel which has been used<br />
Current TX Rate Current transmitting speed<br />
Throughput (Tx ) Shows how much data has been transmitted per second.<br />
Throughput ( Rx ) Shows how much data has been received per second.<br />
Link Quality Indicates <strong>the</strong> quality of <strong>the</strong> wireless connection.<br />
Signal Strength Indicates <strong>the</strong> strength of <strong>the</strong> wireless signal being received.<br />
i The link quality and signal strength data is not available if using <strong>the</strong> Ad-hoc mode.
64 7 BiAdmin Management Utility
8 Web-Based Management<br />
<strong>SysKonnect</strong> <strong>SK</strong>-<strong>54P1</strong> <strong>802.11g</strong> <strong>Wireless</strong> <strong>Print</strong> <strong>Server</strong><br />
This chapter explains how <strong>to</strong> use your web browser <strong>to</strong> configure <strong>the</strong> <strong>SysKonnect</strong> <strong>SK</strong>-<strong>54P1</strong><br />
<strong>802.11g</strong> <strong>Wireless</strong> <strong>Print</strong> <strong>Server</strong>.<br />
Overview<br />
The <strong>SysKonnect</strong> <strong>SK</strong>-<strong>54P1</strong> <strong>802.11g</strong> <strong>Wireless</strong> <strong>Print</strong> <strong>Server</strong> incorporates <strong>the</strong> HTTP server. This<br />
allows you <strong>to</strong> connect <strong>to</strong> <strong>the</strong> <strong>SysKonnect</strong> <strong>SK</strong>-<strong>54P1</strong> <strong>802.11g</strong> <strong>Wireless</strong> <strong>Print</strong> <strong>Server</strong> and configure<br />
it using your web browser. Most browsers should work, assuming that <strong>the</strong>y support tables<br />
and forms.<br />
Preparation<br />
Because it supports dynamic IP address allocation using DHCP, BOOTP, or RARP (Reverse<br />
Address Resolution Pro<strong>to</strong>col), <strong>the</strong> <strong>SysKonnect</strong> <strong>SK</strong>-<strong>54P1</strong> <strong>802.11g</strong> <strong>Wireless</strong> <strong>Print</strong> <strong>Server</strong> ships<br />
with an IP address of 0.0.0.0.<br />
This is not a valid IP address.<br />
Therefore, you must do one of <strong>the</strong> following:<br />
• Check your DHCP server (if you have one), and determine <strong>the</strong> IP address allocated <strong>to</strong><br />
<strong>the</strong> <strong>SysKonnect</strong> <strong>Print</strong> <strong>Server</strong>.<br />
• Use <strong>the</strong> diagnostic but<strong>to</strong>n (if fitted) <strong>to</strong> print a report which includes <strong>the</strong> current IP address.<br />
(Press <strong>the</strong> diagnostic but<strong>to</strong>n, and hold it for 2 seconds.)<br />
• Use <strong>the</strong> Setup Wizard, BiAdmin or ano<strong>the</strong>r <strong>SysKonnect</strong> <strong>Print</strong> <strong>Server</strong> utility <strong>to</strong> allocate a<br />
valid IP address <strong>to</strong> <strong>the</strong> <strong>SysKonnect</strong> <strong>Print</strong> <strong>Server</strong>.<br />
• Add an entry <strong>to</strong> <strong>the</strong> arp table <strong>to</strong> associate <strong>the</strong> hardware address of <strong>the</strong> <strong>SysKonnect</strong> <strong>Print</strong><br />
<strong>Server</strong> with <strong>the</strong> desired IP address, as follows:<br />
arp -s IP_Address 00:c0:02:xx:xx:xx (Unix)<br />
arp -s IP_Address 00-c0-02-xx-xx-xx (Windows)<br />
where:<br />
IP_Address is <strong>the</strong> IP address you wish <strong>to</strong> assign <strong>to</strong> <strong>the</strong> <strong>SysKonnect</strong> <strong>Print</strong> <strong>Server</strong>.<br />
00:c0:02:xx:xx:xx is <strong>the</strong> hardware address of <strong>the</strong> <strong>SysKonnect</strong> <strong>Print</strong> <strong>Server</strong>.<br />
(The hardware address of <strong>the</strong> <strong>SysKonnect</strong> <strong>SK</strong>-<strong>54P1</strong> <strong>802.11g</strong> <strong>Wireless</strong> <strong>Print</strong> <strong>Server</strong> is<br />
shown on a sticker on <strong>the</strong> base of <strong>the</strong> device.)<br />
Example Unix:<br />
arp -s 192.168.0.21 00:c0:02:12:34:56<br />
Example Windows:<br />
arp -s 192.168.0.21 00-c0-02-12-34-56
66 8 Web-Based Management<br />
<strong>Connection</strong> <strong>to</strong> <strong>the</strong> <strong>SysKonnect</strong> <strong>SK</strong>-<strong>54P1</strong><br />
<strong>802.11g</strong> <strong>Wireless</strong> <strong>Print</strong> <strong>Server</strong><br />
To connect <strong>to</strong> <strong>the</strong> <strong>SysKonnect</strong> <strong>Print</strong> <strong>Server</strong>, proceed as follows:<br />
1. Start your web browser.<br />
2. In <strong>the</strong> address box, enter http:// followed by <strong>the</strong> IP address of <strong>the</strong> <strong>SysKonnect</strong> <strong>Print</strong><br />
<strong>Server</strong>.<br />
e.g.: http://192.168.0.100<br />
You will <strong>the</strong>n be asked for <strong>the</strong> password.<br />
3. If a password has been set, enter <strong>the</strong> password.<br />
4. If no password has been set, press ENTER.<br />
You know have access <strong>to</strong> several configuation menus (which are described in <strong>the</strong> following<br />
section).<br />
5. Use <strong>the</strong> menu bar <strong>to</strong> move from one screen <strong>to</strong> ano<strong>the</strong>r.<br />
Remember <strong>to</strong> save each screen before switching <strong>to</strong> a different screen.<br />
Configuration Screens<br />
The following configuration screens are available.<br />
AppleTalk<br />
Apple Talk zone<br />
Figure 37. “AppleTalk” Screen<br />
Apple Talk zone Determines which Apple systems can gain access <strong>to</strong> this printer.<br />
Communication<br />
<strong>Print</strong>er Object Type This value is supplied <strong>to</strong> Macin<strong>to</strong>sh clients. The default value is<br />
LaserWriter, and should normally not be changed.<br />
Communication<br />
Pro<strong>to</strong>col<br />
Sets whe<strong>the</strong>r <strong>the</strong> USB printer port uses ASCII or Binary. The default<br />
is Binary.
Configuration Screens 67<br />
NetBEUI<br />
Domain Name<br />
TCP/IP<br />
<strong>SysKonnect</strong> <strong>SK</strong>-<strong>54P1</strong> <strong>802.11g</strong> <strong>Wireless</strong> <strong>Print</strong> <strong>Server</strong><br />
Figure 38. “NetBEUI” Screen<br />
Domain Name Enter <strong>the</strong> designated work group <strong>to</strong> be serviced by <strong>the</strong> <strong>SysKonnect</strong><br />
<strong>Print</strong> <strong>Server</strong>. This field is not case sensitive, so names with<br />
different case will be considered <strong>to</strong> be <strong>the</strong> same name.<br />
Options<br />
Response Time<br />
(0.1 secs)<br />
Set how fast jobs are sent <strong>to</strong> <strong>the</strong> printer. The default value of zero<br />
(0) delay should be increased only if your printer cannot cope<br />
with no delays.<br />
Abort <strong>Print</strong> Job if Error “Yes” terminates a print job if a printing error occurs. “No” (default)<br />
will try <strong>to</strong> continue <strong>the</strong> print job but may cause print errors.<br />
If print errors occur, try setting this value <strong>to</strong> “Yes”.<br />
Figure 39. “TCP/IP” Screen
68 8 Web-Based Management<br />
IP Address<br />
DHCP Client Select this if your LAN has a DHCP <strong>Server</strong>.<br />
The <strong>SysKonnect</strong> <strong>Print</strong> <strong>Server</strong> will <strong>the</strong>n au<strong>to</strong>matically obtain an IP<br />
address from <strong>the</strong> DHCP <strong>Server</strong>.<br />
Fixed IP Address Select this <strong>to</strong> assign a fixed IP address <strong>to</strong> <strong>the</strong> <strong>SysKonnect</strong> <strong>Print</strong><br />
<strong>Server</strong>. If selected, you must enter <strong>the</strong> device IP address, subnet<br />
mask, and gateway.<br />
Device IP Address IP address assigned <strong>to</strong> <strong>the</strong> <strong>SysKonnect</strong> <strong>Print</strong> <strong>Server</strong>.<br />
Enter an unused IP address from <strong>the</strong> address range used on<br />
your LAN.<br />
Subnet Mask Use <strong>the</strong> same values as PCs on your LAN (or on <strong>the</strong> same LAN<br />
segment, if you have a router).<br />
Gateway Address Use <strong>the</strong> same values as PCs on your LAN (or on <strong>the</strong> same LAN<br />
segment, if you have a router).<br />
<strong>Connection</strong><br />
Delay before reconnection<br />
attempts<br />
Number of reconnection<br />
attempts<br />
<strong>Wireless</strong> Configuration<br />
There are two options on <strong>the</strong> menu for wireless configuration – BASIC and SECURITY.<br />
<strong>Wireless</strong> – Basic<br />
Sets how long <strong>the</strong> <strong>SysKonnect</strong> <strong>Print</strong> <strong>Server</strong> should wait before<br />
retrying a TCP/IP connection which is lost. Allowable values are<br />
from 0 <strong>to</strong> 255 seconds, with 2 as <strong>the</strong> default.<br />
Set how many attempts at reconnection will be made. After that,<br />
<strong>the</strong> TCP/IP session will be terminated.<br />
Allowable values are from 0 <strong>to</strong> 255, with 254 as <strong>the</strong> default.<br />
The settings on this screen must match <strong>the</strong> o<strong>the</strong>r wireless stations in order for communication<br />
<strong>to</strong> occur.<br />
Figure 40. “<strong>Wireless</strong>” Screen
Configuration Screens 69<br />
<strong>Wireless</strong> security –<br />
WEP<br />
Configuration<br />
<strong>Wireless</strong> Security Screen<br />
<strong>SysKonnect</strong> <strong>SK</strong>-<strong>54P1</strong> <strong>802.11g</strong> <strong>Wireless</strong> <strong>Print</strong> <strong>Server</strong><br />
Region or Domain Select your region from <strong>the</strong> drop-down list.<br />
This field displays <strong>the</strong> region of operation for which <strong>the</strong> wireless<br />
interface is intended. It may not be legal <strong>to</strong> operate <strong>the</strong> router in a<br />
region o<strong>the</strong>r than <strong>the</strong> region shown here. If your country or region<br />
is not listed, please check with your local government agency for<br />
more information on which channels you are allowed <strong>to</strong> use, and<br />
select a region, which allows those channels. (The channel list<br />
changes according <strong>to</strong> <strong>the</strong> selected region.)<br />
Station Name This is <strong>the</strong> same as <strong>the</strong> device (host) name on <strong>the</strong> WAN screen.<br />
On your PC, some wireless status screens may display this<br />
name as <strong>the</strong> access point in use.<br />
Network Type Select <strong>the</strong> correct value for your wireless LAN.<br />
• Ad-hoc mode is used when <strong>the</strong>re is no wireless access<br />
point, and each wireless station communicates directly with<br />
o<strong>the</strong>r wireless stations.<br />
• Infrastructure mode is used when each wireless station connects<br />
<strong>to</strong> <strong>the</strong> wireless access point. This also provides<br />
access <strong>to</strong> <strong>the</strong> wired LAN.<br />
SSID<br />
(ESSID)<br />
There are three options for wireless security:<br />
• DISABLED – no data encryption is used.<br />
• WEP – data is encrypted using <strong>the</strong> WEP standard.<br />
• WPA-P<strong>SK</strong> – data is encrypted using <strong>the</strong> WPA-P<strong>SK</strong> standard. This is a later standard than<br />
WEP, and provides much better security than WEP. Use this if possible.<br />
If WEP is selected, <strong>the</strong> screen will look as follows:<br />
To communicate, all wireless stations must use <strong>the</strong> same SSID/<br />
ESSID.<br />
The default value is blank (null).<br />
Note: The SSID is case-sensitive.<br />
Channel No. In Infrastructure mode, this setting has not effect – <strong>the</strong> access<br />
point determines <strong>the</strong> channel used.<br />
For Ad-hoc mode, select <strong>the</strong> value you wish <strong>to</strong> use on your wireless<br />
LAN. If you experience lost connections and/or slow data<br />
transfers you may need <strong>to</strong> experiment with different channels <strong>to</strong><br />
see which is <strong>the</strong> best.<br />
LINK INFO but<strong>to</strong>n Click this but<strong>to</strong>n <strong>to</strong> open a sub-screen displaying link information.
70 8 Web-Based Management<br />
Security System<br />
<strong>Wireless</strong><br />
Security<br />
WEP<br />
Figure 41. “<strong>Wireless</strong> Security “ Screen – WEP<br />
WEP<br />
The 802.11b standard. Data is encrypted before transmission,<br />
but <strong>the</strong> encryption system is not very strong.<br />
Au<strong>the</strong>ntication Select <strong>the</strong> appropriate value, as used on your wireless LAN –<br />
OPEN SYSTEM or SHARED KEY.<br />
Key Size Select <strong>the</strong> WEP encryption level:<br />
• 64-bit (sometimes called 40-bit) encryption<br />
• 128-bit (sometimes called 104 bit) encryption<br />
This selection also allows you <strong>to</strong> choose <strong>the</strong> input type for <strong>the</strong><br />
keys – Hex or ASCII.<br />
Keys • Use <strong>the</strong> radio but<strong>to</strong>ns <strong>to</strong> select <strong>the</strong> default key.<br />
• Enter <strong>the</strong> key value(s) you wish <strong>to</strong> use. O<strong>the</strong>r stations must<br />
have <strong>the</strong> same key values.<br />
Keys can be entered in Hex or ASCII, according <strong>to</strong> your Key<br />
Size selection. Hex characters are <strong>the</strong> digits (0 ~ 9) and <strong>the</strong><br />
letters A ~ F.<br />
Passphrase Enter some printable characters in <strong>the</strong> “Passphrase” field and<br />
click <strong>the</strong> GENERATE but<strong>to</strong>n <strong>to</strong> au<strong>to</strong>matically configure <strong>the</strong> WEP<br />
key(s). For 64 bit keys, four keys fields will be generated. For<br />
128 bit keys, only <strong>the</strong> selected WEP key will be generated.
Configuration Screens 71<br />
<strong>Wireless</strong> security –<br />
WPA-P<strong>SK</strong><br />
<strong>SysKonnect</strong> <strong>SK</strong>-<strong>54P1</strong> <strong>802.11g</strong> <strong>Wireless</strong> <strong>Print</strong> <strong>Server</strong><br />
If WPA-P<strong>SK</strong> is selected, <strong>the</strong> screen will look as follows:<br />
Security System<br />
<strong>Wireless</strong><br />
Security<br />
WPA-P<strong>SK</strong><br />
Figure 42. “<strong>Wireless</strong> Security” Screen – WPA-P<strong>SK</strong><br />
WPA-P<strong>SK</strong><br />
Like WEP, data is encrypted before transmission. WPA is more<br />
secure than WEP, and should be used if possible. WPA-P<strong>SK</strong> is<br />
<strong>the</strong> version of WPA not requiring a radius server on your LAN.<br />
Passphrase Enter <strong>the</strong> keyword key value. Data is encrypted using a key derived<br />
from <strong>the</strong> P<strong>SK</strong>. O<strong>the</strong>r wireless stations must use <strong>the</strong> same<br />
P<strong>SK</strong>. The P<strong>SK</strong> must be from 8 <strong>to</strong> 63 characters in length.<br />
Encryption Select <strong>the</strong> desired option. O<strong>the</strong>r wireless stations must use <strong>the</strong><br />
same method.
72 8 Web-Based Management<br />
O<strong>the</strong>r Screens<br />
<strong>Server</strong> status This screen shows server system data and <strong>the</strong> current settings for all of <strong>the</strong> o<strong>the</strong>r screens. It<br />
is a read-only; no data can be input on this screen.<br />
<strong>Print</strong>er status This screen displays <strong>the</strong> current status of each port. For each port, <strong>the</strong> following data is listed:<br />
• “Connected <strong>Print</strong>er” – <strong>the</strong> model name of <strong>the</strong> printer connected <strong>to</strong> <strong>the</strong> port, if <strong>the</strong> printer<br />
name is known. (If <strong>the</strong> printer is not bi-directional, this information is unavailable.)<br />
• “Status” – shows <strong>the</strong> current status of <strong>the</strong> printer (ON-LINE, OFF-LINE, OUT OF PAPER).<br />
• “<strong>Print</strong>ing Information” – this will show ei<strong>the</strong>r IDLE or PRINTING.<br />
Logical printers Logical <strong>Print</strong>ers (ports) can be used under Unix. For each Logical <strong>Print</strong>er, <strong>the</strong> following fields<br />
are available:<br />
Logical <strong>Print</strong>er No Select <strong>the</strong> logical printer port you wish <strong>to</strong> configure (e.g. L1).<br />
Click <strong>the</strong> GET DATA but<strong>to</strong>n <strong>to</strong> update <strong>the</strong> display with <strong>the</strong> current<br />
data for <strong>the</strong> selected logical printer.<br />
Physical Port Select <strong>the</strong> printer port that <strong>the</strong> logical printer will use.<br />
Pre-string (Hex) The printer control string (in hex) <strong>to</strong> be sent <strong>to</strong> <strong>the</strong> printer before<br />
each print job. This string cannot exceed 15 characters.<br />
Post-String (Hex) The printer control string (in hex) <strong>to</strong> be sent <strong>to</strong> <strong>the</strong> printer after<br />
each print job. This string cannot exceed 15 characters.<br />
Convert LF <strong>to</strong> CR/LF If checked, LF (line feed) characters are changed <strong>to</strong> CR+LF (carriage<br />
return + line feed).<br />
Internet printing See section "Internet Mail <strong>Print</strong>ing" on page 78 for details of this feature.
Installing from <strong>the</strong> CD-<br />
ROM<br />
9 Special Features<br />
<strong>SysKonnect</strong> <strong>SK</strong>-<strong>54P1</strong> <strong>802.11g</strong> <strong>Wireless</strong> <strong>Print</strong> <strong>Server</strong><br />
This chapter covers <strong>the</strong> special features of <strong>the</strong> <strong>SysKonnect</strong> <strong>SK</strong>-<strong>54P1</strong> <strong>802.11g</strong> <strong>Wireless</strong> <strong>Print</strong><br />
<strong>Server</strong>.<br />
Overview<br />
Your <strong>SysKonnect</strong> <strong>SK</strong>-<strong>54P1</strong> <strong>802.11g</strong> <strong>Wireless</strong> <strong>Print</strong> <strong>Server</strong> has three special features:<br />
• IPP (Internet <strong>Print</strong>ing Pro<strong>to</strong>col)<br />
• Proprietary Internet Mail <strong>Print</strong>ing system<br />
• <strong>Print</strong>ing through <strong>the</strong> Internet<br />
Internet <strong>Print</strong>ing Pro<strong>to</strong>col (IPP)<br />
IPP (Internet <strong>Print</strong>ing Pro<strong>to</strong>col) is a standards-based system <strong>to</strong> allow remote printing from a<br />
PC <strong>to</strong> any accessible printer. Normally, <strong>the</strong> printer will be attached <strong>to</strong> a computer or o<strong>the</strong>r device<br />
which functions as an IPP server.<br />
Client PCs need a compatible IPP client program. Windows 2000 and XP include a suitable<br />
IPP client. For o<strong>the</strong>r versions of Windows, a client program is supplied on <strong>the</strong> <strong>SysKonnect</strong><br />
<strong>Print</strong> <strong>Server</strong>'s CD-ROM.<br />
The client must also know <strong>the</strong> IP address or URL of <strong>the</strong> IPP server.<br />
IPP <strong>Server</strong> Configuration<br />
The <strong>SysKonnect</strong> <strong>SK</strong>-<strong>54P1</strong> <strong>802.11g</strong> <strong>Wireless</strong> <strong>Print</strong> <strong>Server</strong> contains <strong>the</strong> necessary firmware <strong>to</strong><br />
act as an IPP server. No additional configuration is necessary. However, <strong>the</strong> following requirements<br />
must be fulfilled:<br />
• The <strong>SysKonnect</strong> <strong>Print</strong> <strong>Server</strong> must have a valid IP address. For printing via <strong>the</strong> Internet,<br />
<strong>the</strong> <strong>SysKonnect</strong> <strong>Print</strong> <strong>Server</strong>'s IP address must be external (allocated by your ISP),<br />
ra<strong>the</strong>r than an IP address on your local LAN.<br />
• Any router, gateway or firewall linking your LAN <strong>to</strong> <strong>the</strong> Internet must not block <strong>the</strong> IPP<br />
pro<strong>to</strong>col.<br />
• You must advise clients of <strong>the</strong> correct URL or IP address of <strong>the</strong> IPP server. To use a URL<br />
ra<strong>the</strong>r than an IP address, you need <strong>to</strong> register <strong>the</strong> domain name for <strong>the</strong> URL.<br />
• Unless clients are using Windows 2000 or XP, you must provide your clients with <strong>the</strong> supplied<br />
IPP client software. If it is not convenient <strong>to</strong> provide <strong>the</strong> CD-ROM, supply <strong>the</strong><br />
ipp_client.exe file, located in <strong>the</strong> IPP folder.<br />
IPP Client Setup – Windows 98/Me<br />
For <strong>the</strong>se platforms, IPP client software is supplied on <strong>the</strong> CD-ROM. Also you can distribute<br />
<strong>the</strong> setup program (ipp_client.exe) <strong>to</strong> users via e-mail.<br />
To install an IPP client server from <strong>the</strong> CD, proceed as follows:<br />
1. Insert <strong>the</strong> CD-ROM in your drive.<br />
If <strong>the</strong> program does not start au<strong>to</strong>matically, run <strong>the</strong> Setup.exe file in <strong>the</strong> <strong>to</strong>p-level folder.<br />
2. Follow <strong>the</strong> instructions until you reach <strong>the</strong> “Select Installation” screen.<br />
3. Select IPP CLIENT.<br />
4. At <strong>the</strong> next screen, select <strong>the</strong> INSTALL IPP CLIENT option.<br />
5. Click NEXT.<br />
6. Step through <strong>the</strong> remaining screens <strong>to</strong> complete <strong>the</strong> installation.
74 9 Special Features<br />
Installing using<br />
IPP_CLIENT.EXE<br />
To install an IPP client server using IPP_client.exe, proceed as follows:<br />
1. Run this program <strong>to</strong> unzip <strong>the</strong> included files.<br />
The IPP setup program will <strong>the</strong>n run.<br />
2. Follow <strong>the</strong> instructions <strong>to</strong> complete <strong>the</strong> installation.<br />
IPP Client Configuration<br />
1. Run <strong>the</strong> “Add IPP Port” program entry created by <strong>the</strong> installation.<br />
A screen like <strong>the</strong> following will be displayed:<br />
Figure 43. IPP Port<br />
2. If Internet access from your location is via a proxy server, check ACCESS IPP SERVER VIA<br />
PROXY SERVER.<br />
3. Enter details of your proxy server. (This will be <strong>the</strong> same as your browser configuration.)<br />
4. Enter <strong>the</strong> IP address or URL of <strong>the</strong> IPP server.<br />
5. Click SELECT DEVICE PORT <strong>to</strong> view <strong>the</strong> available ports on <strong>the</strong> IPP server.<br />
6. Select <strong>the</strong> appropriate port.<br />
A connection <strong>to</strong> <strong>the</strong> IPP server will be established at this time.<br />
7. Click SAVE <strong>to</strong> create <strong>the</strong> IPP port on your system.<br />
A screen which confirms that <strong>the</strong> port has been created is displayed:
Internet <strong>Print</strong>ing Pro<strong>to</strong>col (IPP) 75<br />
<strong>SysKonnect</strong> <strong>SK</strong>-<strong>54P1</strong> <strong>802.11g</strong> <strong>Wireless</strong> <strong>Print</strong> <strong>Server</strong><br />
Figure 44. Select <strong>Print</strong>er for IPP Port<br />
8. Ei<strong>the</strong>r<br />
Select an existing printer <strong>to</strong> use <strong>the</strong> new port.<br />
Then click OK<br />
or<br />
Click <strong>the</strong> ADD NEW PRINTER but<strong>to</strong>n <strong>to</strong> create a new printer <strong>to</strong> use <strong>the</strong> IPP port.<br />
This will start <strong>the</strong> “Add <strong>Print</strong>er” wizard.<br />
Follow <strong>the</strong> instructions <strong>to</strong> complete <strong>the</strong> process. Ensure that <strong>the</strong> new printer uses <strong>the</strong> IPP<br />
port.<br />
Installation is now complete.<br />
To create additional IPP ports, repeat <strong>the</strong> entire procedure. The proxy server and o<strong>the</strong>r<br />
options are set individually for each IPP port.<br />
Changing <strong>the</strong> IPP Port Settings<br />
After <strong>the</strong> IPP port is created, you can reach <strong>the</strong> screen shown in figure 43 "IPP Port" using<br />
<strong>the</strong> WINDOWS PORT SETTINGS but<strong>to</strong>n:<br />
1. Open <strong>the</strong> printers folder (START > SETTINGS > PRINTERS).<br />
2. Right-click <strong>the</strong> IPP printer.<br />
3. Select PROPERTIES.<br />
4. Locate and click <strong>the</strong> PORT SETTINGS but<strong>to</strong>n (DETAILS or PORT tab, depending on your version<br />
of Windows).<br />
There are two settings – ”Retry Interval” and “Retry Count” – which can be adjusted if you<br />
have problems connecting <strong>to</strong> <strong>the</strong> IPP server.<br />
• “Retry Interval” – sets <strong>the</strong> time interval (in seconds) between connection attempts.<br />
Increase this number if you have a poor connection, or <strong>the</strong> remote server is very busy.<br />
• “Retry Count” – sets how many connection attempts will be made.<br />
Increase this number if you have a poor connection, or <strong>the</strong> remote server is very busy.
76 9 Special Features<br />
i<br />
IPP Client Setup – Windows 2000/XP<br />
Windows 2000 and XP have <strong>the</strong>ir own IPP client, and <strong>the</strong>re is no need <strong>to</strong> install <strong>the</strong> supplied<br />
IPP client software. To use <strong>the</strong> Windows IPP client with <strong>the</strong> <strong>SysKonnect</strong> <strong>Print</strong> <strong>Server</strong>, follow<br />
this procedure:<br />
1. Start <strong>the</strong> “Add <strong>Print</strong>er” wizard.<br />
2. Select NETWORK PRINTER.<br />
3. Click NEXT.<br />
The “Locate your <strong>Print</strong>er” screen will be displayed:<br />
Figure 45. Windows 2000 – Locate your <strong>Print</strong>er<br />
4. Select CONNECT TO A PRINTER ON THE INTERNET OR ON YOUR INTRANET.<br />
5. Enter <strong>the</strong> URL of <strong>the</strong> IPP server as follows<br />
port 1 – ip_address: 631/ipp/P1<br />
where<br />
ip_address represents <strong>the</strong> IP address of <strong>the</strong> IPP server, and 631 is <strong>the</strong> port number.<br />
These entries are case sensitive. They must be entered as shown, with "ipp" in lower case,<br />
and “P1” in upper case.
Internet <strong>Print</strong>ing Pro<strong>to</strong>col (IPP) 77<br />
<strong>SysKonnect</strong> <strong>SK</strong>-<strong>54P1</strong> <strong>802.11g</strong> <strong>Wireless</strong> <strong>Print</strong> <strong>Server</strong><br />
If <strong>the</strong> connection can be established, and <strong>the</strong> printer on that port is online, <strong>the</strong> following<br />
dialog will be displayed.<br />
Figure 46. Windows 2000: No printer driver<br />
6. Click OK.<br />
7. Select <strong>the</strong> printer manufacturer and model <strong>to</strong> match <strong>the</strong> printer connected <strong>to</strong> <strong>the</strong> port on<br />
<strong>the</strong> IPP server.<br />
8. Click NEXT and complete <strong>the</strong> wizard.<br />
The IPP printer is now ready for use.<br />
Using IPP <strong>Print</strong>ers<br />
The IPP printer can be selected and used like any o<strong>the</strong>r Windows printer. If <strong>the</strong> IPP server is<br />
not on your network, your Internet connection needs <strong>to</strong> be active.<br />
If using <strong>the</strong> supplied IPP client software, you can use <strong>the</strong> “Query IPP” printer program installed<br />
with ADD IPP PORT <strong>to</strong> check <strong>the</strong> availability of <strong>the</strong> remote IPP server.<br />
An IPP server may be unavailable for any of <strong>the</strong> following reasons:<br />
• It is powered off.<br />
• A printer problem has caused <strong>the</strong> IPP server <strong>to</strong> cease responding, and a restart (reboot)<br />
is required.<br />
• The server's IP address has changed.<br />
• The Internet connection for <strong>the</strong> IPP server is down.<br />
• Network congestion causes <strong>the</strong> connection attempt <strong>to</strong> time out.<br />
If using <strong>the</strong> supplied IPP client software, <strong>the</strong>re are two settings – “Retry Interval” and “Retry<br />
Count” – which can be adjusted if you have problems connecting <strong>to</strong> <strong>the</strong> IPP server.<br />
See <strong>the</strong> section "Changing <strong>the</strong> IPP Port Settings" on page 75 for details.
78 9 Special Features<br />
Internet Mail <strong>Print</strong>ing<br />
The Internet mail printing system allows users <strong>to</strong> print data <strong>to</strong> your printer across <strong>the</strong> Internet.<br />
Users send <strong>the</strong> Internet <strong>SysKonnect</strong> <strong>SK</strong>-<strong>54P1</strong> <strong>802.11g</strong> <strong>Wireless</strong> <strong>Print</strong> <strong>Server</strong> an e-mail, with<br />
<strong>the</strong> print job normally sent as an attachment <strong>to</strong> <strong>the</strong> e-mail. The <strong>SysKonnect</strong> <strong>SK</strong>-<strong>54P1</strong><br />
<strong>802.11g</strong> <strong>Wireless</strong> <strong>Print</strong> <strong>Server</strong> will retrieve <strong>the</strong> e-mail and print it.<br />
System Requirements<br />
Mail server • Accessibility<br />
The mail server must be accessible by <strong>the</strong> intended clients or users. Normally, this<br />
means a permanent connection <strong>to</strong> <strong>the</strong> Internet.<br />
• Pro<strong>to</strong>cols<br />
The mail server must support <strong>the</strong> POP3 and SMTP pro<strong>to</strong>cols. The Internet printing system<br />
uses <strong>the</strong>se pro<strong>to</strong>cols and <strong>the</strong> most common e-mail formatting standards:<br />
• MIME (Multipurpose Internet Mail Extensions)<br />
• Base64 encoding (for mail attachments)<br />
Internet <strong>SysKonnect</strong><br />
<strong>Print</strong> <strong>Server</strong><br />
User (client) requirements<br />
• TCIP/IP pro<strong>to</strong>col<br />
The LAN must use <strong>the</strong> TCP/IP pro<strong>to</strong>col.<br />
• Mail server access<br />
The <strong>SysKonnect</strong> <strong>Print</strong> <strong>Server</strong> must be able <strong>to</strong> access <strong>the</strong> mail server using a single IP<br />
address.<br />
• Mail account<br />
The <strong>SysKonnect</strong> <strong>Print</strong> <strong>Server</strong> must have a mail account. Users print by sending an e-mail<br />
<strong>to</strong> this mail account.<br />
• Internet connection<br />
Ei<strong>the</strong>r through a LAN or dial-up.<br />
• E-mail address<br />
This is used <strong>to</strong> notify <strong>the</strong> user that <strong>the</strong>ir print job has been done, or if <strong>the</strong>re are any problems.<br />
• <strong>Print</strong>er driver<br />
Users must have a printer driver which matches <strong>the</strong> printer connected <strong>to</strong> <strong>the</strong> remote<br />
Internet <strong>SysKonnect</strong> <strong>Print</strong> <strong>Server</strong>.<br />
• <strong>Print</strong> capture software<br />
To print more than plain text, users require InterNet <strong>Print</strong>ing Port software <strong>to</strong> capture <strong>the</strong><br />
print job and convert it in<strong>to</strong> an e-mail attachment.<br />
The InterNet <strong>Print</strong>ing Port software is available for <strong>the</strong> following operating systems:<br />
• Microsoft Windows 95, 98, or Me<br />
• Microsoft Windows NT 4.0, Windows 2000, or XP
Internet Mail <strong>Print</strong>ing 79<br />
<strong>SysKonnect</strong> <strong>SK</strong>-<strong>54P1</strong> <strong>802.11g</strong> <strong>Wireless</strong> <strong>Print</strong> <strong>Server</strong><br />
Internet Mail <strong>Print</strong>ing Configuration<br />
The <strong>SysKonnect</strong> <strong>SK</strong>-<strong>54P1</strong> <strong>802.11g</strong> <strong>Wireless</strong> <strong>Print</strong> <strong>Server</strong> must be configured with <strong>the</strong> data in<br />
<strong>the</strong> following table.<br />
The supplied BiAdmin utility program, or <strong>the</strong> Web interface can be used <strong>to</strong> set <strong>the</strong> following<br />
entries on <strong>the</strong> TCP/IP screen.<br />
Mail server IP<br />
address<br />
User Software<br />
The IP address of <strong>the</strong> e-mail server used by <strong>the</strong> <strong>SysKonnect</strong> <strong>SK</strong>-<br />
<strong>54P1</strong> <strong>802.11g</strong> <strong>Wireless</strong> <strong>Print</strong> <strong>Server</strong>.<br />
Mail account The name of <strong>the</strong> e-mail account used by <strong>the</strong> <strong>SysKonnect</strong> <strong>SK</strong>-<br />
<strong>54P1</strong> <strong>802.11g</strong> <strong>Wireless</strong> <strong>Print</strong> <strong>Server</strong>.<br />
Mail account password<br />
Enter <strong>the</strong> password here for <strong>the</strong> mail account above.<br />
Check mail interval Sets how often <strong>to</strong> check for mail.<br />
Redirect mail<br />
account<br />
Jobs which can not be printed will be sent <strong>to</strong> this account. If<br />
blank, unprintable jobs will be discarded.<br />
Default printer port <strong>Print</strong>er number for all Internet print jobs. Only one port can be selected.<br />
Users on <strong>the</strong> LAN can also use this port.<br />
<strong>Print</strong>er model This text field identifies <strong>the</strong> printer used for Internet printing. This<br />
value is sent <strong>to</strong> remote users upon request.<br />
<strong>Print</strong> every e-mail If ON, <strong>the</strong>n all e-mails received are printed. O<strong>the</strong>rwise, only<br />
e-mails from <strong>the</strong> Internet printing port will be printed.<br />
<strong>Print</strong> banner If YES (default), a banner page is printed <strong>to</strong> identify <strong>the</strong> owner of<br />
<strong>the</strong> print job.<br />
Mail response when<br />
printed<br />
If YES, all print jobs receive an e-mail response. If NO, only users<br />
who set this option in <strong>the</strong>ir InterNet <strong>Print</strong>ing Port software receive<br />
an e-mail.<br />
The software provided for remote users (InterNet <strong>Print</strong>ing Port) should be installed by everyone<br />
intending <strong>to</strong> use Internet printing. O<strong>the</strong>rwise, remote users can print correctly only if:<br />
• They send an e-mail directly <strong>to</strong> <strong>the</strong> <strong>SysKonnect</strong> <strong>Print</strong> <strong>Server</strong> mail account, using <strong>the</strong>ir<br />
normal e-mail application.<br />
• The e-mail contains plain text only.<br />
• The Internet <strong>SysKonnect</strong> <strong>Print</strong> <strong>Server</strong> is configured with <strong>Print</strong> every E-Mail on.<br />
Installation of <strong>the</strong> InterNet <strong>Print</strong>ing Port software will create a new printer port. After attaching<br />
<strong>the</strong> correct printer <strong>to</strong> this port, users can print <strong>to</strong> <strong>the</strong> Internet printer using any Windows application.<br />
To install <strong>the</strong> user software, proceed as follows:<br />
1. Run <strong>the</strong> InterNet <strong>Print</strong>ing Port installation program Setup.exe.<br />
Default values for <strong>the</strong> installation are:<br />
• Direc<strong>to</strong>ry – C:\Program Files\Internet_<strong>Print</strong>er<br />
• “Start” menu folder – InterNet <strong>Print</strong>ing Port Driver<br />
The “Configure Port” screen will be displayed:
80 9 Special Features<br />
2. Provide <strong>the</strong> following data:<br />
Figure 47. InterNet <strong>Print</strong>er Port<br />
Port Name Enter a descriptive name (e.g. "WAN") for <strong>the</strong> new printer port.<br />
Remote <strong>Print</strong>er<br />
E-mail address<br />
Mail <strong>Server</strong> Name<br />
or IP Address<br />
The e-mail address for <strong>the</strong> Internet printer. Your print jobs will be<br />
sent <strong>to</strong> this e-mail address.<br />
This is <strong>the</strong> name or IP address of your mail server. If you are on a<br />
LAN, ask <strong>the</strong> LAN administra<strong>to</strong>r. If using a dial-up connection,<br />
use <strong>the</strong> data provided by your ISP (Internet Service Provider).<br />
Port Name Enter a descriptive name (e.g. "WAN") for <strong>the</strong> new printer port.<br />
Remote <strong>Print</strong>er<br />
E-mail address<br />
Mail <strong>Server</strong> Name<br />
or IP Address<br />
Your Internet<br />
E-mail address<br />
Retry Interval<br />
(seconds)<br />
Reply Notification<br />
E-mail<br />
The e-mail address for <strong>the</strong> Internet printer. Your print jobs will be<br />
sent <strong>to</strong> this e-mail address.<br />
This is <strong>the</strong> name or IP address of your mail server. If you are on a<br />
LAN, ask <strong>the</strong> LAN administra<strong>to</strong>r. If using a dial-up connection,<br />
use <strong>the</strong> data provided by your ISP (Internet Service Provider).<br />
The normal address that people use <strong>to</strong> send you an e-mail.<br />
If unable <strong>to</strong> connect <strong>to</strong> <strong>the</strong> e-mail server, retry after this time<br />
period (1 <strong>to</strong> 255 seconds, 30 is usually OK).<br />
Check <strong>to</strong> receive an e-mail when your print job has been processed.<br />
On completion, a new printer port will have been created.
Internet Mail <strong>Print</strong>ing 81<br />
Using <strong>the</strong> new Port<br />
<strong>SysKonnect</strong> <strong>SK</strong>-<strong>54P1</strong> <strong>802.11g</strong> <strong>Wireless</strong> <strong>Print</strong> <strong>Server</strong><br />
The Windows control panel is used <strong>to</strong> connect <strong>the</strong> correct printer <strong>to</strong> <strong>the</strong> InterNet <strong>Print</strong>ing Port.<br />
In Windows 95/NT, <strong>the</strong> procedure is:<br />
1. Select <strong>the</strong> printer which matches <strong>the</strong> remote printer.<br />
2. Select PROPERTIES, as shown in <strong>the</strong> example below.<br />
Figure 48. InterNet <strong>Print</strong>er Properties<br />
3. Select <strong>the</strong> new port – WAN (InterNet <strong>Print</strong>er) in <strong>the</strong> example – as <strong>the</strong> port for this printer.<br />
• If you do not have <strong>the</strong> correct printer driver, or you wish <strong>to</strong> create ano<strong>the</strong>r printer<br />
using an existing driver, use <strong>the</strong> Windows ADD PRINTER facility.<br />
• Using <strong>the</strong> Windows PORT SETTINGS or CONFIGURE PORT facility will reveal <strong>the</strong> same<br />
“InterNet <strong>Print</strong>er Port” screen shown in figure 47 on page 80.<br />
• If you wish <strong>to</strong> print <strong>to</strong> multiple Internet printers, use <strong>the</strong> Windows ADD PORT facility <strong>to</strong><br />
add a new Internet printer port. Ensure that <strong>the</strong> correct data is entered in each port,<br />
and that each port has a unique name.<br />
Checking <strong>the</strong> <strong>Print</strong>er Driver<br />
To make sure that <strong>the</strong> correct printer driver for <strong>the</strong> remote printer is installed on your system,<br />
you can use <strong>the</strong> InterNet <strong>Print</strong>ing Port <strong>to</strong> send an e-mail <strong>to</strong> <strong>the</strong> Internet printer. The procedure<br />
is as follows:<br />
1. Connect your default printer <strong>to</strong> <strong>the</strong> InterNet <strong>Print</strong>ing Port.<br />
2. Check that Reply Notification Mail in <strong>the</strong> InterNet <strong>Print</strong>ing Port is on.<br />
3. From Notepad or ano<strong>the</strong>r text edi<strong>to</strong>r, print a short message (e.g. "This is a test print") <strong>to</strong><br />
<strong>the</strong> Internet printer.<br />
You will receive a reply e-mail containing <strong>the</strong> printer ID which will identify <strong>the</strong> printer attached<br />
<strong>to</strong> <strong>the</strong> <strong>SysKonnect</strong> <strong>SK</strong>-<strong>54P1</strong> <strong>802.11g</strong> <strong>Wireless</strong> <strong>Print</strong> <strong>Server</strong>. If this does not match <strong>the</strong> printer<br />
driver you are using, install <strong>the</strong> correct printer driver.
82 9 Special Features<br />
i<br />
<strong>Print</strong>ing through <strong>the</strong> Internet<br />
To print through <strong>the</strong> Internet, proceed as follows:<br />
1. Create or open <strong>the</strong> document you wish <strong>to</strong> print.<br />
2. Select <strong>the</strong> printer connected <strong>to</strong> <strong>the</strong> InterNet <strong>Print</strong>ing Port.<br />
3. If you do not have a permanent Internet connection, establish a connection now.<br />
The InterNet <strong>Print</strong>ing Port will not establish a dial-up connection, but it will send <strong>the</strong> e-mail <strong>the</strong><br />
next time you are connected.<br />
4. <strong>Print</strong> <strong>the</strong> document.<br />
The InterNet <strong>Print</strong>ing Port will generate an e-mail and send it <strong>to</strong> <strong>the</strong> remote printer. The<br />
document will be encoded and sent as an attachment <strong>to</strong> <strong>the</strong> e-mail. You will see a<br />
progress screen similar <strong>to</strong> <strong>the</strong> following:<br />
Figure 49. InterNet <strong>Print</strong>ing Progress<br />
5. Close <strong>the</strong> Internet connection if you opened it in step 3.<br />
If <strong>the</strong> Notify after print job option is set, you will receive an e-mail when your job is printed.
10Troubleshooting<br />
<strong>SysKonnect</strong> <strong>SK</strong>-<strong>54P1</strong> <strong>802.11g</strong> <strong>Wireless</strong> <strong>Print</strong> <strong>Server</strong><br />
This chapter describes some problems that may arise, and <strong>the</strong> solutions <strong>to</strong> <strong>the</strong>m.<br />
Overview<br />
If you encounter printing difficulties, please refer <strong>to</strong> <strong>the</strong> appropriate section. If, after following<br />
<strong>the</strong> advice in <strong>the</strong>se documents, <strong>the</strong> <strong>SysKonnect</strong> <strong>SK</strong>-<strong>54P1</strong> <strong>802.11g</strong> <strong>Wireless</strong> <strong>Print</strong> <strong>Server</strong> still<br />
does not function properly, please contact your dealer for fur<strong>the</strong>r advice.<br />
Hardware & <strong>Connection</strong> Problems<br />
Problem Solution<br />
All LEDs are off<br />
All <strong>the</strong> <strong>SysKonnect</strong> <strong>Print</strong><br />
<strong>Server</strong>'s LEDs are off.<br />
Red LED is on<br />
<strong>SysKonnect</strong> <strong>Print</strong> <strong>Server</strong>'s red<br />
status LED continuously stays<br />
on.<br />
<strong>Print</strong> server undetected<br />
The <strong>SysKonnect</strong> <strong>SK</strong>-<strong>54P1</strong><br />
<strong>802.11g</strong> <strong>Wireless</strong> <strong>Print</strong> <strong>Server</strong><br />
unit can not be found on <strong>the</strong><br />
LAN, so configuration is not<br />
possible.<br />
Check <strong>the</strong> power supply or power connection.<br />
Reset <strong>the</strong> <strong>SysKonnect</strong> <strong>Print</strong> <strong>Server</strong> by unplugging <strong>the</strong><br />
power supply and plugging it back in.<br />
If using <strong>the</strong> wireless interface,<br />
• Ensure that WEP is disabled on your o<strong>the</strong>r wireless<br />
stations.<br />
• If using Ad-hoc mode, it is not possible for wireless<br />
stations <strong>to</strong> connect <strong>to</strong> <strong>the</strong> <strong>SysKonnect</strong> <strong>Print</strong> <strong>Server</strong>,<br />
because its default mode is “Infrastructure”. You<br />
must use <strong>the</strong> wired interface for initial configuration.<br />
• If using Infrastructure mode, ensure that your<br />
access point allows connection by wireless stations<br />
with a SSID of ANY or null (blank).<br />
• The access point itself has a blank (null) SSID.<br />
• If <strong>the</strong>re is a setting Broadcast SSID or Allow<br />
SSID of ANY, this setting should be enabled.<br />
If using <strong>the</strong> wired 10/100Base-T interface:<br />
• Check <strong>the</strong> hub. The link LED for <strong>the</strong> port <strong>to</strong> which<br />
<strong>the</strong> <strong>SysKonnect</strong> <strong>Print</strong> <strong>Server</strong> is connected should be<br />
on. If it is off, <strong>the</strong>re is a problem in <strong>the</strong> network<br />
cable.<br />
Notes:<br />
• To use both <strong>the</strong> <strong>Wireless</strong> and LAN interfaces, <strong>the</strong><br />
wireless mode must be set <strong>to</strong> “Ad-hoc”.<br />
• You must power off <strong>the</strong> <strong>SysKonnect</strong> <strong>Print</strong> <strong>Server</strong><br />
before connecting or disconnecting <strong>the</strong> LAN cable.
84 10 Troubleshooting<br />
Problem Solution<br />
(continued) If using TCP/IP:<br />
• Ensure that <strong>the</strong>re are no routers between <strong>the</strong><br />
<strong>SysKonnect</strong> <strong>Print</strong> <strong>Server</strong> and <strong>the</strong> PC used for configuration.<br />
• Ensure that <strong>the</strong> PC used for configuration has <strong>the</strong><br />
TCP/IP network pro<strong>to</strong>col installed. Test its network<br />
connection by seeing if you can locate o<strong>the</strong>r LAN<br />
devices from <strong>the</strong> PC. (e.g. Use NETWORK NEIGH-<br />
BORHOOD and try <strong>to</strong> browse <strong>the</strong> network.)<br />
DHCP IP address<br />
conflict<br />
I am using DHCP, and getting<br />
an IP address conflict involving<br />
<strong>the</strong> <strong>SysKonnect</strong> <strong>SK</strong>-<strong>54P1</strong><br />
<strong>802.11g</strong> <strong>Wireless</strong> <strong>Print</strong> <strong>Server</strong>.<br />
AppleTalk (Macin<strong>to</strong>sh)<br />
Problem Solution<br />
Incorrect Prin<strong>to</strong>ut<br />
Why do I get an incorrect prin<strong>to</strong>ut?<br />
<strong>Print</strong> server undetected in<br />
chooser<br />
Can't find <strong>the</strong> <strong>SysKonnect</strong> <strong>Print</strong><br />
<strong>Server</strong>'s name in <strong>the</strong> Chooser.<br />
EPS file with incorrect fonts<br />
My EPS file doesn't print with<br />
<strong>the</strong> correct fonts.<br />
Selection problem in <strong>the</strong><br />
print dialog box<br />
I can't select <strong>the</strong> "Remaining<br />
from:" item in <strong>the</strong> print dialog<br />
box.<br />
If <strong>the</strong> <strong>SysKonnect</strong> <strong>Print</strong> <strong>Server</strong> is left on, but <strong>the</strong> DHCP<br />
server is turned off, <strong>the</strong>n <strong>the</strong> <strong>SysKonnect</strong> <strong>Print</strong> <strong>Server</strong><br />
will retain its IP address without <strong>the</strong> DHCP server being<br />
aware of it. Simply reset <strong>the</strong> <strong>SysKonnect</strong> <strong>Print</strong> <strong>Server</strong> so<br />
it will obtain a new IP address.<br />
This problem would also arise if you assigned static IP<br />
address, which is within <strong>the</strong> range used by <strong>the</strong> DHCP<br />
server. If so, use ano<strong>the</strong>r address that is not within <strong>the</strong><br />
range used by <strong>the</strong> DHCP server.<br />
Some possible reasons are:<br />
• You may have chosen binary encoding <strong>to</strong> print <strong>the</strong><br />
file. Try <strong>to</strong> use ASCII encoding.<br />
• Some of <strong>the</strong> fonts, which are in your print file may<br />
not be supported by <strong>the</strong> printer. Try selecting Laser-<br />
Writer 7 instead of LaserWriter 8.<br />
Try <strong>the</strong> following:<br />
1. Make sure that AppleTalk is on (<strong>the</strong> but<strong>to</strong>n next <strong>to</strong><br />
ACTIVE is highlighted in <strong>the</strong> Chooser).<br />
2. Make sure <strong>the</strong> printer has been on and in <strong>the</strong><br />
“READY” state for a few minutes.<br />
3. Make sure <strong>the</strong> printer has not been renamed since<br />
its last appearance in <strong>the</strong> Chooser.<br />
4. If <strong>the</strong> printer resides on a network with multiple<br />
zones, make sure <strong>the</strong> correct zone is selected from<br />
<strong>the</strong> “AppleTalk Zones” field in <strong>the</strong> Chooser.<br />
This is a problem that occurs in some application programs.<br />
Try downloading <strong>the</strong> fonts contained in <strong>the</strong> EPS<br />
file before printing <strong>the</strong> saved EPS file.<br />
If you have selected <strong>the</strong> Layout value 2 UP or 4 UP you<br />
cannot access <strong>the</strong> “Remaining from” item. Choose o<strong>the</strong>r<br />
selections.
AppleTalk (Macin<strong>to</strong>sh) 85<br />
<strong>Print</strong> problem with <strong>the</strong> cover<br />
page<br />
A cover page prints ei<strong>the</strong>r on<br />
<strong>the</strong> first or <strong>the</strong> last page of <strong>the</strong><br />
document.<br />
Color problem on printed<br />
output<br />
The colors on my printed output<br />
do not match <strong>the</strong> colors on my<br />
computer screen.<br />
PostScript Command error /<br />
no print out<br />
When I send a print job, I get a<br />
PostScript command error or<br />
no print out.<br />
<strong>SysKonnect</strong> <strong>SK</strong>-<strong>54P1</strong> <strong>802.11g</strong> <strong>Wireless</strong> <strong>Print</strong> <strong>Server</strong><br />
Problem Solution<br />
Select one of <strong>the</strong>se solutions:<br />
• Turn <strong>the</strong> cover page feature off.<br />
• Insert extra page breaks in your document <strong>to</strong> avoid<br />
<strong>the</strong> cover page printing on <strong>the</strong> first or last page of<br />
your document.<br />
When <strong>the</strong> printer receives a color file, it tries <strong>to</strong> match<br />
<strong>the</strong> printed output color <strong>to</strong> <strong>the</strong> screen color. Sometimes<br />
<strong>the</strong> printer cannot match up <strong>the</strong> colors as closely as<br />
wanted. To solve this problem, perform <strong>the</strong> following<br />
steps:<br />
• Select CALIBRATED COLOR/GRAYSCALE in <strong>the</strong> “<strong>Print</strong>”<br />
pop-up menu in <strong>the</strong> “<strong>Print</strong> Options” dialog box. The<br />
printer will make adjustments <strong>to</strong> match <strong>the</strong> colors.<br />
• Check your moni<strong>to</strong>r <strong>to</strong> make sure all settings (e. g.,<br />
brightness) are adjusted correctly.<br />
Check <strong>the</strong> communication pro<strong>to</strong>cols. The computer,<br />
<strong>SysKonnect</strong> <strong>Print</strong> <strong>Server</strong> and printer must all be configured<br />
<strong>to</strong> <strong>the</strong> same communication pro<strong>to</strong>col (ei<strong>the</strong>r binary<br />
or ASCII).<br />
To configure your system:<br />
1. Choose which pro<strong>to</strong>col you are going <strong>to</strong> use. You<br />
should check your printer; it may not give you a<br />
choice.<br />
2. Set your printer <strong>to</strong> <strong>the</strong> correct pro<strong>to</strong>col.<br />
3. Use <strong>the</strong> computer's “<strong>Print</strong>” submenu <strong>to</strong> configure<br />
your computer <strong>to</strong> use <strong>the</strong> pro<strong>to</strong>col you have chosen.<br />
4. Configure <strong>the</strong> <strong>SysKonnect</strong> <strong>Print</strong> <strong>Server</strong> <strong>to</strong> use <strong>the</strong><br />
same pro<strong>to</strong>col as <strong>the</strong> printer and computer.
86 10 Troubleshooting<br />
Windows <strong>Print</strong>ing Problems<br />
Problem Solution<br />
Installation problem for peer<strong>to</strong>-peer<br />
printing<br />
When I tried <strong>to</strong> install <strong>the</strong> printing<br />
software for peer-<strong>to</strong>-peer<br />
printing, I received an error<br />
message and <strong>the</strong> installation<br />
was aborted.<br />
Windows 98 peer-<strong>to</strong>-peer<br />
print port driver installation<br />
problem<br />
On Windows 98, I installed <strong>the</strong><br />
print port driver for peer-<strong>to</strong>-peer<br />
printing, but when I selected a<br />
port on a <strong>SysKonnect</strong> <strong>Print</strong><br />
<strong>Server</strong> and clicked ADD, <strong>the</strong><br />
printer was not installed.<br />
This may be caused by an existing installation of <strong>the</strong><br />
printer port software. Before attempting ano<strong>the</strong>r installation:<br />
1. Remove <strong>the</strong> existing installation.<br />
2. Restart your PC.<br />
To remove an existing printer port installation:<br />
1. Open START > SETTINGS > CONTROL PANEL > ADD/<br />
REMOVE PROGRAMS<br />
2. Look for an entry with a name like "Shared Port",<br />
"Shared <strong>Print</strong>er Port", "<strong>Print</strong> <strong>Server</strong> Driver" or "<strong>Print</strong><br />
<strong>Server</strong> Port".<br />
3. Select this item.<br />
4. Click ADD/REMOVE.<br />
5. Confirm <strong>the</strong> deletion.<br />
Try installing <strong>the</strong> printer using <strong>the</strong> standard Windows<br />
<strong>to</strong>ols, as follows:<br />
1. Start <strong>the</strong> “Add <strong>Print</strong>er” wizard.<br />
2. Select NETWORK PRINTER when prompted "How is<br />
<strong>the</strong> printer attached <strong>to</strong> your Computer?".<br />
3. Click NEXT.<br />
4. When prompted for <strong>the</strong> network path or queue,<br />
enter a dummy value such as shown below. Do not<br />
select YES for "Do you print for MS-DOS programs?"<br />
Figure 50. Add <strong>Print</strong>er Wizard – Network Path
Windows <strong>Print</strong>ing Problems 87<br />
<strong>SysKonnect</strong> <strong>SK</strong>-<strong>54P1</strong> <strong>802.11g</strong> <strong>Wireless</strong> <strong>Print</strong> <strong>Server</strong><br />
Problem Solution<br />
The printer wizard will display a message stating<br />
that "The Network <strong>Print</strong>er is off-line". This is OK.<br />
5. Continue <strong>the</strong> “Add <strong>Print</strong>er” wizard until finished.<br />
6. If requested about sharing <strong>the</strong> printer, do not enable<br />
SHARING.<br />
7. Go <strong>to</strong> <strong>the</strong> “<strong>Print</strong>ers” folder (CONTROL PANEL – PRINT-<br />
ERS).<br />
The printer icon will be grayed out indicating <strong>the</strong><br />
printer is not ready.<br />
8. Right-click <strong>the</strong> printer.<br />
9. Select PROPERTIES.<br />
10. Select <strong>the</strong> DETAILS tab, as shown below.<br />
11. Click <strong>the</strong> ADD PORT but<strong>to</strong>n.<br />
Figure 51. “Details” Tab
88 10 Troubleshooting<br />
Problem Solution<br />
The “Add Port” screen is displayed:<br />
Figure 52. “Add Port” Screen<br />
12. Select O<strong>the</strong>r.<br />
13. Select PRINTSERVER as <strong>the</strong> port <strong>to</strong> be added.<br />
14. Click OK.<br />
The screen “Configure <strong>Print</strong><strong>Server</strong>” is displayed:<br />
USB<br />
Figure 53. “Configure <strong>Print</strong><strong>Server</strong>” Screen<br />
15. Click <strong>the</strong> BROWSE but<strong>to</strong>n.<br />
16. Select <strong>the</strong> desired <strong>SysKonnect</strong> <strong>Print</strong> <strong>Server</strong>.<br />
17. Click OK.<br />
18. Click OK <strong>to</strong> return <strong>to</strong> <strong>the</strong> printers folders.
Windows <strong>Print</strong>ing Problems 89<br />
Windows-only printer problem<br />
I have a Windows-only printer,<br />
and when I tried <strong>to</strong> install <strong>the</strong><br />
peer-<strong>to</strong>-peer printer driver on<br />
Windows 98/Me, installation<br />
failed.<br />
<strong>SysKonnect</strong> <strong>SK</strong>-<strong>54P1</strong> <strong>802.11g</strong> <strong>Wireless</strong> <strong>Print</strong> <strong>Server</strong><br />
Problem Solution<br />
Figure 54. <strong>Print</strong>ers Folder<br />
19. Right-click <strong>the</strong> printer.<br />
20. Ensure that <strong>the</strong> WORK OFF-LINE option is not<br />
checked.<br />
The printer should no longer be grayed out, and is<br />
ready for use.<br />
Note: The screens shown above are from Windows 98.<br />
O<strong>the</strong>r versions of Windows may look slightly different,<br />
but <strong>the</strong> process is identical.<br />
Some Windows-only printers cannot be networked. If a<br />
Windows-only printer cannot be installed using <strong>the</strong> Windows<br />
"Add New <strong>Print</strong>er" wizard, but only by using a program<br />
provided by <strong>the</strong> printer manufacturer, <strong>the</strong>n it<br />
probably cannot be networked.<br />
Try <strong>the</strong> procedure described above (solution for <strong>the</strong> Windows<br />
98 peer-<strong>to</strong>-peer print port driver installation problem).<br />
If you cannot select a printer driver for your printer<br />
within <strong>the</strong> "Add <strong>Print</strong>er" wizard, <strong>the</strong>n <strong>the</strong> printer cannot<br />
be networked.
90 10 Troubleshooting<br />
Problem Solution<br />
LPD printing problem on<br />
Windows 2000/XP<br />
Using Windows 2000/XP, I installed<br />
<strong>the</strong> printer using LPD as<br />
recommended, but I cannot<br />
print.<br />
<strong>Print</strong> problems from software<br />
applications<br />
When printing from some software<br />
applications such as<br />
PowerPoint, it takes a long<br />
time and <strong>the</strong> prin<strong>to</strong>ut is incorrect.<br />
1. Check that <strong>the</strong> correct printer driver is being used.<br />
2. Try disabling <strong>the</strong> bidirectional printing support, as<br />
follows:<br />
• Open <strong>the</strong> printers folder.<br />
• Right-click on <strong>the</strong> printer.<br />
• Select PROPERTIES.<br />
• Select <strong>the</strong> PORTS tab.<br />
3. Uncheck <strong>the</strong> Enable bidirectional support checkbox.<br />
.<br />
Figure 55. <strong>Print</strong>er Ports Tab<br />
The problem is due <strong>to</strong> <strong>the</strong> printer, which is being configured<br />
<strong>to</strong> start printing after <strong>the</strong> first page is spooled. To<br />
change this setting:<br />
1. Go <strong>to</strong> CONTROL PANEL > PRINTERS.<br />
2. Click on your printer.<br />
3. Select FILE > PROPERTIES > DETAILS.<br />
4. On <strong>the</strong> “Details” screen click <strong>the</strong> SPOOL SETTINGS<br />
but<strong>to</strong>n.<br />
5. When <strong>the</strong> “Spool Settings” dialog box appears,<br />
select Start printing after last page is spooled.<br />
6. Click OK.
Windows <strong>Print</strong>ing Problems 91<br />
<strong>SysKonnect</strong> <strong>SK</strong>-<strong>54P1</strong> <strong>802.11g</strong> <strong>Wireless</strong> <strong>Print</strong> <strong>Server</strong><br />
Problem Solution<br />
BiAdmin Configuration Problem<br />
The Configuration but<strong>to</strong>n on<br />
<strong>the</strong> “<strong>Print</strong>er Status” screen in<br />
BiAdmin is grayed out, even<br />
though my printer is bi-directional.<br />
<strong>Print</strong>ing from MS-DOS programs<br />
How do I print <strong>to</strong> <strong>the</strong> <strong>SysKonnect</strong><br />
<strong>Print</strong> <strong>Server</strong>'s printer from<br />
a MS-DOS program?<br />
The but<strong>to</strong>n is unavailable if <strong>the</strong> printer is busy. You must<br />
wait until <strong>the</strong> printer is idle.<br />
Set <strong>the</strong> MS-DOS program <strong>to</strong> use LPT1 (parallel port 1)<br />
<strong>the</strong>n capture <strong>the</strong> output and re-direct it <strong>to</strong> <strong>the</strong> <strong>SysKonnect</strong><br />
<strong>Print</strong> <strong>Server</strong>'s printer.<br />
Windows 98/Me<br />
1. Select START > SETTINGS > PRINTERS <strong>to</strong> open <strong>the</strong><br />
printers folder.<br />
2. Right-click <strong>the</strong> <strong>SysKonnect</strong> <strong>Print</strong> <strong>Server</strong>'s <strong>Print</strong>er.<br />
3. Select PROPERTIES.<br />
4. On <strong>the</strong> “Details” tab, click <strong>the</strong> CAPTURE but<strong>to</strong>n.<br />
The “Capture <strong>Print</strong>er Port” dialog is displayed:<br />
Figure 56. Capture <strong>Print</strong>er Port Dialog<br />
5. On this dialog:<br />
• Select <strong>the</strong> device, normally LPT1 (parallel<br />
port 1).<br />
• Enter or select <strong>the</strong> path <strong>to</strong> <strong>the</strong> printer:<br />
\\printer_name\P1<br />
where printer_name is <strong>the</strong> actual name of<br />
your printer, e.g. \\SC3000014\P1.<br />
• Check <strong>the</strong> Reconnect at logon checkbox. If this<br />
is not activated, <strong>the</strong> capture setting will be lost<br />
when Windows is restarted.<br />
Windows 2000/XP<br />
1. Login as administra<strong>to</strong>r.<br />
2. Open <strong>the</strong> command prompt window.<br />
3. Enter <strong>the</strong> following command:<br />
net use lpt1 \\printer_name\P1 /persistent:yes<br />
where printer_name is <strong>the</strong> actual name of your<br />
printer, e.g. net use lpt1 \\SC3000014\P1 /<br />
persistent:yes<br />
4. To terminate this capture, use <strong>the</strong> following command<br />
at <strong>the</strong> command prompt:<br />
net use lpt1 /delete
92 10 Troubleshooting<br />
Unix Troubleshooting<br />
Problem Solution<br />
<strong>Print</strong> server undetected<br />
The <strong>SysKonnect</strong> <strong>Print</strong> <strong>Server</strong><br />
device is not recognized.<br />
Forgotten <strong>Print</strong> server IP<br />
address<br />
The <strong>SysKonnect</strong> <strong>Print</strong> <strong>Server</strong>’s<br />
IP address is forgotten and it<br />
needs <strong>to</strong> be installed in a new<br />
environment.<br />
Check <strong>the</strong> following:<br />
• The network cable is OK.<br />
• There are no routers between <strong>the</strong> <strong>SysKonnect</strong> <strong>Print</strong><br />
<strong>Server</strong> and <strong>the</strong> UNIX host during IP address assignment.<br />
• There are no NetWare file servers without TCP/IP<br />
support between <strong>the</strong> <strong>SysKonnect</strong> <strong>Print</strong> <strong>Server</strong> and<br />
<strong>the</strong> UNIX host.<br />
• You have used <strong>the</strong> correct hardware address, as<br />
shown on a sticker on <strong>the</strong> base of <strong>the</strong> device.<br />
• Use <strong>the</strong> ping command <strong>to</strong> see if <strong>the</strong> <strong>SysKonnect</strong><br />
<strong>Print</strong> <strong>Server</strong> is a valid device on <strong>the</strong> network.<br />
Use <strong>the</strong> RESET but<strong>to</strong>n <strong>to</strong> res<strong>to</strong>re <strong>the</strong> fac<strong>to</strong>ry default settings,<br />
as described below, <strong>the</strong>n configure as for a new<br />
device.<br />
1. Turn <strong>the</strong> <strong>SysKonnect</strong> <strong>Print</strong> <strong>Server</strong> off.<br />
2. Press and hold <strong>the</strong> diagnostic but<strong>to</strong>n.<br />
3. While pressing <strong>the</strong> but<strong>to</strong>n, switch <strong>the</strong> <strong>SysKonnect</strong><br />
<strong>Print</strong> <strong>Server</strong> on.<br />
4. Continue pressing <strong>the</strong> but<strong>to</strong>n for 10 seconds.<br />
A diagnostic page will be printed, showing <strong>the</strong> new<br />
(default) settings.
11 Important Information<br />
<strong>SysKonnect</strong> <strong>SK</strong>-<strong>54P1</strong> <strong>802.11g</strong> <strong>Wireless</strong> <strong>Print</strong> <strong>Server</strong><br />
Technical Support<br />
If you encounter any problems, read <strong>the</strong> relevant sections of <strong>the</strong> manual. If you cannot solve<br />
your problems, consult our technical support.<br />
If you contact our technical support engineers, have <strong>the</strong> following information ready:<br />
• print server type<br />
• configuration of your network<br />
• type of cabling<br />
• system documentation<br />
Our support team can be reached as follows:<br />
North / South America, Pacific Rim Europe<br />
Office hours 24 hours support via paging service Mon-Thu 8:00 AM – 5:00 PM<br />
Fri 8:00 AM – 03:30 PM (CET)<br />
Phone +1 866 782 2507<br />
(<strong>to</strong>ll free in <strong>the</strong> USA)<br />
+1 408 222 0666<br />
(<strong>to</strong>ll number for international callers)<br />
+1 408 787 5395 (pager)<br />
+49 7243 502 330<br />
Fax +1 408 752 9029 +49 7243 502 364<br />
WWW http://www.syskonnect.com http://www.syskonnect.de<br />
E-mail support@syskonnect.com support@syskonnect.de<br />
Address <strong>SysKonnect</strong>, Inc.<br />
A Marvell®Company<br />
700 First Avenue<br />
Sunnyvale, CA 94089<br />
USA<br />
<strong>SysKonnect</strong> GmbH<br />
A Marvell®Company<br />
Siemensstr. 23<br />
D-76275 Ettlingen<br />
Germany<br />
Calls received outside office hours in Europe are serviced by an answering machine and will<br />
be dealt with as soon as possible.<br />
Returning a <strong>SysKonnect</strong> <strong>Print</strong> <strong>Server</strong> for Repair<br />
If you want <strong>to</strong> return a faulty product <strong>to</strong> <strong>SysKonnect</strong>, follow <strong>the</strong>se steps:<br />
1. Contact us by phone, fax, or e-mail.<br />
North / South America, Pacific Rim European and o<strong>the</strong>r countries<br />
Phone +1 866 782 2507 (<strong>to</strong>ll free)<br />
+1 408 222 0666 (<strong>to</strong>ll number)<br />
+49 7243 502 476<br />
Fax +1 408 752 9029 +49 7243 502 364<br />
E-mail support@syskonnect.com rma@syskonnect.de<br />
We will send you an RMA (Return Material Authorization) form by fax or e-mail.<br />
2. Complete <strong>the</strong> form.<br />
3. Return <strong>the</strong> form <strong>to</strong> us.<br />
We will send you a unique reference number and inform you if <strong>the</strong> product is still under<br />
warranty.
94 11 Important Information<br />
i<br />
4. Send us <strong>the</strong> faulty product, with a copy of <strong>the</strong> completed form enclosed in its original<br />
packaging (or comparable packaging).<br />
5. Write <strong>the</strong> reference number issued by <strong>SysKonnect</strong> clearly visible on <strong>the</strong> outer packaging.<br />
<strong>SysKonnect</strong> cannot accept any returned product without an RMA number on <strong>the</strong> outer packaging.<br />
The warranty does not apply <strong>to</strong> products that have been damaged by inadequate packaging.<br />
Additional Documentation and Updates<br />
On <strong>the</strong> installation CD-ROM additional information is available, i.e. about o<strong>the</strong>r <strong>SysKonnect</strong><br />
products or o<strong>the</strong>r language versions of this manual.<br />
To view a document on <strong>the</strong> CD-ROM, proceed as follows:<br />
1. Insert <strong>the</strong> installation CD-ROM in<strong>to</strong> your CD-ROM drive.<br />
2. On <strong>the</strong> start page of <strong>the</strong> CD-ROM, click MANUAL.<br />
A list with <strong>the</strong> available manuals is displayed.<br />
3. Click <strong>the</strong> appropriate document.<br />
The PDF file is displayed.<br />
<strong>SysKonnect</strong> maintains a site on <strong>the</strong> World Wide Web where you can find <strong>the</strong> latest information<br />
on our product range and our cus<strong>to</strong>mer support services. The latest software is also provided<br />
on <strong>the</strong> <strong>SysKonnect</strong> web site.<br />
To download <strong>the</strong> latest software or firmware from our web site, proceed as follows:<br />
1. Visit our web site: http://www.syskonnect.com.<br />
2. Click <strong>the</strong> but<strong>to</strong>n DRIVER LIBRARY.<br />
The latest software, sorted by product groups, can be found here.<br />
3. Click <strong>the</strong> appropriate network technology, e.g. GWIRELESS LAN.<br />
4. Select <strong>the</strong> product family <strong>SK</strong>-<strong>54P1</strong> WIRELESS PRINT SERVER.<br />
The available software for this adapter is displayed.<br />
5. Click <strong>the</strong> appropriate software.<br />
6. Click <strong>the</strong> diskette symbol <strong>to</strong> download <strong>the</strong> software.
Technical Specifications 95<br />
<strong>SysKonnect</strong> <strong>SK</strong>-<strong>54P1</strong> <strong>802.11g</strong> <strong>Wireless</strong> <strong>Print</strong> <strong>Server</strong><br />
Technical Specifications<br />
Model <strong>SysKonnect</strong> <strong>SK</strong>-<strong>54P1</strong> <strong>802.11g</strong> <strong>Wireless</strong> <strong>Print</strong> <strong>Server</strong><br />
Dimensions (WxDxH) 95 x 63 x 23 mm<br />
Power consumption @ max. 5.5 W<br />
External power adapter 5V DC<br />
LEDs 2<br />
USB 2.0 ports 1<br />
E<strong>the</strong>rnet connec<strong>to</strong>rs 10/100Base-T<br />
Temperature range Operation: 0°C <strong>to</strong> + 40°C<br />
S<strong>to</strong>rage: -10°C <strong>to</strong> + 70°C<br />
Shipping: -40°C <strong>to</strong> + 70°C<br />
Relative humidity Operation: 10% <strong>to</strong> 80% non-condensing<br />
S<strong>to</strong>rage: 5% <strong>to</strong> 90% non-condensing<br />
Shipping: 5% <strong>to</strong> 100% non-condensing<br />
Safety and CE Standards CE class B; compliant <strong>to</strong> 99/5//EEC directive and EMC<br />
standards EN 00328-2, EN 301489-1/-17, EN 60950<br />
FCC class A<br />
Warranty 2 years<br />
Pro<strong>to</strong>col Support<br />
Feature Support<br />
Model TCP/IP NetBeui AppleTalk<br />
<strong>SK</strong>-<strong>54P1</strong> yes yes yes<br />
Model HTTP Setup E-mail <strong>Print</strong>ing IPP Support Au<strong>to</strong>IP<br />
<strong>SK</strong>-<strong>54P1</strong> yes yes yes yes
96 11 Important Information
Appendix A. License and Warranty<br />
Information<br />
<strong>SysKonnect</strong> <strong>SK</strong>-<strong>54P1</strong> <strong>802.11g</strong> <strong>Wireless</strong> <strong>Print</strong> <strong>Server</strong><br />
The Americas, Asia, Australia, New Zealand,<br />
Pacific<br />
Dear Cus<strong>to</strong>mer,<br />
if you acquired your <strong>SysKonnect</strong> product in <strong>the</strong> UNITED STATES, CANADA or any o<strong>the</strong>r country in <strong>the</strong> AMERICAS, ASIA, AUSTRA-<br />
LIA, NEW ZEALAND, PACIFIC, <strong>the</strong> following license and purchase agreement applies <strong>to</strong> you.<br />
This is a legal agreement between you, <strong>the</strong> end user and <strong>SysKonnect</strong> Incorporation, a California U.S.A. Incorporation (<strong>SysKonnect</strong><br />
Inc.).<br />
<strong>SysKonnect</strong> Inc. License and Purchase Agreement<br />
By opening <strong>the</strong> sealed disk package and taking possession of <strong>the</strong> hardware, you are agreeing <strong>to</strong> be bound by <strong>the</strong> terms of this Agreement.<br />
If you do not agree <strong>to</strong> <strong>the</strong> terms of this Agreement, promptly return <strong>the</strong> unopened and unused disk package and hardware with<br />
<strong>the</strong> accompanying items (including all written materials and o<strong>the</strong>r accessories) <strong>to</strong> <strong>the</strong> place of purchase for a full refund.<br />
Grant of Software License<br />
This <strong>SysKonnect</strong> Inc. License Agreement (License) permits you <strong>to</strong> use one copy of <strong>the</strong> <strong>SysKonnect</strong> Inc. software product acquired<br />
with this License (“SOFTWARE”) on any single computer, provided <strong>the</strong> SOFTWARE is in use on only one computer at any time. If you<br />
have multiple Licenses for <strong>the</strong> SOFTWARE, <strong>the</strong>n at any time, you may have as many copies of <strong>the</strong> SOFTWARE in use as you have<br />
Licenses. The SOFTWARE is “in use” on a computer when it is loaded in<strong>to</strong> <strong>the</strong> temporary memory (i.e. RAM) or installed in<strong>to</strong> <strong>the</strong> permanent<br />
memory (e.g. hard disk or o<strong>the</strong>r s<strong>to</strong>rage device) of that computer, except that a copy installed on a network server for <strong>the</strong> sole<br />
purpose of distribution <strong>to</strong> o<strong>the</strong>r computers is not “in use”. If <strong>the</strong> anticipated number of users of <strong>the</strong> SOFTWARE will exceed <strong>the</strong> number<br />
of applicable Licenses, <strong>the</strong>n you must have a reasonable mechanism or process in place <strong>to</strong> assure that <strong>the</strong> number of persons using<br />
<strong>the</strong> SOFTWARE concurrently does not exceed <strong>the</strong> number of Licenses. If <strong>the</strong> SOFTWARE is permanently installed on <strong>the</strong> hard disk or<br />
o<strong>the</strong>r s<strong>to</strong>rage device of a computer (o<strong>the</strong>r than a network server) and one person uses that computer more than 80% of <strong>the</strong> time it is<br />
in use, <strong>the</strong>n that person may also use <strong>the</strong> SOFTWARE on a portable or home computer.<br />
Copyright<br />
The SOFTWARE is owned by <strong>SysKonnect</strong> Inc. or its suppliers and is protected against copying by copyright laws, international treaty<br />
provisions and o<strong>the</strong>r national laws.<br />
If <strong>the</strong> SOFTWARE is not copy protected you may ei<strong>the</strong>r make one copy of <strong>the</strong> SOFTWARE solely for backup or archival purposes, or<br />
transfer <strong>the</strong> SOFTWARE <strong>to</strong> a single hard disk provided you keep <strong>the</strong> original solely for backup or archival purposes.<br />
You may not copy <strong>the</strong> Product Manual(s) or written materials accompanying <strong>the</strong> SOFTWARE or HARDWARE.<br />
O<strong>the</strong>r Restrictions<br />
You may not rent or lease <strong>the</strong> SOFTWARE or HARDWARE, but you may transfer your rights under this <strong>SysKonnect</strong> Inc. License and<br />
Purchase Agreement on a permanent basis provided you transfer all copies of <strong>the</strong> SOFTWARE and all written materials, and <strong>the</strong><br />
recipient agrees <strong>to</strong> <strong>the</strong> terms of this Agreement. You may not reverse engineer, decompile or disassemble <strong>the</strong> SOFTWARE. Any<br />
transfer must include <strong>the</strong> most recent update and all prior versions.<br />
Hardware<br />
<strong>SysKonnect</strong> Inc. warrants, that <strong>the</strong> hardware will be delivered free from defect and in working condition. <strong>SysKonnect</strong> Inc. does not<br />
assume liability for nor warrant damage <strong>to</strong> <strong>the</strong> hardware after delivery. <strong>SysKonnect</strong> also does not warrant <strong>to</strong>tal applicability for specific<br />
applications or cus<strong>to</strong>mer Network environments.<br />
Limited Warranty for Hardware and Software<br />
Limited Warranty<br />
<strong>SysKonnect</strong> Inc. warrants that <strong>the</strong> SOFTWARE will perform substantially in accordance with <strong>the</strong> accompanying Product Manual(s) for<br />
a period of 90 days from <strong>the</strong> date of receipt.<br />
<strong>SysKonnect</strong> warrants<br />
that NETWORK INTERFACE CARDS will be free from defects in materials and workmanship under normal use and service for a<br />
period of 5 years from <strong>the</strong> date of receipt, that NETWORK INFRASTRUCTURE COMPONENTS (e.g., hubs, switches, concentra<strong>to</strong>rs)<br />
will be free from defects in materials and workmanship under normal use and service for a period of 2 years from <strong>the</strong> date of receipt,<br />
and o<strong>the</strong>r HARDWARE for a period of 6 months from <strong>the</strong> date of receipt respectively.<br />
This warranty is given by <strong>SysKonnect</strong> Inc. as producer of <strong>the</strong> PRODUCT; possible legal warranty or liability claims against <strong>the</strong> dealer,<br />
whom you have acquired your SOFTWARE or HARDWARE product from, shall nei<strong>the</strong>r replaced by nor limited through this warranty.<br />
Cus<strong>to</strong>mer Remedies<br />
<strong>SysKonnect</strong>'s entire liability and your exclusive remedy shall be, at <strong>SysKonnect</strong>'s option, ei<strong>the</strong>r return of <strong>the</strong> price paid, or repair or<br />
replacement of <strong>the</strong> SOFTWARE or HARDWARE that does not meet <strong>SysKonnect</strong>'s Limited Warranty and which is returned <strong>to</strong> <strong>SysKonnect</strong><br />
Inc. with a copy of your receipt. This Limited Warranty is void if failure of <strong>the</strong> SOFTWARE or HARDWARE has resulted from accident,<br />
abuse, or misapplication. Any replacement SOFTWARE will be warranted by <strong>SysKonnect</strong> Inc. only for <strong>the</strong> remainder of <strong>the</strong><br />
original warranty period or 30 days, whichever is longer. Any replacement HARDWARE will be warranted for <strong>the</strong> remainder of <strong>the</strong> original<br />
warranty period or 6 months, whichever is longer.
98 Appendix A. License and Warranty Information<br />
No o<strong>the</strong>r Warranties<br />
<strong>SysKonnect</strong> Inc. disclaims all o<strong>the</strong>r warranties or liabilities with respect <strong>to</strong> <strong>the</strong> SOFTWARE, <strong>the</strong> HARDWARE, <strong>the</strong> accompanying Product<br />
Manual(s) and o<strong>the</strong>r written materials and any o<strong>the</strong>r accessories.<br />
No Liability for Consequential Damages<br />
<strong>SysKonnect</strong> Inc. does not warrant <strong>the</strong> software and hardware for a specific application, nor does <strong>SysKonnect</strong> Inc. accept any consequential<br />
damages due <strong>to</strong> <strong>the</strong> use of <strong>the</strong> hardware or software. <strong>SysKonnect</strong> Inc. and its suppliers shall not be liable for any o<strong>the</strong>r damages<br />
whatsoever (including, without limitation, damages for loss of business profits, business interruption, loss of business information<br />
or data, property loss or o<strong>the</strong>r financial loss), arising out of <strong>the</strong> use of or <strong>the</strong> inability <strong>to</strong> use this <strong>SysKonnect</strong> Inc. product, even if<br />
<strong>SysKonnect</strong> Inc. has been advised of <strong>the</strong> possibility of such damages. In any case, <strong>SysKonnect</strong>'s entire liability shall be limited <strong>to</strong> <strong>the</strong><br />
amount actually paid by you for <strong>the</strong> product.<br />
O<strong>the</strong>r<br />
This agreement is governed by <strong>the</strong> procedural and substantive laws of <strong>the</strong> State California, U.S.A. UN Trade Laws shall not be applicable<br />
in any case.<br />
Should individual stipulations of this Agreement be or become invalid, this invalid stipulation shall be replaced by a stipulation, which<br />
is as close as possible <strong>to</strong> <strong>the</strong> invalid stipulation.<br />
Should you have any questions concerning this Agreement, or if you desire <strong>to</strong> contact <strong>SysKonnect</strong> Inc. for any reason, please use <strong>the</strong><br />
address information enclosed in this product or write <strong>to</strong>: <strong>SysKonnect</strong> Inc., A Marvell®Company, 700 First Avenue, Sunnyvale, CA<br />
94089.<br />
U.S. Government Use<br />
Use, duplication, or disclosure by <strong>the</strong> United States Government is subject <strong>to</strong> restrictions as set forth in FAR § 52.227-14 (June 1987)<br />
Alternate III(g)(3) (June 1987), FAR § 52.227-19 (June 1987), or DFARS § 52.227-7013 (c)(1)(!!) (June 1988), as applicable. Contrac<strong>to</strong>r<br />
/ Manufacturer is <strong>SysKonnect</strong>, Inc., A Marvell®Company, 700 First Avenue, Sunnyvale, CA 94089.<br />
Europe<br />
Dear Cus<strong>to</strong>mer,<br />
if you acquired your <strong>SysKonnect</strong> product in EUROPE, <strong>the</strong> following license and purchase agreement applies <strong>to</strong> you: This is a legal<br />
agreement between you, <strong>the</strong> end user and <strong>SysKonnect</strong> GmbH, incorporated in Ettlingen/Federal Republic of Germany.<br />
<strong>SysKonnect</strong> License and Purchase Agreement<br />
By opening <strong>the</strong> sealed disk package and taking possession of <strong>the</strong> hardware, you are agreeing <strong>to</strong> be bound by <strong>the</strong> terms of this Agreement.<br />
If you do not agree <strong>to</strong> <strong>the</strong> terms of this Agreement, promptly return <strong>the</strong> unopened and unused disk package and hardware with<br />
<strong>the</strong> accompanying items (including all written materials and o<strong>the</strong>r accessories) <strong>to</strong> <strong>the</strong> place of purchase for a full refund.<br />
Grant of Software License<br />
This <strong>SysKonnect</strong> License Agreement (License) permits you <strong>to</strong> use one copy of <strong>the</strong> <strong>SysKonnect</strong> software product acquired with this<br />
License (“SOFTWARE”) on any single computer, provided <strong>the</strong> SOFTWARE is in use on only one computer at any time. If you have<br />
multiple Licenses for <strong>the</strong> SOFTWARE, <strong>the</strong>n at any time, you may have as many copies of <strong>the</strong> SOFTWARE in use as you have<br />
Licenses. The SOFTWARE is “in use” on a computer when it is loaded in<strong>to</strong> <strong>the</strong> temporary memory (i.e. RAM) or installed in<strong>to</strong> <strong>the</strong> permanent<br />
memory (e.g. hard disk or o<strong>the</strong>r s<strong>to</strong>rage device) of that computer, except that a copy installed on a network server for <strong>the</strong> sole<br />
purpose of distribution <strong>to</strong> o<strong>the</strong>r computers is not “in use”. If <strong>the</strong> anticipated number of users of <strong>the</strong> SOFTWARE will exceed <strong>the</strong> number<br />
of applicable Licenses, <strong>the</strong>n you must have a reasonable mechanism or process in place <strong>to</strong> assure that <strong>the</strong> number of persons using<br />
<strong>the</strong> SOFTWARE concurrently does not exceed <strong>the</strong> number of Licenses. If <strong>the</strong> SOFTWARE is permanently installed on <strong>the</strong> hard disk or<br />
o<strong>the</strong>r s<strong>to</strong>rage device of a computer (o<strong>the</strong>r than a network server) and one person uses that computer more than 80% of <strong>the</strong> time it is<br />
in use, <strong>the</strong>n that person may also use <strong>the</strong> SOFTWARE on a portable or home computer.<br />
Copyright<br />
The SOFTWARE is owned by <strong>SysKonnect</strong> or its suppliers and is protected against copying by copyright laws, international treaty provisions<br />
and o<strong>the</strong>r national laws.<br />
If <strong>the</strong> SOFTWARE is not copy protected you may ei<strong>the</strong>r make one copy of <strong>the</strong> SOFTWARE solely for backup or archival purposes, or<br />
transfer <strong>the</strong> SOFTWARE <strong>to</strong> a single hard disk provided you keep <strong>the</strong> original solely for backup or archival purposes.<br />
You may not copy <strong>the</strong> Product Manual(s) or written materials accompanying <strong>the</strong> SOFTWARE or HARDWARE.<br />
O<strong>the</strong>r Restrictions<br />
You may not rent or lease <strong>the</strong> SOFTWARE or HARDWARE, but you may transfer your rights under this <strong>SysKonnect</strong> License and Purchase<br />
Agreement on a permanent basis provided you transfer all copies of <strong>the</strong> SOFTWARE and all written materials, and <strong>the</strong> recipient<br />
agrees <strong>to</strong> <strong>the</strong> terms of this Agreement. You may not reverse engineer, decompile or disassemble <strong>the</strong> SOFTWARE. Any transfer must<br />
include <strong>the</strong> most recent update and all prior versions.<br />
Hardware<br />
The risk passes <strong>to</strong> you, <strong>the</strong> end user, upon taking possession (hand over) of <strong>the</strong> HARDWARE. Total qualities were not warranted.<br />
Limited Warranty for Hardware and Software<br />
Limited Warranty<br />
<strong>SysKonnect</strong> warrants that <strong>the</strong> SOFTWARE will perform substantially in accordance with <strong>the</strong> accompanying Product Manual(s) for a<br />
period of 90 days from <strong>the</strong> date of receipt if you have created <strong>the</strong> required technical preconditions.
Deutschland, Schweiz, Österreich, Liechtenstein 99<br />
<strong>SysKonnect</strong> <strong>SK</strong>-<strong>54P1</strong> <strong>802.11g</strong> <strong>Wireless</strong> <strong>Print</strong> <strong>Server</strong><br />
<strong>SysKonnect</strong> warrants that NETWORK INTERFACE CARDS will be free from defects in materials and workmanship under normal use<br />
and service for a period of 5 years from <strong>the</strong> date of receipt, that NETWORK INFRASTRUCTURE COMPONENTS (e.g., hubs,<br />
switches, concentra<strong>to</strong>rs) will be free from defects in materials and workmanship under normal use and service for a period of 2 years<br />
from <strong>the</strong> date of receipt, and o<strong>the</strong>r HARDWARE for a period of 6 months from <strong>the</strong> date of receipt respectively.<br />
Any implied warranties on <strong>the</strong> SOFTWARE are limited <strong>to</strong> 90 days, <strong>to</strong> 5 years on <strong>the</strong> NETWORK INTERFACE CARDS, <strong>to</strong> 2 years on<br />
<strong>the</strong> NETWORK INFRASTRUCTURE COMPONENTS and <strong>to</strong> 6 months on all o<strong>the</strong>r hardware. This warranty is given by <strong>SysKonnect</strong> as<br />
producer of <strong>the</strong> PRODUCT; possible legal warranty or liability claims against <strong>the</strong> dealer, whom you have acquired your SOFTWARE or<br />
HARDWARE product from, shall nei<strong>the</strong>r replaced by nor limited through this warranty.<br />
Cus<strong>to</strong>mer Remedies<br />
<strong>SysKonnect</strong>'s entire liability and your exclusive remedy shall be, at <strong>SysKonnect</strong>'s option, ei<strong>the</strong>r<br />
return of <strong>the</strong> price paid, or repair or replacement of <strong>the</strong> SOFTWARE or HARDWARE that does not meet <strong>SysKonnect</strong>'s Limited Warranty<br />
and which is returned <strong>to</strong> <strong>SysKonnect</strong> with a copy of your receipt. This Limited Warranty is void if failure of <strong>the</strong> SOFTWARE or<br />
HARDWARE has resulted from accident, abuse, or misapplication. Any replacement SOFTWARE will be warranted by <strong>SysKonnect</strong><br />
only for <strong>the</strong> remainder of <strong>the</strong> original warranty period or 30 days, whichever is longer. Any replacement HARDWARE will be warranted<br />
for <strong>the</strong> remainder of <strong>the</strong> original warranty period or 6 months, whichever is longer.<br />
No o<strong>the</strong>r Warranties<br />
<strong>SysKonnect</strong> disclaims all o<strong>the</strong>r warranties or liabilities with respect <strong>to</strong> <strong>the</strong> SOFTWARE, <strong>the</strong> HARDWARE, <strong>the</strong> accompanying Product<br />
Manual(s) and o<strong>the</strong>r written materials and any o<strong>the</strong>r accessories.<br />
No Liability for Consequential Damages<br />
<strong>SysKonnect</strong> does not warrant <strong>the</strong> software and Hardware for a specific application, nor does <strong>SysKonnect</strong> accept any consequential<br />
damages due <strong>to</strong> <strong>the</strong> use of <strong>the</strong> hardware or software. <strong>SysKonnect</strong> and its suppliers shall not be liable for any o<strong>the</strong>r damages whatsoever<br />
(including, without limitation, damages for loss of business profits, business interruption, loss of business information or data,<br />
property loss or o<strong>the</strong>r pecuniary loss), arising out of <strong>the</strong> use of or <strong>the</strong> inability <strong>to</strong> use this <strong>SysKonnect</strong> product, even if <strong>SysKonnect</strong> has<br />
been advised of <strong>the</strong> possibility of such damages. In any case, <strong>SysKonnect</strong>'s entire liability shall be limited <strong>to</strong> <strong>the</strong> amount actually paid<br />
by you for <strong>the</strong> product.<br />
O<strong>the</strong>r<br />
This agreement is governed by <strong>the</strong> procedural and substantive laws of <strong>the</strong> Federal Republic of Germany. UN Trade Laws shall not be<br />
applicable in any case. Place of litigation is Karlsruhe, FRG, as far as this can be agreed upon operatively in this way.<br />
Should individual stipulations of this Agreement be or become invalid, this invalid stipulation shall be replaced by a stipulation, which<br />
is as close as possible <strong>to</strong> <strong>the</strong> invalid stipulation.<br />
Should you have any questions concerning this Agreement, or if you desire <strong>to</strong> contact <strong>SysKonnect</strong> for any reason, please use <strong>the</strong><br />
address information enclosed in this product or write <strong>to</strong>: <strong>SysKonnect</strong> GmbH, Siemensstrasse 23, D-76275 Ettlingen.<br />
Deutschland, Schweiz, Österreich, Liechtenstein<br />
Verehrte Kundin, verehrter Kunde<br />
wenn Sie Ihr <strong>SysKonnect</strong> Produkt in DEUTSCHLAND, in der SCHWEIZ, in ÖSTERREICH oder in LIECHTENSTEIN erworben haben,<br />
gilt für Sie der folgende Lizenz- und Kaufvertrag. Dies ist ein rechtsgültiger Vertrag zwischen Ihnen, dem Endanwender, und der<br />
<strong>SysKonnect</strong> GmbH mit Sitz in Ettlingen/Bundesrepublik Deutschland.<br />
<strong>SysKonnect</strong> Lizenz- und Kaufvertrag<br />
Durch Öffnen der versiegelten Diskettenpackung und durch die Inbesitznahme der Hardware erklären Sie sich an die Bestimmungen<br />
der nachfolgenden Vereinbarung gebunden. Wenn Sie mit den Bestimmungen dieses Vertrages nicht einverstanden sind, geben Sie<br />
bitte die Diskettenpackung und die Hardware ungeöffnet und unbenutzt mit den Begleitgegenständen (einschließlich aller schriftlichen<br />
Unterlagen und dem sonstigen Zubehör) unverzüglich gegen volle Rückerstattung des Preises an die Stelle zurück, von der Sie sie<br />
bezogen haben.<br />
Einräumung einer Software-Lizenz<br />
Diese <strong>SysKonnect</strong> Lizenzvereinbarung (Lizenz) gibt Ihnen die Berechtigung, eine Kopie des <strong>SysKonnect</strong> Software Produktes, das mit<br />
dieser Lizenz (Software) erworben wurde, auf einem Einzelcomputer unter der Voraussetzung benutzen, dass die Software zu jeder<br />
beliebigen Zeit auf nur einem einzigen Computer verwendet wird. Wenn Sie Mehrfachlizenzen für die Software erworben haben, dürfen<br />
Sie immer nur höchstens so viele Kopien in Benutzung haben, wie Sie Lizenzen besitzen. Die Software ist auf einem Computer “in<br />
Benutzung”, wenn Sie in den Zwischenspeicher (d.h., RAM) geladen oder in einem Permanentspeicher (z.B. einer Festplatte oder<br />
einer anderen Speichervorrichtung) dieses Computers gespeichert ist, mit der Ausnahme, dass eine Kopie, die auf einem Netzserver<br />
zu dem alleinigen Zweck der Verteilung an andere Computer installiert ist, nicht “in Benutzung” ist. Wenn die voraussichtliche Zahl der<br />
Benutzer der Software die Zahl der erworbenen Lizenzen übersteigt, müssen Sie angemessene Mechanismen oder Verfahren bereithalten,<br />
um sicherzustellen, dass die Zahl der Personen, die die Software gleichzeitig benutzen, nicht die Zahl der Lizenzen übersteigt.<br />
Wenn die Software permanent auf einer Festplatte oder einer anderen Speichervorrichtung eines Computers, der kein<br />
Netzserver ist, installiert wird und eine einzige Person diesen Computer zu mehr als 80 % der Zeit benutzt, die er in Benutzung ist,<br />
darf diese eine Person die Software auch auf einem tragbaren Computer oder einem Heimcomputer benutzen.<br />
Urheberrecht<br />
Die Software ist Eigentum von <strong>SysKonnect</strong> oder deren Lieferanten und ist durch Urheberrechtsgesetze, internationale Verträge und<br />
andere nationale Rechtsvorschriften gegen Kopieren geschützt.<br />
Wenn die Software nicht mit einem technischen Schutz gegen Kopieren ausgestattet ist, dürfen Sie entweder eine einzige Kopie der<br />
Software ausschließlich für Sicherungs- oder Archivierungszwecken machen die Software auf eine einzige Festplatte übertragen, sofern<br />
Sie das Original ausschließlich zu Sicherungs- und Archivierungszwecken aufbewahren.
100 Appendix A. License and Warranty Information<br />
Sie dürfen weder die Handbücher des Produktes noch anderes schriftliches Begleitmaterial zur Software oder Hardware kopieren.<br />
Weitere Beschränkungen<br />
Sie dürfen die Software oder Hardware weder vermieten noch verleihen, aber Sie dürfen die Rechte aus diesem <strong>SysKonnect</strong> Lizenzund<br />
Kaufvertrag auf Dauer auf einen anderen übertragen, vorausgesetzt, dass Sie alle Kopien der Software und das gesamte schriftliche<br />
Begleitmaterial übertragen und der Empfänger sich mit den Bestimmungen dieses Vertrages einverstanden erklärt. Zurückentwickeln<br />
(Reverse Engineering), Dekompilieren und Entassemblieren der Software sind nicht gestattet. Eine Übertragung muß die<br />
letzte aktuelle Version (Update) und alle früheren Versionen umfassen.<br />
Hardware<br />
Mit der Inbesitznahme (Übergabe) dieser Hardware geht die Gefahr auf Sie, den Endanwender über. Eigenschaften wurden nicht<br />
zugesichert.<br />
Beschränkte Garantie für Hardware und Software<br />
<strong>SysKonnect</strong> garantiert für einen Zeitraum von 90 Tagen ab Empfangsdatum, dass die Software, soweit die technischen Voraussetzungen<br />
hierfür von Ihnen geschaffen wurden, im wesentlichen gemäß der begleitenden Dokumentation arbeitet. <strong>SysKonnect</strong> garantiert<br />
für Netzwerkadapterkarten für einen Zeitraum von 5 Jahren,<br />
Infrastrukturkomponenten (z.B. Konzentra<strong>to</strong>ren, Hubs, Switches) für einen Zeitraum von 2 Jahren<br />
und die sonstige Hardware für einen Zeitraum von 6 Monaten ab Empfangsdatum, dass die gelieferte Hardware bei normaler Benutzung<br />
und Wartung frei von Material- oder Verarbeitungsfehlern ist. Die Garantie ist bezüglich der Software auf 90 Tage, bezüglich der<br />
Netzwerkadapter auf 5 Jahre für Infrastrukturkomponenten auf 2 Jahre und bezüglich der sonstigen Hardware auf 6 Monate beschränkt.<br />
Diese Garantie wird von <strong>SysKonnect</strong> als Hersteller des Produktes übernommen; etwaige gesetzliche Gewährleistungs- oder<br />
Haftungsansprüche gegen den Händler, von dem Sie Ihr Exemplar der Software oder Hardware bezogen haben, werden hierdurch<br />
weder ersetzt noch beschränkt.
visit our website:<br />
www.syskonnect.de<br />
<strong>SysKonnect</strong> GmbH<br />
Siemensstrasse 23<br />
D-76275 Ettlingen<br />
Support: 0180 5 759 526 (0,12 Euro/Minute)<br />
0180 5 <strong>SK</strong>WLAN (0,12 Euro/Minute)<br />
E-mail: support@syskonnect.de