4fm 4-channel fm radio control system quick ... - Tower Hobbies
4fm 4-channel fm radio control system quick ... - Tower Hobbies
4fm 4-channel fm radio control system quick ... - Tower Hobbies

Create successful ePaper yourself
Turn your PDF publications into a flip-book with our unique Google optimized e-Paper software.
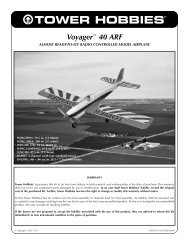
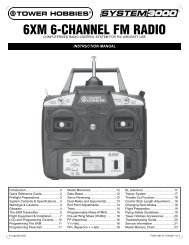
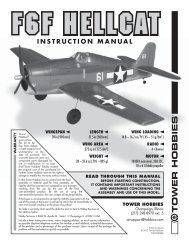
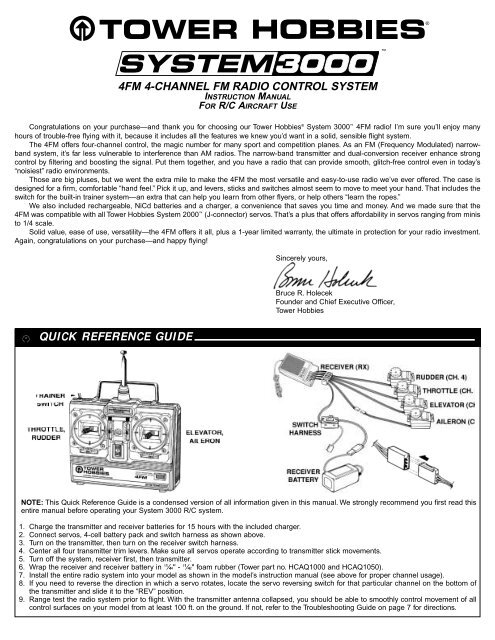
®4FM 4-CHANNEL FM RADIO CONTROL SYSTEMINSTRUCTION MANUALFOR R/C AIRCRAFT USECongratulations on your purchase—and thank you for choosing our <strong>Tower</strong> <strong>Hobbies</strong> ® System 3000 4FM <strong>radio</strong>! I’m sure you’ll enjoy manyhours of trouble-free flying with it, because it includes all the features we knew you’d want in a solid, sensible flight <strong>system</strong>.The 4FM offers four-<strong>channel</strong> <strong>control</strong>, the magic number for many sport and competition planes. As an FM (Frequency Modulated) narrowband<strong>system</strong>, it’s far less vulnerable to interference than AM <strong>radio</strong>s. The narrow-band transmitter and dual-conversion receiver enhance strong<strong>control</strong> by filtering and boosting the signal. Put them together, and you have a <strong>radio</strong> that can provide smooth, glitch-free <strong>control</strong> even in today’s“noisiest” <strong>radio</strong> environments.Those are big pluses, but we went the extra mile to make the 4FM the most versatile and easy-to-use <strong>radio</strong> we’ve ever offered. The case isdesigned for a firm, comfortable “hand feel.” Pick it up, and levers, sticks and switches almost seem to move to meet your hand. That includes theswitch for the built-in trainer <strong>system</strong>—an extra that can help you learn from other flyers, or help others “learn the ropes.”We also included rechargeable, NiCd batteries and a charger, a convenience that saves you time and money. And we made sure that the4FM was compatible with all <strong>Tower</strong> <strong>Hobbies</strong> System 2000 (J-connector) servos. That’s a plus that offers affordability in servos ranging from ministo 1/4 scale.Solid value, ease of use, versatility—the 4FM offers it all, plus a 1-year limited warranty, the ultimate in protection for your <strong>radio</strong> investment.Again, congratulations on your purchase—and happy flying!Sincerely yours,Bruce R. HolecekFounder and Chief Executive Officer,<strong>Tower</strong> <strong>Hobbies</strong>QUICK REFERENCE GUIDENOTE: This Quick Reference Guide is a condensed version of all information given in this manual. We strongly recommend you first read thisentire manual before operating your System 3000 R/C <strong>system</strong>.1. Charge the transmitter and receiver batteries for 15 hours with the included charger.2. Connect servos, 4-cell battery pack and switch harness as shown above.3. Turn on the transmitter, then turn on the receiver switch harness.4. Center all four transmitter trim levers. Make sure all servos operate according to transmitter stick movements.5. Turn off the <strong>system</strong>, receiver first, then transmitter.6. Wrap the receiver and receiver battery in 1 ¼4" - 1 ¼2" foam rubber (<strong>Tower</strong> part no. HCAQ1000 and HCAQ1050).7. Install the entire <strong>radio</strong> <strong>system</strong> into your model as shown in the model’s instruction manual (see above for proper <strong>channel</strong> usage).8. If you need to reverse the direction in which a servo rotates, locate the servo reversing switch for that particular <strong>channel</strong> on the bottom ofthe transmitter and slide it to the “REV” position.9. Range test the <strong>radio</strong> <strong>system</strong> prior to flight. With the transmitter antenna collapsed, you should be able to smoothly <strong>control</strong> movement of all<strong>control</strong> surfaces on your model from at least 100 ft. on the ground. If not, refer to the Troubleshooting Guide on page 7 for directions.
THE TRANSMITTER PAGE 2FIGURE 1The 4FM transmitter (Tx) is designed for mode II operation. Mode II is most commonly used throughout the U.S. andincorporates the <strong>control</strong> of aileron and elevator on the right stick, throttle and rudder on the left stick (see figure 1).During normal conditions, the range, or safe operating distance from the Tx to the Rx is “line of sight”. This means the4FM should maintain complete <strong>control</strong> any time you can see your model. The 4FM operates on the 72MHz frequencyband. There are 50 different <strong>channel</strong>s in the 72MHz band ranging from 72.010MHz (Ch11) through 72.990MHz (Ch60).For safety reasons, you must always be aware of what <strong>channel</strong> you are using so that no two <strong>radio</strong>s in the same areaare EVER operating on the same frequency simultaneously.FIGURE 2Use the frequency flags that are supplied with your R/C <strong>system</strong> so that other modelers at the flying field can identifyyour <strong>channel</strong> number. Attach the flags to the Tx antenna as shown in figure 2.
BEFORE INSTALLATION PAGE 3The rechargeable batteries inside the transmitter and the receiver pack must be fully charged prior to use. Plug the chargerinto a 110V AC wall outlet. Next, connect the charger’s output leads to the Rx battery pack and Tx charge jack. Therespective charger LEDs will illuminate as you connect the charger to the batteries. Charge each battery for 15 hours.The batteries may become warm as they charge. This is normal and a good indication that the batteries are becomingfully charged. NOTE: The Tx and Rx batteries should be charged the night before each use.In cooperation with theRechargeable Battery RecyclingCorporation, <strong>Tower</strong> <strong>Hobbies</strong> encouragesproper disposal of environmentallyhazardous materials. The 4FMcontains rechargeable NiCd batteries.Once the batteries no longer perform adequately,they should be discarded at your local recyclingcenter. Or, call 1-800-8-BATTERY for information.It may be illegal to dispose of NiCd batterieswith common waste in your state.FIGURE 3If the batteries have not been used for several months, you may need to cycle them prior to use. Cycling is the processof fully charging, then discharging, rechargeable batteries to help maximize their charge capacity and run time. To cyclea battery, charge it for 15 hours, then discharge it by turning on the transmitter. The Tx’s voltage indicator should not dropinto the red zone (with the antenna extended) for 90 to 120 minutes. If it does, cycle the batteries again. If the batteriesstill cause the voltage indicator to drop in less than 90 minutes after repeated cycles, battery replacement is recommended.The old batteries should be disposed of at a recycling center.
TRANSMITTER CUSTOMIZATION PAGE 5FIGURE 7The stick tension can be adjusted from inside the transmitter. This allows you to customize the feel of the sticks to yourhands. NOTE: Be cautious when removing and replacing the transmitter backplate. Do not pinch or pull wiring harnessesor drop objects onto the PC board. Electrical short circuits may permanently damage the <strong>radio</strong> and void yourwarranty. Remove the screws from each corner on the back of the transmitter (four total). The tension adjustment screwsare shown in figure 7.FIGURE 8The stick lengths can be adjusted also (see figure 8). Turn the stick head (a) counter-clockwise and stick head (b)clockwise to unlock. Adjust the length to your preference and lock in reverse order.TRAINER FUNCTIONSCAUTION: Only train with an experienced pilot <strong>control</strong>ling the trainer transmitter!The <strong>Tower</strong> <strong>Hobbies</strong> 4FM training cord <strong>system</strong> is Futaba ® compatible (you cannot use an AM or PCM transmitter whentraining with an FM <strong>radio</strong>, and vice-versa). Before training with the airplane, follow these important pre-flight checks:1. Connect the <strong>Tower</strong> <strong>Hobbies</strong> trainer cord (TOWM6080) to the trainer cord jack on the back of both transmitters (see figure 7).2. Turn on the teacher’s Tx and the Rx switch harness in the model. Do NOT turn on the student’s transmitter (it will bepowered by the teacher’s <strong>radio</strong>).3. Press and hold the trainer switch on the teacher’s Tx. Control of the aircraft is now passed on to the student’s Tx.4. Set the trims and reversing switches on the student’s Tx to match the teacher’s Tx.5. Release the trainer switch to allow the teacher to regain complete <strong>control</strong> of the model from the student.6. You are ready to begin training.To make your R/C modeling experience more enjoyable, we recommend that you get experienced, knowledgeablehelp during your first flights. You’ll learn faster and avoid risking your model before you’re truly readyto solo.You can contact the national Academy of Model Aeronautics (AMA), which has more than 2,300 chartered clubs acrossthe country. Most of the clubs provide instructor training programs and insured newcomer training. Contact the AMA at:Academy of Model Aeronautics5151 East Memorial DriveMuncie, IN 47302-9252Tel: (800) 435-9262 Fax: (317) 741-0057World Wide Web Address: http://www.modelaircraft.org/
AMA SAFETY CODE PAGE 6Read and abide by the following Academy of Model Aeronautics Official Safety Code:Model Flying MUST be in accordance with this Code in order for AMA Liability Protection to apply.GENERAL1. I will not fly my model aircraft in sanctioned events, air shows, or model flying demonstrations until it has been provento be airworthy by having been previously, successfully flight tested.2. I will not fly my model higher than approximately 400 feet within 3 miles of an airport without notifying the airport operator.I will give right-of-way and avoid flying in the proximity of full-scale aircraft. Where necessary, an observer shall beutilized to supervise flying to avoid having models fly in the proximity of full-scale aircraft.3. Where established, I will abide by the safety rules for the flying site I use and I will not willfully and deliberately fly mymodels in a careless, reckless and /or dangerous manner.4. At all flying sites a straight or curved line(s) must be established in front of which all flying takes place with the otherside for spectators. Only those persons essential to the flight operations are to be permitted on the flying side of theline; all others must be on the spectator side. Flying over the spectator side of the line is prohibited, unless beyond the<strong>control</strong> of the pilot(s). In any case, the maximum permissible takeoff weight of the models is 55 pounds.5. At air shows or model flying demonstrations a single straight line must be established, one side of which is for flying,with the other side for spectators. Only those persons accredited by the contest director or other appropriate official asnecessary for the flight operations or as having duties or functions relating to the conduct of the show or demonstrationare to be permitted on the flying side of the line. The only exceptions which may be permitted to the single straight linerequirements, under special circumstances involving consideration of site conditions and model size, weight, speed,and power, must be jointly approved by the AMA President and the Executive Director.6. Under all circumstances, if my model weighs over 20 pounds, I will fly it in accordance with paragraph 5 of this sectionof the AMA Safety Code.7. I will not fly my model unless it is identified with my name and address or AMA number, on or in the model.NOTE: This does not apply to models flown indoors.8. I will not operate models with metal-bladed propellers or with gaseous boosts, in which gases other than air entertheir internal combustion engine(s); nor will I operate models with extremely hazardous fuels such as those containingtetranitromethane or hydrazine.9. I will not operate models with pyrotechnics (any device that explodes, burns, or propels a projectile of any kind) including,but not limited to, rockets, explosive bombs dropped from models, smoke bombs, all explosive gases (such ashydrogen-filled balloons), ground mounted devices launching a projectile. The only exceptions permitted are rocketsflown in accordance with the National Model Rocketry Safety Code or those permanently attached (as per JATO use);also those items authorized for Air Show Team use as defined by AST Advisory Committee (document available fromAMA HQ). In any case, models using rocket motors as a primary means of propulsion are limited to a maximum weightof 3.3 pounds and a G series motor. NOTE: A model aircraft is defined as an aircraft with or without engine, not able tocarry a human being.10. I will not operate any turbo jet engine (axial or centrifugal flow) unless I have obtained a special waiver for such specificoperations from the AMA President and Executive Director and I will abide by any restriction(s) imposed for suchoperation by them. (NOTE: This does not apply to ducted fan models using piston engines or electric motors.)11. I will not consume alcoholic beverages prior to, nor during, participation in any model operations.RADIO CONTROL1. I will have completed a successful <strong>radio</strong> equipment ground range check before the first flight of a new or repaired model.2. I will not fly my model aircraft in the presence of spectators until I become a qualified flier, unless assisted by an experiencedhelper.3. I will perform my initial turn after takeoff away from the pit or spectator areas and I will not thereafter fly over pit orspectator areas, unless beyond my <strong>control</strong>.4. I will operate my model using <strong>radio</strong> <strong>control</strong> frequencies currently allowed by the Federal CommunicationsCommission. (Only properly licensed Amateurs are authorized to operate equipment on Amateur Band Frequencies.)5. I will not knowingly operate an R/C <strong>system</strong> within 3 miles of a pre-existing model club flying site without a frequencysharing agreement with that club.6. I will not fly my model aircraft in any racing competition which allows models over 20 pounds unless that competitionevent is AMA sanctioned. (For the purposes of this paragraph, competition is defined as any situation where a winneris determined.)
SAFETY PRECAUTIONS PAGE 7• Never fly if someone else is using your frequency (see The Transmitter section on page 2).• Never fly during adverse weather conditions or at night.• Always fully extend the transmitter and receiver antennas for maximum range.• Check with your local R/C flying field to find out if there are any frequencies deemed dangerous due tointerference caused by local pagers, transmission towers, etc. Do not operate on any of these <strong>channel</strong>s.• Perform a range check prior to every flight (see the Receiver, Switch Harness and Receiver Battery sectionon page 4).• Charge the Tx and Rx batteries overnight before use (see the Before Installation section on page 3).• Periodically cycle the Tx and Rx batteries to maximize charge capacity and run time (see the BeforeInstallation section on page 3).• Be certain your aircraft is balanced as noted in your model's manual.• Never use more <strong>control</strong> surface movement than noted in your model's manual.TROUBLE SHOOTING GUIDEProblem: Possible Cause: Solution:Short range Collapsed Tx antenna Fully extend the Tx antennaInterferenceCheck frequencies in area, check Rx installationRx antenna poorly routedRe-route Rx antennaLow Tx or Rx batteryCharge batteries for 15 hours prior to useRx or Tx out of tuneSend <strong>radio</strong> to Hobby Services for tuningSevered Rx antennaSend <strong>radio</strong> to Hobby Services for repairCrash damageSend <strong>radio</strong> to Hobby Services for repairShort run-time Low Tx or Rx batteries Charge batteries for 15 hours prior to useBatteries need to be cycled See Before Installation on page 3Binding servos causingFree binding components in pushrods or movingexcess battery drainsurfaces, see model’s manualToo many servos for theAdditional servos cause <strong>quick</strong>er battery drain.Rx pack used.Use a Rx battery pack with a higher mAh rating.Tx meter low Tx batteries need charged Charge Tx batteries for 15 hoursTx meter beyond Rx batteries need charged Charge Rx batteries for 15 hoursred zone but servos Rx switch in off position Turn on switch harnessdo not functionSwitch harness connected See <strong>quick</strong> reference guide on page 4incorrectlyInterference Another Tx is on your <strong>channel</strong> Do not operate your <strong>system</strong> until otheror servosglitching<strong>system</strong> is not in useOutside interferenceCheck your local R/C club for conformation(Pagers, transmission towers) of dangerous frequencies in your areaOne glitching servo Bad servo Send servo to Hobby Services for repair
4FM SPECIFICATIONS PAGE 8TransmitterReceiverChannels: 4-<strong>channel</strong> Channels: 7-<strong>channel</strong>Transmitting frequency: 72MHz band Receiving frequency: 72MHz FM narrow-bandModulation type: FM, narrow-band Current drain (w/servos): Approximately 250mACurrent drain: Approximately 150mA Dimensions: 2.5" x 1.38" x 0.88"Output power: less than .75W Receiving range: 500 yards ground, 1000 yards airSERVOS AND REPLACEMENT SERVO PARTS SPECIFICATIONSStock # Description Torque Speed Weight DimensionsTOWM4500-04 SYS3000 TS-10 Micro Servo 30oz./in. .22 sec @ 60° 0.6 oz. 1.12 x1.06 x0.50"TOWM5020-23 SYS2000 TS-31Mini Servo w/Bushings 24oz./in. .20 sec @ 60° 0.9 oz. 1.30 x0.50 x1.20"TOWM4520-24 SYS3000 TS-53 Standard Servo 42oz./in. .22 sec @ 60° 1.5 oz 1.59 x1.41 x0.77"TOWM5025-28 SYS2000 TS-63 Retract Servo w/BB 92oz./in. .50 sec @ 60° 1.2 oz. 1.70 x0.90 x1.00"TOWM5005-08 SYS2000 TS-67 Dual BB Servo 43oz./in. .20 sec @ 60° 1.6 oz. 1.60 x0.80 x1.40"TOWM4540-44 SYS3000 TS-69 Standard BB Servo 42oz./in. .22 sec @ 60° 1.5 oz. 1.59 x1.41 x0.77"TOWM4560-64 SYS3000 TS-75 1/4 Scale BB Servo 110oz./in. .19 sec @ 60° 3.6 oz. 2.32 x1.97 x1.14"TOWL70** SYS3000 7-Channel D/C Rx 72MHz FMTOWM6000 SYS3000 9.6V 500mAh Tx NiCd 4FMTo order any System 3000 servos or replacementTOWM6020 SYS3000 4.8V 500mAh Square Rx NiCdparts, please call <strong>Tower</strong> <strong>Hobbies</strong> at 800-637-6050, orTOWM6100 SYS3000 Battery Charger TH-FBC-8B(4)see the information below.TOWM6060 SYS3000 Switch w/charge cord Fut JTOWM6080 SYS3000 FM Trainer CordNOTE: Each servo model available with standard Futaba J, Airtronics, or JR connectors.FCC STATEMENTThe receiver included with this <strong>system</strong> complies with part 15 of the FCC rules. Operation is subject to the following two conditions:1. This device may not cause harmful interference.2. This device must accept any interference received, including interference that may cause undesired operation.WARRANTY AND REPAIR1-YEAR LIMITED WARRANTY*U.S.A. and Canada Only<strong>Tower</strong> <strong>Hobbies</strong> warrants this product to be free from defects in materials and workmanship for a period of one (1) year from thedate of purchase. During that period, <strong>Tower</strong> <strong>Hobbies</strong> will, at its option, repair or replace without service charge any product deemeddefective due to those causes. You will be required to provide proof of purchase (invoice or receipt). This warranty does not coverdamage caused by abuse, misuse, alteration or accident. If there is damage stemming from these causes within the stated warrantyperiod, <strong>Tower</strong> <strong>Hobbies</strong> will, at its option, repair or replace it for a service charge not greater than 50% of its then current retaillist price. Be sure to include your daytime telephone number in case we need to contact you about your repair. This warranty givesyou specific rights. You may have other rights, which vary from state to state.For service on your <strong>Tower</strong> <strong>Hobbies</strong> product, warranty or non-warranty, send it post paid and insured to:HOBBY SERVICES1610 Interstate DriveChampaign, IL 61821CONTACTING TOWER HOBBIESVia Phone: Toll-Free in the US and Canada: 800-637-6050Outside the US and Canada: 217-398-3636Toll-Free FAX in the US and Canada: 800-637-7303FAX Outside the US and Canada: 217-356-6608Via Mail:Entire Contents © Copyright 1996 TOWJ40** - 3010005<strong>Tower</strong> <strong>Hobbies</strong>PO Box 9078Champaign IL 61826-9078Via The Internet: E-Mail: info@towerhobbies.comWorld Wide Web: http://www.towerhobbies.com/