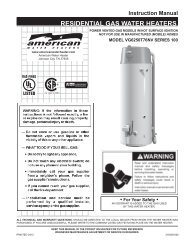
Download Installation Instructions - American Water Heaters
Download Installation Instructions - American Water Heaters
Download Installation Instructions - American Water Heaters

You also want an ePaper? Increase the reach of your titles
YUMPU automatically turns print PDFs into web optimized ePapers that Google loves.
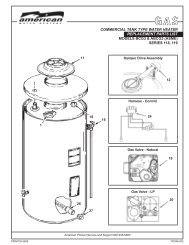
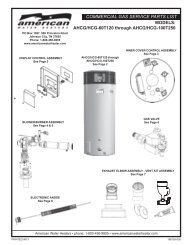
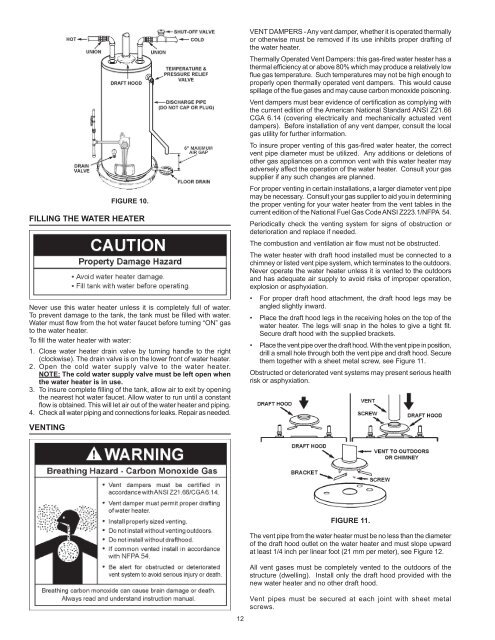
FIGURE 10.Filling the <strong>Water</strong> HeaterNever use this water heater unless it is completely full of water.To prevent damage to the tank, the tank must be filled with water.<strong>Water</strong> must flow from the hot water faucet before turning “ON” gasto the water heater.To fill the water heater with water:1. Close water heater drain valve by turning handle to the right(clockwise). The drain valve is on the lower front of water heater.2. Open the cold water supply valve to the water heater.NOTE: The cold water supply valve must be left open whenthe water heater is in use.3. To insure complete filling of the tank, allow air to exit by openingthe nearest hot water faucet. Allow water to run until a constantflow is obtained. This will let air out of the water heater and piping.4. Check all water piping and connections for leaks. Repair as needed.VENT DAMPERS - Any vent damper, whether it is operated thermallyor otherwise must be removed if its use inhibits proper drafting ofthe water heater.Thermally Operated Vent Dampers: this gas-fired water heater has athermal efficiency at or above 80% which may produce a relatively lowflue gas temperature. Such temperatures may not be high enough toproperly open thermally operated vent dampers. This would causespillage of the flue gases and may cause carbon monoxide poisoning.Vent dampers must bear evidence of certification as complying withthe current edition of the <strong>American</strong> National Standard ANSI Z21.66CGA 6.14 (covering electrically and mechanically actuated ventdampers). Before installation of any vent damper, consult the localgas utility for further information.To insure proper venting of this gas-fired water heater, the correctvent pipe diameter must be utilized. Any additions or deletions ofother gas appliances on a common vent with this water heater mayadversely affect the operation of the water heater. Consult your gassupplier if any such changes are planned.For proper venting in certain installations, a larger diameter vent pipemay be necessary. Consult your gas supplier to aid you in determiningthe proper venting for your water heater from the vent tables in thecurrent edition of the National Fuel Gas Code ANSI Z223.1/NFPA 54.Periodically check the venting system for signs of obstruction ordeterioration and replace if needed.The combustion and ventilation air flow must not be obstructed.The water heater with draft hood installed must be connected to achimney or listed vent pipe system, which terminates to the outdoors.Never operate the water heater unless it is vented to the outdoorsand has adequate air supply to avoid risks of improper operation,explosion or asphyxiation.• For proper draft hood attachment, the draft hood legs may beangled slightly inward.• Place the draft hood legs in the receiving holes on the top of thewater heater. The legs will snap in the holes to give a tight fit.Secure draft hood with the supplied brackets.• Place the vent pipe over the draft hood. With the vent pipe in position,drill a small hole through both the vent pipe and draft hood. Securethem together with a sheet metal screw, see Figure 11.Obstructed or deteriorated vent systems may present serious healthrisk or asphyxiation.Venting12FIGURE 11.The vent pipe from the water heater must be no less than the diameterof the draft hood outlet on the water heater and must slope upwardat least 1/4 inch per linear foot (21 mm per meter), see Figure 12.All vent gases must be completely vented to the outdoors of thestructure (dwelling). Install only the draft hood provided with thenew water heater and no other draft hood.Vent pipes must be secured at each joint with sheet metalscrews.