USAF Honor Guard Basic Protocol, Honors, and ... - USHistory.org
USAF Honor Guard Basic Protocol, Honors, and ... - USHistory.org
USAF Honor Guard Basic Protocol, Honors, and ... - USHistory.org

Create successful ePaper yourself
Turn your PDF publications into a flip-book with our unique Google optimized e-Paper software.
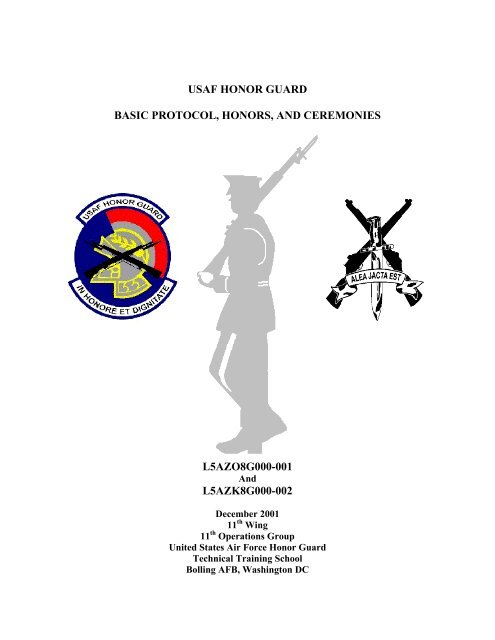
<strong>USAF</strong> HONOR GUARD<br />
BASIC PROTOCOL, HONORS, AND CEREMONIES<br />
L5AZO8G000-001<br />
And<br />
L5AZK8G000-002<br />
December 2001<br />
11 th Wing<br />
11 th Operations Group<br />
United States Air Force <strong>Honor</strong> <strong>Guard</strong><br />
Technical Training School<br />
Bolling AFB, Washington DC
Foreword<br />
This book includes information about ceremonies performed by the United States Air<br />
Force <strong>Honor</strong> <strong>Guard</strong> <strong>and</strong> Base <strong>Honor</strong> <strong>Guard</strong>s worldwide. It will be used to st<strong>and</strong>ardize<br />
ceremonies <strong>and</strong> the manner in which they are performed from base to base. It provides detailed<br />
instructions on key areas such as manuals, uniforms, history <strong>and</strong> traditions, <strong>and</strong> a variety of<br />
ceremonies.<br />
The “ceremonial guardsmen” is an individual of good reputation having integrity, ethical<br />
conduct <strong>and</strong> exhibiting st<strong>and</strong>ards which merit respect; responsible for protecting <strong>and</strong> overseeing<br />
the maintenance of st<strong>and</strong>ards on <strong>and</strong> off duty. It is truly an occupation which requires<br />
outst<strong>and</strong>ing devotion <strong>and</strong> commitment to duty. In keeping with traditions <strong>and</strong> maintaining<br />
exceptionally high st<strong>and</strong>ards the honor guard will continue to remain an icon of excellence.<br />
Although this book contains information on many different types of ceremonies <strong>and</strong><br />
issues related to them, it may be necessary for supplements to be added in the future. Any<br />
questions regarding those supplements may be addressed by calling DSN 754-6210.<br />
WILLIAM GREENE, III, CMSgt, <strong>USAF</strong><br />
<strong>USAF</strong> <strong>Honor</strong> <strong>Guard</strong> Manager<br />
2
Chapter 1—<strong>Basic</strong> St<strong>and</strong>ing Manuals<br />
Introduction 1.1.<br />
Position of Attention 1.2.<br />
Positions of Rest 1.3.<br />
Facing Movements 1.4.<br />
Formation of Flight 1.5.<br />
Present/Order Arms 1.6.<br />
Forward March/Flight Halt 1.7.<br />
To Align Flight in Line 1.8.<br />
Open Ranks 1.9.<br />
Mark Time 1.10.<br />
Right/Left Flank 1.11.<br />
Chapter 2—Appropriate wear of Ceremonial Uniform Items<br />
Ceremonial Hat 2.1.<br />
Ceremonial Coat 2.2.<br />
Ceremonial Belt 2.3.<br />
Ceremonial Trousers/Slacks 2.4.<br />
Ceremonial Shoes 2.5.<br />
Ceremonial Gloves 2.6.<br />
All Weather Coat 2.7.<br />
Overcoat 2.8.<br />
Gray Scarf 2.9.<br />
Combat Boots 2.10.<br />
Summer Dress Uniform 2.11.<br />
Lightweight Blue Jacket 2.12.<br />
Rain Cap Cover 2.13.<br />
Chapter 3—Colors<br />
General Information 3.1.<br />
Definition of Terms 3.2.<br />
General Rules for Colors 3.3.<br />
Implementation 3.4.<br />
Responsibilities 3.5.<br />
Equipment 3.6.<br />
Positions of Staff 3.7.<br />
Weapons Movements 3.8.<br />
Full <strong>Honor</strong>s Funeral 3.9.<br />
Memorial Service 3.10.<br />
Colors Sequence 3.11.<br />
Personal Colors 3.12.<br />
Posting Colors in St<strong>and</strong>s Sequence 3.13.<br />
Rippling to Shoulder from Port Arms 3.14.<br />
Rippling to Port Arms from Shoulder 3.15.<br />
3
Chapter 4—Firing Party<br />
General Information 4.1.<br />
Equipment 4.2.<br />
<strong>Basic</strong> Firing Party Movements 4.3.<br />
Firing Sequence 4.4.<br />
Loading the Weapon 4.5.<br />
Unloading the Weapon 4.6.<br />
Full <strong>Honor</strong>s Funeral 4.7.<br />
St<strong>and</strong>ard <strong>Honor</strong>s Funeral 4.8.<br />
Chapter 5—Pallbearers<br />
Full <strong>Honor</strong>s Funeral 5.1.<br />
St<strong>and</strong>ard <strong>Honor</strong>s Funeral 5.2.<br />
Six - Person Flag Fold 5.3.<br />
Two - Person Funeral 5.4.<br />
Two – Person Flag Fold 5.5.<br />
Cremate Sequence for SHF <strong>and</strong> FHF 5.6.<br />
Chapter 6—Air Force Bugler<br />
General Information 6.1.<br />
Positions 6.2.<br />
Graveside Service 6.3.<br />
Memorial Service 6.4.<br />
Full <strong>Honor</strong>s Funeral 6.5.<br />
St<strong>and</strong>ard/Modified <strong>Honor</strong>s Funeral 6.6.<br />
Veteran <strong>Honor</strong>s Funeral 6.7.<br />
Chapter 7— Funeral Sequences<br />
Full <strong>Honor</strong>s Funeral 7.1.<br />
St<strong>and</strong>ard <strong>Honor</strong>s Funeral 7.2.<br />
Veteran <strong>Honor</strong>s Funeral 7.3.<br />
Chapter 8—Retreat Ceremony<br />
Personnel 8.1.<br />
Equipment 8.2.<br />
Support Materials 8.3.<br />
Preparation 8.4.<br />
Sequence of Events 8.5.<br />
Chapter 9—Air Force Cordon<br />
Formation <strong>and</strong> Advancement of Cordon 9.1.<br />
Dressing Sequence 9.2.<br />
Arrival 9.3.<br />
Departure 9.4.<br />
March Off 9.5.<br />
Cordon Sizes 9.6.<br />
4
Chapter 10—Saber <strong>and</strong> Sword Manuals <strong>and</strong> Cordons<br />
General Information 10.1.<br />
St<strong>and</strong>ing Manual of Arms 10.2.<br />
Chapter 11—Maintenance of the M1 Rifle<br />
Introduction 11.1.<br />
Disassembly 11.2.<br />
Cleaning 11.3.<br />
Assembling 11.4.<br />
General Information 11.5.<br />
Chapter 12—POW/MIA Hat Table Ceremony<br />
Personnel 12.1.<br />
Equipment 12.2.<br />
Support Materials 12.3.<br />
Preparation 12.4.<br />
Sequence of Events 12.5.<br />
Example Script/Table of <strong>Honor</strong> 12.6<br />
Chapter 13—Advanced Weapon H<strong>and</strong>ling Techniques<br />
Beginning a Team 13.1.<br />
Safety <strong>and</strong> Preparation 13.2.<br />
Terms 13.3.<br />
Tips 13.4.<br />
<strong>Basic</strong> Drill Movements 13.5.<br />
Intermediate Drill Movements 13.6.<br />
Advanced Drill Movements 13.7.<br />
Exchanges 13.8.<br />
Chapter 14—History <strong>and</strong> Traditions<br />
Flag History 14.1.<br />
Changes in the Flag 14.2.<br />
Flags on Graves 14.3.<br />
Flags Covering Caskets 14.4.<br />
Flag Position (Open Casket) 14.5.<br />
Folding the Flag 14.6.<br />
Disposing of the Flag 14.7.<br />
Half Staff/Mast 14.8.<br />
Funerals 14.9.<br />
Details within a Funeral 14.10.<br />
Taps 14.11.<br />
Salutes 14.12.<br />
Uniforms 14.13.<br />
Medals <strong>and</strong> Decorations 14.14.<br />
The Pledge of Allegiance 14.15.<br />
5
Base <strong>Honor</strong> <strong>Guard</strong> Creed 14.16.<br />
Chapter 15---OIC/NCOIC Responsibilities on FHF/SHF<br />
General Information 15.1.<br />
Pre-Ceremony 15.2.<br />
Arrival of Ceremony 15.3<br />
Ceremony (FHF/SHF) 15.4<br />
6
1.1. Introduction.<br />
Chapter 1<br />
STANDING MANUALS (without a weapon)<br />
1.1.1. This chapter explains the basic movements which must be mastered before attempting to<br />
accomplish drill <strong>and</strong> ceremonies with a weapon. Many of the drill movements resemble those<br />
covered in AFM 36-2203, Drill <strong>and</strong> Ceremonies, <strong>and</strong> others are unique to the <strong>Honor</strong> <strong>Guard</strong>.<br />
1.2. Position of Attention.<br />
1.2.1. The comm<strong>and</strong> is Attention. To come to attention, bring the feet together smartly, the<br />
heels <strong>and</strong> balls of feet are together <strong>and</strong> on line. Keep the legs straight without stiffening or<br />
locking the knees. The body is erect with hips level, chest lifted, <strong>and</strong> shoulders square <strong>and</strong> even.<br />
Arms hang straight down along side the body <strong>and</strong> wrists are not bent. Place thumbs, which are<br />
resting along the first joint of the forefinger, along the seams of the trousers. H<strong>and</strong>s are cupped<br />
with palms facing the leg. Head is erect, neck is vertical with the body, <strong>and</strong> eyes are facing<br />
forward with the line of sight parallel to the ground. The weight of the body rests equally on the<br />
heels <strong>and</strong> balls of both feet, <strong>and</strong> silence <strong>and</strong> immobility are required. (Figure 1.1.)<br />
1.3. Positions of Rest.<br />
1.3.1. Parade Rest.<br />
1.3.1.1. The comm<strong>and</strong> is Parade, REST. Upon the comm<strong>and</strong> of execution REST, lift the left<br />
foot smartly <strong>and</strong> move it to the left six to eight inches apart <strong>and</strong> parallel with each other. Feet<br />
point straight forward, legs are straight but not stiff, <strong>and</strong> the heels <strong>and</strong> toes are touching.<br />
1.3.1.2. As the left foot moves, arms extend to the back with h<strong>and</strong>s flared properly, right h<strong>and</strong><br />
over left h<strong>and</strong> with middle finger resting over middle finger, right h<strong>and</strong> inside of the left h<strong>and</strong><br />
with fingers extended <strong>and</strong> joined, thumbs touching. (Figure 1.2.)<br />
1.3.2. At Ease.<br />
1.3.2.1. The comm<strong>and</strong> is AT EASE. Relax, keep the right foot in place.<br />
1.3.2.2. The position in the formation does not change, silence is maintained.<br />
1.3.3. Rest.<br />
1.3.3.1. The comm<strong>and</strong> is REST. Relax, keep the right foot in place.<br />
1.3.3.2. You may talk in low conversational tones. The position in the formation does not<br />
change.<br />
7
1.3.4. Fall out.<br />
1.3.4.1. The comm<strong>and</strong> is FALL OUT. From the position of attention, execute a two count about<br />
face, step off with the left foot, <strong>and</strong> leave the formation. Unless told otherwise, remain in the<br />
immediate area.<br />
1.4. Facing Movements.<br />
1.4.1. Two-Count About Face:<br />
1.4.1.1. The comm<strong>and</strong> for the movement is About, FACE. This is a two-count movement<br />
executed from the position of attention. Upon the comm<strong>and</strong> of execution FACE, lift the right<br />
foot just enough to clear the ground <strong>and</strong> place it perpendicular to the left foot forming a<br />
backwards "T" with both feet, arms remained pinned to the side, head follows the lead foot. This<br />
is the first count of the movement. The position of the left foot is not changed. Most of the<br />
weight of the body is resting on the ball of the right foot. (Figure 1.3.) On the second count, pivot<br />
180 degrees to the right on the ball of the right foot while lifting the left foot just enough to clear<br />
the ground to meet the right, resuming the position of attention. Keep arms pinned to the side for<br />
the entire movement. (Figure 1.4.)<br />
1.4.2. Three-Count About Face:<br />
1.4.2.1. There is no comm<strong>and</strong> for this movement. This movement is only performed while<br />
moving as a solitary member <strong>and</strong> from the position of attention. Lift the left foot just enough to<br />
clear the ground <strong>and</strong> place it in front (perpendicular) of the right foot forming a "T" with both<br />
feet, bend the knees slightly. This is the first count of the movement. The position of the left<br />
foot is not changed on the second count, lift the right foot just high enough to clear the ground<br />
<strong>and</strong> pivot 180 degrees, bringing the heels together to form a ninety degree angle (an "L"), then<br />
bring the left foot smartly to the right foot, resuming the position of attention. Keep the arms<br />
pinned at the side for the entire movement.<br />
1.4.3. Left (Right) Face:<br />
1.4.3.1. The comm<strong>and</strong> for the movement is Left (Right), FACE. This is a two-count<br />
movement. To complete count one of the movement, from the position of attention, lift the left<br />
(right) foot <strong>and</strong> place it down ninety degrees to the right (left) foot forming an "L". The heel of<br />
the left (right) foot should be against the heel of the right (left) foot. Head follows the lead foot.<br />
The rest of the body remains at the position of attention. (Figure 1.5.) To complete count two of<br />
the movement, distribute the weight of the body to the left (right) foot. Lift the right (left) foot<br />
<strong>and</strong>, with snap, bring it along side the left (right) foot <strong>and</strong> turn the body 90 degrees to the left<br />
(right) simultaneously. The rest of the body remains at the position of attention. (Figure 1.6.)<br />
1.5. Formation of the Flight.<br />
1.5.1. The purpose of the movement is to form a flight in line formation.<br />
8
1.5.2. The comm<strong>and</strong> for the movement is FALL IN.<br />
1.5.3. Upon the comm<strong>and</strong>: The guide moves to a position so that the formation is three paces<br />
away <strong>and</strong> centered on the Flight Comm<strong>and</strong>er (to do this he or she must take the size of the<br />
formation into consideration). Once in position the guide executes an automatic dress right dress<br />
without turning his or her head. The first element leader falls into a position to the left of the<br />
guide so that his or her right shoulder is touching the fingertips of the guide <strong>and</strong> executes an<br />
automatic dress right dress. The second <strong>and</strong> third element leaders fall into a position behind the<br />
first element leader establishing a 40-inch distance.<br />
1.5.4. Each succeeding member of the formation falls into a position to the left of the element<br />
leaders, executing an automatic dress right dress, establishing dress <strong>and</strong> cover. It's the<br />
responsibility of the first element to establish the interval. Once in position, they return to the<br />
position of attention. It's important to square off the back of the formation. When there is an<br />
odd number, fill the formation in from the third element forward.<br />
1.6. Present Arms/Order Arms.<br />
1.6.1. The comm<strong>and</strong> is Present, ARMS. Upon the comm<strong>and</strong> of execution ARMS, from the<br />
position of attention, raise the right h<strong>and</strong> up the centerline of the body, uncupping the h<strong>and</strong> <strong>and</strong><br />
extending the fingers <strong>and</strong> thumb at approximately waist level. Continue to raise the right h<strong>and</strong><br />
until the upper arm is parallel with the ground <strong>and</strong> slightly forward of the body (or to the extent<br />
of the belt, so that the blouse does not ride up). The line between the middle finger <strong>and</strong> elbow<br />
should be straight (do not bend your wrist or cup your h<strong>and</strong>) <strong>and</strong> the palm is slightly tilted<br />
toward the face. Touch the middle finger to the right front corner of the brim of the hat, the outer<br />
right point of the eyebrow, or the right outer point on the eyeglasses, depending on what is worn.<br />
Thumb <strong>and</strong> fingers are extended <strong>and</strong> joined. (Do not tuck thumb.) (Figure 1.7.)<br />
1.6.2. To return to the position of attention, the comm<strong>and</strong> is Order, ARMS. Upon the<br />
comm<strong>and</strong> of execution ARMS, simply retrace your steps backward from present arms recupping<br />
your h<strong>and</strong> at approximately waist level. During present arms, silence <strong>and</strong> immobility are<br />
required. When performing this movement with a formation using a rifle, present arms <strong>and</strong> order<br />
arms are completed as three count movements. (i.e. If you are NFP calling Present Arms.)<br />
1.7. Forward March.<br />
1.7.1. The comm<strong>and</strong> is Forward, MARCH. Upon the comm<strong>and</strong> of execution MARCH, step<br />
off with the left foot sliding your heel for the first step. Pick up coordinated arm swing, six<br />
inches to the front <strong>and</strong> three inches to the rear. March with 24-inch steps as measured between<br />
the heels. When marching, place one foot in front of the other, in a straight line versus toes<br />
pointing inward or outward. To aid in maintaining cadence, the individual marching the<br />
formation can call cadence. The cadence comm<strong>and</strong>s are Hut, Two, Three, Four <strong>and</strong> are called<br />
in sets of two. Hut is given on the left foot, two on the right foot, three on the left foot, <strong>and</strong> four<br />
on the right foot.<br />
9
1.7.2. To halt, the comm<strong>and</strong> is Flight, HALT. Flight is called on the left foot <strong>and</strong> HALT on<br />
the subsequent foot. Upon the comm<strong>and</strong> of execution HALT, take one more step with the right<br />
foot <strong>and</strong> close with the left.<br />
NOTE: Forward March can be given in incremental steps by using the comm<strong>and</strong> Paces<br />
Forward, MARCH. Upon the comm<strong>and</strong> of execution MARCH, step off with the left foot <strong>and</strong><br />
march forward the number of step comm<strong>and</strong>ed. On the last step simply bring the feet together<br />
<strong>and</strong> resume the position of attention. This movement is executed when there is not enough room<br />
to successfully execute a Flight Halt.<br />
1.8. To Align the Flight in Line.<br />
1.8.1. The purpose of this movement is to align the flight in line formation much like the<br />
comm<strong>and</strong> COVER does in column formation.<br />
1.8.2. The comm<strong>and</strong> for this movement is Dress Right (Left), DRESS. Upon the comm<strong>and</strong> of<br />
execution everyone except the first rank turns their head 45 degrees to the right (left) looking<br />
down line to align themselves to the right (left) making sure that they are directly behind the<br />
person in front of them. Simultaneously, everyone except the last rank, will lift their left arm up<br />
<strong>and</strong> parallel to the ground, fingers extended <strong>and</strong> joined, palm facing down. The rest of the body<br />
remains at the position of attention. To adjust yourself within the formation, take short choppy<br />
steps. The first element must maintain fingertip to shoulder contact. Silence is maintained. At<br />
the completion of this movement each element should be aligned from the right or left flank of<br />
the formation.<br />
1.8.3. To return to the position of attention the comm<strong>and</strong> is Ready, FRONT. Upon the<br />
comm<strong>and</strong> of execution FRONT, bring the head back to the front <strong>and</strong> the arm down to the side<br />
without slapping the side of the leg.<br />
1.8.4. This movement can also be executed at close interval. The comm<strong>and</strong>s are At Close<br />
Interval, Dress Right (Left), DRESS.<br />
1.8.5. To execute the movement, everything is the same except: the left h<strong>and</strong> slides up to the hip<br />
with the palm resting on the hip, fingers extended <strong>and</strong> joined pointing down. The elbow is bent<br />
<strong>and</strong> flared out 45 degrees. The first rank acquires elbow to arm contact.<br />
1.9. Open Ranks.<br />
1.9.1. The purpose of this movement is to open up the formation for inspection.<br />
1.9.2. The comm<strong>and</strong> for this movement is Open Ranks, March. Upon the comm<strong>and</strong> of<br />
execution, the first element takes two paces forward, halts, <strong>and</strong> performs an automatic dress<br />
right, dress. The second element takes one pace forward, halts, <strong>and</strong> performs an automatic dress<br />
right, dress. The third element remains in place <strong>and</strong> executes an automatic dress right, dress. At<br />
the completion of this movement, each element should be aligned from the right flank of the<br />
formation.<br />
10
1.9.3. Alignment procedures are used to ensure each file is properly aligned.<br />
1.9.3.1. Once the formation has been given the appropriate dressing comm<strong>and</strong>, the Flight<br />
Comm<strong>and</strong>er moves by the most direct route, to the end of the first element. From this position,<br />
the front rank is aligned. If necessary, individuals are instructed to adjust their placement by<br />
name or number. The Flight Comm<strong>and</strong>er takes short side steps to verify alignment. He/she then<br />
faces to the left, marches forward, halts on the end of each succeeding rank, executes right face,<br />
<strong>and</strong> aligns the rank.<br />
1.9.3.2. After verifying the alignment of the last rank, the Flight Comm<strong>and</strong>er executes a face in<br />
marching to the right <strong>and</strong> marches three paces from the front rank, halts <strong>and</strong> executes a left face.<br />
The comm<strong>and</strong> Ready, FRONT is given. The Flight Comm<strong>and</strong>er takes one step forward <strong>and</strong><br />
executes a right face.<br />
1.9.4. Once alignment is complete, the Flight Comm<strong>and</strong>er gives the comm<strong>and</strong> Ready, FRONT.<br />
This movement is accomplished by simply returning to the position of attention by bringing the<br />
left arm down sharply down to the side simultaneously snapping the head back to the front.<br />
1.9.5. Once the inspection sequence is complete the flight is ready to be closed. This is done<br />
with the comm<strong>and</strong> Close Ranks, MARCH. Upon the comm<strong>and</strong> of execution the first element<br />
st<strong>and</strong>s fast, the second element takes one step forward <strong>and</strong> halts <strong>and</strong> the third element takes two<br />
steps forward <strong>and</strong> halts. This all happens simultaneously with each element halting at the<br />
position of attention.<br />
1.10. Mark Time.<br />
1.10.1.The purpose of this movement is to march in place.<br />
1.10.2. The comm<strong>and</strong> for this movement is Mark Time, MARCH. Upon the comm<strong>and</strong> of<br />
execution lift the left leg <strong>and</strong> begin marching in place, lifting each foot four inches off the<br />
ground. Keep the arms suspended at your side. The rest of the body remains at the position of<br />
attention. From a march, the comm<strong>and</strong> is Mark Time, MARCH. Upon the comm<strong>and</strong> of<br />
execution, take one more 24-inch step <strong>and</strong> then mark time ensuring you suspend your arms to<br />
your side.<br />
1.10.3. To halt, the comm<strong>and</strong> is Flight or <strong>Honor</strong> <strong>Guard</strong>, HALT. Upon the comm<strong>and</strong> of<br />
execution, take one more step, then bring the feet together <strong>and</strong> halt at the position of attention.<br />
1.10.4. To pick up a march, the comm<strong>and</strong> is Forward, MARCH. At which time one more step<br />
at mark time is taken then step out with a 24-inch step <strong>and</strong> coordinated arm swing.<br />
1.11. Right/Left Flank.<br />
1.11.1. The purpose of this movement is to turn a formation 90 degrees to the right (left),<br />
changing the attitude of the formation.<br />
11
1.11.2. The comm<strong>and</strong> for this movement is Right (Left) Flank, MARCH.<br />
1.11.3. Upon the comm<strong>and</strong> of execution, take one more step, suspend your arms to your side,<br />
pivot on the ball of the left (right) foot 90 degrees to the right (left), <strong>and</strong> step off with a 24-inch<br />
step <strong>and</strong> coordinated arm swing.<br />
12
Figure 1.1. (Attention)<br />
Figure 1.3. (2 Count About Face) Figure 1.4 (2 Count About Face)<br />
Count 1 Count 2<br />
13
Figure 1.5. (Left Face) Figure 1.6. (Left Face)<br />
Count 1 Count 2<br />
Figure 1.7. (Present Arms)<br />
14
2.1. Ceremonial Hat.<br />
Chapter 2<br />
APPROPRIATE WEAR OF<br />
CEREMONIAL UNIFORM ITEMS<br />
2.1.1. The silver braid on the ceremonial hat rests on the top of the black visor portion of the hat.<br />
Pull the two tabs outward to tighten the braid. Place a few small drops of super-glue behind the<br />
tabs <strong>and</strong> set them into place until they dry. This prevents the silver braid from becoming loose<br />
<strong>and</strong> moving out of place<br />
2.1.2. Secure the black patent leather chinstrap into the up position:<br />
2.1.2.1. Unscrew the two chrome hat buttons holding the chinstrap into position.<br />
2.1.2.2. Reverse the chinstrap so that the strap buckle is to the right of center when viewed from<br />
the rear.<br />
2.1.2.3. Screw the chrome hat buttons into place ensuring the wings are in the up position.<br />
2.1.3. The black patent leather chinstrap is worn when inclement weather dictates it. Usually,<br />
very strong winds or driving rain storms make it necessary to wear the chinstrap down. The<br />
chinstrap is designed for these reasons <strong>and</strong> is used accordingly.<br />
2.1.4. Color teams <strong>and</strong> personal colors bearers wear the black patent leather chinstrap down.<br />
Wearing the chinstrap down prevents the flag(s) from knocking the ceremonial hat from the<br />
head. Additionally, drill teams <strong>and</strong> flight line cordons may find it necessary to wear the<br />
chinstrap down due to continuous drill movements or adverse conditions.<br />
2.2. Ceremonial Coat.<br />
2.2.1. Iron the lapels of the blouse down to enable all three buttons of the blouse to be displayed.<br />
Always iron with an ironing cloth. This prevents ironing marks, burns, shining, etc.<br />
2.2.2. The aiguilette fits snugly along the shoulder seam of the blouse. Use several large baby<br />
pins to secure the aiguilette from underneath the blouse. The tassel is pulled down <strong>and</strong> the<br />
spiraled cord is sewn or glued to the inside of the larger portion of the auguilette.<br />
2.3. Ceremonial Belt.<br />
2.3.1. The ceremonial belt is worn when it is practical <strong>and</strong> pertinent to the ceremony. Wear the<br />
ceremonial belt where the member does not do an extreme amount of moving (i.e., marching in<br />
parades). Awards bearers, flower bearers, OIC, NCOIC, color teams, personal colors bearer etc.,<br />
wear the ceremonial belt. Pallbearers <strong>and</strong> Firing Party do not wear the ceremonial belt.<br />
15
2.3.2. When blousing a guardsman, a minimum of two people are used.<br />
2.3.2.1. Adjust the ceremonial belt to fit very tightly around the waist. The ceremonial belt rests<br />
between the second <strong>and</strong> third button of your uniform.<br />
2.3.2.2. The "blousee" holds the belt in the approximate position where the belt fastens with<br />
some slack being provided for the "blousers" h<strong>and</strong>s.<br />
2.3.2.3. The "blouser" positions the h<strong>and</strong>s along two side seems on the back of the blouse,<br />
raincoat, or overcoat.<br />
2.3.2.4. The "blouser" pulls the excess material from the front of the uniform <strong>and</strong> folds it<br />
underneath the two side seams in a forward position. When bloused, the entire uniform appears<br />
neat, wrinkle-free, <strong>and</strong> without bunches.<br />
2.3.2.5. The "blousee" then fastens the belt in front.<br />
2.3.2.6. The "blouser" re-checks the ceremonial belt <strong>and</strong> places the two keepers one thumbs<br />
length from the chrome belt buckle on both sides of the buckle.<br />
2.4. Ceremonial Trousers/Slacks.<br />
2.4.1. Use an ironing cloth when ironing.<br />
2.4.2. When sitting down in ceremonial trousers/slacks, roll the excess material located under<br />
the knees into a neat fold to prevent wrinkling.<br />
2.5. Ceremonial Shoes.<br />
2.5.1. Clean <strong>and</strong> shine the shoes. Furniture polish works well.<br />
2.5.2. Use edge dressing on the soles of the shoes, to include the welts.<br />
2.5.3. Tuck the bows from the shoe strings into the shoe.<br />
2.6. Ceremonial Gloves.<br />
2.6.1 Worn with the end of the glove folded under providing a neat appearance.<br />
2.7. All Weather Coat.<br />
2.7.1. The coat is wrinkle free.<br />
2.7.2. The belt loops are removed from the coat for blousing purposes.<br />
16
2.8. Over Coat.<br />
2.8.1. The coat is wrinkle free.<br />
2.8.2. The belt loops are removed from the coat for blousing purposes.<br />
2.9. Gray Scarf.<br />
2.9.1. Scarf is worn left over right.<br />
2.9.2. When the scarf is worn, wear only black gloves.<br />
2.10. Combat Boots.<br />
2.10.1. May be worn with the ceremonial uniform during heavy snowfall or extremely muddy<br />
conditions.<br />
2.10.2. Do not blouse the ceremonial trousers/slacks over or into the boot.<br />
2.11. Summer Dress Uniform<br />
2.11.1. Proper wear of the summer dress uniform is located in AFI 36-2903, table 3.2 Distinctive<br />
Uniforms.<br />
2.11.1.1. Always wear the ceremonial belt while wearing the summer uniform.<br />
2.11.2. The OIC/NCOIC of the ceremony may authorize wear of the summer dress uniform<br />
when the temperatures exceed 94 degrees or 90 degrees plus with relative humidity of 60% or<br />
higher.<br />
2.11.3. The OIC/NCOIC of the ceremony should request a weather forecast from the installation<br />
or region where the ceremony will take place.<br />
2.11.3.1. The forecast should include temperature, apparent temperature (wind chill/heat index),<br />
wind velocity, humidity <strong>and</strong> precipitation probability.<br />
2.12. Light Weight Blue Jacket<br />
2.12.1. Always wear the light weight blue jacket during transit to a ceremony versus sitting in<br />
the ceremonial blouse.<br />
2.12.2. Do not place a crease in the sleeves of the jacket.<br />
17
2.13. Rain Cap Cover<br />
2.13.1. Whenever you wear the raincoat for a ceremony, you must wear the raincap cover over<br />
the ceremonial hat. The ceremonial hat emblem is displayed on the outside of the raincap cover.<br />
Place a small hole in the raincap cover large enough for the post of the hat emblem to fit. This<br />
enables you to display the hat emblem on the outside of the raincap cover during ceremonies.<br />
2.13.2. Roll the raincap cover underneath the back edges of the ceremonial hat to produce a snug<br />
fit <strong>and</strong> neat appearance.<br />
2.13.3. Always wear the rain cap cover when not performing ceremonies to prevent fading <strong>and</strong><br />
to maintain the cap’s appearance.<br />
18
3.1. General Information.<br />
Chapter 3<br />
COLORS<br />
3.1.1. Introduction: An Air Force Color Team consists of four personnel, <strong>and</strong> if possible, of<br />
equal height, including bearer of the National Colors (NCT), the bearer for the Air Force Flag<br />
<strong>and</strong> two rifle guards. All members will be familiar with all positions on the team.<br />
NOTE: An Air Force Color Team may consist of more than two flag bearers. In this case the<br />
flags are in order of precedence from left to right as you look at the team from the front. In the<br />
event that the team is not equal in height, the team is arranged in a tall to short manner.<br />
3.1.2. Comm<strong>and</strong>s: The supplementary comm<strong>and</strong> of Colors, will be called for all comm<strong>and</strong>s<br />
whenever performing with another element. (i.e. funerals, etc.) ex. Colors, Present, ARMS.<br />
3.2. Definition of Terms.<br />
3.2.1. Colors Turn. There are two positions in which a colors turn is executed: St<strong>and</strong>ing still<br />
<strong>and</strong> marking time. When st<strong>and</strong>ing still, the comm<strong>and</strong> Colors, Colors Turn, MARCH is given<br />
by the NCT, the whole team takes four steps, in place, while turning 90 degrees to the right.<br />
After completing the turn on the fourth step, the entire team slides off on step five, being the next<br />
left foot. The Colors Turn is also done while marking time to position <strong>and</strong> halt the team for the<br />
presentation of colors. The comm<strong>and</strong> Colors is given on the left foot while marking time. The<br />
team then takes four steps in place while rotating 90 degrees to the left. The NCT gives the<br />
comm<strong>and</strong> Halt on the left foot.<br />
3.2.2. Left About. The comm<strong>and</strong> is Left About, MARCH. The left about is a sixteen-count<br />
wheel movement . The left about is done shoulder to shoulder turning to the left in a wheeling<br />
manner on the NCT's comm<strong>and</strong>. The color team rotates 180 degrees, in a half-circle pivoting on<br />
the central point of the team. After the turn is completed the colors are given Forward, March<br />
or Halt. This comm<strong>and</strong> is called on the left foot.<br />
3.2.3. Right/Left Wheel. The comm<strong>and</strong> is Right/Left Wheel, MARCH. The color team is<br />
shoulder to shoulder while marching or marking time. They wheel around 90 degrees to the right<br />
or left with the pivot point being the central point of the color team. This movement will be<br />
completed in eight steps.<br />
3.2.4. MARK TIME. The comm<strong>and</strong> is given while marching <strong>and</strong> is used to suspend progress<br />
temporarily. If colors are marching in a single file, Mark, TIME is given as consecutive (both<br />
the left <strong>and</strong> right) heels strike the ground, i.e. Mark on the left <strong>and</strong> TIME on the right. Execute<br />
the movement on the very next step (left foot).<br />
3.2.5. Dress Center, Dress. This comm<strong>and</strong> is given to dress the colors or align them evenly. On<br />
the comm<strong>and</strong>, each member of the team lowers their head in a three-count movement. The NCT<br />
19
decides if anyone moves forward, backward, or sideways. All members of the team dress on the<br />
NCT. When the team is aligned properly, the NCT comm<strong>and</strong>s Ready, FRONT, the members<br />
raise their heads in a three-count movement to the original position.<br />
3.2.6. St<strong>and</strong> Fast. This is a term used by the colors to remain in a certain position while other<br />
units are performing another movement.<br />
3.2.7. Colors, St<strong>and</strong> At, EASE. This two-count movement is executed when the colors are at<br />
the order position. On the comm<strong>and</strong> of execution, the rifle guards move the left foot six to eight<br />
inches to the left. (Figure 3.1) On the second count the rifle guards twist the wrist of their right<br />
h<strong>and</strong> counterclockwise. At the same time the right h<strong>and</strong> is centered on the body. The left h<strong>and</strong> is<br />
brought straight across the body to grasp the weapon above the right h<strong>and</strong> in a fist. The first<br />
count for the flag bearers is the same as mentioned above for the rifle guards. The flag bearers<br />
keep their right h<strong>and</strong> in position along the seam of the trousers. On the second count grasp the<br />
cup of the sling with the left h<strong>and</strong>. The h<strong>and</strong> should be in a fist, fingers tightly together. (Figure<br />
3.2)<br />
3.2.8. Dip. Dipping the flag is accomplished by fully extending the right arm to a horizontal<br />
position while at the shoulder position. The wrist is locked <strong>and</strong> curled in order to secure the flag.<br />
The movement is accomplished with a silent three count when rendering honors.<br />
3.2.9. Ready Cut Sequence. At the position of Right Shoulder, the ready cut movement is used<br />
to return the flag bearers left h<strong>and</strong> to the position of attention. The comm<strong>and</strong> is Colors, Ready,<br />
CUT. On the comm<strong>and</strong> of execution the flag bearer sharply returns the left h<strong>and</strong> to the position<br />
of attention. At the position of order, the color team executes a two count movement. On the<br />
first count, the team sharply brings their left h<strong>and</strong> to their side, parallel to the ground. On the<br />
second count, the team cuts their h<strong>and</strong> straight down to their side.<br />
3.3. General Rules for Colors.<br />
3.3.1. Never dip the American flag.<br />
3.3.2. All comm<strong>and</strong>s echoed by the NCT are performed on the Comm<strong>and</strong>er of Troops (COT)<br />
comm<strong>and</strong> of execution. Example: If the comm<strong>and</strong> Present, ARMS is given by the COT, the<br />
NCT echos the comm<strong>and</strong> Present <strong>and</strong> the movement will be executed on the comm<strong>and</strong> ARMS.<br />
3.3.3. All comm<strong>and</strong>s given or echoed by the NCT while marching are given <strong>and</strong> executed on the<br />
left foot, except Right Shoulder, ARMS.<br />
3.3.4. Chin Straps Down. Color bearers <strong>and</strong> rifle guards always wear their rear chin straps<br />
down. This is done to avoid the flag being caught momentarily around the hat which may cause<br />
it to fall off.<br />
3.4. Implementation.<br />
20
3.4.1. Formation. The color team is formed in a single rank from the right to left with the right<br />
rifle guard in position first, followed by National Colors, Air Force Colors, <strong>and</strong> the left rifle<br />
guard. The bearer of National Colors (NCT) gives or echoes all comm<strong>and</strong>s for the color team.<br />
3.4.2. Receiving, Posting <strong>and</strong> Retiring the Colors. The colors are presented during each full<br />
honors funeral, arrival/departure of a distinguished visitor <strong>and</strong> retirement ceremonies. Colors are<br />
posted <strong>and</strong> retired during ceremonies honoring a person or occasion<br />
3.4.2.1. The colors are never carried cased during a military funeral.<br />
3.5. Responsibilities.<br />
3.5.1. Right <strong>and</strong> Left Rifle <strong>Guard</strong>s. The primary responsibility of the right <strong>and</strong> left rifle guards<br />
is to protect the National <strong>and</strong> Air Force Colors. The rifle guards keep unauthorized personnel<br />
from walking between the colors <strong>and</strong> other elements. They also assist in the alignment of the<br />
colors during windy days, while marching.<br />
3.5.2. Bearer of National Colors. The bearer of the National Colors is also the NCOIC of the<br />
Color Team (NCT). The NCT is responsible for the entire color team including personal colors.<br />
The NCT is responsible for the appearance, conduct, <strong>and</strong> performance of the color team. The<br />
NCT is responsible for calling the correct comm<strong>and</strong> at the right time <strong>and</strong> in a way that other<br />
members of the team can hear the comm<strong>and</strong>s clearly <strong>and</strong> distinctly. This position on the color<br />
team is considered to be one of honor.<br />
3.5.3. Bearer of Air Force Colors. The bearer of Air Force Colors is placed on the left of the<br />
National Colors.<br />
3.5.4. The color team only takes comm<strong>and</strong>s from the NCT.<br />
3.5.6. Rifle <strong>Guard</strong>s carry their rifles at the position of port arms or shoulder arms.<br />
3.6. Equipment.<br />
3.6.1. The equipment of a color team consists of:<br />
3.6.1.1. National Colors<br />
3.6.1.2. The Air Force Colors<br />
3.6.1.3. Additional Colors may be used as appropriate<br />
3.6.1.4. Battle/Campaign Streamers<br />
3.6.1.5. Staffs of equal length <strong>and</strong> design with nickel warhead<br />
3.6.1.6. Two black Shoulder Slings<br />
21
3.6.1.7. Two M1 Rifles or Springfield 1903s, with white slings<br />
3.7. Positions of the Staff.<br />
3.7.1. Position of the Order. At the order, rest the pike of the staff on the ground two inches<br />
from the outside of the right foot, centered on the length of the right foot. Hold the staff with the<br />
right h<strong>and</strong>, forefinger pointing down the front of the staff with the wrist rolled towards the front<br />
of the staff. (Figure 3.3.)<br />
3.7.2. Port Arms Position. At the comm<strong>and</strong> of Port, ARMS, bring your left arm across your<br />
chest with fingers joined <strong>and</strong> extended. With the left h<strong>and</strong>, raise the staff two to three inches off<br />
the ground. The left arm remains flared at the ready cut position until the comm<strong>and</strong> of Order,<br />
ARMS is given. (Figure 3.4.)<br />
3.7.3. Angle Port Arms Position. At the port arms position, the staff is at a 45-degree angle<br />
<strong>and</strong> diagonally across the waist. The staff is held with the left h<strong>and</strong> approximately one-half of the<br />
distance down the staff. The right h<strong>and</strong> is approximately three-quarters of the distance down the<br />
staff. In this position the <strong>USAF</strong> bearer holds his/her port lower than the national colors. (Figure<br />
3.5.)<br />
3.7.4. Position of Right Shoulder.<br />
3.7.4.1. On the comm<strong>and</strong> Right Shoulder, move your right h<strong>and</strong> to a comfortable position on<br />
the staff in preparation to carry out the comm<strong>and</strong> by bringing your h<strong>and</strong> from the front to the<br />
back.<br />
3.7.4.2. Grasp the staff with the fingers of the right h<strong>and</strong> so that on the comm<strong>and</strong> of execution<br />
ARMS, the staff can be brought up with one sharp movement to be centered on <strong>and</strong> aligned with<br />
the cup. At that time the pike of the staff is place in the cup. The right h<strong>and</strong> does not go higher<br />
than eye level.<br />
3.7.4.3. Hold the staff with the right h<strong>and</strong> with the wrist curled. The index finger of the right<br />
h<strong>and</strong>, if extended should touch the tip of your nose. Hold the cup of the sling with the left h<strong>and</strong><br />
forming a circle around the cup to guide the staff in. The left h<strong>and</strong> will remain on the cup of the<br />
sling until the comm<strong>and</strong> Ready, CUT is given. (Figure 3.6.) On Ready, CUT the left h<strong>and</strong> is<br />
dropped sharply to the side. (Figure 3.8.)<br />
3.7.5. Present Arms from Right Shoulder is the same as that of right shoulder arms, only the<br />
Air Force colors are dipped at specific times during the ceremony. If other flags are in the team<br />
they dip also, excluding foreign nationals. (Figure 3.7.)<br />
22
3.7.6. Present Arms from Port Arms. On the comm<strong>and</strong> of execution ARMS, all flags that are<br />
not national flags will dip to an approximately 45 degree angle to the ground. This is done by<br />
bringing the left arm down with the flag hanging aloft. Due to certain height situation of the flag<br />
bearers, the flag might not be at a 45 degree angle, however ensure that the flag does not hit the<br />
ground or any objects that are beneath it. This movement is executed in a 3 second count.<br />
3.7.7. Port Arms from Present Arms. On the comm<strong>and</strong> of execution ARMS, bring the flag<br />
back up to Port by retracing the path previously used to Present. Ensure that the all flags are<br />
below the national flags. This movement is executed in a 3 second count.<br />
3.8. Weapons Movement (Rifle <strong>Guard</strong>s).<br />
3.8.1. Port Arms from Attention. This movement is executed in two counts. The comm<strong>and</strong> is<br />
Port, ARMS. (Figure 3.4.)<br />
3.8.1.1. Grasp the upper h<strong>and</strong> guard of the rifle with the right h<strong>and</strong>. Lift the rifle to the left front<br />
of the body, so that the right h<strong>and</strong> is in front of the left eye. The forearm is at a 45 degree angle<br />
to the ground. On the same count, grasp the rifle by the balance with the left h<strong>and</strong>. The fingers<br />
are joined tightly together, the sling included in the grip, <strong>and</strong> the thumb is positioned at the rear<br />
h<strong>and</strong> guard b<strong>and</strong>. The lower b<strong>and</strong> is positioned at the left corner of the chin.<br />
NOTE: This first count is the basic first count for all shoulder <strong>and</strong> present movements from the<br />
order position.<br />
3.8.1.2. Move the right h<strong>and</strong> from the upper h<strong>and</strong> guard to the small of the stock. Upon<br />
completing the movement, both elbows are against the sides, <strong>and</strong> the right forearm is at a 45<br />
degree angle to the ground. The left thumb is approximately 4 inches in front of the center of the<br />
body.<br />
3.8.2. Order Arms from Port. This is a five-count movement given from the position attention<br />
only. (Figure 3.3.)<br />
3.8.2.1. Release the left h<strong>and</strong> from the b<strong>and</strong> <strong>and</strong> pin to the left side (count one).<br />
3.8.2.2. Return the left h<strong>and</strong> to the b<strong>and</strong> (count two).<br />
3.8.2.3. Release the small of the stock with the right h<strong>and</strong> <strong>and</strong> grasp the upper h<strong>and</strong> guard<br />
(count three).<br />
3.8.2.4. Release the balance with the left h<strong>and</strong> <strong>and</strong> lower the rifle down in front of the body,<br />
thrusting it out to a flare position. While lowering the rifle, move the left h<strong>and</strong>, thumb <strong>and</strong><br />
fingers straight, <strong>and</strong> joined sharply on top of the right thumb, to steady the rifle. The forearm <strong>and</strong><br />
wrist are straight. The trigger housing of the weapon will be at the right knee. (count four)<br />
3.8.2.5. Bring right arm back to your side (Do not butt slam), at the same time moving the left<br />
h<strong>and</strong> to a flare, parallel to the ground. (count five)<br />
23
3.8.3. Colors, St<strong>and</strong> At, Ease. This is a two-count movement given from the position of<br />
attention only.<br />
3.8.3.1. On the comm<strong>and</strong>, Colors, St<strong>and</strong> At, EASE, the right foot is kept in place <strong>and</strong> the left<br />
foot is moved smartly, six to eight inches to the left (count 1). Keep the butt of the weapon on<br />
the ground on line with the front of the right shoe. (Figure 3.1.)<br />
3.8.3.2. With the right h<strong>and</strong> push the rifle across the front of the body, <strong>and</strong> at the same time<br />
grasp the barrel with the left h<strong>and</strong> above the right h<strong>and</strong> (count 1). The rifle is held at the front,<br />
four inches from your belt buckle. (Figure 3.2.)<br />
3.8.4. Attention from St<strong>and</strong> At, Ease. The comm<strong>and</strong> for this movement is Colors,<br />
ATTENTION.<br />
3.8.4.1. Upon the comm<strong>and</strong>, Colors, move the left h<strong>and</strong> to the small of the back, <strong>and</strong> bring the<br />
weapon flared out (as in parade rest).<br />
3.8.4.2. Upon the comm<strong>and</strong> of execution, ATTENTION, come to the position of attention by<br />
pulling the weapon back to the right side, along the leg. At the same time, bring the left h<strong>and</strong><br />
back to the left side as in the position of attention.<br />
3.8.5. Present Arms from Attention. The comm<strong>and</strong> is Present, ARMS: (3 counts) (Figure 3.8.)<br />
3.8.5.1. On the comm<strong>and</strong> of execution, ARMS, keep the right elbow tight against the side, grasp<br />
the upper h<strong>and</strong> guard with the right h<strong>and</strong>. Using the right forearm, bring the rifle up to the<br />
position of port, arms (count 1).<br />
3.8.5.2. Move your right h<strong>and</strong> directly to the small of the stock <strong>and</strong> grasp it. Both elbows are at<br />
the side.(count 2)<br />
3.8.5.3. Twist the weapon, using the small of the stock, so that the sling faces away from the<br />
chest, <strong>and</strong> the weapon’s sight is at eye level (count 3). The weapon remains a fist-width away<br />
from the body.<br />
3.8.6. Order Arms from Present. This movement is executed in five counts. The comm<strong>and</strong> is<br />
Order, ARMS.<br />
3.8.6.1. On the comm<strong>and</strong> of execution ARMS, rotate the weapon counter-clockwise using the<br />
right h<strong>and</strong>, so that the weapon is at the port arms position, drop <strong>and</strong> pin the left h<strong>and</strong> (count 1).<br />
3.8.6.2. Return the left h<strong>and</strong> to port, arms. (count 2)<br />
24
3.8.6.3. Remove the right h<strong>and</strong> from the butt <strong>and</strong> smartly grab the upper h<strong>and</strong> guard (count 3)<br />
Keep the elbow up <strong>and</strong> forearm level.<br />
3.8.6.4. Release the balance with the left h<strong>and</strong> <strong>and</strong> lower the rifle down in front of the body<br />
thrusting it out to a flare position (count 4). While lowering the rifle, move the left h<strong>and</strong>, thumb<br />
<strong>and</strong> fingers straight, <strong>and</strong> joined sharply on top of the right thumb, to steady the rifle. The forearm<br />
<strong>and</strong> wrist are straight.<br />
3.8.6.5. Bring right arm back to your side (Do not butt slam), at the same time returning left<br />
h<strong>and</strong> flared , st<strong>and</strong> by for the comm<strong>and</strong> , Colors Ready Cut. (count 5)<br />
3.8.7. Right Shoulder, ARMS. This is a four-count movement when executed from attention.<br />
3.8.7.1. On the comm<strong>and</strong> of execution, ARMS, grasp the front (upper) h<strong>and</strong> guard of the rifle<br />
with the right h<strong>and</strong>. Lift the rifle to the left front of the body so that the right h<strong>and</strong> is in front of<br />
the eye. The forearm must be parallel to the ground. On this same count take the rifle by the<br />
balance with the left h<strong>and</strong> (count 1). Fingers are joined tightly together, sling included in the<br />
grip, the thumb is pointed at the rear (lower) h<strong>and</strong> guard b<strong>and</strong>. The lower b<strong>and</strong> is positioned at<br />
the left corner of the chin.<br />
3.8.7.2. Remove the right h<strong>and</strong> from the upper h<strong>and</strong> guard <strong>and</strong> grip the heel of the butt plate<br />
between the first two fingers of the right h<strong>and</strong>, flick the rifle counter-clockwise so the sling is<br />
facing the right shoulder, parallel to the body. (count 2)<br />
3.8.7.3. Keep your right elbow tight to the side, slide the rifle up to the shoulder using the<br />
forearm. At the same time place the rifle on the shoulder <strong>and</strong> guide the rifle up without changing<br />
the grip on the butt. After the rifle is at a 45-degree angle to the ground, take the left h<strong>and</strong> with<br />
fingers <strong>and</strong> thumb tightly together, <strong>and</strong> position it at the rear of the receiver (count 3). The right<br />
elbow is tight to the right side. The left wrist is straight <strong>and</strong> the left forearm approximately at a<br />
45 degree angle to the ground. (Figure 3.6.)<br />
3.8.7.4. On the comm<strong>and</strong> Colors, Ready, Cut, sharply return the left h<strong>and</strong> to the position of<br />
attention. (count 4) (Figure 3.7.)<br />
3.8.8. Port Arms from Right Shoulder. This is a three-count movement. The comm<strong>and</strong> is<br />
Port, ARMS.<br />
3.8.8.1. On the comm<strong>and</strong> of execution ARMS, slide the butt down so the rifle springs from the<br />
shoulder. Hold the weapon in this upright position perpendicular to the ground, using only the<br />
right h<strong>and</strong> (count 1).<br />
3.8.8.2. Twist the rifle clockwise so that the rifle falls in front of your chest with the upper h<strong>and</strong><br />
guard centered over your left eye. Raise the left h<strong>and</strong> smartly to catch the balance (approximately<br />
8” above the trigger housing) a fist-width away from the center of your chest (count 2).<br />
3.8.8.3. Move the right h<strong>and</strong> directly to the small of the stock (count 3).<br />
25
3.8.9. Order Arms from Right Shoulder. The comm<strong>and</strong> is Order, ARMS. This movement is<br />
executed in five counts.<br />
3.8.9.1. On the comm<strong>and</strong> of execution ARMS, slide the butt down so the rifle springs from the<br />
shoulder. Hold the weapon in this upright position perpendicular to the ground, using only the<br />
right h<strong>and</strong> (count 1).<br />
3.8.9.2. Twist the rifle clockwise so that the rifle falls in front of your chest with the upper h<strong>and</strong><br />
guard barrel centered over your left eye. Raise the left h<strong>and</strong> smartly to catch the balance<br />
(approximately 8” above the trigger housing) approximately four inches away from the center of<br />
your chest (count 2).<br />
3.8.9.3. Remove the right h<strong>and</strong> from the butt <strong>and</strong> smartly grab the upper h<strong>and</strong> guard (count 3).<br />
Keep the elbow up <strong>and</strong> forearm at a 45 degree angle to the ground.<br />
3.8.9.4. Release the balance with the left h<strong>and</strong> <strong>and</strong> lower the rifle down in front of the body,<br />
thrusting it out to a flare position (count 4). While lowering the rifle, move the left h<strong>and</strong>, thumb<br />
<strong>and</strong> fingers straight, <strong>and</strong> joined sharply on top of the right thumb, to steady the rifle. The forearm<br />
<strong>and</strong> wrist are straight. The trigger housing of the weapon will be at the knee.<br />
3.8.9.5. Bring right arm back to your side (Do not butt slam), at the same time moving the left<br />
h<strong>and</strong> flared, (count 5) <strong>and</strong> st<strong>and</strong> by for the comm<strong>and</strong>, Colors Ready Cut.<br />
3.8.10. Right Shoulder Arms from Port. This is a five count movement. The comm<strong>and</strong> is<br />
Right Shoulder, ARMS.<br />
3.8.10.1. On the comm<strong>and</strong> of execution, ARMS, pin left h<strong>and</strong> to left side (count 1). Return left<br />
h<strong>and</strong> to port arms (count 2). Remove the right h<strong>and</strong> from the small of the stock <strong>and</strong> grip the heel<br />
of the butt-plate between the first two fingers of your right h<strong>and</strong>, flick the rifle counter-clockwise<br />
so the sling is facing the right shoulder, parallel to the body, take the left h<strong>and</strong>, with fingers <strong>and</strong><br />
thumb tightly together, <strong>and</strong> position it smartly approximately at the b<strong>and</strong> on the lower h<strong>and</strong><br />
guard. (count 3)<br />
3.8.10.2. Place the rifle on the shoulder <strong>and</strong> guide the rifle up without changing the grip on the<br />
butt. The rifle is at a 45 degree angle to the ground <strong>and</strong> the right forearm is level to the ground.<br />
(count 4)<br />
3.8.10.3. Cut the left h<strong>and</strong> smartly to the side. (count 5)<br />
3.8.11. Left Shoulder Arms from Attention. This movement is executed in four counts. The<br />
comm<strong>and</strong> is Right Shoulder, ARMS. Note – All shoulder comm<strong>and</strong>s are called Right Shoulder,<br />
Arms.<br />
26
3.8.11.1. On the comm<strong>and</strong> of execution, ARMS, grasp the upper h<strong>and</strong> guard of the rifle with the<br />
right h<strong>and</strong>. Lift the rifle to the left front of the body so that the right h<strong>and</strong> is in front of the left<br />
eye. The forearm is 45 degrees to the ground. On the same count take the rifle by the balance<br />
with the left h<strong>and</strong>, the fingers are joined tightly together in the grip. The thumb is positioned on<br />
the lower h<strong>and</strong> guard b<strong>and</strong>. (count 1)<br />
3.8.11.2. Release the upper h<strong>and</strong> guard <strong>and</strong> grip the small of the stock with the right h<strong>and</strong>,<br />
release the left h<strong>and</strong> <strong>and</strong> place the rifle above the left shoulder, moving the right h<strong>and</strong> smartly to<br />
the rear of the receiver forming a flare. At the same time bring the left forearm to a position<br />
parallel to <strong>and</strong> against the stock, the left h<strong>and</strong> is over the ear. (count 2)<br />
3.8.11.4. Bring the left h<strong>and</strong> to grip the heel of the butt-plate between the first two fingers of<br />
your fingers left h<strong>and</strong> resting the weapon on the shoulder. (count 3)<br />
3.8.11.5. Upon the comm<strong>and</strong> Colors, Ready, Cut, sharply cut the right h<strong>and</strong> to the right side.<br />
(count 4)<br />
3.8.12. Left Shoulder arms from Port. This movement is executed in five counts. The<br />
comm<strong>and</strong> is Right Shoulder, ARMS.<br />
3.8.12.1. Upon the comm<strong>and</strong> of execution, ARMS, on Count 1 drop <strong>and</strong> pin left h<strong>and</strong>, Count 2<br />
left h<strong>and</strong> back to port arms, Count 3 is place the weapon above the left shoulder using the right<br />
h<strong>and</strong>, moving the right h<strong>and</strong> smartly to the rear of the receiver forming a flare. At the same time<br />
bring the left forearm to a position parallel to <strong>and</strong> against the stock, the left h<strong>and</strong> is over the ear.<br />
3.8.12.2. Bring the left h<strong>and</strong> to grip the heel of the butt-plate between the first two fingers of<br />
your fingers left h<strong>and</strong>. (count 4)<br />
3.8.12.3. Sharply cut the right h<strong>and</strong> away to the position of attention. (count 5)<br />
3.8.13. Order Arms from Left Shoulder Arms. The comm<strong>and</strong> is Order, ARMS. This is a<br />
five count movement.<br />
3.8.13.1. On the comm<strong>and</strong> of execution ARMS, place the right h<strong>and</strong> on the small of the stock,<br />
<strong>and</strong> bring the weapon down to the front of your body at port arms, left h<strong>and</strong> pinned to the side.<br />
(count 1)<br />
3.8.13.2. Bring your left h<strong>and</strong> to slap the weapon to port arms. (count 2)<br />
3.8.13.3. Move the right h<strong>and</strong> to the upper h<strong>and</strong> guard, keeping your forearm at a 45 degree<br />
angle to the ground. (count 3)<br />
3.8.13.4. Release the balance with the left h<strong>and</strong> <strong>and</strong> lower the rifle down in front of your body,<br />
thrusting it out into the flare position. While lowering the rifle, move the left h<strong>and</strong>, thumb <strong>and</strong><br />
fingers straight <strong>and</strong> joined, sharply to the top of your right thumb to steady the rifle. The forearm<br />
<strong>and</strong> wrist are straight. Keeping the trigger housing at the knee. (count 4)<br />
27
3.8.13.5. Bring the right arm back to your side, (Do not butt slam the rifle). Left arm is parallel<br />
to the ground <strong>and</strong> h<strong>and</strong> is flared. (count 5) Upon the comm<strong>and</strong>, Colors, Ready, Cut, move your<br />
left arm back, parallel to ground <strong>and</strong> to your side, then sharply down to the position of attention.<br />
3.8.14. Port Arms from Left Shoulder<br />
3.8.14.1 On the comm<strong>and</strong> of execution ARMS, the movement is executed in the same manner<br />
as the first two counts of Order ARMS from Left Shoulder. (refer to 3.8.13.1 <strong>and</strong> 3.8.13.2)<br />
3.8.15 Present Arms from Shoulder / Shoulder from Present Arms.<br />
3.8.15.1. When going to the position of present arms from either shoulder position, the<br />
movements are executed in the same manner as going to port with a final added count, in which<br />
the weapon is twisted clockwise, so that the sling faces away from the body, front eyesight is<br />
dropped to eye level. (3 counts)<br />
3.8.15.2. When returning to the right shoulder or left shoulder positions, the movements are<br />
executed from present to the appropriate shoulder the same manner as from port to shoulder.<br />
However, the first count includes twisting the weapon to port arms as you execute the first count.<br />
Each count after that is executed the exact same as previously stated for the shoulder from port<br />
sequence. (5 counts)(refer 3.8.10, 3.8.12)<br />
3.9. Full <strong>Honor</strong>s Funeral.<br />
3.9.1. Gravesite Service. Colors are positioned approximately 10 paces away from the foot of<br />
the casket. Upon arrival of the hearse, the NCT comm<strong>and</strong>s COLORS, ATTENTION. Upon the<br />
salute of the OIC/NCOIC, the NCT comm<strong>and</strong>s Present, ARMS. Colors remains at that position<br />
until the OIC/NCOIC of the ceremony drops the salute at the gravesite. At this time the NCT will<br />
comm<strong>and</strong> Order, ARMS; Ready, CUT; St<strong>and</strong> at, EASE (all in a quiet tone). After the service<br />
is completed, the OIC/NCOIC of the ceremony assumes the position of attention <strong>and</strong> presents<br />
arms, the funeral director also asks the family to please rise for the rendering of military honors.<br />
This is the cue for the colors to present arms. The NCT comm<strong>and</strong>s Colors, ATTENTION;<br />
Present, ARMS. After Taps is completed, the NCT comm<strong>and</strong>s Order, ARMS; Ready, CUT<br />
<strong>and</strong> remains at the position of attention.<br />
3.9.2. Retiring the Colors. After the flag has been presented, the pallbearers start their<br />
departure sequence. This is the cue for the colors to leave gravesite. The NCT comm<strong>and</strong>s Port,<br />
ARMS; Colors Turn, MARCH, the team departs for the transportation. Upon arrival at the<br />
transportation, the NCT comm<strong>and</strong>s Mark Time, MARCH. The right rifle guard marks time, the<br />
NCT, <strong>USAF</strong> Bearer <strong>and</strong> left rifle guard advance forward to the left side of each other, even with<br />
the right rifle guard. The NCT comm<strong>and</strong>s Colors, HALT; Order, ARMS: Present, ARMS<br />
(pause) Order, ARMS; Ready CUT; FALLOUT.<br />
3.10. Memorial Service.<br />
28
3.10.1. Explanation. Memorial services are conducted based upon the entitlement of the<br />
deceased. The term memorial service usually refers to a ceremony for those remains not<br />
recovered.<br />
3.10.2. Advancing the Colors/Responsibilities of the OIC/NCOIC. Prior to the beginning of<br />
the memorial service, the family is in the chapel. A color team (without hats or weapons) <strong>and</strong> an<br />
OIC/NCOIC are pre-positioned in the vestibule of the chapel. (The color team follows the<br />
OIC/NCOIC). The colors are at right shoulder arms. At the appropriate time, the NCT<br />
comm<strong>and</strong>s Forward, MARCH. The colors <strong>and</strong> the OIC/NCOIC step off. When the formation<br />
arrives at the front of the chapel, The OIC/NCOIC moves forward <strong>and</strong> places the pre-folded flag<br />
on the small table located in front of the alter. When the colors are in position, the NCT<br />
comm<strong>and</strong>s Mark, TIME; Colors, HALT.. The NCT comm<strong>and</strong>s Order, ARMS; Ready, CUT;<br />
Colors, St<strong>and</strong> At, EASE. The OIC/NCOIC then executes an about face <strong>and</strong> returns to the<br />
vestibule area by proceeding down the center aisle. At the conclusion of the service, the NCT<br />
comm<strong>and</strong>s Colors, ATTENTION; Right Shoulder, ARMS; Ready, CUT. The OIC/NCOIC<br />
returns to the pulpit, advances toward the table <strong>and</strong> picks up the flag. He remains st<strong>and</strong>ing at<br />
attention with the flag in the palms of his h<strong>and</strong>s. At this time the NFP is qued to begin firing<br />
sequence.<br />
3.10.3. Retiring the Colors. When the NCT sees the OIC/NCOIC pick up the flag, the NCT<br />
comm<strong>and</strong>s Present, ARMS. Upon completion of the firing party sequence <strong>and</strong> the playing Taps,<br />
the NCT comm<strong>and</strong>s Right Shoulder, ARMS. The OIC/NCOIC presents the flag <strong>and</strong> departs. At<br />
this time the NCT comm<strong>and</strong>s Forward, MARCH. The color team marches down the center<br />
aisle <strong>and</strong> out of the chapel. This concludes the memorial service.<br />
NOTE: Both rifle guards execute a h<strong>and</strong> salute upon the comm<strong>and</strong> of Present, ARMS.<br />
3.11. Colors Sequences.<br />
3.11.1. Dress Center, Dress Sequence<br />
3.11.1.1. The NCT comm<strong>and</strong>s Dress Center, DRESS is given to dress or align the color team<br />
evenly. On comm<strong>and</strong>, each member of the team lowers his/her head in a three-count movement.<br />
The NCT decides if anyone moves forward, backward, or sideways. All members of the color<br />
team dress on the NCT.<br />
3.11.1.2. When the team is properly aligned, the NCT comm<strong>and</strong>s Ready, Front. All members<br />
bring their heads up in a three-count movement back to their original positions.<br />
3.11.2. Ready Cut Sequence.<br />
3.11.2.1. At the order position the ready cut comm<strong>and</strong> is used to return the team to the position<br />
of attention. The preparatory comm<strong>and</strong> is Ready, on the comm<strong>and</strong> of execution CUT, on count<br />
one, the team sharply cuts their left h<strong>and</strong>s to the side parallel to the ground, <strong>and</strong> on count two,<br />
sharp cut away down to the position of attention . This will be used after order, arms.<br />
29
3.11.2.2. From the shoulder position, for the flag bearers, the left h<strong>and</strong> is wrapped around the<br />
cup, fingers tightly together. On the comm<strong>and</strong> of execution, drop the left h<strong>and</strong> sharply to the left<br />
side.<br />
3.11.3. Present Sequence.<br />
3.11.3.1. Refer to positions of the staff section <strong>and</strong> weapons movement of this chapter.<br />
3.11.4. Advance the Colors Sequence.<br />
3.11.4.1. Air Force Indoor Retirements / Awards Banquets / Luncheons / Promotions /<br />
Graduation Ceremonies: The NCT forms the team in a line formation at the designated location<br />
ten minutes prior to ceremony time. Upon the announcement of “Ladies <strong>and</strong> Gentlemen, Please<br />
Rise <strong>and</strong> Remain St<strong>and</strong>ing for the Advancement <strong>and</strong> the Presentation of the Colors”, the NCT<br />
comm<strong>and</strong>s, St<strong>and</strong> By, Colors, ATTENTION. At this point the NCT comm<strong>and</strong>s either Right<br />
Shoulder, ARMS; Ready, CUT or Port, ARMS, depending on the clearance of the<br />
auditorium/room. The NCT then comm<strong>and</strong>s Forward, MARCH. The right rifle guard leads the<br />
way for the color team <strong>and</strong> positions the team in the proper location for the presentation of the<br />
colors.<br />
3.11.5. Retiring the Colors Sequences.<br />
3.11.5.1. Retiring the colors at indoor ceremonies: The color team executes the same procedures<br />
as in the advance of the colors for indoor ceremonies with the exception of the narrator<br />
announcement of Retire the Colors. Once in position the NCT comm<strong>and</strong>s Present, Arms, the<br />
only members of the team that execute are the rifle guards. The comm<strong>and</strong> of Port, Arms is<br />
called.<br />
3.11.5.2. The NCT comm<strong>and</strong>s Colors, Colors Turn, MARCH. The right rifle guard leads the<br />
team out of the room using the predetermined route of departure.<br />
3.11.5.3. Wheel Sequence: NOTE: REFER to section (A.), number (2.), letter (c.), for<br />
information pertaining to colors wheel movements.<br />
3.12. Personal Colors.<br />
3.12.1. Responsibilities.<br />
3.12.1.1. The bearer of personal colors is responsible for checking out all the equipment, to<br />
include a sling, a flag bearing the rank of the person being honored, <strong>and</strong> a cover for the flag.<br />
3.12.1.2. The personal colors presents arms either by dipping or with the left h<strong>and</strong> extended<br />
straight across the body at chest level with the palm down, parallel to the ground. This is done<br />
whenever honors are to be rendered.<br />
3.12.2. Personal Colors Furling/Casing Sequence.<br />
30
3.12.2.1. From the position of attention the PC bearer reaches straight across the body using the<br />
left h<strong>and</strong> to grasp the staff. The right <strong>and</strong> left h<strong>and</strong> are flush together. Using both h<strong>and</strong>s lower<br />
the staff until it is parallel to the ground, both h<strong>and</strong>s remain together close to the right side of the<br />
body. The flag is then furled completely <strong>and</strong> stopped with the warhead flat <strong>and</strong> parallel to the<br />
ground.<br />
3.12.2.2. The NCOIC is positioned to the side of the flag helping to guide it as the bearer furls,<br />
with the case draped over the left arm, open end inside the arm. Once the furl is complete the<br />
NCOIC removes the case from the arm using the right h<strong>and</strong>. The case is then slipped over the<br />
flag <strong>and</strong> tied in a single knot.<br />
3.12.2.3. Once the casing is complete the PC bearer brings the staff back to the position of port,<br />
both exit in a predetermined path.<br />
3.12.3. Uncasing/Unfurling Personal Colors.<br />
3.12.3.1. PC Bearer <strong>and</strong> NCOIC stop at predetermined position. Once stopped the PC Bearer<br />
lowers the staff until it is parallel to the ground using both h<strong>and</strong>s as in the furling position.<br />
3.12.3.2. The NCOIC takes a position beside the flag, ensuring the flag remains in full view.<br />
When the flag is in position the NCOIC unties the case, slips it off <strong>and</strong> places it over the left arm.<br />
The flag bearer proceeds to unfurl the flag while the NCOIC assists in guiding it.<br />
3.12.3.3. The flag is unfurled <strong>and</strong> stopped with the warhead parallel to the ground. The PC<br />
Bearer then uses both h<strong>and</strong>s to return the staff to the port position. The PC Bearer continues<br />
with predetermined route to post the flag or exit.<br />
3.13. Posting Colors in St<strong>and</strong>s Sequence.<br />
3.13.1. To begin the sequence, the color team must be at port arms <strong>and</strong> facing the audience. All<br />
counts are made without using verbal comm<strong>and</strong>s. The first count is executed by performing a<br />
three-count about face, during this sequence, the third count is a step instead of close. All flag<br />
bearers execute the movement simultaneously, moving off the flag bearer furthest to the left.<br />
(opposite the NCT)<br />
3.13.2. The flag bearers take the appropriate amount of steps to their prospected st<strong>and</strong>, moving<br />
off the NCT.<br />
3.13.3. Once in position at the st<strong>and</strong>s, the colors are placed in the st<strong>and</strong>s simultaneously.<br />
3.13.4. The colors are then dressed with the top edge of the flag to the right.<br />
3.13.5. With a slight tug of the flag, given by the middle person of the team (for a 3 person<br />
posting) or the NCT (for a 2 person posting), the flag bearers move their heads up at the same<br />
time so that they can straighten the warheads using the right h<strong>and</strong>.<br />
31
3.13.6. With another slight tug of the flag, the flag bearers move their heads back down even<br />
with the ground simultaneously to redress the flags.<br />
3.13.7. The colors are redressed, the flag bearers arms are brought straight out, palms down,<br />
parallel to the ground <strong>and</strong> dropped to the side.<br />
3.13.8. The flag bearers take one step back together. The flag bearers then execute a three-count<br />
about face without closing <strong>and</strong> step off taking the appropriate amount of steps to return to the<br />
team. ( NOTE: The rifle guards st<strong>and</strong> fast throughout the posting sequence. The NCT always<br />
waits for the other bearer('s) to complete their movements before beginning the next movement).<br />
3.14. Rippling to Shoulder from Port Arms.<br />
3.14.1. This sequence is used when a color team , either in a line or an abreast formation, leaves<br />
a low clearance area. This sequence is always performed automatically, while marching , with<br />
the individual movements being executed on every other foot.<br />
3.14.2. When performed in the line formation, the ripple is started by the right rifle guard. The<br />
right guard starts the movement after clearing the low clearance area. The right guard begins the<br />
sequence by going to the shoulder position, starting on the left foot. The NCT continues the<br />
sequence, going to the shoulder position on the very next left. The <strong>USAF</strong> bearer <strong>and</strong> the left rifle<br />
guard then follow, completing the sequence.<br />
3.15. Rippling to Port Arms from Shoulder.<br />
3.15.1. This sequence is used when a color team approaches a low clearance or an obstruction<br />
which would hinder the teams ability to remain at the shoulder position. When marching in a line<br />
formation the sequence is automatically started by the right guard with no verbal comm<strong>and</strong>s.<br />
When marching in a column formation, the movement is called by the NCT.<br />
3.15.2. When the sequence is performed in the line formation, the right guard starts the ripple.<br />
The right guard begins the ripple down procedure before reaching the low clearance or<br />
obstructed area. The right guard begins to go to port arms on the left foot <strong>and</strong> complete the<br />
sequence on the next steps. The NCT starts to ripple down on the very next left after the right<br />
rifle guard. The <strong>USAF</strong> bearer <strong>and</strong> the left guard then follow, completing the sequence. The flag<br />
bearers assume the angle port position. Warheads are flattened, with the <strong>USAF</strong> bearer keeping<br />
the <strong>USAF</strong> below the National.<br />
3.15.3. When this sequence is performed in a column formation, the NCT gives the comm<strong>and</strong><br />
Split It, Port, ARMS. Each comm<strong>and</strong> is given on the left foot <strong>and</strong> the whole team goes to the<br />
port arms position on the following foot after the comm<strong>and</strong> of execution ARMS. The team also<br />
breaks shoulder contact to allow for the movement. Once each member has completed the<br />
movement, the team resumes shoulder contact.<br />
32
Figure 3.1. (St<strong>and</strong> At Ease) Figure 3.2. (St<strong>and</strong> At Ease)<br />
Count 1 Count 2<br />
Figure 3.3. (Attention) Figure 3.4. (Straight Port)<br />
33
Figure 3.5. (Angle Port) Figure 3.6. (Right Shoulder, before<br />
Colors, Ready, Cut)<br />
Figure 3.7. (Right Shoulder) Figure 3.8. (Present Arms)<br />
34
4.1. General Information.<br />
4.1.1. Personnel:<br />
(1) NCOIC of Firing Party (NFP)<br />
(7) Firing Party members<br />
4.1.2. Firing Party Location.<br />
Chapter 4<br />
FIRING PARTY<br />
4.1.2.1. Firing Party is positioned at a minimum 50 paces diagonally from the head of the casket.<br />
If possible the entire family should be able to see the entire line. Always ensure that the next of<br />
kin can see the line.<br />
4.1.3. All comm<strong>and</strong>s are given by the NFP from the position of attention.<br />
4.2. Equipment.<br />
4.2.1. The uniform worn is prescribed by the OIC/NCOIC of the ceremony.<br />
4.2.2. The NFP wears the .38 caliber revolver.<br />
4.2.3. The NFP draws twenty-one rounds of ammunition from the armory for each ceremony<br />
scheduled prior to return to armory.<br />
4.2.4. The NFP will be positioned three paces behind the fourth airman.<br />
4.3. <strong>Basic</strong> Firing Party Movements.<br />
4.3.1. Attention. (Figure 4.1.)<br />
4.3.1.1. Weapon is held on the right side of the body with the stock parallel to the foot <strong>and</strong> even<br />
with the toes.<br />
4.3.1.2. St<strong>and</strong> at position of attention with the right h<strong>and</strong> flared along the upper h<strong>and</strong> guard.<br />
4.3.1.3 The rest of the body is in the normal position of attention (refer to 1.2.1.)<br />
4.3.2. Carry Arms. There are two possible positions of carry arms. This position is used to<br />
move the firing party to the firing line, only when weapons are NOT loaded<br />
35
4.3.2.1. The primary position of carry arms is accomplished by grabbing the small of the stock<br />
with your right h<strong>and</strong> underh<strong>and</strong>ed, arm extended <strong>and</strong> sling facing out.<br />
4.3.2.2. The secondary position of carry arms is used any time it is precipitating. Grab the upper<br />
h<strong>and</strong> guard with the right h<strong>and</strong> <strong>and</strong> hold weapon with barrel pointing down <strong>and</strong> sling facing out.<br />
4.3.3. Ground, ARMS.<br />
4.3.3.1. These movements are executed in one count<br />
4.3.3.2. Step out with left foot while simultaneously flaring the left h<strong>and</strong> to the small of the<br />
back. Right h<strong>and</strong> should be flared to the side of the weapon.<br />
4.3.3.3. Rotate weapon counter-clockwise so the sling is up<br />
4.3.3.4. Right h<strong>and</strong> should be properly flared on the upper h<strong>and</strong> guard once the weapon is on the<br />
ground.<br />
4.3.3.5. Right leg is straight <strong>and</strong> head is up.<br />
4.3.3.6. Upon the comm<strong>and</strong>, Ready, UP; leave the weapon on the ground <strong>and</strong> bring body up to<br />
position of attention.<br />
4.3.4. Take, ARMS.<br />
4.3.4.1. Step out with the left foot while simultaneously flaring the left h<strong>and</strong> to the small of the<br />
back.<br />
4.3.4.2. (St<strong>and</strong>ard <strong>Honor</strong>s Funeral only) Bring left h<strong>and</strong> back to front, remove gloves, roll one<br />
into the other <strong>and</strong> with left h<strong>and</strong>, toss the gloves behind you, returning the left h<strong>and</strong> to a flare to<br />
the small of the back. If wearing black gloves due to cold weather, do not remove.<br />
4.3.4.3. Flare right h<strong>and</strong> on upper h<strong>and</strong> guard with head up.<br />
4.3.4.4. Upon the comm<strong>and</strong> Ready, UP; turn the weapon counter clockwise <strong>and</strong> toe the weapon.<br />
4.3.5. Ceremonial At, EASE. (Figure 4.2)<br />
4.3.5.1. This movement is executed in three counts.<br />
4.3.5.2. Move the left foot 6 to 8 inches to the left while simultaneously flaring the weapon<br />
forward with the right h<strong>and</strong> at a fist <strong>and</strong> arm extended, placing left h<strong>and</strong> at a flare on the small of<br />
the back. (count 1)<br />
36
4.3.5.3. The weapon is turned counter clock-wise <strong>and</strong> brought to the center of the body with the<br />
sling facing inward. The left h<strong>and</strong> meets the weapon with the fingers down along the barrel<br />
bending at the wrist with the thumb behind the barrel <strong>and</strong> the forefinger cutting the barrel. (count<br />
2)<br />
4.3.5.4. Right h<strong>and</strong> flares, from upper h<strong>and</strong> guard to the extent of the elbow <strong>and</strong> comes to a<br />
position perpendicular to the left h<strong>and</strong> forming an upside down “T”, left h<strong>and</strong> middle finger<br />
should be touching the knuckle of the right h<strong>and</strong> forefinger.<br />
4.3.6. Firing, PARTY; ATTENTION.<br />
4.3.6.1. This movement is executed in three counts.<br />
4.3.6.2. Upon the comm<strong>and</strong> of Firing, PARTY, flare the right h<strong>and</strong> off the weapon <strong>and</strong> return it<br />
to grasp the upper h<strong>and</strong> guard at a fist. (count 1)<br />
4.3.6.3. Flare weapon to the front, right arm extended, left h<strong>and</strong> flared to the small of the back.<br />
(count 2)<br />
4.3.6.4. Upon the comm<strong>and</strong> of ATTENTION, bring the weapon back to the proper position of<br />
attention. (count 3)<br />
4.3.7. Dress Right, DRESS.<br />
4.3.7.1. All members except the first airman turn their heads to the right, <strong>and</strong> all except the<br />
seventh airman raise <strong>and</strong> extend their left arms parallel to the ground.<br />
4.3.7.2. Members then dress accordingly an arm length plus a h<strong>and</strong>s length away from each<br />
other. Once all members are in position, the NFP calls Ready, FRONT, <strong>and</strong> all members snap<br />
back to attention without slapping the side of the leg.<br />
4.3.8. Port, ARMS. (Figure 4.3.)<br />
4.3.8.1. This movement is executed in two counts.<br />
4.3.8.2. From the position of attention, bring weapon in front of the body with the right h<strong>and</strong> at a<br />
fist while simultaneously bringing left h<strong>and</strong> to meet the lower h<strong>and</strong> guard b<strong>and</strong>. (count 1)<br />
4.3.8.2.1. The stock ferrule swivel is chin level.<br />
4.3.8.2.2. The upper h<strong>and</strong> guard is over the left eye, <strong>and</strong> the butt of the weapon is over the inner<br />
part of the right thigh.<br />
4.3.8.2.3. The weapon is approximately four inches or a fist away from the body (measured at<br />
waist level).<br />
37
4.3.8.2.4. Right elbow is at a 45 degree angle.<br />
4.3.8.3. Bring the right h<strong>and</strong> down the front of the weapon <strong>and</strong> properly flare right h<strong>and</strong> to the<br />
extent of the elbow <strong>and</strong> grip weapon on the small of the stock. (count 2)<br />
4.3.9 Order Arms from Port<br />
4.3.9.1. This movement is executed in 3 counts.<br />
4.3.9.2. On the comm<strong>and</strong> of execution, bring the right h<strong>and</strong> from the small of the stock to the<br />
upper h<strong>and</strong> guard without moving the weapon. (count 1)<br />
4.3.9.3. Release the balance with the left h<strong>and</strong> <strong>and</strong> lower the rifle down in front of your body,<br />
thrusting it out into the flare position. While lowering the rifle, move the left h<strong>and</strong>, thumb <strong>and</strong><br />
fingers straight <strong>and</strong> joined, sharply to the top of your right thumb to steady the rifle. The forearm<br />
<strong>and</strong> wrist are straight <strong>and</strong> the trigger housing of the weapon is at the knee. (count 2)<br />
4.3.9.4. Simultaneously bring the weapon back down to the side <strong>and</strong> cut the left h<strong>and</strong> back to the<br />
side without an excess movement to return to the position of attention. (count 3)<br />
4.3.10. Present, ARMS. (Figure 4.4.)<br />
4.3.10.1. This movement is executed in three counts.<br />
4.3.10.2. The first two counts are identical to port arms.<br />
4.3.10.3. On the third count, perform a quarter turn to the right, so that the front sight is at eye<br />
level <strong>and</strong> the sling is facing out. (Note: If members find it difficult to have sight at eye level due<br />
to height, extend right arm.)<br />
4.3.10.3.1. Thumb <strong>and</strong> middle finger of the left h<strong>and</strong> are on the lower h<strong>and</strong> guard b<strong>and</strong>.<br />
4.3.10.3.2. Right h<strong>and</strong> is at a flare with the thumb tucked.<br />
4.3.10.3.3. Weapon is straight up <strong>and</strong> down <strong>and</strong> still a fist or four inches away from the body.<br />
4.3.11. Order, ARMS from Present Arms.<br />
4.3.11.1. This movement is executed in five counts.<br />
4.3.11.2. Pin your left h<strong>and</strong> along the seam of your trousers while simultaneously turning the<br />
weapon to the position of port arms. (count 1) (Figure 4.5.)<br />
4.3.11.3. With the left h<strong>and</strong>, slap the weapon so thumb <strong>and</strong> middle finger is at the b<strong>and</strong>.<br />
(count 2)<br />
38
4.3.11.4. Complete the order in the same manner as an order arms from port arms. (counts 3-5)<br />
(refer to 4.3.9.)<br />
4.4. Firing Sequence.<br />
4.4.1. Firing, PARTY; ATTENTION. (reference 4.3.6)<br />
4.4.2. Ready, FACE.<br />
4.4.2.1. This movement is executed in six counts.<br />
4.4.2.2. Complete the first count of a right face, flaring the weapon so that the trigger housing is<br />
at the knee. (count 1) (Figure 4.6)<br />
4.4.2.3. Bring the left foot to meet the right foot, weapon is still flared. (count 2)<br />
(Figure 4.7)<br />
4.4.2.4. Butt slam the weapon on the ground controlled. (count 3) (Figure 4.8)<br />
4.4.2.5. Move the left foot approximately 6-8 inches apart while simultaneously bringing the<br />
weapon to the position of port arms, left h<strong>and</strong> thumb <strong>and</strong> middle finger meeting the weapon at<br />
the b<strong>and</strong>. (count 4) (Figure 4.9)<br />
4.4.2.4. Bring the right h<strong>and</strong> from the upper h<strong>and</strong> guard directly to grip the small of the stock<br />
with no flare. (count 5)<br />
4.4.2.5. Release the weapon at the b<strong>and</strong> with the left h<strong>and</strong>, moving the left h<strong>and</strong> <strong>and</strong> placing the<br />
left thumb on the operating rod h<strong>and</strong>le <strong>and</strong> fingers on the rear sights. (When live-firing the left<br />
h<strong>and</strong> is at a fist on the operating rod h<strong>and</strong>le.) (count 6)<br />
4.4.3. READY.<br />
4.4.3.1. This movement is executed in seven counts on the first two volleys <strong>and</strong> the third volley<br />
is executed in six counts.<br />
4.4.3.2. Upon the comm<strong>and</strong> of Ready, each member of the firing party depresses the operating<br />
rod h<strong>and</strong>le half way down with the left thumb. (When live firing the operating rod h<strong>and</strong>le is<br />
depressed fully.) (count 1) (Figure 4.10)<br />
4.4.3.3. Release the operating rod h<strong>and</strong>le, bringing the left h<strong>and</strong> out to a flare in front of the left<br />
shoulder, palm is facing the body, thumb on forefinger. (count 2) (Figure 4.11)<br />
4.4.3.4. Slap the left h<strong>and</strong> at the b<strong>and</strong>, returning to proper port. (count 3)<br />
4.4.3.5. Throw weapon down to position of aim. (count 4) (Figure 4.12)<br />
39
4.4.3.5.1. Upper body turned slightly to the left without movement of the feet.<br />
4.4.3.5.2. The bottom of the stock rests under the right arm with the forearm pressed firmly<br />
against it.<br />
4.4.3.5.3. The left h<strong>and</strong> supports the weapon on the stock below the lower h<strong>and</strong> guard.<br />
4.4.3.5.4. The right h<strong>and</strong> is at a fist with the index finger in the trigger housing; thumb is along<br />
the forefinger.<br />
4.4.3.5.5. Head is facing left with the front sight of the weapon at eye level.<br />
4.4.3.6. The right h<strong>and</strong> is ripped out of the trigger housing, squeezing the trigger at the same<br />
time, <strong>and</strong> bringing the right h<strong>and</strong> out at a fist. The arm is fully extended <strong>and</strong> parallel with the<br />
weapon. All weapons are fired simultaneously. Firing party must strive for “boomers.”<br />
(count 5)<br />
4.4.3.7. Move the weapon back to the position of port while your head snaps forward following<br />
the weapon. (count 6)<br />
4.4.3.8. Release the weapon at the b<strong>and</strong> <strong>and</strong> grab the operating rod back to the Ready position.<br />
(count 7)<br />
4.4.3.9. The third comm<strong>and</strong> of READY is executed with six counts (the left h<strong>and</strong> does not go<br />
back to the operating rod h<strong>and</strong>le).<br />
4.4.3.10. The movements above are performed until the firing party has fired three volleys. The<br />
comm<strong>and</strong>s are timed so that the volleys are approximately three to five seconds apart. (If there is<br />
an echo, make sure the echo has seized before calling Ready again.)<br />
4.4.4. Present, ARMS after firing, (NFP takes own comm<strong>and</strong> <strong>and</strong> performs a three count<br />
present.)<br />
4.4.4.1. This movement is executed in five counts.<br />
4.4.4.2. Bring the left foot in to meet the right. (count 1)<br />
4.4.4.3. Keeping heels together, turn left foot 90 degrees to the left. (count 2)<br />
4.4.4.4. Bring the right foot to meet the left. (count 3)<br />
4.4.4.5. Slap the weapon with the left h<strong>and</strong> at the b<strong>and</strong>. (count 4)<br />
4.4.4.6. Perform a present arms with another slap. (count 5)<br />
Note: The firing party should dry fire the weapon at least once prior to firing with live<br />
ammunition.<br />
40
4.4.5. Order, ARMS. (reference 4.3.10.)<br />
4.4.5.1. The NFP gives this comm<strong>and</strong> when Taps is complete.<br />
4.5. Loading the Weapon.<br />
4.5.1. Under the supervision of the NFP, the firing party locks <strong>and</strong> loads one clip with three<br />
rounds into the weapons in the following manner:<br />
4.5.2. With the weapon in the port position, release the weapon at the balance, move the left h<strong>and</strong><br />
(fingers doubled into a fist) <strong>and</strong> place the left thumb on the operating rod h<strong>and</strong>le.<br />
4.5.3. Push the operating rod h<strong>and</strong>le to the rear until it is caught by the operating rod catch.<br />
4.5.4. Place the left h<strong>and</strong> back on the balance of the weapon <strong>and</strong> release the small of the stock.<br />
4.5.5. With the right h<strong>and</strong>, insert the clip into the receiver of the weapon with the open end of the<br />
magazine facing the muzzle of the weapon.<br />
4.5.6. Load three rounds into the clip <strong>and</strong> with the knife edge of the right h<strong>and</strong> in contact with the<br />
operating rod h<strong>and</strong>le, move it slightly to the rear. At the same time, push down on the clip <strong>and</strong><br />
rounds with the right thumb <strong>and</strong> allow the bolt to go forward sliding over the rounds. Pull the<br />
operating rod h<strong>and</strong>le slightly back to make sure no round was chambered.<br />
4.5.7. Re-grasp the small of the stock with the right h<strong>and</strong>.<br />
Notes: All loading <strong>and</strong> unloading of weapons is done outside. Loaded weapons always remain<br />
outside <strong>and</strong> in a person's possession <strong>and</strong> loaded weapons are always carried at the position of<br />
port arms.<br />
4.6. Unloading the Weapon.<br />
4.6.1. Pointing the weapon in a safe direction, at the port position, with the knife-edge of your<br />
left h<strong>and</strong> with the fingers cupped over the bolt, depress the operating rod h<strong>and</strong>le to the rear. This<br />
automatically ejects the clip <strong>and</strong> the third round into the fingers of your left h<strong>and</strong>.<br />
4.6.2. The NFP then visually checks the chamber of each weapon. After this has been done <strong>and</strong><br />
with the weapon pointed toward the ground, bring the knife-edge of the right h<strong>and</strong> in contact<br />
with the operating rod h<strong>and</strong>le, moving it slightly to the rear. At the same time, depress the<br />
follower with the right thumb <strong>and</strong> allow the bolt to go forward slightly (overriding the rear of the<br />
follower).<br />
4.6.3. Remove the thumb from the receiver <strong>and</strong> release the operating rod h<strong>and</strong>le, allowing the<br />
bolt to go forward.<br />
4.6.4. Regrasp the small of the stock with the right h<strong>and</strong>, place the right index finger on the<br />
trigger <strong>and</strong> squeeze it.<br />
41
4.7. Full <strong>Honor</strong>s Funeral.<br />
4.7.1 NFP positions team at predetermined location <strong>and</strong> dry fires before the family arrives.<br />
4.7.2. Before the family arrives, the Firing Party <strong>and</strong> NFP are at the position of ceremonial at,<br />
ease.<br />
4.7.3. The NFP waits for the OIC/NCOIC to go to present arms <strong>and</strong> then gives the comm<strong>and</strong><br />
Present, ARMS. (This present, arms is for the carrying of the remains.)<br />
4.7.4. After the remains are placed at gravesite <strong>and</strong> the OIC/NCOIC orders arms, the NFP orders<br />
arms <strong>and</strong> comm<strong>and</strong>s, Order, ARMS.<br />
4.7.5. When the OIC/NCOIC goes to the position of st<strong>and</strong> at, ease, the NFP then gives the<br />
comm<strong>and</strong> Ceremonial At, EASE <strong>and</strong> NFP assumes the position of st<strong>and</strong> at, ease.<br />
4.7.6. The NFP proceeds with the firing sequence (4.4) after the funeral director instructs the<br />
family to rise for the rendering of military honors. (NFP will see the OIC/NCOIC present arms.<br />
4.7.7. Once the OIC/NCOIC presents the flag to the next of kin <strong>and</strong> leaves the gravesite, the NFP<br />
calls Port, ARMS. All members go to the position of port arms, the fourth person in the line<br />
automatically performs a three count about face after he executes the port arms.<br />
4.7.8. The fourth member marches to <strong>and</strong> takes a position one pace away from <strong>and</strong> directly in<br />
front of the NFP. The right h<strong>and</strong> is brought up to the upper h<strong>and</strong> guard <strong>and</strong> the weapon is spun<br />
180 degrees while simultaneously pinning the left h<strong>and</strong>.<br />
4.7.9. The NFP reaches out <strong>and</strong> takes the weapon at the position of port arms.<br />
4.7.10. When the exchange is complete the NFP gives the firing line the comm<strong>and</strong> Left or<br />
Right, FACE, depending on which way the team’s vehicle is. The fourth member also follows<br />
this comm<strong>and</strong> as does the NFP. (Note: If the family is still by the gravesite, take the longest<br />
route so there is no disruption to the family.)<br />
4.7.11. The NFP then marches the line back to the transportation.<br />
4.7.12. The fourth person stays <strong>and</strong> collects the 14 spent rounds <strong>and</strong> marches off at attention.<br />
4.8. St<strong>and</strong>ard <strong>Honor</strong>s Funeral.<br />
4.8.1. The NFP marches the team to a predetermined position <strong>and</strong> dry fires.<br />
4.8.2. After the weapons are loaded the NFP gives the comm<strong>and</strong> Ground, ARMS, followed by<br />
Ready, UP.<br />
42
4.8.3. The NFP gives the comm<strong>and</strong> of FALLOUT <strong>and</strong> the seven members perform a left face<br />
while the six team members march off to perform bearer duties. The seventh member remains<br />
<strong>and</strong> takes a position to the left of the NFP.<br />
4.8.4. After team members have completed bearer duties they march back <strong>and</strong> fall in to their<br />
weapons with no facing movements <strong>and</strong> st<strong>and</strong>-by at the position of attention.<br />
4.8.5. When all team members are in place the NFP gives the comm<strong>and</strong> Take, ARMS, the<br />
members remove gloves, roll one into the other <strong>and</strong> with left h<strong>and</strong> toss the gloves behind them.<br />
(Unless wearing black gloves). NFP then calls Ready, UP.<br />
4.8.6. The NFP then gives the comm<strong>and</strong> Ceremonial At, EASE <strong>and</strong> assumes the position of<br />
st<strong>and</strong> at, ease.<br />
4.8.7. When the funeral director instructs the family to rise for military funeral honors, the NFP<br />
starts the firing sequence.<br />
4.8.8. All remaining movements are identical to those performed on a Full <strong>Honor</strong>s Funeral.<br />
4.8.9. When the fourth person collects rounds, gloves are also collected.<br />
Figure 4.1. (Attention) Figure 4.2. (Ceremonial At Ease)<br />
43
Figure 4.3. (Port Arms) Figure 4.4. (Present Arms)<br />
Figure 4.5. (Order Arms) Figure 4.6. (Ready Face)<br />
(Count 1) (Count 1)<br />
44
Figure 4.7. (Ready Face) Figure 4.8. (Ready Face)<br />
(Count 2) (Count 3)<br />
Figure 4.9. (Ready Face) Figure 4.10. (Ready)<br />
(Count 4) (Count 1)<br />
45
Figure 4.11. (Ready) Figure 4.12. (Ready)<br />
(Count 2) (Count 4)<br />
46
5.1. FULL HONORS FUNERAL<br />
5.1.1. Personnel<br />
CHAPTER 5<br />
Pallbearers<br />
5.1.2. Officer in Charge/Non-Commissioned Officer in Charge<br />
5.1.3. Non Commissioned Officer in Charge of Pallbearers (NPB)<br />
5.1.4. Pallbearers (6) Including NPB<br />
5.1.5. Non Commissioned Officer in Charge of Firing Party (NFP)<br />
5.1.6. Firing Party members (7)<br />
5.1.7. Color Team<br />
5.1.8. Bugler<br />
5.1.9. Sequence of Events<br />
5.1.9.1. The pallbearer team begins the ceremony positioned three abreast from each other,<br />
facing the graveside.<br />
5.1.9.2. Ensure that there is enough space between the two ranks. A good rule of thumb is to<br />
have one arms length plus one h<strong>and</strong> to satisfy the space requirement.<br />
5.1.9.3. Depending on the direction the hearse enters for the ceremony, the NPB aligns the team<br />
appropriately ensuring that the NPB is in the front right of the formation after the team flanks<br />
<strong>and</strong> is facing the back of the hearse.<br />
5.1.9.4. While at attention waiting for the hearse, the comm<strong>and</strong> St<strong>and</strong>-at, EASE is given by the<br />
NPB. (Figure 5.11.)<br />
5.1.9.5. The comm<strong>and</strong> st<strong>and</strong>-at-ease is performed from the position of attention. On the first<br />
count of the movement, the pallbearers raise the left foot slightly, just enough to feel the knee<br />
bend <strong>and</strong> place the left foot down on the ground approximately shoulder width apart. The right<br />
foot does not move.<br />
5.1.9.6. On the next count of the movement, both h<strong>and</strong>s flare together in the front of the body.<br />
5.1.9.7. The h<strong>and</strong>s will be positioned left over right, with the thumbs interlocked.<br />
47
5.1.9.8. The arms hang down comfortably, fingers are together, <strong>and</strong> h<strong>and</strong>s lie on top of one<br />
another, with the middle fingertips overlapping.<br />
5.1.9.9. When the procession for the funeral begins to near, the NPB then comm<strong>and</strong>s, Bearers,<br />
ATTENTION.<br />
5.1.9.10. The hearse passes the team <strong>and</strong> stops when the OIC/NCOIC executes an Order, Arms.<br />
5.1.9.11. When the hearse is six paces off the first bearer, salute if there is a flag on the casket.<br />
This responsibility always falls on Carry or H<strong>and</strong>-off, depending on the direction the hearse<br />
approaches. After the hearse passes, drop salute.<br />
5.1.9.12. The pallbearer that saluted the hearse ensures that the procession is halted <strong>and</strong> there is<br />
enough room for the pallbearers to flank out to set-up behind the hearse.<br />
5.1.9.13. After the hearse stops, the NPB gives the comm<strong>and</strong> STEP. (Figure 5.12)<br />
5.1.9.14. At this time, the pallbearers lift the left leg with the toe completely extended straight<br />
<strong>and</strong> parallel to the ground.<br />
5.1.9.15. Toes are as close to the ground as possible without touching it. Lost balance can be<br />
regained by gently placing toe on the ground momentarily.<br />
5.1.9.16. Place the heel where the big toe was; one foot in front of the other. This helps the team<br />
to take equal length steps.<br />
5.1.9.17. Continue this same movement for each step.<br />
5.1.9.18. This movement is smooth <strong>and</strong> ceremonious as if the team was gliding on the<br />
pavement. There is no specific count or cadence to the hang-step; the middle person(Crossmark<br />
<strong>and</strong> Mark) sets the cadence.<br />
5.1.9.19. H<strong>and</strong>s are suspended down while stepping.<br />
5.1.9.20. While hang stepping, the team keeps the appropriate dress, cover, interval, <strong>and</strong><br />
distance.<br />
5.1.10. Flanking Procedures<br />
5.1.10.1. The NPB starts the three-step comm<strong>and</strong> on the heel touching the ground in the<br />
direction flanking.<br />
5.1.10.2. Once the first heel touches the ground parallel to the corner of the back bumper of the<br />
hearse, the NPB will begin to call the flanking comm<strong>and</strong>.<br />
48
5.1.10.3. The three comm<strong>and</strong>s are called on the opposite heels. The NPB calls Left/Right on<br />
the first available left/right heel. The comm<strong>and</strong> is called on the foot of the direction flanking<br />
5.1.10.4. The NPB then calls Flank on the next heel.<br />
5.1.10.5. The NPB calls the comm<strong>and</strong> of execution MARCH on the next heel.<br />
5.1.10.6. Each member then places the toe of the left/right foot in the center of the right/left foot<br />
<strong>and</strong> forms a T. (Figure 5.13.) Next, the right/left foot is raised <strong>and</strong> turned 90 degrees to the<br />
right/left. (Figure 5.14.)<br />
5.1.10.7. Once the team executes the flank, they take three steps <strong>and</strong> stop. These three steps are<br />
used to ensure all members are properly dressed with the hearse.<br />
5.1.10.8 If the OIC/NCOIC is at the position of st<strong>and</strong> at ease, the NPB gives the comm<strong>and</strong><br />
St<strong>and</strong> at, EASE. If the OIC/NCOIC stays at the position of attention, the bearers will also stay<br />
at attention.<br />
5.1.11. Removing the Casket from the Hearse<br />
5.1.11.1. After the casket is prepared for retrieval <strong>and</strong> the family is in position, the OIC/NCOIC<br />
of the ceremony will come to attention first then give the comm<strong>and</strong> SECURE.<br />
5.1.11.2. The NPB calls STEP <strong>and</strong> the team marches to the rear of the hearse.<br />
5.1.11.3. The NPB calls the comm<strong>and</strong> Mark, TIME, on consecutive steps initiated with the left<br />
foot, two-paces from the back bumper heel.<br />
5.1.11.4. NPB calls, Bearers, HALT, called on consecutive lefts.<br />
5.1.11.5. The next set of movements are executed in 6 counts. All members will take one more<br />
step <strong>and</strong> close (counts 1 <strong>and</strong> 2). All members with the exception of HO will execute a center<br />
face, HO will st<strong>and</strong> fast (counts 3 <strong>and</strong> 4). All members with the exception of HO will take one<br />
side step toward the hearse, HO will take one side step to the right(counts 5-6).<br />
5.1.11.6. With the exception of H<strong>and</strong>-off, bearers will make eye contact, then execute a threesecond<br />
head drop.<br />
5.1.11.7. At this point, H<strong>and</strong>-off hang-steps to the rear of the casket.<br />
5.1.11.8 H<strong>and</strong>-off stops <strong>and</strong> executes a three-second head drop.<br />
5.1.11.9. NPB then informs H<strong>and</strong>-off of the number of turning-steps the team will execute.<br />
(Figure 5.15.)<br />
49
5.1.11.10.1. This information is given quietly in the form of two numbers <strong>and</strong> a direction in<br />
which to travel.<br />
5.1.11.10.2. For example 6 <strong>and</strong> 5 to H<strong>and</strong>-off. The 6 tells you how many side steps to take<br />
away from the hearse, <strong>and</strong> 5 tells you how many steps to take during the turning of the casket<br />
<strong>and</strong> the words “to H<strong>and</strong>-off” indicates which direction to turn the casket. H<strong>and</strong>off is clockwise<br />
<strong>and</strong> Carry is counter-clockwise. (The first number will be no less than 3, no greater than 10)(The<br />
second number will always be 5)<br />
5.1.11.11. H<strong>and</strong>-off then pulls the casket out of the hearse, lifting the head at the same time.<br />
H<strong>and</strong>-off quietly repeats the turning instructions while pulling the casket.<br />
5.1.11.12. NPB tells Fold, Ready, TAKE; this comm<strong>and</strong> is subdued. This ensures NPB <strong>and</strong><br />
FOLD grab casket simultaneously.<br />
5.1.11.13. NPB then tells Fold, Ready, LIFT; this comm<strong>and</strong> is subdued. This prevents the<br />
casket from dropping loudly onto the rear bumper of the hearse. This comm<strong>and</strong> is also called<br />
quietly.<br />
5.1.11.14. Cross mark supports the weight of H<strong>and</strong>-offs position.<br />
5.1.11.15. The team’s palms are down with the thumbs facing the NPB.<br />
5.1.11.16.When the casket is out, H<strong>and</strong>-off steps around to the original position.<br />
5.1.11.17. H<strong>and</strong>-off executes a 3 second head drop <strong>and</strong> calls Ready<br />
5.1.11.18. The NPB then calls STEP.<br />
5.1.11.19. The team side-steps (without heel clicking), while performing turning-steps it is<br />
important to step either forward or backward beginning with the foot farthest from the hearse.<br />
(i.e. NPB will initiate with the left foot, Fold side will initiate with the right foot)<br />
5.1.11.20. Mark or Crossmark will always be the pivot points of the turn. These positions must<br />
ensure the casket rotates with out drifting.<br />
5.1.11.21. The comm<strong>and</strong>, UP will be given by the NPB, the team will bring their head up in a<br />
three-second count.<br />
5.1.11.22. The NPB calls the comm<strong>and</strong> FACE; each member faces the gravesite using a 3second<br />
count.<br />
5.1.11.23. The next comm<strong>and</strong> is STEP, the team steps-off with the left foot <strong>and</strong> proceed to the<br />
gravesite.<br />
50
5.1.11.24. The casket must remain level during the carry. To accomplish this, every member of<br />
the team must extend the arms, roll the wrist, <strong>and</strong> press toward the casket with the forearm. To<br />
ensure safety, we recommend “duckwalking”. (i.e. Pointing the toes outwards while walking to<br />
prevent stepping on the persons feet in front of you).<br />
5.1.11.25. If the casket is high on one end, in a low tone of voice say, fold-up or down, front-up<br />
or front-down.<br />
5.1.11.26. The NPB guides the casket during the carry to graveside.<br />
5.1.11.27. The NPB slightly pushes or pulls the casket to signal the team to turn the casket in the<br />
appropriate direction.<br />
5.11.11.27.1 The team will pick up an automatic mark time march. When in the mark time, the<br />
team will turn the casket 90 degrees in the appropriate direction.<br />
5.1.11.28. To carry the casket over an obstacle, such as a tombstone, the NPB calls Ready, UP.<br />
On the first available left foot Ready is called <strong>and</strong> UP is called on the next left foot.<br />
5.1.11.29. When this comm<strong>and</strong> is given, every member of the casket team raises the casket<br />
slowly, in a three second motion, just enough to clear the obstacle.<br />
5.1.11.30. After the casket has cleared the obstacle, h<strong>and</strong>-off gives the comm<strong>and</strong>, CLEAR.<br />
5.1.11.31 The NPB then comm<strong>and</strong>s DOWN on either foot <strong>and</strong> the bearer team will lower the<br />
casket back down to the regular carrying position, in a three second motion.<br />
5.1.11.32. When the team arrives at the head end of the mock-up, the NPB gives the comm<strong>and</strong>,<br />
HALT. When approaching the mock-up, the NPB will slow the team down.<br />
5.1.11.33. This comm<strong>and</strong> is in a loud voice <strong>and</strong> dragged out. It is called on either foot when the<br />
heel of that foot strikes the ground.<br />
5.1.11.34. The bearer team halts, without heel clicks, on the next available foot after the<br />
comm<strong>and</strong> was called.<br />
5.1.11.35. The next comm<strong>and</strong> is CENTER.<br />
5.1.11.36. When the NPB gives this comm<strong>and</strong>, all the members face in toward the casket in a<br />
three-second count.<br />
5.1.11.37. Once the team centers in, they make eye contact, then h<strong>and</strong>s turn palm up , <strong>and</strong> lower<br />
their heads as to focus on the top of the casket. All three movements will be executed in a three<br />
second motion, for a total of a nine count movement.<br />
5.1.11.38. The NPB then calls STEP.<br />
51
5.1.11.39. At this time, all team members side step onto the mock-up or next to the gravesite if<br />
no mock-up is present.<br />
5.1.11.40. It is important for everyone to carry their weight evenly while keeping their backs as<br />
straight as possible.<br />
5.1.11.41. Each set of bearers across from one another should step upon the mock-up at the<br />
same time.<br />
5.1.11.42. When the casket is centered on the grave, the NPB comm<strong>and</strong>s, HALT then DOWN.<br />
5.1.11.43. After the comm<strong>and</strong> of halt, the four outside bearers release the casket with the outside<br />
h<strong>and</strong> <strong>and</strong> secure the flag to keep it from getting caught under the casket or touching the ground.<br />
5.1.11.44. After the corners are secure, the NPB will call DOWN, the team sets the casket down<br />
slowly <strong>and</strong> evenly, bending at the knees.<br />
5.1.11.45. Once the casket has been placed on the lowering device, all bearers will rise up<br />
slowly, going off the center (Crossmark <strong>and</strong> Mark), with flag in h<strong>and</strong> making a canoe.<br />
5.1.11.45.1. Canoe: Bearers bring their arms up high enough so that the flag is not touching the<br />
casket, therefore forming a “U” shape with the flag. This is done by the people on the corners to<br />
pull the flag out away from the middle people.<br />
5.1.11.45.2. The positions of NPB <strong>and</strong> H<strong>and</strong>off will give the comm<strong>and</strong> of Ready, STEP for<br />
Fold <strong>and</strong> Carry in a low tone.<br />
5.1.11.45.3. On the comm<strong>and</strong> Ready, STEP, NPB <strong>and</strong> Fold will take one side step towards the<br />
outside, <strong>and</strong> H<strong>and</strong>off <strong>and</strong> Carry will also take one side step to the outside <strong>and</strong> begin rolling the<br />
two <strong>and</strong> a halfs. When rolling the two <strong>and</strong> a halfs, the four corner people are to keep tension on<br />
the flag to ensure there is no excess material that is “rolled”. All of this is done with the flag<br />
being in the “canoe”.<br />
5.2. SIX-PERSON FLAG-FOLDING PROCEDURES.<br />
5.2.1. Full <strong>Honor</strong>s Funeral/St<strong>and</strong>ard <strong>Honor</strong>s Funeral<br />
5.2.1.1. Positions<br />
52
HANDOFF CROSS-MARK FOLD<br />
CARRY MARK NPB<br />
5.2.1.2.. Once bearer’s thumbs are together after rolling the two <strong>and</strong> a halfs, start the first tug.<br />
5.2.1.2.1. The four corner people will have the thumbs together at the corners. Crossmark will<br />
have both h<strong>and</strong>s together where the union meets the red stripe at the top of the flag on the Fold’s<br />
side. Mark will have both h<strong>and</strong>s together directly across from that spot so that everyone is<br />
directly across from each other.<br />
5.2.1.2.2. First tug – Simultaneously, NPB, Crossmark, <strong>and</strong> H<strong>and</strong>off will slide left h<strong>and</strong> down<br />
the flag in a three second motion until there h<strong>and</strong>s are approximately shoulder width apart. Fold,<br />
Mark, <strong>and</strong> Carry will simultaneously slide the right h<strong>and</strong> down the flag in a three second motion<br />
until there h<strong>and</strong>s are approximately shoulder width apart. When tugging, NPB’s left h<strong>and</strong> should<br />
be approximately 10-12 inches apart, so he will pick up the h<strong>and</strong> slide when Folds right h<strong>and</strong> is<br />
directly across NPB’s left h<strong>and</strong> to achieve a “mirrored” effect.<br />
5.2.1.2.3. On the second tug, three things will occur at the same time.<br />
1 – Bearers will center themselves between their arms.<br />
2 – All heads will come up facing the front<br />
3 – Flag will be pulled open towards the body at a level position so that the flag has an<br />
appearance of a table (called “tabletop”)<br />
5.2.1.2.4. When at “tabletop”, ensure that the flag stays level, dressing off of Mark <strong>and</strong><br />
Crossmark.<br />
5.2.1.2.5. This is done by thumb corrections. Each individual is responsible for correcting the<br />
person directly across from them. The thumb corrections are as follows:<br />
53
(1) To bring someone up, slightly lift the corresponding thumb up from the flag until it is even<br />
with the rest of the flag.<br />
(2) To bring someone down, slightly bend the corresponding thumb down to the flag until it is<br />
even with the rest of the flag.<br />
(3) To make someone regrip the flag, slightly release the corresponding h<strong>and</strong> from the flag <strong>and</strong><br />
regrip<br />
(4) To make someone have tension on the flag, (flag starts to droop), slightly move both thumbs<br />
side to side until the corresponding person has tension on the flag.<br />
5.2.1.3. Flag Folding Sequence. NPB tugs the flag for the third time to initiate the folding of the<br />
flag. (This is a four count movement)<br />
5.2.1.3.1. COUNT 1: NPB, Fold, Carry, <strong>and</strong> H<strong>and</strong>off slide their inside h<strong>and</strong> toward the h<strong>and</strong><br />
holding the outside of the flag. Mark <strong>and</strong> Cross-Mark slide their farthest h<strong>and</strong> toward the blue<br />
field.<br />
5.2.1.3.2. COUNT 2: NPB <strong>and</strong> Carry replace their outside h<strong>and</strong> with the inside while placing<br />
two fingers on the end of the flag, cutting the flag in half. Mark pinches the underside of the flag<br />
with the left h<strong>and</strong> approximately in the middle. Fold <strong>and</strong> H<strong>and</strong>off place their inside h<strong>and</strong><br />
underneath for support. Crossmark does the same as H<strong>and</strong>off <strong>and</strong> places their left h<strong>and</strong><br />
underneath for support.<br />
5.2.1.3.3. COUNT 3: The bearers on the NPB side throw the flag over toward the blue field with<br />
the h<strong>and</strong> that is closest to them with the palms up, <strong>and</strong> h<strong>and</strong>s flared. Fold, Crossmark, <strong>and</strong><br />
H<strong>and</strong>off will st<strong>and</strong>fast.<br />
5.2.1.4. COUNT 4: Bearers on the NPB side place their throw-over h<strong>and</strong> underneath the flag for<br />
support so that both h<strong>and</strong>s are approximately shoulder width apart. Fold, Crossmark, <strong>and</strong><br />
H<strong>and</strong>off will bring the h<strong>and</strong> that was supporting out to grab the flag <strong>and</strong> set the border.<br />
5.2.1.4.1. The border is approximately halfway of the top stripe, or the top parallel mark on the<br />
top row of stars in the union.<br />
5.2.1.5. Once the borders have been set, all members on Fold side will re-grip the flag shoulder<br />
width apart. When all movement has stopped, Mark initiates the pulling out of support h<strong>and</strong>s<br />
underneath the flag.<br />
5.2.1.6. Once all h<strong>and</strong>s have been placed back in original positions, the flag is centered over the<br />
casket. The flag is now at a half fold. This sequence of events is repeated to bring the flag to the<br />
quarter fold. (Exception: NPB, Mark, <strong>and</strong> Carry DO NOT put the h<strong>and</strong>s underneath on count 4,<br />
they re-grip the flag approximately shoulder width apart).<br />
5.2.1.7. The NPB <strong>and</strong> fold start a triangular fold by bringing the striped corner of the folded<br />
edge to the open edge. Ensure the outside edge of the fold forms a 45-degree angle.<br />
54
5.2.1.8. Next, fold the outer point inward, parallel with the open edge, to form a second triangle.<br />
Continue to fold the flag in this manner. (Figure 5.10) When folding the flag ensure that NPB<br />
<strong>and</strong> Fold use the “thumb towards/h<strong>and</strong>s away” method of creasing the flag. This prevents excess<br />
movement on the flag <strong>and</strong> ensures the flag is taut.<br />
5.2.1.8.1. Every fold consists of two creases. NPB <strong>and</strong> Fold each will have one crease, one<br />
using the “thumb towards”, the other using the “h<strong>and</strong> away” method. When a fold consists of a<br />
90 degree angle “pointing” towards NPB or Fold, then that individual will execute both creases.<br />
5.2.1.9. Throughout the flag folding sequence, Mark, Cross-Mark, Carry, <strong>and</strong> H<strong>and</strong> Off feed the<br />
flag toward NPB <strong>and</strong> Fold.<br />
5.2.1.10. Every 2 & 1/2 folds, the team members not folding the flag (Mark, Crossmark, Carry<br />
<strong>and</strong> H<strong>and</strong>off) slides their h<strong>and</strong>s toward the other, thus feeding the flag. The members that are<br />
across from each other should feed together to achieve a mirrored effect.<br />
5.2.1.11. Once bearers’ h<strong>and</strong>s leave the flag, they resume the position of Attention.<br />
5.2.1.12. When the first fold enters the blue field, Mark <strong>and</strong> Crossmark will step toward the<br />
NPB <strong>and</strong> Fold. An eyewink may be given by the bearer whose back is to the family to ensure<br />
they step at the same time.<br />
NOTE: The tip of the flag enters the blue union without exceeding the second star. This is a rule<br />
of thumb to prevent the flag from being folded long, thus not allowing the flag to be tucked at the<br />
end.<br />
5.2.1.13. The fold continues through the union<br />
5.2.1.14. Cross-Mark ensures all red is properly tucked by pulling out the union to let Fold roll<br />
under any red material showing on the flag.<br />
5.2.1.15. At the last fold, the flag tip is approximately six inches from the white edge-b<strong>and</strong>.<br />
Mark <strong>and</strong> Cross-Mark tuck the remaining excess flag into the folded flag. They look for any red<br />
or white parts of the flag sticking out of the blue union <strong>and</strong> tuck them in. NPB secures the flag<br />
by gripping the middle of the flag with the right h<strong>and</strong> <strong>and</strong> lifting up the “flap” with the left h<strong>and</strong>.<br />
Fold secures the flag by gripping the corner of the flag closest to him with the left h<strong>and</strong> <strong>and</strong><br />
lifting up the “flap” with the right h<strong>and</strong>.<br />
5.2.1.15.1. Mark begins the tucking sequence by folding a 45 degree angle with the material on<br />
his side, ensuring that there is enough space to clear the lip of the flag (approximately 1”).<br />
Crossmark pinches the flag with the left h<strong>and</strong> tucks the flag with the right, pushing all the<br />
material to the back of the flag.<br />
5.2.2. NPB Flag Dressing Sequence (reference 5.4.3.)<br />
5.2.2.1. NPB renders a h<strong>and</strong> salute to the flag.<br />
55
5.2.2.2. The NPB faces in <strong>and</strong> steps to the original position.<br />
5.2.2.3. The OIC/NCOIC presents the flag to the next of kin <strong>and</strong> returns to the original position<br />
(full honors funeral) or steps back to the original position with the flag secured (st<strong>and</strong>ard honors<br />
funeral). At that time, the OIC/NCOIC gives a subdued comm<strong>and</strong> of BEARERS POST.<br />
5.2.2.4. The NPB then gives the comm<strong>and</strong> Face, ME or Face, AWAY <strong>and</strong> the team departs,<br />
either by hang stepping off the mock-up or marching off when there is no mock-up present. If<br />
hang-step is used, H<strong>and</strong>-off or NPB (whichever is to the rear) calls STEP once the bearers have<br />
cleared the mock-up.<br />
5.3. STANDARD HONORS FUNERAL<br />
5.3.1. Personnel<br />
5.3.1.1. Officer in Charge/Non-Commissioned Officer in Charge<br />
5.3.1.2. Non Commissioned Officer in Charge of Firing Party (NFP)<br />
5.3.1.3. <strong>Honor</strong> <strong>Guard</strong> Members (7)<br />
5.3.1.4 Bugler<br />
5.3.2. Sequence of events<br />
5.3.2.1. The 8 member firing party (NFP <strong>and</strong> seven dual qualified <strong>Honor</strong> <strong>Guard</strong> members) are<br />
positioned approximately 50 paces away from gravesite <strong>and</strong> fire over the head of the casket.<br />
5.3.2.2. The weapons are grounded <strong>and</strong> the 6 members designated as pallbearers depart the<br />
formation to wait at the curbside for the funeral procession (NFP <strong>and</strong> seventh firing party<br />
member remain in the formation to secure the weapons).<br />
5.3.2.3. The OIC/NCOIC <strong>and</strong> pallbearers are at attention in their predetermined positions as the<br />
funeral procession arrives.<br />
5.3.2.4. Pallbearers execute same procedures as outlined in the 6-person pallbearer team. The<br />
flag is folded immediately upon arrival at gravesite.<br />
5.3.2.5. Pallbearers h<strong>and</strong> off flag to NCOIC/OIC <strong>and</strong> march off with no armswing towards the<br />
firing party position <strong>and</strong> pallbearers execute a “zipper in”. When the comm<strong>and</strong> of STEP is<br />
made, bearers start to march at cadence of quicktime.<br />
5.3.2.6. Pallbearers execute take, arms, <strong>and</strong> ready, up <strong>and</strong> are now in position to render<br />
3 volleys (follow sequence outlined in Firing Party)<br />
56
5.3.2.7. Once the chaplain has completed remarks, the funeral director asks the family to rise for<br />
the rendering of military honors, this is the NFP’s cue to begin firing party sequence.<br />
5.3.2.8. Once firing party is complete, bugler sounds Taps.<br />
5.3.2.9. NCOIC/OIC h<strong>and</strong>s off flag to next of kin, says the message of condolence, <strong>and</strong> renders<br />
slow salute.<br />
5.3.2.10. Once salute is dropped, <strong>and</strong> NCOIC/OIC marches off, <strong>Honor</strong> <strong>Guard</strong> members depart<br />
the funeral site, returning to staging area.<br />
5.4. TWO-PERSON FUNERAL<br />
5.4.1. Purpose<br />
5.4.1.1. The two-person funeral is primarily used for veterans.<br />
5.4.1.2. Provides military representation to present the flag to the next of kin.<br />
5.4.2. Sequence<br />
5.4.2.1. Two qualified <strong>Honor</strong> <strong>Guard</strong> members pre-position themselves at curbside awaiting the<br />
procession.<br />
5.4.2.2. When the hearse approaches both members execute present, arms.<br />
5.4.2.3. Once the hearse passes both members they execute order, arms.<br />
5.4.2.4. The family designated pallbearers secure the casket <strong>and</strong> proceed to graveside.<br />
5.4.2.5. <strong>Honor</strong> <strong>Guard</strong> members follow the pallbearers to graveside <strong>and</strong> position themselves at<br />
both ends of the casket once it has been lowered.<br />
5.4.2.6. The <strong>Honor</strong> <strong>Guard</strong> members wait for cue from the chaplain or funeral representative<br />
before folding the flag (see two person flag fold section for detailed instructions.) While the<br />
eulogy or sermon is given, the <strong>Honor</strong> <strong>Guard</strong> personnel st<strong>and</strong> at the position of st<strong>and</strong> at ease, once<br />
given their cue they simultaneously move to the position of attention.<br />
5.4.2.7. After the flag is presented, both members execute the appropriate facing movement <strong>and</strong><br />
depart.<br />
5.5. Two-Person Flag Fold.<br />
5.5.1. Procedures <strong>and</strong> Responsibilities.<br />
5.5.1.1. Requires two qualified <strong>Honor</strong> <strong>Guard</strong> personnel to fold the flag.<br />
57
5.5.1.2. One <strong>Honor</strong> <strong>Guard</strong>sman is positioned at each end of the flag one pace off the casket.<br />
5.5.1.3. The two positions are the folder <strong>and</strong> NCOIC/OIC.<br />
5.5.2. Flag Folding Sequence<br />
5.5.2.1. Each movement is initiated by the folder’s eye wink.<br />
5.5.2.2. Both members secure the four corners of the flag over the casket.<br />
5.5.2.3. Two side steps are taken to clear the flag from the casket ensuring enough room is<br />
provided to enable the folder to step toward the end of the flag while folding. Note: Always try<br />
to fold the flag in front of the family. If there is not enough room due to obstacles, such as a pile<br />
of dirt, family in the way or a lid, then go to a quarter fold over the casket then take side steps<br />
over.<br />
5.5.2.4. Step 1: Bring the two open ends of the flag together, leaving approximately three inches<br />
(approximately half the red stripe, <strong>and</strong> the horizontal portion of the top star) of border from the<br />
union side of the flag <strong>and</strong> the striped edge. This is known as establishing the border; the two<br />
open ends do not lie evenly upon each other, there must be a definite margin.<br />
5.5.2.5. Step 2: Bring the h<strong>and</strong> not securing the established border back to opposite corner.<br />
Simultaneously, the NCOIC/OIC flares down with the right h<strong>and</strong> <strong>and</strong> secure the other corner<br />
with the left h<strong>and</strong> while the folder flares down with the left h<strong>and</strong> <strong>and</strong> secure the opposite corner<br />
with the right h<strong>and</strong>.<br />
5.5.2.6. Step 3: Repeat steps 1 <strong>and</strong> 2.<br />
5.5.2.7. Step 4: The folder begins by making a triangular fold bringing the striped corner of the<br />
folded edge to the open edge. Ensure the outside edge of the fold forms a 90-degree angle.<br />
Note: With your left h<strong>and</strong>, half the white on the first fold.<br />
5.5.2.8. Step 5: Fold the outer point inward, parallel with the open edge, to form second triangle.<br />
5.5.2.9. Step 6: Continue folding the flag alternating steps 4 <strong>and</strong> 5 until the flag reaches the end<br />
(approximately 6-10 inches but may vary). This process usually involves 10 folds on the<br />
st<strong>and</strong>ard internment flag.<br />
5.5.2.10. Step 7: Folder reaches underneath the flag with the right h<strong>and</strong>, lifting up the flap,<br />
cradling it with the left arm. The folder must also pinch the right corner of the flag to ensure the<br />
flag is taut.<br />
5.5.2.11. Step 8: The NCOIC/OIC makes a 90-degree fold with the right side of the flag,<br />
ensuring the thumb is placed in between the fold <strong>and</strong> the flag.<br />
5.5.2.12. Step 9: Crease the excess portion of the flag <strong>and</strong> neatly tuck it in the pocket formed by<br />
the folded flag.<br />
58
5.5.2.13. Inspection of the flag. The folder takes the flag, brings it to the chest with head down<br />
<strong>and</strong> stationary <strong>and</strong> eyes looking down at the flag. Ensure no red is showing or any white is<br />
protruding, flag should be flat. Note: There is no head movement while inspecting the flag.<br />
5.5.3. Flag Dressing Sequence<br />
5.5.3.1. This movement is executed in 3 second increments in 9 counts.<br />
5.5.3.2. Once inspection of flag is completed, position both h<strong>and</strong>s at the top portion of the flag.<br />
(Figure 5.1.)<br />
5.5.3.3. Slowly slide the left h<strong>and</strong> down at a flare to the extent of the elbow <strong>and</strong> pause.<br />
(Figure 5.2) (count 1)<br />
5.5.3.4. Bring left h<strong>and</strong> underneath the flag to support the flag against the chest <strong>and</strong> pause.<br />
(Figure 5.3.) (count 2)<br />
5.5.3.5. Repeat this flaring process with the right h<strong>and</strong> <strong>and</strong> pause. (Figure 5.4.) (count 3)<br />
5.5.3.6. Bring the right h<strong>and</strong> across the flag <strong>and</strong> touch the opposite end of the flag <strong>and</strong> pause.<br />
(Figure 5.5) (count 4)<br />
5.5.3.7. The right h<strong>and</strong> sweeps across the front of the flag to the top left corner of the flag <strong>and</strong><br />
pause. (Figure 5.6.) (count 5)<br />
5.5.3.8. Grasp the flag with the right h<strong>and</strong>, keeping all fingers joined <strong>and</strong> pause. (Figure 5.7)<br />
(count 6)<br />
5.5.3.9. Rotate flag in a clockwise motion with the right h<strong>and</strong> while simultaneously lifting the<br />
flag up <strong>and</strong> pause. (Figure 5.8) (count 7) NOTE: The rotation is complete once the top tip of<br />
the flag is directly in front of the nose <strong>and</strong> the bottom of the flag is parallel to the ground.<br />
5.5.3.10. Lower the flag until the upper portion of the flag is at eye level <strong>and</strong> pause. (count 8)<br />
5.5.3.11. The left h<strong>and</strong> comes up <strong>and</strong> joins the right h<strong>and</strong>, ensuring the fingers are joined <strong>and</strong><br />
remain together. (Figure 5.9.) (count 9)<br />
5.5.3.12. The dressing sequence is now complete, the folder h<strong>and</strong>s off to the flag to the<br />
OIC/NCOIC. The folder then looks at the flag without moving their head <strong>and</strong> performs a slow<br />
salute.<br />
5.5.3.13. The NCOIC/OIC is responsible for holding the opposite end of the flag taut ensuring it<br />
stays level while the flag is being folded.<br />
5.5.3.14. The NCOIC/OIC presents the flag to the next of kin <strong>and</strong> recites the message of<br />
condolence, followed by a slow salute to the flag <strong>and</strong> departure.<br />
59
5.5.3.15. The message of condolence is; On behalf of the President of the United States, the<br />
Department of the Air Force, <strong>and</strong> a grateful nation, we offer this flag for the faithful <strong>and</strong><br />
dedicated service of (state service members rank <strong>and</strong> name).<br />
5.6 Cremate Sequence for SHF or FHF<br />
5.6.1. The sequence is the same as a casket until the comm<strong>and</strong> of SECURE is given by the<br />
NCOIC/OIC.<br />
5.6.2. On the comm<strong>and</strong> of SECURE NPB calls the team to ATTENTION. NPB <strong>and</strong> Fold step<br />
off in the cadence of slow time <strong>and</strong> suspended armswing<br />
5.6.3. When NPB <strong>and</strong> Fold are lined up with the rear bumper of the vehicle, they takes three<br />
steps <strong>and</strong> automatically halt.<br />
5.6.4. NPB <strong>and</strong> Fold automatically execute a three-second-center face.<br />
5.6.5. NPB eye winks to Fold for both members to lower their head into the car to retrieve the<br />
flag <strong>and</strong> urn.<br />
5.6.6. Once the members have the urn <strong>and</strong> flag in possession, NPB gives a subdued comm<strong>and</strong> of<br />
ready up for NPB <strong>and</strong> Fold to raise their heads out of the car.<br />
5.6.7. NPB eye winks to Fold to initiate a three-second face towards the formation <strong>and</strong><br />
automatically slide step off with the left foot in the cadence of slow time.<br />
5.6.8. Approximately two paces away from the formation NPB gives a subdued comm<strong>and</strong> of<br />
HALT for he <strong>and</strong> Fold. Both automatically execute a three count about face.<br />
5.6.9. NPB then gives the comm<strong>and</strong> of STEP, all team members step off with arms suspended<br />
in the cadence of slow time. As the team is marching the team marches shoulder to shoulder.<br />
5.6.10. As the team is approaching gravesite, the team splits up <strong>and</strong> Mark calls HALT as he is<br />
centered on the st<strong>and</strong> for the urn.<br />
5.6.11. NPB gives the comm<strong>and</strong> of CENTER, the team executes a three second center face.<br />
5.6.12. Fold places the urn on the st<strong>and</strong> <strong>and</strong> NPB executes a half dress on the flag.<br />
5.6.13. NPB passes the flag to by “shooting” the flag down, the top point is pointing towards<br />
Fold. Fold receives the flag with the left h<strong>and</strong> on top of the flag <strong>and</strong> right h<strong>and</strong> on bottom.<br />
5.6.14. Fold passes the flag to Crossmark by simply turning their upper body, Crossmark<br />
receives the flag with both h<strong>and</strong>s grabbing the angled sides of the flag with both palms facing<br />
down.<br />
60
5.6.15. Crossmark passes the flag to H<strong>and</strong>off by simply turning his upper body 180 degrees to<br />
the right, H<strong>and</strong>off receives the flag by grabbing the flag with both h<strong>and</strong>s at the two angled sides<br />
of the flag with the palms facing down.<br />
5.6.16. H<strong>and</strong>off brings the flag to the center of the body so that the top point of the flag is<br />
approximately at the sternum, where H<strong>and</strong>off begins the half dress of the flag.<br />
5.6.17. H<strong>and</strong>off on completion of the half dress shoots the flag down to Carry so that the “tuck”<br />
of the flag is parallel to Carry’s body. Carry meets H<strong>and</strong>off in the middle so that Carry can<br />
begin to untuck the flag.<br />
5.6.18. Carry takes the b<strong>and</strong> of the flag <strong>and</strong> places it in H<strong>and</strong>off’s right h<strong>and</strong>. Carry begins to<br />
unfold the flag.<br />
5.6.19. H<strong>and</strong>off supports the flag with the left h<strong>and</strong> while maintaining a hold of the flag with the<br />
right h<strong>and</strong>. As Carry is unfolding the flag with BOTH h<strong>and</strong>s, one of the two middle bearers eye<br />
winks to the other to initiate to go help unfold the flag. Crossmark supports the flag <strong>and</strong> Mark<br />
unfolds the flag with BOTH h<strong>and</strong>s. At this time, Carry is re-gripping the flag so that the left<br />
h<strong>and</strong> is on the corner of the flag, <strong>and</strong> the right h<strong>and</strong> is placed approximately shoulder width apart<br />
from the left h<strong>and</strong> but keeping the right h<strong>and</strong> underneath the flag.<br />
5.6.20. H<strong>and</strong>off slides the right h<strong>and</strong> to the corner of the flag, on their side, then bring the left<br />
h<strong>and</strong> out from underneath to re-grip so that the h<strong>and</strong>s are approximately shoulder width apart.<br />
5.6.21. NPB or Fold eye winks at one another to initiate the two to unfold the flag. Fold brings<br />
both h<strong>and</strong>s underneath to support the flag. NPB begins to unfold the flag using BOTH h<strong>and</strong>s.<br />
Mark brings the left h<strong>and</strong> out to re-grip the flag where the union meets the stripes, but keeping<br />
the right h<strong>and</strong> underneath the flag approximately shoulder width apart from the left h<strong>and</strong>.<br />
5.6.22. Fold re-grips the flag with both h<strong>and</strong>s keeping the left h<strong>and</strong> at the corner of the flag <strong>and</strong><br />
placing the right h<strong>and</strong> approximately shoulder width apart from the left. NPB grips the flag with<br />
the right h<strong>and</strong> at the corresponding corner <strong>and</strong> then place the left h<strong>and</strong> underneath the flag<br />
approximately shoulder width apart from the right h<strong>and</strong>.<br />
5.6.23. Upon the completion of the unfolding Mark brings the right h<strong>and</strong> out from underneath<br />
the flag, signaling NPB <strong>and</strong> Carry to do the same.<br />
5.6.24. Fold has his left index finger underneath the corner “flap” of the flag. Crossmark <strong>and</strong><br />
H<strong>and</strong>off has their right index finger underneath the flap of the flag as well.<br />
5.6.25. NPB “tugs” the flag, all of the following things happen simultaneously:<br />
5.6.25.1. NPB “flares” the left h<strong>and</strong> <strong>and</strong> bring it across the flag to Fold’s left h<strong>and</strong> <strong>and</strong> grabs the<br />
flag<br />
61
5.6.25.2. Mark “flares” the right h<strong>and</strong> <strong>and</strong> brings it across the flag to grab the flag at<br />
Crossmark’s right h<strong>and</strong>.<br />
5.6.25.3. Carry “flares” the right h<strong>and</strong> <strong>and</strong> brings it across the flag to grab the flag at H<strong>and</strong>off’s<br />
right h<strong>and</strong><br />
5.6.25.4. Fold simultaneously raises the flag with the left index finger <strong>and</strong> bring the right h<strong>and</strong><br />
<strong>and</strong> forearm underneath the flag for support.<br />
5.6.25.5. Crossmark simultaneously raises the flag with the right index finger <strong>and</strong> brings the left<br />
h<strong>and</strong> <strong>and</strong> forearm underneath the flag for support.<br />
5.6.25.6. H<strong>and</strong>off simultaneously raises the flag with the right index finger <strong>and</strong> bring the left<br />
h<strong>and</strong> <strong>and</strong> forearm underneath the flag for support. (yes they do the same thing)<br />
5.6.26. All members grab the flag respectively <strong>and</strong> begin the six person flag fold as stated in 5.3.<br />
Figure 5.1. (End of Inspection of Flag) Figure 5.2. (Dressing Sequence)<br />
Count 1<br />
62
Figure 5.3. (Dressing Sequence) Figure 5.4. (Dressing Sequence)<br />
Count 2 Count 3<br />
Figure 5.5. (Dressing Sequence) Figure 5.6. (Dressing Sequence)<br />
Count 4 Count 5<br />
63
Figure 5.7. (Dressing Sequence) Figure 5.8. (Dressing Sequence)<br />
Count 6 Count 7<br />
Figure 5.9. (Dressing Sequence) Figure 5.10. (6 Person Flag Fold)<br />
Count 9<br />
64
Figure 5.11. (St<strong>and</strong> At Ease) Figure 5.12. (Step)<br />
Figure 5.13. (Left Flank, March) Figure 5.14. (Left Flank, March)<br />
Count 1 Count 2<br />
65
Figure 5.15. (Turning Steps)<br />
66
6.1. General Information<br />
Chapter 6<br />
Air Force Bugler<br />
6.1.1. All Air Force funerals have a requirement for the playing of Taps.<br />
6.1.2. During the movement of the casket, the bugler presents arms with the OIC/NCOIC of the<br />
ceremony.<br />
6.1.3 As the casket is placed on the lowering device, the bugler orders arms with the<br />
OIC/NCOIC of the ceremony<br />
6.1.4. While practicing or “warming up” at the ceremony location, music other than Taps is used<br />
<strong>and</strong> does not distract from other ceremonies in the area.<br />
6.2. Positions<br />
6.2.1. Attention<br />
6.2.1.1. To come to attention, bring the feet together smartly <strong>and</strong> on line. Keep the legs straight<br />
without stiffening or locking the knees. The body is erect with hips level, chest lifted, <strong>and</strong><br />
shoulders square <strong>and</strong> even. Right arm hangs straight down along side the body <strong>and</strong> the wrist is<br />
not bent. Place the right thumb, which is resting along the first joint of the forefinger, along the<br />
seam of the trousers. H<strong>and</strong> is cupped (but not clenched as a fist) with palm facing the leg. The<br />
left arm is at a 90-degree angle, parallel to the ground, cradling the bugle, which is also parallel<br />
to the ground. Head is erect, neck is vertical with the body, <strong>and</strong> eyes are facing forward with the<br />
line of sight parallel to the ground. The weight of the body rests equally on the heels <strong>and</strong> balls of<br />
both feet, <strong>and</strong> silence <strong>and</strong> immobility are requirements.<br />
6.2.2. St<strong>and</strong> at, ease<br />
6.2.2.1. St<strong>and</strong>-at-ease is performed from the position of attention. On the first count of the<br />
movement, the bugler raises the left foot slightly, just enough to feel the knee bend <strong>and</strong> places<br />
the left foot down on the ground approximately shoulder width apart. The right foot does not<br />
move.<br />
6.2.2.2. On the next count of the movement, both h<strong>and</strong>s come together in the front of the body,<br />
the left h<strong>and</strong> holds the bugle vertical at the center of the body, the right h<strong>and</strong> is flared over the<br />
left.<br />
67
6.3. Graveside Service<br />
6.3.1. Upon arrival at the gravesite, the bugler assumes a position approximately 50 paces from<br />
the gravesite, in view of the family.<br />
6.3.1.1. If a firing party is also performing, the bugler is positioned in the opposite line of sight,<br />
usually diagonal to the foot end of the casket.<br />
6.4. Memorial Service.<br />
6.4.1. During memorial services, the bugler may be placed indoors or out. If indoors, the<br />
acoustics of the area should be such that the sound is not overbearing.<br />
6.5. Full <strong>Honor</strong>s Funeral<br />
6.5.1 After the placement of the casket on the mock-up, the bugler assumes the position of st<strong>and</strong><br />
at, ease.<br />
6.5.2. At the conclusion of the clergy’s remarks, the funeral director asks the family to rise for<br />
the rendering of military honors, at this time, the bugler assumes the position of attention.<br />
6.5.3. During the firing of the three volleys, the bugler prepares to play Taps.<br />
6.5.4. Taps is played at the conclusion of the third volley performed by the firing party.<br />
6.6. St<strong>and</strong>ard/Modified <strong>Honor</strong>s Funeral<br />
6.6.1 After the placement of the casket on the mock-up, the bugler remains at the position of<br />
attention.<br />
6.6.2. When the flag is presented to the OIC/NCOIC of the ceremony, the bugler assumes the<br />
position of st<strong>and</strong> at, ease.<br />
6.6.3. At the conclusion of the clergy’s remarks, the funeral director asks the family to rise for<br />
the rendering of military honors. The bugler assumes the position of attention.<br />
6.6.4. During the firing of the three volleys, the bugler prepares to play Taps.<br />
6.6.5. Taps is played at the conclusion of the third volley.<br />
6.7. Veteran Funeral<br />
6.7.1 After the placement of the casket on the mock-up, the bugler assumes the position of st<strong>and</strong><br />
at, ease.<br />
68
6.7.2. At the conclusion of the clergy’s remarks, the funeral director asks the family to rise for<br />
the rendering of military honors, at this time, the bugler assumes the position of attention.<br />
6.7.3. Taps is played after the flag is presented to the OIC/NCOIC but prior to presentation to the<br />
family.<br />
69
7.1. Full <strong>Honor</strong>s Funeral<br />
Chapter 7<br />
FUNERAL SEQUENCES<br />
7.1.1. Full honors funerals are conducted for deceased active duty Air Force members <strong>and</strong><br />
Medal of <strong>Honor</strong> recipients.<br />
7.1.2. Members of the Air Force Reserve <strong>and</strong> Air National <strong>Guard</strong> are also eligible if killed while<br />
on active duty status.<br />
7.1.3. Twenty honor guard members are required.<br />
7.1.3.1. Personnel<br />
7.1.3.1.1 Officer in Charge/Non-Commissioned Officer in Charge<br />
7.1.3.1.2. Non Commissioned Officer in Charge of Firing Party (NFP)<br />
7.1.3.1.3. Color <strong>Guard</strong> (4)<br />
7.1.3.1.4. Pallbearers (6)<br />
7.1.3.1.5. Firing party members (7)<br />
7.1.3.1.6. Bugler/Sound system operator<br />
7.1.4. Sequence<br />
7.1.4.1. The pallbearers <strong>and</strong> OIC/NCOIC position themselves at the road <strong>and</strong> await the arrival of<br />
the hearse.<br />
7.1.4.2. Colors, Firing Party, <strong>and</strong> Bugler are pre-posted in their positions.<br />
7.1.4.3. The pallbearers, followed by the OIC/NCOIC bring the casket to gravesite <strong>and</strong> bring the<br />
flag to waist level.<br />
7.1.4.4. The clergy gives the graveside committal service.<br />
7.1.4.5. When the funeral director asks the family to rise for the rendering of military honors, the<br />
OIC/NCOIC comes to attention <strong>and</strong> executes a present arms; which is the cue for the NFP to<br />
begin the firing sequence.<br />
7.1.4.6. At the conclusion of the three volleys, the bugler sounds Taps.<br />
70
7.1.4.7. After Taps, the pallbearers fold the flag <strong>and</strong> present it to the OIC/NCOIC.<br />
7.1.4.8. The OIC/NCOIC presents the flag to the next of kin.<br />
7.1.4.9. All elements proceed to the assembly point.<br />
7.2. St<strong>and</strong>ard <strong>Honor</strong>s Funeral<br />
7.2.1. St<strong>and</strong>ard honors funerals are conducted for Air Force Retired Members to include those<br />
receiving retired pay or members of the Air Force Reserves or Air National <strong>Guard</strong> (ANG) who<br />
have 20 years or more satisfactory service for retirement.<br />
7.2.2. Ten honor guard members are required.<br />
7.2.3. Personnel<br />
7.2.3.1. Officer in Charge/Non-Commissioned Officer in Charge<br />
7.2.3.2. Non Commissioned Officer in Charge of Firing Party (NFP)<br />
7.2.3.3. Dual qualified Pallbearers (6)<br />
7.2.3.4. Firing party member (1)<br />
7.2.3.5. Bugler/Sound system operator<br />
7.2.4. Sequence<br />
7.2.4.1. The NFP positions the firing party members <strong>and</strong> has them ground arms.<br />
7.2.4.2. All but one firing party member departs for pallbearer duty.<br />
7.2.4.3. The pallbearers <strong>and</strong> OIC/NCOIC position themselves at the road <strong>and</strong> await the arrival of<br />
the hearse.<br />
7.2.4.4. The pallbearers, followed by the OIC/NCOIC bring the casket to gravesite <strong>and</strong> begin the<br />
flag fold sequence once the family has been seated.<br />
7.2.4.5. The flag is presented to the OIC/NCOIC <strong>and</strong> the pallbearers depart for firing party duty.<br />
7.2.4.6. The clergy gives the graveside committal service.<br />
7.2.4.7. When the funeral director asks the family to rise for the rendering of military honors, the<br />
NFP begins the firing sequence.<br />
7.2.4.8. At the conclusion of the three volleys, the bugler sounds Taps.<br />
71
7.2.4.9. After Taps, the OIC/NCOIC presents the flag to the next of kin.<br />
7.2.4.10. All members proceed to the assembly point.<br />
7.3. Veteran <strong>Honor</strong>s Funeral<br />
7.3.1. Veteran honors are rendered for former members (veterans) of the Air Force, Army Air<br />
Corps or Army Air Forces, <strong>and</strong> Women's Air Forces, Service Pilots whose last service was<br />
honorable, <strong>and</strong> members of a reserve component not in a duty status.<br />
7.3.2. Three honor guard members are required.<br />
7.3.3.1. Personnel<br />
7.3.3.1.1. Officer in Charge/Non-Commissioned Officer in Charge<br />
7.3.3.1.2. Fold<br />
7.3.3.1.3. Bugler/Sound system operator<br />
7.3.4. Sequence<br />
7.3.4.1. The OIC/NCOIC <strong>and</strong> Fold position themselves at the road <strong>and</strong> await the arrival of the<br />
hearse.<br />
7.3.4.2. Family designated pallbearers, followed by the OIC/NCOIC <strong>and</strong> Fold, bring the casket<br />
to gravesite.<br />
7.3.4.3. OIC/NCOIC <strong>and</strong> Fold take their positions at the casket <strong>and</strong> come to the position of<br />
st<strong>and</strong> at, ease together.<br />
7.3.4.4. The clergy gives the graveside committal service.<br />
7.3.4.5. The funeral director asks the family to rise for the rendering of military honors.<br />
7.3.4.6. The flag is folded <strong>and</strong> presented to the OIC/NCOIC <strong>and</strong> Fold takes a predetermined<br />
position away from the family.<br />
7.3.4.7. The bugler sounds Taps<br />
7.3.4.8. The OIC/NCOIC presents the flag to the next of kin.<br />
7.3.4.9. OIC/NCOIC steps to Folds position <strong>and</strong> all members proceed to the assembly point.<br />
72
8.1. Personnel.<br />
Chapter 8<br />
RETREAT CEREMONY<br />
8.1.1. (1) Non Commissioned Officer-in-Charge (NCOIC)<br />
8.1.2. (2),(5) Flag Bearers<br />
8.2. Equipment.<br />
8.2.1. Base or All Purpose flag<br />
8.3. Support Materials.<br />
8.3.1. Job Commitment<br />
8.3.2. Security Police for traffic control<br />
8.3.3. B<strong>and</strong> or Installation PA system<br />
8.4. Preparation.<br />
8.4.1. Schedule at least one practice one day prior to the job.<br />
8.4.2. The NCOIC ensures the Base Security Forces is notified of the upcoming retreat<br />
ceremony in order to provide the necessary traffic control.<br />
8.4. Intersections surrounding the flagpole are blocked off 15 minutes prior to retreat time.<br />
8.5. Sequence of Events.<br />
8.5.1. At the appropriate time the NCOIC of the Flag detail comm<strong>and</strong>s Forward, MARCH <strong>and</strong><br />
the <strong>Honor</strong> <strong>Guard</strong> moves into position:<br />
8.5.1.1. The flag lowering portion of the ceremony is conducted IAW AFMAN 36-2203<br />
Chapter 7.<br />
8.5.2. The logistics of each installation will determine a large portion of how the retreat<br />
ceremony is conducted. While flexibility is required, great attention must be given to how the<br />
National flag is h<strong>and</strong>led. The ultimate result of the ceremony should reflect pride <strong>and</strong><br />
professionalism while providing the audience with a sense of patriotism.<br />
73
9.1. Formation <strong>and</strong> Advancement of Cordon.<br />
Chapter 9<br />
AIR FORCE RIFLE CORDON<br />
9.1.1. The cordon is formed in two lines of equal numbers, the NCOIC may be<br />
positioned on the outside of either line <strong>and</strong> centered.<br />
9.1.2. The NCOIC gives the comm<strong>and</strong> Port, ARMS followed by Forward, MARCH.<br />
Cordon marches to a predetermined position <strong>and</strong> picks up an automatic mark time.<br />
9.1.3. The NCOIC gives the comm<strong>and</strong> Cordon, HALT <strong>and</strong> Order, ARMS.<br />
9.2. Dressing Sequence.<br />
9.2.1. The NCOIC gives the comm<strong>and</strong> Center, FACE followed by Dress Center, DRESS.<br />
The cordon drops their heads <strong>and</strong> adjust to the marks (If marks are not used, members use<br />
peripheral vision to adjust). The NCOIC gives the comm<strong>and</strong> Ready, TWO. The cordon snaps<br />
their heads <strong>and</strong> dress in the direction the official party will proceed. The NCOIC gives the<br />
comm<strong>and</strong> Ready, FRONT. The cordon snaps their heads straight forward.<br />
9.2.2. The NCOIC gives the comm<strong>and</strong> Ceremonial at, EASE. The cordon awaits the arrival of<br />
the official party.<br />
9.3. Arrival.<br />
9.3.1. Upon the arrival of the official party, the NCOIC gives the comm<strong>and</strong> Cordon,<br />
ATTENTION followed by Present, ARMS. The official party passes through the cordon.<br />
9.3.2. The NCOIC gives the comm<strong>and</strong> Order, ARMS.<br />
9.4. Departure.<br />
9.4.1. Upon the departure of the official party, the NCOIC gives the comm<strong>and</strong> Present, ARMS.<br />
The official party departs through the cordon.<br />
9.4.2. The NCOIC gives the comm<strong>and</strong> Order, ARMS.<br />
9.5. March Off.<br />
9.5.1. The NCOIC gives the comm<strong>and</strong> Ready, FACE. Both elements of the cordon face the<br />
direction that they marched on from.<br />
9.5.2. The NCOIC gives the comm<strong>and</strong> Port, ARMS then Forward, MARCH.<br />
74
9.6. Cordon Sizes.<br />
9.6.1. President/Ex-President, 21 member<br />
9.6.2. Vice-President, 19 member<br />
9.6.3. Secretary of Defense, 19 member<br />
9.6.4. Chairman of the Joint Chiefs of Staff/Chief of Staff, 19 member<br />
9.6.5. 4-Star General, 17 member<br />
9.6.6. 3-Star General, 15 member<br />
9.6.7. 2-Star General, 13 member<br />
9.6.8. 1-Star General, 11 member<br />
75
10.1. General.<br />
Chapter 10<br />
SABER AND SWORD MANUALS AND CORDONS<br />
10.1.1. The saber is worn by officers <strong>and</strong> the sword is worn by NCO’s. Figure 10.1 shows the<br />
nomenclature for pertinent parts of the saber, sword, <strong>and</strong> scabbard.<br />
10.2. St<strong>and</strong>ing Manual of Arms.<br />
10.2.1. ATTENTION. This is the position before the comm<strong>and</strong> Draw, SABER (SWORD) <strong>and</strong><br />
after the comm<strong>and</strong> Return, SABER (SWORD). The h<strong>and</strong>s are behind the trouser seams <strong>and</strong><br />
the thumbs touch the first joint of the forefingers.<br />
10.2.2. Draw Saber (Sword).<br />
10.2.2.1. At the preparatory comm<strong>and</strong> Draw, grasp the scabbard with the left h<strong>and</strong> turning the<br />
scabbard clockwise 180 degrees, tilting it forward to form an angle of 45 degrees with the<br />
ground. Take the saber grip in the right h<strong>and</strong> <strong>and</strong> pull the saber about 6 inches. The right<br />
forearm is now parallel to the ground.<br />
10.2.2.2. On the comm<strong>and</strong> of execution SABER (SWORD), the saber (sword) is pulled out the<br />
scabbard <strong>and</strong> held in the position of carry saber (sword). The saber (sword) is held with the<br />
inner blade-edge riding in a vertical position along the forward tip of the right shoulder.<br />
10.2.3. Carry Saber (Sword).<br />
10.2.3.1. At carry saber (sword), the officer (NCO) is at the position of attention. The saber<br />
(sword) is held in the right h<strong>and</strong>; the wrist is as straight as possible with the thumb along the<br />
seam of the trouser leg. The point of the blade rests inside the point of the shoulder <strong>and</strong> not<br />
along the arm. The saber (sword) is held in this position by the thumb <strong>and</strong> forefinger grasping<br />
the grip, <strong>and</strong> it is steadied with the second finger behind the grip.<br />
10.2.3.2. The carry saber (sword) position is assumed under the following situations:<br />
10.2.3.2.1. To give comm<strong>and</strong>s.<br />
10.2.3.2.2. To change positions.<br />
10.2.3.2.3. By officers when officially addressing, or when officially addressed by, another<br />
officer, if the saber is drawn.<br />
10.2.3.2.4. By NCO’s when officially addressing an airman, or when officially being addressed<br />
by an officer, if the sword is drawn.<br />
76
10.2.3.2.5. Before returning the saber (sword) to the scabbard.<br />
10.2.3.2.6. At the preparatory comm<strong>and</strong> for, <strong>and</strong> while marching at, quick time.<br />
10.2.3.3. Present saber (sword) may be executed from the carry position when serving in the<br />
capacity of comm<strong>and</strong>er of troops or serving in a comm<strong>and</strong> that is not part of a larger unit. On<br />
the preparatory comm<strong>and</strong> of Present, the saber (sword) is brought to a position (at the rate of<br />
two counts) approximately four inches from the nose so that the tip of the saber (sword) is six<br />
inches from the vertical. At the comm<strong>and</strong> of execution ARMS, the right h<strong>and</strong> is lowered at the<br />
left side of the grip <strong>and</strong> the tip of the saber (sword) about six inches from the marching surface.<br />
10.2.3.4. On the comm<strong>and</strong> Order, ARMS, the saber (sword) is returned to the position of carry<br />
saber (sword).<br />
10.2.4. Parade Rest. This position is assumed without moving the saber (sword) from the<br />
order arms position. At the comm<strong>and</strong> of execution, the left foot is moved about 10 inches to the<br />
left of the right foot, <strong>and</strong> the left h<strong>and</strong> is placed in the small of the back, fingers extended <strong>and</strong><br />
joined, palm to the rear. At the comm<strong>and</strong> of execution ATTENTION, the left h<strong>and</strong> <strong>and</strong> foot are<br />
returned to the position of attention.<br />
NOTE: Whenever the saber (sword) is at the order arms position the saber (sword) is straight,<br />
not at an angle inward or outward in relationship to the body.<br />
10.2.5. Return Saber (Sword). This movement is executed from carry saber (sword) in three<br />
counts.<br />
10.2.5.1. At the preparatory comm<strong>and</strong> Return of the comm<strong>and</strong> Officers (NCO’s), Return,<br />
SABER (SWORD), the saber (sword) is brought to a vertical position. The forearm (wrist) is<br />
held parallel to the marching surface about three inches from the body; the guard is pointed to<br />
the left.<br />
10.2.5.2. At the comm<strong>and</strong> of execution SABER (SWORD), three actions take place<br />
simultaneously: the saber (sword) is pivoted downward toward the guard, at the same time grasp<br />
the scabbard with the left h<strong>and</strong> just above the upper brass ring mounting. Tilt it forward <strong>and</strong> turn<br />
it clockwise 180 degrees. The scabbard should form a 45-degree angle with the ground, <strong>and</strong> the<br />
saber (sword) bearer turns his head to the left <strong>and</strong> looks down to observe the mouthpiece of the<br />
scabbard (the shoulders remain squared to the front <strong>and</strong> level). As smoothly <strong>and</strong> as quickly as<br />
possible, the saber (sword) is inserted into the scabbard <strong>and</strong> stopped so that about 12 inches of<br />
the blade is showing; the right forearm (wrist) is horizontal to the marching surface <strong>and</strong> three<br />
inches from the body.<br />
10.2.5.3. At the comm<strong>and</strong> of execution CUT of the comm<strong>and</strong> Ready, CUT, the saber (sword)<br />
is thrust smartly into the scabbard, the scabbard is rotated so that its tip is<br />
forward, <strong>and</strong> the saber (sword) bearer comes to attention.<br />
77
10.3 Saber (Sword) Cordon.<br />
10.3.1. Saber (sword) Cordons consist of eight members <strong>and</strong> an OIC/NCOIC.<br />
10.3.1.1. All nine members bear a saber (sword).<br />
10.3.2. The cordon is formed in two elements four members deep, the OIC/NCOIC is centered<br />
outside one of the elements.<br />
10.3.3. The distance between the two elements is dependent on available room, the distance<br />
should be at least adequate for those who are walking through the cordon to pass safely.<br />
10.3.4. The distance between the members of each element is at least normal distance.<br />
10.3.4.1. Distance can be adjusted in relationship to the performance area to achieve symmetrical<br />
spacing using pre-positioned marks on the floor.<br />
10.3.5. The cordon enters the performance area at the position of carry, saber (sword).<br />
10.3.6. The cordon picks up an automatic mark time on the marks then halted.<br />
10.3.7. The OIC/NCOIC gives the comm<strong>and</strong>s Center, FACE followed by Dress Center,<br />
DRESS.<br />
10.3.7.1. On the comm<strong>and</strong> DRESS, the cordon members execute a head snap down <strong>and</strong> make<br />
small adjustments to center on the mark<br />
10.3.8. The OIC/NCOIC gives the comm<strong>and</strong> Ready, FRONT.<br />
10.3.8.1. The cordon members snap their heads to the front.<br />
10.3.9. Upon que or advancement of the honorees, the OIC/NCOIC gives the comm<strong>and</strong> Present,<br />
ARCH.<br />
10.3.9.1. The cordon members form the arch by extending their right arm, forming a straight line<br />
with their arm <strong>and</strong> the saber (sword). The saber (sword) is at a 45 degree upward angle.<br />
10.3.9.2 Once all honorees have exited the arch, the OIC/NCOIC gives the comm<strong>and</strong> Order,<br />
ARCH.<br />
10.3.9.3 Cordon members return to the position of carry.<br />
10.3.9.4 OIC/NCOIC gives the comm<strong>and</strong> Ready, FACE. Cordon members face in the direction<br />
they entered<br />
10.3.9.5 OIC/NCOIC gives the comm<strong>and</strong> Forward, MARCH . Members march to a<br />
predetermined location.<br />
78
Figure 10.1. (Saber <strong>and</strong> Sword Diagrams)<br />
79
11.1. Introduction.<br />
Chapter 11<br />
GENERAL INFORMATION AND<br />
MAINTENANCE OF THE M1 RIFLE<br />
11.1.1. This chapter provides basic maintenance <strong>and</strong> general information on the M1 Gar<strong>and</strong><br />
Rifle. A diagram is included to identify each piece of the weapon.<br />
11.2. Disassembly of the weapon.<br />
11.2.1. Remove the trigger housing from the rifle.<br />
11.2.2. Remove the gas port cylinder assembly. This is accomplished by taking off the screw<br />
assembly <strong>and</strong> then unscrewing the gas chamber lock.<br />
11.2.3. Pull off both the gas cylinder <strong>and</strong> the upper h<strong>and</strong> guard.<br />
11.2.4. Remove the follower rod assembly.<br />
11.2.5. The operating rod spring now comes out, along with the follower rod assembly.<br />
11.2.6. Take the shoulder head pin out. Use a small screwdriver.<br />
11.2.7. Remove the bullet guide, catch assembly, follower, <strong>and</strong> the follower slide.<br />
11.2.8. Remove the operating rod assembly from the bolt assembly.<br />
11.2.9. Once the operating rod assembly is separated from the bolt you are able to slide the bolt<br />
out of place.<br />
11.2.10. After following these steps you have a fully broken down M1 Gar<strong>and</strong> .30 cal Rifle.<br />
11.3. Cleaning of the M1 Rifle.<br />
11.3.1. After disassembling the weapon completely, clean <strong>and</strong> lubricate each metal piece on the<br />
weapon.<br />
11.3.2. When cleaning the barrel, use bore cleaner <strong>and</strong> patches.<br />
11.3.3. First use a cleaning brush to loosen the excess burned gun powder.<br />
11.3.4. Next, run patches with bore cleaner through the barrel until the patches come out clean.<br />
80
11.3.5. Once the barrel is clean, apply a small coat of lubricating oil to the entire metal surface<br />
of the barrel to reduce the chances of rust <strong>and</strong> corrosion.<br />
11.3.6. After the barrel is clean move on to the other pieces of the weapon. This includes all<br />
metal parts.<br />
11.3.7. You must make sure every piece is clean <strong>and</strong> free of dirt <strong>and</strong> oil, leaving a very light coat<br />
of oil for lubrication.<br />
11.4. Reassembling the M1 Rifle.<br />
11.4.1. First, place the bolt in its slide position with the firing pin pointing toward the barrel.<br />
11.4.2. After the bolt is in place, then place the operating rod assembly into place by attaching it<br />
to the bolt. Slide the operating rod assembly in leaving it in the forward position.<br />
11.4.3. Take the follower <strong>and</strong> the follower slide <strong>and</strong> place it in the appropriate slots so the<br />
follower slide is facing toward the bolt. The follower forms a “T”, with the top of the “T” facing<br />
the barrel.<br />
11.4.4. The next objective is to place the guide into its proper place.<br />
11.4.5. Put the catch assembly in place by hooking the arm end of the piece under the<br />
clip latch.<br />
11.4.6. Put the follower arm onto the other pieces so the end that looks like a small rod<br />
has been placed through the arm itself <strong>and</strong> it is rested on the inside of the follower.<br />
11.4.7. Place the shoulder headed pin into its position so all of the pieces are connected through<br />
the pin.<br />
11.4.8. When all of the pieces are in place you can check your work by pushing on the tip of<br />
your catch assembly, the clip latch should move in <strong>and</strong> out.<br />
11.4.9. Place the operating rod spring onto the tip of the follower assembly rod.<br />
11.4.10. Next, place the operating rod spring into the operating assembly rod <strong>and</strong> place the other<br />
end of the follower rod assembly onto the end of the follower arm. The bent end of the follower<br />
assembly rod will be facing down towards the barrel.<br />
11.4.11. Place the upper h<strong>and</strong> guard onto the weapon. After the h<strong>and</strong> guard is in place, slide the<br />
as cylinder over the barrel <strong>and</strong> the operating rod assembly with the swivel facing down.<br />
11.4.12. Screw the gas cylinder lock into place.<br />
11.4.13. Screw the screw assembly into the gas cylinder.<br />
81
11.4.14. Put the stock back on the weapon, <strong>and</strong> return the trigger housing<br />
11.4.15. The weapon is now completely reassembled.<br />
11.5. General Information<br />
11.5.1. The M1 Gar<strong>and</strong> was a st<strong>and</strong>ard issue weapon during WWII <strong>and</strong> Korea<br />
11.5.2. The M1’s primary military function today is to serve as a ceremonial weapon for Drill<br />
<strong>and</strong> Ceremony<br />
11.5.3. The M1 comes in two configurations.<br />
11.5.3.1. The functional M1 is used to fire blank rounds during ceremonies requiring the 21-gun<br />
salute. This weapon is also capable of firing live rounds.<br />
11.5.3.2. The inert M1 is used during any <strong>Honor</strong> <strong>Guard</strong> ceremony not requiring the 21-gun<br />
salute. The inert M1 has been rendered unable to fire any type of round, including blanks. The<br />
inert M1 should not be confused with a demilitarized M1, which is completely destroyed.<br />
11.5.4. It is illegal to modify the M1 Gar<strong>and</strong> without prior written approval from Warner<br />
Robbins ALC/LKJTMW.<br />
11.5.5. The M1 is stored <strong>and</strong> transported IAW AFI 31-209.<br />
82
12.1. Personnel.<br />
12.1.1. (1) NCOIC<br />
12.1.2. (4) Hat Bearers<br />
12.2. Equipment.<br />
12.2.1. (1) ceremonial Army hat<br />
12.2.2. (1) ceremonial Marine hat<br />
12.2.3. (1) ceremonial Navy hat<br />
12.2.4. (1) ceremonial Air Force hat<br />
12.2.5. (1) ceremonial Coast <strong>Guard</strong> hat<br />
12.3. Support Materials.<br />
12.3.1. (1) Bible<br />
12.3.2. (1) red c<strong>and</strong>le<br />
12.3.3. (1) yellow ribbon<br />
Chapter 12<br />
POW/MIA HAT TABLE CEREMONY<br />
12.3.4. (1) slice of lemon on a coaster with a pinch of salt<br />
12.3.5. (1) place setting at an open table<br />
12.3.6. (4) wine glasses<br />
NOTE: All support materials should be supplied by the host.<br />
12.4. Preparation.<br />
12.4.1. NCOIC meets with host upon arrival at ceremony site to go over specifics:<br />
12.4.1.1. Entrance cue.<br />
12.4.1.2. Entrance <strong>and</strong> departure area.<br />
84
12.4.1.3. Make sure that there is enough room around the table for all team members to walk.<br />
12.4.1.4. Proper set-up of the table:<br />
12.4.1.4.1. Yellow ribbon tied around red c<strong>and</strong>le, placed in the middle of the table.<br />
12.4.1.4.2. Bible is placed next to the c<strong>and</strong>le.<br />
12.4.1.4.3. Coaster with slice of lemon <strong>and</strong> pinch of salt on it is placed next to the Bible <strong>and</strong> the<br />
c<strong>and</strong>le.<br />
12.4.1.4.4. There is only one place setting with plate, silverware, <strong>and</strong> wineglass.<br />
12.4.1.4.5. The other four wineglasses should be placed evenly around the table in empty place<br />
settings.<br />
12.4.1.5. Have team practice at least once prior to the ceremony.<br />
12.5. Sequence of Events.<br />
12.5.1. Fifteen minutes prior to ceremony the team lines up outside of the entrance: holding hats<br />
in correct Joint Service order, at waist level, <strong>and</strong> with the bill of the hat pointing out.<br />
12.5.2. Once the narrator starts reading the POW/MIA HAT TABLE script the team is queued<br />
<strong>and</strong> enters the room headed toward the table.<br />
12.5.3. Upon reaching the table the team circles it once <strong>and</strong> the NCOIC calls HALT when the<br />
Air Force hat is in front of the full place setting for the second time.<br />
12.5.4. NCOIC calls Ready, FACE <strong>and</strong> the team faces the table.<br />
12.5.5. The NCOIC starts the movement <strong>and</strong> at the same time all bearers move their right h<strong>and</strong>s<br />
slowly around the front of the bill to the left side of the hat, touching their left h<strong>and</strong>. Then letting<br />
go with the left h<strong>and</strong> <strong>and</strong> keeping it in position, turning the hat around 180 degrees. Bearers then<br />
bend over <strong>and</strong> place hats in the place setting.<br />
12.5.6. The bearers let go of the hat, st<strong>and</strong> up at attention <strong>and</strong> reach out with their right h<strong>and</strong> <strong>and</strong><br />
cup the wineglass. All wineglasses will be lifted out in front of the bearers meeting in the center<br />
of the table. Glasses are turned upside down <strong>and</strong> then lowered back down to the table.<br />
12.5.7. When the glasses are securely on the table the bearers come back to the position of<br />
attention.<br />
12.5.8. NCOIC calls Present, ARMS. The bearers perform a three second present <strong>and</strong> a three<br />
second order.<br />
85
12.5.9. Once back at the position of attention the NCOIC calls Ready, FACE. All bearers<br />
perform a right face, wait one count, <strong>and</strong> then step off with no arm swing toward the<br />
predetermined departure area.<br />
NOTE: If the host wishes, after the dinner is over the team may go back in <strong>and</strong> get the hats.<br />
This is performed in the exact opposite order.<br />
12.6. The table you see before you is set for those MIA that cannot be with us tonight.<br />
-The table is smaller than the others…symbolizing the frailty of one prisoner alone against their<br />
oppressors.<br />
-The four service hats…symbolizing everyone who has served in all conflicts.<br />
-The white table cloth…represents the purity of their response to our country’s call to arms.<br />
-The table is round…to show our concern for them is never ending.<br />
-The bible…is a symbol of our faith in a higher power <strong>and</strong> the pledge to our country, founded as<br />
one nation under God.<br />
-The black napkin…st<strong>and</strong>s for the emptiness these warriors have left in the hearts of their<br />
families <strong>and</strong> friends.<br />
-The single red rose…reminds us of the families <strong>and</strong> loved ones: ..<strong>and</strong> the red ribbon represents<br />
the love of our country which inspired them to answer our nation’s call.<br />
-The yellow c<strong>and</strong>le <strong>and</strong> its yellow ribbon…symbolizes the everlasting hope for a joyous reunion<br />
with those yet accounted for.<br />
-The slice of lemon on the bread plate…reminds us of their bitter fate.<br />
-The salt upon the bread plate…represents the tears of their families.<br />
-The wine glass turned upside down…reminds us our distinguished comrades cannot be with us<br />
to drink a toast or join in the festivities this evening.<br />
-The flag is present to mourn the fact that many of them will not return to our shores, <strong>and</strong> to pay<br />
tribute to their passing.<br />
Ladies <strong>and</strong> Gentlemen, the Table of <strong>Honor</strong>.<br />
12.6.1. The following is another example of the narration. This has been accepted by the DOD<br />
<strong>and</strong> is on their website.<br />
As you entered the dining area, you may have noticed a table at the<br />
front, raised to call your attention to its purpose -- it is reserved<br />
to honor our missing loved ones [or missing comrades in arms, for<br />
veterans].<br />
Set for six, the empty places represent Americans still [our men]<br />
missing from each of the five services -- Army, Navy, Marine Corps, Air<br />
Force, Coast <strong>Guard</strong> – <strong>and</strong> civilians. This <strong>Honor</strong>s Ceremony symbolizes<br />
that they are with us, here in spirit.<br />
Some [here] in this room were very young when they were sent into<br />
combat; however, all Americans should never f<strong>org</strong>et the brave men <strong>and</strong><br />
women who answered our nation's call [to serve] <strong>and</strong> served the cause of<br />
freedom in a special way.<br />
86
I would like to ask you to st<strong>and</strong>, <strong>and</strong> remain st<strong>and</strong>ing for a moment of<br />
silent prayer, as the <strong>Honor</strong> <strong>Guard</strong> places the five service covers <strong>and</strong> a<br />
civilian cap on each empty plate.<br />
<strong>Honor</strong> <strong>Guard</strong>: (In silence or with dignified, quiet music as background,<br />
the <strong>Honor</strong> <strong>Guard</strong> moves into position around the table <strong>and</strong> simultaneously<br />
places the covers of the Army, Navy, Marine Corps, Air Force <strong>and</strong> Coast<br />
<strong>Guard</strong>, <strong>and</strong> a civilian hat, on the dinner plate at each table setting.<br />
The <strong>Honor</strong> <strong>Guard</strong> then departs.)<br />
Please be seated ....... I would like to explain the meaning of the<br />
items on this special table.<br />
The table is round -- to show our everlasting concern for our missing<br />
men.<br />
The tablecloth is white -- symbolizing the purity of their motives when<br />
answering the call to duty.<br />
The single red rose, displayed in a vase, reminds us of the life of<br />
each of the missing, <strong>and</strong> the[ir] loved ones <strong>and</strong> friends of these<br />
Americans who keep the faith, awaiting answers.<br />
The vase is tied with a yellow ribbon, symbol of our continued<br />
determination to account for our missing.<br />
A slice of lemon on the bread plate is to remind us of the bitter fate<br />
of those captured <strong>and</strong> missing in a foreign l<strong>and</strong>.<br />
A pinch of salt symbolizes the tears endured by those missing <strong>and</strong> their<br />
families who seek answers.<br />
The Bible represents the strength gained through faith to sustain those<br />
lost from our country, founded as one nation under God.<br />
The glass is inverted -- to symbolize their inability to share this<br />
evening's [morning’s/day’s] toast.<br />
The chairs are empty -- they are missing.<br />
Let us now raise our water glasses in a toast to honor America's<br />
POW/MIAs <strong>and</strong> to the success of our efforts to account for them.<br />
Courtesy of NATIONAL LEAGUE OF FAMILIES OF AMERICAN PRISONERS AND<br />
MISSING IN SOUTHEAST ASIA<br />
87
13.1. Beginning A Team.<br />
Chapter 13<br />
ADVANCED WEAPON HANDLING TECHNIQUES<br />
13.1.1. The minimum personnel for a drill team is two people. From there, more members may<br />
be added. Ensuring each member has a partner for exchanges broadens the range of drill<br />
movements to be performed. Example: Start with two people, then add a third <strong>and</strong> fourth,<br />
always add members in two’s. Eventually work up to a twelve or sixteen man team.<br />
13.1.2. There is no set time limit to the length of a routine. Allow adequate time for the proper<br />
execution of movements <strong>and</strong> to showcase teamwork. Give the audience a thrill <strong>and</strong> leave them<br />
wanting to see more. Don’t be redundant in the drill movements, use variety. A good time limit<br />
for a short drill routine with a small number of performers is five to seven minutes <strong>and</strong> fifteen to<br />
twenty minutes for a long routine with a large number of performers.<br />
13.1.3. The routine itself does not have to be technically challenging. Keeping the routine<br />
simple helps the performers <strong>and</strong> gives newer members in the <strong>Honor</strong> <strong>Guard</strong> incentive to learn it.<br />
Once a drill routine is established, it is best that is not be changed drastically in a year. Making<br />
the appropriate changes to a routine at the beginning of a drill season allows consistency<br />
throughout the year. Keeping to that routine eliminates guess work to what will be performed.<br />
13.1.4. Practice is the key to the success of any drill team. Each member needs to do the same<br />
movement exactly the same way. The individuals <strong>and</strong> their willingness to put in the time to<br />
practice determine the difficulty of your routine.<br />
13.1.5. Ensure every team member receives the proper training. Learning how to use the proper<br />
techniques in drill will keep yourself <strong>and</strong> others from injury.<br />
13.1.6. We recommend not using bayonets. Don’t mistake the flash of the chrome <strong>and</strong> danger<br />
with precision. Once the team attains a level of proficiency without the bayonet, the NCOIC of<br />
the team may decide to use them. Please underst<strong>and</strong> that greater injury to ones-self <strong>and</strong> others<br />
rises with a bayonet on the rifle. On another note, bayonets are an expensive item. Account for<br />
some of the bayonets breaking while training.<br />
13.1.7. A Drill Comm<strong>and</strong>er or NCOIC should be established to provide guidance <strong>and</strong> to enforce<br />
st<strong>and</strong>ards of excellence <strong>and</strong> precision. This individual should have drill experience <strong>and</strong> training.<br />
13.1.8. Once the drill team members are in place, the next step is to decide what they will<br />
perform. Keep in mind the routine should be exciting as well as precise. Pick movements in the<br />
following segments to put in the routine as well as some movements you already know.<br />
Sequencing has two definitions in drill. One definition is placing drill movements one after the<br />
other. For example: starting from the position of attention, kick up roll to shoulder, flat order to<br />
side st<strong>and</strong>by, throw the side double, then throw into right shoulder, is a drill movement sequence.<br />
The other definition of a sequence in drill is making formations <strong>and</strong> putting them in an order<br />
88
from start to finish. This is done by using grid paper. Using the X <strong>and</strong> Y axis, place the<br />
performers in the formation they are to look like. For example: If the performers are to look like<br />
a “V”, draw the formation on the grid paper. Place the performers in their perspective spots.<br />
Now move them to the place they started from. If they started from a 4x4 formation, that is<br />
where they return to. Each element is one step from the other. Each rank is one step from the<br />
other. An ideal formation would be a sixteen member, 4x4 formation. In this formation each<br />
member has a partner with more options to exchange. Work the drill sequence backward to<br />
forward. In other words, start on the drawing board at the end of the sequence <strong>and</strong> then work<br />
toward where the sequence starts. Be creative <strong>and</strong> build sequences that make the team<br />
distinctive.<br />
13.1.9. The two things that have potential to destroy a drill routine is cadence <strong>and</strong> dress.<br />
Practice the drill in a slow <strong>and</strong> steady cadence. When performing, adrenaline naturally tends to<br />
speed up the drill. Dress is another important element of the drill. Stress the alignment of the<br />
team.<br />
13.1.10. Keep the drill routine in the center of the performance area. For example: If there is a<br />
performance at a high school gymnasium, most of the drill is performed at center court.<br />
Different areas of the floor may be used, however, the team returns to the center.<br />
13.1.11. Balance the routine by placing the weapon sequences <strong>and</strong> formation sequences in an<br />
order to evenly distribute the exciting areas. An example of this is: In the routine, there are two<br />
parts. In the first part there are overhead exchanges with a line sequence. To balance that in the<br />
second part, have a walk through <strong>and</strong> a back to back sequence. Now there are equally exciting<br />
movements that balance the two parts <strong>and</strong> eliminates audience boredom.<br />
13.1.12. When developing the drill routine, keep in mind the amount of space needed to<br />
complete the performance. Determine ceiling height, floor space, <strong>and</strong> distance from the audience<br />
to the performers. Always be safe. If certain conditions inhibit the performance, then it’s best<br />
not to perform.<br />
13.1.13. Avoid modifying or changing the routine at the last minute to fit the occasion.<br />
Although some modifications may be necessary, last minute changes can be mixed up by the<br />
way the routine is normally performed.<br />
13.1.14. It is wise to check the drill location before performing there. Getting a visual picture of<br />
the environment to be performed in eliminates guesswork. Check to see if the location meets the<br />
ceiling height, floor space, <strong>and</strong> distance from the audience criterion. Again, if major<br />
modifications to the routine need to made to accommodate the performance, then it is best not to<br />
perform.<br />
13.2. Safety <strong>and</strong> Preparation.<br />
13.2.1. Before getting into some actual drill movements, let’s go over a few safety tips. The use<br />
of fiberglass stocks <strong>and</strong> upper h<strong>and</strong> guards are recommended for practices. The stock numbers<br />
<strong>and</strong> ordering procedures for the fiberglass stocks can be found in the Base <strong>Honor</strong> <strong>Guard</strong><br />
89
Ceremonial Equipment Guide. The fiberglass pieces h<strong>and</strong>le more abuse with out breaking. The<br />
fiberglass stocks are not much different in weight to the wooden pieces, <strong>and</strong> when performing,<br />
simply exchange the fiberglass for wood. To prevent injury to h<strong>and</strong>s <strong>and</strong> fingers, remove of the<br />
front <strong>and</strong> rear sights during practices. Since these two pieces are not a permanent part of the<br />
weapon, they can become loose while drilling.<br />
13.2.2. When using a bayonet, secure them in the following manner using black electrical tape:<br />
13.2.2.1. Tape from the h<strong>and</strong> guard to the bottom of the h<strong>and</strong>le.<br />
13.2.2.2. Tape the bottom of the h<strong>and</strong>le to the barrel.<br />
13.2.2.4. Tape the top of the h<strong>and</strong>le to the barrel.<br />
13.2.3. The sling is taped using a white cloth type tape.<br />
13.2.3.1. Four fingers from the top of the upper sling ring.<br />
13.2.3.2. Above the clip.<br />
13.2.3.3. Below the clip * Above the buckle if necessary to secure excess sling.<br />
13.2.3.4. The sling is as tight as possible. The clip is placed slightly ahead of the small of the<br />
stock. The buckle is as close to the hook <strong>and</strong> ring assembly as possible.<br />
13.2.4. Use silicone on the fingers <strong>and</strong> palm of the gloves to aid in gripping the weapon.<br />
13.2.5. When performing drill, hats are worn at all times. During performances, the chin-straps<br />
are worn down.<br />
13.3. Terms<br />
13.3.1. H<strong>and</strong> flare. Fingers straight, close together, <strong>and</strong> thumb tucked along index finger.<br />
Weapon remains a fist away from the body.<br />
13.3.2. When at port arms, the b<strong>and</strong> is at chin level, <strong>and</strong> the upper h<strong>and</strong> guard is over the left<br />
eye.<br />
13.3.3. Feet remain together facing forward.<br />
13.3.4. Head <strong>and</strong> eyes remain forward while drilling except to look at the weapon while it is in<br />
the air.<br />
13.4. Tips<br />
13.4.1. The M1 has two balance points. The first being at the b<strong>and</strong>, <strong>and</strong> the second at the small<br />
of the stock.<br />
90
13.4.2. The secret of drill is to utilize these balance points while performing the movements.<br />
Manipulate the weapon.<br />
13.5. <strong>Basic</strong> Drill Movements.<br />
Caution: Drilling with the M1 rifle is dangerous. Use extreme care while learning these<br />
movements. Ensure that all safety precautions are adhered to<br />
13.5.1. Ceremonial-at, EASE. A three count movement starting at the position of attention.<br />
The comm<strong>and</strong> of execution EASE<br />
13.5.1.1. The right h<strong>and</strong> extends the weapon out while the left foot moves to the left <strong>and</strong> the left<br />
h<strong>and</strong> goes to the small of the back to the position of parade, rest. The right h<strong>and</strong> then brings the<br />
weapon to the front center of the body, (the weapon rests on it’s toe touching the foot). The left<br />
h<strong>and</strong> meets the weapon <strong>and</strong> the bayonet at the base of the blade resting on the top of the h<strong>and</strong><br />
guard, the h<strong>and</strong> is flared <strong>and</strong> parallel to the bayonet h<strong>and</strong>le.<br />
13.5.1.2. Extend right arm with h<strong>and</strong> flare <strong>and</strong> return to gas port underneath left h<strong>and</strong>. H<strong>and</strong>s<br />
will form a T.<br />
13.5.2. Team, ATTENTION. A three count movement starting from the position of<br />
Ceremonial-at-ease.<br />
13.5.2.1. Extend right arm fully with h<strong>and</strong> flare <strong>and</strong> return to the upper h<strong>and</strong> guard grasping<br />
with a fist.<br />
13.5.2.2. The right h<strong>and</strong> brings the weapon to the right side of the body so the weapon is<br />
touching the right leg. The left h<strong>and</strong> at a flare, goes to the small of your back making a noise.<br />
13.5.2.3. The feet close together <strong>and</strong> the left h<strong>and</strong> pins to the lift leg, h<strong>and</strong> at a fist.<br />
13.5.3. Port, ARMS. A two count movement starting at the position of attention.<br />
13.5.3.1. The right h<strong>and</strong> brings the weapon in front of the body at a slight angle with the right<br />
forearm parallel to the ground, while the left h<strong>and</strong> grabs the weapon at the stock with the middle<br />
finger on the lower h<strong>and</strong> guard retaining b<strong>and</strong>. Note: proper distance of the weapon from your<br />
body, <strong>and</strong> alignment of upper h<strong>and</strong> guard over left eye, <strong>and</strong> b<strong>and</strong> at chin level.<br />
13.5.3.2. Extend the right arm with h<strong>and</strong> flare then bring into small of the stock.<br />
13.5.4. Order arms. A two count movement starting at the position of attention. At the<br />
comm<strong>and</strong> of execution arms:<br />
13.5.4.1. Move the right h<strong>and</strong> from the small of the stock to the upper h<strong>and</strong> guard grabbing with<br />
a fist, forearm parallel to the ground.<br />
91
13.5.4.2. Using the right h<strong>and</strong>, bring the weapon straight down to right side of leg, while the left<br />
h<strong>and</strong> returns to the left leg with a fist. Note: be sure the weapon hits on the heel of the butt. Then<br />
toe the weapon.<br />
13.5.5. Right shoulder. A four count movement starting at the position of port. At the<br />
comm<strong>and</strong> of execution shoulder:<br />
13.5.5.1. The left h<strong>and</strong> at a fist extends no further than the left shoulder width <strong>and</strong> returns to the<br />
stock at the lower h<strong>and</strong> guard retaining b<strong>and</strong>.<br />
13.5.5.2. The right h<strong>and</strong> moves to the butt of the weapon <strong>and</strong> flicks it into the heel of the right<br />
h<strong>and</strong> <strong>and</strong> moves the weapon aligning it with the right shoulder. The left h<strong>and</strong> flares at the lower<br />
h<strong>and</strong> guard retaining b<strong>and</strong>.<br />
13.5.5.3. The right h<strong>and</strong> lifts the weapon allowing it to fall into the right shoulder. The right arm<br />
is at a 90 degree angle with the right elbow pinned. The left h<strong>and</strong> follows the weapon to shoulder<br />
at a flare but moves to the rear bolt housing. The index <strong>and</strong> middle finger touch the housing. The<br />
left forearm is at a slight angle.<br />
13.5.5.4. The left h<strong>and</strong> cuts sharply to pin at left leg.<br />
13.5.6. Returning to the position of Port arms from right shoulder. A two count movement<br />
starting at right shoulder. At the comm<strong>and</strong> of execution arms:<br />
13.5.6.1. Drop the right h<strong>and</strong> so that the entire weapon is held by the right h<strong>and</strong>, grasping the<br />
butt of the weapon tightly.<br />
13.5.6.2. Move the right h<strong>and</strong> clockwise to twist the weapon to the port position allowing the<br />
weapon to fall to the left, the left h<strong>and</strong> stops the weapon at the port position on the stock with the<br />
middle finger on the lower h<strong>and</strong> guard b<strong>and</strong>. Note: the weapon should stop directly in front of<br />
your left eye.<br />
13.5.7. Left shoulder. A three count movement starting at the position of port. At the comm<strong>and</strong><br />
of execution shoulder:<br />
13.5.7.1. The right h<strong>and</strong> remains on the small of the stock moving the weapon aligning it on the<br />
left shoulder, the left h<strong>and</strong> is next to the upper h<strong>and</strong> guard with the forearm touching the weapon.<br />
The upper h<strong>and</strong> guard is at the left ear.<br />
13.5.7.2. The left h<strong>and</strong> then moves to the butt of the weapon while the right h<strong>and</strong> flares at the<br />
bolt housing with the index <strong>and</strong> middle fingers touching the housing. The forearm is at a slight<br />
angle.<br />
13.5.7.3. The right h<strong>and</strong> cuts sharply to pin at right leg.<br />
92
13.5.8. Returning to the position of Port arms from left shoulder. A three count movement<br />
starting at the position of left shoulder. At the comm<strong>and</strong> of execution arms:<br />
13.5.8.1. Bring the right h<strong>and</strong> into the small of the stock at a fist.<br />
13.5.8.2. Simultaneously with the right h<strong>and</strong> bring the weapon in front of the body <strong>and</strong> pin the<br />
left h<strong>and</strong>.<br />
13.5.8.3. Bring the left h<strong>and</strong> to the stock at the lower h<strong>and</strong> guard retaining b<strong>and</strong>, dress the<br />
weapon to your eye <strong>and</strong> chin.<br />
13.5.9. Flare. A one count movement from the position of attention.<br />
13.5.9.1. Grab the upper h<strong>and</strong> guard with the right h<strong>and</strong> <strong>and</strong> extend the right arm forward. This<br />
positions the weapon at a 45 degree angle with the trigger housing at the right knee.<br />
13.5.10. High secure. A two count movement starting from the position of port.<br />
13.5.10.1. Grab the weapon on the lower h<strong>and</strong> guard with the right h<strong>and</strong> at the retaining b<strong>and</strong>.<br />
The ring <strong>and</strong> middle finger split the operating rod. Bring the weapon in line with the right<br />
shoulder, in the vertical position. As the weapon is being moved, move the left h<strong>and</strong> to the upper<br />
h<strong>and</strong> guard. Palm facing out, cupped around the upper h<strong>and</strong> guard, knuckles are on the<br />
shoulder.<br />
13.5.10.2. Push forward with the left h<strong>and</strong>, <strong>and</strong> bring your right h<strong>and</strong> up so the weapon is in the<br />
horizontal position, sling up. The stock is in the right armpit. The left arm is extended <strong>and</strong> the<br />
h<strong>and</strong> flared. The index <strong>and</strong> middle fingers will rest on the tracks of the upper h<strong>and</strong> guard, not to<br />
extend pass the stacking swivel. The weapon is at a slight angle upward.<br />
13.5.11. Back to port. The left arm lifts approximately three inches <strong>and</strong> tap the upper h<strong>and</strong><br />
guard with the left h<strong>and</strong>.<br />
13.5.11.1. Pin the left h<strong>and</strong>.<br />
13.5.11.2. Using the right h<strong>and</strong> holding on to the weapon, bring the weapon back to port, with<br />
right arm extended. Catch at port with the left h<strong>and</strong>.<br />
13.5.11.3. Flare right arm <strong>and</strong> h<strong>and</strong> into the small of the stock.<br />
13.5.12. Single spin. A four count movement starting from the position of port.<br />
13.5.12.1. Slap the weapon with the left h<strong>and</strong> at port.<br />
13.5.12.2. Using the right h<strong>and</strong>, tap underneath the left forearm at a flare.<br />
93
13.5.12.3. Move the right h<strong>and</strong> palm up to the weapon at the recess. Pin the left h<strong>and</strong>. As the<br />
weapon starts to fall to the left in a counterclockwise rotation, twist the right wrist to complete<br />
one revolution with the weapon.<br />
13.5.12.4. As the weapon completes the spin, stop the upper h<strong>and</strong> guard with the left h<strong>and</strong> in<br />
front of the left eye. The right h<strong>and</strong> flares back to the small of the stock.<br />
13.5.13. Reverse port. A three count movement starting from the position of right shoulder.<br />
13.5.13.1. Pull the weapon down with the right h<strong>and</strong> in a counterclockwise twist to the front of<br />
the body. Sling facing to the right. As the weapon is dropping, grab the small of the stock with<br />
the left h<strong>and</strong>, <strong>and</strong> move the right h<strong>and</strong> to the stock by the lower h<strong>and</strong> guard retaining b<strong>and</strong>. The<br />
weapon is at reverse port.<br />
13.5.13.2. With the right h<strong>and</strong>, flip the weapon to the left h<strong>and</strong> in a half twist turn. The left h<strong>and</strong><br />
catches the weapon on the stock where the right h<strong>and</strong> was, <strong>and</strong> the right h<strong>and</strong> flares at the upper<br />
h<strong>and</strong> guard with the forearm along the weapon.<br />
13.5.13.3. Move the right h<strong>and</strong> into the small of the stock. The weapon is at port position.<br />
13.5.14. Rock to shoulder. A four count movement starting from the position of attention.<br />
13.5.14.1. Grab the upper h<strong>and</strong> guard with the right h<strong>and</strong> <strong>and</strong> extend the right arm forward. The<br />
weapon is in the flare position. Left h<strong>and</strong> pinned.<br />
13.5.14.2. Bring the right h<strong>and</strong> up <strong>and</strong> twist the weapon in a half turn clockwise rotation. Keep<br />
the same grip on the weapon. The right arm looks as if you are doing a waving motion from left<br />
to right. Follow through with the motion by then dropping the right h<strong>and</strong> so that the weapons<br />
barrel is pointing towards the ground. As the butt comes towards the right shoulder, catch it with<br />
the left h<strong>and</strong> at the small of the stock <strong>and</strong> put the knuckles into your shoulder. The left h<strong>and</strong> palm<br />
facing out. The sling facing forward.<br />
13.5.14.3. Using the right h<strong>and</strong> guide the weapon into the right shoulder. As this is happening,<br />
the right h<strong>and</strong> moves to the butt of the weapon. As soon as the right h<strong>and</strong> slaps the butt, flare the<br />
left h<strong>and</strong> at the bolt housing.<br />
13.5.14.4. Cut the left h<strong>and</strong> to left leg.<br />
13.6. Intermediate Drill Movements<br />
13.6.1. Spin port. A two count movement starting at the position of attention.<br />
13.6.1.1. With right h<strong>and</strong> pull the weapon up <strong>and</strong> across the body. As the right h<strong>and</strong> gets to<br />
about the middle of the chest, turn the wrist in toward you. While still going up, snap the wrist<br />
out, the weapon is in the vertical position, spinning clockwise one time. As the weapon<br />
94
completes the spin, stop the rotation in the right h<strong>and</strong> on the upper h<strong>and</strong> guard <strong>and</strong> catch the<br />
weapon in the left h<strong>and</strong> at the port position.<br />
13.6.1.2. Move the right h<strong>and</strong> into the small of the stock with a flare.<br />
13.6.2. Spin Right Order. A three count movement starting at the position of port.<br />
13.6.2.1. With the right h<strong>and</strong>, reach up <strong>and</strong> grab the upper h<strong>and</strong> guard with a fist. Arm parallel<br />
to the ground.<br />
13.6.2.2. Spin the weapon one revolution in the vertical position clockwise using the right h<strong>and</strong>.<br />
While doing this, the weapon will move right. The left h<strong>and</strong> will guide the weapon <strong>and</strong> hold it<br />
pinned against the right forearm. No height should be lost during the movement.<br />
13.6.2.3. Using the right h<strong>and</strong>, bring the weapon straight down tot he right side of the body, to<br />
the position of attention. Use caution to butt slam on the heel of the weapon <strong>and</strong> not the toe. Pin<br />
the left h<strong>and</strong> to left leg.<br />
13.6.3. Flat Order. A six count movement starting from the position of right shoulder.<br />
13.6.3.1. Drop the right h<strong>and</strong> so the weapon starts to fall forward.<br />
13.6.3.2. Bring the left h<strong>and</strong> over in front of the body to the front of the right leg. Allow the<br />
weapon to fall into the left h<strong>and</strong>. The body may be turned to the right, however the head <strong>and</strong><br />
eyes remain forward. The right h<strong>and</strong> holds the butt of the weapon at ear level.<br />
13.6.3.3. Push the butt of the weapon down with the right h<strong>and</strong> <strong>and</strong> pin.<br />
13.6.3.4. The left h<strong>and</strong> rotates the weapon clockwise one time on the right side of the body.<br />
13.6.3.5. As the weapon completes the spin, stop it with the right h<strong>and</strong> on the upper h<strong>and</strong> guard<br />
in the vertical position.<br />
13.6.3.6. Drop the weapon to the position of attention using caution to butt slam on the heel of<br />
the stock.<br />
13.6.4. Kick up to side st<strong>and</strong>by. A three count movement starting at the position of attention.<br />
13.6.4.1. Extend the right foot in front of the toe of the weapon, kick the butt gently back <strong>and</strong><br />
extend the right h<strong>and</strong> forward tot he flare position.<br />
13.6.4.2. Close the heels of the feet to make the second count <strong>and</strong> bring the weapon in a half<br />
turn clockwise rotation.<br />
13.6.4.3. Turn the right wrist out away from the body <strong>and</strong> catch the weapon at the small of the<br />
stock. The weapon is in the horizontal position at belt level.<br />
95
13.6.5. Roll to right shoulder. A two count movement starting at side st<strong>and</strong>by on the right side<br />
of the body. H<strong>and</strong> position-- The left h<strong>and</strong> is near the recess, the right h<strong>and</strong> is on the upper h<strong>and</strong><br />
guard.<br />
13.6.5.1. Push down with the right h<strong>and</strong> <strong>and</strong> perform a twisting clockwise motion with the left<br />
wrist allowing the weapon to rotate to the shoulder, as the weapon starts to l<strong>and</strong> into the<br />
shoulder, grab the butt of the weapon with the right h<strong>and</strong>. As the right h<strong>and</strong> hits the stock,<br />
simultaneously flare the left h<strong>and</strong> at the bolt housing. Index <strong>and</strong> middle finger touching the<br />
corner. Arm at a slight angle.<br />
13.6.5.2. Cut sharply with your left arm to pin at left leg.<br />
13.6.6. Roll to left shoulder. A two count movement starting at side st<strong>and</strong>by on the left side of<br />
the body. H<strong>and</strong> Position-- The right h<strong>and</strong> is near the recess, the left h<strong>and</strong> is on the upper h<strong>and</strong><br />
guard.<br />
13.6.6.1. Push down with the left h<strong>and</strong> <strong>and</strong> perform a twisting counterclockwise motion with the<br />
right wrist allowing the weapon to rotate to the shoulder, as the weapon starts to l<strong>and</strong> into the<br />
shoulder, grab the butt of the weapon with the left h<strong>and</strong>. As the left h<strong>and</strong> hits the stock,<br />
simultaneously flare the right h<strong>and</strong> at the bolt housing. Index <strong>and</strong> middle fingers touching the<br />
corner. Arm at a slight angle.<br />
13.6.6.2. Cut sharply with your right arm to pin at right leg.<br />
13.6.7. Triple present exchange. A three count movement starting from the position of port.<br />
You need a partner facing you approximately two feet in front <strong>and</strong> facing you.<br />
13.6.7.1. Slap the weapon at port with the left h<strong>and</strong>.<br />
13.6.7.2. Slap the weapon with the left h<strong>and</strong>, then twist the weapon with the right h<strong>and</strong><br />
clockwise on quarter turn, sling facing away from body.<br />
13.6.7.3. With the right h<strong>and</strong>, place the weapon in your partners left h<strong>and</strong>, <strong>and</strong> receive their<br />
weapon with the left h<strong>and</strong>.<br />
13.6.7.4. With the left h<strong>and</strong> twist the weapon to the port position.<br />
13.6.8. Nine tap (firing sequence). A seventeen count movement starting from the position of<br />
right shoulder.<br />
13.6.8.1. Step forward with the left foot one half step.<br />
13.6.8.2. Drop the right h<strong>and</strong> so that the entire weapon is held by the right h<strong>and</strong>, grasping the<br />
butt of the weapon tightly, as the right foot comes forward.<br />
96
13.6.8.3. Move the right h<strong>and</strong> clockwise to twist the weapon to the port position allowing the<br />
weapon to fall to the left, the left h<strong>and</strong> stops the weapon at the port position .<br />
13.6.8.4. Holding the weapon with the left h<strong>and</strong>, move the right h<strong>and</strong> towards the butt of the<br />
weapon <strong>and</strong> tap the weapon to the left. The left wrist twists the weapon clockwise.<br />
13.6.8.5. While the weapon is rotating the right h<strong>and</strong> grabs the upper h<strong>and</strong> guard.<br />
13.6.8.6. The left h<strong>and</strong> then moves to support the weapon under the small of the stock. The<br />
weapon is horizontal sling facing up.<br />
13.6.8.7. Tap the top side of the upper h<strong>and</strong> guard with the right h<strong>and</strong> to start the rotation<br />
clockwise. Twist the left wrist.<br />
13.6.8.8. The right h<strong>and</strong> grabs the weapon at the recess <strong>and</strong> left h<strong>and</strong> moves to the upper h<strong>and</strong><br />
guard <strong>and</strong> tap down as the weapon comes to the horizontal position <strong>and</strong> the right wrist twists the<br />
weapon back to port counterclockwise.<br />
13.6.8.9. The left h<strong>and</strong> stops the weapon at port<br />
13.6.8.10. Place the right h<strong>and</strong> over the trigger housing <strong>and</strong> place the index finger on the safety.<br />
13.6.8.11. Click the safety off.<br />
13.6.8.12. Move the right h<strong>and</strong> to the small of the stock to support the weapon.<br />
13.6.8.13. Place the left h<strong>and</strong> on the operating rod in a fist.<br />
13.6.8.14. Pin the left h<strong>and</strong> to left leg.<br />
13.6.8.15. Slap back to port with the left h<strong>and</strong>.<br />
13.6.8.16. Raise the weapon <strong>and</strong> pull the trigger.<br />
13.6.8.17. Lower the weapon back to port.<br />
13.6.9. Inspection arms. A seven count movement starting at the position of attention. On the<br />
comm<strong>and</strong> of execution arms:<br />
13.6.9.1. Bring the weapon to port<br />
13.6.9.2. Once the right h<strong>and</strong> flares into the small of the stock, place the left h<strong>and</strong> on the<br />
operating rod.<br />
13.6.9.3. Charge the weapon by pushing down with the left h<strong>and</strong>. Make sure the bolt stays back.<br />
97
13.6.9.4. Pin the left h<strong>and</strong> to the left leg.<br />
13.6.9.5. Slap the weapon at port with the left h<strong>and</strong>.<br />
13.6.9.6. Supporting the weapon with the left h<strong>and</strong>, bring the right h<strong>and</strong> to the side of the recess,<br />
fingers flared.<br />
13.6.9.7. Drop the head looking at the chamber, <strong>and</strong> place the thumb of the right h<strong>and</strong> in the<br />
chamber while holding the operating rod back with heel of the h<strong>and</strong>.<br />
13.6.9.8. At the comm<strong>and</strong> of order arms:<br />
13.6.9.8.1. Simultaneously, release the operating rod with the right h<strong>and</strong>, making sure the thumb<br />
is clear of the chamber, <strong>and</strong> bring the right h<strong>and</strong> to a flare straight up. The head snaps back up.<br />
13.6.9.8.2. Bring the right h<strong>and</strong> back to the small of the stock, <strong>and</strong> pull the trigger.<br />
13.6.9.8.3. Flare the weapon.<br />
13.6.9.8.4. Cut to the position of attention.<br />
13.6.9.8.5. Spin port<br />
13.6.9.8.6. Fallout<br />
13.6.10. Neck roll. A three count movement starting at the position of left shoulder.<br />
13.6.10.1. Move left with the left h<strong>and</strong> so the weapon is on the back of the neck, <strong>and</strong> the sling is<br />
touching the neck. Grab the upper h<strong>and</strong> guard with the right h<strong>and</strong> as the weapon rotates around<br />
the neck.<br />
13.6.10.2. Pin the left h<strong>and</strong> as the right h<strong>and</strong> continues to rotate the weapon. The weapon stops<br />
in the horizontal position, barrel pointing forward, sling up.<br />
13.6.10.3. Bring the right h<strong>and</strong> down, the weapon flips over the shoulder <strong>and</strong> catches the<br />
weapon with the left h<strong>and</strong> under the small of the stock. The weapon is at side st<strong>and</strong>by.<br />
13.6.11. Slaw toss a four count movement starting at the position of port.<br />
13.6.11.1. Slap at port with the left h<strong>and</strong>.<br />
13.6.11.2. Rotate the weapon counterclockwise one half rotation. The left h<strong>and</strong> slaps the stock<br />
when the weapons barrel is pointing towards the ground.<br />
98
13.6.11.3. Using the left h<strong>and</strong>, rotate the weapon clockwise one time. Right h<strong>and</strong> pins. As the<br />
weapon completes the rotation, use the right h<strong>and</strong> to stop the weapon in the vertical position on<br />
the upper h<strong>and</strong> guard, palm up. Sling to the right, <strong>and</strong> barrel pointing down.<br />
13.6.11.4. Using the right h<strong>and</strong>, in a counterclockwise rotation, flip the weapon one revolution<br />
back into port. Catch it with the left h<strong>and</strong> on the upper portion of the stock <strong>and</strong> the right h<strong>and</strong> on<br />
the small of the stock.<br />
13.7. Advanced Drill Movements<br />
13.7.1. Double. A two count movement starting at right side st<strong>and</strong>by. The weapon is parallel to<br />
the ground, at belt level, the right h<strong>and</strong> is holding the upper h<strong>and</strong> guard, thumb on top, <strong>and</strong> the<br />
left h<strong>and</strong> is holding the stock at the small of the stock underneath the sling, behind the trigger<br />
housing, thumb on top. Head is tilted slightly looking down at the end of the butt on the weapon.<br />
13.7.1.1. To throw the weapon, push down with the right h<strong>and</strong> allowing the weapon to rotate in<br />
a clockwise direction, bring the weapon up with the left h<strong>and</strong> while twisting with the left wrist.<br />
The right <strong>and</strong> left h<strong>and</strong> will make an X . Release the weapon as the h<strong>and</strong>s cross. Throw the<br />
weapon up simultaneously.<br />
13.7.1.2. Looking at the weapon, after two rotations catch the weapon with the left h<strong>and</strong> on top<br />
of the small of the stock <strong>and</strong> the right h<strong>and</strong> underneath the upper h<strong>and</strong> guard. The head snaps<br />
forward once the weapon is caught.<br />
13.7.2. Vertical flip. A six count movement starting from the position of right shoulder.<br />
13.7.2.1. Drop the right h<strong>and</strong> so the weapon starts to fall forward.<br />
13.7.2.2. Bring the left h<strong>and</strong> over in front of the body to the front of the right leg. Allow the<br />
weapon to fall into the left h<strong>and</strong>. The body maybe turned to the right, however the head <strong>and</strong> eyes<br />
remain forward. The right h<strong>and</strong> holds onto the butt of the weapon at ear level.<br />
13.7.2.3. Push the butt of the weapon down with the right h<strong>and</strong> <strong>and</strong> pin.<br />
13.7.2.4. The left h<strong>and</strong> rotates the weapon clockwise one <strong>and</strong> a half times on the right side of the<br />
body.<br />
13.7.2.5. As the butt of the weapon comes around, tap the rear sight to cause the weapon to flip<br />
up in the same formation. Left h<strong>and</strong> pins.<br />
13.7.2.6. Catch the weapon on the upper h<strong>and</strong> guard immediately after the flip. Guide the<br />
weapon to the front of the body, belt level, sling facing up. Support the weapon with the left<br />
h<strong>and</strong> underneath the small of the stock.<br />
13.7.3. Double Spins. A seven count movement starting at port with the right h<strong>and</strong>, palm up,<br />
just underneath the trigger housing, <strong>and</strong> left h<strong>and</strong> on the upper h<strong>and</strong> guard palm facing away<br />
from you.<br />
99
13.7.3.1. With the left h<strong>and</strong> pull the weapon down while rotating the weapon with the right h<strong>and</strong><br />
in a counterclockwise rotation. The left h<strong>and</strong> pins to the left leg, while the right h<strong>and</strong> will rotate<br />
the weapon twice. The weapon hops in the h<strong>and</strong>.<br />
13.7.3.2. As the second rotation finishes, the left h<strong>and</strong> grabs the weapon slightly below the<br />
upper sling ring, while the right h<strong>and</strong> catches the weapon on the stock by the butt. The weapons<br />
barrel is facing towards the ground, sling to the right.<br />
13.7.3.3. Now, with the right h<strong>and</strong>, pull the weapon down to start the rotation <strong>and</strong> pin to the<br />
right leg. With the left h<strong>and</strong>, rotate the weapon in a clockwise rotation twice. When the weapon<br />
finishes the second rotation, the right h<strong>and</strong> catches the weapon slightly below the trigger housing<br />
<strong>and</strong> the left h<strong>and</strong> catches the weapon on the upper h<strong>and</strong> guard. You will now be at the same<br />
position you started in. Spreading the h<strong>and</strong>s enables you to control the weapon during the catch.<br />
The weapon starts <strong>and</strong> ends in a vertical position.<br />
13.7.3.4. Upon catching the weapon at the end of the second set of spins, snap the head to the<br />
left, then turn your body <strong>and</strong> complete the spins on the left side.<br />
13.7.3.5. When completed, upon catching the weapon at the end of the second set of spins, snap<br />
the head back to center <strong>and</strong> complete the spins again.<br />
13.7.3.6. When completed, upon catching the weapon at the end of the second set of spins, snap<br />
the head to the right, <strong>and</strong> complete the spins.<br />
13.7.3.7. On the right side, complete one set of spins, then complete two spins with the right<br />
h<strong>and</strong>, at this point the weapons barrel is pointing to the ground. Complete a flat order to the<br />
position of attention.<br />
13.7.4. Double comeback. A six count movement starting at the position of right shoulder.<br />
13.7.4.1. Drop the right h<strong>and</strong>, hold tightly to the butt of the weapon, <strong>and</strong> catch the weapon on<br />
the upper h<strong>and</strong> guard with the left h<strong>and</strong>, thumb at the b<strong>and</strong>. The left forearm is parallel to the<br />
ground.<br />
13.7.4.2. With the right h<strong>and</strong>, bring the weapon straight up <strong>and</strong> back slightly, guiding it with the<br />
left h<strong>and</strong>, toss <strong>and</strong> release the weapon when the right h<strong>and</strong> is near the right ear. The barrel of the<br />
weapon falls forward as the butt of the weapon is thrown. While looking at the weapon, pin the<br />
left h<strong>and</strong>. As the weapon rotates in a one half counterclockwise rotation so the barrel is pointing<br />
45 degrees toward the ground. Catch the weapon with the right h<strong>and</strong> slightly below the upper<br />
sling ring.<br />
13.7.4.3. As soon as your h<strong>and</strong> makes contact with the weapon, the head snaps back to the<br />
forward position. Bring the left h<strong>and</strong> to the upper h<strong>and</strong> guard as the weapon is brought into the<br />
right armpit. Barrel is facing towards the ground.<br />
100
13.7.4.4. Using both h<strong>and</strong>s, lift the weapon by the upper h<strong>and</strong> guard. Let the butt build<br />
momentum. Release the weapon when the h<strong>and</strong>s pass the right ear. Pin the left h<strong>and</strong>. The<br />
weapon completes two rotations in a clockwise direction on the right side of the body.<br />
13.7.4.5. Watch the weapon. As it completes the second rotation catch the weapon with the<br />
right h<strong>and</strong> on the upper h<strong>and</strong> guard. When the weapon is caught, the head snaps back forward.<br />
13.7.4.6. Bring the weapon into port.<br />
13.7.5. Self toss. A two count movement starting at the position of attention.<br />
13.7.5.1. Grab the upper h<strong>and</strong> guard with the right h<strong>and</strong>, <strong>and</strong> lift the weapon so that the right<br />
forearm is parallel to the ground. Grab the weapon with the left h<strong>and</strong> at the small of the stock.<br />
The weapon is at a slight angle. Head tilts down at a slight angle looking at the toe of the<br />
weapon.<br />
13.7.5.2. Looking at the weapon. Push down with the right h<strong>and</strong> while lifting <strong>and</strong> twisting the<br />
weapon in a clockwise rotation with the left h<strong>and</strong>. Throw the weapon high enough to catch it on<br />
the right h<strong>and</strong> at the upper h<strong>and</strong> guard after two rotations. After releasing the weapon from the<br />
right h<strong>and</strong>, pin it at the right leg. As you catch the weapon in the right h<strong>and</strong>, pin the left h<strong>and</strong>.<br />
Snap head back to front once the weapon is secure.<br />
13.7.5.3. The weapon may be brought to port following the movement.<br />
13.7.5.4. This movement can also be accomplished by starting at the position of attention <strong>and</strong><br />
kicking the weapon with the right heel to a flare, then bringing the weapon to the st<strong>and</strong>by<br />
position before throwing.<br />
13.7.6. Queen Ann. A three count movement starting at right shoulder. Performed as one fluid<br />
motion.<br />
13.7.6.1. Grasp the weapon firmly with the right h<strong>and</strong>, move the right h<strong>and</strong> towards the body<br />
until the weapon is in a vertical position, then toss the weapon, using the right h<strong>and</strong> straight up in<br />
the air. The butt of the weapon should rise no higher than the ear.<br />
13.7.6.2. Look at the weapon, simultaneously, as the weapon is dropping, the right h<strong>and</strong> will<br />
catch the weapon at the bolt housing behind the small of the stock. The left h<strong>and</strong> catches the<br />
weapon on the sling side near the upper sling ring. The butt of the weapon is on the outside of<br />
the right elbow. The left forearm is along the forehead, the right arm is pinned.<br />
13.7.6.3. With the left h<strong>and</strong> slap the weapon to start the rotation forward allowing it to rotate<br />
using the right h<strong>and</strong> to grasp it firmly on the small of the stock. The right h<strong>and</strong> controls the<br />
movement, the left h<strong>and</strong> guides the weapon until the upper h<strong>and</strong> guard rotates into the right<br />
armpit. While this motion is being performed, take a small step forward with the left foot <strong>and</strong> go<br />
down on the right knee. The left leg will make a 90 degree angle, the back will be straight in a<br />
vertical position, the weapon is pinned along the right leg, weapon remains in a vertical position<br />
101
also. When the right knee touches the ground the left h<strong>and</strong> pins, then move out across the body<br />
at flare hitting the chest, then aligning at neck level. Arm is parallel to the ground. Feet remain<br />
straight, aligned with the leg. The butt of the weapon remains approximately 3 inches off the<br />
ground.<br />
13.7.7. Wrist breaker. A six count movement starting at the position of attention. Although<br />
broken down in several steps the movement is performed in a fluid motion.<br />
13.7.7.1. Extend the right foot in front of the toe of the weapon, kick the butt gently back <strong>and</strong><br />
extend the right h<strong>and</strong> forward to the flare position. Right arm fully extended with the trigger<br />
housing at the right knee.<br />
13.7.7.2. While closing the heels of the feet, bring the right h<strong>and</strong> up <strong>and</strong> twist the weapon in a<br />
half turn clockwise rotation. It is important to bend your arm keeping the elbow pinned. Keep<br />
the same grip on the weapon. The right arm looks as if you are doing a waving motion from left<br />
to right. Follow through with the motion by then dropping the right h<strong>and</strong> so that the weapons<br />
barrel will be pointing towards the ground <strong>and</strong> the butt is by your shoulder. The weapon is on<br />
the outside of the arm sling facing forward.<br />
13.7.7.3. Using the momentum created by the weapon, allow it to continue to rotate by bringing<br />
the right h<strong>and</strong> up towards the shoulder.<br />
13.7.7.4. Once the right h<strong>and</strong> reaches the shoulder, release the weapon throwing it into the air.<br />
Caution: if you hold onto the weapon, you risk serious injury to your wrist.<br />
13.7.7.5. Allow the weapon to rotate one time, <strong>and</strong> with the right h<strong>and</strong> catch the weapon on the<br />
upper h<strong>and</strong> guard. The left h<strong>and</strong> remains pinned throughout the movement.<br />
13.7.7.6. The weapon may be brought to port following the movement. Note: if the weapon<br />
counters during the movement, simply flip the weapon into port similar to a spin port.<br />
13.7.8. Marine pitch out. A one count movement stating at the position of right shoulder.<br />
13.7.8.1. Holding tightly to the butt of the weapon with the right h<strong>and</strong>, bring the right h<strong>and</strong><br />
towards the chest until the weapon is in a vertical position. Then bring the right h<strong>and</strong> straight up<br />
allowing the weapon to pitch forward slightly, as this occurs, raise the right h<strong>and</strong> to the right ear<br />
<strong>and</strong> toss the weapon. The weapon rotates a half turn forward. Catch the weapon on the upper<br />
h<strong>and</strong> guard with the right h<strong>and</strong>, arm parallel to the ground, weapon in the vertical position, sling<br />
facing out. The left h<strong>and</strong> stays pinned throughout the entire movement.<br />
13.7.9. Air Force Pitch-out. A four count movement starting a right shoulder.<br />
13.7.9.1. Drop the right h<strong>and</strong>, hold tightly to the butt of the weapon, <strong>and</strong> catch the weapon on<br />
the upper h<strong>and</strong> guard with the left h<strong>and</strong>, thumb at the b<strong>and</strong>. The left forearm is parallel to the<br />
ground.<br />
102
13.7.9.2. With the right h<strong>and</strong>, bring the weapon straight up <strong>and</strong> back slightly, guiding it with the<br />
left h<strong>and</strong>, toss <strong>and</strong> release the weapon when the right h<strong>and</strong> is near the right ear. The barrel of the<br />
weapon will fall forward as the butt of the weapon is thrown. While looking at the weapon, pin<br />
the left h<strong>and</strong>. As the weapon rotates in a one half counterclockwise rotation so the barrel is<br />
pointing down. Catch the weapon with the right h<strong>and</strong> slightly below the upper sling ring.<br />
13.7.9.3. As soon as your h<strong>and</strong> makes contact with the weapon, the head snaps back to the<br />
forward position. Using the momentum of the weapon, complete two rotations in a<br />
counterclockwise direction on the right side of the body with the right h<strong>and</strong>.<br />
13.7.9.4. As the weapon completes the second rotation catch the weapon flat at belt level, the<br />
left h<strong>and</strong> on near the trigger housing on the sling <strong>and</strong> the right h<strong>and</strong> on top of the upper h<strong>and</strong><br />
guard. Head snaps to look at the butt of the weapon.<br />
13.7.10. Double roll to shoulder. A five count movement starting from the position of side<br />
st<strong>and</strong>by with your right forearm along the top of the weapon with the weapon at a 45 degree<br />
angle.<br />
13.7.10.1. Push down with the right h<strong>and</strong> <strong>and</strong> pin. Twist the left wrist in a clockwise rotation.<br />
Complete two rotations on the right side of the body. Head remains forward.<br />
13.7.10.2. As the weapon completes the second rotation, let it go with the left h<strong>and</strong> <strong>and</strong> bring the<br />
right h<strong>and</strong> to the upper h<strong>and</strong> guard to stop the weapon at the ear. The left h<strong>and</strong> stops the weapon<br />
on the small of the stock. The weapon is at a 45 degree angle.<br />
13.7.10.3. Using the left h<strong>and</strong> guide the weapon into the right shoulder. As this is happening,<br />
the right h<strong>and</strong> moves to the butt of the weapon.<br />
13.7.10.4. As soon as the right h<strong>and</strong> slaps the butt, flare the left h<strong>and</strong> at the bolt housing.<br />
13.7.10.5. Cut the left h<strong>and</strong> to left leg.<br />
13.7.11. Sling Inspection Toss. A two count movement starting at port arms.<br />
13.7.11.1. With the right h<strong>and</strong> on the small of the stock, twist the weapon in a counterclockwise<br />
turn while simultaneously rotating the weapon in a counterclockwise motion so that the barrel is<br />
facing the ground <strong>and</strong> the sling is to the left. The left h<strong>and</strong> remains on the upper h<strong>and</strong> guard <strong>and</strong><br />
twists so that the palm in facing in.<br />
13.7.11.2. Throw the weapon in a clockwise rotation by bringing the left h<strong>and</strong> up <strong>and</strong> the right<br />
h<strong>and</strong> down. The weapon rotates one <strong>and</strong> a half times. Catch the weapon in the vertical position<br />
with the left h<strong>and</strong> on the small of the stock <strong>and</strong> the right h<strong>and</strong> on the upper h<strong>and</strong> guard.<br />
13.7.12. Front double. An eight count movement starting at the position of port arms.<br />
13.7.12.1. Slap at port arms with the left h<strong>and</strong><br />
103
13.7.12.2. Flick the butt of the weapon into the heel of the right h<strong>and</strong> so the sling is facing the<br />
body. The left h<strong>and</strong> flares along the weapon, fingers do not go above the b<strong>and</strong>, forearm is<br />
touching the weapon. The weapon remains in front of the body <strong>and</strong> the right arm is fully<br />
extended. The b<strong>and</strong> is at chin level.<br />
13.7.12.3. While holding the weapon in the vertical position, the left h<strong>and</strong> pins to the left leg.<br />
13.7.12.4. With the right h<strong>and</strong>, allow the weapon to fall to the left in a counterclockwise<br />
rotation. Catch the weapon on the upper h<strong>and</strong> guard with the left h<strong>and</strong>. The weapon is again in<br />
the vertical position with the barrel facing the ground.<br />
13.7.12.5. Throw the weapon by pulling up with the left h<strong>and</strong> <strong>and</strong> pulling down with the right<br />
h<strong>and</strong>. Pin the right h<strong>and</strong> as soon as you release the weapon.<br />
13.7.12.6. The weapon rotates two times in a clockwise rotation. Catch the weapon flat in front<br />
of you at belt level. The left h<strong>and</strong> is on top of the upper h<strong>and</strong> guard <strong>and</strong> the right h<strong>and</strong> is near the<br />
trigger housing, underneath the weapon.<br />
13.7.12.7. Push down with the left h<strong>and</strong> <strong>and</strong> twist the right wrist to allow the weapon to rotate<br />
counterclockwise to port arms. Pin the left h<strong>and</strong> as you push down.<br />
13.7.12.8. As the weapon comes to port, stop it with the left h<strong>and</strong>.<br />
13.7.13. Front one <strong>and</strong> a half. A nine count movement starting at the position of port.<br />
13.7.13.1. Slap the weapon at port.<br />
13.7.13.2. Rotate the weapon counterclockwise one half rotation. The left h<strong>and</strong> slaps the stock<br />
when the weapons barrel in pointing towards the ground.<br />
13.7.13.3. Using the left h<strong>and</strong>, rotate the weapon clockwise one <strong>and</strong> a half times <strong>and</strong> pin the<br />
weapon to the left leg, barrel pointing down. Pin the right h<strong>and</strong>.<br />
13.7.13.4. Rotate the weapon to the horizontal position behind the back <strong>and</strong> reach around with<br />
the right h<strong>and</strong> to grab the upper h<strong>and</strong> guard. It is important not to change the grip on the upper<br />
h<strong>and</strong> guard. Now release the weapon from the left h<strong>and</strong> <strong>and</strong> allow the butt end of the weapon to<br />
fall. Pin the left h<strong>and</strong>.<br />
13.7.13.5. As the weapon is falling, bring the right h<strong>and</strong> to front of the body. The weapon<br />
swings out approximately one foot to the right.<br />
13.7.13.6. The weapon swings in towards the front of the body, as this happens, the right h<strong>and</strong> is<br />
twisted. Raise the right h<strong>and</strong> in front of the body <strong>and</strong> release the weapon approximately at belt<br />
level.<br />
13.7.13.7. The weapon rotates clockwise one <strong>and</strong> a half times.<br />
104
13.7.13.8. Catch the weapon flat in the horizontal position at belt level. Sling facing down,<br />
barrel pointing to the left. The left h<strong>and</strong> is on the top of the upper h<strong>and</strong> guard, <strong>and</strong> the right h<strong>and</strong><br />
is on the sling side of the small of the stock.<br />
13.7.13.9. Twist the weapon with the right wrist to rotate the weapon back to the position of<br />
port. Pin the left h<strong>and</strong> as it leaves the upper h<strong>and</strong> guard.<br />
13.7.14. Back drop. A three count movement starting from the position of left shoulder.<br />
13.7.14.1. Move left with the left h<strong>and</strong> so the weapon is on the back of the neck, <strong>and</strong> the sling is<br />
touching the neck.<br />
13.7.14.2. Release the weapon with the left h<strong>and</strong> <strong>and</strong> pin. As the weapon drops in the horizontal<br />
position, the right h<strong>and</strong> hooks back <strong>and</strong> catches it by the upper h<strong>and</strong> guard.<br />
13.7.14.3. Once secure in the right h<strong>and</strong>, bring the weapon into the side st<strong>and</strong>by position.<br />
13.7.15. Back stretch. A three count movement starting from the position of right shoulder.<br />
13.7.15.1. Bring the right h<strong>and</strong> to the right ear so the weapon falls over the shoulder.<br />
13.7.15.2. Reach behind with the left h<strong>and</strong> <strong>and</strong> grab the upper h<strong>and</strong> guard.<br />
13.7.15.3. After releasing the butt of the weapon, pin the right h<strong>and</strong>, <strong>and</strong> bring the weapon to<br />
side st<strong>and</strong>by to the left side. The left h<strong>and</strong> is on the upper h<strong>and</strong> guard <strong>and</strong> the right h<strong>and</strong> is<br />
underneath the small of the stock.<br />
13.7.16. Butt inspection. An eight count movement starting from the position of port.<br />
13.7.16.1. Slap at port with the left h<strong>and</strong>.<br />
13.7.16.2. Move the right h<strong>and</strong> to the butt of the weapon <strong>and</strong> flick the butt into the heel of the<br />
right h<strong>and</strong> so the sling is facing you. The weapon is in the vertical position <strong>and</strong> makes a quarter<br />
turn counterclockwise. The left h<strong>and</strong> flares along the weapon, fingers do not go above the b<strong>and</strong>,<br />
<strong>and</strong> forearm is touching the weapon.<br />
13.7.16.3. While holding the weapon in the vertical position, the left h<strong>and</strong> pins to the left leg.<br />
13.7.16.4. Allow the weapon to start to fall to the left, as this is happening, the right h<strong>and</strong> starts<br />
to twist the butt in a clockwise rotation. As the weapon drops it makes one turn in the right h<strong>and</strong><br />
so the sling in facing you. The right h<strong>and</strong> slides down the stock to the small of the stock <strong>and</strong> the<br />
left h<strong>and</strong> meets the stock at a flare. Fingers pointing up. At the same time the head snaps down<br />
to look at the butt of the weapon.<br />
13.7.16.5. Pin the left h<strong>and</strong>.<br />
105
13.7.16.6. Execute a three quarters turn in a clockwise rotation in the vertical position with the<br />
right h<strong>and</strong>. While this is happening, snap the head up, <strong>and</strong> catch the weapon with the left h<strong>and</strong><br />
on the lower h<strong>and</strong> guard at the retaining b<strong>and</strong>. The right h<strong>and</strong> moves to the left side of the upper<br />
h<strong>and</strong> guard palm up.<br />
13.7.16.7. Lift the right h<strong>and</strong> to flip the weapon, it makes one <strong>and</strong> a half rotation<br />
counterclockwise to the port position.<br />
13.7.16.8. Catch the weapon at port.<br />
13.8. Exchanges<br />
13.8.1. Marching set back. A five count movement starting at the position port.<br />
You need a partner to do this move positioned approximately two feet behind you.<br />
13.8.1.1. With the right h<strong>and</strong> grab the upper h<strong>and</strong> guard <strong>and</strong> flare the weapon by the right leg.<br />
13.8.1.2. Cut the left h<strong>and</strong> to a pin.<br />
13.8.1.3. Stepping off with the left foot, on the next right foot, bring the right h<strong>and</strong> back setting<br />
the weapon on the butt, slightly behind the heel of the right foot.<br />
13.8.1.4. As you step with the next left, release the weapon with the right h<strong>and</strong> from the upper<br />
h<strong>and</strong> guard. It is important to bring the right h<strong>and</strong> to the side of the leg <strong>and</strong> not push the weapon<br />
out. Let it fall backwards.<br />
13.8.1.5. The person behind as he/she steps on the next left, receives the weapon in the right<br />
h<strong>and</strong> on the upper h<strong>and</strong> guard. On the next right step, bring the weapon to port arms.<br />
13.8.2. Marching toss back. A six count movement starting from the position of attention.<br />
You need a partner behind you approximately two feet. This is done while marching.<br />
13.8.2.1. Stepping off with the left foot, grab the upper h<strong>and</strong> guard with the right h<strong>and</strong> <strong>and</strong> flare<br />
the weapon by the right leg.<br />
13.8.2.2. On the next right foot, remain at flare.<br />
13.8.2.3. On the next left foot, remain at flare.<br />
13.8.2.4. On the next right foot, bring the right h<strong>and</strong> back setting the weapon on the butt, Next<br />
to the heel of the right foot.<br />
13.8.2.5. As you step with the next left, lift the weapon with the right h<strong>and</strong> preparing to throw<br />
over the shoulder. Release the weapon with the right h<strong>and</strong> from the upper h<strong>and</strong> guard as the<br />
right h<strong>and</strong> passes the ear. The weapon does one revolution clockwise to the individual behind<br />
you.<br />
106
13.8.2.6. The person receiving the weapon catches the weapon on the upper h<strong>and</strong> guard with the<br />
right h<strong>and</strong>.<br />
13.8.3. Right shoulder exchange. A three count movement. starting a right shoulder. You<br />
need a partner for this movement positioned two feet in front <strong>and</strong> facing you. This exchange<br />
may be performed in a diamond formation.<br />
13.8.3.1. Holding onto the weapon tightly with the right h<strong>and</strong>, drop the right h<strong>and</strong> so the weapon<br />
falls forward towards your partners left shoulder. The left h<strong>and</strong> remains pinned.<br />
13.8.3.2. The person receiving the weapon catches the weapon on the upper h<strong>and</strong> guard with the<br />
left h<strong>and</strong>. The right h<strong>and</strong> remains pinned.<br />
13.8.3.3. With the left h<strong>and</strong>, bring the weapon into reverse port. See the reverse port<br />
explanation for movement.<br />
13.8.4. Triple present exchange. A three count movement starting from the position of port,<br />
arms. You need a partner two feet in front <strong>and</strong> facing you.<br />
13.8.4.1. Slap the weapon at port, arms with the left h<strong>and</strong>.<br />
13.8.4.2. Slap the weapon with the left h<strong>and</strong>, then twist the weapon with the right h<strong>and</strong><br />
clockwise on quarter turn, sling facing away from body.<br />
13.8.4.3. With the right h<strong>and</strong>, place the weapon in your partners left h<strong>and</strong>, <strong>and</strong> receive their<br />
weapon with the left h<strong>and</strong>.<br />
13.8.4.4. With the left h<strong>and</strong> twist the weapon to the port, arms position.<br />
13.8.5. Split exchange at port, arms. A six count movement starting at the position of port,<br />
arms. You need a partner for this, facing you, three steps away. This exchange is executed as<br />
members pass one another.<br />
13.8.5.1. Stepping off with the left foot, throw the weapon using your left h<strong>and</strong> into the right<br />
h<strong>and</strong>. The weapon is in the vertical position sling facing away. Once the weapon is in the right<br />
h<strong>and</strong>, pin the left h<strong>and</strong>.<br />
13.8.5.2. On the next right foot, keep the weapon in the vertical position, throw the weapon to<br />
the left h<strong>and</strong>, <strong>and</strong> pin the right h<strong>and</strong>.<br />
13.8.5.3. On the next left foot, throw the weapon to your partner. Turn slightly to the right to<br />
face the receiver.<br />
13.8.5.4. The receiver catches the weapon in the right h<strong>and</strong> in the vertical position. Left h<strong>and</strong><br />
pinned.<br />
107
13.8.5.5. While continuing to march, flip the weapon into port, arms with the right h<strong>and</strong>. When<br />
the left h<strong>and</strong> catches the weapon, the right h<strong>and</strong> flares along the upper h<strong>and</strong> guard, fore arm is<br />
along the side of the weapon.<br />
13.8.5.6. Flare the right h<strong>and</strong> into the port, arms position.<br />
13.8.6. Underh<strong>and</strong> toss. A five count movement starting at the position of attention. You<br />
need a partner for this movement approximately positioned five feet in front <strong>and</strong> facing you.<br />
13.8.6.1. Grab the upper h<strong>and</strong> guard with the right h<strong>and</strong>, extend your arm fully allowing it to act<br />
as a pendulum , extend the right foot in front of the toe of the weapon, kick the butt back hard<br />
enough to allow the weapon to swing behind you approximately two feet.<br />
13.8.6.2. As the weapon swings forward, release for the throw as if you were shaking someone’s<br />
h<strong>and</strong>. The weapon makes one full rotation to your partner. After releasing, pin the right h<strong>and</strong>.<br />
The left h<strong>and</strong> remains pin, until catching your partners weapon.<br />
13.8.6.3. The person receiving the toss catches the weapon slightly below the upper sling ring<br />
<strong>and</strong> rotate the weapon until the barrel is pointing down. Then pin the weapon to the left leg.<br />
13.8.6.4. Using the left h<strong>and</strong>, move the weapon in a counterclockwise rotation behind the back,<br />
so the barrel is pointing to the right, <strong>and</strong> the sling is facing towards the ground. The right h<strong>and</strong><br />
catches the weapon on the upper h<strong>and</strong> guard with a fist.<br />
13.8.6.5. Release the weapon with the left h<strong>and</strong> <strong>and</strong> pin, the right h<strong>and</strong> brings the weapon to the<br />
side st<strong>and</strong>by position, bring the left h<strong>and</strong> to the right side of the body to support the weapon<br />
slightly behind the trigger housing.<br />
13.8.7. Overhead toss. A four count movement starting at the position of right shoulder. You<br />
need a partner for this movement facing you approximately six feet away.<br />
13.8.7.1. Drop the right h<strong>and</strong>, hold tightly to the butt of the weapon, <strong>and</strong> catch the weapon on<br />
the upper h<strong>and</strong> guard with the left h<strong>and</strong>, thumb wrapping around the b<strong>and</strong>. The left forearm is<br />
parallel to the ground.<br />
13.8.7.2. With the right h<strong>and</strong>, bring the weapon straight up <strong>and</strong> forward slightly, guiding it with<br />
the left h<strong>and</strong>, throw the weapon <strong>and</strong> release flick the right h<strong>and</strong> back towards the ear to flip the<br />
weapon to your partner. As the weapon rotates once, pin the right h<strong>and</strong>.<br />
13.8.7.3. The person catching the weapon will do so with the left h<strong>and</strong> on the upper h<strong>and</strong> guard.<br />
13.8.7.4. Once the weapon is caught, bring the weapon into the port, arms position.<br />
13.8.8. Mini under. A six movement starting at the position of attention. You need a partner<br />
facing you approximately two feet in front of you.<br />
108
13.8.8.1. Grab the upper h<strong>and</strong> guard with the right h<strong>and</strong>, extend your arm fully allowing it to act<br />
as a pendulum, extend the right foot in front of the toe of the weapon, kick the butt back hard<br />
enough to allow the weapon to swing behind you approximately one foot.<br />
13.8.8.2. As the weapon swings forward, raise the right arm slightly. Release for the throw as<br />
the right h<strong>and</strong> is rising past belt level. The weapon makes a half rotation to your partner. After<br />
releasing, pin the right h<strong>and</strong>. The left h<strong>and</strong> remains pinned, until catching your partners weapon.<br />
13.8.8.3. The person receiving the weapon catches the weapon on the upper h<strong>and</strong> guard with the<br />
left h<strong>and</strong>. The weapon is in the vertical position, barrel pointing down.<br />
13.8.8.4. Once caught, allow the weapon to fall to the right, sling down, <strong>and</strong> catch with the right<br />
h<strong>and</strong> near the trigger housing. Weapon is in the horizontal position at belt level.<br />
13.8.8.5. Push down with the left h<strong>and</strong> <strong>and</strong> twist the right wrist to allow the weapon to rotate<br />
counterclockwise to port arms. Pin the left h<strong>and</strong> as you push down.<br />
13.8.8.6. As the weapon comes to port, arms, stop it with the left h<strong>and</strong>.<br />
13.8.9. Back to back toss. A one count movement starting at the position of attention. You<br />
need a partner. You have your back to your partner <strong>and</strong> he will be approximately six feet behind<br />
you.<br />
13.8.9.1. Grab the upper h<strong>and</strong> guard with the right h<strong>and</strong>, extend your arm fully allowing it to act<br />
as a pendulum , extend the right foot in front of the toe of the weapon, kick the butt back hard<br />
enough to allow the weapon to swing behind you approximately two feet.<br />
13.8.9.2. As the weapon swings forward, lift it keeping your arm extended. Bend the right<br />
elbow slightly as you bring the right h<strong>and</strong> near the right ear. The weapon should be near the<br />
vertical position, barrel pointing the ground. Release for the throw as the right h<strong>and</strong> passes the<br />
right ear. Ensure the right h<strong>and</strong> is turned out so the weapon doesn’t go to the inside of the person<br />
receiving it. The weapon makes one full rotation to your partner. After releasing, pin the right<br />
h<strong>and</strong>.<br />
13.8.9.3. The person receiving the toss catches the weapon with the right h<strong>and</strong> on the upper<br />
h<strong>and</strong> guard.<br />
13.8.9.4. Bring the weapon into the port, arms position.<br />
109
14.1. Flag History<br />
Chapter 14<br />
HISTORY AND TRADITIONS<br />
14.1.1. Just as our country received its birthright from people of many l<strong>and</strong>s, so did the stars <strong>and</strong><br />
stripes rise from several origins. The stars <strong>and</strong> stripes are symbols of heavens <strong>and</strong> the divine<br />
goal to which man has aspired since the beginning of time. The stripes are symbolic of the rays<br />
of light emanating from the sun.<br />
14.1.2. Both have been represented on st<strong>and</strong>ards of nations, from banners of ancient Egypt <strong>and</strong><br />
Babylon to the 12 stared flag of the Spanish Conquistadors under Cortez. Continuing in favor,<br />
they spread to striped st<strong>and</strong>ards of Holl<strong>and</strong> <strong>and</strong> West India company in the 17th Century <strong>and</strong> to<br />
the present patterns of stars <strong>and</strong> stripes on flags of several nations of Europe, Asia, Africa, <strong>and</strong><br />
the Americas.<br />
14.1.3. Many of the flags created by our forefathers were symbols of their struggles with the<br />
wilderness of new l<strong>and</strong>s. Beavers, pine trees, rattlesnakes, <strong>and</strong> anchors are some examples used<br />
on the flags created by our forefathers with mottos such as: hope, liberty, appeals to heaven, or<br />
don’t tread on me.<br />
14.1.4. St<strong>and</strong>ardization became necessary as the colonies became closer <strong>and</strong> the revolution<br />
grew.<br />
14.1.5. On December 2, 1775 the Continental Congress approved a flag design to be flown by<br />
ships departing to intercept British supply vessels. The flag was first hoisted on the Alfred at<br />
Philadelphia by Lt. John Paul Jones. The flag had 13 red <strong>and</strong> white stripes <strong>and</strong> a (canton) with<br />
the British Union Jack with the St. Ge<strong>org</strong>e’s <strong>and</strong> St. Andrew crossed on top. It was called the<br />
Continental Flag <strong>and</strong> later the Gr<strong>and</strong> Union. It soon became inappropriate so they thought of a<br />
new idea for a flag.<br />
14.1.6. An act of Congress established the Stars <strong>and</strong> Stripes on June 14, 1777. They stated that<br />
the 13 stars represented a “new constellation” on a union of blue. Stars <strong>and</strong> stripes were added<br />
over the years, but would get too big by adding stars <strong>and</strong> stripes for every added state. So, Capt.<br />
Samuel C. Reid, Comm<strong>and</strong>er of the General Armstrong in the War of 1812 <strong>and</strong> Peter Waldone<br />
suggested to Congress that they should have a flag with 13 stripes for the 13 original colonies<br />
<strong>and</strong> just add a star for every new state on the blue union. Congress approved the idea on April<br />
18, 1818. The flag would have 13 alternating red <strong>and</strong> white stripes, 7 red <strong>and</strong> 6 white, for the 13<br />
original colonies <strong>and</strong> a new star would be added for each new state on July 4 following it’s<br />
admission. The next flag made after it was passed <strong>and</strong> had twenty stars. Stars were added over<br />
the years <strong>and</strong> the union began to fill. Then on July 4, 1960 we were flying our present flag with<br />
the admission of Hawaii as our 50th state.<br />
14.1.7. Traditional customs <strong>and</strong> practices of displaying our flag <strong>and</strong> ensuring that it is properly<br />
honored were gathered by veterans <strong>and</strong> other patriotic <strong>org</strong>anizations over 50 years ago. These<br />
110
served as a voluntary guide until World War II when Congress prepared a formal code of flag<br />
etiquette to assure uniform practices throughout the nation.<br />
In a joint resolution by both Houses in the 77th Congress, the Code became Public Law 829-77<br />
on December 22, (1947). It was a guide for citizens who were not required to conform to the<br />
regulations of the armed forces or other branches of the government. The military services <strong>and</strong><br />
the Department of Defense (DoD) have instructions, regulations, <strong>and</strong> manuals prescribing the use<br />
<strong>and</strong> display of the flag. Examples include DoD Instruction #1005.6, Half-staffing of the<br />
American Flag.<br />
14.1.8. When our flag is raised it should be raised briskly. When lowered, it should be lowered<br />
ceremoniously. The same ceremonious respect should be used when folding our flag. By<br />
folding our flag with dignity <strong>and</strong> honor, we not only show our respect to our flag but patriotism<br />
to our country.<br />
14.1.9. Webster’s dictionary definition of a flag is: A piece of fabric displayed to identify a<br />
nation, group of persons, or to serve as a signal. The meaning derived from the design of our<br />
nations flag carries many traditions.<br />
14.1.9.1. White stars on a blue field; the heavens, calm <strong>and</strong> serene, as it can be filled with stars.<br />
14.1.9.2. The red <strong>and</strong> white stripes; rays of light reaching down from the sun to gently caress<br />
you <strong>and</strong> I.<br />
14.1.10. The description of the colors of our nation’s flag can carry more detail.<br />
14.1.10.1. Red; blood, pain, rage, courage, warning<br />
14.1.10.2. White; purity, hope, life, <strong>and</strong> color<br />
14.1.10.3. Blue; calm, serene, true, patriotic, uniform<br />
14.1.11. Now that we have discussed a few ideas about the origins <strong>and</strong> meanings of the color’s<br />
of our flag. It is safe to assume that courage is derived from the red stripes representing the<br />
blood of those lives lost to defend <strong>and</strong> protect our way of life <strong>and</strong> the rage we all feel when our<br />
feeling of freedom is possibly compromised. Freedom is derived from the white stars on the<br />
blue field representing a sky free from fire, flack, <strong>and</strong> oppression. Peace is derived from the<br />
white stripes representing purity in every form that we try to preserve.<br />
14.2. Changes in Flags.<br />
14.2.1. In 1912, New Mexico <strong>and</strong> Arizona were admitted to the Union to increase the number of<br />
stars to 48, the number remained that way for more than 46 years <strong>and</strong> two world wars. Finally,<br />
in 1959 Alaska was admitted into the Union bringing the number to 49. Our present flag came to<br />
be in 1960 with the acceptance of Hawaii into the Union, our 50th state. From the first flag to<br />
our present, 27 changes were made to finalize the combination of 50 white stars on a blue field<br />
<strong>and</strong> 7 red <strong>and</strong> 6 white stripes.<br />
111
14.3. Flags On Graves.<br />
14.3.1. The flags on graves we display on Memorial Day was started by Mrs. Laura D.<br />
Richardson of Knoxville, Tennessee. Mrs. Richardson was the Chairperson of a committee of 4<br />
women to obtain flowers for decorating the three thous<strong>and</strong> graves in the national cemetery of<br />
Knoxville. Unfortunately, the flowers were unavailable or out-of-season, so a substitute was<br />
added. One day she saw some flags in the store window <strong>and</strong> got an instant idea. She purchased<br />
the flags <strong>and</strong> persuaded the local lumber mill to provide the wood for the tiny flagpoles <strong>and</strong> on<br />
May 30, 1874 we saw the flags in a national cemetery for the first time.<br />
14.4. Flags Covering Caskets.<br />
14.4.1. The custom of covering the casket with a flag believed to have occurred during the pre-<br />
Civil War, Civil War days when on the battlefield caskets were not available. The flag was<br />
wrapped around the dead soldier’s body forming a makeshift pall in which he could be buried.<br />
The word pall can mean different things depending on where you look. For example: A cloth<br />
often of velvet for spreading over a coffin, bier, or tomb (American College Dictionary) or<br />
denotes the flag held at waist level, stretched taunt <strong>and</strong> kept even at all points while being held.<br />
Later, this custom assumed a deeper significance. The position of the blue field is reversed to<br />
indicate mourning with the blue field on the right as the flag faces the coffin. It may be said that<br />
the flag is embracing the deceased who in life has served the flag. Today, the American Flag<br />
that covers the casket symbolizes the decedents service in the armed forces of the United States<br />
of America.<br />
14.5. Flag Position (Open Casket).<br />
14.5.1. It is customary to drape the flag on the casket over the part of the cover, which is usually<br />
left on the casket during the period that the body is being viewed. The flag is placed in the same<br />
position as when it is used to cover the casket (union at the head over the left shoulder) union in<br />
full view. The stripes should be folded under so the flag will not hang excessively at the foot.<br />
Some interesting trivia pertaining to flags <strong>and</strong> burials is that it is not improper to bury a war<br />
veteran with a small flag or should it be requested, it is proper for a veteran to be buried with his<br />
body wrapped in the flag. Additionally, the story of Betsy Ross <strong>and</strong> the first American Flag is<br />
very popular but no where in the history books is it supported by fact.<br />
14.6. Folding the Flag.<br />
14.6.1. Totally, the flag is folded in two parts reminding us of 2 parts of life; our birth <strong>and</strong> death<br />
<strong>and</strong> our life here <strong>and</strong> hereafter. The red <strong>and</strong> white stripes interchange throughout our flag<br />
reminding us; in the red, of the blood <strong>and</strong> hardships of life <strong>and</strong> in the white, of the purity <strong>and</strong><br />
goodness of life. Every life has both red <strong>and</strong> white. The flag is carefully folded into the shape of<br />
the tri-cornered hat, reminiscent of the hats worn by the soldiers who fought <strong>and</strong> won the<br />
revolution for American independence. The three fold also reminds Christians of the 3-in-1 of<br />
the Trinity: Father, Son, <strong>and</strong> Holy Spirit. The red <strong>and</strong> white are soon folded <strong>and</strong> only blue <strong>and</strong><br />
the stars are seen, reminding us of heaven. When our life of red <strong>and</strong> white is over, may only<br />
heaven remain?<br />
112
14.7. Disposal of the Flag<br />
14.7.1. When the National Flag is worn out, it should be disposed of with due reverence.<br />
According to approved custom, the union is first cut from the flag then the two pieces, which are<br />
no longer forming a flag, are burned privately <strong>and</strong> without ceremony.<br />
14.8. Half Staff or Mast<br />
14.8.1. Half-staff or mast was <strong>and</strong> still is a naval custom to (honor) the flag in salute, respect or<br />
as a sign of distress. In the early times it was a custom to fly the victors colors over the defeated<br />
enemy <strong>and</strong> to run down the enemy’s colors for that purpose. Thus lowering the flag to half-staff<br />
during a military funeral symbolizes the victory of the spiritual over the temporal. Where flags<br />
cannot be flown at half-staff or mast, they should have a black streamer from the spearhead<br />
halfway down the flag. Flags hung horizontally or perpendicular should bear a black bunting<br />
border of appropriate width.<br />
14.9. Funerals<br />
14.9.1. Funerals are ceremonies connected with the disposition of the body of a dead person.<br />
Military funeral ceremonies are based on a few simple customs <strong>and</strong> traditions that developed<br />
through the years. Some elements of the funeral ceremony are based on old expedient s used<br />
long ago on the battlefield. The ceremony demonstrated our nations recognition of the debt it<br />
owes the services <strong>and</strong> sacrifices of members of the armed forces.<br />
14.9.2. There are three general classifications for funerals:<br />
14.9.2.1. A funeral service with a chapel service, funeral procession <strong>and</strong> graveside ceremony.<br />
14.9.2.2. A funeral service without a chapel service but with a procession at the mouth of the<br />
cemetery to gravesite <strong>and</strong> then a graveside ceremony.<br />
14.9.2.3. A funeral service with a graveside ceremony only.<br />
14.10 Details within a Funeral<br />
14.10.1. Pallbearers escort the body of the deceased safely to the place of internment.<br />
14.10.2. Firing Party pay final tribute to the deceased with the firing of three rounds of seven<br />
volleys.<br />
14.10.2.1. The firing of the three rounds of seven volleys dates it’s origins back to the 14th<br />
century when firearms began to appear on the battlefield. Mercenary b<strong>and</strong>s (professional<br />
soldiers) grew in Switzerl<strong>and</strong>, Italy, <strong>and</strong> Germany <strong>and</strong> they accepted contracts to fight for or<br />
against anyone. They varied in size from tens to hundreds to thous<strong>and</strong>s. Their symbol of<br />
corporate existence was flags or colors. They respected them very much, especially the German<br />
b<strong>and</strong>s. We derive our reverence for colors from the Germans who fired three volleys in the name<br />
113
of the Trinity over the dead. Ancient beliefs say that the three volleys were used to scare away<br />
the evil sprits. Other sources say that in the early days of warfare, firing of the three volleys was<br />
a custom of opposing armies to declare a truce so that each could clear its dead from the<br />
battlefield. Also, the volleys fired three times was a signal that the burial ceremony was finished<br />
<strong>and</strong> it invited the enemy to join in battle once again.<br />
14.10.3. Colors bears the national colors <strong>and</strong> service colors of the deceased. Colors traces its<br />
beginnings back to the early Roman era. The early Roman armies were comprised of<br />
approximately 120 men called maniples, meaning h<strong>and</strong>ful. They used h<strong>and</strong>fuls of straw tied<br />
around the end of a pole as a rallying point in battle. Later, they re<strong>org</strong>anized themselves into<br />
cohorts (three maniples). The straw st<strong>and</strong>ard was then replaced by symbols such as bears,<br />
globes, <strong>and</strong> dragons. Each legion had an eagle st<strong>and</strong>ard carried by knights <strong>and</strong> was considered to<br />
be sacred. The cohorts eventually evolved into using a square piece of cloth with their own<br />
device embroidered on it. At the beginning of the 17th Century, when the regiment system was<br />
started. Each regiment had a color. That is when colored st<strong>and</strong>ards were used as a means of<br />
battlefield identifications. This is the symbolism used for the colors detail bearing the deceased<br />
service members national <strong>and</strong> service colors.<br />
14.10.4. The slow cadence of the modern funerals is dictated by solemn music prescribed for<br />
funeral march. The slow march arose from the practice of using heavy artillery wagons to<br />
transport the remains of the deceased to the grave. The slow march custom arose during the<br />
reign of Henry The VIII. Drummers marched behind the wagons <strong>and</strong> beat what was known as<br />
Dede Sounde.<br />
14.11. Taps<br />
14.11.1. Originally, the American Army used the French L’Extinction Des Feux (Lights Out) for<br />
Taps. It was said to be Napoleon’s favorite but it did not suit General Daniel Butterfield. Not<br />
knowing a note of music, General Butterfield decided to put something together more suited for<br />
signaling the end of the day’s activity. With the help of the brigade bugler, Oliver W. Norton,<br />
General Butterfield created Taps one night in July 1862. Taps was made official throughout the<br />
Army in 1932.<br />
14.11.2. Taps was used in connection with military funerals during the same campaign. A<br />
soldier was buried at a time when Capt. Tidball’s battery occupied an advanced position<br />
concealed in the woods. It was unsafe to fire the customary three volleys over the grave. So,<br />
Capt. Tidball thought that Taps would be the most appropriate ceremony that could be<br />
substituted. The custom went up through the chain-of-comm<strong>and</strong> of the Army <strong>and</strong> was finally<br />
confirmed by orders.<br />
14.11.3. Taps over the grave today marks the beginning of the long last sleep <strong>and</strong> expresses<br />
hope <strong>and</strong> confidence in an ultimate reveille to come.<br />
114
14.11.4. Words for Taps<br />
14.12. Salutes<br />
Fades the light,<br />
<strong>and</strong> afar<br />
Goeth day<br />
Cometh night;<br />
<strong>and</strong> a star<br />
Leadeth all,<br />
Speedeth all<br />
To their rest.<br />
Day is done,<br />
Gone the sun,<br />
From the hills,<br />
From the lake,<br />
From the sky,<br />
All is well,<br />
Safely rest,<br />
God is nigh<br />
14.12.1. There are several meanings for the origins of the salute. One being that during the days<br />
of chivalry, knights in (vail) raised their visors to friends for identification purposes. The junior<br />
was required to make the first gesture. Another belief is in the early days in B<strong>org</strong>ia,<br />
assassination by dagger were not uncommon. It was customary for men to approach each other<br />
with raised h<strong>and</strong>s, palms to the front to prove that there was no dagger hidden. Lastly, in the<br />
younger days of the military <strong>org</strong>anization the junior uncovered when meeting or addressing the<br />
senior. Gradually the act of uncovering was simplified by touching the cap <strong>and</strong> finally our<br />
present day salute which means, “I greet you”.<br />
14.12.2. Presenting arms with a weapon was a token of submitting your weapon to the person<br />
being honored. It has been traced back to 1660, when Charles II returned to Engl<strong>and</strong> to claim the<br />
throne. The sword salute is said to have started back in the days when crusaders kissed the hilt<br />
(cross) before battle <strong>and</strong> lowered the point toward the ground as a symbol of trust in putting<br />
down your guard.<br />
14.13. Uniforms<br />
14.13.1. Uniforms have only been worn for the past three hundred years. The oldest uniform in<br />
existence is worn by the papel guard of the Vatican, which were said to have been designed by<br />
Michael Angelo. The main reason for uniforms are the early years was to identify friend from<br />
foe.<br />
14.13.2. The aiguillette was the mark of an aide de camp. The French definition of aiguillette is<br />
a metal tipped throng. The aiguillette distinguishes the officer aide <strong>and</strong> the attaches’. Its origins<br />
have several beliefs, one being that it was used as a string to tie the knight’s horses up. Another<br />
115
elief is that the metal tipped throng on the string was used to lace knights into their armor.<br />
Finally, the string with pencil on it was used for writing down orders.<br />
14.13.3. The fourragere (foo-ra-zher) is a unit citation. It is a symbol of a hangman’s rope <strong>and</strong><br />
nail. It is believed that a unit was threatened that they would all be hung if they failed to do well<br />
in a battle. During, the War of 1870, the jails were emptied so they could defend the city. The<br />
convicts wrapped the hangman’s rope around their shoulder as part of an improvised insignia.<br />
The results of their efforts allowed the men to keep their lives <strong>and</strong> insignia.<br />
14.14. Medals <strong>and</strong> Decorations<br />
14.14.1. One feature of the human anatomy is that by carrying a shield on the left arm, leaving<br />
the right h<strong>and</strong> free for a weapon. The heart is afforded maximum protection by the shield.<br />
Southpaws (left-h<strong>and</strong>ed) did their best. Considerations for protection led crusaders for<br />
protection to wear small decorations over their heart. Could this be why we also wear our<br />
military decorations on the left?<br />
14.15. The Pledge of Allegiance<br />
14.15.1. The Pledge of Allegiance was written by Mr. Francis Bellamy of Rome, New York. It<br />
was first published on September 8, 1892. In connection with the National Public Schools<br />
celebration of Columbus Day by the Youth’s Companion. The first change to the pledge was<br />
made on June 14, 1923. It changed the words from my flag to the flag because of the foreign<br />
born adults <strong>and</strong> children. It was belief that they would believe that they were pledging allegiance<br />
to the flag of their native l<strong>and</strong>. The second change came on June 14, 1954 when President<br />
Dwight D. Eisenhower amended the language by adding the words under God.<br />
14.15.2. Proper h<strong>and</strong> position during the Pledge of Allegiance is placing the right h<strong>and</strong> over the<br />
heart until the words “to the flag”. Then extend the arm with the palm upward toward the flag<br />
until the pledge is complete. The salute was discontinued because it resembled the Nazi-Fascist<br />
salute. The difference only being that the Nazi-Fascist saluted with the palm facing down.<br />
Although it is not directed in the Code <strong>and</strong> is not considered bad form to omit the right h<strong>and</strong><br />
being placed over the heart. Many schools prefer the gesture <strong>and</strong> local procedures should<br />
therefore, be observed in this regard. In uniform, it is appropriate to remain silent <strong>and</strong> render the<br />
military salute if outdoors. A male not in uniform should remove any headgear (if worn) <strong>and</strong><br />
place the right h<strong>and</strong> over the heart <strong>and</strong> recite the pledge.<br />
116
14.16. Base <strong>Honor</strong> <strong>Guard</strong> Creed<br />
H<strong>and</strong>picked to serve as a member of the (name of base) <strong>Honor</strong> <strong>Guard</strong>,<br />
my st<strong>and</strong>ards of conduct <strong>and</strong> level of professionalism must be above reproach,<br />
for I represent all others in my service.<br />
Others earned the right for me to wear the ceremonial uniform, one that is honored in rich<br />
tradition <strong>and</strong> history. I will honor their memory by wearing it properly <strong>and</strong> proudly.<br />
Never will I allow my performance to be dictated by the type of ceremony,<br />
severity of the temperature, or size of the crowd. I will remain superbly<br />
conditioned to perfect all movement throughout every drill <strong>and</strong> ceremony.<br />
Obligated by my oath I am constantly driven to excel by a deep devotion to duty <strong>and</strong> a strong<br />
sense of dedication.<br />
Representing every member, past <strong>and</strong> present, of the United States Air Force, I<br />
vow to st<strong>and</strong> sharp, crisp, <strong>and</strong> motionless, for I am a ceremonial guardsman.<br />
117
15.1. General Information<br />
Chapter 15<br />
OIC/NCOIC RESPONSIBILITIES ON FHF/SHF<br />
15.1.1. All FHF/SHF has a requirement for an OIC/NCOIC position.<br />
15.1.2. During the movement of the casket, the OIC/NCOIC presents arms.<br />
15.1.3. As the casket is placed on the lowering device, the OIC/NCOIC orders arms.<br />
15.1.4. Has responsibility of knowledge on all elements <strong>and</strong> sequence.<br />
15.1.5. Presents the folded flag to the next of kin.<br />
15.1.6. Overall responsibility of the whole ceremony<br />
15.2. Pre-ceremony<br />
15.2.1. Checks gravesite with NPB/NFP/NCT (approximately one hour before start time).<br />
15.2.2. Check with funeral director for route of hearse <strong>and</strong> ensuring the ceremony is on time.<br />
15.2.3. Determine where pallbearers need you to stop the hearse. You will have your back to<br />
the gravesite.<br />
15.3. Arrival of Ceremony<br />
15.3.1. From the position determined by pallbearers, remain at the position of st<strong>and</strong> at ease.<br />
15.3.2. Take the comm<strong>and</strong> of Bearers, ATTENTION given by the NPB.<br />
15.3.3. As hearse approaches salute, when it passes drop salute.<br />
15.3.3.1. Ensure the hearse stops where needed, this ensures the pallbearers have the shortest<br />
route possible.<br />
15.3.4. Communicate with the funeral director/chaplain etc.<br />
15.3.4.1. Determine who the next of kin or the recipient of the flag will be.<br />
15.3.4.2. Let the funeral director/chaplain etc. know the sequence of events for the ceremony.<br />
This should ensure that the ceremony runs smooth without confusion.<br />
118
15.3.4.3. Tell the funeral director to ask the family to rise for military honors when it is time for<br />
honors.<br />
15.3.4.4. Tell the funeral director to let you know when the ceremony can begin so you can<br />
signal the pallbearers.<br />
15.3.4.5. If the procession is large, go to the position of st<strong>and</strong> at ease. This signals the<br />
pallbearers to go to st<strong>and</strong> at, ease.<br />
15.3.4.6. Ensure that the casket is in the hearse properly, flag properly draped etc. If anything is<br />
needed to fix, ask the driver of the hearse or funeral director to fix it. DO NOT TOUCH<br />
ANYTHING unless given permission.<br />
15.4. Ceremony<br />
15.4.1. When given the cue by the funeral director, give the comm<strong>and</strong> of SECURE to the<br />
pallbearers. When giving the comm<strong>and</strong>, remember to come to the position of attention.<br />
15.4.2. When the pallbearers have pulled the casket out render h<strong>and</strong> salute.<br />
15.4.3. After pallbearers execute “turning steps”, execute a facing movement in the appropriate<br />
direction <strong>and</strong> render a h<strong>and</strong> salute.<br />
15.4.4. When casket passes, order arms <strong>and</strong> step off with both arms suspended following the<br />
casket. Ensure that you stay in step with the pallbearer team. You should be approximately four<br />
to six paces away from the rear of the casket.<br />
15.4.5. Break off of the pallbearers <strong>and</strong> march to the foot end of the grave. Make sure you leave<br />
enough room for the pallbearers to fold the flag at tabletop. Present arms until the casket is set<br />
down on the lowering device. Order arms once it is down.<br />
15.4.6. On a SHF, pallbearers will fold the flag immediately upon the seating of the immediate<br />
family.<br />
15.4.6.1. Once the Dressing sequence is complete, take a left step towards the NPB. As NPB<br />
lowers the flag down to you, retrieve it with the left <strong>and</strong> on top, right h<strong>and</strong> on the bottom.<br />
15.4.6.2. After NPB orders arms, bring the flag to your chest, placing both h<strong>and</strong>s on the flag to<br />
press it against your chest.<br />
15.4.6.3. Ensure that the left h<strong>and</strong> is on top of the right h<strong>and</strong> <strong>and</strong> the fingertips of the middle<br />
fingers overlap.<br />
15.4.6.4. Take one right step simultaneously with the NPB executing a left face. Ensure that<br />
you are at the center of the lowering device.<br />
119
15.4.6.5. Give the subdued comm<strong>and</strong> of Bearers, POST.<br />
15.4.6.6. Once pallbearers depart, assume the position of st<strong>and</strong> at, ease. This is done by moving<br />
the left foot six to eight inches to the left.<br />
15.4.6.7. When the funeral director asks the family to rise, signaling the beginning of the<br />
military honors sequence, return to the position of attention, by bringing the left foot back in<br />
place.<br />
15.4.6.8. Upon the completion of taps, lower the flag down so that it is parallel to the ground.<br />
Walk over to the recipient of the flag, rotate the flag so that the top point is toward you <strong>and</strong> offer<br />
the flag. You have the option of kneeling down on one knee. Refer to 5.5.3.15. for message of<br />
condolence.<br />
15.4.6.9. If kneeling, st<strong>and</strong> up <strong>and</strong> render h<strong>and</strong> salute to the flag. Order arms, take one step<br />
back, face in the appropriate direction <strong>and</strong> step off with suspended armswing towards the<br />
transportation site.<br />
15.4.7. On a FHF, OIC/NCOIC will go to the position of st<strong>and</strong> at ease when the pallbearers go<br />
to “tabletop”.<br />
15.4.7.1. When the funeral director asks the family to rise, signaling the beginning of the<br />
military honors sequence, return to the position of attention. Present arms.<br />
15.4.7.2. Upon the completion of taps, order arms.<br />
15.4.7.3. Upon the completion of the dressing sequence, take one left step to retrieve the flag<br />
from the NPB. When receiving the flag ensure that the left h<strong>and</strong> is on top <strong>and</strong> the right h<strong>and</strong> is<br />
underneath to support.<br />
15.4.7.4. After the order arms by the NPB, execute a three second facing movement in the<br />
appropriate direction toward the recipient of the flag.<br />
15.4.7.5. Walk over to the recipient of the flag, rotate the flag so that the top point is toward you<br />
<strong>and</strong> offer the flag. You have the option of kneeling down on one knee. Refer to 5.5.3.15. for the<br />
message of condolence.<br />
15.4.7.6. If kneeling, st<strong>and</strong> up <strong>and</strong> present arms. Order arms, take one step back, <strong>and</strong> face in<br />
appropriate direction. Step off with suspended armswing <strong>and</strong> return to the foot end of the casket.<br />
15.4.7.7. Give the subdued comm<strong>and</strong> of Bearers, POST.<br />
15.4.7.8. Step off behind the pallbearers with armswing suspended. When pallbearers return to<br />
the cadence of quick time, OIC/NCOIC does as well.<br />
120
15.4.8. At the transportation site, give debrief on how the ceremony went. This helps others<br />
learn from possible scenarios <strong>and</strong> situations.<br />
15.4.8.1. When in the debrief, ensure that all key personnel address the ceremony as well.<br />
121