
You also want an ePaper? Increase the reach of your titles
YUMPU automatically turns print PDFs into web optimized ePapers that Google loves.
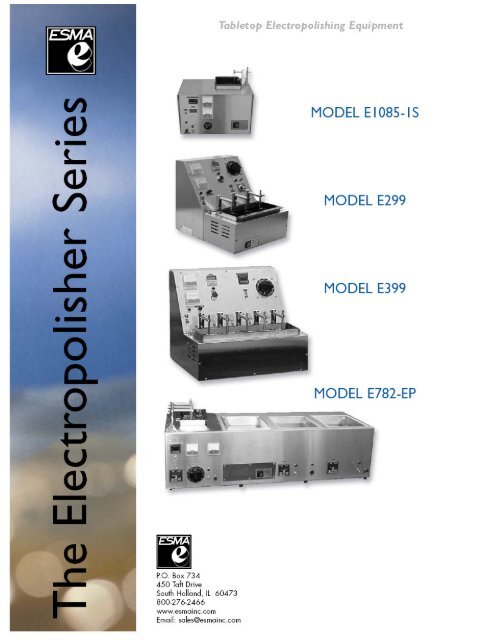
<strong>ESMA</strong> INCPO BOX 734 450 W. Taft Dr.South Holland IL 604731-800-276-2466 708-331-1855INSTRUCTIONSFORELECTROPOLISHER E399IntroductionThe E399 unit polishes stainless or chrome-cobalt alloys with amaximum current carrying capacity of 50amps. The unit has five polishingstations controlled by a digital Omron timer.The unit, constructed of 304 stainless steel is built to give years ofreliable, trouble-free operation. The cathodes and anode clips are built of noncorrodingalloys. The polishing solution temperature is automatically controlledby heater-cooling fan combination. The unit is designed for production.PLEASE READ CAREFULLY THE INSTRUCTIONS BEFORE OPERATINGInstallationUnpack, place unit on counter, connect black wire on tank to bindingpost of cabinet. Connect unit to 120VAC outlet (230VAC for 230V units). Theunit is rated at 2000 watts, 120VAC, 50/60HZ. The polishing cell is fused at 10amp, 120VAC. A 10amp, 250VAC internal fuse protects the heating circuit.Pour the electropolishing solution into tank to one inch from top of tank. Forstainless steel use Esma E972 and for chrome-cobalt alloys use Esma E272.Safety Precautions: The system is designed with maximum safetyfeatures. The electropolishing solutions are mildly acidic solutions and certainprecautions are recommended.· Wear safety goggles when pouring the liquid into tank. Ifsolution gets on your skin, rinse off with plenty of water. In caseof eye contact-rinse off with plenty of water and seek medicalattention.· Solution will damage cloth and carpeting.· A small amount of solution mist is emitted during polishing:avoid inhaling-install near exhaust or ventilated area.Slide horizontal holding arm (8G) into each of the main posts (6D) and fastenwith knurled screw (13A) of main post. The arm with clip (13C) is attached tohorizontal holding arm, with part to be polished suspended into solution(diagram 1).3
OperationSet Athena temperature control at 110°-120° F. Turn main switch and heater switch ON. When the tank is heating thered indicator light will be ON. The green indicator light is ON whenthe heater is OFF.TIMERIn approximately 30 minutes the temperature will be reached andblower will come on. (We recommend turning heater switch off oncetemperature is reached).An OMRON, Model H3CA solid state timer has been installed in unit. Thetimer has been set in Mode H and in minutes (See separate instructions).Simply set the time with the + or – button. After time has been set, pushSTART button and polishing will commence for the set time. The polishing cyclecan be stopped at any time by momentarily turning the main switch OFF.Polishing Suspend part to be polished on clip (13C); immerse end of holder intoliquid so treated parts are fully submersed, tighten arm (13C) intohorizontal arm with knurled screw (13A). Set timer for desired time and push START button to begin thepolishing. Remove holder with polished parts, rinse in water. Neutralize part in baking soda solution (teaspoon of soda per cup ofwater). Rinse under running hot water, then air-dry.4
MaintenanceMaintain clean cabinet: wipe off with cloth wetted with mild detergent;polish with a polish for stainless appliances (as Sheila Shine).Solution should not be spilled on cabinet; shorting of post 6D may takeplace- wipe off !Replacement of <strong>ESMA</strong> E972 or E272 Solutions; during polishing metal andmetal oxides are dissolved, some decomposition and drag-out take place. Replacewhen action gets slow, solution thick, objectionable odor, non-uniform shine andrapid overheating.Cleaning polishing cell: shut off unit and unplug power cord from outlet disconnect black wire on tank from black binding post on cabinet. slowly lift tank out of unit by holding front and back flanges oftank dispose of solution (dispose properly according to local regulations); rinse tank thoroughly with water, remove any film or build-upfrom inside, wipe tank walls with soft towel or sponge. THE TANKIS COATED, SO DO NOT USE ANY ABRASIVE MATERIAL whilecleaning inside the tank. Dry tank with towel, do not pour solutioninto wet tank.Trouble ShootingProblem Possible Cause Corrective MeasuresBlowing fuse -Part touching - Re-position part-tank cathode-Solution spilledon cabinet and iswetting base of post- Remove tank, loosenscrew under post,remove post, rinse anddry all parts;reassemble making5
-None of the abovesure insulatingwashers are in place-Contact manufacturerOdor emitted -Solution present -Shut off unit, removeduring heat up on heating plate tank and clean up anysolution on heatingplatform-Leaking of tank-Solution needsexchange-If repeated clean-upsdo not eliminate odortank may be leaking-Replace with freshsolutionFor technical assistance please call 1-800-276-24666