Olympus CLV-160 Light Source - Instructions.pdf
Olympus CLV-160 Light Source - Instructions.pdf
Olympus CLV-160 Light Source - Instructions.pdf

Create successful ePaper yourself
Turn your PDF publications into a flip-book with our unique Google optimized e-Paper software.
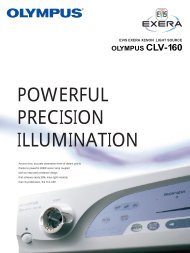
INSTRUCTIONSEVIS EXERA XENON LIGHT SOURCEOLYMPUS <strong>CLV</strong>-<strong>160</strong>
ContentsContentsLabels and Symbols ..................................................................... 1Important Information — Please Read Before Use.................... 3Intended use ............................................................................................ 3Instruction manual .................................................................................... 3User qualifications..................................................................................... 4Instrument compatibility ........................................................................... 4Repair and modification ........................................................................... 4Signal words.............................................................................................. 5Dangers, warnings and cautions .............................................................. 5Chapter 1 Checking the Package Contents............................ 8Chapter 2 <strong>Light</strong> <strong>Source</strong> Nomenclature.................................... 92.1 Front panel...................................................................................... 92.2 Rear and side panels ...................................................................... 11Chapter 3 Installation and Connection ................................... 133.1 Installation of equipment ................................................................. 133.2 Connection of the EVIS EXERA video system center or EVIS videosystem center.................................................................................. 153.3 Connection of an endoscope .......................................................... 163.4 Connection of the OES video system ............................................. 163.5 Installation of the water container ................................................... 173.6 Connection to an AC mains power supply ...................................... 18Chapter 4 Inspection ................................................................ 194.1 Inspection of the power supply ....................................................... 194.2 Checking the lamp life..................................................................... 214.3 Inspection of the filter function ........................................................ 224.4 Inspection of air and water feeding ................................................. 244.5 Inspection of the examination light.................................................. 254.6 Inspection of the light decreasing function...................................... 264.7 Inspection of transillumination function ........................................... 274.8 Inspection of brightness adjustment ............................................... 28EVIS EXERA XENON LIGHT SOURCE <strong>CLV</strong>-<strong>160</strong>i
ContentsChapter 5 Operation.................................................................. 315.1 Igniting the lamp.............................................................................. 335.2 Brightness adjustment .................................................................... 335.3 Using the filter function ................................................................... 355.4 Using the transillumination function ................................................ 385.5 Adjusting air/water pressure............................................................ 395.6 Turning the light source OFF .......................................................... 39Chapter 6 Lamp Replacement.................................................. 406.1 Lamp life ......................................................................................... 406.2 Replacement of the examination (xenon) lamp............................... 40Chapter 7 Care, Storage and Disposal .................................... 487.1 Care ................................................................................................ 487.2 Storage ........................................................................................... 497.3 Disposal .......................................................................................... 49Chapter 8 Troubleshooting ...................................................... 508.1 Troubleshooting guide .................................................................... 508.2 Returning the light source for repair................................................ 54Appendix........................................................................................ 55System chart ............................................................................................ 55Operating environment.............................................................................. 59Transportation and storage environment ................................................. 59Specifications ............................................................................................ 60iiEVIS EXERA XENON LIGHT SOURCE <strong>CLV</strong>-<strong>160</strong>
Labels and SymbolsLabels and SymbolsSafety-related labels and symbols are attached to the light source at thelocations shown below. If labels or symbols are missing or illegible, contact<strong>Olympus</strong>. Rear sideElectrical ratingSerial number plateFuse ratingRefer to instructions.Equipotential TerminalWarns that the inside isextremely hot immediatelyafter the lamp is turned off.Refer to instructions.EVIS EXERA XENON LIGHT SOURCE <strong>CLV</strong>-<strong>160</strong>1
Labels and Symbols Back cover of this instruction manualManufacturerAuthorized representative in the EuropeanCommunity2EVIS EXERA XENON LIGHT SOURCE <strong>CLV</strong>-<strong>160</strong>
Important Information — Please Read Before UseImportant Information — Please ReadBefore UseIntended useThis light source has been designed to be used with <strong>Olympus</strong> endoscopes, andancillary equipment for observation, diagnosis, endoscopic treatment andrecording of image data.Do not use this light source for any purpose other than its intended use.Instruction manualThis instruction manual contains essential information on using this light sourcesafely and effectively. Before use, thoroughly review this manual and themanuals of all equipment which will be used during the procedure and use theequipment as instructed.Keep this and all related instruction manuals in a safe, accessible location.If you have any questions or comments about any information in this manual,please contact <strong>Olympus</strong>. Terms used in this manualOES video converter, OES video system:The OES video converter and OES video system are devices thatconvert endoscope images from a fiberscope into monitor images.EVIS video system center:The EVIS video system center is a device that converts signals from avideoscope or OES video converter into monitor images.Mobile workstation:The mobile workstation is a special trolley on which this light source isplaced and used for endoscopic diagnosis and treatment.EVIS EXERA XENON LIGHT SOURCE <strong>CLV</strong>-<strong>160</strong>3
Important Information — Please Read Before UseUser qualificationsThe operator of this light source must be a physician or medical personnel underthe supervision of a physician and must have received sufficient training inclinical endoscopic technique. This manual, therefore, does not explain ordiscuss clinical endoscopic procedures.Instrument compatibilityRefer to the “System chart” in the Appendix to confirm that this light source iscompatible with the ancillary equipment being used. Using incompatibleequipment can result in patient injury or equipment damage.Repair and modificationAside from the examination lamp and the fuses, this light source does notcontain any user-serviceable parts. Do not disassemble, modify or attempt torepair it; patient or user injury and/or equipment damage can result.Some problems that appear to be malfunctions may be correctable by referringto Chapter 8, “Troubleshooting”. If the problem cannot be resolved using theinformation in Chapter 8, contact <strong>Olympus</strong>.4EVIS EXERA XENON LIGHT SOURCE <strong>CLV</strong>-<strong>160</strong>
Important Information — Please Read Before UseSignal wordsThe following signal words are used throughout this manual:Indicates an imminently hazardous situation which, if notavoided, will result in death or serious injury.Indicates a potentially hazardous situation which, if notavoided, could result in death or serious injury.Indicates a potentially hazardous situation which, if notavoided, may result in minor or moderate injury. It may alsobe used to alert against unsafe practices or potentialequipment damage.Indicates additional helpful information.Dangers, warnings and cautionsFollow the dangers, warnings and cautions given below when handling this lightsource. This information is to be supplemented by the dangers, warnings andcautions given in each chapter.• As a TYPE BF applied part, this light source must never beapplied directly to the heart and must not be used inprocedures involving cardiac observation or surgery.Leakage current from the TYPE BF applied part may bedangerous and cause ventricular fibrillation or otherwiseseriously affect the cardiac function of the patient.Accordingly, always adhere to the following points:−−Never apply the endoscope connected to this light sourceto the heart or any area near the heart.Never allow an endo-therapy accessory or anotherendoscope applied to or near the heart to come in contactwith an endoscope connected to this light source.EVIS EXERA XENON LIGHT SOURCE <strong>CLV</strong>-<strong>160</strong>5
Important Information — Please Read Before Use• Strictly observe the following precautions. Failure to do somay place the patient and medical personnel in danger of anelectrical shock.−−−When the light source is used to examine a patient, do notallow metal parts of the endoscope or its accessories totouch metal parts of other system components. Suchcontact may cause unintended current flow to the patient.Keep liquids away from all electrical equipment. If fluidsare spilled on or into the unit, stop operation of the lightsource at once and contact <strong>Olympus</strong>.Do not prepare, inspect or use this light source with wethands.• Never install and operate the light source in locations where:−−The concentration of oxygen is high.Flammable anesthetics are present in the atmosphere.Otherwise, explosion or fire may result because this lightsource is not designed to be explosion-proof.• Do not touch the light guide of the endoscope connectorimmediately after removing it from the light source because itis extremely hot. Operator or patient injury can result.• Do not look directly into the distal end of the endoscope orthe output socket of this light source while the examinationlamp is ignited. The intense light may cause eye injury.• To be prepared in case of a light source failure, always haveanother light source available for immediate use.• Xenon light sources produce significant heat due to the highintensity light required for endoscopic procedures and cancause a fire if brought into contact with flammable material.To avoid this, make sure that the distal ends of the light guidecable and endoscope do not touch drapes or otherflammable material. Also, make sure that light emitted fromthe cable and scope is not directed toward a drape or otherflammable material. Turn OFF the light source whenever it isnot being used.• The system should be establish with equipment compliedwith relevant EMC standards for safety reason.• Equipment which do not comply with EMC standard maycause interference and its function or performance may beaffected.6EVIS EXERA XENON LIGHT SOURCE <strong>CLV</strong>-<strong>160</strong>
Important Information — Please Read Before Use• Portable or mobile phones may influence the medicalelectrical equipment by their emitting energy.• Do not use a pointed or hard object to press the switches onthe front panel. This may damage the switches.• To avoid breaking electric contacts and causing amalfunction:−−Do not touch the electric contacts of the light sourceoutput socket.Do not subject any connector to excessive force.As defined by the international safety standard(IEC 60601-1:1988), medical electrical equipment isclassified into the following types: TYPE CF applied part (theinstrument can safely be applied to any part of the body,including the heart), and TYPE B/BF applied part (theinstrument can safely be applied to any organ except theheart). The part of the body a videoscope or electrosurgicalaccessory can safely be applied to depends on theclassification of the equipment to which the instruments areconnected. Before beginning the procedure, check thecurrent leakage classification type of each instrument to beused for the procedure. Classification types are clearlyspecified on the instruments and in the instruments’instruction manuals.SymbolClassificationTYPE CF applied partTYPE BF applied partTYPE BF applied partEVIS EXERA XENON LIGHT SOURCE <strong>CLV</strong>-<strong>160</strong>7
Chapter 1 Checking the Package ContentsChapter 1Checking the PackageContentsMatch all items in the package with the components shown below. Inspect eachitem for damage. If the light source is damaged, a component is missing or youhave any questions, do not use the light source; immediately contact <strong>Olympus</strong>.<strong>Light</strong> source (<strong>CLV</strong>-<strong>160</strong>)<strong>Light</strong> control cable (MH-966) Foot holder (MAJ-878) Spare fuse (MAJ-892)Power cordInstruction manual8EVIS EXERA XENON LIGHT SOURCE <strong>CLV</strong>-<strong>160</strong>
Chapter 2 <strong>Light</strong> <strong>Source</strong> NomenclatureChapter 2<strong>Light</strong> <strong>Source</strong> Nomenclature2.1 Front panel5. Transillumination switch4. Filter switch3. Output socket2. Power indicator1. Power switchAirflow regulatorOFF switchAirflow regulatorON switch6. Airflow regulatorswitches7. Airflow indicators8. Emergency lamp indicator13. Lamp ignitionswitch15. Reset switch12. Auto/manual indicators14. Lamp life indicator11. Auto/manual brightness selector10. Brightness level indicators9. Brightness adjustment switchesEVIS EXERA XENON LIGHT SOURCE <strong>CLV</strong>-<strong>160</strong>9
Chapter 2 <strong>Light</strong> <strong>Source</strong> Nomenclature1. Power switchPressing the power switch in until its stops turns the light source ON. Whenthe power is ON, the power indicator above the power switch is lit. To turnthe light source OFF, press the power switch once again.2. Power indicatorThe power indicator is lit when the power is ON.3. Output socketThis socket provides light, electrical signals and air to the endoscope.4. Filter switchWhen a special-purpose filter is installed, pressing this switch changesbetween normal observation mode and filter mode.5. Transillumination switchWhen pressing this switch, light emitted from the endoscope’s distal endbecomes brighter for 7 seconds, then returns automatically to its originalbrightness level.6. Airflow regulator switchesWith these switches, the pressure of the air being fed from the endoscopecan be controlled.7. Airflow indicatorsThese indicators display the current airflow regulator setting (“L”, “M”, or “H”)when the airflow regulator “ON” switch is pressed.8. Emergency lamp indicatorThis indicator is lit when the emergency lamp (halogen) is in use, andblinking when emergency lamp (halogen) is disconnected or not mounted.9. Brightness adjustment switchesThese switches are pressed to adjust the brightness level.10. Brightness level indicatorsThese indicators display the current brightness level.11. Auto/manual brightness selectorThis selector is pressed to select automatic or manual brightness control.12. Auto/manual indicatorThis indicator displays the brightness selector setting (“auto” or “manual”).13. Lamp ignition switchThis switch is pressed to turn ON the examination (xenon) lamp.14. Lamp life indicatorThis indicator displays the total working hours of the examination (xenon)lamp.15. Reset switchAfter replacing the examination (xenon) lamp, the lamp life indicator is resetby pressing this switch for more than 3 seconds.10EVIS EXERA XENON LIGHT SOURCE <strong>CLV</strong>-<strong>160</strong>
Chapter 2 <strong>Light</strong> <strong>Source</strong> Nomenclature2.2 Rear and side panels2. AUX connector1. <strong>Light</strong> control connectorAC mains inlet3. Fuse holders4. Water containerholder5. Potential equalizationterminalRear panelRear footVentilation grills6. Lamp cover7. Filter diskLeft sideEVIS EXERA XENON LIGHT SOURCE <strong>CLV</strong>-<strong>160</strong>11
Chapter 2 <strong>Light</strong> <strong>Source</strong> Nomenclature1. <strong>Light</strong> control connectorThis connector is receptacle for the light control cable to connect the lightsource to the EVIS EXERA video system center or the EVIS video systemcenter.2. AUX connectorThis connector is receptacle for the light control cable to connect the lightsource to the OES video system.3. Fuse holdersThe fuses are mounted here.4. Water container holderThis holder is used for the installation of the water container.5. Potential equalization terminalFor safety purposes, this terminal is connected to a potential equalizationbusbar of the electrical installation.6. Lamp coverThis cover is removed to replace the examination lamp and aspecial-purpose filter.7. Filter diskThis disk is hold a special-purpose filter when necessary.12EVIS EXERA XENON LIGHT SOURCE <strong>CLV</strong>-<strong>160</strong>
Chapter 3 Installation and ConnectionChapter 3Installation and Connection• Turn OFF all system components before connecting them.Otherwise, equipment damage can result.• Use appropriate cables only. Otherwise, equipment damageor malfunction can result.• Use the light source under the conditions described in the“Operating environments” and the “Specifications” in theAppendix only. Otherwise, improper performance,compromised safety and/or equipment damage may result.Prepare the light source and compatible equipment (shown in the “System chart”in the Appendix) before each use, and refer to the instruction manuals of eachsystem component. Install and connect the equipment as follows:3.1 Installation of equipment• Do not place any equipment other than the EVIS videosystem center or OES video system on the top of the lightsource. Otherwise, equipment damage can result.• Keep the ventilation grills of the light source clear. Blockagecan cause overheating and equipment damage.• Place the light source on a stable level surface, using the footholder (MAJ-878).• If no mobile workstation (WM-30, WM-N60) is used, confirmthat the light source does not exceed the allowed maximumload of the installation site.EVIS EXERA XENON LIGHT SOURCE <strong>CLV</strong>-<strong>160</strong>13
Chapter 3 Installation and Connection Installation on the mobile workstation1. Place the mobile workstation on a level surface. Lock the caster brakes asshown in Figure 3.1.Brake casterBrake releaseCasterFigure 3.12. Install the shelf of the mobile workstation as described in the mobileworkstation’s instruction manual.3. Using the pattern sheet as a template on the mobile workstation, positionthe foot holders at the four corners.4. Peel the paper from the bottom of the foot holders and gently place them inposition as shown in Figure 3.2.Foot holderPattern sheetPeel offFigure 3.214EVIS EXERA XENON LIGHT SOURCE <strong>CLV</strong>-<strong>160</strong>
Chapter 3 Installation and Connection5. Once in position, press the foot holders firmly in place.6. Place the light source on the mobile workstation so that the feet rest in thefoot holders (see Figure 3.3).Video system center<strong>Light</strong> source(<strong>CLV</strong>-<strong>160</strong>)Figure 3.3 Installation in another locationWhen installing the light source in another location, adhere the foot holders asdescribed above.3.2 Connection of the EVIS EXERA video systemcenter or EVIS video system centerPrepare an EVIS EXERA video system center or an EVIS video system centerwhen using a videoscope or an OES video converter.Connect the light control cable that comes with the EVIS EXERA video systemcenter or the EVIS video system center to the light control connector (see Figure3.4).<strong>Light</strong> control connectorFigure 3.4EVIS EXERA XENON LIGHT SOURCE <strong>CLV</strong>-<strong>160</strong>15
Chapter 3 Installation and Connection3.3 Connection of an endoscopeBefore connecting the endoscope’s light guide connector tothe light source, make sure that it is perfectly dry. If theendoscope’s light guide connector is wet (after disinfecting,for example), wipe and dry the exterior as described in theendoscope’s reprocessing manual. Otherwise, electricalshock or equipment damage can result.Insert the light guide connector into the output socket on the front panel of thelight source until it clicks into place (see Figure 3.5).Figure 3.53.4 Connection of the OES video system• Set the auto/manual brightness selector to “AUTO” toprevent burns caused by close observation. So thebrightness is adjusted automatically. If using manualbrightness adjustment, set the brightness to the middle orlower level and never observe close to mucous membranesfor a long time.• When using rigidscope, set the auto/manual brightnessselector to “AUTO” to prevent burns caused by closeobservation. So the brightness is adjusted automatically. Ifusing manual brightness adjustment, set the brightness tothe middle or lower level and never observe close to mucousmembranes for a long time.16EVIS EXERA XENON LIGHT SOURCE <strong>CLV</strong>-<strong>160</strong>
Chapter 3 Installation and ConnectionTo view a fiberscope’s image on a video monitor, prepare an OES video system,such as the OTV-S6.Connect the light control cable supplied with the OES video system to the AUXconnector (see Figure 3.6).AUX connectorFigure 3.63.5 Installation of the water containerWhen using an endoscope where water can be fed via the light source, preparethe water container as shown in the “System chart” in the Appendix. Install thewater container in the water container holder on the left side of the light source(see Figure 3.7).Figure 3.7EVIS EXERA XENON LIGHT SOURCE <strong>CLV</strong>-<strong>160</strong>17
Chapter 3 Installation and Connection3.6 Connection to an AC mains power supplyConnect the power plug of the power cord directly to agrounded wall mains outlet. If the light source is notgrounded properly, it can cause an electric shock and/or fire.• Do not allow the power cord to become wet. A wet powercord may cause electrical shock.• Make sure that the wall mains outlet to which the light sourceis connected has a higher capacity than the total powerconsumption of all connected equipment (including this lightsource). If the capacity is inadequate, fire can result or thecircuit breaker may trip and turn OFF the light source and allother light sources connected to it.• Do not bend, pull or twist the power cord. Electrical shock,equipment damage or fire can result.When combined with the mobile workstation (WM-30), do notconnect the power cord of the light source to the secondaryoutlet on the workstation. Connect the power cord directly toa wall mains outlet. Otherwise the system may malfunction orthe supplied voltage will be insufficient.1. Confirm that the light source is OFF.2. Connect the power cord to the AC mains inlet and to a wall mains outlet.18EVIS EXERA XENON LIGHT SOURCE <strong>CLV</strong>-<strong>160</strong>
Chapter 4 InspectionChapter 4InspectionBefore each case, inspect this light source as instructedbelow. Inspect other equipment to be used with this lightsource as instructed in their respective instruction manuals.Should the slightest irregularity be suspected, do not use thelight source and see Chapter 8, “Troubleshooting”. If theirregularity is still suspected after consulting Chapter 8,contact <strong>Olympus</strong>. Damage or irregularity may compromisepatient or user safety and may result in more severeequipment damage.Prepare this light source and other equipment (shown in the “System chart” inthe Appendix) to be used with this light source for each particular case. Refer torespective instruction manuals for each piece of equipment.4.1 Inspection of the power supplyPress the power switch once to turn ON the light source. Confirm that the powerindicator is lit (see Figure 4.1).Power indicatorPower switchFigure 4.1EVIS EXERA XENON LIGHT SOURCE <strong>CLV</strong>-<strong>160</strong>19
Chapter 4 Inspection If the power fails to come onIf the power fails to come on, inspect the system as follows:1. Confirm that the power cord is connected securely to the wall mains outletand to the AC mains inlet on the light source.2. Confirm that the lamp cover is completely closed. For safety, the lightsource cannot be turned ON unless the lamp cover is completely closed.3. Confirm that the fuses have not blown. If the fuses have blown, replacethem with new ones according to the following procedures.• Turn the light source OFF and remove the power cord fromthe wall mains outlet before replacing the fuses with newones. Otherwise, electric shock may result.• When changing fuses, use only MAJ-892 (6.35 × 31.8 mm).Otherwise, fire or equipment damage can result.• If the power fails to come ON after replacing the fuses withnew ones, immediately turn the light source OFF. Removethe power cord from the wall mains outlet and contact<strong>Olympus</strong>. Equipment damage or malfunction may haveoccurred and fire or electric shock can result.4. Turn the light source OFF and disconnect the power cord from the wallmains outlet.5. Turn the knob of the fuse holder counterclockwise about 90°, then pull it outstraight (see Figure 4.2).KnobsFuse holdersFigure 4.220EVIS EXERA XENON LIGHT SOURCE <strong>CLV</strong>-<strong>160</strong>
Chapter 4 Inspection6. Inspect the fuses (see Figure 4.3). Even if only one fuse has blown, alwaysreplace both of them.KnobFuseFuse replacementFigure 4.37. Push the knob into the fuse holder. When fully pushed, turn the knobclockwise until it stops.8. Reconnect the power cord and press the power switch. Confirm that thepower indicator is lit. If the emergency lamp indicator is litIf the emergency lamp indicator is lit immediately after the light source is turnedON, it is highly likely that the installed emergency lamp is burned out or out oforder, contact <strong>Olympus</strong>.4.2 Checking the lamp lifeCheck the lamp life indicator.The total working hours of the examination lamp are displayed by this lamplife indicator.If the “500 h” indicator is lit (see Figure 4.4), replace the examination lampwith a new one as described in Chapter 6, “Lamp Replacement”.The examination lamp should be replaced as soon as itappears to darken, even if the “500 h” indicator is not yet lit.EVIS EXERA XENON LIGHT SOURCE <strong>CLV</strong>-<strong>160</strong>21
Chapter 4 InspectionLamp life indicator500hFigure 4.44.3 Inspection of the filter functionThe filter function makes it possible to place a filter of your choice in the lightpath for special applications. For instructions on selecting and installing aspecial-purpose filter, see Section 5.3, “Using the filter function”.• Do not use the filter function when no filter is installed in thefilter disk. Confirm that the frame of a special-purpose filter ispushed into the filter disk as far as possible. Otherwise,equipment damage can occur, or light emitted from the distalend of the endoscope can cause burns.• While inspecting the filter function, do not touch anythinginside the lamp chamber. The lamp cover and everythinginside is extremely hot and may cause burns.Do not touch the emergency lamp, reflector or filter. Naturalskin moisture from your fingers can cause cracks anddamage the light source.• When switching the light source ON, the filter function isautomatically set to normal observation mode (the filterswitch is not lit).• The color of the filter’s frame for the special purpose filter issilver.• In the factory, the metal board is set instead of the filter in thefilter’s frame.22EVIS EXERA XENON LIGHT SOURCE <strong>CLV</strong>-<strong>160</strong>
Chapter 4 Inspection1. When the light source is already ON, set the filter function to normalobservation mode.2. Turn the light source OFF and disconnect the power cord from the wallmains outlet.3. Remove the lamp cover and confirm that a special-purpose filter is installedin the filter disk (see Figure 4.5).Lamp coverLamp chamberFilter diskFigure 4.5If the filter is loose, reinstall it as instructed in Section 5.3, “Using the filterfunction”.4. Close the lamp cover securely. Then reconnect the power cord and turn thelight source ON.5. Press the filter switch (see Figure 4.6) to activate the filter mode. A beep isheard and the filter switch lights.Filter switchFigure 4.66. Press the filter switch once again. The filter function returns to the normalobservation mode and the filter switch is not lit.EVIS EXERA XENON LIGHT SOURCE <strong>CLV</strong>-<strong>160</strong>23
Chapter 4 Inspection4.4 Inspection of air and water feedingWhen using a water container to feed water from the endoscope, inspect the airand water feeding functions as follows.1. Confirm that one of the airflow indicators (“L”, “M”, and “H”) is lit. If noindicator is lit, press the airflow regulator ON switch once. Then confirm thata beep is heard and one of indicators (“L”, “M”, and “H”) is lit (see Figure4.7).• When the light source is turned OFF, the airflow regulatorsetting is automatically stored and recalled when the lightsource is ON again.• The airflow regulator has been set to OFF before shipment.Press the airflow regulator ON switch once to set the airflowregulator to “L”.Airflow indicatorsAirflow regulatorOFF switchAirflow regulatorON switchFigure 4.72. With the airflow regulator set to “L”, “M” or “H”, immerse the distal end of theconnected endoscope in sterile water and operate the endoscope’s airfeeding function as described in the endoscope’s instruction manual.24EVIS EXERA XENON LIGHT SOURCE <strong>CLV</strong>-<strong>160</strong>
Chapter 4 InspectionCheck the following functions:• Air bubbles are emitted from the air/water nozzle at the distal end of theendoscope.• When the air bubbles are emitted, pressing the airflow regulator OFFswitch stops the air bubbles.• When restarting, the setting of the airflow regulator is the same asbefore the airflow regulator OFF switch is pressed; the emission of airbubbles is resumed.• Pressing the airflow regulator ON switch again increases the airpressure and the airflow indicator moves to the next level (level “H” isfollowed by level “L”).3. Remove the distal end of the endoscope from the sterile water and operatethe endoscope’s water feeding function as described in the endoscope’sinstruction manual. Confirm that the amount of water emitted from theair/water nozzle at the distal end of the endoscope corresponds to thesetting of the air flow regulator.4.5 Inspection of the examination lightDo not look directly into the distal end of the endoscope orthe output socket of the light source when they are emittinglight. Eye damage may result.Press the lamp ignition switch. Confirm that the white examination light isemitted from the distal end of the endoscope as shown in Figure 4.8.Distal end of endoscopeExamination lightFigure 4.8EVIS EXERA XENON LIGHT SOURCE <strong>CLV</strong>-<strong>160</strong>25
Chapter 4 Inspection1. Press the lamp ignition switch once. The ignition operation is repeatedautomatically for up to about 5 seconds until the examination (xenon) lampignites. If ignition fails, the light source automatically switches to theemergency (halogen) lamp and the emergency lamp indicator is lit. If thishappens, turn the light source OFF and ON again. Then press the lampignition switch.2. If ignition of the examination (xenon) lamp fails, install a new lamp asdescribed in Chapter 6, “Lamp Replacement”.4.6 Inspection of the light decreasing functionDo not look directly into the distal end of the endoscope orthe output socket of the light source when they are emittinglight. Eye damage may result.The light decreasing mechanism is a safety feature designed to prevent lightfrom being emitted when not necessary, for example when no endoscope isconnected. Inspect this function as follows:1. Disconnect the endoscope while it is emitting light. Confirm that no intenselight is emitted from the output socket of the light source by holding asuitable object to the light.2. Reconnect the endoscope to the output socket and confirm that light isemitted from the distal end of the endoscope following the procedure asdescribed in Section 4.5, “Inspection of the examination light”.26EVIS EXERA XENON LIGHT SOURCE <strong>CLV</strong>-<strong>160</strong>
Chapter 4 Inspection4.7 Inspection of transillumination functionWhen using a fiberscope without video or TV systems, do notuse the transillumination function while looking into theeyepiece of the endoscope. Using this function sets theexamination light to maximum, and eye damage can result.The transillumination function allows to externally confirm the endoscope’sposition in the patient’s body due to more intense examination light emitted fromthe endoscope’s distal end. Inspect this function as follows.Press the transillumination switch and confirm that:• A beep is heard• The transillumination indicator on the front panel blinks.• Brightness is set to maximum for manual brightness control.• Brightness control remains switched to manual even if the auto/manualbrightness selector is pressed.• After 7 seconds, the light returns to its original brightness.Distal end ofendoscopeFigure 4.9Pressing the transillumination switch while thetransillumination function is activated cancels the functionand restores the previous setting.EVIS EXERA XENON LIGHT SOURCE <strong>CLV</strong>-<strong>160</strong>27
Chapter 4 Inspection4.8 Inspection of brightness adjustmentWhen using the fiberscope without video or TV systems, setthe auto/manual brightness selector to “MAN.”. Setting to“AUTO” changes the examination light to maximum, and eyedamage can result. Selecting automatic or manual brightness controlWhen selecting a brightness control mode, confirm that the correspondingindicator lights up when pressing the auto/manual brightness selector (seeFigure 4.10) and a beep is heard.Auto/manual indicatorsAuto/manual brightness selectorFigure 4.1028EVIS EXERA XENON LIGHT SOURCE <strong>CLV</strong>-<strong>160</strong>
Chapter 4 Inspection Automatic brightness adjustmentBefore disconnecting the video system from the endoscope,always select manual brightness control and set thebrightness to minimum. If the video system is disconnectedwhile the brightness adjustment is set to automatic,examination light may change to maximum and eye damagecan result.1. Press the auto/manual brightness selector to select “AUTO”.2. Point the distal end of the endoscope at a suitable object and vary thedistance between 5 and 60 mm (see Figure 4.11). Confirm that the lightbeing emitted from the distal end varies with the distance.Figure 4.113. Hold the distal end of the endoscope at a distance between 30 and 40 mmto the object and press the brightness adjustment switches (“ ” or “ ”).Confirm the following:• Each time either of the brightness adjustment switches is pressed, abeep is heard and the brightness level increases or decreasesaccordingly. The present brightness level is indicated and the indicatormoves one level up or down.• When either of the brightness adjustment switches is pressed downcontinuously, successive beeps are heard and one of the brightnesslevel indicator moves continuously.EVIS EXERA XENON LIGHT SOURCE <strong>CLV</strong>-<strong>160</strong>29
Chapter 4 InspectionBrightness level indicatorsBrightness adjustment switchesFigure 4.12 Manual brightness adjustmentWhen using manual brightness adjustment, always set thebrightness to the minimum level necessary to complete theexamination. If the light is too bright, eye damage or burnscan result.1. Press the auto/manual brightness selector to select “MAN.”.2. Press the brightness adjustment switches (“ ” or “ ”) and confirm thefollowing (see Figure 4.13):• Each time either of the brightness adjustment switches is pressed, abeep is heard and the brightness level increases or decreasesaccordingly. The brightness level indicators also increase or decrease.• When either of the brightness adjustment switches is pressed downcontinuously, successive beeps are heard and the level indicatorincreases or decreases continuously.Brightness level indicatorsBrightness adjustment switchesFigure 4.1330EVIS EXERA XENON LIGHT SOURCE <strong>CLV</strong>-<strong>160</strong>
Chapter 5 OperationChapter 5OperationThe operator of this light source must be a physician or medical personnel underthe supervision of a physician and must have received sufficient training inclinical endoscopic technique. This manual, therefore, does not explain ordiscuss clinical endoscopic procedures. It only describes basic operation andprecautions related to the operation of this light source.• Wear personal protective equipment to guard againstdangerous chemicals and potentially infectious material.During operation, wear appropriate personal protectiveequipment, such as eye wear, face mask, moisture-resistantclothing and chemical-resistant gloves that fit properly andare long enough so that your skin is not exposed.• If the examination lamp does not ignite or go off with blinkingthe brightness level indicators, immediately stop using thelight source and withdraw the endoscope from the patientslowly as described in the endoscope’s instruction manual.And then, contact <strong>Olympus</strong>.• Anytime you suspect an abnormality in a light sourcefunction, stop the examination immediately. Take actionaccording to the procedures described below. Using adefective light source may cause injury.−−−If the image on the monitor becomes completely white orblack when the automatic brightness adjustment isselected, the automatic brightness adjustment may bemalfunctioning. In this case, set the auto/manualbrightness selector to “MAN.” and adjust the brightnessmanually. Withdraw the endoscope from the patientslowly as described in the endoscope’s instructionmanual.If the examination lamp fails and the emergency lamplights, withdraw the endoscope from the patient slowly asdescribed in the endoscope’s instruction manual.The emergency lamp provides only the absolute minimumof light needed to keep operating in an emergency, so donot use the emergency lamp for operation unlessabsolutely necessary.EVIS EXERA XENON LIGHT SOURCE <strong>CLV</strong>-<strong>160</strong>31
Chapter 5 Operation−If any other abnormality occurs or is suspected, stopusing the equipment and immediately withdraw theendoscope from the patient slowly as described in theendoscope’s instruction manual. Then refer to theinstructions in Chapter 8, “Troubleshooting”. If theproblems cannot be resolved by the remedial action asdescribed in Chapter 8, do not use this light source on apatient again and immediately contact <strong>Olympus</strong>.• Whenever possible, do not leave the endoscope illuminatedbefore and/or after an examination. Continued illuminationwill cause the distal end of the endoscope to become hot andcould cause operator and/or patient burns.• Turn the video system center ON to operate the lightsource’s auto-brightness function. When the video systemcenter is OFF, it cannot operate the light source’sauto-brightness function, and the light intensity is set to themaximum level. In this case, the distal end of the endoscopecan become hot and could cause operator and/or patientburns.• Do not use the light source in a location exposed to strongelectromagnetic radiation (e.g., near microwave medicaltreatment equipment, short wave medical treatmentequipment. MRI equipment or radio). Brightness fluctuationcan occur.• It is recommended to use only <strong>Olympus</strong> high frequencyelectrosurgical equipment with this unit. Non-<strong>Olympus</strong>equipment can cause interference on the monitor display or aloss of the endoscopic image.Set the brightness of the light source to the minimumnecessary to perform the procedure safely. If the endoscopeis used for a prolonged period at or near maximum lightintensity, vapor like smoke may be observed in theendoscopic image. This is caused by the evaporation oforganic material (remaining blood, moisture of stool and soon) due to heat generated by the light guide near the lightguide lens. If this vapor continues to interfere with theexamination, remove the endoscope, wipe the distal end ofthe endoscope with a lint-free cloth moistened with 70% ethylor isopropyl alcohol, reinsert the endoscope and continue theexamination.32EVIS EXERA XENON LIGHT SOURCE <strong>CLV</strong>-<strong>160</strong>
Chapter 5 Operation5.1 Igniting the lamp1. Confirm that the endoscope is connected to the output socket, and press thepower switch (see Figure 5.1).Output socket2.Power switch1.Lamp ignitionswitchFigure 5.12. Press the lamp ignition switch to ignite the examination lamp.5.2 Brightness adjustment• When using the fiberscope without a video system, set theauto/manual brightness selector to “MAN.”. Setting to“AUTO” changes the examination light to maximum, and eyedamage can result.• When using in combination with an OES video system, setthe auto/manual brightness selector to “AUTO” to preventburns caused by close observation. So the brightness isadjusted automatically. If using manual brightnessadjustment, set the brightness to the middle or lower leveland never observe close to mucous membranes for a longtime.• When using rigidscope with an OES video system, set theauto/manual brightness selector to “AUTO” to prevent burnscaused by close observation. So the brightness is adjustedautomatically. If using manual brightness adjustment, set thebrightness to the middle or lower level and never observeclose to mucous membranes for a long time.EVIS EXERA XENON LIGHT SOURCE <strong>CLV</strong>-<strong>160</strong>33
Chapter 5 OperationAdjust the brightness of the video monitor.Operating the automatic brightness adjustmentBefore disconnecting the video system from the endoscope,always select manual brightness adjustment and set thebrightness to minimum. If the video system is disconnectedwhile the brightness adjustment is set to automatic,examination light may change to maximum and eye damageor burns can result.1. Press the auto/manual brightness selector to select automatic brightnessadjustment.2. Press either of the brightness adjustment switches (“ ” or “ ”) to set thebrightness to a level suitable for observation. The standard setting is “0”(see Figure 5.2).Brightness level indicatorsBrightness adjustment switchesFigure 5.2• Depending on the endoscopic system being used and the part beingobserved, the standard setting may be too bright or too dark. In thiscase, adjust the brightness as needed. This can also be done duringobservation, if necessary.• Pressing either of the brightness adjustment switches (“ ” or “ ”)once moves the level one step; pressing the switch continuously movesthe level continuously.34EVIS EXERA XENON LIGHT SOURCE <strong>CLV</strong>-<strong>160</strong>
Chapter 5 OperationOperating the manual brightness adjustment• When using manual brightness adjustment, always set thebrightness to the minimum level necessary to complete theexamination. If the brightness is set higher than necessary,eye damage or burns can result.• When using a fiberscope without a video system, do not usethe transillumination function while looking into the eyepieceof the endoscope. Using this function when the examinationlight is set to maximum, and eye damage can result.1. Press the auto/manual brightness selector to select manual brightnessadjustment.2. Press either of the brightness adjustment switches (“ ” or “ ”) to set thebrightness to a level suitable for observation (see Figure 5.3).Brightness level indicatorsBrightness adjustment switchesFigure 5.3Pressing either of the brightness adjustment switches (“ ” or “ ”) onceincreases or decreases the level one step; pressing the switch continuouslyincreases or decreases the level continuously.5.3 Using the filter functionDo not use the filter function without a special-purpose filterinstalled in the filter disk. Otherwise, equipment damage canoccur or light emitted from the distal end of the endoscopecan cause burns.EVIS EXERA XENON LIGHT SOURCE <strong>CLV</strong>-<strong>160</strong>35
Chapter 5 OperationUse the filter function only when a special-purpose filter isinstalled. If the special-purpose filter is used for normalobservation, the correct color or brightness cannot beobtained.A special-purpose filter of your choice can be mounted on the filter disk, which isthen placed in the light path.Installing a special-purpose filter• Before installing a special-purpose filter, contact <strong>Olympus</strong> toconfirm its compatibility. If an inappropriate filter is used,equipment damage and/or fire can result.• Install a special-purpose filter as described below. If thespecial-purpose filter becomes detached, electric shock canoccur.• If the filter falls into the light source, turn it OFF immediately,disconnect the power cord and contact <strong>Olympus</strong>. If the lightsource is used with the filter left inside of it, an electric shockand/or fire may result.Do not touch the emergency lamp, reflector or filter. Naturalskin moisture from your fingers can cause cracks anddamage the light source.The color of the filter’s frame for the special purpose filter issilver.1. When the light source is turned ON, confirm that the filter switch is not lit. Ifthe filter switch is lit, press the filter switch to go back to normal observationmode.2. If the lamp was in use immediately, the lamp chamber is extremely hot. Coolthe chamber down by turning the light source OFF and ON again. Thisactivates the built-in fan. Do not press the lamp ignition switch.3. Turn the light source OFF and disconnect the power cord.4. Remove the lamp cover.36EVIS EXERA XENON LIGHT SOURCE <strong>CLV</strong>-<strong>160</strong>
Chapter 5 Operation5. Align the filter’s frame installed a special-purpose filter with the groove in thefilter disk, and push the filter’s frame into the filter disk until it locks (seeFigure 5.4).Lamp coverFilter’s frameFilter diskSpecial-purpose filterFigure 5.46. Close the lamp cover securely.7. Turn the light source ON and press the filter switch to enable the filter mode.Filter switchFigure 5.5EVIS EXERA XENON LIGHT SOURCE <strong>CLV</strong>-<strong>160</strong>37
Chapter 5 Operation5.4 Using the transillumination function• Do not use the transillumination function unless absolutelynecessary. Otherwise, eye damage or burns can result.• When using a fiberscope without video or TV systems, do notuse the transillumination function while looking into theeyepiece of the endoscope. Using this function sets theexamination light to maximum, and eye damage can result.When the transillumination function is used in a darkened room, the moreintense examination light emitted from the endoscope makes it possible toexternally confirm the position of the endoscope inside the patient’s body.1. Press the transillumination switch. The brightness adjustment automaticallychanges to maximum for manual brightness control (see Figure 5.6).Transillumination switchFigure 5.62. After 7 seconds, the brightness returns to its original level.To stop transillumination before 7 seconds have passed, press thetransillumination switch again. The original setting will be restored.In some areas of the patient, the transillumination functionmay not be sufficient to confirm the endoscope’s position.38EVIS EXERA XENON LIGHT SOURCE <strong>CLV</strong>-<strong>160</strong>
Chapter 5 Operation5.5 Adjusting air/water pressure1. Confirm that one of the airflow indicators (“L”, “M”, or “H”) is lit. If no indicatoris lit, press the airflow regulator ON switch to set the airflow regulator to “L”,“M” or “H”.The standard air pressure is “H”.Airflow indicatorsAirflow regulatorswitchesFigure 5.72. Change the air pressure according to the technique or the patient’scondition.3. Feed water or air as described in the endoscope’s instruction manual.4. Pressing the airflow regulator OFF switch stops air feeding from the lightsource.When the airflow regulator OFF switch is pressed, the airflowregulator setting is automatically stored and recalled whenthe airflow regulator ON switch is pressed again.5.6 Turning the light source OFF1. Press the power switch to turn the light source OFF.2. If the light source is not to be used for an extended period of time,disconnect the power cord.The light source is OFF when the power indicator is not lit.EVIS EXERA XENON LIGHT SOURCE <strong>CLV</strong>-<strong>160</strong>39
Chapter 6 Lamp ReplacementChapter 6Lamp Replacement6.1 Lamp lifeWhen the lamp life indicator “500 h” is lit, replace the examination (xenon) lampas instructed below. Although the lamp brightness from the distal end of theendoscope depends on the part being observed, the lamp should be replaced assoon as the lamp appears darker than normal, even if the lamp life indicator“500 h” is not yet lit.• The lamp life indicator displays the total working hours of theexamination (xenon) lamp (e.g. “500 h” means about500 hours).• The examination lamp can be replaced by the user asdescribed in Section 6.2.• The emergency lamp cannot be replaced by the user. If theemergency lamp has burned out or is out of order, contact<strong>Olympus</strong>.6.2 Replacement of the examination (xenon) lamp• Do not touch anything inside the lamp chamber. The lampchamber is extremely hot immediately after the lamp isturned OFF.• When replacing the lamp, do not leave any objects (such asa cloth) inside the lamp chamber. Fire and/or equipmentdamage can result.• Store the hexagon wrench securely on the back side of thelamp cover. If the wrench falls inside the light source, turnOFF the light source immediately, disconnect the power cordand contact <strong>Olympus</strong>. If the light source is used while thewrench is detached inside the light source, equipmentdamage and/or electrical shock can result.40EVIS EXERA XENON LIGHT SOURCE <strong>CLV</strong>-<strong>160</strong>
Chapter 6 Lamp Replacement• Never install a lamp that has not been approved by <strong>Olympus</strong>.The use of a non-approved lamp can cause damage to thelight source and ancillary equipment, malfunction or fire.• Do not apply shock, excessive force or scratches to the lamp.It could break the glass and/or shorten the lamp life due tothe high internal pressure of the lamp.• When disposing of the used lamp, make sure to cut theprojection part on the “+” side of the examination lamp byusing a nipper and discharge the internal gas (see Figure6.1). Otherwise, the glass could break due to the highinternal pressure of the lamp.• When cutting the projection part on the “+” side of theexamination lamp, wear appropriate protection equipment allthe time and be sure to cover the lamp with cloth. Otherwise,the projection part could scatter in all direction and causeinjury to people around. The protective equipment mayinclude eye wear, face mask and gloves.Projection partPinExamination lampFigure 6.1• Do not touch the glass surface of the lamp, filter or reflector.Natural skin moisture from your fingers can cause cracks anddamage the light source.• Handle the lamp carefully. Otherwise, the lamp may bedamaged, resulting in equipment failure.• When replacing the examination lamp, use a clean lint-freecloth to wipe off residual heat compound from the heat sink. Ifthe heat compound is not wiped off completely, the lamp’sheat efficiency will be impaired and the examination lamp lifewill be shortened significantly.EVIS EXERA XENON LIGHT SOURCE <strong>CLV</strong>-<strong>160</strong>41
Chapter 6 Lamp ReplacementTo replace the examination lamp, follow the procedure given below. Use theexamination lamp MD-631 only.To order a new examination lamp, contact <strong>Olympus</strong>.1. Turn the light source OFF and disconnect the power cord.2. If the lamp was in use immediately, the lamp chamber is extremely hot. Coolthe lamp chamber down by turning the light source OFF and ON again. Thisactivates the built-in fan. Do not press the lamp ignition switch.3. Remove the lamp cover on the side of the light source. After making surethe interior has cooled down, remove the hexagon wrench from the rear ofthe lamp cover (see Figure 6.2).Hexagon wrenchLamp coverKnob (B)Knob (A)Figure 6.24. Turn knob (A) counterclockwise by 90° to loosen it. Then loosen knob (B) inthe same manner.5. Holding the knobs or projections of the heat sinks, remove the examinationlamp with heat sinks (A) and (B) attached (see Figure 6.3).42EVIS EXERA XENON LIGHT SOURCE <strong>CLV</strong>-<strong>160</strong>
Chapter 6 Lamp ReplacementHeat sink (A)Insertion grooveHeat sink (B)Knob (B)Knob (A)Figure 6.36. Using the hexagon wrench, loosen the three bolts on heat sink (B) (on the“+” side of the examination lamp or heat sink (B)) and remove heat sink (B)from the examination lamp (see Figure 6.4).Heat sink (B)BoltsBack of heat sink (B)ExaminationlampClampFront of heat sink (A)Heat sink (A)Figure 6.47. Remove the clamp of heat sink (A) and pull out the examination lamp.8. Using a clean lint-free cloth, wipe off any residual heat compound from theheat sink.EVIS EXERA XENON LIGHT SOURCE <strong>CLV</strong>-<strong>160</strong>43
Chapter 6 Lamp Replacement9. Hold the new examination lamp without touching the glass surface.• Do not apply the heat compound to the glass surface and theceramic part of the examination lamp. If any compound getson the glass surface, wipe it off with a clean lint-free cloth.• Apply enough heat compound. If not enough heat compoundis applied, the heat can cause lamp ignition failures.10. Using your finger, apply the heat compound evenly over the outercircumference (see the cross-hatched area in Figure 6.5) on the “–” side ofthe new examination lamp (the metal portion on the light emitting side).11. Insert the “–” side of the examination lamp (see Figure 6.5) into heat sink (A)until it stops.Examination lampCeramic partPinHeat compoundFigure 6.5Match the examination lamp and heat sink pin positions, thenpress them tightly together. Otherwise a decrease in the lightoutput can result.12. Apply heat compound to the end surface (see the cross hatched area inFigure 6.5) on the “+” side of the examination lamp in the same manner.13. Insert the “+” side of the examination lamp (see Figure 6.5) into heat sink (B)and tighten the three bolts firmly with the hexagon wrench.Install the heat sink securely in the light source and tightenthe knobs securely. Otherwise, a decrease in light output canresult.44EVIS EXERA XENON LIGHT SOURCE <strong>CLV</strong>-<strong>160</strong>
Chapter 6 Lamp Replacement14. Make sure that the undersides of the heat sinks (A) and (B) are flat, andclose the clamp of heat sink (A).15. Turn the knobs of heat sinks (A) and (B) to the horizontal position, and insertthe heat sinks all the way into the lamp chamber along the insertiongrooves.Heat sink (A)Insertion grooveLamp chamberHeat sink (B)Knob (B)Knob (A)Figure 6.616. First secure heat sink (B) by turning knob (B) clockwise by 90°, then secureheat sink (A) by turning the knob (A) clockwise by 90°.17. Store the hexagon wrench back on the rear of the lamp cover. Then closethe lamp cover securely (see Figure 6.7).Hexagon wrenchLamp coverKnob (B)Knob (A)Figure 6.7EVIS EXERA XENON LIGHT SOURCE <strong>CLV</strong>-<strong>160</strong>45
Chapter 6 Lamp Replacement18. Turn ON the light source. Then press the reset switch for at least 3 secondsuntil all lamp life indicators are OFF.Lamp life indicatorsReset switchFigure 6.8If the light source is to be used immediately, proceed with the inspection ofthe light source as described in Chapter 4, “Inspection”.46EVIS EXERA XENON LIGHT SOURCE <strong>CLV</strong>-<strong>160</strong>
Chapter 6 Lamp ReplacementEVIS EXERA XENON LIGHT SOURCE <strong>CLV</strong>-<strong>160</strong>47
Chapter 7 Care, Storage and DisposalChapter 7Care, Storage and Disposal7.1 Care• After wiping with a piece of moistened gauze, dry the lightsource thoroughly before using it again. If it is used while stillwet, there is the risk of an electrical shock.• When cleaning the light source, always wear appropriatepersonal protection equipment. Blood, mucous and otherpotentially infectious material adhering to the light sourcecould pose an infection control risk.• Do not clean the output socket, other connectors or the ACmains inlet. Cleaning them can deform or corrode thecontacts, causing damage to the light source.• Do not autoclave or gas sterilize the light source. Thesemethods will damage it.• Do not wipe the external surface with hard or abrasive wipingmaterial. The surface will be scratched.If the light source is soiled, perform the following cleaning procedure immediatelyafter use. If cleaning is delayed, residual organic debris will begin to solidify, andit may be difficult to effectively clean the light source. The light source shouldalso be cleaned routinely.1. Turn the light source OFF and disconnect the power cord.2. To remove dust, dirt and non-patient debris, wipe the light source using asoft, lint-free cloth moistened with 70% ethyl or isopropyl alcohol.3. If the light source is soiled with blood or other potentially infectiousmaterials, first wipe off all gross debris using detergent and thendecontaminate its surface using a lint-free cloth moistened with 70% ethyl orisopropyl alcohol. The light source is compatible with 70% ethyl or isopropylalcohol.4. Make sure that the light source is completely dry before use.48EVIS EXERA XENON LIGHT SOURCE <strong>CLV</strong>-<strong>160</strong>
Chapter 7 Care, Storage and Disposal7.2 StorageDo not store the light source in a location exposed to directsunlight, X-rays, radioactivity or strong electromagneticradiation (e.g., near microwave medical treatmentequipment, short-wave medical treatment equipment, MRIequipment or radio). Damage to the light source may result.1. Turn the light source OFF and disconnect the power cord.2. Disconnect all ancillary equipment connected to the light source.3. Store the equipment at room temperature in the horizontal position in aclean, dry and stable location.7.3 DisposalWhen disposing of this equipment or any of its components (e.g., lamps, fuses orfilters), follow all applicable national and local laws and guidelines.EVIS EXERA XENON LIGHT SOURCE <strong>CLV</strong>-<strong>160</strong>49
Chapter 8 TroubleshootingChapter 8TroubleshootingIf the light source is visibly damaged, does not function as expected or is foundto have irregularities during the inspection as described in Chapter 3,“Installation and Connection” and Chapter 4, “Inspection”, do not use the lightsource. Contact <strong>Olympus</strong>.Some problems that appear to be malfunctions may be correctable by referringto Section 8.1, “Troubleshooting guide”. If the problem cannot be resolved by thedescribed remedial action, stop using the light source and send it to <strong>Olympus</strong> forrepair.<strong>Olympus</strong> does not repair accessory parts. If an accessory part becomesdamaged, contact <strong>Olympus</strong> to purchase a replacement.Never use the light source if an abnormality is suspected.The patient can be fatally or seriously injured.8.1 Troubleshooting guideIrregularitydescriptionThe endoscopecannot beconnected to thelight source.The power fails tocome ON.Possible causeThe endoscope is not compatible withthis light source.The power cord is not connected.The power switch is not turned ON.The lamp cover is not closed.The fuses have blown.SolutionConnect anendoscope that islisted in the “Systemchart” in the Appendix.Connect the powercord to a hospitalgrade outlet.Turn the power switchON.Close the lamp coversecurely.Replace both fuseswith new ones asdescribed in Section4.1, page 19.50EVIS EXERA XENON LIGHT SOURCE <strong>CLV</strong>-<strong>160</strong>
Chapter 8 TroubleshootingIrregularitydescriptionThe examinationlamp does notignite.The examinationlamp does notignite, and theemergency lampindicator (red) is lit.The examinationlamp does notignite, and a beep isheard.Possible causeThe examination lamp has not beenignited yet.The examination lamp is not installed.The examination lamp is not installedcorrectly.The examination lamp is broken.The examination lamp is not installed.The examination lamp is not installedcorrectly.The examination lamp is broken.The temperature of the light source istoo high.SolutionPress the lamp Ignitionswitch.Install an examinationlamp as described inSection 6.2, page 40.Reinstall theexamination lamp asdescribed in Section6.2, page 40.Replace theexamination lamp witha new one asdescribed in Section6.2, page 40.Install an examinationlamp as described inSection 6.2, page 40.Reinstall theexamination lamp asdescribed in Section6.2, page 40.Replace theexamination lamp witha new one asdescribed in Section6.2, page 40.Turn OFF the lightsource and conformthat the ventilationgrills are not covered.Allow the light sourceto cool down, then turnit ON again.No light is emittedfrom theendoscope.The brightnesslevel does notchange even whenthe brightnesscontrol switches arepressed.The endoscope is not connected to theoutput socket.The level is set to the minimum ormaximum.Connect theendoscope to theoutput socket securelyas described inSection 3.3, page 16.(The level cannot beset above or belowthese limits.)EVIS EXERA XENON LIGHT SOURCE <strong>CLV</strong>-<strong>160</strong>51
Chapter 8 TroubleshootingIrregularitydescriptionThe field of viewand the image aretoo dark or toobright.Possible causeThe examination lamp is old.The emergency lamp is active.The endoscope is not connected to theoutput socket.The filter mode is activated.(The filter switch is lit.)The brightness level is unsuitable.Transillumination is activated.(The transillumination switch is lit.)SolutionReplace theexamination lamp witha new one asdescribed in Section6.2, page 40.Replace theexamination lamp witha new one asdescribed in Section6.2, page 40.Connect theendoscope to theoutput socket securelyas described inSection 3.3, page 16.Press the filter switchto change to thenormal observationmode.Adjust the brightnessto a suitable level asdescribed in Section5.2, page 33.Wait for automaticrestoration (about for7 seconds).When automaticbrightness controlis intended:When manualbrightness controlis intended:The brightnesscontrol is still set tomanual.The connectionsand ancillaryequipment areincomplete or acomponent has amalfunction.The brightnesscontrol is still set toautomatic.Set the brightnesscontrol to automatic asdescribed in Section5.2, page 33.Confirm that theancillary equipment isconnected andfunctioning correctly.Refer to thecorrespondinginstruction manuals.Set the brightnesscontrol to manual asdescribed in Section5.2, page 33.52EVIS EXERA XENON LIGHT SOURCE <strong>CLV</strong>-<strong>160</strong>
Chapter 8 TroubleshootingIrregularitydescriptionThe field of viewand image color arepoor.When using anOES endoscope,the field of viewsuddenly alternatesbetween dark andbright.The air/waterfeeding functiondoes not operate.Possible causeThe emergency lamp is active.The filter mode is activated.(The filter switch is lit.)The brightness control is set toautomatic.The air/water feeding function is notbeing operated.SolutionReplace theexamination lamp witha new one asdescribed in Section6.2, page 40.Press the filter switchto change to thenormal observationmode.Set the brightnesscontrol to manual asdescribed in Section5.2, page 33.Operate the air/waterfeeding function asdescribed in Section5.5, page 39.The endoscope is not connected to theoutput socket.Connect theendoscope to theoutput socket securelyas described inSection 3.3, page 16.EVIS EXERA XENON LIGHT SOURCE <strong>CLV</strong>-<strong>160</strong>53
Chapter 8 Troubleshooting8.2 Returning the light source for repair<strong>Olympus</strong> is not liable for any injury or damage which occursas a result of repairs attempted by non-<strong>Olympus</strong> personnel.When returning the light source for repair, contact <strong>Olympus</strong>. With the lightsource, include a description of the malfunction or damage and the name andtelephone number of the individual at your location who is most familiar with theproblem. Include a repair purchase order.If a light source accessory (e.g., examination lamp, sparefuse, foot holder, power cord, light control cable) needs to bereplaced, contact <strong>Olympus</strong> to purchase a new accessory.54EVIS EXERA XENON LIGHT SOURCE <strong>CLV</strong>-<strong>160</strong>
AppendixAppendixSystem chartThe recommended combinations of equipment and accessories that can beused with this light source are listed below. New products released after theintroduction of this light source may also be compatible for use in combinationwith this light source. For further details, contact <strong>Olympus</strong>.If combinations of equipment other than those shown beloware used, the full responsibility is assumed by the medicaltreatment facility.EVIS EXERA XENON LIGHT SOURCE <strong>CLV</strong>-<strong>160</strong>55
AppendixEVIS system chartVideo monitor(OEV203, 202, 201)(OEV143, 142, 141)KeyboardEVIS video system center(CV-140)EVIS EXERA video system center(CV-<strong>160</strong>)<strong>Light</strong> control cable(MH-966)Videoscope(See the next page.)Videoscope cable EXERAVideoscope cable(See the next page.)Water container(See the next page.)EVIS EXERAxenon light source(<strong>CLV</strong>-<strong>160</strong>)OES video converter(OVC-140, 100)Fiberscope(OES 40, 30, 20, 10 series)Water container(See the next page.)Mobile workstation(WM-30, WM-N60)56EVIS EXERA XENON LIGHT SOURCE <strong>CLV</strong>-<strong>160</strong>
Appendix Videoscope cable EXERA/videoscope cableEVIS EXERA video system center/EVIS video system centerVideoscope cable EXERA/Videoscope cableMAJ-843 MH-976 MD-148CV-<strong>160</strong> ◦ ◦ ◦CV-140 – ◦ ◦◦ applicable– not applicable Water containerWater containerEndoscopeMAJ-901 MAJ-902 MH-884 MH-970 MD-431 MA-995EVIS EXERA <strong>160</strong> series ◦ ◦ ◦ ◦ – –EVIS 140 series ◦ ◦ ◦ ◦ – –EVIS 100, 130 series – – – – ◦ ◦OES 40 series ◦ ◦ ◦ ◦ – –OES 10, 20, 30 series – – – – ◦ ◦◦ applicable– not applicableEVIS EXERA XENON LIGHT SOURCE <strong>CLV</strong>-<strong>160</strong>57
AppendixOES system chartVideo monitor(OEV203, 202, 201)(OEV143, 142, 141)Mobile workstation(WM-30, WM-N60)OES videosystem(OTV-S6)<strong>Light</strong> control cable (MAJ-586)Videoadapter(A10-T1/T2)Fiberscope(See below.)EVIS EXERAxenon light source(<strong>CLV</strong>-<strong>160</strong>)Water container(See below.) Water containerWater containerEndoscopeMAJ-901 MAJ-902 MH-884 MH-970 MD-431 MA-995OES 40 series ◦ ◦ ◦ ◦ – –OES 10, 20, 30 series – – – – ◦ ◦◦ applicable– not applicable58EVIS EXERA XENON LIGHT SOURCE <strong>CLV</strong>-<strong>160</strong>
AppendixOperating environmentOperatingenvironmentAmbienttemperature10 – 40°C (50 – 104°F)Relative humidity 30 – 85%Air pressure700 – 1060 hPa(0.7 – 1.1 kgf/cm 2 )(10.2 – 15.4 psia)Transportation and storage environmentTransportation andstorage environmentAmbienttemperature–25 to +85°C(–13 to +185°F)Relative humidity 10 – 90%Atmosphericpressure700 – 1060 hPaEVIS EXERA XENON LIGHT SOURCE <strong>CLV</strong>-<strong>160</strong>59
AppendixSpecificationsItemSpecificationPower supply Voltage 100 – 120 V ACPower fluctuation Within ±10%FrequencyFrequencyfluctuationInput currentFuse ratingFuse size50/60 HzWithin ±1 Hz5A8A, 250V6.35 × 31.8 mmSize Dimensions 385 (W) × 145 (H) × 490 (D) mm(maximum)Weight15 kgIllumination Examination lamp Xenon short-arc lamp (ozone-free)300 WAverage lamp lifeIgnition methodBrightnessadjustmentCoolingColor conversionEmergency lampAverage emergencylamp lifeApproximately 500 hours of continuoususe (With intermittent use, the lamp lifemay vary slightly.)Switching regulator<strong>Light</strong>-path diaphragm controlForced-air coolingPossible by using exchangeable filterHalogen lamp (without mirror) 12 V100 WApproximately 100 hours60EVIS EXERA XENON LIGHT SOURCE <strong>CLV</strong>-<strong>160</strong>
AppendixAutomaticbrightnesscontrolItemAutomaticbrightness controlmethodAutomatic exposureServo-diaphragm method17 stepsSpecificationAir feeding Pump Diaphragm type pumpPressure switching4-level available(off, low, mid, high)Water feeding Method Air pressurization or detachable watercontainerIndicators onfront panelSetting memoryClassification(Electro-medicalequipment)EMCYear ofmanufactureEmergency lampFilterType of protectionagainst electricshockDegree of protectionagainst electricshock of applied partDegree or protectionagainst explosion7012345It reports absence of emergency lamp,disconnection and use of emergencylamp.It identifies a special-purpose filtersetting.Settings (except filter setting) are storedeven when the light source is OFF.Class ITYPE BF applied partNOTE: The applied part as classificationtypes are not marked is theTYPE BF applied part.Use prohibited in flammableenvironment.This device complies with the EMCrequirements of IEC 60601-1-2:1993Emission: Class B of CISPR 11:1997The year of manufacture is given in thesecond digit of the serial number.EVIS EXERA XENON LIGHT SOURCE <strong>CLV</strong>-<strong>160</strong>61
©2000 OLYMPUS MEDICAL SYSTEMS CORP. All rights reserved.No part of this publication may be reproduced or distributed without theexpress written permission of OLYMPUS MEDICAL SYSTEMS CORP.OLYMPUS is a registered trademark of OLYMPUS CORPORATION.Trademarks, product names, logos, or trade names used in thisdocument are generally registered trademarks or trademarks of eachcompany.
Manufactured by2951 Ishikawa-cho, Hachioji-shi, Tokyo 192-8507, JapanFax: (042)646-2429 Telephone: (042)642-2111Distributed by3500 Corporate Parkway, P.O. Box 610 Center Valley, PA18034-0610, U.S.A.Fax: (484)896-7128 Telephone: (484)896-5000One Corporate Drive, Orangeburg, N.Y. 10962, U.S.A.Fax: (845)398-9444 Telephone: (845)398-94005301 Blue Lagoon Drive, Suite 290 Miami, FL 33126-2097, U.S.A.Fax: (305)261-4421 Telephone: (305)266-2332(Premises/Goods delivery) Wendenstrasse 14-18, 20097 Hamburg, Germany(Letters) Postfach 10 49 08, 20034 Hamburg, Germany Telephone: (040)237730KeyMed House, Stock Road, Southend-on-Sea, Essex SS2 5QH, United KingdomFax: (01702)465677 Telephone: (01702)616333117071, Moscow, Malaya Kaluzhskaya 19, bld. 1, fl.2, RussiaFax: (095)958-2277 Telephone: (095)958-2245Room 1202, NCI Tower, A21 Jianguomenwai Avenue ChaoyangDistrict Beijing 100022 PRCFax: (10)6569-3545 Telephone: (10)6569-35358F, Hyundai Marines Bldg., 646-1, Yeoksam-Dong, Kangnam-Gu, Seoul 135-080 KoreaFax: (02)6255-3499 Telephone: (02)1544-3200491B, River Valley Road #12-01/04, Valley Point Office Tower, Singapore 248373Fax: 6834-2438 Telephone: 6834-001031 Gilby Road, Mount Waverley, VIC., 3149, AustraliaFax: (03)9543-1350 Telephone: (03)9265-5400GC7033 11Printed in Japan 20070606 *0000