Software Instructions - Bren-Tronics
Software Instructions - Bren-Tronics
Software Instructions - Bren-Tronics

Create successful ePaper yourself
Turn your PDF publications into a flip-book with our unique Google optimized e-Paper software.
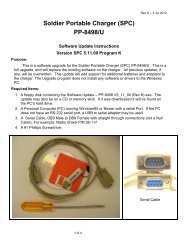
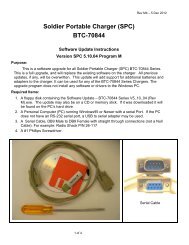
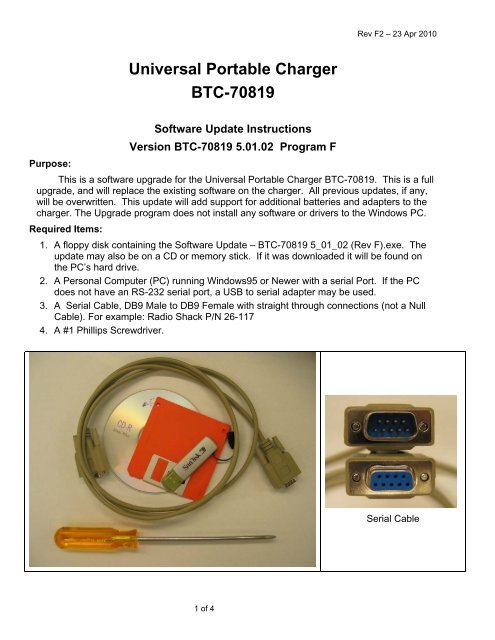
Rev F2 – 23 Apr 2010Universal Portable ChargerBTC-70819Purpose:<strong>Software</strong> Update <strong>Instructions</strong>Version BTC-70819 5.01.02 Program FThis is a software upgrade for the Universal Portable Charger BTC-70819. This is a fullupgrade, and will replace the existing software on the charger. All previous updates, if any,will be overwritten. This update will add support for additional batteries and adapters to thecharger. The Upgrade program does not install any software or drivers to the Windows PC.Required Items:1. A floppy disk containing the <strong>Software</strong> Update – BTC-70819 5_01_02 (Rev F).exe. Theupdate may also be on a CD or memory stick. If it was downloaded it will be found onthe PC’s hard drive.2. A Personal Computer (PC) running Windows95 or Newer with a serial Port. If the PCdoes not have an RS-232 serial port, a USB to serial adapter may be used.3. A Serial Cable, DB9 Male to DB9 Female with straight through connections (not a NullCable). For example: Radio Shack P/N 26-1174. A #1 Phillips Screwdriver.Serial Cable1 of 4
Rev F2 – 23 Apr 2010To Reprogram the Charger Follow these Steps:1. With the Phillips Screwdriver, remove the SOFTWARE UPGRADE PORT RS232 coverplate on the Charger. The cover plate is located on the control panel above the PowerSwitch under the AC Cord Velcro strap. (Note: the cover plate is fastened with two 4x40-3/8" Phillips-head screws)2. Prepare the charger for the serial data transfer:a. Connect the Chargers’ SOFTWARE UPGRADE PORT RS232 to the WindowscompatiblePC communication port marked Com1 using the Serial Cable.b. Remove all batteries from the chargerc. Connect the Charger to a suitable AC power sourced. Turn the Charger AC power switch to the ON positionTypical Connection for <strong>Software</strong> Update2 of 4
Rev F2 – 23 Apr 20103. Insert the floppy disk, CD or memory stick into the computer.4. On the PC go to “My Computer” and Double Click on the drive or folder holding the file“BTC-70819 5_01_02 (Rev F).exe”.5. Double Click on the “BTC-70819 5_01_02 (Rev F).exe” Icon.6. You will be asked “Update Charger <strong>Software</strong> Now?” Click Yes to Proceed.7. The Update utility will prompt you to enter your Com Port number. This is usually “1”.Press the number key for the port you are using. If you are using a USB to Serial Adapterthe Com Port number may be 3, 4, 5, or 6.8. Verify the charger responds by reporting its current software version.Current Version:SPC LITE US compiled on XXX XX 200X at XX:XX:XX V4.XX.XX PROGRAM -(Note: The version message may not be displayed. Continue anyway, if you want toprogram the charger)9. If you desire to proceed and update the software, Press the letter “P”.10. If you changed your mind and do not wish to proceed, press any other key to cancel.11. All of the LEDs on the charger will light as the reprogramming begins. As the softwareupdate process proceeds, the messages on the screen will display the progress of thereprogramming.(Note: if no Message is displayed or a “Timeout” message appears, check the cable andconnections. Turn the Chargers’ Power switch OFF, wait 10 seconds, and then turn theChargers’ Power switch ON. Repeat the programming.)3 of 4
Rev F2 – 23 Apr 201012. When the software update is complete (about 4 minutes) the Charger will reportReprogramming With 5_01_02.hexReprogramming Completed OKSystem will now start new program.Total Elapsed Time 00:0X:XXNew Version:SPC LITE US compiled on Apr 23 2010 at 22:33:28 V5.01.02 PROGRAM FPress any key to continue.13. Verify there are no error messages.14. Verify the Version is: V5.01.02 PROGRAM F15. Press any key to continue.16. Turn the Chargers’ Power switch OFF, wait 10 seconds, and then turn Chargers’ Powerswitch ON. The charger should show the normal startup LED blinking. If all of the LEDsare lit, repeat the reprogramming procedure.17. Mark the new software revision on the Program label with a bold line through the letter“F” as shown below:18. Remove the Serial Cable from the Charger.19. Replace the cover plate over the UPGRADE PORT RS23220. The <strong>Software</strong> Update is Now Completed.4 of 4